Standing desks have become a popular trend in recent years. I decided to see what the hype was all about three years ago. My quick test setup was quite simple. I placed a big box, in this case a rather large CD/DVD carrying case, on top of my arcade cabinet. When I put my laptop on top, this brought the keyboard to just the right height so I could use the keyboard comfortably.
I was only using this for an hour or two each day, and I didn’t stick with it for very long. The biggest problem was that my neck would get sore pretty quickly, because I had to look down at the laptop screen the entire time. This was far from ideal.
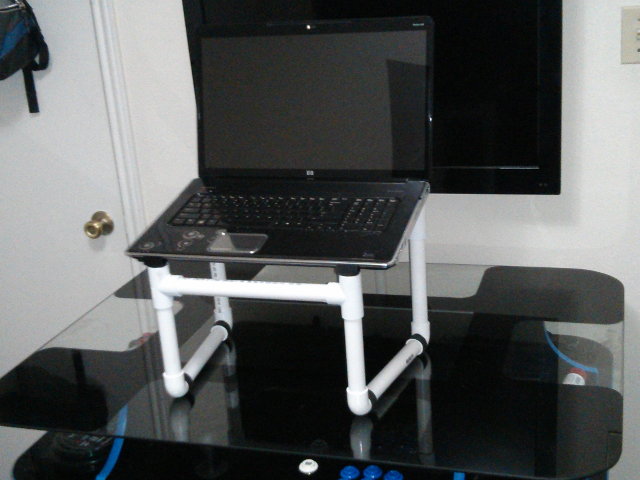
Last year, I decided that I missed my cheater standing desk, so I built a better one out of PVC pipe. It is a slight improvement over the rectangular box. The back is elevated a couple inches higher than the front, so I don’t have to look down quite as far. I do still have to look down, though, which means I can’t use it for extended periods.
That’s alright, though. Even with the eventual discomfort, I like having the standing option available. When I’m standing, I feel like I’m ready for action. Like a ninja waiting to attack. Maybe. At the very least, it is a small change of scenery!
Improving the all-PVC design
The original design has the laptop resting behind a pair of T fittings. This keeps the laptop from falling, but those big one-inch circles in front of the laptop get in the way of my palms. I changed the dimensions a bit to try to get them out of the way, but that was only a partial fix.
When I was building this standing desk, I remember saying to myself, “This would be easy to fix if I had a 3D printer.” Now I do actually own a Prusa i3 3D printer, and I was absolutely correct. It was a very easy problem to solve, and it was definitely a good project to work on for my first attempt at 3D design.
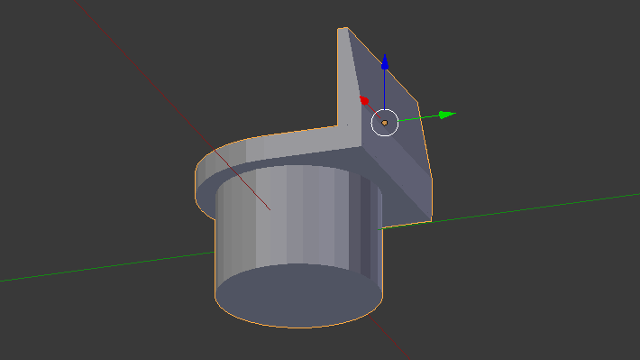
It’s a cylinder with an L-bracket on top. How hard can that be?
It was only a little bit harder than I thought, and it only took three iterations to get it right. I knew for certain that my first print would be a failure. I just didn’t know to what extent.
I already knew overhangs would be problematic, but I needed to see what I could get away with. All three iterations of this object started with a tall cylinder at the bottom. I made sure the diameter of that cylinder was about the same diameter as a 1” PVC pipe. That way I knew it would fit into the PVC connector.
The first prototype
On the first iteration, I put a 3 mm disc on top of that cylinder. The disc matched the outside diameter of the PVC connector. I figured that would be a good way to keep it from falling in.
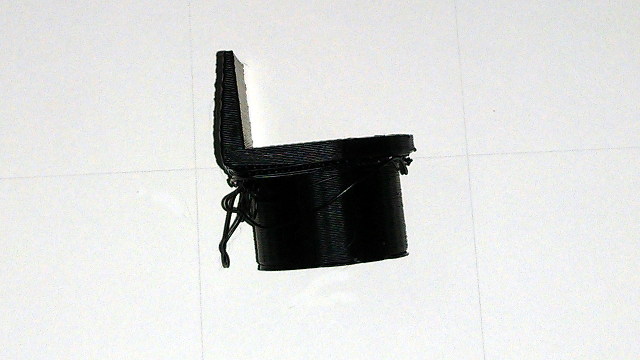
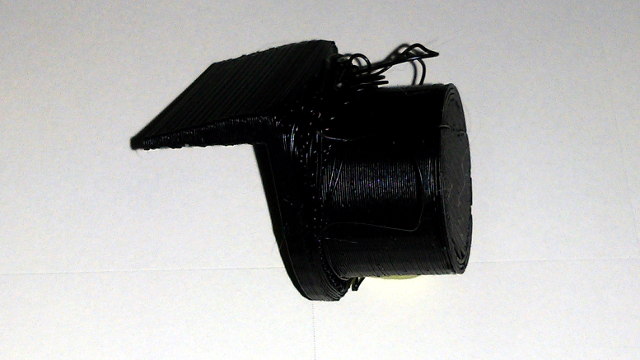
This actually went better than I expected. Most of the overhang on that wider 3 mm disc actually stuck. Even though it looks pretty bad, the longer overhang in the front still came out structurally sound.
This would have been a serviceable design. I could have printed another, trimmed off the stray filament, and called the project finished. But I couldn’t leave it like this. I just had to try again.
The second prototype
I made some small improvements on my second try. I tapered the edges of the top disc. That part printed perfectly. I added similar angles to the front edge as well. That part came out a bit sloppy, but there was no hanging filament this time.
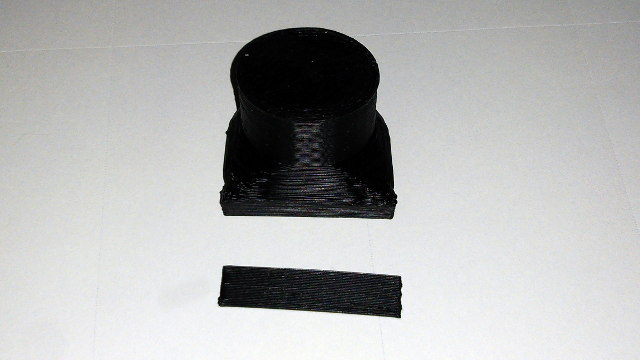
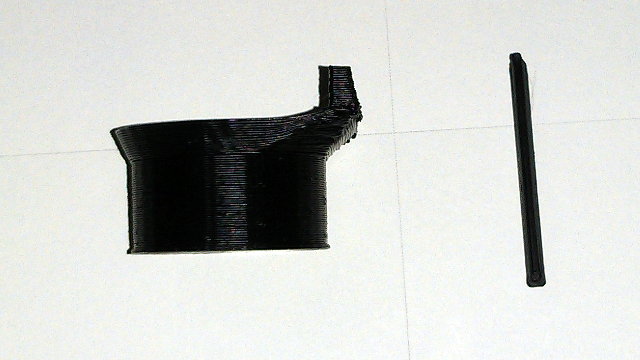
I almost had it this time, but I learned from the first print that the “retaining wall” didn’t need to be quite so high to hold the laptop up. I decided to correct for that in the design, but I did a terrible job. I made the wall too thin and was able to easily snap it in half.
The third time’s a charm
It was easy enough to go back into Blender and make that wall a bit thicker. I decided to make more changes while I was there. I wanted to reduce the messier parts of that overhang in the front.
The first two attempts were unions of four simple objects: two cylinders and two cubes. That’s why the ledge extends so far in the front. I had to make sure the 3-mm-tall cylinder wouldn’t poke out the front.
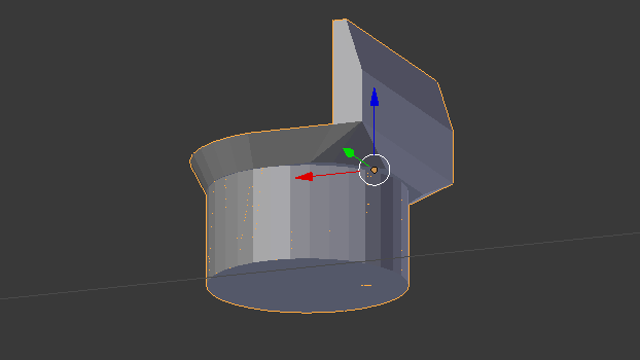
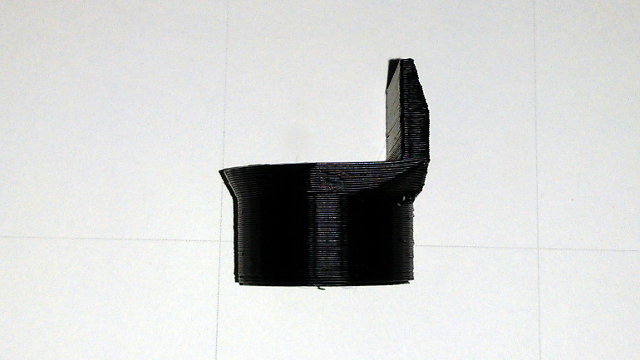
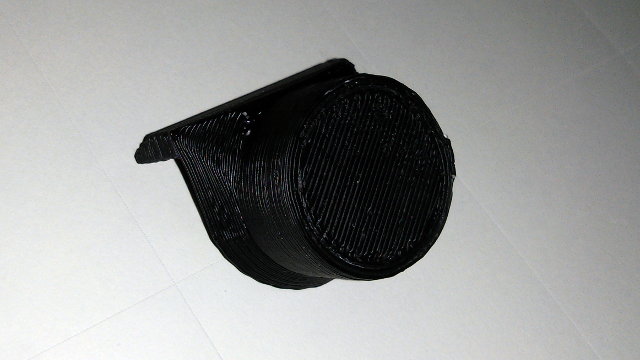
I was getting quite a bit more proficient with Blender by this point. It wasn’t too much trouble to redo the top so that the front wall was directly over the base cylinder. That eliminated almost all the overhang issues. One of the corners was curling upward a little during the print. I think it was cooling faster than the rest of the object.
I’m very happy with the results
I haven’t used my laptop at all in the last month or so, and it will probably be quite a while before I make use of my standing desk again, but I am very happy with how this entire process went. I was printing nice, consistent objects with my 3D printer within a week, and I had my first useful object designed, printed, and ready to use less than a week after that. This is much more progress than I ever expected to make in just two weeks.
These caps for the ends of my PVC laptop stand are very simple objects, but I’m still excited that I was able to make them.
Plans for the future
I think I really need a fan to cool the extruded filament to print good overhangs and bridges. I found a nice-looking fan mount that I’d like to try out. It was designed with a different hot end in mind, so I’ll need to do some measuring first to make sure it will fit correctly. I sure hope it prints well without a fan!
I’ve already started working on my next custom object. It’s going to be a custom grommet for my desk. I already upgraded the stock grommet by gluing in a 3-outlet AC power adapter and a small powered USB hub. This has been very convenient. I can easily charge just about anything, and I don’t have to reach far to plug in USB joysticks.
I had to take that grommet out last week to install a clamp for a dual monitor stand, and I’ve been missing it ever since. I’ve started modeling a replacement that fits around the stand’s big clamp using Blender. It should be a nice-looking upgrade over the jury-rigged grommet assembled with glue. I even hope to have room for an RJ-45 jack this time.