My friend Brian has been on a mission to reduce the weight and volume of his keychain.
He had some empty space in his fancy new key machine, so he decided to add a USB flash drive. There were a lot of thin USB 2 flash drives that leave out the metal guard around the connector, but Brian wanted his new drive to be a faster USB 3 model. All the USB 3 drives are a little thicker, and they all have the metal guard. We were wondering if it was now a functional requirement.
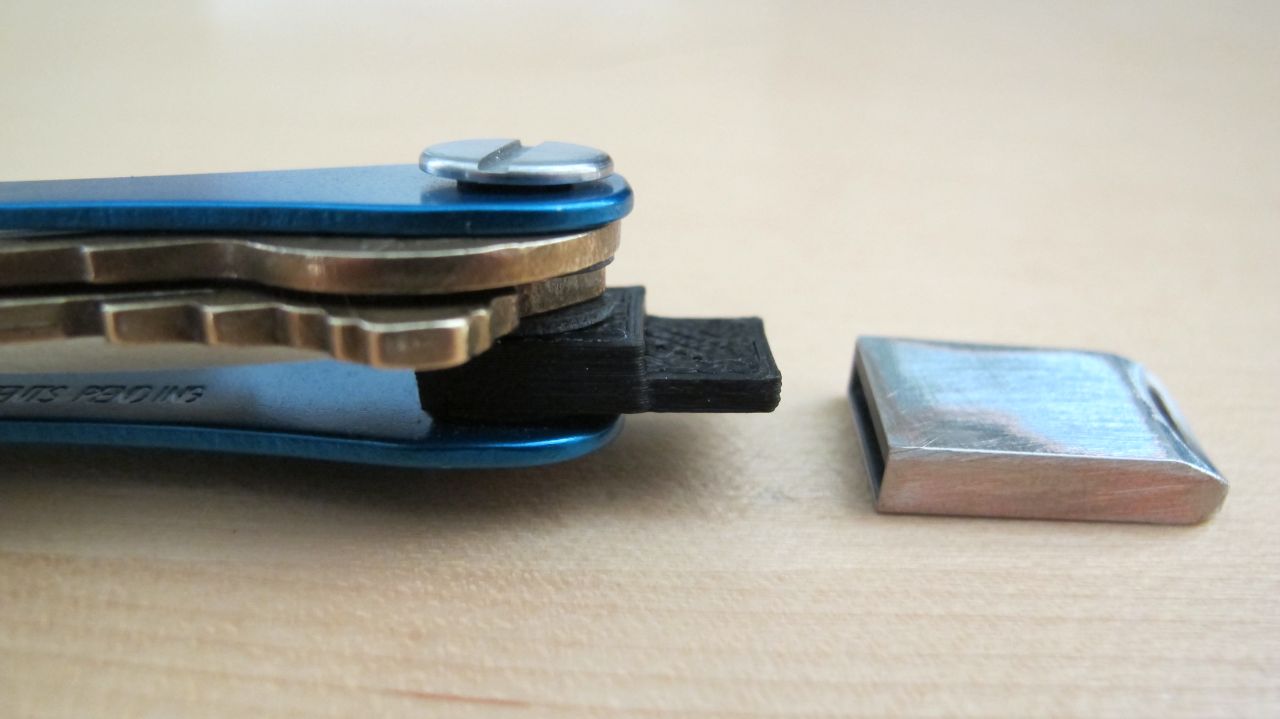
Brian found some nice USB 3 flash drives, but none of them had large enough keyring holes to fit his fancy keychain. I had an idea, though. I figured it would be easy to print up a little plug that could fit inside the USB connector. That way he could buy any flash drive he wanted.
Even easy prints require three attempts
This is one of the simplest models I’ve designed using OpenSCAD, and it didn’t take more than 10 minutes to have a model that was ready to print. I hadn’t seen this new keychain yet, but I thought the nuts and bolts looked pretty big, so I took a guess and overestimated on purpose. I figured it would be easier to test if the hole was oversized rather than undersized.


I printed this first model on its side, because it was sized to be precisely the same thickness as a USB connector, and the plug was positioned so that two of the edges would be flush with the USB connector.
This print was a complete disaster. The hole for the keyring was huge, and the walls were all so narrow that the print just didn’t stick together very well.
I printed five parts at once, and each one had a plug 2% smaller than the last. This worked out well, because some of them were sturdy enough to test, and I was definitely on the right track.
The second attempt
The second attempt was a bit more well designed. I rotated the object 90 degrees so that it would print with the connector facing up. This allowed me to make the connector the same width and thickness as a USB connector, so the metal would be flush on all four sides.
This seemed like a great idea, but it was a terrible idea. Not only did I have the same problems printing the small, thin parts as I did the first time, but this part was also extremely weak on the most important axis. It would easily snap off at a layer transition, and you’d end up with a chunk of plastic stuck in your flash drive!
Simple is better
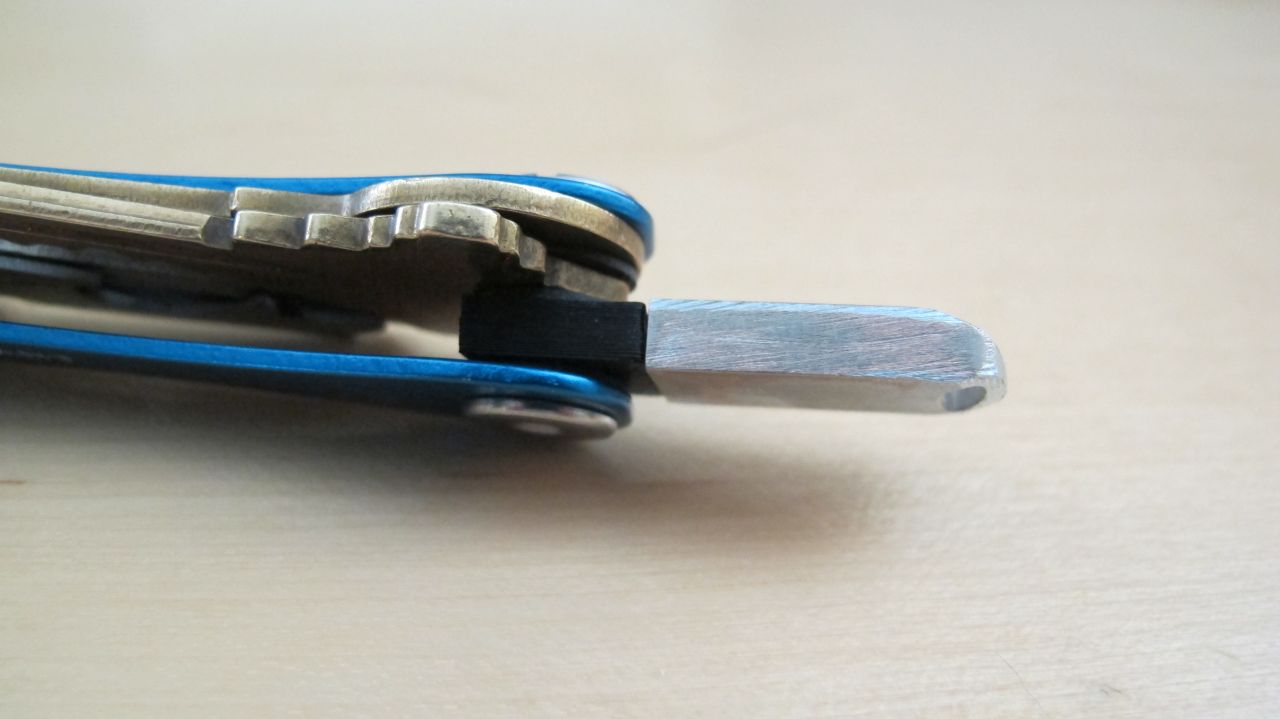
Printing the part lying down was a much better way to go. The plug that inserts into the USB drive is printed along more than one axis, so it is much sturdier. Also, the part printed much better because it was so much wider.

I was even able to make the part flush with the USB connector on three sides, and three out of four sides is good enough for me.
Lessons learned
I’m still new to 3D printing, and I learn something new with each failure. The time I once again learned that orientation is extremely important. In the past, I have had to adjust the orientation of the part to reduce overhangs. I had that covered this time, but I didn’t think about how poorly such a narrow part might print.
I would likely get better results on these narrow parts if my printer was better calibrated. The first two attempts would have been problematic even if they printed perfectly, because they each had a weak axis that might have snapped off in the USB connector. The third part has three walls surrounding the outside edges and solid layers with a 45-degree offset on the top and bottom. That should make it much sturdier!
- Upgrading my Keychain at Brian’s Blog
- Keychain Connector for USB Flash Drives at GitHub
- Keychain Connector for USB Flash Drives at Thingiverse