I have no idea what I’m doing. I’ve broken two endmills so far; thank goodness they were cheap ones! If you want to learn how to CNC aluminum on your Shapeoko, check out Winston Moy on YouTube. He already knows what he’s doing. If you want to learn about the mistakes I’m making, then I encourage you to keep reading!
My CAM software is still rather simple. I’m going to need to buy something better, but I haven’t decided what that will be. The choices in CAM software that runs on Linux are few and far between. For now, I’m running Carbide Create using Wine.

I bought ¼” and ½” sheets of 6061 aluminum on Amazon last month. The Shapeoko can handle aluminum, so I have to give it a try. What sort of thing should I cut out of aluminum?
I decided to go with something simple and decorative. Brian and I have played quite a few hundred hours of Team Fortress 2. I figured it would be fun to machine a medallion with the logo of one of the classes from TF2. They’re round. They’re simple. Seems like fun.
- I Bought a CNC Machine: I Have No Idea What I’m Doing at patshead.com
- The Kestrel HD Micro Quad Frame Version 1.0 at patshead.com
Most of the emblems have too much detail
Small details sound easy. That’s what vcarving is for. I converted a Demoman emblem to an SVG, imported it into Carbide Create, and tried to figure out how to carve that sucker out. I couldn’t figure out how to do it. It only wanted to run my v-bit near the edges of the SVG.

I’m not smart enough to somehow combine a vcarve pass and a pocketing pass with a different bit. Even if I knew how to do it correctly, I’m not sure things would line up.
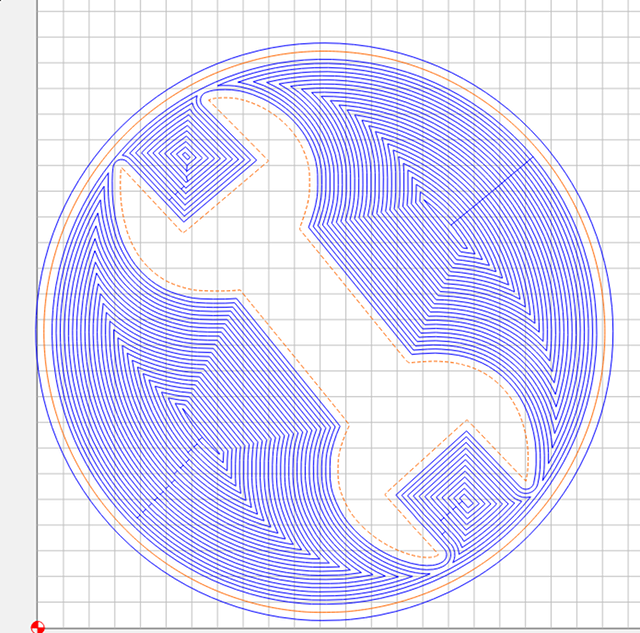
So I decided to keep my first carve into aluminum simple. I chose the Engineer’s emblem. It is less detailed than the Demoman’s stickybomb emblem, and once I scaled it up enough, it looked like I would have no trouble carving it with a 2mm endmill!
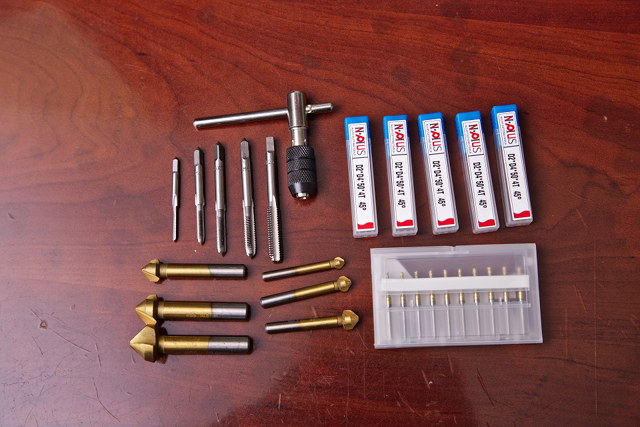
My cheap 2mm endmills
I didn’t buy these endmills for machining aluminum. I’ve been using cheap 1/16” endmills when cutting drone frames out of carbon fiber. They seem to work as well as nicer mills. They get dull quickly, but everything dulls quickly when cutting carbon fiber! I’d rather dull cheap mills, right?
When I was shopping at Banggood, I came across a 10-pack of 2mm carbide endmills. That’s about 25% larger in diameter than my 1/16” endmills, and also just small enough to cut my Kestrel frames. These should be sturdier, and they should cut more quickly than my 1/16” mills, so I figured I’d give them a try!

My emblem is cutting with one of these endmills right now. It is on the final pocketing pass, and it will probably be working on the countour cutting operation to free the disc by the time I finish writing this blog.
I didn’t get to this point immediately. I broke two endmills last night! I believe it was my fault, though, and not the cheap mills!
- I Bought a CNC Machine: I Have No Idea What I’m Doing at patshead.com
- Inexpensive 2mm Endmills at Banggood
Feeds and speeds are hard!
The first thing I did after firing up Carbide Create was head over to YouTube to see what Winston Moy thought I should be using for my settings. He told me what feed rates to use with a 1/8” endmill from Carbide 3D’s store. I’m a smart guy, right? I can make an educated guess. I can just use smaller numbers for my 2mm endmill, right?
I could, and I did. Except I goofed up. I also didn’t document my failures well.
While I had my hunk of aluminum out in the sun, I squatted down to attempt a quick pan. It was not smooth. pic.twitter.com/bY4SqFi9yv
— Pat Regan (@patsheadcom) July 7, 2019
I made it through at least two passes before breaking the first endmill. I lowered my feedrate and depth per pass, and I tried again. I attempted to pick up the job roughly where it left off, and I broke another endmill.
Where did I goof? I goofed up the stepover. I left it at Carbide Create’s default of 1.4mm. That must be acceptable when cutting MDF, but it was killing my mills when cutting aluminum! I lowered the stepover to 0.8mm, and it seems to be doing a much better job.
These are the settings I’m using successfully right now:
- 0.187 mm Depth Per Pass
- 0.8 mm Stepover
- 355 mm Feedrate
- 7.144 mm Plungerate
- Dewalt DWP611 set to 1
I’m certain this isn’t optimal. With last night’s settings, the job was going to take about three hours. The second endmill broke after an hour of cutting. I started today with roughly 0.6mm already pocketed out, and I had set the depth of that pocket to 1.5mm.
I did my best to pick up right around where I left off, so there was 0.9mm left to pocket out. Today’s estimate was another three hours, so this is definitely going slower!
- I Bought a CNC Machine: I Have No Idea What I’m Doing at patshead.com
- Inexpensive 2mm Endmills at Banggood
Can you use a bigger endmill to remove most of the material?
This would save a lot of time, but I don’t think I can do this efficiently with Carbide Create. For this to work well, your CAM software needs to be aware of the material that was already removed on the previous pass.
It would be possible to simulate this with Carbide Create. You could make another SVG with lines covering the area that would have been hogged out on the first pass with the big ¼” endmill. That way you could create a toolpath using the 2mm endmill that avoids that area.
I need to invest in software that will do this for me. The savings in machine time and my own time means it will be a worthwhile purchase!
- I Bought a CNC Machine: I Have No Idea What I’m Doing at patshead.com
- Inexpensive 2mm Endmills at Banggood
My contour operation failed, so I abandoned this project for now
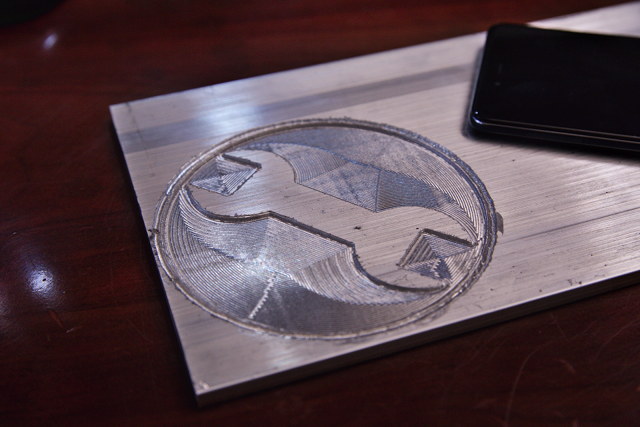
The 2mm endmill did a fantastic job pocketing out the void around the wrench. You can see the pattern of marks left behind by the tool, but it is quite smooth to the touch. In fact, the machined surface feels smoother than the top surface of the extruded aluminum!
The 2mm endmill ran into trouble while trying to machine the disc out of the block of aluminum. I noticed that at a depth of around 1.5mm, things started to get noisier. Then the shape of the cut started to get wonky. I wound up canceling the job.
I realized that I had my stepover set a bit too high, and I've also reduced my depth of cut. It is definitely a smoother finish with the smaller stepover! Picked up where I left off, 3 hours to go! pic.twitter.com/PuwOgsisuy
— Pat Regan (@patsheadcom) July 5, 2019
The tiny endmill just couldn’t clear the chips of aluminum. Maybe I need a high-pressure air nozzle to blow the chips clear. Maybe I could have used my ¼” endmill for this operation. An air nozzle will definitely be a future upgrade, but next time I attempt a cut like this, I will use the bigger endmill.
The relatively huge flutes on the ¼” endmill are probably three times deeper than the flutes on the 2mm endmill. I bet that would have solved all my problems!
Another option would have been to use a pocketing operation to remove a ring of material slightly wider than the endmill. Making contact with aluminum on two sides of the endmill while it is moving along gets more and more problematic as the tool cuts deeper into the material. Taking two passes to clear out a wider channel would have helped with this!
- I Bought a CNC Machine: I Have No Idea What I’m Doing at patshead.com
- Inexpensive 2mm Endmills at Banggood
Conclusion
I’m excited. My Shapeoko is considered a hobby-grade machine. Its biggest downside is its use of pulleys and belts instead of heavy-duty lead screws for movement. Sure, I won’t be cutting steel with these belt-driven gantries, but it is obvious that they won’t be limiting my ability to cut aluminum!
I’m working on a larger drone frame, so playing with aluminum is going to be on the back burner for a few weeks. I’m happy with my test cuts, and I look forward to putting what I’ve learned to good use next time!
What do you think? Am I doing a good job? Was this a good failure? Do you have any questions? Let me know in the comments, or stop by the Butter, What?! Discord server to chat about it!
- I Bought a CNC Machine: I Have No Idea What I’m Doing at patshead.com
- Inexpensive 2mm Endmills at Banggood
- The Kestrel HD Micro Quad Frame Version 1.0 at patshead.com
- I’m Designing an Open-Source 5-inch FPV Freestyle Miniquad Frame! at Patreon