I have wanted to build an arcade cabinet for a very long time. I finally decided to stop thinking about doing it and actually do it!
Some of the Inspiration
I decided that we are going to build a four player cocktail cabinet. We like the design of the Crazy Canadian’s Custom Cocktail Cabinet. We might use nice-looking stain grade wood, but I really like the look of The NEON MAME cabinet with light blue t-molding on a black cabinet.
Some of our Constraints
I think a cocktail cabinet will be more useful than an upright cabinet, since it can also double as a table. I want this build to be more like a table instead of just a standard cocktail cabinet. I don’t want to have a box underneath, I want you to be able to pull a chair up to it and put your legs underneath. I also don’t want the control panels to stick out past the glass tabletop. I am also trying to keep the tabletop at about the usual height of a desk or table.
It turns out that this isn’t going to be as easy as I thought at first. The joysticks are fairly deep and you need enough room between the control panel and the glass so that you can comfortably use the controls. Our joysticks drop about 3 inches below the top of the control panel and we think we need about 6 inches of clearance between the panel and the glass. Fudging in one inch for the glass tabletop and the covering under the panel that will put the bottom of the controls 10 inches below the tabletop.
My desk is about 30 inches high. 10 inches below that would have the controls just about sitting on my chair. We’ve been figuring the tabletop height will end up having to be somewhere around 34 inches (maybe 33 if we’re lucky!). It is a little on the high side but shouldn’t be ridiculously tall.
Our life size whiteboard diagrams have the tabletop dimensions at about 37 by 29 inches using a 24 inch LCD panel. We’ve seen some deals on 36 inch square tabletop glass (for some reason square is significantly less expensive than a rectangle).
Control Panel Layout
We will definitely be using a 4-player layout. We thought about putting two players on one of the long sides of the cabinet. That would let me put the table up against a wall and it would be great for fighting games. We think it might be a little too crowded, though, so we will probably go with one player to a side.
What Games Do I Want to Support
The most important game this cabinet needs to support is Mortal Kombat II. I was in high school when Mortal Kombat and Mortal Kombat II were released and we used to play quite a bit.
The four-player game I have in mind is Gauntlet), though I’m sure there will be others. There is no reason to limit the cabinet to arcade games. I was thinking Liquid War would be a good fit.
The Parts We Have So Far
I ordered joysticks, buttons, and connectors from Groovy Game Gear. I was hoping to use their GP-Wiz40. It looks like a good product and a good value (and an even better value if you don’t mind soldering). Unfortunately, we need 44 inputs, and that is four too many.
I ended up going with an I-PAC 4 from Ultimarc. It has more than enough inputs and didn’t cost much more than a pair of GP-Wiz40 controllers.
I went with the HAPP™ Super Arcade Joystick. I am surprised how happy I am with them. They work very well as an 8-way joystick and they seem to make it pretty easy to perform circular-style moves in Mortal Kombat.
I also got buttons for players one through four and six HAPP Black Horizontal Pushbuttons for each player.
The Mock-Up Test Controller
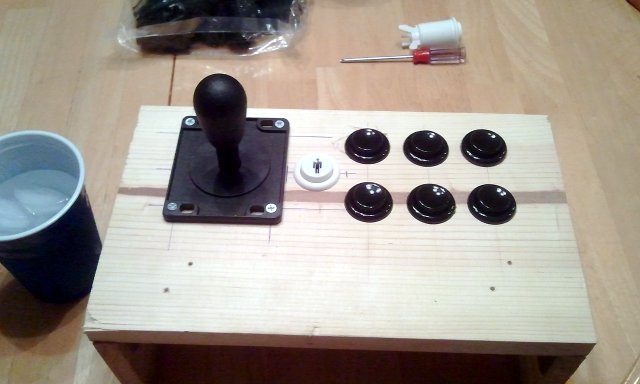
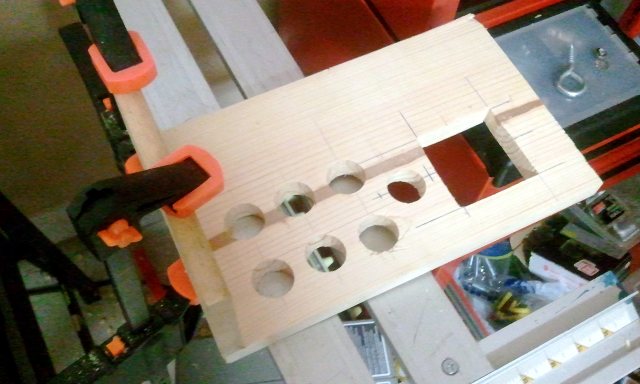
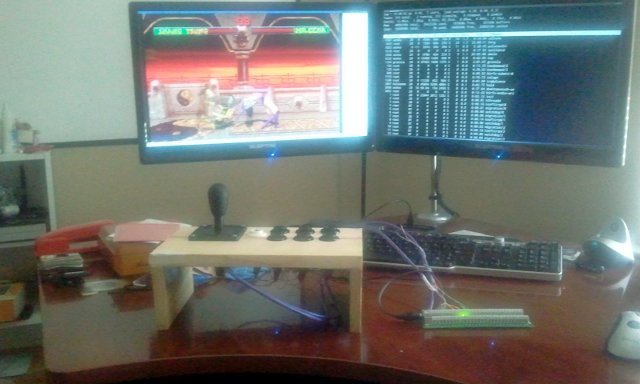
We put some holes in a piece of wood and put together a test controller. It works great. The buttons feel right and the joystick feels great. We will definitely be going with the two-rows-of-three-buttons layout, but I am unsure what sort of spacing and staggering they will have. Yes, we indeed forgot to leave room for the Player 1 button…
The test controller has very arcade-like wide button spacing: 2.0 inches between button centers on the vertical, 1.625 inches on the horizontal. It seems a little too wide; I will probably tighten that up for the final product.
Plopping the control panel down on my desk isn’t ideal. Getting the half-circle moves to go off is a little hit or miss because the controller slides around. I don’t think it will be a problem on the real controls that are bolted to the table.


How Long is this Build Going to Take?
Hopefully not too long! We’ve been talking about this and drawing on the whiteboard for probably two months so far. Now that I have actually had a controller in my hands I am getting very excited.