I’ve had my Prusa i3 3D printer for more than a month now, and I’ve been having a blast. Hardly a day went by in the first couple of weeks that I wasn’t printing something. Most of the things I was printing were designed by someone else. Some of those things were parts to improve or upgrade my 3D printer.
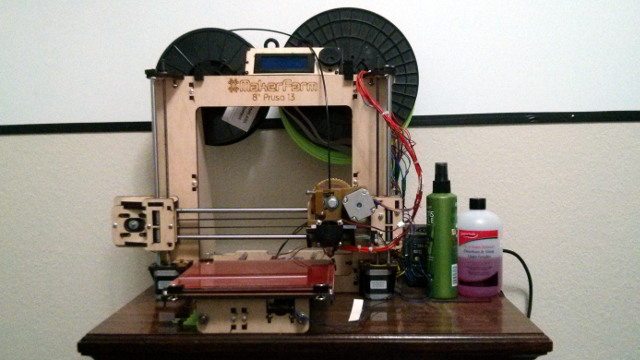
In fact, I found quite a few very useful additions and upgrades for my printer posted up on thingiverse.com.
Everyone needs a spool holder
There are A LOT of spool holder designs up on thingiverse.com. Most of them are a variation on the same theme: a rod or spindle sitting between a couple of arms. Usually those arms point upwards, but sometimes they hang over the back.
These all seemed pretty crude to me. For the first few days I was using my PVC laptop stand as a makeshift spool holder. It did the job, but it showed me how this kind of design might be problematic, the biggest problem being that you have to lift off the spindle to add or remove a spool. This would likely be a lot less troublesome with a proper spool holder, but it was quite a nuisance with my first makeshift holder.
Then I found Lisa Croxford’s awesome Compact Spool Holder. I think her spool holder is just brilliant. It hangs off the back and holds the spool perpendicular to the printer. Unlike most of the other spool holders that hang off the back, her design doesn’t extend back past the base of the printer.
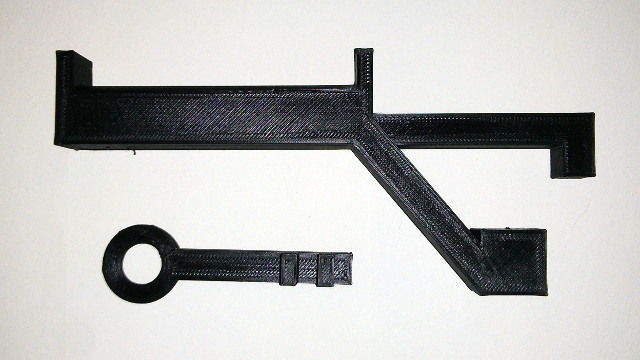
This means I can actually fit my printer on its new little table—a table that is actually meant to be a night-stand. It is also more stable than using a spool holder than extends 12” behind or above the printer. I have one hanging on either side of the printer.
She recommended that this spool holder be printed with 80% infill, but I completely forgot to make that adjustment when I was slicing the model. I ended up printing them at my usual 30% infill. They seem quite strong to me, but if you have a better memory than me, it would probably be a good idea to increase that infill.
- Compact Spool Holder and Guide at thingiverse.com
Filament spool clips
This is a pretty simple idea that came in very handy. I have a spool of bright green filament hanging off the back of my printer, and I have no idea when I’ll use it again. I was using an extra binder clip to keep it from unraveling, but then I saw this handy filament spool clip on thingiverse.com.
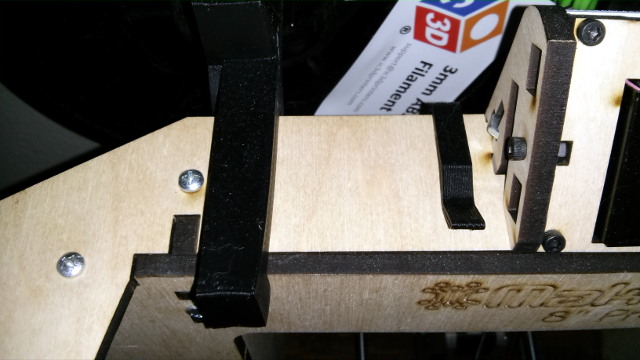
I printed off a pair to try them out, and they work great. One of the clips is holding my green filament in place. The other one is clipped onto the printer frame, patiently waiting for the day I need to remove the black filament.
- Filament Spool Clip at thingiverse.com
Cooling system for the Magma hot end
My printer happened to come with the Magma hot end, which is an all-metal hot end. These all-metal hot ends can print just about anything, even nylon, but they have some trouble with PLA. Since it is 100% metal, the Magma hot end needs to be cooled continuously.
The printer comes with a 40 mm fan bolted to the extruder assembly for this purpose, but it doesn’t just keep the hot end cool. Most of the air ends up hitting your print, and this can cause warping. When I first started printing, this fan was also messing with temperature readings of the thermistor.
The “Magma cooling system” at thingiverse.com looked like the perfect solution. It draws air in from the top, blows it directly across the Magma hot end’s cooling fins, and then it expels the air back out the top. This keeps heat from traveling up the hot end to the filament without affecting your print. It may even work well enough to print PLA, but I haven’t tried that yet.
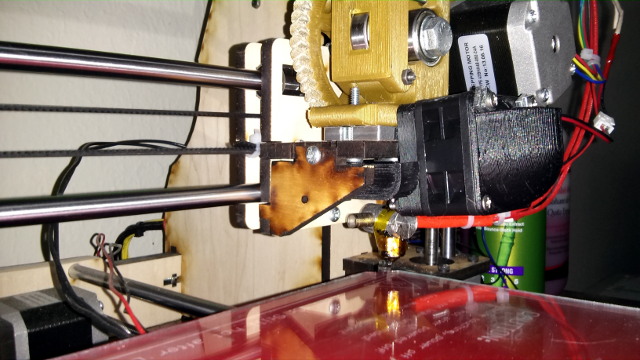
I printed this pretty early on. At the time the printer wasn’t very well calibrated, and I was still printing with a 0.3 mm layer height. This made everything a bit snug. It all fits, but I had to muscle it into place. I also had to use a small file to open up the slots the wedge piece slides into. I have no doubt that it would have fit perfectly if I printed at a 0.2 mm layer height.
- MakerFarm Prusa i3 Magma Cooling System at thingiverse.com
Don’t break your fan!
When attaching the cooling system, I somehow managed to break two of the blades off of the 40 mm fan. This made the already loud fan even louder. A lot louder.
I’m happy that this happened, though. The replacement fan that I ordered is whisper quiet compared to the fan that MakerFarm ships with these printers. The stock 40 mm fan was the loudest component of this printer. Now you can’t hear it over the sound of the power supply.
The replacement 40 mm fan is almost twice as thick as the original fan. This was good for me, because the machine screws I bought to hold the cooling system in place were way too long.
- 40 mm Silent Cooling Fan at Amazon.com
One-handed bed leveling
This is another very simple, yet very useful upgrade. Adjusting the corners of the heated bed usually requires two hands—one underneath to keep the nut from spinning, and another up top to turn the hex key. This isn’t too bad in the front, but adjusting the height in the back requires some interesting contortions.
These little brackets help out by holding the nut on the bottom in place, so you only need one had to loosen or tighten the bolts. I think this is especially useful, because I can slide a piece of paper around under the print head to test the height as I’m adjusting the screws.
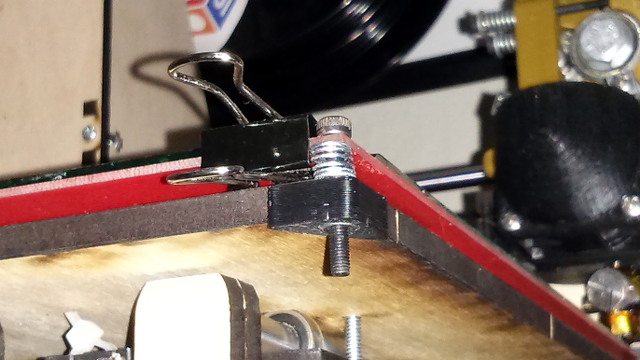
These seemed much more exciting last month, when it seemed like I was constantly adjusting the bed. Since learning that I can adjust the Z-axis end stop screw, I’ve barely had to touch the bed leveling screws. Even so, this was a very simple and worthwhile upgrade.
- One Handed Bed Leveling – Captive Nuts at thingiverse.com
Z-axis anti-rattle bushings
I’m not so sure these bushings are doing much, but they were easy to print, easy to install, and they make the printer look a little cleaner.
They keep the threaded rods for the Z-axis from dancing around their giant holes at the top of the machine. This is supposed to make things a bit quieter and maybe make the Z-axis a little more accurate.
I don’t really care how much noise a Z-axis makes—it only makes one minuscule movement for each layer anyway. I don’t know how much it does for my Z-axis accuracy, either, since I haven’t noticed any sort of waves in my layers.
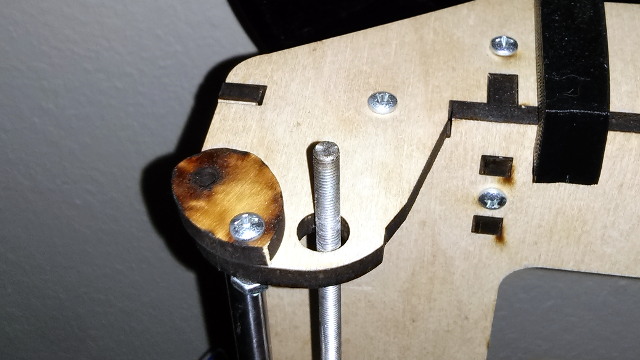
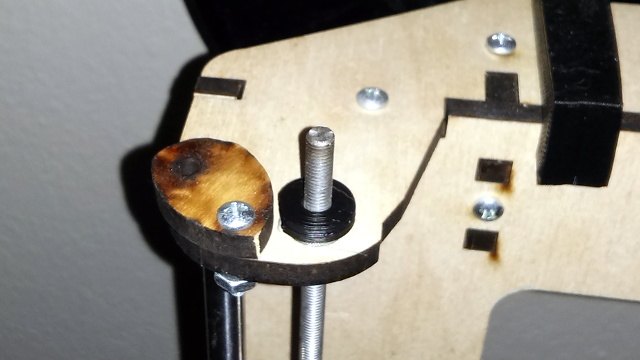
Mine came out a little on the small side, since these are another thing I printed before calibrating my printer properly. I just wrapped a piece of tape around them, so now they fit very snugly.
Knob for the LCD control panel
There are tons of knobs to choose from to use with your LCD control panel. I chose this one because the edges are knurled, and I wanted to see how the knurling would turn out. It also has an indentation in the top for one fingered spinning.
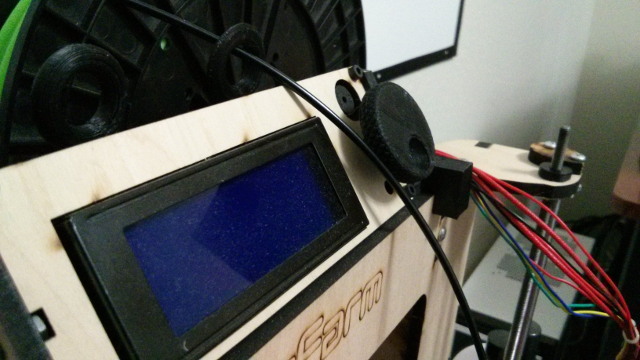
The knob does its job admirably, and the knurling came out better than I expected. The knob is HUGE. Much bigger than I would prefer. I’ll probably print something smaller at some point, but this one will do for now.
- Knurled LCD Knob at thingiverse.com
Improving the Z-axis end stop
Even though it is one of the most important parts on the printer, the end stop for the Z-axis is very poorly designed. The microswitch is attached to the machine with a small zip tie, so it wiggles around quite a bit. I’d like to replace that with some nuts and bolts, but I don’t have anything small enough in my parts bin.
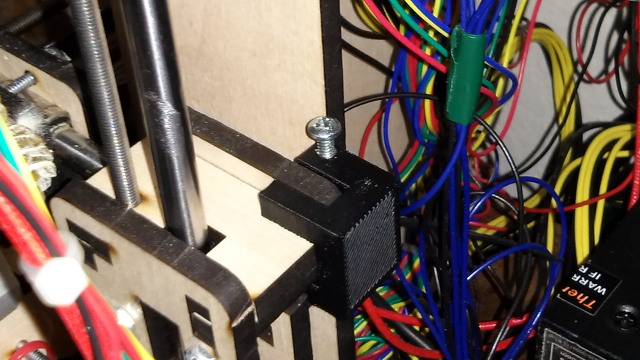
I found a nice looking Z-axis end stop adapter at thingiverse.com this week. It wraps around the wooden frame of the MakerFarm Prusa i3 and gives the adjustment screw more material to bite on.
I haven’t printed anything yet since installing this part, but I’m already extremely pleased with the result. I don’t think my z-axis adjustment screw was ever straight or secure. It used to hit the switch pretty squarely.
Now that the screw is actually at the correct angle, it just barely touches the edge of the switch. It also feels much more solid, and I actually need to use a screw driver to turn the screw now.
- Z-Axis End Stop Adapter at thingiverse.com
Knobs for the Z-axis rods
I recently learned that you can level out the Z-axis by turning the threaded rods on each side of the machine. It is easy to get a good grip on the rods because they’re so tall, but it is uncomfortable and seems imprecise.
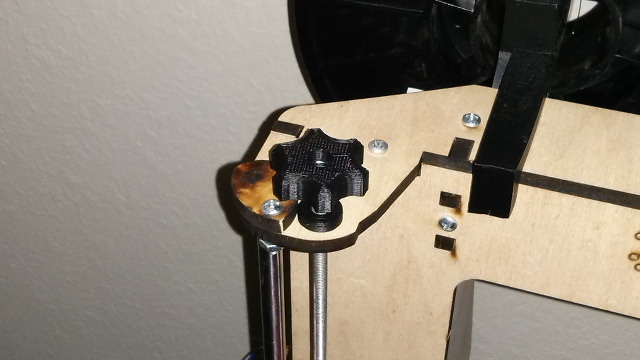
I found nice looking Z-axis knobs on thingiverse.com. They fit nicely and work great. I can even spin the rods with just one finger now.
- M5 Threaded Rod Knob at thingiverse.com
Upgrades for the future
I haven’t had a chance to print everything I need. I only learned about some of these parts recently.
Extrusion cooling fan
I definitely need to add a second fan for cooling the extruded material. That would improve my overhangs and hopefully make bridging a possibility. I printed quite a few 20 mm calibration pyramids, and the bridges on those all came out droopy.
I really like the design of the “Extrusion cooling fan-holder/cowling for MakerFarm Prusa i3 – Version 3,” but my measurements in Blender say that it is too tall for my Magma hot end. I have no idea how to correct such a complex model, so I’m holding off on this upgrade for now.
I’ve even been wondering if I installed the aluminum mounting plate for the hot end upside down. There’s definitely a groove in there, but I don’t know if it is deep enough to account for the difference in height.
- Extrusion cooling fan-holder/cowling for MakerFarm Prusa i3 at thingiverse.com
Conclusion
Owning a 3D printer has been a lot of fun so far. I was printing my own custom designed parts in just over a week. I’ve already finished designing and printing tablet stand for my Bluetooth keyboard, and I’m already starting on my third model. I’m very excited about this, because I’m WAY ahead of where I expected to be at this point.
When I got the printer, I’m pretty sure I printed something every single day for almost three weeks. I saw how fast the spool of filament was running down, so I ordered two more. Since then, I’ve slowed down quite a bit. At the time, I was mostly printing things I downloaded from the Internet.
I haven’t printed anything from the Internet in weeks. I’ve only been printing my own designs, so I’ve become the bottleneck. That first two-pound spool will probably last me quite a few months, and I bet the extra four pounds I have will carry me through the beginning of next year.