A Quick Port of App::EditorTools to Emacs

I saw an article about Stealing from Padre for Vim and I got a bit jealous that this functionality wasn't already available for Emacs. I guess I lucked out because it was very easy to make use of App::EditorTools in Emacs.

It probably took about a half hour to an hour to get this all up and running. The hardest part was actually tracking down the elisp functions that would return the current row and column of the beginning and end of a region. The terminology was just not easy to search for.

I did not include any default bindings in the package. I am still not entirely sure where their permanent home will be within my own config. For now I am using these:

(define-key cperl-mode-map (kbd "C-c e r") 'editortools-vim-renamevariable)
(define-key cperl-mode-map (kbd "C-c e t") 'editortools-vim-introducetemporaryvariable)

I don't think I want a binding for the renamepackage/renamepackagefrompath functions. I think I might set it up to call one of those automatically when I create a new file.

The elisp file can be found at:

http://rcs.patshead.com/dists/editortools-vim-el/

A Darcs repository is also available at http://rcs.patshead.com.

Huge Low Cost Whiteboards and How To Keep Them Clean

I am a huge fan of whiteboards. I can never have enough. Early last year I started hanging some inexpensive 4’ by 8’ melamine panels in my new home office. One of the three walls wasn’t big enough for a full sheet. I had to cut that one to 4’ by 5’.

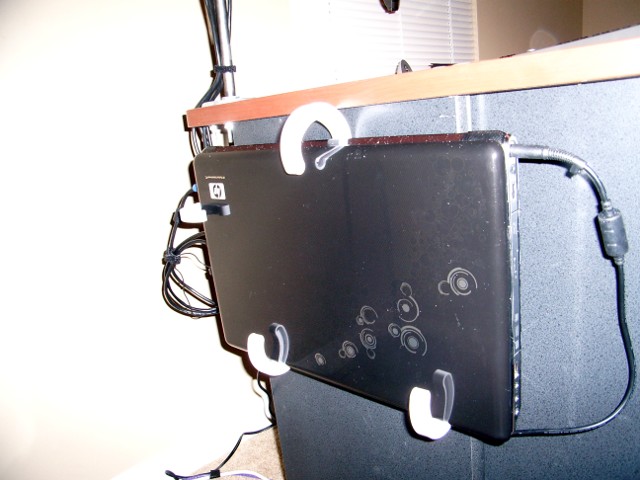
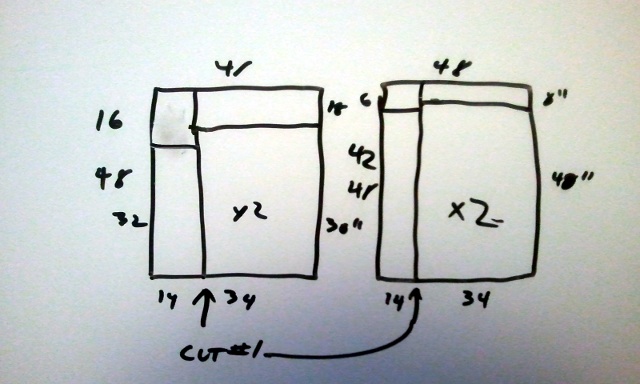
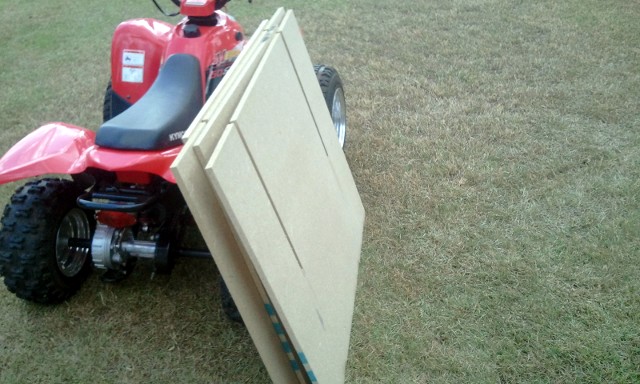
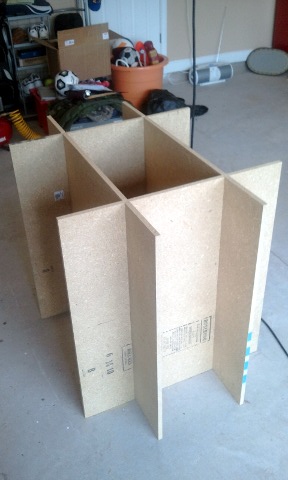
32 square feet behind my chair Two 32 square foot boards waiting to be hung A cluttered desk waiting for whiteboards

After over a year of use I am still very happy with all 84 square feet of melamine whiteboard. When I was first purchasing the melamine, I read a lot of complaints about how hard it can be to cleanly erase them, especially after the ink has been on there for an extended period.

I am using Expo Low Odor Dry Erase Markers. I've read that they can be more problematic, but that is the only kind that were on the shelf the day I was shopping for them. One of the colors didn't like to erase very well. We hung some of the left over whiteboard inside the door of our pantry. Any colors that ended up being difficult (or ugly, like brown) ended up in there.

Most of the colors that I use have erased pretty easily even after setting in for two months or more, but at that point they usually require a bit more effort. Unfortunately, today I had my first complete failure at erasing. The area I was trying to erase had been written on for almost a full year.

I don't have any special whiteboard cleaners here. First I reached for my little bottle of screen cleaner—my own mix of a small amount of glass cleaner in water. It worked just as well as the undiluted glass cleaner I tried next, which is not at all.

Fortunately, I remembered that I had a cheap generic Mr. Clean Magic Eraser in the closet. I sprayed the whiteboard with my screen cleaner, since it was handier than water, and scrubbed away. Everything came clean with barely any elbow grease. It was quite awesome!

I am apparently not the first person to think of this.

I did see some people who were wary of using these on whiteboards because they are a mild abrasive that might eventually wear down the writing surface. These melamine boards were very inexpensive. I wouldn’t mind replacing them every few years.

My Dead Intel X25-M and My Experience with Intel’s RMA Process

My Intel 80 GB X25-M G2 in my laptop died recently. Everything was running smoothly when I shut down, but when I powered back up the BIOS couldn't see the drive any longer. Fortunately, I keep pretty good backups, and I was up and running on a spare platter drive relatively quickly.

The RMA process was pretty disappointing. Phoning Intel was the only option.

I called in the afternoon on Monday, February 1, since they are only available during business hours. My time on hold was pretty short, probably about five minutes, and it took less than 10 minutes to get the RMA rolling. I was told I'd receive an email shortly with RMA instructions.

I didn't receive an email. At that point it was after business hours so I used their web-based form to submit a question. I included my RMA and case numbers, and I never heard back from them.

At this point there is a delay that is completely my fault. I didn't get a chance to call back until a week, later on Monday, February 8. It turned out they got my email address wrong. I pronounced my email address and I spelled it to them letter for letter. They didn't only have it wrong, they were short on characters…

I was happy with the turn around time on the package. I had the drive at the post office on Tuesday, February 9, and the new drive arrived at my door on Tuesday, February 16.

The night of my second call to Intel I realized there was a pretty good chance they also didn't get my address correct. They do not include your shipping address in the RMA email. This time I emailed the address listed in the RMA email, which is rma@mailbox.intel.com. I never heard anything back.

My Overall Opinion

I was happy with the service once I was able to get to the point where they were actually able to ship the drive out. I'm generally unhappy with their telephone support, and I am extremely disappointed with their email communications.

I Sure Did Miss the SSD

Certain tasks were noticeably slower. Most of the time the performance difference isn't something you can feel, but some disk intensive tasks are significantly faster with the SSD. Things like booting, installing and updating numerous packages with apt, and importing photos into F-Spot are at least twice as fast with the X25.

The thing I noticed most was the heat. When I first moved from the old hot platter drive to the X25 I didn't think the difference was so dramatic. Running on the SSD for months sure made the platter drive feel scary hot. The SSD is warm underneath the laptop where there is only a piece of plastic covering and physically touching the drive.

The platter drive even made the top of the laptop very warm to the touch. The difference in temperature is huge.

  • Update: The replacement drive died in the middle or April 2010 (about 3 months later). It died in a different make/model laptop, my new HP DV8T, but under similar circumstances. The drive was fine when the laptop was cleanly shut down; the BIOS could no longer see the drive on next boot. The replacement-for-the-replacement has been running fine since then, it is now September 2010.

Testing btrfs Root File System on Ubuntu

I'm starting to get impatient. I really want to start running a next-generation file system. I'd like to have easy to manage sub volumes, block level checksums, and RAID-like redundancy at a higher level.

Writable snapshots are what I'm most excited about, though. Snapshots of my home directory will help protect me from accidental file deletions and modifications between backups.

I'm currently saving disk space with my QEMU disk images by juggling cloned qcow images. It should be much easier to manage some writable Btrfs snapshots instead. Deduplication would likely save me quite a bit of space as the virtual machines age. ZFS already has deduplilcation, but it sounds like deduplication won't be all that far away for Btrfs.

What are the Best Practices for a Btrfs Root File System?

I have absolutely no idea, but I think I am on the right track. I did not want to use the root of the Btrfs file system as my / file system. I created a sub volume called rootfs instead. I mounted that sub volume as / and I mounted the entire Btrfs volume under /mnt/btrfs.

Doing it this way felt pretty well organized. From this point, it would be pretty easy to create a homefs and a tmpfs. I didn't want to break out /var/ or /usr. That would make it too difficult to snapshot the operating system between upgrades.

Overview of How to Get it All Up and Running

There is a tool to convert and ext3 or ext4 file system to Btrfs. I didn't use them and I don't know if they would allow me to lay out the file system the way I was hoping. I ended up doing it the long way.

This isn't going to be a step-by-step guide. The quick overview of the steps was:

  • Install Ubuntu 9.10, small ext2 or ext3 boot partition
  • Compile and install kernel 2.6.32 and the latest btrfs-utils (you can skip this if you don't need snapshot removal)
  • Add btrfs.ko, zlib_deflate.ko, and crc32c.ko to the initramfs
  • Back up everything on the / file system
  • Create a Btrfs on the old / block device, create a rootfs sub volume
  • Restore the old / file system contents to the rootfs subvolume

GRUB and fstab

You'll have to change your root kernel parameter and add a rootflags parameter:

root=/dev/sda2 rootflags=subvol=rootfs

I left fstab just pointing to /dev/sda2. That seemed to be work fine and allowed me to boot from different snapshots. I also added a line to mount /dev/sda2 under /mnt/btrfs.

Taking a snapshot and booting from a snapshot

I created a snapshot of rootfs called rootfs-1 and then I performed an apt-get dist-upgrade and installed a few extra packages. It wasn't a huge change but it was enough to test booting from a snapshot.

Booting from a snapshot turned out to be easy. At the start of boot, I chose to edit the GRUB entry before booting. I just changed subvol=rootfs to subvol=rootfs-1. It would probably be pretty easy to automatically generate a GRUB menu with all the snapshots as options.

One Little GRUB Hiccup

update-grub ran fine the first time, while my root filesystem was still ext4. update-grub got angry and wouldn't update properly with a Btrfs root. I don't have a good fix for this yet—I just kept fiddling with the GRUB entries during boot.

GRUB, Btrfs, and Kernels

Being able to snapshot root will be very handy. I'd be tempted to set up some automation to snapshot root every day and at every apt-get upgrade.

Unfortunately, GRUB doesn't understand Btrfs or its snapshots. Kernels and initrd images have to be stored on a boot partition that won't support snapshots. That makes the kernel the weak link in the upgrade chain.

It would be nice if the boot loader could pull a kernel straight from the snapshot. That would let you keep your snapshots more self-contained. I don't feel this is very important, though. Snapshots of root alone will be a huge step forward.

Sorry for the Lack of Screen Shots

My X25 died this week and I didn't get around to backing up my Btrfs virtual machine. I didn't think I would need to back up that image because I was planning on deleting it after I wrote this article.

I am seriously considering giving Btrfs a try on my laptop when the replacement X25 gets here. I will post some screen shots if I do.

What the Internet Didn’t Tell Me About My Moka Express

I bought my first Moka Express about a year ago. It is a wonderful little machine. It is very easy to use, simple to keep clean, and durable. It doesn't take up any counter space and it is easy to take with me when I travel. It also makes a good strong espresso-like coffee.

I should probably mention here that I am not a coffee aficionado. I can't tell the difference between coffee I ground today or last month. A lot of people would probably say I don't even really like coffee.

I do like French Vanilla creamer and caramel syrup, though. I don't make proper coffee beverages. I usually mix about 1/3 Moka Express coffee with 2/3 french vanilla creamer (50/50 if it's iced) with a bit of caramel syrup.

We have a Keurig K-Cup machine. I can only get a strong enough brew out of it to make a coffee the way I like if I use the iced-coffee (3.25 oz) setting and use it to make a hot coffee. Even on that setting it is much, much weaker than what comes out of the Moka Express. It may not be as strong, but it sure is fast and convenient.

I've learned a lot about brewing coffee with the Moka Express over the last 12 months. Some of what I learned is exactly the opposite of what "The Internet" told me.

Don't Grind the Coffee Too Fine, Watch Out For Dust

The first batches of coffee I made with my Moka Express were awesome. After a while, things got bitter. Tiny grounds of coffee were making it through the filter into my beverage.

It turned out that the pre-ground coffee we had lying around was probably processed with a blade-style grinder. No matter how coarse the grind, a blade grinder will generate tiny grains of coffee dust. These pass right through the metal filter and make the brew extremely bitter.

My first attempts at grinding my own beans failed in the same way, since I was using a cheap blade-type grinder. I picked up an inexpensive Nesco burr grinder. Now my brews are consistent and taste better than ever.

My good friend, "The Internet," told me to grind the beans finer than for a drip machine. I'm actually getting much better results on a slightly coarser setting (the 6.5-7.0 setting on my Nesco grinder).

When I ground too fine the water couldn't get through the grounds. The valve would whistle, it'd take forever to brew, and it would taste terrible.

I've made plenty of tasty non-bitter coffee with pre-ground mass-produced coffee. If you're buying pre-ground, you will just have to find one that works. You can also probably grind the coffee in the store.

It is OK to Pack the Coffee

You sure don't want to tamp it down like you would in an espresso machine, but I do lightly pack the coffee into the pot. I probably fit an extra teaspoon or more in there this way.

You know you packed it too tight if the pressure release valve starts whistling.

How Much Heat?

I've read all sorts of ideas related to applying heat…

I crank the stove up all the way. Right before the coffee starts flowing, you'll recognize the sound; I turn it down to about half heat. It brews quite a bit slower than at full heat and it seems to taste better. I haven't really done any sort of blind taste test here, though.

Light or Dark Roast?

This is more about personal taste than anything else. I prefer to use a lighter roast. I've been buying huge, cheap bags of Sam's Club brand breakfast blend coffee. We're happy with the taste and the price.

We managed to buy a huge bag of Sam's Club French Roast coffee. We really didn't know our coffee lingo at the time. We did not know that French Roast was the darkest over-burnt coffee. I feel it is way too dark. It has been handy to have around, though. I sometimes throw a few spoonfuls in with the breakfast blend if we want a darker-tasting coffee.

Is it Hard to Keep Clean?

My old friend, "The Internet," tells me that the coffee tastes better when the walls of the pot are coated with coffee oils. I don't actually know if this is true or not.

I rarely use any soap to clean it, though. As long as I use the pot every other day or so, I just take it apart and rinse it before each use. Just make sure you empty and rinse the top of the pot out after you use it. If you don't you will have scrub out the dried out, caked-on day old-coffee.

How Does it Compare to Proper Espresso?

I have absolutely no idea. I do know that the Moka Express produces a much stronger, more caffeinated brew than a drip machine. They are also much cheaper than a proper Espresso machine and seem easier to maintain.

Dirt Cheap Extended Battery for the T-Mobile G1/HTC Dream

I've been fairly unhappy with the battery life of my G1. With the stock 1150mAh battery, I am lucky to get 12 hours out of it most of the time. I was once able to use 49% of my battery in an hour and a half by driving to a doctor's office and surfing the web in the waiting room… Bluetooth was at the top of the list of battery consumers, so be sure to turn that off if you don't need it.

I found a cheap 2300mAh battery at dealextreme.com. I've ordered lots of cheap gadgets and cables from them in the past, so I figured it'd be worth spending $11.22 at this battery to try it out. They ship their items, slowly, from Hong Kong. I think it took about 3 weeks to get the battery.

How long does it last?

I haven't actually run it down to empty yet. The first day I had it, I ran it down to 25% in a little over 19 hours. I had everything enabled except Bluetooth. I watched a little over an hour of video, listened to some SHOUTcast radio with Tunewiki, played a bunch of games, read email, and surfed the web. I tried to use the phone as often as I could. That last 25% should easily have put it over 24 hours, but I was tired and I needed a full battery for the next day.

Just how big is that thing, anyway?

I looked at a lot of batteries. Nobody seems to give dimensions. Unfortunately, I don't have anything terribly accurate like a caliper to measure this thing with. I did come up with an easy way to convey the difference in thickness between the stock battery cover and this new battery cover.

The top part of the battery cover that sits over the camera is probably identical in thickness to the stock battery cover. Just below the camera it gets thicker and it maintains that thickness all the way to the bottom of the phone. I was able to stack 3 pennies on the shallow side of the cover and it came out pretty flush with the deep side. My good friend Wikipedia tells me that a United States Penny is 1.55mm thick.

My math tells me that the thickness of my phone has increased from 17.1mm to about 21.75mm. That puts it just a smidge under the thickness of my old Treo 650. I think I can live with that.

Is it heavy? Does the cover fit well?

I may not have a caliper handy, but I do have access to a shipping scale! The stock battery came out at 25g; the beefy new battery came out at 45g.

The first time I put the cover on the phone it didn't feel like it was going to fit. I may have had to press it on a little harder, but it fits very snugly with no gaps anywhere.

Update 2010-01-06:

My phone has mostly been sitting idle the last few days and I forgot to put it on the charger last night. The battery use applet is showing that I've been unplugged for a few minutes shy of 39 hours, with 29% capacity remaining. The three biggest battery wasters seem to be Cell Standby, Bluetooth, and Phone Idle, all clocking in at 29%. Wi-Fi clocked in at 9%, Voice Calls at 6%, and Display at 2%. I was on the phone for about 45 minutes.

All the power-wasting goodies were turned on—GPS, Bluetooth, Wi-Fi, and Sync. It probably helps that I live about a quarter of a mile from a cell tower.

Achieving Better Compression with lrzip and rzip

I recently upgraded to Mozilla Thunderbird 3.0. That got me thinking that now might be a good time to clean up my local mail folders. All of my mail from the past few years is stored on my IMAP server. I still have a few gigabytes of old mail from my old POP3 days stored in Thunderbird's Local Folders.

I decided that now might be a good time to do some spring cleaning and not carry around my old POP3 mail anymore. I figured it is also a good time to store this current copy of my old mail with my long-term backups.

My Old Friend rzip

I have been using rzip for quite a few years. Its job is to find and encode large chunks of duplicated data over very large distances, up to 900 MB. Once that is complete, it runs the resulting data through bzip2. For large datasets, I've found it to be much faster than `bzip2 and it usually results in an archive that is about 30% smaller than just using bzip2.

Unfortunately, rzip can’t operate on pipes. All of my automated backup scripts run along pipelines, usually from tar to bzip2 to gpg. They never touch the disk unencrypted, which probably isn't always helpful.

My New Friend lrzip

I recently discovered Con Kolivas' lrzip. lrzip takes rzip a couple steps further. It lets you choose a compressor other than `bzip2 for the second stage of compression. It can also be used in a pipe.

Unfortunately, when used in a pipe it generates a large temp file. This can be a problem if you are trying to generate a large archive and don't have a lot of free disk space, or if you don't want unencrypted data being written to the disk.

Some Benchmarks

I compressed the tarball of my .thunderbird directory every way I could think of that made sense. The default settings for lrzip kept erroring out on me at about 30%. I had to use the -w switch to reduce the window size from 20. I chose 12, which should be about 30% higher than rzip's window.

              Size    Minutes    Ratio
              (MB)
uncompressed  5761         na    1.0:1
lrzip zpaq    1207        265    4.7:1
lrzip lzma    1262         60    4.5:1
lrzip bzip2   1401         27    4.1:1
rzip          1362         20    4.2:1
lzma          1441         97    4.0:1
bzip2         1748         38    3.3:1

Both rzip and lrzip achieved a smaller file size in less time than bzip2. lrzip with zpaq is over 13 times slower than rzip for a savings of 155 MB, or about 12%.

Why Would Anyone Wait for zpaq to Finish?

Most of the time it isn't worth the wait. I'm a huge fan of smaller backups. Backups become significantly more expensive every time a single backup has to span a second (or third, or fourth…) piece of media. It's another floppy, CD, DVD, Blu-ray, tape, hard drive, or flash drive to have to manually swap around and keep safe.

I like flash drives for my personal backups. I have too many CDs and DVDs that are unreadable. I've accidentally run an old compact flash drive through the laundry and it still worked. I'm sure all flash drives won't survive that, but they do tend to be very durable.

Unfortunately, lrzip with zpaq did not get the file size down enough for the archive to fit on the backup flash drive that I keep around the house. Another 100 MB or so would have done the trick and would save me quite a bit of effort.

Which One Should You Use?

For most archives I would probably just choose bzip2. It does a very good job, and a decompressor is always very readily available.

For almost every very large archive, I will definitely be sticking with rzip. It is faster and more space-efficient than bzip2. It is also easier to find than lrzip; my Ubuntu machine has an rzip package available in apt.

I will be sure to keep lrzip with zpaq in mind, though. Sometimes an extra couple hundred MB will save the time, effort, and cost of a second piece of media. The other downside to zpaq is that decompression is also very slow as well.

A Quick and Dirty wiper.sh Fix For Intel X25-M

Update: I very much doubt that anyone should be using this anymore. The discard mount option has been working properly for years. In fact, you probably should use hdparm to manually TRIM your drive. You should be using fstrim. It is available in the software repositories of most recent Linux distributions.

The wiper.sh script that ships with hdparm 9.27 does not work well with the Intel X25 drives. The call to hdparm will fail if it is passed in more than 512 ranges of sectors. I made a quick and dirty modification to the wiper.sh script so that it makes multiple calls to hdparm with 500 ranges each. I've only been running it for a few days, but it seems to be working just fine so far.

I also added a --yes command line switch so that I could more easily call it from cron.

wonko@zaphod:~$ sudo ./wiper-dangerous.sh --commit --yes /

wiper-dangerous.sh: Linux SATA SSD TRIM utility, version 2.5-dangerous, by Mark Lord.
Preparing for online TRIM of free space on /dev/sda2 (ext4 mounted read-write at /).
Creating temporary file (3091782 KB).. 
Syncing disks.. 
Beginning TRIM operations..

/dev/sda:
trimming 6183568 sectors from 159 ranges
succeeded
Removing temporary file..
Syncing disks.. 
Done.

The script also now has a dependency on Perl. Feel free to download a copy of my wiper-dangerous.sh, but I make no promise that it won't eat your data!

My New Favorite Kind of Tape: Cloth Tape

I've been carrying a small roll of duct tape in both my wallet and laptop bag for years. I've been taking advantage of the fact that duct tape is the same width as a business card. You just roll some fresh duct tape around an old business card ten or twenty times and you'll get a small roll of duct tape that fits right in your wallet.

A year or two ago I found a roll of cloth tape in an ancient first aid kit that we had lying around the house. The first thing I noticed was how similar it is to duct tape. It is fabric reinforced like duct tape, but it is more flexible and less sticky.

It does a great job holding cables together, and it doesn't seem to leave behind the nasty mess duct tape leaves behind when you remove it a few months later. Cloth tape also works great for labeling things; it takes Sharpie ink very well.

The width of cloth tape does not line up as well with a business card as duct tape does. I've come up with a better idea, though. I now wrap three kinds of tape around the length of a business card: duct tape, cloth tape, and electrical tape. The three added together are slightly too big for a business card, so there is a tiny bit of overhang.

Three types of tape in my wallet

Using QR Codes for Hardcopy Backups of Private Keys

For years I have been keeping a small font printout of my important SSH and GPG private keys hidden and locked away for safe-keeping. I have lost enough floppies, CDs, and DVDs to bit rot, so I do not have much trust in them for the long-term storage of something this important.

The hard copies are nice, but I sure don't want to have to manually type in an error-free copy of my private keys. That is why I now print two copies of each of my keys. One copy is text, the other copy is a QR Code.

QR Codes are popping up all over the place lately. Some of the websites hosting Android software that I use have QR Code images on them, so you can just snap a picture of the code with your smart phone and be taken straight to the website. This one will bring you to this blog:

QR code pointing to patshead.com

An alphanumeric QR Code can contain up to 4,296 characters. This was plenty for my SSH and GPG private keys.

Where Should I Store My Backup Keys?

That would depend on your level of paranoia. You could store them in your safe deposit box at your bank, in a safe at home, under your mattress, or you could bury it in your back yard.

Why Bother Storing a Hard Copy of your Keys?

I am mostly worried about losing my GPG private key. I have gigabytes upon gigabytes of backups and important data encrypted with my key. Completely losing that key would turn all that data into useless bits.

Losing my SSH key(s) wouldn't have nearly as much impact. There would just be a few hosts that I would have trouble logging into. The extra effort to print the SSH key along with the GPG is minimal, though.