10-Gigabit Ethernet Connection Between MokerLink Switches Using Cat 5e Cable

| Comments

I ordered and installed a pair of MokerLink 2.5-gigabit Ethernet switches in my home about two weeks ago. I put an 8-port managed switch with one 10-gigabit SFP+ port in my network cupboard, and I put a 4-port unmanaged switch with two 10-gigabit SFP+ ports in my home office. I got that all running at 2.5-gigabit speeds immediately, but my intention was to set up a path from my workstation to the cupboard at 10 gigabits per second.

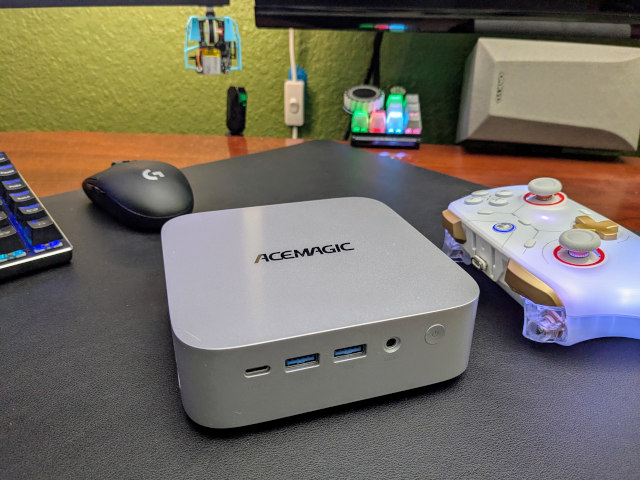
My MokerLink 4-port 2.5-gigabit ethernet switch in its 3D-printed stand

The MokerLink 2.5-gigabit switch sitting in its custom 3D-printed stand with all its 10-gigabit SFP+ ports running

The hardware to set up the required 10-gigabit Ethernet just wound up taking a little longer to arrive.

Let’s talk about the title of this blog!

Brian Moses and I ran Cat 5e cable to almost every room in this house in 2011. That was eight or nine years before I bought the place!

Both 2.5-gigabit and 5-gigabit Ethernet are designed to run over Cat 5e or Cat 6 cable with lengths up to 100 meters. 10-gigabit Ethernet over copper requires Cat 6A cable. I am not using any Cat 6A cable, but I also don’t have 328 feet of cable between my office and the network cupboard!

You can run 10-gigabit over pretty crummy cables if they’re short enough, but how short is short enough? I haven’t found any good data on this. I have mostly only read anecdotes, so I figured I should document my own anecdote here!

Some SFP+ modules only support 10-gigabit Ethernet. I decided to try these Xicom SFP+ modules because they support 2.5-gigabit and 5-gigabit Ethernet. The latter would still be an upgrade, and the 3-pack of modules from Aliexpress cost about half as much as three of the cheapest SFP+ modules I could find on Amazon.

I had good luck. My connection across the house negotiated at 10 gigabits per second, and I haven’t seen any errors accumulating on the counters of the managed switch.

Exactly what kind of cabling am I working with here?

My house is a little over 50 feet wide, and the network jack in my office is almost that far away from the cupboard. The cable has to go up 8 feet to get to the attic, then it has to come back down 4 feet to reach the patch panel in the network cupboard. It isn’t a perfectly straight line through the attic, and Brian and I definitely didn’t pull the cable taught.

Let’s just say there might be 70 feet of Cat 5e between the port on the wall in my office and the patch panel.

Brian's Network Cupboard Conduit

The tube that collects all the cables leading to the 48-port patch panel in my network cupboard

The cable from the patch panel to the 10-gigabit SFP+ module is an extremely short color-coded patch cable that I crimped myself. It is probably Cat 5e.

The 10-foot cable connecting my office’s switch to the wall has some historical significance for me! It is a yellow Cat 5 cable that almost definitely somehow made the journey here from the days when I worked for Commonwealth Telephone in Pennsylvania. Almost all our patch cables there were yellow, and this cable is from the days before the Cat 5e standard even existed.

What if I couldn’t get 10 gigabit out of these cables?

What would I personally have done? Me?! I would have swapped that old Cat 5 cable from the nineties between the 4-port switch and the wall, and if I was still stuck at 5 gigabits per second, I would have stopped there. That is more speed than I actually need anyway!

What could you do if you REALLY want that faster connection? The easiest thing to do would be trying a different brand of SFP+ module. They are not all identical. Maybe you could borrow some from friends to see if you have better results!

Old 3com switches at Commonwealth Telephone

The only relevant photo I could find. This is a stack of old 3com switches stacked on what was at one time my desk! Every one of these switches would have had 23 yellow patch cables plugged in.

I honestly expect that most people will be lucky enough to have 10-gigabit Ethernet work across old Cat 5 or Cat 5e wiring in their homes. I definitely don’t live in the biggest house around, but I also don’t live in a small house, and it is only a single story. That makes it a pretty wide house. Your longest cable run is likely to be shorter than mine if you are in a two-story house unless you’re approaching 5,000 square feet.

Maybe. I don’t know. I don’t live in your house!

I don’t think my MokerLink 8-port switch supports LACP, but I was able to bond four ports!

There are four 2.5-gigabit Ethernet ports on my router-style Intel Celeron N100 mini PC. I don’t really need to bond these ports together, because a single 2.5-gigabit Ethernet port is about as fast as the 14-TB USB hard disk connected to my NAS virtual machine. Even so, trunking these ports made it easier to properly verify that I actually have 10 gigabits of bandwidth between my office and my network cupboard.

10-gigbit iperf3 test

The documentation for MokerLink’s 5-port managed switch has slightly different screenshots that what show up in my 8-port switch’s trunk configuration. The 5-port switch lets you choose whether a trunk group is set to static or LACP. I can put any four ports in a single trunk group, but I don’t have a choice as to what sort of group it is, and the link doesn’t work when set Proxmox to use LACP.

The trunk works great with the Proxmox’s default setting of balance-rr for the bond0 device, and I am able to push data at 9.36 gigabits per second using iperf3 as long as I use at least four parallel connections. Sometimes I have bad luck and two or more of those parallel connections get stuck on the same 2.5-gigabit interface, but bumping it up to six or eight parallel connections almost always breaks 9 gigabits per second.

That is part of the bummer about channel bonding. A single TCP connection will max out at the speed of just one network interface. You need multiple connections to fully utilize all the ports in the group, and they don’t always wind up attaching to the ideal interfaces.

This isn’t a problem in situations where you would use bonded network interfaces in a business environment, because you probably have hundreds or thousands of clients sharing those two, three, or four network ports. When I want more speed at home it is always between two clients.

Troubles with my Intel X540T2 PCIe card from Aliexpress

I could easily burn through 2,500 words explaining the problems that I have had with this 10-gigabit Ethernet card in great detail. I will probably dedicate an entire blog post to this card when I am confident that everything is going smoothly, but I will try to hit the important bits here.

I did not carefully choose this card. I had the three pack of Xicom SFP+ modules in my cart when I searched for 10-gigabit PCIe cards. I saw a dual-port card with an Intel chipset for $16, and almost immediately added it to my cart.

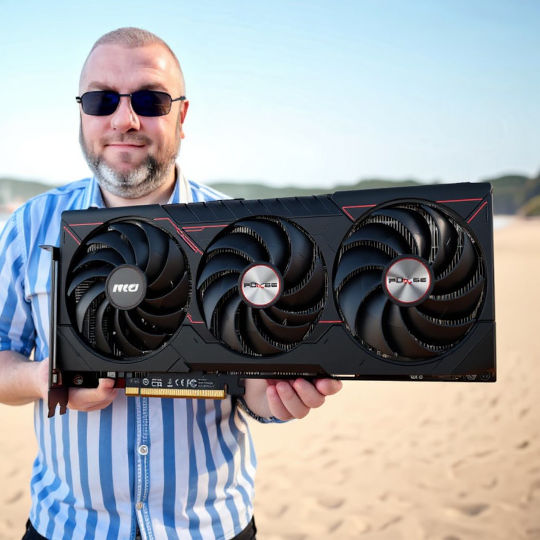
Stable Diffusion or Flux Man Installing a Network Card

When I installed the card, my PC wouldn’t power on. I pulled the card, plugged it back in, and it booted just fine.

Then I noticed that I couldn’t get more than 6 gigabits per second out of the card, and dmesg said that the card was using two PCIe lanes. I wanted to reboot to check the BIOS, but the machine shut down instead and wouldn’t power back up. Many attempts at reinstalling the PCIe card failed to improve the situation.

I set the BIOS to 4x instead of auto for that slot, and I dug out an old computer for testing. The Intel card from Aliexpress worked just fine over and over again in that machine, so I gave it another shot in my PC. It worked on the first try now, it is using four PCIe lanes, and I can reach up over 9 gigabits per second.

Will it work when I reboot next week?

Should I have bought a different 10-gigabit PCIe card?

For my situation, I don’t think it makes much sense to spend more than $20 on a NIC for my workstation. There are no other 10-gigabit Ethernet hosts on my network. I can max out the 2.5-gigabit Ethernet ports on three devices and still hit 900 megabits per second in both directions at speedtest.net. That’s pretty neat, but not terribly useful.

This older Intel NIC is pretty neat at $16. That’s about what I would have to pay for a 2.5-gigabit Ethernet PCIe card anyway, so it felt like a no-brainer to give it a try. The Intel X540 is old enough that it predates the 2.5-gigabit and 5-gigabit Ethernet standards, so this card will only work at 1-gigabit or 10-gigabit and not anything in between.

My Network Cupboard

I still have the 8-port switch dangling in the network cupboard. I need to set aside some time to unscrew one of the old 1-gigabit switches and get that thing mounted correctly!

The next step up would be more legitimate looking Intel X540 cards on Amazon for $60. After trying this one, I am not excited about paying so much for another 17-watt NIC. Prices only go up from there.

Conclusion

I think it is definitely time to stop buying 1-gigabit Ethernet hardware. You can get 2.5-gigabit switches for quite a bit less than $10 per port now, so much hardware is shipping standard with built-in 2.5-gigabit network adapters now, and you can sneakily upgrade some of your older machines with $7 2.5-gigabit USB dongles.

The 10-gigabit Ethernet stuff is fun, but it is both more AND less persnickety than I anticipated. I expected to have trouble with the inadequate wiring in the attic. I absolutely did not expect to have weird issues with an Intel network card, even if that network card might be made from discarded or unused enterprise network gear from a decade ago.

The 10-gigabit link between switches on opposite sides of my house is fantastic. This has turned this pair of switches into a single switch for all practical purposes, so it doesn’t matter which room my mini PC servers call home. They will always have a full 2.5-gigabit connection directly to any other server no matter how many of them are moving data at the same time.

I would very much love to hear from you in the comments! Are you running 10-gigabit Ethernet at home across older wiring? How old is that wiring, and how long do you think the runs are? What make and model of SFP+ module do you have on each end? It would be awesome if we could figure out which gear is working for people, and also what sorts of wiring they have managed to get a good connection on. If you are interested in chatting about DIY NAS and homelab shenanigans, then you should considering joining our Discord community. We are always chatting about servers, network gear, and all sorts of other geeky topics!

Upgrading My Home Network With MokerLink 2.5-Gigabit Switches

| Comments

I am changing course again. I used to have a small 40-gigabit Infiniband network segment in my home office. This was necessary at the time because I stored video files on my NAS that I needed access to on my workstation, and video editing is a lot smoother when those files feel just as fast as if they were sitting on a SATA SSD installed in my workstation. It was also quite inexpensive and exceedingly cool.

I eventually decided to move my NAS and homelab server out of my office to cut down on the fan and hard disk noise in here. I didn’t have a good way to extend my 40-gigabit connection all the way to the other side of the house, so I wound up installing a 12-terabyte hard disk and a 1-TB SSD for lvmcache in my workstation. That let me keep a synced copy of my video files on my workstation, my NAS on the other side of the house, and my off-site server at Brian Moses’s house.

My new MokerLink 2.5-gigabit Ethernet Switch

My home office’s new 4-port Mokerlink 2.5-gigabit switch with two 10-gigabit SFP+ ports in its new 3D-printed home

While I was setting that up, I made a sort of informal decision that I would attempt to keep my file storage setup configured in such a way that I would never need more than a 100-megabit Ethernet connection. This was a good fit for the symmetric 150-megabit Internet connection I had at the time.

Things have changed since then. I have upgraded our home FiOS internet service to symmetric gigabit. Brian upgraded his service to symmetric two gigabit. I also swapped out my old homelab server and NAS for a mini PC with four 2.5-gigabit Ethernet ports. I knew it would only be a matter of time before I added a second device with 2.5-gigabit Ethernet ports.

That day has already passed, and I have enough USB 2.5-gigabit Ethernet dongles to upgrade two more machines. It seems like it is about time to upgrade my network cupboard to 2.5-gigabit Ethernet, and it also seems like it would be fun to connect my home office and my workstation back to the cupboard using 10-gigabit Ethernet.

Here’s the tl;dr

Everything is working great. It took less than five minutes to swap out the switch in my office, and I was immediately seeing better than 2.3 gigabits per second between my desktop PC and my office’s Proxmox server via iperf3.

It didn’t take much longer to temporarily stash the 8-port managed MokerLink switch into my network cupboard. The web interface is basic but capable, and iperf3 is running just as fast in both directions between devices connected anywhere in my home.

The real summary is that the MokerLink 2.5-gigabit switches are exactly what they are supposed to be: boring! I plugged them in. They work. They are faster than the switches they replaced.

How fast is 2.5-gigabit Ethernet? Is it fast enough?

The speed of 2.5-gigabit Ethernet is just math, but math is boring, and it may not help us understand what these speeds are equivalent to. You want to know if the network is going to be your bottleneck, and you’d like to figure out if you could use the upgrade.

I put together a little table that describes what each Ethernet standard’s maximum performance is roughly equivalent to. The equivalents aren’t exact, but they’re reasonably close.

Ethernet megabytes/s Rough Equivalent
100 megabit 12.5 Slow
gigabit 100 500 GB laptop hard disk
2.5-gigabit 250 3.5” hard disk or older SATA SSD
5-gigabit 500 the fastest SATA SSDs
10-gigabit 1,000 the slowest NVMe drives
40-gigabit 4,000 mid-range NVMe drives

What is wrong with these rough equivalents? Hard disks don’t have a steady throughput. They are faster at the outer edge of the platter and slow down as they approach the center. The largest modern 7200-RPM disks can reach a little over 300 megabytes per second on the fast end, but they’ll drop down to something a little below 150 megabytes per second on the slow end.

Your 10-gigabit Ethernet network also has a lot more latency than your local NVMe drive. While it is no trouble for a mid-range NVMe to manage 500,000 input/output operations per second (IOPS), introducing a fraction of a millisecond and an extra protocol like CIFS or NFS will severely impact your IOPS when accessing a remote NVMe drive over 10-gigabit or 2.5-gigabit Ethernet.

Upgrading to 2.5-gigabit Ethernet is kind of a no-brainer these days. We are at or below $10 per switch port, USB 2.5-gigabit Ethernet dongles are under $10, and PCIe cards are in that ballpark as well. Not only that, but both 2.5-gigabit and 5-gigabit Ethernet will almost definitely work with the cables that are successfully carrying gigabit Ethernet signals.

I can tell you that one switch for each end of my house, three 10-gigabit SFP+ modules, a two-port 10-gigabit Ethernet card for my workstation, and a couple of USB 2.5-gigabit Ethernet adapters cost less than $200.

Is 10-gigabit Ethernet worth the hassle?

This is a fantastic question! 10-gigabit Ethernet pricing is getting pretty good, but the price of the switches and network cards isn’t the only thing to consider.

Both 10-gigabit Ethernet switches and network interface cards tend to use a lot more electricity, so they also generate a lot more heat. The protocol is also much pickier about the cabling that it will manage to run over. Some people have success on shorter runs over Cat 5e cable. You’re only supposed to need Cat 6 cable, but some people have trouble even then, and they have to try multiple SFP+ transceivers in the hopes that they will get a good connection.

Stable Diffusion or Flux Schnell Network Man

I wouldn’t even be worrying about connecting my office to my homelab with 10-gigabit Ethernet if I weren’t writing a blog. I don’t need that extra performance, but it will be fun to tell you whether things work or not!

I helped Brian Moses run Cat 5e to every room in this house almost a decade before I bought the house from him. I know that there is somewhere around 50’ to maybe 60’ of Cat 5e cable between my home office and the switches in my network cupboard.

That is short enough that I may have success over Cat 5e. The RJ-45 transceivers I picked out also support 2.5-gigabit and 5-gigabit Ethernet, so it will still be a worthwhile upgrade even if I only manage half the speed.

UPDATE: The trio of Xicom SFP+ modules arrived, and they are working great. The connection to the other side of the house is running from a 10-gigabit port on my office switch to the wall via a Cat 5 cable from the nineties, then through the attic on around 40 to 50 feet of Cat 5e cable Brian and I pulled in 2011, then connected from the patch panel in the network cupboard to the 10-gigabit port on the switch. It connected at 10 gigabits per second, and I managed to run enough simultaneous iperf3 tests over various 2.5-gigabit and 1-gigabit Ethernet connections to push around 6 gigabits per second over that link.

When are you going to tell us what you ACTUALLY BOUGHT?!?!

MokerLink has three sizes of switch that I was considering, and each size is available in a managed or unmanaged variety. I waffled a lot on whether I was going to pay the extra $20 to put a managed switch in my network cupboard.

The number one reason on most people’s list for using a managed switch is to set up secure VLANs for their skeevy, untrusted Internet of Things hardware and oddball IP cameras with sketchy firmware that might phone home, and they don’t want that gear with janky firmware being used as a foothold to hack their important computers.

I am not worried about that in the slightest. I don’t run anything important outside of my Tailscale network. As far as I am concerned, my private and protected VLAN is my Tailnet. That is all I need, but I bought a managed MokerLink switch for my cupboard anyway. I thought $20 was a small price to pay to let you know how I feel about MokerLink’s managed switches.

The three sizes on my radar were the 8-port and 5-port 2.5-gigabit Ethernet switches, each with a single 10-gigabit SFP+ port, and the 4-port model with a pair of SFP+ ports. I thought that I wanted two SFP+ ports in the cupboard so that future Pat would have more options available, but I realized that I could probably connect every in-use port in the house to a single 8-port switch. Math also told me that four 2.5-gigabit ports in the cupboard wasn’t going to be enough.

I put a MokerLink 8-port managed 2.5-gigabit switch in the cupboard. Then I placed a 4-port unmanaged switch with a pair of SFP+ ports in my home office.

I only need a single 10-gigabit port in the cupboard to connect to my office. When they day comes that I need a second port, then it will definitely be time to pick up a dedicated 10-gigabit switch!

Fanless switches are awesome!

We put a pair of small, inexpensive, fanless gigabit Ethernet switches in Brian’s network cupboard in 2011. They are still running in my network cupboard today. Aside from power outages, they have been running 24/7 for 13 years.

They don’t use much power. They don’t generate much heat. Even more important, though, is that they don’t have any moving parts.

Moving parts like fans will eventually fail. It was important to me that my new switches have no moving parts, and these two MokerLink switches have no fans. There is a very good chance that both of these switches will still be in service in my house in another 13 years.

The network is the road that all of my computers have to travel on. I don’t want that road to be exciting, fancy, or even interesting. I want it to work, work well, and continue to function almost indefinitely.

Why MokerLink?

The homelab community in general seems to be pleased with MokerLink’s hardware, and I have friends who are already using some of their gear. The prices are pretty good, too!

I was extremely tempted to try one of the more generic-looking 2.5-gigabit switches. There are more than a few that look physically identical and have the same specs as MokerLink’s offerings, and those switches are 30% to 40% cheaper than MokerLink’s devices. The price gets even lower if you shop at Aliexpress.

I know that 40% sounds like a lot, but with these small switches, that winds up being only $25 or so.

My Network Cupboard

The 8-port MokerLink 2.5-gigabit switch is just hanging by its cables because I can’t install it until the 10-gigabit modules arrive!

MokerLink doesn’t have an 8-port 2.5-gigabit switch with TWO SFP+ ports. I did see some rather sketchy-looking and quite inexpensive 8-port switches that do, but I was weirded out by their odd faux-VLAN toggle button on the front of their hardware. This option seems similar to WiFi client isolation. I was tempted by the extra SFP+ port, but extremely turned off by the odd VLAN option.

I am a dopefish and have a poor memory!

The back corner of where my two desks meet is REALLY far back there. I can’t reach that far unless I stand up and bend way over. It is a reasonable place to keep my office’s network switch. I can see if things are working, and I can reach back there if I have to when I am setting up a new laptop or server.

I designed a custom bracket to hold my old gigabit switch, and that bracket helps wrangle the patch cables and keeps everything tidy. I figured I should print a new bracket for my smaller MokerLink switch.

When I was working on that, I noticed that I was already out of switch ports, and I was kicking myself for not buying an 8-port switch for my office. I wound up redesigning the bracket to hold both the new MokerLink switch and my old gigabit switch.

The bracket is awesome, and I will leave it installed, but I didn’t realize until after I was finished installing it that I won’t need both switches.

I completely forgot that I would soon be using the two SFP+ ports! I’ll be moving the uplink cable from the wall, and I’ll be moving my workstation to the other. I will have two ports free, and that is more than enough for testing things at my desk.

I also remembered why I didn’t order an 8-port switch for my office—MokerLink doesn’t even make a fanless 8-port switch with TWO SFP+ ports!

How is everything working out?

You have already read more than 1,500 words, and I haven’t even told you how the new hardware is working out so far. I will have to stick a tl;dr up at the top!

Everything is working great. I am getting slightly better than 2.3 gigabits per second via iperf3 in either direction. This is true between devices connected to my office switch, and between devices plugged into my office switch to and from devices connected to my network cupboard switch.

The web interface on the managed MokerLink switch is basic but quite functional. It is possible that I missed something, but I couldn’t find a way to limit MokerLink’s web management interface to particular ports of particular VLANs.

I would expect that if you want to divvy up your network into VLANs for security purposes, that you’d want to make sure your guest WiFI, IoT, and DMZ VLANs wouldn’t be able to hammer away at the password to your management interface. I also wouldn’t expect that interface to be well hardened. It is up to you to decide if this is a deal-breaker for you.

I don’t have enough 2.5-gigabit devices to simultaneously beat the crap out of every port on these switches, but the review on the unmanaged 8-port Mokerlink switch at servethehome seems to indicate that you can get quite close to maxing every port out.

I thought I would finally be able to max out Tailscale on the Intel N100 CPU!

I have a vague recollection of us learning that Tailscale’s encryption speed tops out at somewhere around 1.2 gigabits per second on the older Intel N5095 CPU. Depending on what you are measuring, the Celeron N100 is a 25% to 40% faster CPU. Surely it won’t quite be able to max out a 2.5-gigabit Ethernet port, right?!

My older model but roughly comparable mini PC with a Ryzen 3550H CPU gets really close to maxing out all its CPU cores while reaching 2.15 gigabits per second via iperf3 over the encrypted Tailscale interface.

My Intel N100 mini PC manages 2.26 gigabits per second with a sizable chunk of CPU going unused. That is around 90 megabits short of maxing out the physical link, which is about how far short Tailscale falls when running over gigabit Ethernet as well.

I won’t have a good way to find the actual limit until my 10-gigabit hardware arrives in a couple of weeks, but I did skip ahead and set up a bonded LACP link using two of my unused ports on my router-style Proxmox server. We’ll see if that will help me max out Tailscale on the Intel N100 in a couple weeks!

UPDATE: I am able to get pretty close to 100% CPU utilization running iperf3 over Tailscale over my four bonded 2.5gbe ports. I am stuck at about 2.26 gigabits per second in the inbound direction, but I can reach 2.84 gigabits per second when going outbound.

Honorable mention

I picked up a 5-pack of CableGeeker’s 5’ flat-pack Cat 6 patch cables in a variety of colors. I dropped these cables down through a hole in the network cupboard to the table where our mini PCs and servers sit.

I am finally running out of good patch cables after more than two decades of hoarding. I have enough stock that I could crimp some fresh ones, but I thought it would be useful to color-code these cables that are difficult to trace, and I don’t know that I have enough colors on hand to do that.

I am using 10’ CableGeeker flat-pack cables all over my office now, and I have packed my various network toolkits and laptop bags with their cables. They are well made, and they have all done a good job of carrying 2.5-gigabit signals. We will find out if the modules capable of carrying 10-gigabit Ethernet in a couple of weeks.

I am a big fan of flat network cables. They roll back up nicely, and they take up less room in your bag even if you’re not careful about how you wind them up. They’re also easier to hide along floorboards.

What’s next?

I wasn’t going to publish this until after I had a chance to properly install the 8-port switch in my network cupboard, but I realized that I might need to bring it into my office for testing if I wind up having trouble with the 10-gigabit SFP+ modules. It isn’t going to be easy to fish it back out once installed in its proper home in the cupboard!

I have a three-pack of Xicom 10-gigabit SFP+ copper modules and a 2-port Intel 10-gigabit PCIe card ordered and on the way. The SFP+ modules arrived and they are working splendidly!

I did stick the corner of the new switch in between the two pieces of pegboard in my network cupboard, and the new switch will definitely fit where it needs to go. I am definitely relieved by this. Cutting a new swinging 19” rack would be a fun little CNC project, but the project that Brian and I worked on 14 years ago has historical significance. I’d like to see that simple rack still doing its job in another 14 years!

If you want to dive deeper into the world of home networking and connect with other tech enthusiasts, you should check out the Butter, What?! Discord community. We have a dedicated channel for homelab setups and discussions where you can share your experiences, ask questions, and get some helpful advice.

Leave a comment below and let me know what you think of this post!

I Am Running XFCE On My Proxmox Host?!

| Comments

I was supposed to buy one power-sipping Celeron N100 mini PC to replace the aging and inefficient AMD FX-8350 in my homelab. That is what I did at first, and it worked out great. My Intel N100 with a single 14-TB USB hard disk averages around 15 watts, while the FX-8350 with four 4-TB hard disks was averaging just over 70 watts. Not only is it more efficient, but the mini PC is very nearly as fast and has nearly double the usable amount of storage as the old server. How awesome is that?

Then I bought a second N100 mini PC and decided to experiment with it before putting it directly into my homelab. I learned that the N100 has enough GPU to play some reasonably modern games, and it can emulate consoles up to and including the Nintendo Wii.

Minisforum UM350 Proxmox Machine In Its Temporary Home

My Proxmox host mini PC with XFCE in its temporary home where I can easily plug and unplug USB devices while I continue testing

That’s what put this weird thought in my head. Why not load Steam and Retroarch on the host OS of one of my Proxmox nodes and leave it on the TV in the living room? That is as far as I got with the question because I don’t have wired Ethernet running to the TV, and I am not going to put one of my Proxmox nodes on WiFi.

Then I bought a third mini PC with a Ryzen 3550H CPU. This older CPU roughly comparable to the Intel N100 in both power consumption and horsepower, but the Ryzen has an integrated GPU that is 3 or 4 times faster.

These two extra Proxmox nodes have both been sitting on my desk for enough weeks just waiting for me install them in their permanent homes that it getting another hare-brained idea was inevitable. I at least am hoping that my new idea is a good idea!

Installing XFCE on the Proxmox install was easy!

I just had to run apt install task-xfce-desktop. Aside from creating a non-root user account for myself, that was it. You will have to either reboot or manually fire up lightdm yourself, and you’ll be able to log into XFCE.

I don’t believe Proxmox uses network-manager, so the network controls in XFCE aren’t going to work. That is fantastic, because I wouldn’t want XFCE goobering up my Proxmox networking settings!

I had to add myself to the sudoers group and log back in before I could install Steam. That was easy.

OBS Studio via VNC

I installed flatpak so I could use it to install OBS Studio with VAAPI. That was also easy, and it went quite smoothly.

It took me longer than I want to admit to remember the name of the project that replaced Synergy. I remembered that the modern fork of Synergy is called Barrier. Barrier was in apt, and it only took me a few minutes to get that working. Now I could move my mouse to the right edge of my monitor and start controlling the Proxmox host on my office TV.

One of our lovely friends in our Discord community pointed out that Barrier is also dead now, and that the new fork is called Input Leap. This was not in apt, so I am just going to leave my barrier setup running for now. It is locked down to my Tailscale network, so I am not worried about it being an older piece of network code.

Why on Earth am I doing this?!

I have two reasons for wanting to run a desktop GUI, and I have one extra reason for wanting one of my Proxmox nodes to live in my office.

The first was inspired by a recent hardware problem on my desktop PC. My PSU fan started making some noise, so I had to shut it down to work on that. I happened to have a spare power supply that was beefy enough to swap in its place while I replaced the power supply’s fan, but only just barely. This could have easily been a situation where I would have had to wait for Amazon to deliver me a new piece of hardware to get up and running again!

Proxmox with desktop logged in

The Proxmox server is using less than 3 GB of RAM with the XFCE desktop running, OBS Studio running, and the Octoprint container running

I thought it would be nice to have a spare mini PC with a desktop GUI at my desk that I could use in an emergency. I could quickly plug in my monitor, keyboard, and mouse so I could use Discord, Emacs, and Firefox. That is plenty of functionality to keep me chugging along, and it is way more comfortable than using my laptop.

This idea all by itself seems like a good enough excuse to try this out.

If you’ve been wondering why I wouldn’t attempt to pass the GPU through to a virtual machine and isolate the desktop GUI inside, here is the first part of the explanation. When my computer stops working, I want to be able to plug my important peripherals right in and use them. I don’t want to be futzing around with passing through all the appropriate USB devices. I wouldn’t even have a good place to sit down and do that work!

A dedicated OBS streaming box might be a nice thing to have!

I am running out of USB 3 ports on my desktop PC. Some of my video gear is plugged in via USB hubs. Sometimes I need to disconnect and reconnect my USB to HDMI adapters to get them to work correctly. Even just reducing the number of USB cables that have to run toward my desktop computer will be an improvement.

I have my podcasting camera mounted upside down. This lets me see my Sony ZV-1 vlogging camera’s little display while pushing the lens as close to my monitor as possible. The USB to HDMI dongle that I use doesn’t allow for simple flipping and inverting via the V4L2 driver, so I have to pass it through something like OBS Studio to transform the camera.

Having a dedicated streaming mini PC to handle my cameras, encoding, and streaming seems like it’d be handy.

My desk with my podcasting camera

The latency and frame rate of the OBS Studio output from my mini PC over VNC are both terrible, but it is more than adequate for making tweaks to the OBS Studio settings!

I am able to encode 1080p HEVC video using the GPU via VAAPI. It only uses around 40% of this tiny iGPU’s horsepower, but it has had weird encoder hiccups during the first couple seconds of recording. I suspect it just isn’t ramping up the speed of the GPU quickly enough, but it is fine once it settles in. Worst case I have to dial that back from h.265 to h.264.

I haven’t decided exactly how I am going to tie this into my recording and streaming setup, but I am excited to see that this little box is more than capable of handling these tasks.

I simplified my virtualized Octoprint setup

A lot of people run Octoprint on a Raspberry Pi. I’ve always run it in a virtual machine on my homelab server. When I moved my old FX-8350 homelab server out of my office to quiet things down in here, that meant my 3D printer was now 60’ away from the Octoprint virtual machine, and I surely wasn’t going to run a 60’ USB cable across my house!

I brought one of my old OpenWRT routers out of retirement and installed socat. That let me extend a virtual serial port across my network so I was able to keep using my Octoprint instance. It also gave me an extra access point to add to my 802.11r WiFi roaming network, which was a nice bonus.

Octoprint on my Proxmox host via Tailscale

The socat setup worked most of the time, but every once in a while I would have to restart the socat processes. This didn’t happen often, but these days I only fire up my last remaining Octoprint server once every month or two. The socat process now almost always needs to be kicked before I can start printing.

I was able to plug my Sovol SV06 directly into my new quiet Proxmox server in my office. I did have to cheat, though. If I wanted to run the cable along the wall, I would have needed a 30’ USB cable to make that journey. I decided to run a cable directly across the carpet from my 3D-printer stand to my desk, so there’s 32” of USB cable on the floor with a temporary piece of duct tape helping to make sure I don’t snag it with my foot.

This cable across my floor is a terrible solution, but the Sovol SV06 will definitely be my last printer that is slow enough or old enough to be used with Octoprint. I don’t have a timeline for retiring it, but it is definitely going to happen. That means this short span of USB cable across my office floor is temporary. We just don’t know how temporary!

Is this a good idea?

Should you do this with one of your production Proxmox servers at your company? Absolutely not. Should you do this at home? If you know what you are doing, I would say that it is worth a shot. I am only eating up 2.6 gigabytes of RAM having a desktop session logged in with OBS Studio running. That will be less than 10% of the available RAM in this machine once I am finished shuffling SO-DIMMs around.

Way back when I built my arcade cabinet, I started telling people that the best computer in the house to use as a NAS is the one that already has to be powered up 24 hours a day. An arcade cabinet is way more fun when you can just walk up to it, hit a button, and immediately start jumping on goombas.

Mario Galaxy on an Intel N100 Mini PC

If you’re already paying a tax on your electric bill to keep one computer running all day long, why not give it one more task instead of buying another machine and paying that same tax again?

The important thing to bear in mind is that you may be tying the uptime of these tasks together. When you can’t play Dead Cells because your GPU has somehow gotten itself into a weird state, and the only way to fix it is a reboot, then all the virtual machines on that Proxmox server will also wind up being restarted.

If that means your PiHole VM and Jellyfin container have to be stopped, then nobody in your house will be able to access websites, and someone’s movie stream may stop. Nobody is going to lose any sales, but it is up to you to decide how much money it is worth to avoid this situation.

Conclusion

This little mini PC project has proven to be fun, and it was as easy to get a desktop GUI running on Proxmox as I had hoped! Having a single power-sipping mini PC fitting into two or three roles at the same time seems like a good value, and I am excited to see just how much use I get out of these tertiary use cases.

Odds are pretty good that I will never need to use this Proxmox mini PC as an emergency workstation, but I will feel better knowing that it is available. I do expect to get some use out of the video recording and streaming capabilities. I have some work to do there because I want to be able to use the output from OBS Studio on the mini PC as a virtual webcam in Chrome on my desktop when I connect to Riverside.fm.

What do you think? Do you think it is silly to run a GUI on a server? I would usually be the first person to think so! Are you already doing something similar with one of your Proxmox servers? Or are you running your emergency GUI in a virtual machine? Does it seem like a good idea to overload one of my Proxmox nodes as a video capture, encoding, and streaming machine? Tell me about it in the comments, or join the Butter, What?! Discord community to chat with us about it!

I Added A Refurbished Mini PC To My Homelab! The Minisforum UM350

| Comments

I saw the refurbished Minisforum UM350 on Amazon for $155, and my brain immediately started tingling. Geekbench 5 says that this older Ryzen 3550H is a little faster than an Intel N100, though the spec sheet implies that it may use a lot more power than an Intel N100 when you start to push it hard, but surely it can’t be too bad at idle! It has TWO DDR4 SO-DIMM slots, and the listing INCORRECTLY says that it can run with a pair of 32 GB SO-DIMMs. Not only that, but this Minisforum box has a 2.5-gigabit Ethernet port.

Minisforum UM350 Ryzen 3550H mini PC

So you’re saying that for $10 to $15 more than a brand new Trigkey N100, I can get a comparable machine that supports twice as much RAM, has a faster network port, and should have a much faster GPU?! The lowest price I have seen on a mini PC with 2.5-gigabit Ethernet is around $200. This seemed like it was worth a try!

Mine doesn’t work with 32 GB SO-DIMMs

It sort of works. Memtest86 sees that there are two sticks of RAM installed, but the BIOS and Memtest86 both only see 32 GB. Memtest86 was getting 15 GB/s throughput with the stock pair of 8 GB SO-DIMMs, but it was only getting 9 GB/s with the pair of 32 GB SO-DIMMs. That makes me suspect that it is really only using one of the DIMMs. It did pass a full run of Memtest86 with the pair of 32 GB SO-DIMMs installed.

The BIOS is pretty basic and didn’t give me much insight here.

My suspicion is that there is something about my particular pair of 32 GB SO-DIMMs that this mini PC doesn’t like. Just the fact that it can fully utilize one 32 GB SO-DIMM is a strong indication that it should be able to use a second, and there isn’t anything about the first-generation Zen CPUs that would suggest that it won’t support 64 GB.

I had a lot of weird problems with the 32 GB SO-DIMM that went away when I put the stock RAM back in. My USB keyboard had to be unplugged and replugged a lot. I was able to install Proxmox, but it kept locking up shortly before the fresh install finished booting. It didn’t lock up every time, though. It booted clean the first time. It was definitely acting weird.

If my Minisforum UM350 would have worked with 64 GB of RAM, it would have been an AMAZING value for my homelab. Even so, I feel that the 2.5-gigabit Ethernet port alone was worth the extra $10!

Minisforum vs. Beelink or Trigkey

I am pretty convinced that Beelink and Trigkey are the same company. The packaging has the same corporate address, and their cases are identical.

All of these mini PCs share some common features. They vary in size, but they would all be considered small. Almost every model ships with some sort of hardware to mount the mini PC to the VESA mount on the back of your monitor.

This particular Minisforum PC is a little bigger than any of the Beelink or Trigkey boxes that I have seen, but not by a huge margin. I enjoy that it has a tool-free lid granting you access to the RAM, NVMe, and WiFi card. That kind of feels like a wash because the NVMe is tucked underneath the edge of the shell, and it is a bit of a challenge to get it in to place to push it straight into the slot.

Minisforum UM350 Ryzen 3550H mini PC

You can see some scuff marks on the tool-free lid of my refurbished Minisforum UM350!

I don’t know why, but I was under the impression that Minisforum wasn’t a Chinese company. I thought they were a European company shipping rebranded hardware shipped from China.

Buying a Minisforum product has all the same advantages and disadvantages from Beelink, Trigkey, Topton, or Sovol. The documentation is thin and often poorly translated. Customer service is probably on a different schedule than you. Even so, you will be getting a lot of hardware for your money.

I am extremely pleased with the Ryzen 3550H!

I expected that the 3550H would be reasonably comparable to the much newer Intel Celeron N100. I didn’t expect the aging Ryzen mobile CPU to be 15% faster, and I also didn’t expect the Minisforum box to idle at a lower wattage than either of my Intel N100 mini PCs!

After installing and updating Proxmox on my new mini PC, I plugged it into my spare Tasmota smart outlet, and I have been logging electricity usage. It is using 0.11 kilowatt hours each day. That works out to an average of only 4.6 watts.

Ryzen 3550 Minisforum UM350 Kilowatt hours per day and watts

That is 1.6 watts less than I have ever seen on my Topton CWWK N100 router-style mini PC!

I also ran a couple dozen concurrent copies of openssl speed to keep all the CPU cores pegged, and the Minisforum UM350 topped out at 28 watts. That is only 2 watts more than I have ever seen my Intel N100 mini PCs use. That isn’t too bad, either. It is using 7% more electricity while being about 15% faster. That is a decent trade!

How is the iGPU?

I was really curious about this. The Ryzen 3550H has the exact same iGPU silicon with the same core counts as my Ryzen 5700U laptop, but while the Ryzen 3550H’s GPU is clocked at only 1.3 GHz, my laptop’s GPU is clocked at 1.9 GHz.

None of these machines have what you would call powerful GPUs, but the Intel N100 can easily play emulated games up to and including the Nintendo Wii, and I was able to play Gunfire Reborn at just a little under 60 FPS at 720p. My laptop is a much more capable gaming machine than my N100 mini PCs, and I kind of expected the Ryzen 3550H to be closer to my laptop.

Why Gunfire Reborn? It is a fun game that isn’t very old, and it is still being updated and improved. It also runs reasonably well on even the slowest mini PCs.

I am quite pleased with how the Ryzen 3550H stacked up. I swapped my Intel N100 gaming PC’s NVMe right into the UM350, and I fired up Gunfire Reborn with the exact same settings. It runs at 102 FPS at 720p, and it still managed 92 FPS at a full 1080p. Mind you, this is with all the settings dialed down to low.

Intel N100 vs. Ryzen 3550H Geekbench 5

Just for reference, my Ryzen 5700U laptop runs at about 132 FPS at 720P and 118 FPS at 1080p. That is about 30% faster than the Ryzen 3550H. That is in the ballpark of what I expected.

Does this matter? Probably not. I don’t think anyone is buying a refurbished Minisforum UM350 to play games. It is likely more interesting to you just how well this thing transcodes video for Jellyfin or Plex. The silicon used for encoding video is entirely separate from the silicone used for playing games, so how much better this Ryzen iGPU runs Gunfire Reborn doesn’t mean it will transcode video faster than the Celeron N100!

I had a little trouble getting the Jellyfin Proxmox helper script working. I do know from friends in our Discord community that the Plex and Jellyfin hardware encoding on this Ryzen iGPU is more than up to the task, but I am quite curious how it stacks up to the Intel QuickSync hardware on the Celeron N100. I am going to give this another try soon, but I didn’t want to let it slow down the publishing of this blog post!

Did Pat get hosed by not being able to use 2x32 GB of RAM in the Minisoforum UM350?!

Nope! I am going to turn this into a really good value for me!

My $155 Minisforum UM350 came with 2x8 GB SO-DIMMs. That is technically enough for my needs, but at the same time it feels like a bummer.

My $143 Trigkey N100 came with a single 16 GB SO-DIMM. I then spent $105 on 2x32 GB of DDR4 SO-DIMMs. The intention was to buy a second N100 mini PC and upgrade both to 32 GB.

Minisforum UM350 Ryzen 3550H Mini PC

Can you see how the NVMe with the thick heat sink is partially blocked by the chassis?

Are you keeping score? That means I was going to pay $390 for a pair of N100 mini PCs each with 32 GB of RAM, and I would have had an extra pair of 16 GB SO-DIMMs left over.

What if I buy another Trigkey N100? I can upgrade it to 32 GB, then I can use my leftover pair of 16 GB SO-DIMMs to upgrade the Minisforum UM350.

This may mean my homelab is getting out of control, but it WILL give me three comparable mini PCs each with 32 GB of RAM for my homelab for $545.

It might just be an excuse to add one extra mini PC to my homelab, but it’d only lower the cost of each mini PC with 32 GB of RAM from $195 to $180.

Conclusion

I could write twice as many words about how pleased I am with this Ryzen 3550H mini PC from Minisforum, but it won’t do you any good. This is an older model that you won’t likely be able to buy, and that bums me out!

That said, you CAN still buy a Beelink or Trigkey mini PC with a Ryzen 5560U or Ryzen 5700U, and those models are priced quite aggressively. They both have more CPU and GPU chooch than my Ryzen 3550H, but they are missing the 2.5-gigabit Ethernet. That might be just fine for your use case, and you can add 2.5-gigabit Ethernet for about $7. My suspicion is that the 5560U and 5700U would both idle just as well as my refurbished Minisforum PC because [my Ryzen 5700U laptop][2n1] uses 5 or 6 watts at idle, and that includes the extra power for the screen.

What do you think? Did I get a good deal on my UM350 mini PC? Do you own one, and are you happy with it? Do you think I need to grab a Ryzen 5560U mini PC to test its power efficiency? Let me know in the comments, or join the Butter, What?! Discord community to tell us about your experience or see what we are up to with out homelab mini PCs!

I Bought The Cheapest 2.5-Gigabit USB Ethernet Adapters And They Are Awesome!

| Comments

I very nearly typed “so you don’t have to” as the end of this blog post’s title, but that wouldn’t be the least bit accurate! I bought these because I posted a link to a deal for a Sabrent 2.5-gigabit USB Ethernet adapter for $20 on our Discord server, and someone piped up and said they buy theirs from Aliexpress because the cheap ones over there use the same Realtek R8169 Ethernet chip. I fully expected these inexpensive network dongles to work great!

I now have two mini PCs in my homelab with 2.5-gigabit Ethernet ports, so it feels like it is going to be time to start ordering some 2.5-gigabit switches. I figured I could order a couple of 2.5-gigabit dongles to upgrade some other machines around the house, and I could also use those dongles to make sure that the Cat 5e cable that Brian and I pulled through this house a decade ago is up to the task of pushing faster speeds from my homelab on the opposite side of the house to my home office!

Aliexpress 2.5 Gigabit Ethernet

I also don’t know that I literally chose the cheapest dongles on Aliexpress. Some cost more but had free shipping. Others never had free shipping. Some vendors had free shipping over $10. I figured that last one would be where I’d get a deal, so I bought a USB-A and USB-C dongle from the same store for a total of about $14 for the pair.

Oddly enough, these are the most premium-feeling USB network adapters I have ever owned. My 1-gigabit Ethernet dongle in my laptop bag is all plastic and weighs 20 grams. These new dongles are in an aluminum shell, and they weigh over 30 grams each!

Why am I excited about USB network adapters? Aren’t PCIe cards better?!

The best bang for the buck in mini PC gear for your homelab cluster will have DDR4 memory and almost always have 1-gigabit Ethernet ports. Part of the reason the older DDR4 mini PCs are such a good value is because large DDR5 SO-DIMMs cost 40% more. That isn’t a big difference if you’re only buying one mini PC or if you aren’t maxing out the RAM, but it can add up to a sizable amount of cash if you’re building a small cluster.

Not only that, but some of us already have mini PCs in our homelab that only have gigabit Ethernet. These $7 dongles are a fantastic way to turbocharge our older mini PCs, and they are such an inexpensive way to add 2.5-gigabit Ethernet without paying an extra $80 to $120 for a more expensive mini PC.

I now have two mini PCs in my homelab with built-in 2.5gbe ports. The third Celeron N100 mini PC in my cluster only has 1gbe. I will definitely be adding one of these $7 dongles to that $143 mini PC once I get around to upgrading my network cupboard to 2.5-gigabit Ethernet!

The cheap 2.5-gigabit dongles passed their first test without any hiccups!

I plugged the USB-A dongle into my workstation, then I plugged the USB-C dongle into my Minisforum UM350 mini PC, and I connected them up with one of my new 10’ flat-pack Cat 6 cables.

I have been a fan of flat Ethernet cables for many years, but I haven’t bought any in ages, and I needed a reasonably long cable for my network toolkit. The cables I decided to try were excited to tell me that they were Cat 6 cables at Cat 5e prices, so I was a little skeptical. Seeing them move data via iperf at 2.36 gigabits per second made me feel better about my purchase!

Aliexpress 2.5 Gigabit Ethernet

There isn’t much to say. The kernel modules automatically loaded on both my Ubuntu workstation and my Proxmox mini PC. Pings were fast, and throughput was right where it should be.

I would call that a successful first test.

How about testing the Cat 5e in my walls?!

Brian and I ran Cat 5e to every room in this house about five years before I moved in. I bet Brian wrote down which ports on the patch panel lead to each room, but I don’t have that document. I was smart enough to make a note of some of the important ports when I was setting things up, so I knew that my office was on port 13 on the 48-port patch panel.

I plugged one of the 2.5-gigabit USB dongles into my laptop and connected my laptop directly to the RJ-45 jack on my office’s wall using one of those 10’ flat-pack Cat 6 cables.

Then I walked across the house with a second 10’ flat-pack cable and plugged one of the extra 2.5-gigabit Ethernet ports on my router-style mini PC Proxmox server into port 13 on the patch panel.

I configured each of those network interfaces with new IP addresses on an unused subnet, and then I ran my usual iperf tests. I am not surprised to report that I was 2.36 gigabits per second in both directions. Huzzah!

It was nice to see my Realtek R8169 USB adapter communicating with an Intel i226-V chipset, and it was also great to see that adding a second inexpensive 10’ flat-pack cable to the connection didn’t degrade my signal.

Will the cheap 2.5-gigabit Ethernet adapters be stable over the long term?

I put both 2.5-gigabit adapters away after my tests were completed. That is kind of a bummer because I definitely want to make sure they continue to work for weeks, months, and years.

I am pondering which Mokerlink 2.5-gigabit switches I need to buy, and I don’t have much use for extra 2.5-gigabit network interfaces until I order and install a new switch in both my network cupboard and my home office. That work is at least a few weeks away.

We have several people on our Discord server who have had good luck with their R8169 USB adapters, and Brian Moses tells me he had his homelab server connected with an R8169 USB dongle for a few months. I don’t expect to see any long-term problems once I put these into service, but I will definitely report back with anything I see!

What’s next?

It is a good sign that the cabling in my walls is in good enough shape to run at 2.5 gigabits per second, but the Mokerlink 2.5-gigabit switches I want to put in my network cupboard and home office have 10-gigabit SFP+ ports. I do not have proof that my wiring will get me that far!

The next step is definitely to buy a pair of Mokerlink switches, and I will definitely shop around for 10-gigabit modules that actually support 2.5-gigabit and 5-gigabit Ethernet. My hope is that they will negotiate down if my office can’t support a full 10 gigabit.

Want to follow along on this journey? We’re building a homelab and DIY NAS community on the *Butter, What?! Discord server where we share tips, tricks, and troubleshoot issues. Swing by, join the conversation, and share your homelab setup with us! I’m also curious to hear your thoughts. What kind of network gear are you using in your own setups? Are you using inexpensive USB 2.5-gigabit Ethernet adapters? How are they working out for you? Are you using the Mokerlink switches that I am currently shopping for? Let me know how things are working out for you in the comments below!

When An Intel N100 Mini PC Isn’t Enough Build a Compact Mini-ITX Server!

| Comments

This really depends on what you mean when you say that a Celeron N100 mini PC isn’t enough. If an N100 mini PC isn’t powerful enough, you can spend a bit more on a Ryzen 5560U mini PC that is more than twice as fast, or splurge on a mini PC with a Ryzen 7840HS that is more than four times faster. Heck! You could buy a stack of four N100 mini PCs, or you can mix and match models to fit your unique needs!

Maybe that isn’t what you mean. Maybe you need to cram in more hard drives to store backups, the videos you record yourself on your vlogging camera, or movies and TV shows you acquire on the high seas. You should have no shame in hanging a big USB hard disk off the back of your mini PC, but if that isn’t enough, what are you supposed to do?

Flux Schnell Small Form Factor NAS Guy

You can definitely build something for your homelab that is much more well equipped than a mini PC, but you can also keep your up-front costs and electricity bill down by sticking with a mobile CPU like the Intel Celeron N100. You just have to upgrade your form factor!

My friend Brian Moses has been using, buying, and selling all sorts of mini-ITX motherboards with low-power CPUs, lots of 2.5-gigabit Ethernet ports, and plenty of SATA ports.

You can probably build what you need, and it might only be as big as two or three stacked shoe boxes. That isn’t as small as a stack of mini PCs, but it isn’t exactly huge!

Why is the Intel Celeron N100 so popular now?

Brian and I have both been excited about the various small form factor motherboards built around mobile CPUs for a long, long time. I built my homelab server around a motherboard that was rocking an AMD 5350 processor nine years ago, and Brian put together one of his DIY NAS builds a few years ago based around an Intel N5105 CPU.

I could write an entire blog post about how much of a bummer it was that there weren’t any good homelab or NAS motherboard choices with mobile CPUs in the seven years in between our two builds. Instead, I am just going to say that it is fantastic that power-sipping CPUs are showing up on motherboards again, and they have been showing up on motherboards with plenty of SATA ports. There’s no shortage of homelab-friendly mini-ITX motherboards to choose from today!

The Celeron N5095, N5105, and N6005 had some minor popularity, but not nearly as much as the Celeron N100. I can’t explain why. The Intel N100 is an incremental evolution over the N5095 and not some sort of revolution. It is only better in the ways that you would expect from a processor released two years later: it is a little faster and a bit more power efficient.

The previous generation is every bit as useful as the Intel N100. I imagine it just took a few years for everyone to start catching on, and the Intel N5095 that started the party is now just too old to be as relevant.

You didn’t answer the question, Pat!

You are right. Sorry about that!

The Celeron N100 is awesome because it is a little less than half as fast as a Ryzen 5600 desktop CPU, and you can get an entire mini PC with an N100, RAM, and storage for about the same price! The Intel N100 has a fantastic little GPU with more than enough video-encoding capacity to transcode several 4K Jellyfin or Plex streams. You can upgrade them to 48 gigabytes of RAM. They are also reasonably priced. You can usually buy a mini PC with RAM and storage for $145.

UPDATE: The Trigkey N100 with 16 GB of RAM and 500 GB NVMe has been going on sale almost once a week for less than $140. Sometimes as low as $134 shipped!

My own Intel N100 router-style mini PC idles at around 8 watts. That is the whole thing: motherboard, network interfaces, RAM, NVMe, and the CPU. It is using half as much electricity as a modern LED light bulb. Adding the external 14-terabyte hard disk drive brings that up to about 15 watts.

All of this applies to the Intel N5095 and its siblings.

You can go a long way with just a mini PC!

Everyone’s needs will be a little different, but 32 GB or 48 GB of RAM paired with an N100 is a pretty reasonable ratio of RAM to CPU horsepower, and so is 64 GB paired with a Ryzen 5560U. You can fit a lot of light- or medium-duty virtual machines and containers on these tiny boxes! What about storage?

I had a RAID array at home from the late nineties right up until just a few years ago. They just didn’t make large enough hard drives to hold all my data. The options were to manually split things between drives, or bundle them all together in a RAID and just dump everything in one place. I chose the latter because it also adds redundancy.

Hard drives have been getting bigger at a rate that exceeds my needs, so I am using single USB hard disks on each of my mini PCs and in my personal desktop computer. A copy of all my data lives on a 14 TB USB hard drive attached to the N100 mini PC at my house, and another copy lives on a 14 TB USB hard drive attached to a Raspberry Pi at Brian Moses’s house. The original copy of that data lives on a 12 TB SATA hard disk in the computer I am sitting at right now.

Assuming they survive long enough, those 14-terabyte disks will be rather old by the time I fill them up. When I do, I will be able to replace them with 30 terabyte disks.

What if I don’t like the idea of USB hard drives? What if I need way more storage than that?!

I haven’t had any real issues with the USB hard drives on my servers in the last four years. The USB disk on my N100 Proxmox server can read and write data at just over 200 megabytes per second, which is pretty close to the maximum speed of the drive that came in Western Digital’s enclosure. I have no qualms about recommending this configuration to other people.

I also don’t want to twist your arm! If you want to build a RAID using Linux’s mdadm or ZFS, I surely don’t want to stop you!

You don’t have to give up the power-sipping Intel N5095, N6005, or N100 to do that. If those offer enough horsepower for your needs, you can start shopping for a mini-ITX motherboard and a nice little case. There are plenty of options to choose from.

I like Brian Moses’s new off-site buddy NAS build!

I am not just saying this because I host Brian’s off-site NAS at my house. Many of the choices Brian makes in his builds can be attributed to my own recommendations, thoughts, and insights. In the case of the current iteration of his off-site NAS, my contribution was me exclaiming, “OMG Brian! You are absolutely correct! That 3D-printed NAS case from makerunit looks awesome!”

Brian has been selling Celeron N5105/N6005 and N100 motherboards in his eBay store for quite a while now. He wound up pairing one of those Celeron N6005 motherboards with six refurbished 12-terabyte SATA hard drives. He is running TrueNAS Scale and connecting to his other devices using the awesome Tailscale mesh VPN.

These Celeron N5105, N6005, and N100 motherboards from Topton are all awesome. You get six SATA ports, multiple m.2 NVMe slots, and four 2.5-gigabit Ethernet ports. They squeeze a lot of hardware into a small space, and they manage to utilize every one of the limited number of available PCIe lanes on these mobile processors.

It is a fantastic little server. Brian printed his case using two different shades of blue PETG filament, and he has his face logo on the front.

The makerunit 6-bay NAS case’s front cover is held on by magnets, and you can slide any of the six hard drives right out if you need to replace them. It might not be quite as slick as a case with real hot-swap drive bays, but it costs less than two rolls of filament, and it looks super cool!

The case has room for a full-height single-slot PCIe card, so you might be able to sneak in a slim GPU for some machine learning shenanigans. You really need at least 24 gigabytes of VRAM to run the more serious LLMs, but you can fit some really useful stuff into 8 or 12 gigabytes.

I don’t believe that you will find room to squeeze a GPU into the Topton N100 motherboards. It does have a 1x PCIe slot, and that would actually be just fine for running large language models that completely fit on one GPU, but you’re going to have clearance issue with other ports on the motherboard.

You don’t have to 3D-print a case

Finding cool new uses for your 3D printer is fun. So is finding a good excuse to buy a 3D printer, and I think all of makerunit’s cases qualify here. Even so, you still don’t have to 3D-print a case. There are no shortage of awesome mini-ITX and micro-ATX cases to build a compact NAS or homelab server around.

I am a fan of all the NAS cases from Jonsbo. The Jonsbo N1 and Jonsbo N2 look equivalent according to the spec sheet, but they each have a very different vibe, and they lay out the major components in very different ways. The Jonsbo N1 looks like something out of a sci-fi movie, while the Jonsbo N2 is a more functional and usable NAS case. I could argue with going with either one.

The Jonsbo N3 looks a lot like the Jonsbo N2. The Jonsbo N3 bumps you up to 8 hot-swap 3.5” hard drive bays instead of 5, and it gives you room for a dual-slot full-height PCIe GPU. Then there’s the even larger Jonsbo N4 that gives you room for a micro-ATX motherboard and a wide half-height GPU.

Or you can follow Brian Moses again and go even larger. He migrated his personal DIY NAS to a SilverStone CS382. It has 8 hot-swap 3.5” drive bays, room for a micro-ATX motherboard and full-size ATX power supply, and he is using an Icy Dock to squeeze eight additional 2.5” SATA SSDs into the single available 5.25” optical drive bay.

The SilverStone CS382 is a big case. That not only buys you room to fit your hands inside the machine when you need to work on things, but it also gives you room for a huge GPU and a less expensive and more capable ATX power supply.

There’s an option between a full mini-ITX NAS build and USB hard disks!

Topton makes a nifty little server, the R1 Pro, that we lovingly refer to as “the toaster NAS”. Why do we call it that? Because the pair of 3.5” SATA hard disks slide in from the top like two pieces of bread! It is reasonably priced, quite compact, and it sips power. Brian stocks them in his eBay store, but they are also available with different branding on Amazon and Aliexpress.

Stable Diffusion NAS Guy

The toaster NAS features the Intel N100 processor, one DDR4 SO-DIMM slot, one m.2 slot, and a pair of 2.5 gigabit Ethernet ports. It is basically a mini PC sandwiched between two hard drives but wrapped up in an attractive shell.

This is a fantastic middle ground between a basic mini PC and a 5-bay mini-ITX home server. Depending on how you are measuring things, you could almost fit four of these in the space that Brian’s 6-bay makerunit NAS is taking up under my network cupboard.

Can we trust these motherboards from Topton?

I have to admit that when I first heard about these motherboards a few years ago, I was worried that they’d be sketchy. You had to order them from Aliexpress. Who the heck is Topton? Do they make a reliable product? Will I have to ship it back to China if it doesn’t power on? What if it stops working in a week?

Then Brian bought one and used one. A few of our friends tried them, too, and we got more confident. We started hearing DIY NAS success stories. Then Brian started importing them by the dozen selling them in his eBay store, and we didn’t have to worry about something going wrong between us here in the United States and China, and we didn’t have to wait two or three weeks for the motherboard to show up. This helped a lot!

Today we know that Brian has shipped hundreds of Topton mini-ITX motherboards to customers. I spoke with Brian about failure rates and returns on more than one of our weekend pizza nights here at my house. I don’t want to blabber about specific numbers that I may or may not have been told in confidence and that I may not be remembering precisely, but I think it is safe for me to say that he has had some returned motherboards, and I believe every one of his very small number of returned motherboards worked just fine when he tested them.

We’ve gone from an anecdote, to anecdata, to real data over the last few years. At this point, I would try any of Topton’s motherboards without hesitation.

All of this advice works in reverse

I am not entirely certain that whatever insights this blog post provides qualify as advice, but I am going to refer to it as such anyway!

Maybe you have a huge but aging NAS in your home. Maybe you have a short stack of rack-mount servers in your closet. Perhaps you’ve been planning to downsize during your next upgrade, but you were planning to move from one or more giant 4U servers into something like the Jonsbo N2 or makerunit’s 6-bay 3D-printed case.

Stable Diffusion Mini PC Guy

Is it possible that this is bigger than you need? You might be better served with a toaster NAS and a couple of Trigkey or Beelink Intel N100 or Ryzen 5560U boxes in a little Proxmox cluster that would all fit inside your childhood Return of the Jedi lunch box. You may be better off with just a stack of mini PCs.

The neat thing is that there are no wrong answers. As long as you are treating your valuable data correctly and you have good backups, then getting everything else perfectly optimal is much less important. You can just do whatever seems fun, interesting, or useful to you!

Conclusion

We’ve explored a world of options here, from the humble USB hard drive to the spacious SilverStone CS382, and many options in between. There’s no single right answer when it comes to building your ideal homelab or NAS setup. The best choice depends on your unique needs, budget, and even your personal aesthetic preferences. Maybe you’re drawn to the sleek minimalism of a mini PC, or perhaps you crave the expandability of a larger case.

Whatever path you choose, remember that the journey is as important as the destination. Don’t be afraid to experiment, to try something new, and to learn along the way. Embrace the challenges and celebrate your successes. And most importantly, share your experiences with others!

Join the Butter, What?! Discord community and connect with a passionate group of individuals who are just as excited about homelabs as you are. Come share your builds, ask for advice, and learn from the collective wisdom of the group. Let’s build something awesome together! And don’t forget to leave a comment below and tell us what you think of this exploration of mini-ITX options. What are your favorite builds? What challenges have you faced?

GPT-4o Mini Vs. My Local LLM

| Comments

I am not some sort of machine-learning enthusiast. I am not trying to shoehorn large language models into every problem I encounter. I am just a dude who writes a blog post every week or so, and I have been messing around with various things to see how they might help streamline my workflow.

I am probably only scratching the surface, but I figured this is a reasonable time to write down what I have learned so far.

Stable Diffusion man using an llm

I am almost definitely not using the most optimal local models. I have tried a handful of different things available on Huggingface, and I settled in on things that seem to work well for my needs.

Large language models aren’t replacements for search engines

I used to see a lot of comments on Reddit and Hacker News that were excitedly posting what ChatGPT had to say about the topic at hand, or what ChatGPT said the answer was. More recently I am seeing questions asked on Reddit, not being answered in a way that the poster believes is adequate, so the original poster leaves a comment with the better advice they believe they got from ChatGPT.

Large language models make stuff up all the time. I asked one of the local models I was trying out about the specifications of my first childhood computer: the Texas Instruments TI 99/4a. Much to my surprise, that rather tiny large language model seemed to be correct! I didn’t verify that everything was perfect, but it matched my memory, and that was more than enough to impress me.

Then I asked it for the specs of an Apple 2e. It confidently told me that it had a dual Intel Xeon machine with 192 GB of RAM.

There is a lot of information hiding in a lossy compressed state inside these models. GPT-4o Mini definitely has more real-world information hiding in its weights than my local LLM, and the full GPT-4 model has way more information than that. Either has a better chance of being correct than my tiny local model, but they all suffer from the same problem.

Even if full GPT-4 will be correct more often, it will still be just as confidently wrong as my local model.

I have asked ChatGPT to summarize some of my 3D printing blog posts, and it has given me back lots of bullet points that are exactly the opposite of what I actually said. I only know this because I wrote the words. I’d be careful basing any important decisions off of a summary from ChatGPT if I were you.

Large language models can definitely supplement your use of search engines!

When Windows Copilot+ Recall was announced, I almost immediately started writing a blog post about how I felt about this sort of software. I remembered with absolute certainty that there was a Gnome project more than twenty years ago that attempted to keep track of your information for you in a similar way.

The project was called Dashboard. It monitored your email, instant messages, and text files in an attempt to gather related information before you needed it. It didn’t use AI, but it felt a lot like what Copilot is hoping to accomplish. The trouble is that I couldn’t remember the name of the project, and my Google searches were coming up completely empty.

Stable Diffusion man using an llm

I had a back-and-forth with ChatGPT about it. It went off the rails a lot, and ChatGPT was extremely confident of some wrong answers, but I didn’t eventually get it to mention both Dashboard and Nat Friedman in one of its responses.

Finding that nugget of information made it easy for me to find some old references to the actual Dashboard project!

This applies to OpenAI’s models and local models. They are so often breathtakingly incorrect, but we used to say the same thing about search engines twenty years ago. If you’re not a subject matter expert, you had better dig a little deeper to verify the responses from whichever chatbot you decide to use!

OpenAI’s API is stupidly inexpensive

OpenAI’s most expensive API costs $30 per million tokens, and their newest and cheapest model, GPT-4o Mini, costs only $0.60 per million tokens.

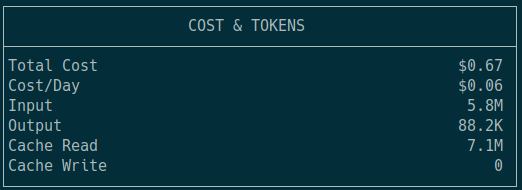
I have been using an Emacs package to help me quickly and easily send paragraphs and entire blog posts up to their API to have thing rewritten, rephrased, or have introductions written for me. I added $6.61 to my OpenAI account in November of 2023, and I have $5.83 left in my account as of July 2024.

I have no idea why I wound up adding $6.61 to my account. That is a really odd number, isn’t it?!

Sending a paragraph or two at a time for GPT-3.5 Turbo to rephrase was costing me a few pennies per blog post. Things got way more expensive when I started using the huge context window of GPT-4 to start each session with entire 2,500 word blog posts. That was costing me nearly an entire dime to work on a single blog post!

I used a local LLM to help me write an intro, conclusion, and call to action for my most recent blog post. When GPT-4o Mini went live, I sent it the exact same text, and I gave it the exact same prompt. That work cost me less than a penny. Not just less than a penny, but less than a tenth of a penny.

This was fun, because I have been messing around with various local models using the oobabooga webui for a few weeks, and I had forgot how lightning fast the OpenAI API can be!

My local LLM is slower and not as good as GPT-4o Mini

I didn’t buy some big, expensive LLM-friendly workstation with a $2,00 24 GB Nvidia RTX 4090. I have a little $300 12 GB Radeon 6700 XT. I didn’t buy it for running AI stuff. I bought it to play games! The AI stuff is a free bonus.

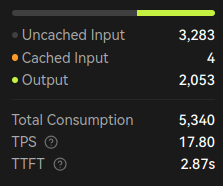
My local LLM can ingest an entire blog post in a handful of seconds, and it can respond to my prompt about that blog at around 25 tokens per second. That winds up settling down to something around 15 tokens per second as I get deeper into the chat and the context goes up.

How much better is GPT-4o Mini?

I gave both my local Gemma 2 9B LLM and GPT-4o Mini the following prompt:

If I give you the text of a blog post I am writing, can you write me a “conclusion” section with a call to action that includes joining our discord server and leaving a comment?

I pasted them both the contents of the blog post. I got this response back from GPT-4o:

Conclusion

In the world of 3D printing, choosing the right machine can be both exciting and daunting. While the Sovol SV06 has its merits, especially with the recent firmware upgrades that enhance its performance, it’s essential to recognize that the Bambu A1 Mini excels in various aspects, including user-friendliness and print quality. For those who value speed and ease of use, the A1 Mini is hard to beat, while the Sovol SV06 may appeal to enthusiasts looking for a larger build volume or the joy of tuning and customizing their machines.

Ultimately, your choice should align with your printing needs and preferences. But whether you opt for the Sovol or the Bambu, remember to keep your expectations realistic and informed.

I’d love to hear your thoughts! Have you had experiences with either the Sovol SV06 or the Bambu A1 Mini? Share your insights in the comments below. And if you’re passionate about 3D printing or want to connect with other enthusiasts, consider joining our Discord server! It’s a fantastic space to share tips, get advice, and stay updated on the latest in the 3D printing community. Let’s keep the conversation going!

This was the response I got from Gemma 2 9B:

Great! Here’s a conclusion with a call to action incorporating your Discord server and a comment section:

Sovol’s SV06 is a capable machine, especially when you consider the price. But, if you’re looking for an out-of-the-box experience with exceptional print quality and ease of use, the Bambu A1 Mini is hard to beat.

Want to explore the world of 3D printing and share your own projects? Join our Discord server where you can connect with fellow makers, get advice, and show off your creations! [Link to your Discord server]

Let me know in the comments what you think of the Sovol SV06 – would you consider it for your next 3D printing project?

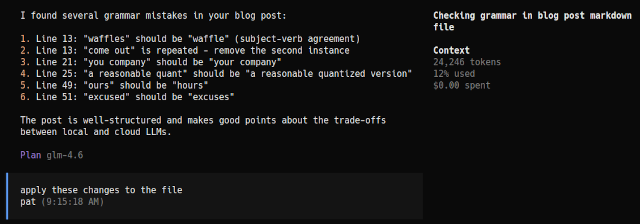
I could never use any of these words without heavy editing. Every AI has a weird voice that feels way too pretentious for me.

I also don’t want to say that one of these did a better job than the other. The response from OpenAI is rather long winded, but it does contain a lot of useful information that Gemma’s response is missing. That said, the response I got from Gemma 2 9B is much more like the sort of conclusion I would write on my own.

While both GPT-4o Mini and my local LLM do appear to slowly type a response to you query, the difference is that GPT-4o Mini is only pretending to be as slow as it appears. It actually took GPT-4o Mini about two seconds to complete the entire task, whereas my local LLM took 25 seconds to ingest my blog post and return its entire first response.

That is definitely a usable pace, but I have spent a lot of money on hardware to get lesser responses that take longer. I could work with GPT-4o Mini to help me rewrite all 800,000 words of blog posts I have ever written and it wouldn’t even cost 5% of what I paid for my GPU.

Do you know what I think is neat? I had an LLM generate a conclusion for one of my recent blogs, and I decided to leave in a couple of sentences and phrases that absolutely never would have written on my own. I didn’t feel entirely comfortable speaking the way the machine wrote the words, but they were useful and relevant statements. If it didn’t work out, I could blame the robot!

The GPT-4o Mini API is extremely cheap, but my local LLM is almost free

The electricity required to have an LLM churning away on my workstation is a rounding error. My GPU maxes out at 174 watts, but llama.cpp doesn’t seem capable of utilizing all of the capacity, so it rarely goes far past 100 watts. It would cost less than twenty cents if you could somehow coax oobabooga into running for 10 hours straight with no downtime. That would be somewhere between 500,000 and 900,000 tokens.

The hardware is a sunk cost. I need my GPU to edit videos with DaVinci Resolve and play games. I need my CPU, RAM, and monitor just to be able to do any work at all. I am not investing in hardware to run a language model. I already own it. Running the model is effectively free.

Stable Diffusion neon pcb

Free isn’t cheap enough to justify the effort. My back catalog of blog posts should be somewhere around a million tokens. It would cost me 30 cents every time I have GPT-4o Mini ingest the whole thing, and it’d only cost $1.20 to get a full rewrite of my blog back out. If I were working with the API to actually do a good job of reworking my old posts, then I would most definitely have to go back and forth more than once with many of the paragraphs.

I can’t imagine having to spend more than $10 or so conversing with the OpenAI API to rewrite my entire blog. The OpenAI API would respond faster than my local API via oobabooga, and that alone would save me way more than $10 worth of my own time.

I would never actually do this, but this is by far the most extreme use case I can come up with for using an LLM, and it would only cost me ten bucks!

What if I don’t want to upload all my words to a third party?

This has to be the best reason by far to use avoid using an LLM in the cloud. Would Stephen King want to risk the chapters of his latest novel leaking? Maybe he wouldn’t care. I don’t think that a leak would have a significant impact on his life, but I think you understand the idea.

I have no qualms about uploading my words to OpenAI before I publish them. It feels icky in principle, but I’m not some sort of investigatory journalist trying to beat everyone to the latest scoop. The majority of the words that I write wind up on the public Internet anyway. Who cares if they manage to sneak out a week early?

You might not be as fortunate as I am. You might have actual private work that needs to stay private. I could totally see investing in a small server with an Nvidia 3090 to run Gemma 2 27B so your small business can have access to a reasonably powerful LLM. Spending a few thousands dollars to not leak your secrets is pretty inexpensive!

What is Pat actually running locally?

The two models that I have really settled on are CodeQwen1.5-7B-Chat-GGUF and gemma-2-9b-it-GPTQ, both of which are available at Hugging Face. I think Meta-Llama-3.1-8B-Instruct-GPTQ-INT4 is also fantastic, but Gemma 2 seems to fit my blogging needs better.

1
2
3
4
5
6
7
8
9
10
$ du -sh *GPTQ*
5.4G  hugging-quants_Meta-Llama-3.1-8B-Instruct-GPTQ-INT4
5.8G  marcsun13_gemma-2-9b-it-GPTQ

$ ls -sh *.gguf
4.5G codeqwen-1_5-7b-chat-q4_k_m.gguf
4.0G internlm2_5-7b-chat-IQ4_XS.gguf
4.4G internlm2_5-7b-chat-q4_k_m.gguf
6.0G internlm2_5-7b-chat-Q6_K.gguf
4.2G Llama-3-Instruct-8B-SPPO-Iter3-IQ4_XS.gguf

I was mostly using InternLM 2.5 before Gemma 2 9B and Llama 3.1 8B were released. I tried three different quantizations of InternLM with the context window set to about 12,000 tokens. They eat up about 6, 6.5, and 7 gigabytes of VRAM on my Radeon 6700 XT, and they seem to have the same speed and quality for my use cases.

InternLM supports a context window as large as one million. The more VRAM I leave free, the larger I can adjust the context window. I haven’t needed more than six or seven thousand tokens of context yet.

I had trouble getting CodeQwen1.5 to load. I recall the errors in the stack trace seeming a little nonspecific, so I originally assumed there was just a compatibility issue somewhere. I dialed back CodeQwen’s massive default context window, and it loaded right up. I was just running out of VRAM!

I have not properly used an LLM to help writing any code. I don’t tend to write much code. I just figured I should try out one of the programming-focused LLMs, and CodeQwen seemed to do a nice job of spitting out the short shell scripts that I asked for.

Stable Diffusion is also awesome!

I feel like I have to say this every time I write any words about machine learning. I have been using Stable Diffusion via the automatic1111 webui since I upgraded to my current GPU. It is so much fun generating silly images to break up the walls of words that are my blogs.

I can queue up a bunch of images with different config scales using a handful of different checkpoints, then I can wander off an make my morning latte. I will have several hundred images waiting for me when I get back, and I usually just pick the ones that make me giggle the most. The more fingers the better!

Why am I messing around with running these things locally at all?!

I’ve already said that it doesn’t make a lick of difference if my blog posts go up into the cloud before they are published, and OpenAI’s API is much faster and costs almost nothing. Why bother with any of this?

I think it is neat, and I am having some fun. I am excited that I know where the limits of local models seem to be, and I now understand how much GPU you need to buy to run something useful.

It is awesome that things are moving so quickly. When I bought my 12 GB GPU just over a year ago, I looked around to see what sort of value a large language model small enough to fit in my VRAM might add. At the time, those small models seemed to do a rather poor job.

A year later, and these small models are starting to feel quite capable! I imagine that things will continue to improve in the future.

Getting Llama 3.1 and Gemma 2 working with my Radeon GPU and oobabooga webui required a bit of a kludge!

At least, I think I am using Llama 3.1 8B. You have to roll back llama.cpp to an older version if you want to use the latest releases of oobabooga with AMD’s ROCm, and that version of llama.cpp doesn’t work with Llama 3.1 or Gemma 2, so I am running Llama 3.1 and Gemma 2 9B via ExLlama V2. I have no idea if I am doing this correctly.

Conclusion

As I continue to explore the capabilities of large language models and local alternatives, it’s clear that these tools have the potential to assist with my creative processes in interesting ways. My hope is that machine learning can take some of the monotonous work off my shoulders.

I believe it is doing that to a small extent, but at the same time it is creating more work for me while at the same time improving my writing. I’m not sure how much my blog posts are improving when I bounce things off of the artificial intelligence monstrosities, but it is interesting enough that I am going to continue to do so just to see where it leads.

This is the part where GPT-4o Mini suggested that I invite you to join the Butter, What?! Discord community, where we share our experiences, insights, and tips on leveraging AI in creative projects. I can’t say that, because it isn’t even true! There is hardly any machine learning nonsense going on in there, but it is a fun place where a lot of homelab, NAS, and 3D printing projects are often being talked about!

Additionally, I’d love to hear your thoughts on this topic! Have you experimented with local models or found innovative ways to integrate LLMs into your work? Leave me a comment below and let’s start a conversation!

The Sovol SV06 Got Much More Interesting In 2024

| Comments

First of all, I am NOT saying that you should buy a Sovol SV06. I wholeheartedly believe that the Bambu A1 Mini is by far the best $200 3D printer, and I really do think everyone should own one. The only measure where the Sovol SV06 beats the Bambu A1 Mini is size.

If you click one of my links and buy a Sovol, I will make a few dollars. If you buy a Bambu printer, I will make absolutely nothing. I still think you should buy a printer from Bambu.

Stable Diffusion 3D printer guy

I DO believe there are good reasons to buy a Sovol SV06, SV06 Plus, or SV08. I also believe that Sovol makes a decent printer, but you have to understand what you’re buying.

Now that we got that out of the way, let’s talk about why the Sovol SV06 recently got more awesome.

The Sovol SV06 now ships with Marlin’s input shaper

Do you already own a Sovol SV06? If you do, then you should definitely head over to Sovol’s website and download the latest firmware and Orcaslicer profiles. Your prints will run two or three times faster.

I updated my Sovol SV06 to support Marlin’s input shaping a little over 12 months ago. I had to dial it in on my own and create my own PrusaSlicer and Orcaslicer profiles. That work resulted in me being able to print a 21-minute Benchy with a 0.6 mm nozzle.

This was my Sovol SV06 going about as fast as Octoprint will allow!

This is neat, but I have to note here that I have seen my Bambu A1 Mini print a Benchy in less than 14 minutes at a higher resolution with its 0.4 mm nozzle. The A1 Mini can print faster than my Sovol SV06. Even so, if I slice a Benchy myself with Bambu’s stock profiles, it won’t print much faster than the 35-minute Benchy that Sovol is advertising for the SV06. The 14-minute Benchy on Bambu’s SD card is super optimized!

You don’t have to do any of the work I did to make my own Sovol SV06 fast. If you buy a Sovol SV06 today, it will ship with officially supported firmware that has the input shaper configured for you. Once you figure out how to get your Sovol up and running, you will be printing almost as fast as a Bambu printer.

If you already own a Sovol SV06, you are one firmware update away from printing almost as fast as a Bambu Lab printer!

The Sovol SV06 is ancient technology

The Sovol SV06 is an open-source clone of the venerable Prusa MK3. It is a solid, reliable, and well proven design, but it is built around technology that was state of the art in 2016.

It is also extremely important to note that while Prusa uses premium components, Sovol seems to be using the cheapest parts they can get away with. This isn’t necessarily a bad thing, but this is one of the reasons why a Prusa MK3S kit was $750 while an almost fully assembled Sovol SV06 costs $199.

Fast benchy on my Sovol SV06

One of my first 30-minute Benchy prints on my Sovol SV06

Almost every single Prusa ships with straight rods, good bearings, and a decent print bed. Some people get a good roll of the dice, and they wind up with a nearly perfect printer from Sovol. A few people will wind up rolling poorly, and they will receive a dud.

There are a lot of little things that a Prusa MK4, Prusa XL, or any printer from Bambu can do that a Sovol SV06 can’t, but the most important upgrade would be their modern bed-leveling systems.

Sovol’s printers are still using an inductive probe to locate the heated bed. These sense the position of the print surface indirectly, and their accuracy varies with temperature. That means they aren’t detecting the PEI surface that plastic has to stick to—they are sensing the metal underneath, which means it is up to you to explain to the printer where the nozzle is in relation to the metal surface.

Bambu Lab printers and the most recent Prusa printers detect when the nozzle makes actual contact with the surface. These printers know exactly where the nozzle is in relation to the PEI sheet. Temperature doesn’t have any impact on this like it does with a PINDA probe, and heat slightly changing the shape of the bed doesn’t matter. These more modern printers know how to get a perfect first layer almost every single time.

0.2mm nozzle benchy

The Bambu A1 Mini prints a very nice tiny Benchy with zero tuning or effort, using the 0.2 mm nozzle!

I only use my Sovol SV06 once or twice a month, and I always wonder if I am going to have to adjust the Z-offset for my next print. I have been doing this for more than a decade. I know how to make this adjustment quite well, but the trouble is that I don’t know if I will need to do it until after the start of my next print fails. This is a waste of my time.

If you are new to 3D printing, then this is the thing you are most likely to mess up. Buying a printer that doesn’t require you to dial in a z-offset may be worth several hours of wasted time.

You get a lot of nice features when you buy a Bambu A1 Mini. This feature in particular could be the difference between immediately seeing a successful print vs. hours of frustration.

Sovol is cutting as many corners as they can get away with

There are people all over r/Sovol and r/3DPrinting complaining about bent linear rods, crunchy bearings, and warped beds on their Sovol printers.

It is challenging to determine which folks are actually having a problem, and which folks are expecting perfection. Nobody is getting a perfectly flat print bed on a Sovol SV06, and you don’t need one. Marlin’s mesh bed leveling can compensate for a bed that is 0.4 mm or so out of flat.

Some people have DEFINITELY received beds that are too bent to be usable, but Reddit is flooded with people who think they need perfection. You don’t need perfection to get a good first layer, and Sovol isn’t likely to ship you perfection.

It isn’t just that Sovol chooses cheap components. Their customer service department is tiny, they are slow to respond to emails or tickets, and they don’t keep people updated about the status of their preorders.

Every time Sovol releases a new printer, you will see one or two people every day on Reddit complaining that Sovol isn’t answering their emails about when their printer is going to ship. If you’re expecting good customer service, then you need to spend more money to get it.

You are getting precisely what you pay for. You just need to understand that you aren’t paying for a premium product, and you aren’t paying for a cadre of customer support people. These are some of the reasons that you are getting a bigger printer from Sovol for less money.

Refurbished Sovol SV06 printers are where things get interesting

The Bambu A1 Mini and Sovol SV06 are both about $200. Just about the only reason to pick the Sovol is the bigger build volume. The Bambu is better in every single other way.

Refurbished Sovol SV06 printers are listed at $149. Now you get a bigger build volume AND you save about $50. Is that a good deal?

I’d still go with the A1 Mini. At the time I am writing this, the Sovol SV06 refurbs don’t seem to ship with the input-shaping firmware installed. That is something you will have to spend time upgrading, and it is something that you can mess up.

But that is just, like, my opinion, man! The hours I save using my Bambu A1 Mini instead of futzing with my Sovol SV06 are easily $50 to me. In fact, those hours are worth way more than $50 to me. The results that come out of my printer enable my other hobbies, so I prefer that my printers just work.

A whole lot of people enjoy tuning and upgrading their 3D printers. This is a valid hobby all on its own, and it makes a ton of sense to buy a Sovol SV06 or Sovol SV08 if that is what you enjoy. I certainly don’t want to deprive you of something that you would consider fun!

A few more complaints about the Sovol SV06

When I bought my refurbished Sovol SV06 in April of 2023, my biggest complaint was how loud these printers are. My Prusa MK3S was almost as quiet as a whisper when printing in stealth mode, while the SV06 has the drone of loud, cheap fans as soon as you flip the power switch, and things only get louder when you start printing.

This is still true today. My Sovol SV06 is louder than my Bambu Lab A1 Mini, but neither printer is quiet. You just can’t print fast and quiet. A 3D printer has to move a lot of air to cool the object you are printing, and the faster you are printing, the faster those fans need to go.

Sovol SV06 cable clips

*My SV06 has inadequate cooling for high speeds toward the front left. These are printed with the same settings, but with the overhang oriented in different directions.

Keep in mind that I have upgraded every fan on my Sovol SV06, and I have dialed in these bigger fans to spin as slowly as I can get away with to keep the noise down. My Sovol SV06 is probably quieter than stock.

A lot of people will tell you that there are upgrades and other things that you HAVE to do to your Sovol SV06. They are exaggerating. You don’t have to do anything. The Sovol SV06 prints just fine with 100% stock hardware.

That said, it is hard to resist the urge to upgrade. Those crappy 4010 fans on the extruder assembly are loud and underpowered. Upgrading the part-cooling fan will improve overhangs and bridges, and it will allow you to print a little faster. Swapping out the power-supply fan will make the printer quieter. Spending two bucks on a knock-off CHT-style nozzle will increase your maximum print speed by up to 35%.

If you are planning on immediately spending $20 or $30 on upgrades and investing hours of your time into getting those things working, it might be worth considering putting another $100 in and just skipping ahead to the even bigger and better 256-mm Bambu A1.

I feel like I have to mention the Sovol SV08

The Sovol SV08 is an impressive machine. It is an open-source clone of the Voron. It’s massive 350x350x340 mm build volume is very nearly as big as the $1,999 Prusa XL, but the Sovol SV08 is currently priced at $579.

If you need a machine as big as the Prusa XL, then the Sovol SV08 seems like a steal!

I am looking at things from the other direction. I rarely need a printer larger than my Bambu Lab A1 Mini, but I would enjoy owning a printer larger than my Sovol SV06. That printer SHOULD be a full-size Bambu A1 with an AMS Lite, but there is a tickle in my brain telling me I should put a Sovol SV08 in place of my Sovol SV06.

I liked the value proposition from this angle a lot better when the Sovol SV08 launched with early-bird pricing of $450 while the Bambu A1 was $399 or $559 with an AMS Lite. The trouble is that the Sovol SV08 has crept up in price, and Bambu sure seems to have made their anniversary sale pricing permanent.

Now it is $579 for the Sovol SV08, $339 for the Bambu A1, or $489 for the Bambu A1 with AMS Lite. That has me leaning back toward the convenience of a Bambu Lab printer with an AMS.

Conclusion

In the world of 3D printing, choosing the right machine can be a daunting task. While the Sovol SV06 does have its merits, especially with the recent firmware upgrades that enhance its performance, it is essential to recognize that the Bambu A1 Mini excels in various ways, including user-friendliness, build quality, print quality, and performance. For those who value ease of use, speed, and price, the A1 Mini is hard to beat, while the Sovol SV06 may appeal to enthusiasts on an even tighter budget who are looking for a larger build volume or the joy of tuning and customizing their own printers. Not all of us find joy in working on our 3D printers, and that is OK!

Ultimately, your choice should align with your printing needs, preferences, and budget. Whether you opt for a Sovol or a Bambu 3D Printer, remember to keep your expectations realistic.

I’d love to hear your thoughts! Have you had experiences with either the Sovol SV06 or the Bambu Lab A1 Mini? It would be awesome if you would share your insights in the comments below. And if you’re passionate about 3D printing or want to connect with other enthusiasts, consider joining our Discord server! It’s a fantastic space to share tips, get advice, and stay updated on the latest in the 3D-printing community.

Everyone Struggles to Identify Bottlenecks

| Comments

Identifying bottlenecks is a skill that many of us struggle with. Learning to pinpoint bottlenecks is important, and learning which bottlenecks to ignore can save you a lot of money.

In this blog post, we’ll explore the concept of bottlenecks and how they can impact your computing setup. We’ll discuss common types of bottlenecks, such as CPU, GPU, network, and IOPS, and provide tips and strategies for identifying and addressing them. Whether you’re a seasoned homelab enthusiast or just starting out, understanding bottlenecks is crucial for optimizing your system’s performance and getting the most out of your hardware investments.

What is a bottleneck?

You have seen a bottle. When you pop the top and tip that bottle over, the liquid won’t instantly exit the container. Its exit is slowed by the narrow neck of the bottle. The wider the neck, the faster the liquid can flow.

Stable Diffusion Bottleneck Guy

You see bottlenecks everywhere. The door to your house will only let one person through at a time. The escalator at the mall only has room for two people on each step. The ramp onto the 4-lane highway is one lane wide. Your faucet is only an inch wide, so it takes a long time to fill a pot of water.

Every IT department faces similar constrictions at every level of their operation.

You will always have a bottleneck, and that is OK!

This section almost came in right before the conclusion, but I think it is a better idea to discuss this closer to the top. No system will be perfectly balanced. There will always be a bottleneck somewhere. Every time you eliminate one bottleneck, that will just move the bottleneck elsewhere.

What matters most is that your system is designed in such a way that your bottleneck is acceptable. Performance may be the primary driver behind your design, but cost is usually a significant factor as well.

10-gigabit Ethernet has gotten pretty cheap, while 40-gigabit Ethernet hardware is still extremely expensive. Just because your 10-gigabit network is slower than the disks in your NAS doesn’t mean that the bottleneck is a problem. Would upgrading to 40-gigabit Ethernet ACTUALLY improve your workflow? Four times faster than fast enough is also fast enough.

You may learn that plain old gigabit Ethernet will do the job well enough, and that 2.5-gigabit Ethernet won’t cost you much more.

Your CPU might be bottlenecking your GPU!

PC gamers seem to love using the word “bottleneck,” and they really seem to enjoy using it as a verb. I dislike the verbing of the word bottleneck because it seems like a significant percentage of the people using “bottleneck” as a verb aren’t using the term correctly.

There are real bottlenecks in a gaming PC. The CPU, the GPU, and your monitor each have to do work for every frame that is displayed. Every game needs a different balance, but whichever component is maxed out first is your bottleneck.

If your GPU is near 100% utilization and your FPS isn’t keeping up with your monitor, then your GPU is a bottleneck.

If your GPU is significantly below 100% utilization and your FPS isn’t keeping up with your monitor, that means your CPU is the bottleneck.

When your CPU and GPU are both barely breaking a sweat while running your game at your monitor’s maximum refresh rate, then it might be time for a monitor upgrade! Your 60 Hz 1080p monitor might be a bottleneck, because your other components have room to render at a higher resolution or more frames per second. It might be time for a nice 34” 3440x1440 165 Hz upgrade!

I didn’t have a terribly appropriate photo to use in the section, so I dropped in a test clip of Severed Steel running on my Ryzen 5700X with a Radeon 6700 XT. You can see that the game can’t quite manage to maintain a constant 144 frames per second, and my GPU is at 97% utilization and max wattage, so GPU is holding me back from keeping up with my monitor!

The network is always the bottleneck of your NAS

I hate to use the word “always.”“ It always feels like a lie. As long as your NAS is ONLY being used as a NAS, then this is almost definitely correct. Sharing files tends to be light-duty work.

A 10-gigabit Ethernet connection can move data at about 1 gigabyte per second. That sounds fast, but it really isn’t! Three 20-terabyte hard disks can nearly max that out. A pair of SATA SSDs will be a little faster, and any NVMe you can buy will be a lot faster.

I paid less than $100 for a low-power motherboard and CPU combo ten years ago, and it could share files over CIFS or NFS as fast as the PCIe slot could go via my 20-gigabit Infiniband network. The available PCIe slot was my bottleneck then because it maxed out at around 8 gigabits per second, so I was definitely underutilizing my network at the time!

Stable Diffusion Bottleneck Guy 2

This is what encouraged me to start writing this post. There was a tiny Celeron N100 server posted on r/homelab recently that had slots for four NVMe drives. It is the more compact sibling of my own Celeron N100 homelab box with 5 NVMe slots.

So many comments on that Reddit post were complaining that each NVMe slot only has a single 1x PCIe 3.0 connection. These folks are all bad at finding bottlenecks! That little server only has a pair of 2.5-gigabit Ethernet ports, so any single NVMe installed in that miniature server will be twice as fast as all the network ports combined.

What if your NAS isn’t just a NAS?

I wholeheartedly believe that you cram as much stuff onto your homelab server hardware as possible. Serving files over CIFS or NFS might occasionally max out your network port, but it usually leaves you with a ton of CPU and disk I/O left to burn. You might as well put it to good use!

Stable Diffusion stack of hard disks

Running Jellyfin or Plex in a virtual machine or container on a NAS is quite common. I am fortunate enough that my Jellyfin server rarely has to transcode any video, because most of my Jellyfin clients can directly play back even the 2160p 10-bit files in my meager collection.

I do have one device that requires transcoding. My Jellyfin server can transcode 2160p 10-bit video at 77 frames per second, and it can transcode 1080p 8-bit video at well over 200 frames per second. That means the GPU on my little Celeron N100 is the bottleneck when transcoding video, and I will be in trouble if I need to feed more than three devices a 10-bit 2160p video at the time.

That bottleneck is so wide that I will never need to worry about it, and the transcoding runs a little faster when two or more videos are going simultaneously, so I wouldn’t be surprised if I could squeeze in a fourth playback session!

Sometimes, the bottleneck is IOPS and not throughput

Old mechanical hard disks have reasonably fast sequential throughput speeds. A 12-terabyte hard disk will be able to push at least 100 megabytes per second on the slow inside tracks, and a 22-terabyte has enough platter density to push nearly 300 megabytes per second on the fast outer tracks.

Every 7200 RPM hard disk has a worst-case seek time of 8 milliseconds. That works out to only 120 I/O operations per second (IOPS). A single hard disk has enough throughput to easily stream a dozen 4K Blu-Ray movies, but it might only be able to insert 120 records per second into your PostgreSQL database.

The cheapest SATA SSD can handle tens of thousands of IOPS, while the fastest NVMe drives are starting to reach 1,000,000 IOPS. These drives are fast when streaming a Blu-Ray, and they don’t slow down when you start updating random people’s phone numbers in you 750 gigabyte customer database.

The vast majority of people adding a NAS to their home network are storing video files from the high seas, or they are storing backups. If you fit either of these descriptions, then you probably only need inexpensive 3.5” hard disks.

My personal video storage is mostly footage taken straight off my own cameras, and I work with that footage in DaVinci Resolve. I layered a few hundred gigabytes of lvmcache on top of slow video storage,because 8-millisecond seek times add up to noticeable lag when you are bouncing around a timeline that references three or four videos.

One seek to get to the correct video frame, at least one more seek to backtrack to the previous keyframe, then maybe a third seek to pull in enough video to start rendering—that adds up to around 100 milliseconds on a mechanical hard disk before the GPU even gets to start decoding and rendering the video, while it would take less than one millisecond on any solid-state storage device. That is a difference you can feel!

Caching to an SSD is a great way to smooth out some of the rough edges. The SSD can catch thousands of those database updates and flush them back to the slow disk later on. My SSD cache is big enough to hold one or two projects’ worth of video files, so it is usually only holding on to the data that I need to work with this week.

Conclusion

In summary, understanding and addressing bottlenecks is crucial for optimizing the performance of your NAS and homelab setup. Identifying which component is constraining your system can make a world of difference, and recognizing these limitations can help you make informed decisions about upgrades and configurations, or even whether or not you should worry about upgrading anything at all!

It is your turn to contribute to the conversation! Share your insights, experiences, or questions related to this topic in the comments below. Have you encountered any unexpected bottlenecks in your own setup? How did you overcome them? Was the upgrade to reduce your bottleneck worth the expense? Let’s learn from each other and continue to refine our systems.

If you’re interested in connecting with a community of homelab, NAS, and even gaming enthusiasts, consider joining the *Butter, What?! Discord community. You can engage in discussions, share knowledge, and stay up to date on the latest trends, developments, and deals in the world of homelabbing.

Is Machine Learning Finally Practical With An AMD Radeon GPU In 2024?

| Comments

I don’t know for certain that I have enough to say here to justify writing an entire blog post, but let’s see what happens!

It has been a little over a year since I upgraded this computer from an ancient Nvidia GTX 970 to an AMD Radeon RX 6700 XT. I really needed that upgrade, but I was stubborn, and I didn’t want to pay those inflated crypto-mining GPU prices, so I hung on to that GTX 970 for way longer than I wanted to.

Stable Diffusion Nervous LLM Kid

I think I did a good job. Fifteen months later, and I have only seen my new GPU go on sale for at most $120 less than what I paid. I am happy to have paid less than $10 per month for the privilege of being able to have so much more fun playing games, so I think the timing of my upgrade was pretty decent!

I am not some sort of software developer trying to teach an LLM to learn how to read and do other stuff good too. I am just a guy hoping to use existing models in some sort of useful way.

One of the first things I learned immediately after installing my new GPU was that running AI models with an AMD GPU on Linux was a crapshoot.

At the time of my upgrade, getting Stable Diffusion to run with an Nvidia GPU was as easy as running one command and waiting for things to download. Getting it running on my Radeon took several attempts, and I felt like I was lucky to get it working at all. Every time I wanted to update my Stable Diffusion install, it was almost certain that something would break.

Getting Llama up and running seemed like it would be nearly impossible, but things are much improved today!

I had Oobabooga’s text-generation-webui up and running in thirty minutes

Since you are reading this, you can probably do it in less than half the time.

The first problem I had was picking out a model or two to download. I don’t know if I will find something better, but so far I have been pleased with MistralMakise-Merged-13B. It seems reasonably capable, and it fits well in my 12 GB of VRAM.

NOTE: So far, I am happier with DiscoPOP-zephyr-7b-gemma, and I am using it to help me put the finishing touches on this blog post before I send it to my editor for review.

My second problem was easily solved by punching some error messages into Google, but it took a few clicks before I found the solution. It is mentioned in their documentation under the AMD heading, but that section is way down near the bottom, and I managed to miss it.

1
2
3
4
5
6
# I had to uncomment those two lines in one_click.py

# Remove the '# ' from the following lines as needed for your AMD GPU on Linux
# os.environ["ROCM_PATH"] = '/opt/rocm'
os.environ["HSA_OVERRIDE_GFX_VERSION"] = '10.3.0'
os.environ["HCC_AMDGPU_TARGET"] = 'gfx1030'

If you have a functioning Nvidia GPU, CUDA will just work. If you have a working AMD GPU, things are a little more complicated. When you have the RIGHT Radeon GPU with ROCm correctly installed, Oobabooga’s text-generation-webui will also probably just work.

When you have a different Radeon, you have to give pytorch some hints as to which ROCm bits to actually use. This is a pain point, but if this is the only real problem we’re going to be running into today, then things are already infinitely better than they were a year ago!

Installing ROCm and OpenCL might be a pain!

The documentation says that I need ROCm 5.6 to use text-generaton-webui, but I already have ROCm 5.4.6 installed. That is the version that seems to work well with DaVinci Resolve Studio 19, my RX 6700 XT, and Mesa 24. It seems to be working just fine for text-generation-webui as well!

I would love to tell you the correct way to install ROCm and OpenCL, but I always goof something up, and I wind up jumping through hoops to fix it. That means I don’t REALLY know how to install these things. I know how to goof it up, correct at least some of my mistakes, then wind up with a working installation. I am not even confident that doing things in what seems to be the correct way would even get me to the correct destination!

The newer versions of ROCm can’t easily exist alongside the bleeding-edge versions of Mesa. If you install ROCm 5.6 or newer you can expect to not be able to play games or run DaVinci Resolve. At least, that was the case when I set things up last. This should be a problem that will eventually straighten itself out.

I don’t think this is currently any better or worse than it was a year ago. This is something AMD really, really, really needs to do better. Really.

Should you bother running an LLM on your local machine?

I am sure there are some fantastic reasons to avoid using the ChatGPT API. I do not enjoy the idea of sending all my words up to some company’s servers, but all the words I write are published to one of my blogs, so that doesn’t really matter for me.

The ChatGPT API is quite inexpensive. It didn’t even cost me an entire dime when I was messing around with sending every paragraph of my blog posts up to ChatGPT for rewrites and suggestions. That was with GPT-3.5-Turbo.

Stable Diffusion Man With Tiny Robot

GPT-4o is still inexpensive, but I could easily get up into dollars instead of cents. One of the problems is that GPT-4 offers a much bigger context window, so I can send entire blog posts up as context. Even though GPT-4o is still inexpensive per token, it encourages me to send up 1,500 tokens of context with each query.

OpenAI’s API is FAST. I forgot just how fast it was until I decided to ask GPT-4o and my local Mistral LLM to rephrase the same paragraphs. I ran the paragraph through ChatGPT first because I have some shortcuts to make that happen in Emacs, and I was surprised that it was able to ingest my context and give me a full answer almost instantly. The local LLM on my $300 GPU took a noticeable number of seconds to give me a response.

OpenAI’s API isn’t just ridiculously fast—it also gives significantly better responses than my tiny GPU ever could. I can’t even run an equivalent to GPT-3.5-Turbo locally, and GPT-4 and GPT-4o are orders of magnitude bigger than that.

Speed doesn’t matter if you don’t want to send your private information to a third party.

Sometimes, quantity beats quality!

The game shifts a little when you can run something locally and do not have to pay for every single transaction.

My GPU can consume an additional 175 watts when running at full tilt. It would take something like four hours of me constantly interacting with a local LLM to add 10 cents to my electric bill, and I certainly can’t ask her enough questions to keep her running without lots of breaks. My cost to keep the LLM running and answering all my questions is effectively zero.

I absolutely love being able to run Stable Diffusion locally. I can try out a handful of weird prompts to find something that makes me giggle. Then I can ask Stable Diffusion to generate a eight images at two different guidance scales using six different checkpoints. It will grind away for ten to fifteen minutes while I make a latte, and I will have 96 images to evaluate when I sit down. Usually one will be goofy enough to break up a wall of words in a blog post.

I can’t max out my GPU with an LLM for long, but asking Stable Diffusion to generate 96 images will keep my GPU maxed out for ten minutes. That means I can generate more than 2,000 images for a dime.

I can see myself doing something similar for my blog-writing workflow in Emacs. Right now, I just send a paragraph or two to GPT-4o when I can’t find a synonym I like, can’t decide how to start the next paragraph, or just don’t like the flow of a sentence. OpenAI’s API is almost always just a lazy thesaurus for me. ChatGPT’s writing feels either way too pretentious or corporate for my taste, but it does often inspire me to reorder sentence fragments into something that reads more pleasant.

Stable Diffusion Man with Robot

When the LLM doesn’t cost me anything to run, why not throw everything into that blender to see what comes out? I could write some Emacs Lisp that will send every paragraph to the OobaBooga interface as soon as I hit the Enter key. I’ve already tried connecting my Emacs automations to my local LLM’s API, and it works great even if it feels so much slower than GTP-4o!

Maybe it could show me the rephrased paragraph next to the window I am typing in. Maybe I could puzzle out a prompt that would coax the robot into only speaking up if its rewrite or suggestion seems like it would be helpful to me. Perhaps I could send it the last two or three paragraphs and give it a chance to write the next one?

I think this sort of thing would have to be done one paragraph at a time, or at least be limited to a few paragraphs. When I asked ChatGPT to turn six columns of a Google Sheet into a Markdown table, it gave me back the results in a few seconds. It LOOKED like it was typing the results slowly, but I was able to hit the copy code button right away, and the entire table was available.

It took my local Mistral robot 90 seconds to give me the complete table of mini PC prices and performance. The latency would be too high if my local artificial brain works with too much text at once!

Not every employee needs to be Albert Einstein

My little Radeon 6700 XT with 12 GB of VRAM will never run an LLM that can compete with what can be run on even a single AMD MI300X with 192 GB of RAM, and it certainly can’t compete with a server full of those cards!

That is OK. I don’t need to hire Albert Einstein to figure out how fast my FPV drone falls when I dive down the side of a building. A high school student should be equipped to handle that task, just like my little Mistral 7B LLM can give me a handful of synonyms.

I don’t need to hire Douglas Adams to fix up my words, even if I wish I still could!

Let’s get back on topic

We are supposed to be talking about how much easier it is now to run machine learning stuff on a Radeon GPU. I feel like automatic1111’s stable-diffusion-webui and oobabooga’s text-generation-webui cover something like 90% of the machine learning tasks we might want to do at home. These are both reasonably easy to get going with ROCm.

The other popular machine learning project is the Whisper speech-to-text engine. There is a webui for this, but it doesn’t seem to make it simple to get going with a Radeon GPU. Even so, I am not certain that a webui would be the right place to use Whisper.

Whisper feels like it needs to be built into something else. I want it to transcribe my video footage and turn the text into subtitles. I want to automatically transcribe any audio files that land in a particular directory. I don’t want to be doing any of this manually.

DaVinci Resolve Studio has a fantastic speech-to-text workflow. You can delete words from the transcription, and Resolve will cut it right out of the video timeline. How cool is that?!

I very nearly had to delete this entire blog post!

The version 1.8 release of text-generation-webui showed up in my feeds right in the middle of writing the previous section. I did the thing that any competent professional writer might do, and I upgraded to the latest release!

My GPU acceleration immediately stopped working. That took my performance down from between about 12 to 25 tokens per second to an abysmal 2 to 5 tokens per second.

Stable Diffusion man with GPU

Someone already filed a bug report. I decided to put this blog on hold, and I figured I could check back in a few days. The stickied AMD bug thread had a fix that worked. I had to edit the requirements_amd.txt file to replace one of the packages with an older version.

There were two lines with two slightly different versions. I assume that they weren’t supposed to be there, so I deleted both before pasting in the URL from the comment.

Llama 3.1 and Gemma 2 on an AMD GPU with Oobabooga

All the recent releases of oobabooga ship with broken support for llama.cpp when using AMD’s ROCm.

I forged ahead and installed the latest version anyway. I wound up getting GPTQ versions of Llama 3.1 8B and Gemma 2 9B running using the ExLlamav2_HF loader. They both seem to run at comparable speeds to the Llama 3 and InternLM GGUF models I was using before, so that is exciting!

I was a bit bummed out because not having a working llama.cpp meant that I couldn’t use any of the GGUF files I have been running. The new models are better than what I was using, but I didn’t want to miss out on using CodeQwen 1.5 7B.

I wound up editing the requirements-amd.txt file once again, and I downgraded the llama.cpp packages just like I did before. That means I can run all my old GGUF files exactly as I was, and I can now also run the newer models via ExLlamav2_HF. That’ll do!

Conclusion

I was eager to write this blog. It was exciting to no longer feel like a second-class citizen in the world of machine learning with my budget-friendly AMD Radeon GPU. Then I found out that no one attempted to run the text-generation-webui with a ROCm GPU in the two days between that dependency being updated and the release of version 1.8, and my citizenship level was once again demoted.

Is that the end of the world? Definitely not. Finding and applying a fix wasn’t a challenge, but even so, everything would have just worked if I had bought an Nvidia GPU, and everything would have just worked for the entirety of this past year. My 6700 XT is comparable in gaming performance and price to an RTX 4060 Ti, but I have 50% more VRAM. In theory, I should have as much or more machine-learning performance as well, except that there is so much less optimization work happening outside of the world of Nvidia’s CUDA.

What do you think? Are you running automatic1111’s stable-diffusion-webui or OobaBooga’s text-generation-webui on an AMD GPU? How have things been working out for you? Do you think it is worth the extra effort and problems to be able to own a Radeon GPU with 24 GB of VRAM for less than half the price of an Nvidia RTX 4090? Let me know in the comments, or stop by the Butter, What?! Discord server to chat with me about it!