I subscribed to Z.ai’s Coding Lite plan for what worked out to $3 per month. I’ve written in detail about my experiences with the Z.ai plan, and running OpenCode against Z.ai’s GLM-4.7 is most definitely all that I need. In fact, it is way more than enough to meet my needs, but the trouble is that I am a curious person. How much better are other models? I keep hearing that Claude Opus works much better with OpenCode’s planning agent. Is there a way I could use Opus without adding $20 a month to my Claude Code expenses? Should I be looking at other open-weight models like Kimi K2?
I am writing this from my perspective, but I believe my perspective here could be extended to more serious professionals, so don’t click away just yet! The same train of thought could also help you squeeze the most out of your Claude Code subscription by augmenting it with another company’s plan!
I keep seeing posts on Reddit from people unexpectedly hitting their weekly Claude Max quotas early in the week when they used to easily make it through Friday. I don’t know if Anthropic has accidentally introduced a bug, or if they are purposely tightening things up. It sounds like it might be a bug in the Claude Code client, but it sure seems like a good enough reason to explore other coding plans as a supplement.
UPDATE: Recent changes to plans and pricing
Most of what I wrote here still applies, but prices are drifting upwards and limits are shrinking across the board.
Z.ai added GLM-5 to their subscription. This is a huge upgrade over GLM-4.7, but it isn’t yet on their Lite plan. They are no longer offering 50% off, and their Lite plan has gone up in price to $10. They say they will be adding GLM-5 to the Lite plan in the near future, but it hasn’t happened yet. Z.ai’s deducts three times as much usage from your 5-hour limit when you use GLM-5, so the limits are feeling smaller here.
Chutes.ai no longer offers what they refer to as frontier models on the $3 plan. I can’t access GLM-5, Kimi K2.5, or MiniMax M2.5 on my plan right now. You have to move up to the $10 plan to use these models. They have not shrunk the limits on any of their plans, so the $10 plan seems to be the best value out there right now.
Synthetic bumped the price of their base plan to $30. The limit hasn’t changed, but they did expand the limit on lower-cost tool calls to 500, which means you can run 500 small requests without impacting your quota. They used to have a $60 plan with 10x the limits of the $20 plan, but that is gone now.
Restrictions on third-party agentic coding clients
Things have gotten a bit more complicated in the world of LLM coding tools this week. Anthropic has started banning people for using Claude subscriptions with other agentic coding tools that aren’t Claude Code, and they’ve asked the authors of some of these tools to remove support. Google has also taken steps to block OpenCode-Antigravity-Auth.
This is exactly why OpenCode’s multi-model approach has become so valuable. When one provider decides to lock things down, you still have options. You’re not betting everything on one horse anymore.
These restrictions are also exactly why I’m so excited about Chutes.ai and Z.ai. They’re giving us access to capable models without the same level of vendor lock-in or platform restrictions. We will talk more about these providers soon.
OpenCode makes it easy to use multiple models from different vendors
You can use Z.ai’s coding plans with the Claude Code client, but you have to set up your API settings through environment variables. I believe there are some sneaky ways to streamline the process, but this essentially means that if you want to switch models, you have to exit Claude Code, point your variables to a different provider, and fire up Claude Code again. Some of the other open-source agentic tools are set up the same way.
OpenCode lets you mix and match models from different providers in a single interface. When I started writing this blog post, I was logged in to Z.ai, Google’s Antigravity API, Alibaba’s service, OpenRouter, and OpenCode Zen.
In OpenCode’s framework, you can assign different models to specialized roles. A planning agent breaks down complex tasks and creates a roadmap for the work, but doesn’t have the ability to modify files. Build agents, meanwhile, execute the actual coding work and make changes to your files. By assigning different LLM models to each role, you can optimize for both quality and cost. Until recently, I had my planning agent pointed to Claude Opus via the Antigravity API, but Google has blocked OpenCode-Antigravity-Auth, so I switched my planning agent to Kimi K2 via Chutes.
NOTE: Using OpenCode with Antigravity’s API seems to be against Google’s terms of service. Even so, Google has taken steps to block opencode-antigravity-auth. The authors of the plugin have bypassed Google’s restrictions again, but this could break at any time, and you almost definitely don’t want Google to ban your Gmail account.
You can get started whichever way makes sense for you. I started using OpenCode with a $3 a month subscription through Z.ai, but you could just as easily start using it with only free API calls, or you could connect OpenCode to your existing OpenAI Codex subscription, because it sure looks like OpenAI is going to be friendly to third-party clients.
Being able to switch models on the fly is nice. I don’t have to learn or configure a new tool when I want to try something new. I can just point OpenCode at a new model at any time in the future.
- Is The $6 Z.ai Coding Plan a No-Brainer?
- Google AI Studio (Antigravity)
- OpenAI Codex with OpenCode — My Experience After a Month
I just learned about Chutes.ai!
I’ve only been using Chutes for a few days, but I’m already pretty excited about what they’re offering. Chutes gives you 300 requests per day for $3 per month, and that scales up to 2,000 requests per day when you pay $10 per month.
What really gets me excited about Chutes is the model lineup they’ve got available. They’re offering GLM-4.7, DeepSeek v3.2, Kimi K2, MiniMax M2, and more. Kimi K2 is particularly interesting because it’s got around 1 trillion parameters. That is nearly three times the size of Z.ai’s GLM-4.7. Having access to a model that size at these price points is pretty wild.
I’m still in the early days of experimenting with Chutes, so I don’t have a fully formed opinion yet. But having access to multiple high-end models from a single provider, at these prices, and without the restrictions we’re seeing from the big players? That’s a compelling proposition.
Chutes is more versatile than Z.ai’s plans, and a Chutes subscription costs less. Chutes might be the way to go if you’re on a budget, but I haven’t been using it nearly long enough to say for sure. Is their service reliable? Is it fast, and does it stay fast? Is their GLM-4.7 service as capable as Z.ai’s, or is Chutes quantizing the model to save money? I don’t have the answers to any of these questions, but $3 isn’t a lot of money to risk to try the service.
I am expecting to change my recommendation for other low-volume users like myself from Z.ai’s coding plan to the Chutes plans, but I need at least a few weeks to feel confident in that. Having access to the same models as Z.ai and more at a lower price is fantastic.
Chutes includes Devstral 2
I am excited about Devstral 2. I tried Devstral 2 with Mistral’s Vibe CLI last month, and both the model and coding frontend are pretty good!
Devstral 2 stands out as the only dense coding model recently released. It is half the size of MiniMax M2, or around one-third the size of GLM-4.6, but they are both MoE models.
It will be fun to find out if a smaller, dense model can outperform a much larger MoE model on some tasks!
A Z.ai plan is still a fine choice, and the value might be in their MCP servers
I’ve been using Z.ai for months now, and it’s been my go-to low-cost option. Their Coding Lite plan lists at $6 per month, but I’ve always been able to get it at 50% off, so I’m actually paying $3 per month for 120 requests every 5 hours. If you need more, they’ve got a $15 per month plan that gives you 600 requests every 5 hours.
For an 8-hour business day, you’re looking at more total requests with Z.ai compared to Chutes. The tradeoff is that Z.ai only has GLM-4.7 available, so you’re not getting access to the massive parameter models like Kimi K2 that Chutes also offers.
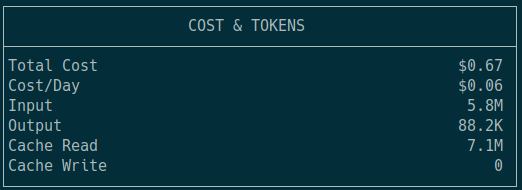
The Z.ai plan is inexpensive. For someone like me who only burns through 30 million tokens each month, pairing it with OpenCode makes it an extremely capable model. It is nice to have that $3 spending cap for a virtually unlimited number of tokens in a model that can do all the grunt work.
Z.ai’s plans come with a few useful MCP servers that I have plumbed in to OpenCode. They have a vision MCP, but it is challenging to do anything useful with vision when using OpenCode. Their Zread MCP can pull useful information from public GitHub repositories. I don’t use either of those, but my OpenCode sessions are making several dozen calls to Z.ai’s web search and web reader MCP servers every month.
I suspect that we might get more mileage out of the vision MCP as OpenCode matures. The MCP is able to check for differences between images, which might help OpenCode debug changes to a web site. It can also decode technical drawings and OCR text from an image.
What do I do with OpenCode and Z.ai? I would say that I’ve mostly been having it write glue code: scripts to use data from Home Assistant to light up the appropriate keys on my macro pad, and little daemon scripts to monitor the state of audio devices so the correct headphones are activated when they are turned on.
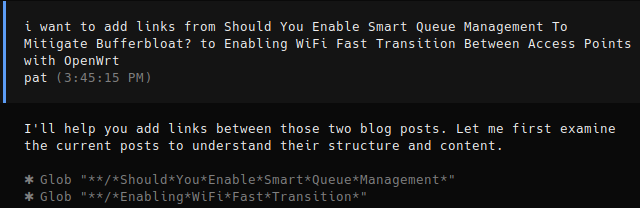
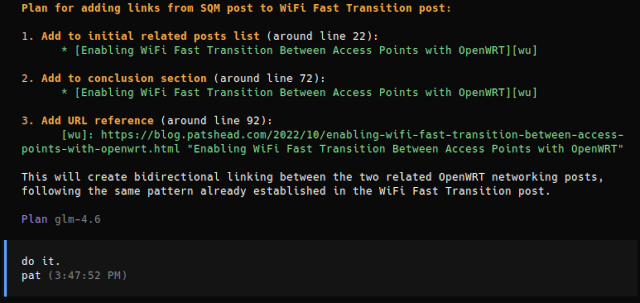
I am also using OpenCode to help me with blogging. I think that is going to be an entire blog post of its own soon, but I have been doing the majority of these tasks using Z.ai as well. I am definitely getting more than enough value for my money here.
- Devstral with Vibe CLI vs. OpenCode: AI Coding Tools for Casual Programmers
- Is The $6 Z.ai Coding Plan a No-Brainer?
What about NanoGPT?!
I regularly search for low-cost coding subscriptions. I want to make sure I’m not missing something interesting when I tell you about the inexpensive services that I am currently using. I had never once seen mention of NanoGPT. I only happened to come across it due to a random Reddit comment. I literally published this blog post earlier today, then I saw the comment and figured I should add some information.
NanoGPT has all the same large open-source models that Chutes offers, plus a variety of other smaller models. NanoGPT’s subscription costs $8 per month. You get 60,000 requests per month, and they also give you access to their image-generation models. This equates to roughly the same number of requests as a $10 Chutes subscription.
Does NanoGPT perform well? Is the uptime good? I have no idea. I only learned of its existence a few hours ago. I do know that it is a supported provider in the list of choices when you run opencode model auth at the command line.
UPDATE: I have tried NanoGPT. The major models are lucky when they manage to run a successful tool call. NanoGPT can’t be properly used with OpenCode
Chutes is $3 per month, Z.ai is $6 per month, and NanoGPT is $8 per month. These are all inexpensive enough that there isn’t much risk in trying them out. Try each service for a month. Snag them all at the same time and cancel the ones that don’t work out. Alternatively, wait until next month, because I’ll probably also be giving NanoGPT a try!
Maybe you can stretch your subscriptions with some paid tokens?
I switched OpenCode’s explore subagent to use gpt-oss-120b via my Chutes subscription. This is a relatively simple task, so you don’t need to use massive models like Kimi K2, GLM-4.7, or Claude Opus to hammer on these for you. This felt like a good way to direct my less premium requests to a different service provider, and it will probably speed up my OpenCode sessions by at least a little.
This open-weight model from OpenAI is extremely inexpensive. You can pay for a million tokens via OpenRouter for less than a nickel. I haven’t been doing this long enough to check my statistics, but spending 25 cents a month on gpt-oss-120b via OpenRouter might be enough to keep me from bumping into my quota on my $3 Chutes or Z.ai subscriptions. I will do my best to analyze my OpenCode logs and statistics to see how this works out for me!
You could also sign up for an Nvidia developer account and add your Nvidia NIM free-trial API key to OpenCode. That would let you assign models on Nvidia’s service to the simpler subagents to keep a percentage of your paid quotas free for more difficult tasks.
I ran some small requests through Chutes using OpenCode using a handful of different models. My plan was to choose something FAST for these two subagents. I tried Qwen 30B A3B, but the Chutes implementation didn’t seem to agree with OpenCode. I tried MiniMax M2, but it seemed roughly as fast as GLM-4.7. I was pleased with the speed of gpt-oss-120b, so I stopped there.
Pricing and performance will vary by provider. You will have to puzzle out exactly what makes sense for your setup.
Vercel offers $5 in free credits for their AI Gateway every month
I don’t know a lot about this yet. Vercel offers GPU hosting infrastructure and it is an OpenRouter-style inference gateway.
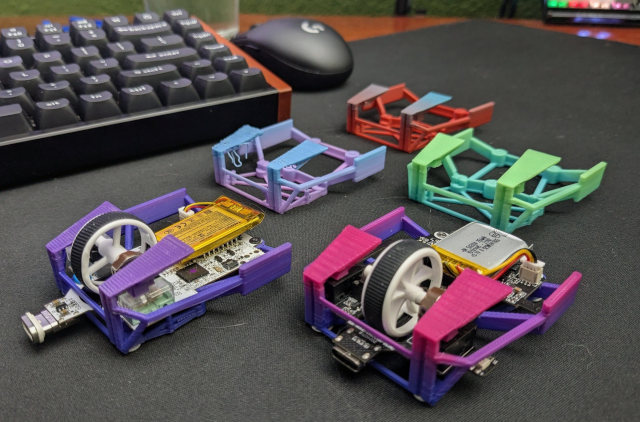
I signed up, I got my free credits, and I chewed through 60 cents in Claude Opus 4.5 tokens in about two minutes. I was curious what Opus might make of the OpenSCAD source for my Li’l Magnum! mouse mod. I was wondering if it could intuit anything useful about the shape of the mouse in real life.
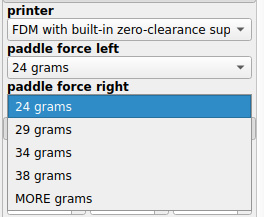
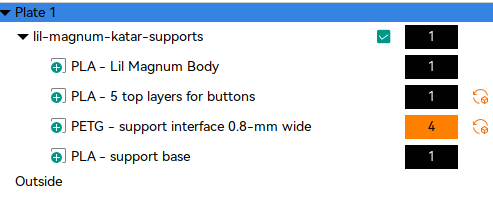
I asked Opus to give me a plan to help improve the print quality of the underside of the button paddles. Then I decided to have my Z.ai subscription implement the plan, since OpenCode burned 15% of my free tokens almost instantly while generating the plan.
The fix wasn’t great, but it did add material to the correct areas. I asked GLM-4.7 and Kimi K2 for similar plans, and they also did a reasonable job. In fact, GLM-4.7 was the only model that did the math to figure out the angle of the underside of the button paddles.
I don’t mind spending a dollar or two of my OpenRouter credits on Claude Opus, Google Gemini 3 Pro, or GPT 5.2 Codex when a tricky problem pops up. When I am paying for the tokens, though, I will probably only do it once. Having a few free credits to throw around encourages me to try all three of these models just to see how much better they are than GLM or Kimi!
OpenRouter offers 1,000 requests to free models per day
The caveat is that you have to purchase $10 in API credits. None of the models available for free are the top-tier coding models at the time I am writing this. They do have Qwen3 Coder 480B and Step 3.5 Flash.
OpenAI has a similar deal where they will give you several million free tokens per day on some of their lower tier models as long as you have money in your account, but your paid credits at OpenAI expire if they haven’t been used in 12 months.
I’m a little grumpy that OpenAI deleted my money. I didn’t even get to use any free tokens. It wasn’t much money, but it felt scummy. I deposited $10 into my OpenRouter account more than 13 months ago, and most of it is still there.
OpenRouter’s free models may not be exciting, but they are useful. There are definitely tasks you could offload to these less capable models instead of eating into your quota on your paid coding plans.
Nvidia NIM offers developers large quotas
Nvidia must not be advertising this massive free trial at all, because I only just learned about it, and I am adding this section to the blog post three weeks after it was published. Nvidia’s NIM trial doesn’t specify what the limits are, but they say up to 40 requests per minute.
They have all the usual open-weight models in their lineup: Kimi K2, GLM-4.7, Devstral 2, and MiniMax M2.1. Performance varies quite a lot. When I first fired up Kimi K2 with my Nvidia API key in OpenCode, it was screaming along. Later the same day, I felt like I was lucky to be getting anything back at all. That said, I’ve only been trying this for a few days. Maybe the bad luck I had is the exception rather than the rule.
If you’re running entirely on free tokens, then this seems like it would be a worthwhile service to pair with Vercel’s $5 monthly credits. You could use Vercel to run Claude Opus, GPT 5.2 Codex, or Gemini 3 Pro when Kimi K2 or GLM-4.7 aren’t able to handle your current task.
I’m happy to pay $3 per month for a steady stream of tokens, but Nvidia NIM’s free trial seems like a good way to stretch your plan a little farther.
I could probably get by using only free tokens
Google Antigravity gives you a free allotment of Gemini and Opus tokens every day. However, with Google blocking opencode-antigravity-auth, you’d need to use their Antigravity client to access these directly. Alibaba will give you one million free Qwen tokens per day, though I haven’t managed to get that to work quite well with OpenCode. You can get several million tokens per day for free from OpenAI as long as you have $10 in your account and agree to let them use your data for training.
I’ve previously written about trying out different models through OpenRouter, which is a great way to test before committing to a subscription.
I am confident that I would hit my daily limits on these services. However, I’m just as confident that I would be in pretty good shape if I could use a lower-volume Kimi K2 via Chutes for the planning agent while using Gemini 3 Flash or Qwen Coder for the build agent. I might have to swap between models on an occasional busy day, but I think I would do all right.
I still have Alibaba plugged into OpenCode to use Qwen Coder 480B for free. I don’t know if it is against Alibaba’s terms of service to use their free API with OpenCode, but I’m also not the least bit worried about being banned from their service. This wouldn’t be like losing access to my Google account, and I’m really only using it so I have more useful information to include in this blog post.
Possibly even more exciting, OpenAI now has a GPT Codex Mini coding model, and it’s one of the models that is included in OpenAI’s free daily API tokens. OpenAI provides several free models as long as you have a funded API account and opt in to let OpenAI use the tokens for training. Codex Mini seems to be in the same ballpark as GLM-4.7 or Claude Sonnet.
Even though I could use free tokens, spending around $30 for a year of what amounts to unlimited use for my purposes is nice. I don’t have to worry about using a lesser model or running out of tokens. I just get to keep trucking.
- Google AI Studio (Antigravity)
- Contemplating Local LLMs vs. OpenRouter and Trying Out Z.ai With GLM-4.6 and OpenCode
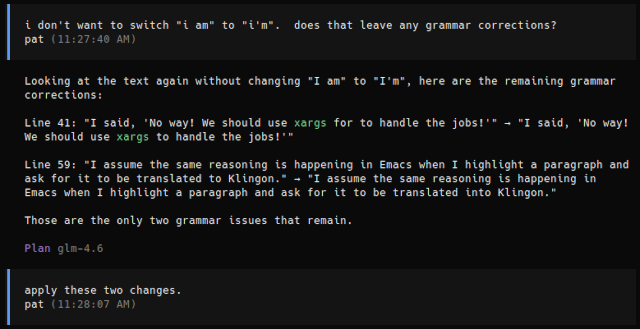
Using a swarm of models to check the grammar of my blog posts?!
I am absolutely delighted that this worked. I am still dialing things in a bit. I will publish everything that I am using once things feel a little more polished.
I have had two serious problems when asking an LLM to check my grammar. The LLM usually misses some of my mistakes, and the LLM almost always wants to correct lots and lots of things that don’t need correcting.
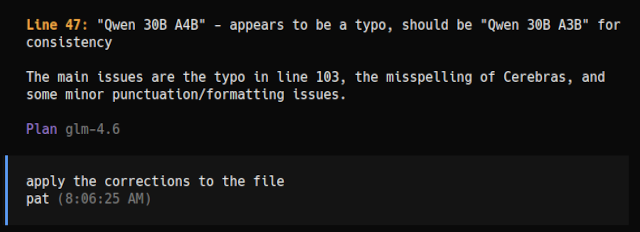
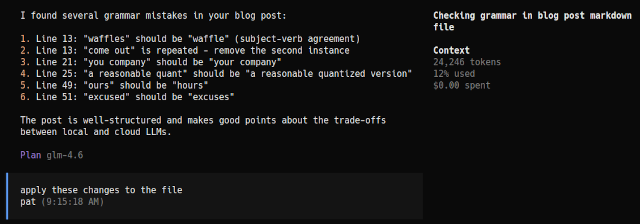
I don’t know if I did this correctly, but I set up three nearly identical grammar-checking subagents that each point to a different model. I’m currently using GLM-4.7 via Z.ai, and I’m experimenting with Kimi K2 and DeepSeek v3.2 via Chutes for the other two. With Google blocking opencode-antigravity-auth, I’m no longer able to use their models through OpenCode for this setup.
I have a grammar-checking skill set up that is instructed to call these subagents in parallel and collect their findings. It tells me where the various models reach consensus on grammar problems, and asks me which of those problems I would like it to correct.
Why did I pick these three models? It does help that they are all free, but that isn’t terribly important. It only costs a nickel in OpenRouter credits to use Claude Opus and Gemini 3 Pro to check one blog post, and it is even cheaper to use the more appropriate Claude Sonnet and Gemini 3 Flash. I thought it was important to use models with different lineages, because I suspect they’ll have different feelings on what constitutes a good blog post.
I don’t think I would consistently get the results I want by using GLM-4.7, GLM-4.6-Flash, and GLM-4.5 in three different subagents. I switched two of the swarm agents to GPT-OSS-120B and Gemma-27B after signing up for a Chutes plan. I’ve only used them in the trio once so far, but they seem to be up to the task, and they’re really fast.
The LLM benchmarks don’t tell the whole story
I think LLM benchmarks are great. It is nice to get a rough idea of where a brand new model sits in relation to the models that are already available. However, don’t just pay attention to the benchmarks. Listen to what your friends say. Read about the experiences of other people. Different models work better for different languages, different coding styles, and for different people.
I am not an expert. I don’t have hundreds of hours of real-world experience with this stuff. Here’s what I’ve learned from talking to friends and paying attention to various coding communities.
Claude Opus, GPT 5.2 Codex, and Gemini 3 Pro are all in roughly the same league. Opus seems to still be in the lead, but I keep hearing that Codex is amazing at debugging complicated problems, and OpenAI gives you a lot more tokens and requests for your money than Anthropic.
Claude Sonnet, Gemini 3 Flash, and GLM-4.7 are all on the same lower rung of the ladder. It seems like Sonnet often feels like it is right in between GLM-4.6 and GLM-4.7 for a lot of tasks, but any one of them could come out ahead depending on what you’re trying to do.
I am using a lot of weak phrases here such as “seems like” or “feels like.” This is more like figure skating than playing darts.
I am hoping that OpenCode Black saves the day?!
There isn’t much more information available than rumors at the time I am writing this. The company behind OpenCode has a paid API gateway called OpenCode Zen. Zen charges you by the token, and the prices are reasonable.
They’ve been tweeting about a $200 OpenCode Black subscription, which is already sold out, and it seems to give you access to models from both OpenAI and Anthropic, while also giving you access to open-weight models like GLM-4.7 and Kimi K2. It seems that they are doing a limited subscription run in order to puzzle out just how many tokens subscribers will be using, and they’ll be able to use that data to set limits.
I am excited about the idea of having a single subscription that would give me access to so many models. The Chutes subscription is nice, because there are quite a few models included, but missing out on Claude Opus and GPT Codex is a bummer. Sure, I can and do pay for some tokens on these models via OpenRouter, but it would be nice to have these included as part of my fixed costs.
I sure hope OpenCode Black winds up having a pricing tier that makes sense for a casual user like me!
- OpenCode with Local LLMs — Can a 16 GB GPU Compete With The Cloud?
- OpenCode Go Coding Plan From A Light User’s Perspective
Supplementing your premium plan with a low-cost plan
Are you paying for your own Claude Code Max subscription? Are you hitting the limits on that $200 plan too often? Does it feel like you’re paying too much?
Maybe a reasonable idea could be to drop down to a $20 Claude Pro subscription, then supplement that with a Codex Plus plan for $20 and a Z.ai Coding Pro plan for $15. You could easily assign the models available on these plans to different agents in OpenCode, and switching models when one isn’t capable of doing the job is just a keystroke away. Switching models in Claude Code is a bit more work, but it is definitely doable there as well.
You might use Opus for planning, Codex for debugging, and GLM-4.7 for the actual coding grunt work. That way you’d be using the most expensive tokens for the lowest volume, most challenging work. The limits on the Z.ai Pro plan should be roughly fifteen times higher than Claude Pro’s limits. The combo of a Claude Pro and Z.ai Pro subscription would get you close to Claude Max’s limits, but it would save you $160 every month.
Or maybe you’d go with Chutes instead of, or in addition to, Z.ai. You could use Chutes to get access to Kimi K2’s massive 1-trillion parameter model for particularly tricky problems, while still using Z.ai’s GLM-4.7 for the bulk of your work. Chutes also gives you DeepSeek v3.2 and MiniMax M2 as additional options to experiment with.
Given the restrictions Anthropic and Google have started placing on third-party tools, having both Chutes and Z.ai in your toolkit gives you a lot of flexibility. If one provider decides to change their policies or pricing, you’ve got alternatives ready to go. When one provider has an outage or their responses are slow due to load, you can switch to the other.
You can mix and match these providers however makes sense for your workflow.
I am for sure out of my depth here. I am just not a heavy enough user to get myself to this point. OpenCode makes it easy to mix and match these plans any way you like, and I am hearing about more and more people splitting their work between different models.
Hedging your bets by splitting your subscriptions between multiple companies seems smart, especially when those plans can be used in a single frontend like OpenCode. GitHub just announced that they are allowing OpenCode to integrate with their CoPilot subscription. OpenAI has tweeted something similar but with less solid of a commitment. Hopefully more companies will officially allow you to use the tokens you are paying in advance for in any way you like.
Claude Opus was the clear leader for a long time, but there are situations where Codex and Gemini Pro will do a better job. Not only that, but the much more inexpensive models are doing a good job at keeping pace with Claude Sonnet. Being able to slot new models into place will probably be even more useful in the future.
Wrapping Up
The key takeaway here is that you don’t need to spend a fortune or lock yourself into a single provider to get excellent coding assistance. OpenCode’s multi-model approach lets you easily mix and match plans from Z.ai, Chutes, and even the higher end plans from OpenAI, and it doesn’t take a lot of effort to swap Z.ai’s or Chutes’ models into your Claude Code client. I recently subscribed to Synthetic.new. I haven’t decided if they’re significantly more premium or just pricier than Chutes, but they’ll give you $10 off if you use my link.
You can even layer in free tiers from Google and Alibaba to stretch your budget even further. Whether you’re a casual coder like me or writing massive amounts of code, the strategy is the same: hedge your bets and use the right model for each job.
What makes this approach particularly valuable right now is the flexibility it gives you. With Anthropic and Google tightening restrictions on third-party tools, having accounts with multiple providers means you’re not left hanging when one changes their policies or prices. Z.ai and Chutes are filling an important niche here by offering capable models without the platform restrictions we’re seeing from some of the bigger players. Plus, the upcoming OpenCode Black subscription looks like it could be a game-changer for folks who want access to both proprietary and open-weight models while only making a single payment.
The most exciting part is that anyone can get started today with a $3 subscription or entirely through free tiers. You just need a little curiosity and willingness to experiment with different setups. I’m still discovering what works best for my workflow, and I’d love to hear what you’ve been trying. What’s your current stack? Are you married to one provider, or have you built your own Frankenstein setup to squeeze out more value? Join our Discord community and let’s swap tips and tricks for getting the most out of these tools!
- Contemplating Local LLMs vs. OpenRouter and Trying Out Z.ai With GLM-4.6 and OpenCode
- Is The $6 Z.ai Coding Plan a No-Brainer?
- Devstral with Vibe CLI vs. OpenCode: AI Coding Tools for Casual Programmers
- How Is Pat Using Machine Learning At The End Of 2025?
- OpenCode on a Budget — Synthetic.new, Chutes.ai, and Z.ai