Last year, I had two problems to solve. I needed to carry one more thing in my smallest laptop bag. I also wind up having two long and narrow strips of carbon fiber plate left over after cutting batches of a product I sell on Tindie, and I am always trying to come up with a good use for that extra material.
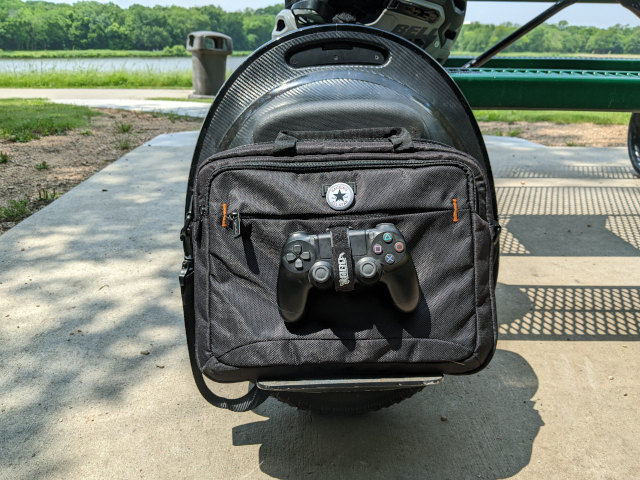
I feel like I found a good solution for both problems. I cut two small pieces out of carbon fiber, poked some tiny holes in my laptop bag with a razor, and bolted those pieces of carbon fiber to the laptop bag. Now I can use a Velcro strap to tie my PlayStation 4 controller and a water bottle to my laptop bag!
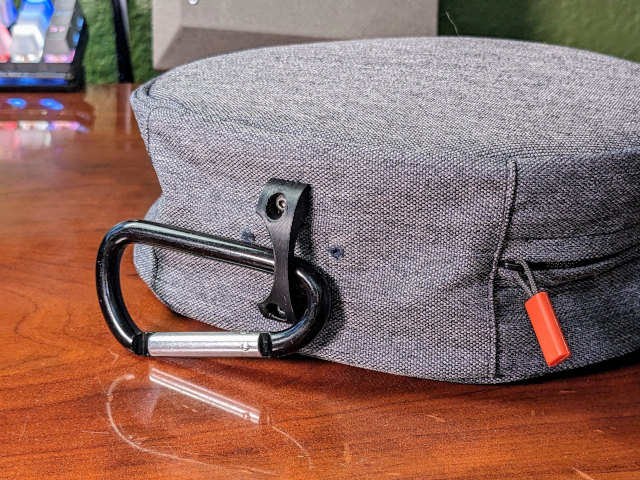
I think this is a cool little product, but I have two serious problems with it. I have no idea how to market it. What would you type into Google if you needed to attach something to your bookbag? Even more importantly, how would you even know that this is an option?
The other major problem is that poking the holes in the bag was a fiddly process. People won’t have the right tools, and the tools I was using myself weren’t even the right tools. This is the problem I solved this week!
- How Do You Add Straps to a Bag When You Don’t Know How to Sew?
- No-Sew Accessories for Your Backpack or Bag at Tindie
- No-Sew Carabiner / Velcro Strap / Camera Plate Backpack Hack at Printables
Before I forget!
This will all be open-source. The STL files no-sew doodads are on Printables. The OpenSCAD source will be on GitLab and Printables. I will also stock the non-printable pieces separately in my Tindie store just in case you want to print your own, but you don’t want to source bits and pieces of hardware from all over Amazon or Aliexpress.
The OpenSCAD source has gotten ugly. My intention is always to make a clean, parametric design. Then I start using magic numbers. Then I copy and paste modules so I can work on two different ideas at the same time. Then stuff gets left over, and stuff gets ugly.
The source will get out there, but cleaning it up is pretty low on my list. I need to get this listed on Tindie. I need to get the STL files exported and uploaded to Printables. I really, really need a video to embed in this blog to show you exactly how well this all works.
All of these things should be happening at the same time, but I can’t do everything at once. I will get there soon.
- No-Sew Carabiner / Velcro Strap / Camera Plate Backpack Hack at Printables
- No-Sew Accessories for Your Backpack or Bag at Tindie
I designed an alignment tool for a leather punch!
I figured there must be some sort of punch tool that would work on thick fabric. Where I wound up here is definitely not quite where I expected to be.
I was betting there would be a tiny punch that I could embed in a 3D-printed part. I hoped I could embed two of them at the correct spacing. I was picturing a tool that you could insert the fabric into and squeeze like a red Swingline stapler.
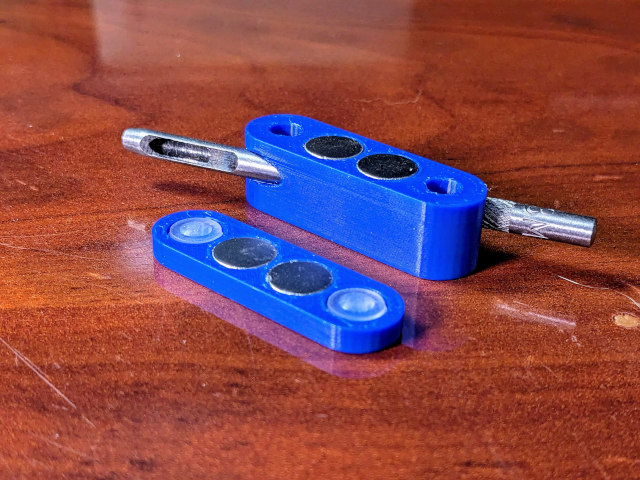
What I found were three-inch leather punches. I couldn’t put those inside a small tool. They are also rather dull. I don’t think you can punch through fabric unless you tap the punch pretty solidly with a hammer. Even if you could, my original idea was terrible, because you might want to poke your holes miles away from the edge of the bag.
What I settled on is a two-piece alignment tool with two holes spaced to match all the accessories. You put one half of the tool inside your bookbag, then connect the other half of the tool outside the bag. They stick together, because they have a pair of strong magnets!
Then you just put the leather punch in each hole and give it a little tap with a hammer. You have to use a bit of authority when hammering, but not nearly as hard as you would when driving in a nail. It only takes a few seconds to punch two holes in exactly the right spots to bolt on one of my hooks or straps.
NOTE: I had one bag that really didn’t want to punch! I had to give it quite a hit with the hammer! My testing sample size is still pretty small here.
- How Do You Add Straps to a Bag When You Don’t Know How to Sew?
- No-Sew Accessories for Your Backpack or Bag at Tindie
- No-Sew Carabiner / Velcro Strap / Camera Plate Backpack Hack at Printables
No more carbon-fiber parts
At least for now. I did some testing with a chain of various 3D-printed parts. I tied my 42-pound electric unicycle to a 3D-printed camera plate, and that camera plate was bolted to an old backpack using a 3D-printed piece with heat-set inserts. I was able to lift the 42 pounds without anything showing any signs of wear, though I was really worried that my terrifying set of zip ties and carabiners would slip off the tripod screw!
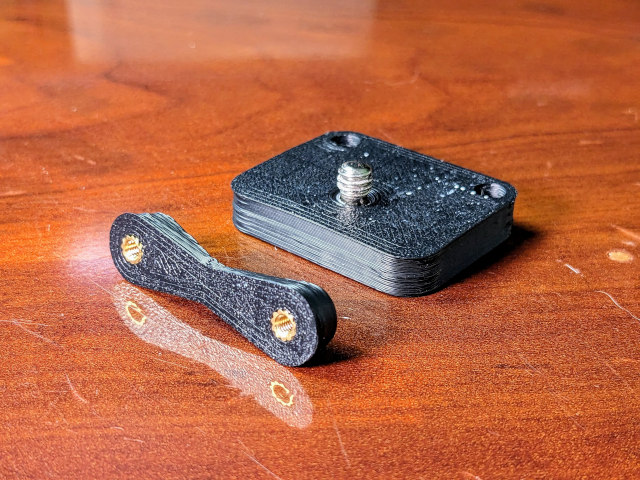
I am not saying that you should hang 42 pounds off your backpack, but I do feel very confident in the strength of the 3D-printed parts.
More importantly, the 3D-printed parts do a good job keeping any steel screws from scratching anything inside your bookbag. The old carbon-fiber pieces left exposed nuts and bolts, while the 3D prints cover those up for you.
I used to joke and say that the carbon fiber could probably hold my weight, and that the bookbag fabric would break first. I suspect I was more correct than I thought. It might be fun to rig up a real test someday!
3D-printing opens up so many possibilities
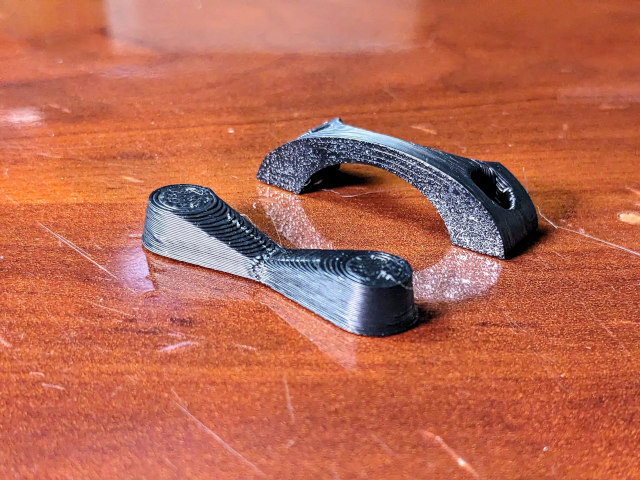
The carbon-fiber parts could only take advantage of two dimensions. I couldn’t do much besides letting you strap a water bottle, a game controller, or a baseball bat to your bag. That’s pretty handy, and it is cool having it made out of such a sturdy and exotic material, but that was nearly as far as the idea would ever go.
I almost immediately printed some hooks to match the carbon-fiber plates. I use an old headphone case to hold all the parts of my Raspberry Pi KVM kit. Adding the hook to that case meant that I could clip the kit to my small laptop bag with a carabiner. I don’t need to take it with me often, but it is nice to know that I don’t need to pack a bigger bag when I do need it.
This week, I have been contemplating ways to quickly stow a DJI Pocket 3 while riding my electric unicycle. I am not allowed to buy a Pocket 3 unless I can find some good uses for my Osmo Pocket 1, so I figured I better put some thought into this.
My favorite solution so far involves printing a PGYTECH-compatible quick-release plate for my Osmo Pocket 1. I have 3D-printed receivers that are compatible with these plates, but they don’t lock nearly well enough for me to trust them in motion, so I designed a no-sew camera adapter.
I can bolt the no-sew adapter to my backpack strap. Then I can attach a real PGYTECH quick-release doodad to my backpack, and I can quickly and easily clip my Osmo Pocket to my backpack. How cool is that?
I figure that if the no-sew camera adapter can lift my 42-pound unicycle, then it should be safe to attach any of my cameras to it.
There are so many possibilities
I am doing my best not to go too bananas. I just want to get some simple parts into the collection that work well together. I accidentally went down the wrong, more complicated path when first attempting to design the camera bracket.
I knew that having the tripod screw between the bracket and your bookbag would be problematic because you would never be able to tighten the camera in place without removing the bracket from your bag. I wound up designing and abandoning a fairly convoluted dovetail system to get around this problem before realizing that fabric is flexible, so I just had to make sure the camera bracket was wide enough to allow you to fold it out of the way to get to the screw. This simple solution is so much better.
The dovetail that I designed was convoluted because it needed extra screw holes to make sure it never accidentally let go of your $2,000 camera. It was thick, and the need for the extra screw made it cumbersome to install or remove.
I think I could simplify things for situations where you aren’t carrying something expensive. Maybe we can design some sort of quick-release mechanism using magnets for quickly stowing an inexpensive water bottle or something as light as a PlayStation controller.
What exactly is in the Tindie store?
I have been running off most of the test parts in PLA on my Bambu A1 Mini because I am lazy, and I always have PLA loaded up and ready to go. The parts on Tindie are all ABS plastic printed on [my Sovol SV06][sv06is2].
Why ABS? PLA is definitely strong enough, and if you print your own, I wouldn’t be afraid to use it. The trouble is that PLA can get soft if you leave it in direct sunlight in your car here in Texas. I don’t want parts breaking on anyone just because they left their bookbag in the car, and ABS doesn’t have this problem.
If you want to 3D-print your own, I have a bundle with the punch tool, magnets, and rubber bumpers. If you can’t or don’t wish to print your own, that is fine. I am stocking all the various parts.
I don’t want to give you my money, Pat! It is MY money! I want to print my own doohickeys!
This is fine! It is better than fine! I don’t want to take your money. I will be just as excited if you print your own no-sew accessories. I think I have made a neat thing. I find it useful. I think a lot of people could get some use out of them. I will be excited to see other people using them!
You can even source your own magnets and punch tools. You don’t have to buy them from me. In fact, you can even skip these things. They aren’t necessary to make the system work, but they do make things much easier and cleaner!
What’s next?
I have some other ideas since installing the first no-sew carbon-fiber doodad last summer. I haven’t fleshed those ideas out, and I haven’t put any design work into them. I felt like this idea was pretty much dead because cutting the holes was a pain in the butt. The template and punch tool have corrected that problem! I wouldn’t be surprised if I could install a hook on a backpack in the same amount of time it takes you to thread a needle.
I have some half-baked parts that attach to the bag using dovetails. I almost used them for the camera mount, but I realized that it wasn’t necessary. Even so, I think the dovetails are a neat idea, and I have some other uses where they might work well. I hope!
What do you think? Do you need to add a heavy-duty attachment to your backpack, but you don’t know how to sew? Maybe you just don’t know how to sew well enough to hold 42 pounds securely. Do you just need to hang one more water bottle on your bag? Is this a good idea? Let me know in the comments, or stop by the Butter, What?! Discord server to chat with me about it!