I’m excited about this. I have to say that I expected to be writing a post talking about my first day with my new Prusa MK3S, but I had a very successful first evening with the machine. I started unboxing around dinner-time, had my first PLA print running through OctoPrint in about 20 minutes, and the 90-minute job finished before we left for our 10-mile electric unicycle ride.
This is so much slower than my old work horse of a printer, but it is so super quiet, and it just works! pic.twitter.com/x52xg0NAu8
— Pat Regan (@patsheadcom) August 3, 2020
When I got home, I managed to get my first TPU job running, and I had a replacement GoPro mount for my FPV freestyle miniquad ready to go a few hours later. It finished while Brian and I were playing Team Fortress 2.
Why is this exciting?
I ordered the fully assembled and tested Prusa MK3S. The kit is $749, while the machine I bought was $999. The bill after taxes and shipping came to $1,111.31. I paid an extra $250 to avoid the time and headache of assembling and configuring my machine. I’ve tinkered with enough 3D printers over the last six years. I just want to start 3D-printing my designs again!
I started unboxing my new Prusa MK3S at 4:24. I hit print in my first Octoprint job a minute ago, and the printer just started moving! pic.twitter.com/Iad8tjNwd3
— Pat Regan (@patsheadcom) August 3, 2020
I cut open the box with my trusty Saros EDC knife, removed some custom packing foam, lifted out the printer, and put it on my 3D-printer stand. It is in the same spot where my old printer lived, so I just plugged my old power and USB cables right in. All I had to do next was remove some zip ties, follow the instructions on the printer’s display to unload the test filament and load my own, and I was ready to print.
I was able to go from a neatly wrapped box to watching a handful of brackets printing away in less than 30 minutes. I know that I’m cheating a bit. I already had OctoPrint running in a VM for my last printer. I only had to make minor modifications there to get things working for the Prusa MK3S.
I would have been printing even sooner if it weren’t for those meddling kids!
By meddling kids, I mean the guy who configured things for the OctoPrint virtual machine. That would be me.
With KVM, it is easy to pass through a serial device from the host to a virtual machine. The problem I had was that my old printer’s RAMPS board runs at 250,000 baud. KVM’s simple serial passthrough didn’t like that at all, so I had to go one layer higher and assign the actual USB device to the VM.

If a driver on the host claims the device when it is plugged in, then you won’t be able to assign it to a VM. I spent five minutes or so puzzling out what I did four years ago.
The answer probably won’t be of much value to you, but I’m going to tell you anyway. I blacklisted the cdc_acm driver that the RAMPS board on my old 3D printer used. The EINSY board in the Prusa MK3S uses the same driver.
If it weren’t for this little wrinkle, I may have been up and printing in 10 to 15 minutes instead of 20 minutes!
PLA was a breeze
I should tell you that I modified Prusa’s slicer profiles a few days before the printer arrived. The default profiles are just glacially slow. I started with the “0.15mm SPEED” profile, and these are the things I remember changing:
- Bumped layer height from 0.15 to 0.16
- Set infill to every other layer for 0.32mm infill
- Increased infill acceleration from 1000 to 1800
- Bumped internal perimeter speed from 60 to 70 mm/s
- Bumped first layer speed from 20 to 30 mm/s
- Cubic infill instead of rectilinear
I’ve done a bad job. I couldn’t verify this. I made about half these changes, then saved the profile. Then I made more changes, sliced the first print, then I forgot to save the changes!
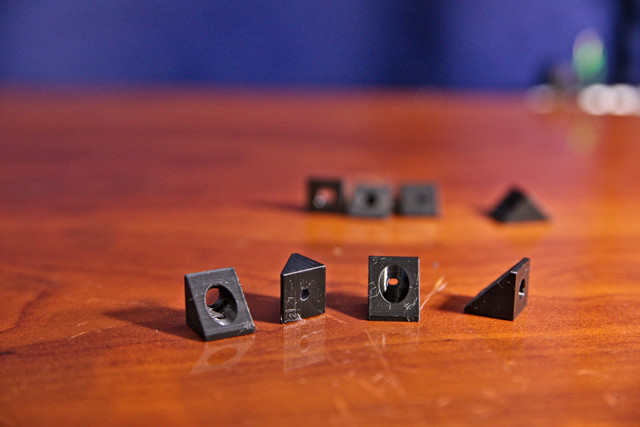
I only printed 8 brackets in my test print, because I knew I needed to print a TPU mount the same evening. When I was testing my changes to the print profile, I was checking the estimate with 32 brackets from my Tindie store on the plate. The time dropped from roughly 6:45 to 5:15. I figured that was a reasonable first attempt at pushing things faster!

Prusa’s “0.30 mm DRAFT” mode is still faster. I believe it was estimating 3:30 for a set of 32 brackets. I’d prefer to keep my 0.16mm perimeters, though. We’ll see how close I can get without making my prints look nasty!
I switched to cubic infill as soon it was available, and I’ve never looked back. I’m not going to look for data to back up my memory here, but I recall cubic allowing for more strength with less infill. Cubic infill is all straight lines just like rectilinear, so cubic allows you to increase your print speeds or increase your strength for free. That is assuming my memory is correct and testing hasn’t proven otherwise since then!
TPU was a headache
My friend Brian recommended that I print TPU on painter’s tape. He tells me it is a pain in the butt getting TPU off of a PEI surface. I’m taking his word for it!
I used the “Sainsmart TPU” filament profile along with the “0.20 mm QUALITY” print profile. I don’t need my GoPro mount fast, but I definitely needed it to succeed!
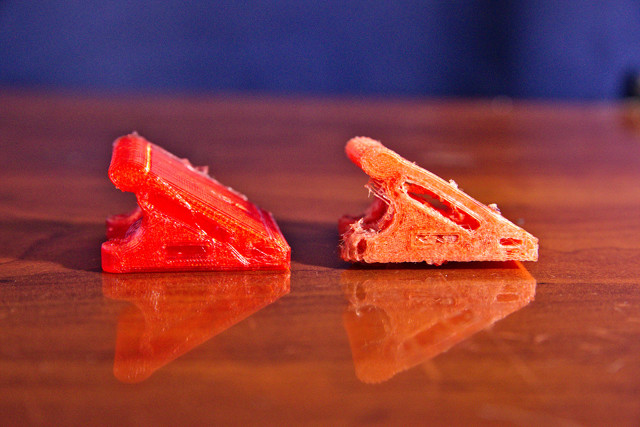
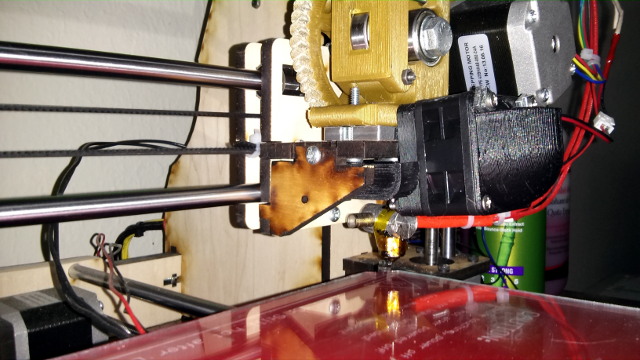
I heard some clicking noises from the extruder during the first layer. After canceling the job and moving the print head out of the way, it was obvious that my first layer was squished. My old printer’s massively powerful extruder would have just powered through this, but the MK3S extruder wound up bending the narrow filament.

NOTE: Prusa MK3S on the left, heavily crashed part from MakerFarm i3 on right.
I took a set of calipers to my painter’s tape. It is 0.12mm thick! I used the live z adjustment on the next attempt, and things were better. The first layer looked great! Unfortunately, the extruder still got gummed up.
I went into PrusaSlicer and attempted to disable retraction. Things went much better this time, and 90 minutes later I had a GoPro mount in my hands!
I failed to completely disable retraction. There are several retraction settings, and I’m guessing I missed one. Early in the print, I was marking the filament every half inch or so with a Sharpie. I could see the retractions happening, but I could also verify that the printer was indeed still extruding!
Why the Prusa MK3S?
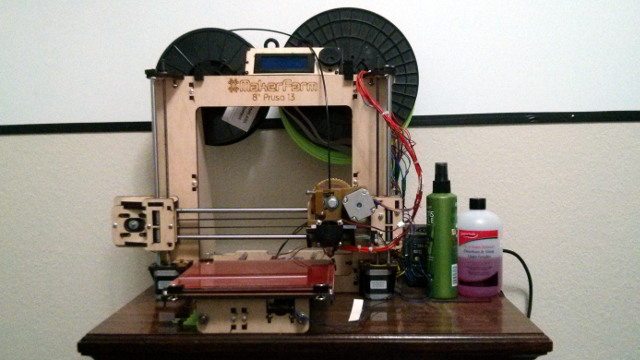
My old 3D printer was a beast, but it was lacking a lot of modern conveniences that every Prusa printer ships with. When my old printer’s heated bed connection melted, that seemed like a good excuse to buy a new, modern printer. I was certain I was going to order the little Prusa MINI.
The Prusa MINI really does have all the features and performance I need. In all honesty, I don’t 3D-print nearly as much as I used to, and I’ve 3D-printed even less since buying a CNC router.
Everything I've #3dprinted so far on the new Prusa MK3S has been to tune check that I didn't push things to far while trying to make a faster #3dprinting profile. Except this one. This robot from @thingiverse was just for fun! https://t.co/fro49ALgOO pic.twitter.com/mJcqQocScp
— Pat Regan (@patsheadcom) August 5, 2020
A $350 Prusa MINI seemed like a great value. It has enough build surface for me. It has the silent Trinamic stepper drivers. It has automatic mesh bed leveling. That’s all I really need, and I really wanted to try one out!
Then I saw that that Prusa MINI wouldn’t be shipping until some-time in September. That was in May. Could I survive without a 3D printer for 4 or 5 months? The preassembled Prusa MK3S claimed it would ship in 5 weeks. That seemed a lot better!
Due to the current global situation, it took about 10 weeks to ship. It did manage to get here just in time, though. I broke one of my TPU GoPro mounts on my drone on Sunday. The Prusa MK3S arrived Monday, and I was able to have a fresh mount installed on the quad that night.
That didn’t really explain why you chose the Prusa MK3S!
I could have repaired my old MakerFarm i3. It would have been simple to solder the heated bed wires directly to the RAMPS board. In many ways, that printer outclasses the Prusa MK3S. The MakerFarm’s stepper motors are at least 30% bigger, its extruder was an absolute beast that could power through anything, and 3mm TPU filament is so much easier to work with.
It is an old printer. It is missing so many modern features. I had to check and set my Z-axis offset between every print because parts of the printer expand as they heat up. The MakerFarm printer was loud. Its extruder may have been a beast, but it was ancient, outdated, and was quite drippy.
I could have repaired the failure. I could have bought Trinamic stepper drivers and shoehorned them onto the RAMPS board. I could have bought a BLTouch probe for automatic bed leveling.
These are all features I desired. I could either spend money and time upgrading the old machine, or I could just bite the bullet and replace the whole thing. It definitely cost more money, but I saved a heck of a lot of time, and my old printer has already found itself a new home.
Why the Prusa and not something like an Ender 3?
The Creality Ender 3 is a fine printer at an amazing price. The Ender 3 is basically what you get if you try to replicate my old MakerFarm printer, except you replace every part with the lowest-cost hardware that will do the job.
This is fine. The Prusa MK3S is doing the same thing, isn’t it? It isn’t literally the best 3D printer in the world. The impressive thing about Josef Prusa’s engineering is that he has managed to strike a seemingly perfect balance between features, cost, performance, and reliability.
If I had bought an Ender 3, it would have been an upgrade in a few places, a downgrade in a few others, but I would have been at roughly the same point I was six years ago.

The Prusa MK3S got me the features I really wanted. Those quiet stepper motors are fantastic. When you put it in stealth mode, the loudest thing on the printer is the fans. I’m also really excited about the automatic mesh bed leveling.
I got to do something that I could never really do with my MakerFarm printer. I sliced an object, hit the “send to printer” button, and then I checked the box that says “start print after upload.”
I didn’t have to check my Z-axis offset three times before printing. I didn’t even open OctoPrint. I just clicked OK, waited a bit, and my part was successfully printing. This is such a nice upgrade!
I have no idea if I could do that with an Ender 3.
- Creality Ender 3 at Amazon
What’s next?
I started writing this blog post the morning after I finished those two prints. I didn’t quite make it to the conclusion before getting distracted. I’ve been tweaking PLA profiles to increase speed, and I’ve been looking for things to print to test those profiles!
I’m using the same layer heights as I used on my old printer. One of my early and still-clean prints was an Osmo Pocket stand. OctoPrint says my old printer managed to print it in 51 minutes. The Prusa took 68 minutes. Unfortunately, I can’t say for sure that the infill density and perimeter counts are directly comparable here, but I’m excited that I’m approaching my old speeds already.
I’ve pushed far enough that I’m getting slightly messy perimeters. I’m excited that I’m figuring out the limits, and I’m pleased that they won’t be all that much slower than my old machine. At this rate, I expect I’ll be settled in on some reasonable print settings in a few days. Once I get the TPU dialed in, I’ll post my profiles!
What do you think? Is the Prusa MK3 worth paying two or three times the price of an Ender 3? Do you have a Prusa MK3S, or something entirely different? Are you happy with it? Let me know in the comments, or stop by the Butter, What?! Discord server to chat with me about it!