I bought a 3D printer. I’ve wanted one ever since reading about the old MakerBot Cupcake almost five years ago. Now I finally have one, and I’m very excited. Things have come a long way in four years. The printer I chose has a build area twice as wide, twice as long, and over 50% taller than those old MakerBot Cupcake machines.
I decided to buy a used printer
I knew which printer I wanted—A Prusa i3—and I wanted it to have an extruder that used 3mm filament. I was also more interested in the Prusa i3 printers with aluminum frames. I thought this would be enough information to make choosing a printer easy.
It turns out that there are a lot of different sizes to choose from in the Prusa i3 family. Not only that, but sometimes you get to choose one of four different controller boards and four different nozzle sizes, and that is just at one store. Different vendors also offer different types of hot ends.
I thought I had my choices narrowed down to just two printers from two different vendors. At this point, it was already getting late, so I figured I’d mull things over the next day. I did decide to see if there were any printers for sale nearby on Craigslist.
I lucked out. There was a Makerfarm 8” Prusa i3 for sale not even 20 minutes away from here. This was such an easy decision. I didn’t have to choose a hot end. I didn’t have to choose electronics. I didn’t have to choose a nozzle size. Best of all, this printer was already assembled, and I didn’t have to wait two weeks or more for it to show up at my doorstep. There were no Prusa i3 printers available with Amazon Prime shipping.
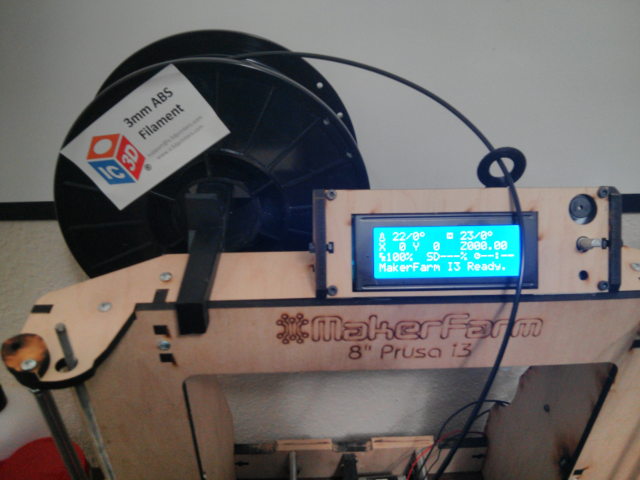
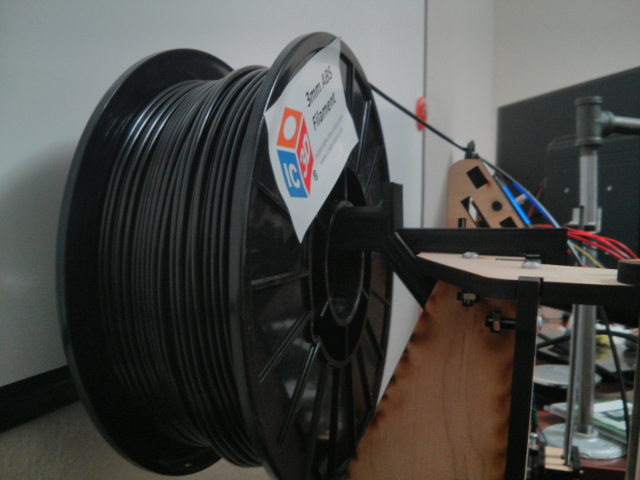
What I ended up with is a Makerfarm 8” i3 printer with an LCD screen, not the newer i3v model. It has a heated bed and the magma hot end with a 0.4 mm nozzle. It also came with at least half of a spool of 3 mm glow-in-the-dark filament, two sheets of glass for the build surface, a bottle of Garnier Fructis Full Control hair spray, an ATX power supply, and pretty much all the odds and ends that would have come with the printer.
If you are interested in keeping track of my progress, I picked up the printer and had it up and running last Tuesday evening.
Up and printing in about an hour
When I got home, I plugged the printer right in and watched the print head and bed move around. I plugged the printer into my computer, and I immediately started pushing buttons in Pronterface to move the print head around. It was working. This was exciting.
I had already sliced up a Space Invader magnet the night before, so I was ready to start printing almost immediately. Shortly after hitting print, I started seeing checksum errors. The Internet suggested that I try different USB cables and ports. I did that, and I even tried using my laptop. It just didn’t work.
This was the first point that I started to notice that I have no idea what I’m doing. I was just firing up Pronterface directly. I didn’t notice that there were scripts to start Pronterface that load the correct configuration for your printer. I used mendel.sh and everything started working correctly.
1 2 3 | |
My first print wasn’t the best. There were gaps between the perimeter and the infill. The corners were a bit round, and edges were pretty jagged. I wasn’t sure what was wrong, but my little glow-in-the-dark Space Invader looked like a thing of beauty to me!
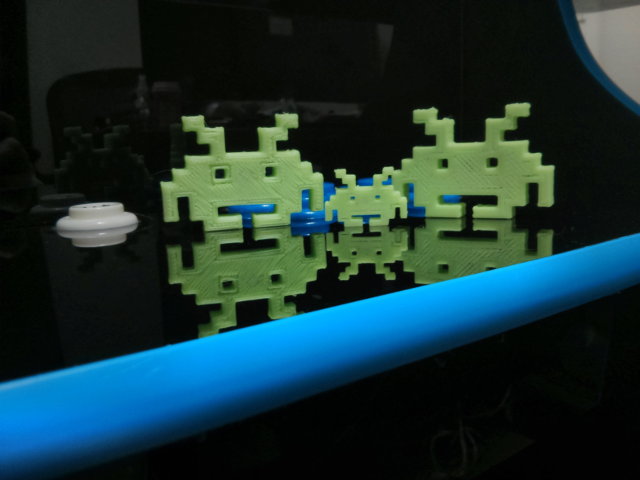
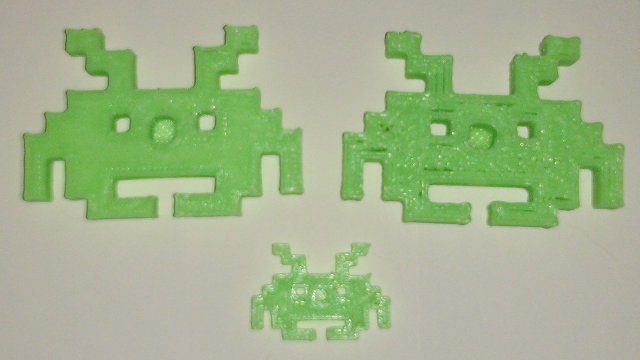
I went through the settings in Slic3r. I had imported those settings from files I downloaded from the Makerfarm website, so I was surprised to see that the “nozzle diameter” was set to 0.8 mm. I turned that down to 0.4 mm, and my second Space Invader came out much better. I guess the printer just wasn’t laying down enough plastic the first time.
Temperature problems
I had temperature problems the first day. It was taking a very long time for the hot end to reach its operating temperature, and it would randomly drop 20 or 30 degrees in an instant. When this happened, wiggling the cables would cause it to jump back up near the correct temperature.
I figured that there must be a loose connection to the thermistor or the thermistor wasn’t seated correctly. I took apart the extruder assembly and removed all the Kapton tape holding the wiring to the nozzle. The thermistor seemed to be in there just fine, and all the wires seemed to be joined correctly.
I put everything back together. While I was at it, I decided to use some zip ties to clean up some of the wiring. The wires for the heating element, thermistor, and fan were all just hanging free, and they were all different lengths. I tied them all together, routed them so they wouldn’t get in the way, and pulled them all back a bit so they are now all the same length.
The temperatures stopped dropping suddenly, but the hot end still wouldn’t heat up well at all. I found a suggestion that I should wrap the nozzle of my magma hot end in several layers of Kapton tape. This keeps the fan from messing with the temperature readings, and it worked like a charm.
However, when I reassembled things, I screwed something up. There’s an aluminum plate in the extruder assembly that holds the hot end in place. I put it in upside down. This meant the hot end could spin freely and wiggle around all over the place. This certainly wasn’t helping me get clean prints out of this Prusa i3.
Printing the 5mm Calibration Cube Steps
This is another obvious moment where I had no idea what I was doing. I started a print of the 5 mm Calibration Cube Steps, watched it lay down a few layers, and I walked away. When I came back to see how it was doing, the print head was happily moving around but it wasn’t extruding at all. It had been doing that for a while. I managed to get the filament a bit tangled on the spool.
I cleared off the built plate, sprayed the plastic bits off the hobbed bolt with a can of air, reloaded the extruder, and fired off the print job again. This time it finished, but it was awful.
There was well over 1 mm of difference in the length and width, and the height wasn’t looking so good either. I did some research and poked around in the printer. It sure seemed like the belts were pretty loose. This explains why the infill doesn’t always meet the perimeter and why the magnet holes in my Space Invaders looked more like rounded squares than like circles.
I was able to snug up the tension on the X axis easily enough. I only had to loosen the bolts on the motor and move it back a little bit. The Y axis was more problematic—it was already as tight as it would go. I remembered seeing that someone on the Internet added tension to one of his belts using the metal spring from a clothespin.
This works great. You just have to make sure you put the clothespin spring in a spot where it won’t hit anything when the axis is at its minimum or maximum. I know how to fix this correctly, but I sure don’t want to have to take the bed off again any time soon.
A major catastrophe
I am happy to report that this time it wasn’t entirely my own incompetence that caused the problem. This time I get to blame either the guy who assembled the printer or the designer. More than likely, though, a little of both.
My friend Brian ordered me a two-pound spool of black ABS filament IC3D Printers. I’m pretty sure this is his down payment for some 3D prints. I was waiting very patiently for this black filament to arrive so that I could print a filament spool holder to attach to the printer.
I chose the Compact Spool Holder and Guide from the large selection of spool holders available at Thingiverse. I am extremely pleased with it. It is compact, seems quite sturdy, and it is much less convoluted than most of the others. I will definitely be printing a second one for the other side of the printer.
This was Saturday night. I started the print of the spool holder. I had a few bad starts because I had trouble getting the new black filament to stick to the bed. This was due to incompetence on my part. I had misinterpreted the meaning of the “first layer height” setting in Slic3r. I assumed that it would put the print head closer to the bed if I put a smaller number in there. This was the wrong assumption. I bumped it up all the way to my nozzle width, and things are working much better now!
I watched two or three millimeters of my new spool holder print, and then I headed out for dinner. When I got back, the job was completed, but the part didn’t come out quite as straight as I would have hoped. As I was wiggling it loose from the build plate, I noticed how easily the plate was moving around.
Then I noticed some tiny lock nuts under the printer. Four nuts had wiggled loose, so two of the bearings on one of the metal rails were completely disconnected from the build plate!
I’m amazed at how well the spool holder came out under these circumstances. It doesn’t look quite right, but it is still usable, and it is doing its job splendidly right now. This slightly deformed part will probably remain in service for a long time.
A disappointing Saturday night actually has a silver lining
I did get a little more familiar with the workings of the printer on Friday night. I had to pull the build plate off to reattach the bearings. This whole area seems a bit problematic to me.
The screws that hold the bearings on are only just barely long enough to put the lock nuts on. In fact, you can’t even put the lock nuts all the way on. While I was putting things back together, I was wondering why they didn’t just ship longer screws. I later learned that they can’t. If the screws were much longer, they would bump into the frame of the printer. They’d need to source custom-length screws that are just one or two millimeters longer.
I’m guessing the previous owner was afraid he’d break something if he torqued them down too tight. I’m not afraid. I think I torqued them down quite nicely. I’ll be surprised if I get bitten by this design flaw again.
I had things reassembled too late that night to do a test print, but things were working so much better the next day. I only printed two items on Sunday.
The first thing I printed was the filament guide loop to go along with my new spool holder. The round end lifted up off the bed during the print, so it didn’t come out perfect. It came out amazingly round, though, much rounder than the failed print earlier in the week using the glow-in-the-dark filament.
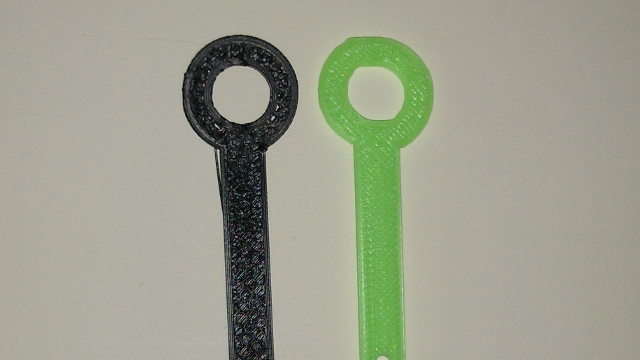
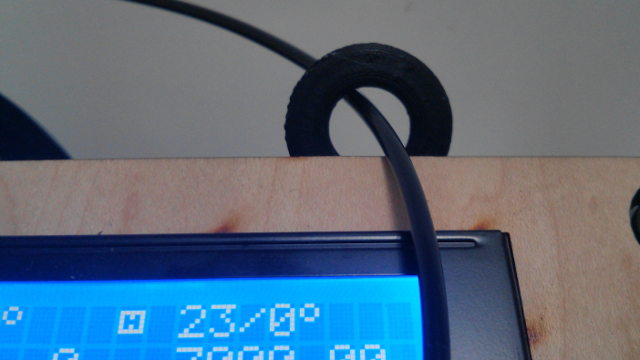
I also printed another 5 mm Calibration Cube Steps. As far as I’m concerned, it came out nearly perfect. The length, width, and height are all about 0.1 mm of the 25 mm target. Pronterface claimed the printed height was going to be 24.9 mm, so I’m probably within the margin of error for my layer height and extrusion width.
There’s also no gap between the infill and the perimeters anymore. In some spots it looks like there is tiny gap, but I can’t even get the edge of a razor blade in there. I guess the printer just needed to fall apart to solve all my problems!
The verdict
I thought I made the right decision in buying a used 3D printer right up until the night that the thing fell apart. That night I wasn’t so sure. I was very happy with my decision again the next day after seeing that first print after the repair.
Not having to wait two weeks for my printer to arrive was great. Seeing the printer make an object just a few hours after getting it home was even better. If this were a kit, I’d have probably spent that much time just figuring out if all the pieces were there.
I was also surprised to learn that the wooden Prusa i3 printers are more rigid than their metal counterparts, so I lucked out there. The used printer cost me at least $50 less than the cheapest equivalent metal Prusa i3 on my list, and it came with a bunch of extra stuff.
Between the time, money, and extra parts, I would have to say that I got a pretty good deal. I just designed my first two parts using Blender, and I will be printing them tomorrow. I can’t wait to see how bad of a job I did on them!