We finished up our fourth, and longest, day of arcade cabinet construction. We also made significantly less progress than on any of our previous days. Plexiglas is a bit harder to work with than we expected…
We started with a single 36”x30” sheet of 0.080” plexiglas that had just a bit more material than we were going to need. It is the thinnest we could find at Lowes. If we could have found thinner it would have been easier to work with, even cheaper, and would have been just fine for our purposes.
Unfortunately, we cracked the first piece we tried to cut…
Cutting Out The Large Rectangles
I don’t think we’re going to crack any more pieces when we’re making the long straight cuts. We’re clamping the sheet of plexiglas between our workbench and a straight edge. Then we’re repeatedly scoring the plexiglas along the straight edge with a blade. It seems that the deeper we cut with the blade, the less likely we are to cause cracking. This seems very obvious in retrospect.
Rounding the Corners
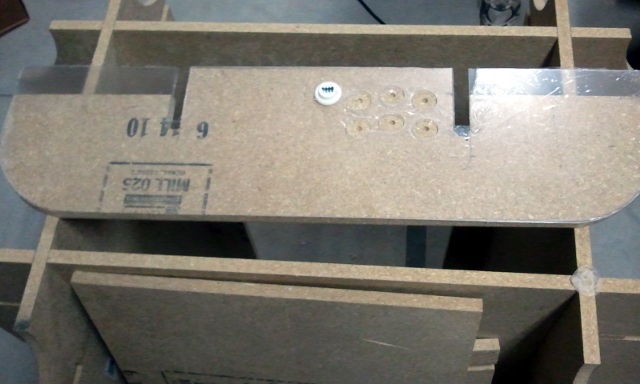
We were able to rough-cut the curves on the corners by scoring the curve very deeply with a blade. We lined up the plexiglas to the control panel board and clamped them together. Then we just flipped it over so the plexiglas was on the bottom, and followed the curve with the blade.
Once the excess fell off we went around the edge with a belt sander. That made the edge nice and smooth and forced the plexiglas and particleboard into a matching curve. We learned that you have to keep moving the sander. If you stay in one place for too long, the plastic starts to melt.
We probably won’t sand like that again until all four pieces are cut and fixed into place. Then we’ll just go around the whole table and make everything smooth and flush.
Drilling the Holes for the Buttons
This part was pretty scary. Every time we drilled a hole we were worried we’d make a small hairline crack and ruin the whole control panel. We did some testing on our broken piece, so we did learn a bit before we drilled the real panel.
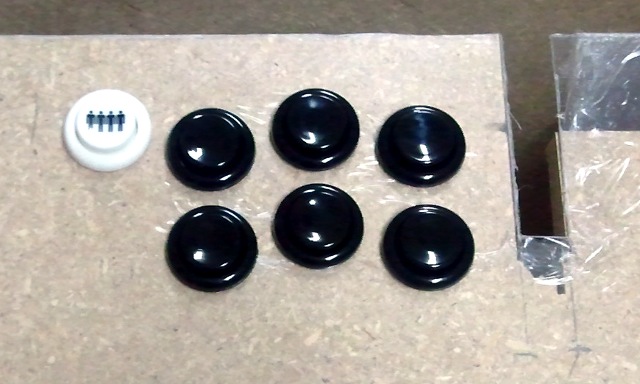
I made up a button template out of a thin piece of cardboard. It has a small hole at the center of each button. We used that to mark the button centers with a marker and we drilled small pilot holes at each point. Without the pilot holes it was difficult for us to keep the larger spade bit centered.
We used a 1 1/8” spade bit to drill the holes. I don’t know if this is the preferred method of putting holes in plexiglas, but it worked quite well as long as we were careful.
We kept the plexiglas clamped to the particleboard control panel but we did not drill all the way through the particleboard with the plexiglas still attached. It is important to clamp the pieces together pretty close to each hole that is drilled. Our test piece was clamped at both ends and it did a pretty good job of vibrating and flexing.
We also learned not to try to drill all the way through the plexiglas and particleboard at the same time. It was easier and safet for the plexiglas to finish the holes after the plexiglas was removed.
The trick seems to be going slow and straight. We only just barely drilled through the plexiglas. We didn’t even drill all the way through. Some of the little disks had to be popped out, and a few stuck to the drill bit.
A Small Change to the Design
We originally planned to have the plexiglas slot around the vertical pieces of particleboard that make up the legs. I don’t think we can cut quite that precisely…
We’re going to widen the slots the control panels fit into by 0.080 inches so we can fit the plexiglas underneath. It is much easier to cut particleboard and it should also do a good job of holding down the plexiglas.
Why Are We Still Using Plexiglas?
We test-painted a small piece of scrap and it looks VERY nice. The plan is to paint the underside of the plexiglas black. When you do this, the top side of the control panels will be very shiny and fairly mirror like. I think it is going to look good enough to be worth the effort.


What Comes Next
I’m a bit sad to say that we aren’t ready for the next step. We’re still in the middle of cutting the plexiglas for the control panels. There’s still three more panels to be cut and we still need to cut holes to mount the joysticks.
Update 2010-10-20:
We were able to cut and drill the plexiglas for the other three control panels in less than two hours. Applying a little more patience and using the correct tool helped a lot.