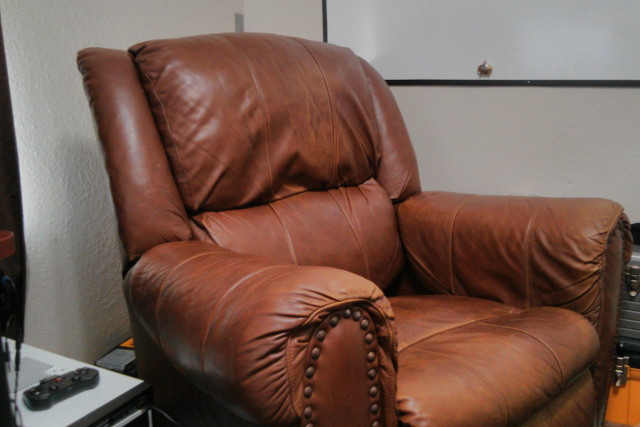
Two years ago, I bought a big, old Lane Summerlin recliner off Craigslist for $100. It looked great, but I knew before I bought it that the seat was falling out. The guy that sold it to me knew this recliner was in trouble—he made me sit on it several times, and he kept asking if I was sure I wanted to buy it.
I was OK with this. I just wanted an extra chair for the corner of my home office, and at the time, I didn’t think I’d be sitting on it all that often. If I hadn’t repaired it, that would have been true, but that old recliner has grown to become an important part of my home office. I sit on it almost every day!
The Lane Summerlin is a nice recliner—especially if you’re tall! The armrests are high enough that my elbows can actually reach them. Sometimes I don’t want to hit the armrests, and this chair is wide enough that I can easily tuck my elbows in between—like when I’m playing video games!
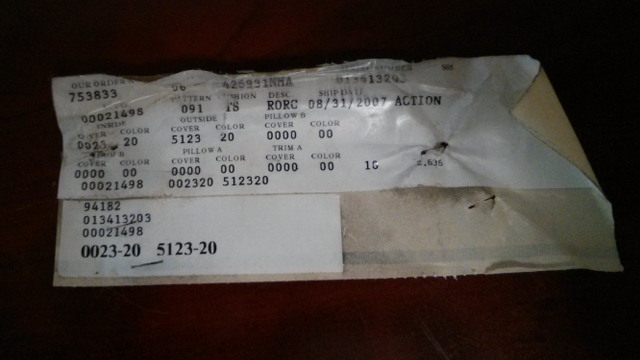
My Summerlin recliner will be celebrating its 10th birthday this year, but Lane still produces this recliner today. I don’t know what I’d have to pay locally, but they start at $715 at Amazon. Adding together a full set of springs, enough seat cushion foam for three recliners, and the initial cost of the used recliner, my total cost is about $180, a little elbow grease, and an unexpected learning opportunity.
I should note here that I only bought two springs. At a later, random date I liberated a full set of springs from a couch my friend Brian was throwing away.
Had I known two years ago how much I would like this model of recliner and how much I’d be using it, I would have gladly paid $715 for a factory-fresh model. I’m happy how things turned out, though. If you have an aging recliner, I hope my story will encourage you to repair it.
The previous repairs
As soon as I got my recliner home, I flipped it over and discovered missing and broken springs under the seat. Recliner-seat springs can be found at Amazon for about $10 with Prime shipping, and they’re easy to replace. I already wrote 1,600 words about that two years ago, so I won’t go into too many details here.
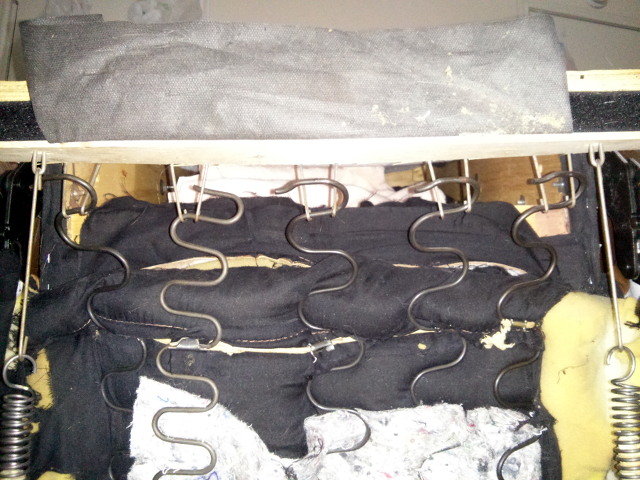
The hardest part about putting those springs in is stretching them into place. I should have done some research two years ago, and I should have done research again when I decided to replace the cushion this week. You can get a T-Hook tool from Amazon for about $5. I’m sure my fingers and back would have thanked me if I had been smart enough to order one. Most of the T-Hook tools are an add-on item, and I’ll definitely be adding one to my toolbox on my next order.
When I was replacing the springs, I noticed two problems. The wooden frame that the springs are attached to had already been repaired once, and it was repaired poorly. The L-bracket in one of the front corners came loose at some point, and whoever reattached it didn’t line things up right—the L-bracket was back about an inch from its original location. This meant my springs weren’t getting as much tension on one side.
I also noticed that the seat cushion was in terrible shape. It had some cuts and gouges, and it was squished quite flat in the back. My quick fix at the time was to put the cushion in backwards.
It worked well, and it was a huge upgrade. The recliner may not have felt brand new, but I didn’t sink to the floor anymore, and the chair was worth sitting on.
I’ve been talking about replacing that cushion for two years, but the chair has been good enough, so I lacked any real motivation. I’m not sure what triggered my impulse to buy a new seat cushion, but I finally did. Had I known how much more of an improvement it would be, I would’ve bought one two years ago!
- Repairing an Old, Sagging Recliner
- Recliner-Seat Spring at Amazon
- T-Hook tool at Amazon
Replacing the cushion
Replacing the seat cushion was as easy as I expected. I measured the existing cushion. It was 4” thick and 24” wide. I never measured the length. I knew from my previous research that I would be buying a long piece of high density foam. I figured I’d cut it a few inches too long—I could always shorten it, but I can’t make it longer once it’s cut!
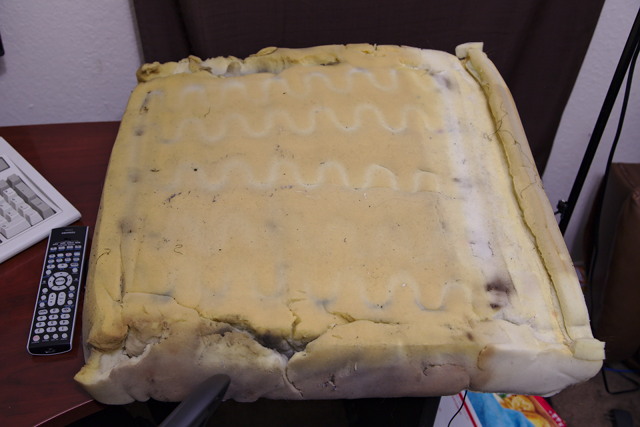
I ordered a 4”-thick 24” x 72” piece of high density foam for $47 shipped. It cost a little more than some of the other options available at Amazon, but its compression rate was higher than most of the other high-density foam. A six-foot length of foam was more than I needed; it was enough to replace the foam in three recliners! The foam was inexpensive, and I have enough now that I could screw everything up and try again if I have to, and it was easy to put the rest back in the box and stick it in a closet.
Cutting the foam was easy. I put the old piece of foam on top for size, and I hacked away at it with my Swiss Army CyberTool 34. I was in a hurry, and I didn’t need a clean cut. I figured that side would be facing the back anyway!
Getting the new piece of foam in wasn’t as easy as I expected. The old, flattened, tattered foam slides in and out quite easily. The new foam was a tight fit, but I was able to muscle it into place. While I was cutting, I learned that the old foam was probably 1” or 2” narrower, and it was really bulging in the middle once I got it into place.
I was worried that this would work poorly or look funny, but once I got the recliner reassembled, it looks perfectly flat. It also feels amazing! I’m pretty heavy, and I don’t think I sink down into the chair at all. It is literally—not figuratively!—like a brand-new chair.
- High-Density Upholstery Foam at Amazon
Straightening the seat frame
There’s not much to describe here. I took the screws out of the existing L-bracket, and I muscled the piece of wood in the front back to where it was from the factory—or at least extremely close to it! I drilled a new hole, and I put a fresh screw into the L-bracket.
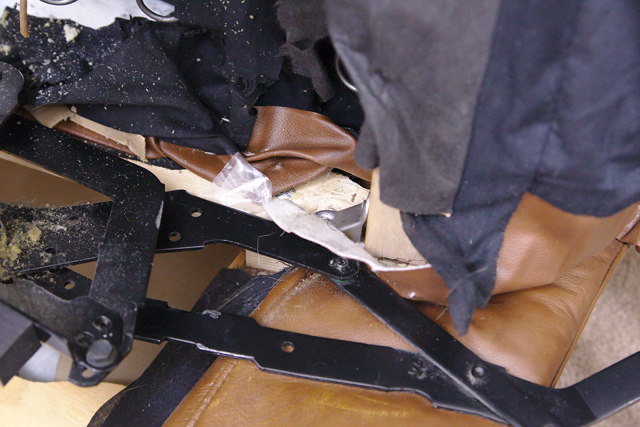
Without the springs pulling on the frame, it was easy enough to move the frame back into place. I’m not sure how much impact this had on my repairs, but I figured I should fix it while I had the springs out.
I’m hoping this repair helped a little, and it was easy to do. I didn’t do a before and after with the new seat cushion for verification, but I’m not confident that I’ll be able to feel the difference. Those springs were just as hard to pull into place when the frame was an inch shorter on the left, and the seat never felt like it was leaning to one side.
It was a simple fix, though, and it only took a few minutes.
The results
I thought it felt like a new chair when I replaced the springs two years ago. I was wrong. It felt like a slightly less used chair—a chair that was comfortable enough to sit on, though.
With the new cushion, it truly does feel like a brand new chair. If I had just spent a few more minutes’ time and a few extra dollars two years ago, I could have been sitting on this the entire time! If you’re replacing springs, I highly recommend replacing the cushion at the same time.
Do you have an old, sagging recliner? Does it have busted springs and a sad, lumpy cushion? If you repaired it, I’d love to hear about how your repairs went! Was it worth your time and effort? I’m extremely happy with my results!
- Lane Summerlin Recliners at Amazon
- Recliner-Seat Spring at Amazon
- T-Hook tool at Amazon
- High-Density Upholstery Foam at Amazon
- Repairing an Old, Sagging Recliner