I Bought an Electric Unicycle: I Have No Idea What I’m Doing

| Comments

Hello! My name is Pat. I’m 42 years old. I’m about 6’ tall and weigh 200 pounds. I’ve never ridden a skateboard, and I bought an electric unicycle. It has been in my possession for nearly a week. I am the opposite of an expert.

Maybe you’re an older, tubby guy like me, and you are thinking about looking at e-bikes, e-skateboards, OneWheels, and EUCs. I’m here to tell you that I believe in you. I am confident that you can ride one of these unicycles.

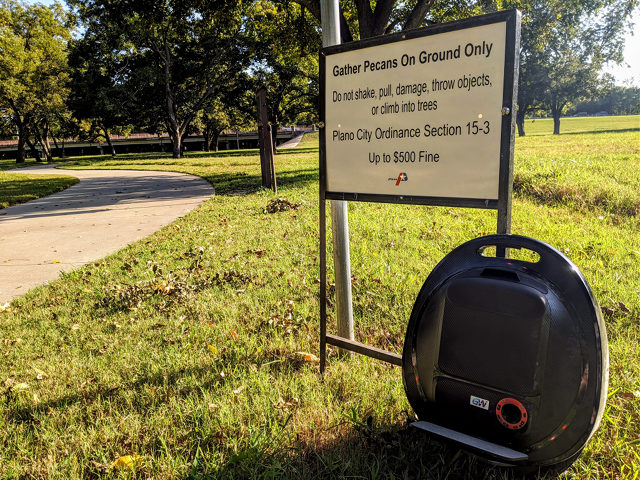
I chose the InMotion V5F SoloWheel Glide 2 electric unicycle (EUC)

Don’t just go out and buy what I bought. I did even more research after I started learning to ride, and I found out that everyone says your first wheel should probably be a used wheel. They say it is easier and safer to learn with a heavier, more powerful unicycle. It sure sounds like you can find beefier unicycles than mine for $200 or less on the used market.

I checked Craigslist for used unicycles before I ordered my refurbished InMotion V5F. I either don’t know what to search for, or there just aren’t any unicycles for sale near here!

That said, I’m quite happy with my choice. I bought my refurbished unicycle directly from InMotion. It was $399 shipped. They said it would have fewer than 150 miles on it, and the app says it had 13 kilometers on the odometer. It had a few scuffs, but nothing serious.

View this post on Instagram

My electric unicycle arrived. I tried it out in the back yard before I plugged it in to charge. Getting on is tricky. It probably too a half dozen attempts before I could ride ten feet while holding onto the side of the house. I've never ride a skateboard, but I did have an actual pedal powered unicycle what I was a kid. I've already ride this thing farther! It weighs 25 pounds, has 15 to 20 miles of range, and a top speed of 18 mph. It is as fast as my ebike, has more range, and weighs half as much. Should be much easier to load this into the trunk for #fpvfreestyle adventures! #fpv #fpvracer #drone #drones #droneracing #droneracer #fpvdrones #fpvrace #multirotor #quadcopter #fpvfreestyle

A post shared by Pat Regan (@patsheaddotcom) on

I own a Hover-1 XLS folding electric bike. I wanted something lighter, easier to put in the car, but with similar or better range.

I looked at the OneWheel XR. These cost $1,899, weigh more than my unicycle, and they have less range. This didn’t make a lot of sense to me. I might look cooler riding a OneWheel, though that is unlikely. They also seem to be much easier to learn to ride. For less than $1,899, I could have bought InMotion’s biggest, fastest unicycle.

I also looked at Brian’s Exway X1 Riot Pro longboard. The Exway weighs quite a bit less than my unicycle. It has about as much range as my e-bike, but not as much as the InMotion V5F. The X1 has a higher top speed, but I doubt I’d ever be able to use it.

That 14” wheel is so smooth!

Learning to ride a skateboard like Brian’s Exway X1 was tempting. The weight is right. The range is good. The price of an Exway X1 Pro is pretty comparable to a new InMotion V5F, and Exway has cheaper models that would suit my needs, too.

The giant diameter of the unicycle is what really sold me. The $399 price tag might have been a big influence, too, but the giant wheel really does make the unicycle a great fit for my use case.

When I followed Brian on his skateboard last month, he told me that could feel every bump on the bike path. Every time you transition from one slab of concrete to the next, the skateboard’s tiny wheels get caught up a bit. The 7” air-filled tires on my Hover-1 XLS don’t feel those bumps, so I figured a 14” wheel would do even better.

I would also like to be able to ride on grass. Electric skateboards can kind of manage this, but not really. I’d like an electric vehicle that I can ride out into the field when I crash my FPV freestyle quad 1,200 feet away.

I’ve already ridden my InMotion V5F on the grass, and it moves along just fine.

How proficient are you after a week, Pat?!

I haven’t quite had the EUC for seven days, and I didn’t ride it the first two days. I also didn’t keep track of how many hours I’ve put into this. I can say that I don’t feel like I’ve spent all that much time at all, so most definitely fewer than eight hours. I’d guess something more like four hours.

Friday: I farted around in the back-yard, and my skills plateaued rather quickly. I used the side of the house to help get myself up on the unicycle, and I propped myself up while I moved 10 or 15 feet along the wall.

The narrow sidewalk next to the house was beyond my skill level. I couldn’t ride in a straight enough line. This problem ended my practice.

Saturday: I took the EUC with me when I met my friends to fly at the local abandoned golf course. The parking lot there has some incline to it, which definitely slowed my progress. It didn’t take long before I could get up on the unicycle by holding on to the car, then ride 100’ or more in a straight line.

I managed to turn and ride rather a few times, but on Saturday, I never made it back to my starting point. Coming down the hill was scary and difficult.

My friend Tanner did better than me. Saturday was the first time he’d ever seen a EUC in person. By the time we went home, he was able to hop on without holding on to anything for support, and he was circling the parking lot.

We used about 1/3 of the charge of the battery on Saturday.

Sunday: We were back at the golf course again. I learned how to climb onto the machine without holding on to something. I am not successful every time, but I’m getting there. I rode much farther on a single attempt, and I was able to make a lap around the parking lot.

At this point, Tanner was doing top-speed runs. He managed to get the V5F to squawk at him, because he was going too fast.

Monday: I was rained out, I think.

Tuesday: Our city has some amazing bike trails running through its park system, and I happen to live about two doors away from those trails. I was able to ride to the trail, and follow the trail. I did stop a few times on each trip, but only one of those was due to the wheel getting out of control on me.

It was cold and gloomy. I didn’t go too far. I was worried that I would get tired. On each trip, I went about half a mile out. At the beginning of the trail, there is quite a long stretch going down hill. It is enough of a hill that my e-bike can only climb it at about half of its top speed.

It was scary going down that hill the first time. Going up the hill on the way home was murder on my feet!

Wednesday: It is cold and damp outside, so I’m writing this blog!

Riding the unicycle is REALLY tiring at first!

I didn’t mention this above, but I didn’t practice nearly as much as I anticipated on Saturday. I was going to be out there flying for three or four hours, and I didn’t bring any water. It was warmer than I expected, and riding the unicycle was much more tiring than I expected!

I knew that if I rode too much, I’d get thirsty.

Once Tanner started to get the hang of it, he was making laps around the parking lot, and he was sweating quite a bit. Once he got more comfortable with riding, he wasn’t using much effort to ride at all.

For your first few miles, you’re going to be tense. You’ll be balancing hard when you don’t need to. You’ll be waiting for bad things to happen. We got through the worst of that rather quickly.

I’m no longer sweating or getting thirsty when I ride. I am not doing so well going up hills, though. Each of the three times I rode home from the park, I had to stop at the top of the hill.

My feet start to hurt quite a bit from all that heavy leaning forward I have to do to get up the hill! I hope this will get easier as I ride more, and I’ve heard that it might help if I put my feet an inch or two closer to the front of the pedals when I ride. We’ll see how that goes!

My electric bike is awesome because anyone can ride it

Most of my friends poked fun at my e-bike. It is big. It looks silly. I’ll look like a goof when I’m riding it. The first time I took it to the park when we went flying, every one of them rode my bike, and they all had smiles on their faces the entire time.

Whenever people on the bike trail at the park comment on my Hover-1 scooter, I offer to let them take it for a ride. Some of those folks accept the offer, and every single one has been able to ride the bike.

Nobody will be able to ride my unicycle. It takes 10 minutes of practice just to figure out how to stand on the thing.

This is a bummer.

Conclusion

I’ve already written about my new electric unicycle three times in less than a week. At least I’m spreading the words across two different sites, right? I’m just too excited!

My next goal is to be able to ride with a small backpack, so I can take my flying gear to the park with me. I’ve already charged some batteries for my diminutive TinyHawk Freestyle, and my little 9-pound backpack is filled with gear and ready to go. I’m just waiting for some warm, dry weather.

I’ll try to keep my excitement off the blog until I manage to discharge the entire battery on a single trip. In the interim, you can follow my EUC shenanigans on Twitter and Instagram!

What do you think? Was the InMotion V5F a good choice for my first unicycle? Do you think I’ll need to upgrade in the future, or will this meet most of my needs just fine? What should I have bought instead? Do you think I’ll ever use my e-bike again? Let me know in the comments, or stop by the Butter, What?! Discord server to chat with me about it!

What Should You Bring When You Go Flying FPV Miniquads?

| Comments

We’re not going to talk about any of the obvious stuff: quadcopters, batteries, goggles, or radios. We’re going to talk about all those ancillary things you might want to pack in your backpack when you meet up with your friends to spend an afternoon flying!

Almost nothing in this blog post will talk about anything specific to flying quadcopters.

You should bring a chair

When I go flying with my friends, it isn’t just to go flying. It is to spend time sitting around shooting the breeze. If you’re going to spend a few hours talking, you should have somewhere comfortable to sit. If you prefer to fly while sitting down, that’s another good reason to bring a chair.

Most of my friends keep folding chairs in their cars. I try to pack lighter than that. I have two types of similar-looking chairs that fit well on my backpack, and they don’t weigh a lot.

Moon Lence folding chair

My favorite is the Moon Lence ultralight folding chair. It is light, compact, and extremely comfortable. Make sure you get the newer model with the large feet, because you don’t want to sink into the grass or dirt!

Moon Lence Folding Chair

The Moon Lence chairs are rather inexpensive: $37 for one, or $55 for a pair. So far, I have torn the fabric on three of these chairs. They come with a lifetime warranty, and I haven’t had any trouble getting replacements.

The CLIQ Chair

This one just confused me. Brian ordered a mess of these chairs during their Indiegogo campaign, and I just spent five minutes trying to find them on the Internet. I had to go out to the car to make sure. My folding chair is called a Go Chair, but it has the same logo as the CLIQ chair, so I’m assuming they’ve rebranded!

This chair looks like it should be just as comfortable as the Moon Lence chair, but it isn’t. It has the same basic shape, but it is a little off. Whenever I sit on it, I feel like I’m going to slide out. If you park it on a very slight incline, it feels awful.

NOTE: How do I not have an action shot of this chair in use?! I will correct this soon!

So why would you spend three or four times as much on a chair that is less comfortable? Well, let me tell you why!

The CLIQ Chair packs up tidier and much more quickly than the Moon Lence chair. It looks cleaner in my bag. If I’m riding my electric bike, I usually stop to fly at three or four different places. It is nice to be able to unpack and repack the chair in about 10 seconds. It is OK if it is less comfortable. I’m only sitting in it for 15 minutes or so at a time.

Upon reading this section, I realized that I’m being a bit disingenuous here. When the Moon Lence chair is properly folded and stuffed into its carrying case, it may look even tidier than the CLIQ Chair. I rarely pack it up this neatly, though. I collapse the Moon Lence chair’s legs, fold over the seat fabric a few times, then wind the whole thing up in its Velcro strap.

You need a big stick!

I carry a Mr. Longarm painters’ pole in the car. It is about 8’ long, and it extends to almost three times that length. We use it to knock quads out of trees, and it works quite well.

There’s a similar pole on Amazon that I wish I had instead. It is a 6’ pole that extends to about four times its length. Having just as much reach while saving 2’ in the car would be awesome.

If I’d prefer the pole from Amazon, then why do I keep a Mr. Longarm in the car? I got stuck in a tree, and we needed a pole as soon as possible. We went to Lowes and picked up a Mr. Longarm, and it has been in the car ever since!

Alternative quad retrieval tools

I also keep a basketball in the trunk. It is easier to carry, and if your quad is only stuck 10’ or so up in a tree, the basketball is heavy enough to knock it loose.

I also keep a 300-yard spool of 50-pound test fishing line in my backpack. It is light enough that you can fly the strand up over the tallest tree using another quad. If you do it right, you can attempt to floss the stuck quad down.

This is a bit riskier, because you might get a second quad stuck in the tree.

Get yourself a nice Thermos!

I have two. A 24-oz and a 68-oz Thermos Stainless King. They keep my water quite cold, or my coffee quite hot, and they do it for a long, long time.

My 24-oz Thermos is quite beat up. I’ve used it as a quad retrieval tool! It still works well enough, but the dented spots must be close to the inner wall, because they usually feel pretty chilly when the Thermos is filled with ice water!

It doesn’t matter how you bring your drink. I prefer to load up a Thermos with ice and water, especially on our 106-degree summer days here in Texas. Just remember to stay hydrated!

Sunscreen and bug spray

I don’t know where you fly, but I’m in north Texas. There’s lots of sun here, and we have more than our fair share of humidity. If I spend much time outside, I turn a bright red color. I’ll also be eaten alive by mosquitoes.

I used to keep a bottle of sunscreen and bug spray in the car. I still do, but I also recently learned that single-use sunblock and insect repellent is available. This is genius!

Bug Wipes and Sunscreen

I keep two or three of each in my backpack. I use travel packets of Banana Boat sunscreen. These would almost remind you of fast food ketchup packets. I also use Bug X Insect Repellent towelettes. They work exactly as you would expect.

Be careful if you’re going the single-use route. I had to shop carefully for individually wrapped insect repellent. Most products were a resealable pouch that contained 10 or 20 wipes. That wasn’t at all what I was looking for!

I prefer insect repellent with DEET. It is probably nasty stuff, but it is actually quite effective.

USB cables, power banks, and hand warmers!

Cables are handy. My ancient phone still uses micro USB. My GoPro HERO5 Session and HERO6 Black both use USB C. My flight controllers all have micro USB ports. I do my best to make sure I have cables to charge or interface with all these devices. It is a bummer when your last GoPro runs out of juice, but you still want to fly!

My Hand Warmer Charging Some Lipo Batteries

On a whim, I bought a little USB hand warmer contraption last month. The pink model was on sale, so I figured it was worth a try. I figured I could power it up and stuff it in the compartment where I store my flight packs to keep them warm. On the coldest days, I’ve been transferring it from one hand to the other while I keep my hands in my pockets between flights.

It is actually pretty handy. I haven’t used it to keep my batteries warm yet, but it does double duty as a USB power bank, so I have used it to charge TinyHawk batteries and my phone!

You need a good way to carry all your stuff

The best bag to carry your drone gear is the one you already have. Just because I think my $200 backpack is one of the best things I ever bought to help with my hobby doesn’t mean you should run out and upgrade!

That said, I use two different backpacks depending on the situation. Nine times out of ten, I carry my giant ThinkTank FPV Airport Helipak. That name is a mouthful, and so is the bag. It is ginourmous.

An Old Photo of My Backpack

When fully loaded, my backpack weighs about 25 pounds. That is with two or three 5” freestyle quads, a pair of 3” Kestrels, eight 6S batteries, a dozen small 4S batteries, my goggles, Taranis X9D+, my giant field-charging battery, and all sorts of tools and spare parts inside. That also includes the CLIQ Chair and my 24-oz Thermos in the side pockets.

Everything I need to fly for several hours is in that backpack, and I have enough spares to survive a few heinous crashes. I don’t always need to bring that much gear along with me, though.

When I take my electric bike for a ride to the local park, I usually bring my AmazonBasics DSLR backpack. I have to pare down a lot when I take this bag, because it is so much smaller, but that’s the entire point.

With the smaller backpack, I am able to my Taranis, Fat Shark goggles, and one of my chairs. Then I either bring a 5” freestyle quad, one or two of my Kestrels, or my Emax TinyHawk Freestyle and a bunch of batteries appropriate for the quad I’m carrying.

With the TinyHawk, the backpack weighs about 8 pounds. With the 5” quad and six batteries, it weighs about 12 pounds.

Conclusion

When I’m out flying, folks often ask me about the stuff I’ve brought with me. I figured it would be a good idea to do a write-up about it. That way I can point people to this blog post if they need to find any of the gear I pack with me!

The next post in this series will be about the gear I pack in my bag that is very specific to the hobby: tools, chargers, and things.

As for this list of gear, do you think I missed anything? Am I carrying something I forgot to list? Am I not carrying something important, because I don’t even know it exists? Or am I just forgetting to pack something important in my own backpack?

Let me know in the comments, or stop by the Butter, What?! Discord server to chat with me about it!

What I Learned From Just Two Attempts at Cinewhooping

| Comments

I am stretching the truth just a bit when I say I’m recording footage with a cinewhoop. I’ve been messing around with the idea of mounting my GoPro HERO5 Session on my 3” and 4” Kestrel freestyle quads, flying them slow and smooth, and running the footage through ReelSteady Go.

The biggest problem with this setup is that I don’t have prop guards. I’m thinking about designing some prop guards to fit the Kestrel, but for now, I’m happy enough to maintain a safe distance from the soft targets!

I’ve only set out to record proper cinewhoop footage on two occasions. The first attempt was following Brian Moses around a lake while he rode his Exway Riot Pro electric skateboard. A few weeks later, I attempted to follow my friend Alex while he rode his Onewheel around a parking lot.

I did some testing and tuning in my front yard before attempting to follow Brian, and I did more testing and tuning before I followed Alex. This means I’ve put more than two batteries through my cinestyle setup, so I do have a bit of practice!

My 4” Kestrel is working well, my 3” is problematic

I’ve tried a few different configurations with my 4” Kestrel and its Emax 1606 motors. I’ve tried Emax Avan 3.5x2.8x3 and 4x2.5x3 props. I’m pretty sure I get smoother footage on the 3.5” props, but I haven’t used them since my earliest tests.

I’ve tried my 4S 650 mAh freestyle batteries, an old 4S 1,300 mAh battery, and an old 3S 1,300 mAh battery. My little freestyle packs are pretty beat up, but I can manage about four minutes of skateboard follow footage with those batteries.

The two bigger batteries both work great, and they both provide similar flight times. Seven to eight minutes chasing skateboards is no problem with these packs. I think the 4” Kestrel feels better for cinewhooping on the 3S. It is easier to maintain a stable altitude, but it isn’t tremendously easier.

My 3” Kestrel with its 1306 motors and HQ 3x2.5x3 props isn’t doing well with the GoPro. It feels fine in the air, but it is transferring too much vibration to the GoPro. I haven’t gotten clean output from ReelSteady Go with the 3” build yet.

Is the gyro in my 3” Kestrel going out? My 3” Kestrel is mostly made from the original prototype parts. Those arms are weak compared to the 4” Kestrel. Maybe they’re getting a little soft with all the crashes they’ve survived. Maybe the 3” props just transfer a different frequency that resonates with something. I just don’t have the answer yet.

I’m supposed to use an extremely soft mount for the GoPro HERO5 Session

I might have lucked out with my Session 5. It is pretty beat up now, so maybe its gyro is loose enough inside the case that it is soft mounted, because I’m having very little trouble getting clean video out of ReelSteady Go.

Even in the rigid TPU mount on my 5” freestyle build, ReelSteady Go has no trouble smoothing out my cinematic footage. It only has trouble there when I fly backwards or run into propwash.

I’m excited that the built-in soft mounts on my 4” Kestrel seem to be enough to keep ReelSteady Go happy with the footage from the GoPro HERO5 Session. I just have it strapped to the top plate with a battery strap!

I’m hoping this is the fault of my Kestrel frame and not some luck I’m having with my particular GoPro!

Plan your route before shooting

When I filmed Brian on his skateboard, I told him to make laps around the pond, and I would follow him. Then I immediately proceeded to do a bad job.

I took off to late, and I didn’t really understand how fast he was moving. I flew about ¼ of the way around the pond before realizing that I would never catch up, so I turned around and landed near myself. That ate up nearly half my battery!

As you can see in the video, I did a reasonable job picking him up as he started his second lap, but I had to abort after about 90 seconds. If I kept going, I wasn’t going to make it back. In hindsight, I realized that I should have just kept going. Brian is a smart guy. If I flew ahead of him and landed in the grass next to the path, he would have recovered the drone for me!

What could we have done better at the lake?

There are so many things we could have done better! Nurk has a lot of good cinewhooping tips. Maintain a stable altitude. If your flight could be done by a guy carrying a gimbal, why are you flying? Go through obstacles that a guy on a gimbal wouldn’t be able to.

I’m better at maintaining altitude today. It took me a few batteries to get the feel for the throttle response on the 4” while carrying a GoPro!

I realized half-way through my chase that I could just as easily have been riding a skateboard and carrying a gimbal. I needed to do something a skateboard couldn’t do, so I gained a bit of altitude to get a higher shot.

With planning, we could have done so much better. I should have flown over the water. I should have flown through the covered seating next to the dock. I should have gotten a strafing shot with water between Brian and myself.

It wouldn’t have taken much to elevate my first cinewhoop chase video to the next level.

Always shoot in 4K!

I haven’t remembered to take this particular piece of advice, but I’m pretty sure it will be extremely valuable!

My old GoPro Session isn’t in the best of shape. The screen doesn’t work. The back cover is falling off. The button on the back is gone. Not only that, but it is paired to my old phone, so it is very difficult for me to change settings!

I usually leave it set to 1080p SuperView with the flat color profile. This is just fine for my freestyle footage, and it wasn’t a problem when following Brian on his skateboard.

That wide field of view and low resolution was terrible when I chased Alex’s Onewheel. Alex was quick and nimble. I had absolutely no idea which path he was going to take around the parking lot. Trying to make smooth course corrections meant I was separated from him by quite a distance most of the time.

When I was editing the video, I wound up cropping in quite a bit. I didn’t have the extra resolution available to make that look good, though. Do I want blocky, grainy video, or do I want a good view of the action? I did my best to compromise somewhere in between.

If I recorded at 4K with a tighter field of view, I wouldn’t have had to crop as much, and even if I still had to crop, I wouldn’t have given up so much quality.

I think I did a better job following Alex

I didn’t manage to stay in tight most of the time, but I think I managed to take some more interesting lines. At the start of the video, I flew over that pile of landscaping stuff. When Alex rode under the covered valet area, I took an exit over the wall where someone on a skateboard wouldn’t be able to follow.

We didn’t choreograph anything. Alex rode around, and I followed him with my cinewhoop.

Just like the flight with Brian a few weeks earlier, a little planning would have gone a long way!

I might have to pick up a GoPro HERO6 Black

There’s something different about the HERO6. I don’t know if it uses a different gyro chip, the gyro is mounted differently, or the filtering is just better, but the HERO6 Black is supposed to work just fine when strapped to a vibrating quadcopter. No need for any of this soft-mount nonsense!

I’m about to go off on a bit of a detour here. Before the GoPro HERO8 Black was released, my plan was to switch all my quads over to TPU mounts that fit the HERO7 Black. That mount will work for the 5, 6, and 7.

That would give me a lot of options. I could fly the GoPro 7 when I need hypersmooth, or when I just need to want to capture better footage. Then I could fly the GoPro 5 when I’m just knocking around the golf course for fun. Why risk smashing a $400 GoPro when you’re flying the same lines that you fly every week?

The GoPro HERO8 goofed up my plans. They changed the form factor. That means when I upgrade from my HERO5 Session, it will be time to go straight to the newest camera and just hope I don’t smash one every month!

My recent if limited cinewhoop adventures have me rethinking things. I am going to ignore the HERO8 Black for the time being. I just ordered a refurbished GoPro HERO6 Black with a two-year Asurion accidental damage protection plan. My plan is to get cinewhooping with this over the next couple of days, then figure out how I’m going to be mounting and swapping between a Session 5 and HERO6 Black on my 5” over the weekend!

I look forward to more cinewhoop shenanigans!

Cinewhooping is more fun that I expected, and I didn’t think it would be so easy to capture such amazing cinematic footage. I guess I shouldn’t be surprised. I’ve been putting in 10 or 20 packs per week for most of the past three years. I should be pretty good at this by now!

As I said, I ordered a HERO6 Black, and I’m excited about trying it out. I won’t be terribly surprised if that simple change smooths out the footage on my 3” Kestrel, and it will be a general upgrade for all my cinewhooping, so I’m super excited about it!

Brian wants to take another stab at recording some cool footage of his new skateboard. If the weather cooperates, we might work on that over the weekend.

I think I’m doing a pretty good job on my first few attempts at cinewhooping. What do you think? Do I need more practice? Do you agree that my footage will reach the next level by just applying what I’ve learned from these first attempts? Are you cinewhooping? Do you think I’m crazy for not using prop guards?

Let me know in the comments, or stop by the Butter, What?! Discord server to chat with me about it!

ReelSteady Go Works on Linux with Wine

| Comments

Google didn’t turn up any results, so I had to test this out for myself. ReelSteady Go works just fine on Linux with Wine. It didn’t work with the ancient version of Wine that ships with Ubuntu 18.04, but it does work with the wine-platform-4-devel snap package. The only caveat is that ReelSteady Go doesn’t work correctly in its own window. You have to run it in a virtual desktop.

What is ReelSteady Go?

ReelSteady Go takes your shaky, jarring GoPro footage and turns it into smooth, buttery footage. The full version of ReelSteady is an Adobe After Effects plugin. That version works with any camera, but it is much slower and much more persnickety than ReelSteady Go.

ReelSteady Go uses the accelerometer data that your GoPro encodes in each video to render a smoother version of your clip. I’m using ReelSteady Go to create buttery-smooth Cinewhoop-style videos using my 4” Kestrel micro drone and my GoPro HERO 5 Session. I’ve had success with footage from my 5” freestyle quad, too, but the solid mount I use on the 5” transfers too much vibration into the GoPro, and this goofs up ReelSteady Go’s algorithm a bit.

How to use ReelSteady Go on Ubuntu

This is Linux, so there’s definitely more than one way to do it. For simplicity’s sake, I’m just going to tell you what I did.

I used snap to install the latest development version of Wine:

snap install wine-platform-4-devel

Then I installed ReelSteady Go using this command:

unzip ReelSteadyGoSetup.zip
/snap/wine-platform-4-devel/10/opt/wine-devel/bin/wine explorer.exe /desktop=name,1920x1080 ReelSteadyGoSetup.exe

Then I created a ReelSteadyGo.desktop file in ~/.local/share/applications:

1
2
3
4
5
6
7
8
[Desktop Entry]
Name=ReelSteady Go
Comment=ReelSteady Go
Exec=sh -c "/snap/wine-platform-4-devel/10/opt/wine-devel/bin/wine explorer.exe /desktop=name,1920x1080 ReelSteadyGo.exe"
Path=/home/wonko/.wine/drive_c/Program Files/ReelSteadyGo
Terminal=false
Type=Application
Categories=Multimedia;

You’ll have to replace my username with your own. It didn’t let me use a tilde or $HOME in a desktop file.

Why are you telling us about this? There’s a demo, so anyone can test it!

This is true. This is what I did. I just figured it would be worth documenting so you can just ask Google about ReelSteady Go and Linux and quickly find an answer!

What’s Pat doing with ReelSteady Go?

I’ve mostly just been goofing around in my front yard pretending my 4” Kestrel is a Cinewhoop even though it doesn’t have prop guards. I figure that practicing at home can’t hurt, because I need to do a better job at maintaining altitude with the 4” build. ReelSteady Go does a fantastic job at making my movements seem smooth and at leveling the horizon, but it can’t do anything about me bobbing up and down like an idiot!

I’m reasonably happy with the job I did following Brian and his Exway skateboard. On our first and only take, we managed to record nearly 90 seconds of chase footage. For long stretches, I think I maintained altitude quite well. I was also keeping an eye out for pedestrians and branches, while trying to find interesting lines.

I’d like to practice more before we revisit that flight!

Do you really need to soft mount your GoPro HERO5 Session?

The Kestrel’s built-in vibration damping seems to work well. I’ve tried running footage from my 5” freestyle quad through ReelSteady Go, and the results have been mixed.

Most footage on the 5” comes out just fine. ReelSteady Go tends to do odd things when I do a 180-degree yaw and start drifting backwards. It also does weird things during propwash sometimes. The original footage looks clean through the propwash, but when you can hear the motors fighting to keep the craft smooth in the wash, you will almost certainly see ReelSteady Go add oscillations to your footage.

I imagine I could have chased Brian with the hard-mounted GoPro HERO5 Session on my 5”, and the video would have been smooth. I didn’t do any maneuvers that seem to mess things up in that clip.

I’d say you’re better safe than sorry. If you soft mount your GoPro, you’re less likely to be disappointed when you get home!

Conclusion

ReelSteady Go works on Linux. It does a fantastic job, and it is well worth the $99 price tag.

I’ve been more than a little jealous of other pilots’ footage when they use HyperSmooth on their GoPro HERO7 Blacks, but it seemed disappointing that you can’t use an ND filter with HyperSmooth.

With ReelSteady Go, it seems like I can have my cake and eat it too. I can fly with an ND filter, and I can still smooth out my footage. Even better, I don’t have to make that choice before I fly. If I decide that something needs smoothing while I’m editing, I can run the clip through ReelSteady to see how it looks!

What do you think? Are you using ReelSteady Go? Are you using it to smooth your flight videos? Are you using it on Linux? Let me know in the comments, or stop by the Butter, What?! Discord server and chat with me about it!

Prepping My 3-Inch Freestyle Kestrel for Long-Range Flights

| Comments

Let’s start this blog post out with a summary of what I’m excited about. My 3” Kestrel with its little 1306 motors has just barely enough room to squeeze on a set of 4” biblade props, and using the Outcast Droneworks 3250 mAh 2S Lithium-Ion pack, it is getting some amazing flight times. So far, I’ve had a 19-minute flight while cruising at a pretty good pace, and a 12-minute flight that covered just over 6 miles on a day with 21-MPH winds!

In its current long-range configuration, my 3” Kestrel weighs in at 248.5 grams with a Caddx Turtle, TBS Crossfire, GPS, and Zoe FPV’s 3250 mAh battery.

This is all exciting, but at this point I have more questions than answers. I can’t give you a definitive guide to building a sub-250 gram long-range quad. I can tell you what I’ve learned so far. I can tell you about what I’m hoping to learn over my next three or four flights. I can also tell you about how I got to this point.

I’m going to be repeating a lot of information from [my previous post on this topic][e4o]. With any luck, I’ll only repeat the bits that are directly relevant to my new findings!

My Kestrel is not designed to be a long-range quad!

I did not set out to build a long-range micro quad. From the moment I began designing the Kestrel frame, I knew that I wanted an amazing HD freestyle quad. The goal was to keep the build under 250 grams, but if I went a little over, that wasn’t a big deal.

Just because a quad is good at one task doesn’t mean that it can’t pull double or triple duty. The front end of the Kestrel is set up in such a way that it is easy to use a battery strap to mount a GoPro on top. I’ve done short flights on both my 3” and 4” Kestrel builds with a GoPro Session.

You aren’t going to fly like Mr. Steele with all that extra weight, but either of my builds could do the job of a Cinewhoop. In fact, I think my 4” Kestrel with 1606 motors would do an amazing job at getting that buttery Cinestyle footage. Maybe I should design some prop guards?

I was hoping my 4” Kestrel build would be a good long-range quad

I hoped that 4” props would add enough efficiency that it would be easy to get a 10-minute cruising flight out of my 4” Kestrel, but it didn’t work out that way. The bottom-end power and the general feel of my 4” build is better for the type of freestyle I fly, but if anything, it wound up being less efficient than my 3” Kestrel.

I put heavy, overpowered VTX modules on both my Kestrel builds in the hope that they would one day make a long-range flight.

If the 4” was going to cruise for 10 minutes, it was going to need a bigger battery. A bigger battery would push it way over 250 grams, though, and that was going to be a bummer. This encouraged me to shelve the idea of going long range.

The Outcast Droneworks 3250 mAh High-Discharge Lithium-Ion battery pack

Zoe FPV’s amazing 2-cell battery changed everything. I quickly learned that my quads will fly on 2S. They didn’t fly smooth at first, but it didn’t take much to tune out most of the wobbles. My tuning isn’t quite done. I noticed that as the battery drains enough, when it gets close to 6 volts, the Kestrel doesn’t fly as smoothly. I’m sure I can compensate for that.

WARNING: The video above is the entire 19-minute flight.

Zoe’s battery weighs in at almost exactly 100 grams. My 650 mAh 4S packs are 85 grams, and the extra weight very nearly pushed my 3” Kestrel over the 250-gram limit. For testing purposes, I wasn’t too worried about the weight. I was just glad it was in the right ballpark.

My 3” Kestrel is forced to land when the Outcast Droneworks battery starts showing about 2.8 volts per cell in my OSD. When the load is removed, it bounces back to 3.2 volts per cell. This is nice, because it means I’m not ruining the battery when I take these long flight.

The new HQ 4x2.5 biblade T-mount props are awesome

These props are amazing. They’re quite gentle. They weigh less than the HQ 3x2.5x3 props. On my 3” Kestrel, the 4” props managed to fly almost 20% longer than the 3”. I think that’s impressive.

They actually feel great for freestyle on 4S, but my little 1306 motors just don’t have enough torque to manage propwash with such a long propeller.

The combination of Zoe’s battery and the new HQ props is a game changer for me.

I lucked out. I’ve designed three different arms for the Kestrel. There are 4” arms with a ton of clearance. There are compact 3” arms, which have just barely enough room to keep 3” props from rubbing on the fuselage. The arms I fly on my 3” build are the long 3” arms.

Kestrel with HQ 4x2.5x2 biblade props

I wanted the Kestrel to be light, but it doesn’t need to be tiny. The farther apart you can get the props, the better a quad flies. The extra distance helps with leverage, and getting the rear props farther away means they have less turbulent air to work with.

I lucked out. My long 3” arms are just barely long enough to fit a 4” prop. The arms on the Kestrel have a tiny bit of play because each arm is only held on by a single screw. I had to pivot each arm to keep the 4” props from rubbing on the frame. If I crash, they may pivot the other way and get stuck!

If all this experimenting works out, I will need to adjust the design of the arms to eliminate this problem!

Let’s talk about the 19-minute flight

I don’t have a lot of data on the 19-minute flight. At the time, I didn’t have a GPS module on my 3” Kestrel. I do have one on the 4” Kestrel, so I used the 4” to calibrate my brain. I flew for five minutes to get a feel for how fast 15 MPH is.

My plan was to fly the 3” Kestrel with the 4” props in roughly the same manner. Was I really flying at 15 MPH the entire time? Probably not. In fact, I’m starting to think I was at 20 MPH or more a lot of the time. For now, I’m going to assume that my average speed was indeed 15 MPH.

If that’s true, that first 19-minute flight should have covered about 5.75 miles.

I had a 16-minute flight on HQ 3x2.5x3 props

There isn’t a lot to say here. I flew at the same pace on the 3” props as I did on the 4” props. I didn’t have GPS to verify, though.

This flight was 3 minutes short of the previous flight. That means the 19-minute flight covered nearly an extra mile of distance.

I’ll be repeating both these flights with GPS.

Adding GPS and getting back under 250 grams was hard work!

I’m using a 5-gram GPS module from Banggood. It is a fantastic little piece of hardware, but I was right at the 250-gram limit. This pushed my to 253 grams, and shaving 3 grams was really difficult!

I wanted to save a bit more than 3 grams, though. I wanted to be far enough under that an error on my scale wouldn’t be making a liar out of me!

I removed extra zip ties. I removed two screws from each motor. I took off my gummy battery pad. I even used a pair of scissors to make my battery strap more narrow. The last bit got me under 250 grams, but only by 0.04 grams. That didn’t feel right, and I had another problem. The ND filter doesn’t weigh much, but it definitely pushed me over 250!

I got my old PH145 out of the closet, and I borrowed four aluminum M3 screws. Swapping out my steel screws for aluminum brought me down to 248.5 grams.

That’ll do it, right?!

Flying slow might be the wrong idea

To have this discussion correctly, I need to watch the amp-draw readout in the OSD. I haven’t done that. I only have estimates for throttle position. Throttle position doesn’t scale directly with power consumption, but I’m going to pretend that it does. It is close enough to help illustrate my point.

When I think about efficiency, I assume slower is better. That’s why I decided that 15 MPH would be a good cruising speed. While it is true that you’ll get a longer flight at a slower speed, I’m not so sure that’s the point of this exercise.

If my goal is to fly up the side of a mountain, I don’t want my flight to last as long as possible. I want to cover as much distance as possible!

Here’s what I’m thinking. With my long-range setup, it takes about 30% throttle to hover in place. Then it takes a total of about 45% throttle to cruise at 15 MPH.

That means about 2/3 of my energy is being used just to keep the Kestrel in the air, and only 1/3 of the energy is being used to propel the craft forward. If the goal is to cover as much distance as possible, this doesn’t seem like a good plan!

What if I cruise at 60% throttle? That would mean half my energy would be propelling the craft forward.

Comparing throttle position isn’t accurate here. I need to compare amps at different speeds. In any case, I think the concept is sound.

My first GPS flight with the big battery

I was hoping to make several test flights over the weekend. It was way too windy to get good data, so I only took one flight.

I was cruising at about 62% throttle for most of the flight. When I flew south, I was going at 15 to 20 MPH. When I turned around to fly north, I was flying at 50 to 60 MPH! The wind was pretty constant, but there were some gusts. I’m hopeful that the directions of my flight canceled out the wind assists, but I’m not all that confident.

This needs to be repeated on a calm day, but I’m going to tell you how things went anyway.

The flight lasted 12:41, and I covered 6.01 miles according to the GPS. If I had known that this was 9.67 kilometers, I might have tried to push it past 10 kilometers!

Should you build a long-range micro quad?

I’m not sure. Even with the Kestrel’s extremely long fuselage, it has been difficult to get enough separation between all the various radio components.

When I put my first Kestrel together, I mounted the Crossfire Nano module under the VTX board. Even though the antennas weren’t close to each other, this was still horrible for my video signal. I’ve since moved the Crossfire Nano to the opposite end of the quad, and that helped tremendously, but I’m running into new problems.

My GPS wouldn’t even pick up a single satellite when it was mounted near my Crossfire antenna, so I moved it to the front of the quad. Now it is directly above my Caddx Turtle board, and I have to be careful to mount my battery farther back to keep it from blocking the GPS module.

A friend of mine told me that he can’t mount a GPS module too close to his Caddx Tarsier, because the Tarsier is noisy, and prevents the GPS from locking on. I might be in trouble if I upgrade!

Getting enough separation between these three radio modules and antennas is difficult enough on my rather large micro quad frame. Things will be even harder on a smaller, lighter build, and I’m not even sure how well this will all work if I actually managed to fly two or three miles away!

Why use a micro quad for long range?

I always tell people that my Kestrels are my hold-my-beer quads. The last time I priced one out, either of my Kestrel build comes in at around $250 including props and the battery. The addition of the GPS module and the more expensive 3250 mAh battery probably pushes that number up to $280 or $290.

My pricing spreadsheet includes a whopping $45 for the cost of the Kestrel frame. If I ever manage to put them up for sale, I sure hope I don’t have to charge that much!

This is where I usually say that the entire Kestrel costs less than a GoPro. While this is true, I’m still flying with a Session 5, so it isn’t quite true for me.

Why send my $500 5” miniquad that carries a $150 to $400 camera on a risky mission when my $250 Kestrel could get the job done just fine? That risky mission could be crossing a stretch of ocean to reach an island, flying freestyle in a sketchy part of a bando that you could never climb up to yourself, or maybe even just scoping out a new spot when you’re uncomfortable.

I’ve been examining all sorts of compromises

I’ve been ignoring the Runcam Hybrid. I don’t want to spend $90, take a Kestrel apart, solder in the new camera, then realize that I’m almost as disappointed in the HD footage from the new camera as I was in the old camera!

My newfound long-range excitement has me rethinking this. The limited field of view of the Turtle looks awful when flying freestyle. When going on a slow, steady, long-range cruise, it doesn’t look bad at all! The new problem is that the Runcam Hybrid is 5 to 10 grams heavier than the Caddx Turtle.

Where do I save another 10 grams? My heaviest component is the massive RaceDayQuads 1,000 mW VTX and the MMCX antenna. The lightest replacements wouldn’t be suitable for long range. A light VTX with reasonable output power for long-range flights will be something pricier like a TBS Unify of some sort, and that bumps up the cost of my hold-my-beer quad!

I’m sure I can cut a frame that is a few grams lighter. There are four M3 screws left that can be swapped out for aluminum. I’m sure I can puzzle out a way to get a Runcam Hybrid on here and still manage to get under 250 grams.

I don’t really have to stay under 250 grams, but I think the build is more interesting if I do. I’d like to have a good, reasonably priced parts list. If you live in a country with a 250-gram weight limit, and you want to replicate my success, I would like to make that easy for you to do. That is assuming that this long-range Kestrel stuff is truly successful!

What’s next for the long-range Kestrel testing?

I need to take more flights! We have some nice-looking days coming up, and they should be free of wind.

I need to replicate that 19-minute flight, but this time I need to do it with GPS. Most of that flight happened at around 45% throttle.

I’ve done a flight at around 62% throttle. I’d like to do another at around 75% throttle.

I need to do more tuning. The Kestrel is pretty solid now when the 2S battery is full, but it has a big case of the wobbles towards the end of the battery. For most of the flight, the voltage stays above 7 volts. The last mile or so is at 6 volts or less, and that’s where it gets problematic.

These test flights are long and boring, and I have to wait for a battery to charge between flights. With any luck, I can get the 45%– and 75%-throttle flights in during a single session.

I also need to burn through an entire Outcast Droneworks pack on my real 4” 1606 Kestrel. She comes in at about 275 grams with the 2S pack. She flies fine on 2S, but the voltage dropped quickly enough on my 5-minute test flight that I can see that it won’t compete with the 248-gram 1306 Kestrel.

Update: List of flights, times, and distances

I’m not sure this is the best place to keep track of this data, but it is definitely the best place for now!

Flights using Outcast Droneworks 3250 mAh 2S Lithium-Ion battery:

  • 11/23: 19:01, unknown distance, 45% throttle
  • 12/09: 12:41, 6.01 miles, 60% throttle
  • 12/14: 10:06, 6.05 miles, 75% throttle
  • 12/15: 16:00, 5.5 to 5.75 miles, 45% throttle (forgot to DVR!)

Flights on 650 mAh 4S:

  • 12/15: 4:29, 2.58 miles, 25% throttle

My 4S 650 mAh packs are old and tired, but they save me about 25 grams of weight. These are very different batteries, but I figured I should include the data.

Conclusion

I have absolutely no idea where I’d fly some sort of long-range mission. Maybe flying from one end of our abandoned golf course to the other and back would qualify. Google Maps says it is about 4,800 feet, but I’d have to cross a street at about 3,000 feet.

It is possible to fly under the bridge, but that’s a long way to fly so close to the ground, and there’s no way for me to get a height advantage on my end. I’m a bit bummed out that this is the most exciting and interesting long-range flight I can imagine taking.

If that works out, maybe I’ll drive out to a nearby lake and attempt to fly across!

What do you think? Am I on the right track? Is sub-250 gram long range interesting? Do you think the Outcast Droneworks battery is as awesome as I think it is? Do you think I’m going to have any use for a long-range micro quad, or should I just stick to freestyle? Let me know in the comments, or stop by the Butter, What?! Discord server to chat with me about it!

We Are About to Order OoberLights Prototypes!

| Comments

I first posted about this in May. We’ve been working on this for nearly six months. How can that be possible? To me, it feels like we just started talking about the idea a few weeks ago!

Life has been getting in the way. We’ve gone through some redesigns, but things are looking good now. I was handed a copy of all the work today. In theory, I could send this off to have a handful of OoberLights boards manufactured right now. In practice, I’m going to stick these in front of a few eyeballs to make sure everything is really ready to go.

What are OoberLights?

Is one board an OoberLight? Is one board an OoberLight board? Or should it always be plural, because there are lots of lights on the board? Maybe each ring is an OoberLight, and the board with two rings should be referred to as OoberLights? This is something we’ll have to figure out.

I’ve already written about where the idea came from, but I figure I may as well talk about it again. A long time ago, I learned of the existence of dekatrons. I’m pretty sure I saw one or two LED dekatron imitations on hacakday.com. At around the same time, I had also learned of something called charlieplexing.

With this newfound knowledge, I thought it might be fun to wire up a ring of red LEDs to replace the indicator LEDs on my IBM Model M keyboard. At the time, I didn’t even own a 3D printer. I had no idea how I could ever make something like that look nice, so it never came to fruition.

I chatted with a friend about doing a PCB. I was thinking we’d do one ring of WS2812 RGB LEDs with the intention of putting one or two of these rings into a 5.25” drive bay on my virtual machine server. In that form factor, I believe we would have been able to make a circle of about a dozen LEDs.

Then we thought about doing concentric rings. The 5mm LEDs are pretty big, so the smaller ring isn’t all that circular looking. Then something awesome happened. 2mm WS2812 LEDs started shipping!

If you count the single LED in the center as a ring, we are now able to fit four concentric rings within the height of a 5.25” optical drive bay. There are now 24 LEDs in the outer ring, and a total of 90 LEDs in the pair of rings on the board!

What do you do with something like this?

When the OoberLights were less uber, my ideas were pretty simple. You could send a pixel spinning around the ring at varying speeds to indicate network throughput. You could have pixels spinning in opposing directions to indicate the direction of network traffic. You could light up LEDs like a progress bar to indicate disk usage or CPU load.

Then the OoberLights got a whole lot more uber! We should be able to draw hands like a clock. We will be able to pulse the concentric rings like a raindrop on water. We can have each concentric ring displaying different information. I’d like to be able to have several of these animations running at the same time. The possibilities have gotten quite large!

What if I don’t have 5.25” drive bays? Can I put this on my desk?

The OoberLights board receives 5-volt power via a micro=USB port. We are using an ESP8266 microcontroller to control the LEDs. You will be able to communicate with the Ooberlights using either the USB cable or WiFi.

Ooberlights Front

If you want to use your OoberLights as a status display on your NAS server, you will probably communicate with it via USB. If you don’t want to put your OoberLights display near a computer, that will be fine. We want to make sure you can still access all the functionality via WiFi as well.

I want OoberLights on my desk!

We have some concerns

I have been using the word “we” a lot. Sometimes I have concerns. Sometimes our hardware designer has concerns. Sometimes we share those concerns to varying degrees. Let’s focus a bit on the concerns our designer has had over the course of the Ooberlights project so far.

He isn’t a professional electronics guy. He’s a software guy. This is an interesting learning experience for him, but he will tell you he’s not an expert. As far as I’m concerned, he’s doing a fantastic job, but that doesn’t mean I know that he knows what he’s doing!

Ooberlights Jumpers

When the initial layout was done, he had a pretty serious concern. What if he goofed, and one of the power supply components was set up incorrectly? What if we’re accidentally sending 5 volts to the LEDs that require 3 volts? We might plug the first board in, and immediately burn out every WS2812 LED. There were a few similar concerns.

How we thought we might address those concerns

Our designer wanted to break each piece of the project down into its own prototype board. A few power supply boards, and ESP8266 board, and a handful of LED ring boards.

Smaller boards cost less to manufacture. This way, we could connect things up one at a time while keeping an eye on things with a multimeter.

How we’re really going to address those concerns

We are back to a single board, and it is almost identical to what should be the final production PCB. Instead of breaking the Ooberlights PCB into physically separate pieces, our designer is cutting around a dozen traces on the board.

At the cut points, he’s leaving solder pads. I will be able to bridge those gaps with solder to test more and more of the board. I can plug the USB cable in and verify that the voltage regulator is regulating correctly. If it is, I can connect that up to the ESP8266 and verify that it powers up correctly.

One step at a time.

Assuming everything checks out, this means that our prototype boards will be completely compatible with the production run. That’s exciting!

The Ooberlights hardware specifications

Here’s what I can tell you about the Ooberlights so far:

  • The hardware and software will be open-source
  • 2-layer PCB
  • 229 surface mount components
  • 90 WS2812 LEDs
  • ESP8266 micro controller with 4MB flash and WiFi
  • USB-to-serial interface
  • 5 volt power input

I don’t know how he managed to get us down to a 2-layer PCB, but he did it. This may not be impressive to you, but it is impressive to me. I think it is neat, because this is potentially something I could mill on my CNC. I could never place 229 tiny surface-mount components, but I could mill the PCB!

We haven’t released any source code

We’re not trying to be secretive. In fact, I believe that being more open is better. No one has asked to see the source code, and we haven’t had a lot of discussion about exactly which license to use.

If someone else wanted to get involved, I’m sure we could settle on a license pretty quickly. I figure there’s no reason to work on something that we don’t desperately need at this point. We’ll have a license in place before we start sending prototypes out for testing and review.

I’ve been open-sourcing my quadcopter frame designs. I don’t like to push changes to the public repo on Gitlab.com until I have a chance to test the physical parts. Sometimes changes sit in my private repository for a month or two. Compiling code is fast. [Cutting carbon fiber on the CNC][cf] can be slow!

I’m taking a similar attitude here. I don’t want anyone paying to have a completely untested PCB made. I would feel terrible if it didn’t work!

We haven’t written any software

The hardware is nice. The hardware is fun. The hardware is completely useless without software, and we don’t have any software written.

If there’s zero software, the audience for our hardware is tiny. It will only be the people that want to write their own animations using the ESP8266 SDK or the Arduino IDE.

If the Ooberlights hardware is running just enough software that it can accept some simple commands, then our audience expands quite a bit. Any system admin can figure out how to send commands over a serial port to make the Ooberlights blink or spin when needed.

If we can integrate the Ooberlights with iftt.com, then our audience becomes huge. Anyone can start counting likes on Facebook or Instagram, flashing the lights when there’s a retweet on Twitter, or use their Ooberlights to keep track of subscribers on YouTube.

What’s next?

I have to sit down with a friend of mine that is an actual professional electronics guy. He’s offered to take a look at our design to make sure there aren’t any glaringly obvious mistakes.

Once that works, it is my job to order some prototypes. For me, ordering prototypes is the scariest part!

How much will Ooberlights cost?

I have a pretty good idea, but I’m afraid to tell you! I’ve never had a PCB manufactured before. We’re going to need to have drive bay enclosures made, and I’ve really only considered how much they’ll cost me to manufacture myself in the garage.

The cost of the populated circuit boards go down as the quantities go up. Even at relatively low quantities, the prices are quite reasonable.

What if the enclosures cost more than I think? What if we have to change the design? What if something goes wrong?

Ooberlights Back

If I suggest a price today, and things change, people will point back to this post and yell, “But you said it would cost half as much!” and I don’t want to worry about that. I have enough things to worry about!

At the highest price I can imagine us charging, I’d buy one for my virtual machine server at home. At the price point I’m hoping we can hit, I’d buy one for each of my computers and one for my desk. I’m really hoping we can reach the lower price point. I imagine we’ll land somewhere in between.

Conclusion

The next time I write about the Ooberlights, I expect to have a prototype in my possession. That will be so much more exciting! Showing off screenshots of the rendered PCB is fun, but that doesn’t really go far towards explaining what these Ooberlights are for!

Am I saying Ooberlights enough? Are you excited about Ooberlights? I am aware that there’s only so much excitement I could ever manage to drum up with diagrams and descriptions. Any real excitement won’t get here until there are videos and gifs, right?

If you think we’re on the right track here, leave a comment, or stop by the Butter, What?! Discord server to chat with us about Ooberlights. I said Ooberlights again!

I’m Getting Excited About 4-Inch Quads Again

| Comments

At first, I was excited about trying out 4” props. A few years ago, I experimented with 5.5” and 6” props on my 5” quads. On all but my most underpowered 5” quad, these larger props added several minutes of cruising flight time.

Not only that, but the larger props have a very different feel. You lose a bit of top speed, but you gain a bunch of low-end grunt. If you’re pulling out of a 200’ dive with 6” props, the quad just feels like it stops dead in its tracks when you add some throttle.

Kestrel with 4x2.5x3 HQ props

I was hoping that scaling a 3” freestyle quad up to 4” props would lead to some of the same improvements. Could I build an HD freestyle quad that is capable of long-range flights and still fit everything in under 250 grams?

When I started testing, the most efficient 4” props available were the HQ 4x4.3x3 and HQ 4x3x3. On my 4” Kestrel with 1606 3300 kv motors, neither of these props led to the efficiency gains I was hoping to see. I prefer the flight characteristics of these 4” props for freestyle, but not by a large enough margin that I would encourage anyone else to build a light 4” freestyle quad.

WARNING: I don’t have much data yet!

I have a few problems. I have a dozen 450 mAh and 650 mAh 4S batteries for my Kestrels. They’re all in rough shape. I tend to be mean to micro quad batteries. I accidentally bring them in at 3.3 volts or less more often than I would care to admit. I charge a bunch of them, but don’t get around to flying them, so they’re always dying a slow death, because they’re not at storage voltage.

This means I don’t currently have any batteries that make it easy to compare directly with data in my old blog posts. I have a post that says my 4” can cruise for more than 5 minutes, and the 3” can manage 5 minutes of aggressive freestyle. I rarely get a 4-minute flight out of the 3” these days, because the batteries are old.

3” Kestrel on 4S

One day when I was doing GPS speed runs on the 4” with the new Avan props, I borrowed a fresh 550 mAh RaceDayQuads battery from my friend Tanner. On my 650 mAh pack, my top speed was 76 MPH. With Tanner’s 550 mAh pack, I hit 86 MPH on my first try. That was when I knew for certain that my batteries were getting tired.

Not only that, but the long-range flight testing takes time. I have to fly at about 15 MPH for nearly 20 minutes for those tests. Then I have to charge the 3250 mAh pack at about 1C. Even if I wanted to run tests back to back, I’ll be waiting an hour for the battery to charge, then I have to fly for 20 minutes again.

That said, I’m excited. I want to tell you what I’ve learned so far, and I want to tell you where I think this is going.

There are some new props

Emax has come out with three new props since I last wrote about 4” props: the Avan 4x2.8x3, the Avan 4x2.4x3, and the Avan 3.5x2.8x3. I’ve logged a good bit of flight time on the Avan 4x2.4x3 on my 1606 quad, and I like them a lot. They make the quad feel more like a 5” than any 3” prop I’ve tried, they’re pretty efficient, and they handle propwash a lot better than the HQ props.

I have a set of the Avan 3.5” props on there now. I’ve only flown one pack, but they’re promising. I’m hopeful that 3.5” is a sweet spot between 3” and 4” props. Before these were available, I cut down a set of HQ 4x3x3 props to about 3.5”. The 3.5” Avan props are definitely better than my homemade bullnose 3.5” props.

NOTE: In this snippet with the 4x2.5x2 props on 4S, there’s definitely more propwash than on 3x3x3 props. However, I like the way the quad feels. I’m going to be experimenting more.

I’m even more excited about HQ’s new 4x2.5x2 T-mount prop. It is a thin, gentle prop designed for light motors. Since it is a T-mount prop, I can only use it on my lighter 3” Kestrel with 1306 4000 kv motors. This is exciting because that is my lighter build by somewhere around 40 grams. It is disappointing because I have no way to directly compare this biblade prop to the other 4” props.

Zoe FPV may have solved my long-range problem

I am excited about the idea of my Kestrel freestyle quads being capable of long-range flight. I haven’t quite figured out what I would personally do with my long-range setup, but I’m tickled by the idea of having a $250 HD build that I can send two miles away. I’m even more excited about that build if it is also an awesome little freestyle quad.

My hopes of the 4” props increasing my flight time by 3 or 4 minutes didn’t pan out. If you’re cruising in the 15 to 20 MPH range, that would be an extra mile of range.

Then I saw Zoe FPV talking about her 2S 3250 mAh Lithium Ion pack from Outcast Droneworks. She has a 2” build that has managed to hover for 26 minutes with this pack. Lithium ion has more energy density than our usual lithium polymer batteries, but they can’t deliver as much amps. Her pack can deliver up to 40 amps, and that should be more than enough for my purposes.

Will all my hardware power up with only a 2S pack? Will my 3” Kestrel even be able to get off the ground? Will it still fit in under 250 grams?!

Tests with the Outcast Droneworks pack have been quite successful!

As soon as the battery arrived, I plugged it into one of my Kestrels. The VTX was transmitting, the Caddx Turtle was recording HD video, and I was able to do a test hover. Not only that, but my 3” Kestrel comes in at 248 grams with the 2S pack!

I also managed to fit the HQ 4x2.5x2 props onto my 3” Kestrel frame, but only just barely. Some of the props were rubbing the frame, but I was able to rotate the arms ever so slightly out of place to buy myself a fraction of a millimeter of clearance for each prop.

My 3” Kestrel does not yet have a GPS module, so I’m not doing good science here. I got the feel for about how fast 15 to 20 MPH would feel using the GPS on my 4” Kestrel. I’m probably flying in the right ballpark, at least.

View this post on Instagram

This is the last 30 seconds or so of my 19 minute test flight of my 3" Kestrel with HQ 4x2.5x2 props shoehorned on while using @outcastdroneworks 3250 mAh 2S pack. I don't have GPS on this build, but I do have GPS on the other Kestrel, so I did a sort of calibration run to get the feel for 15 to 20 mph cruising. This was 19 minutes of cruising. No hovering or any nonsense like that! With this 2S pack the build comes in at 248 grams. It has a Caddx Turtle, Crossfire, and a 1,000 mW VTX on 1306 4000 kv motors. The last 3 minutes of the flight were spent cruising circles around the dry parking lot, because I didn't know what voltage things would stop working at, and I didn't want to fall into a puddle. I chose to land when I started seeing less than 3v per cell. For the next test flight, I swapped on a set of HQ 3x2.5x3 props. On that pack, I started dropping under 3v at 16 minutes. I pushed it another 30 seconds, and quickly got to the point where I didn't have enough thrust at 90% throttle to hover. For this quad, 3v per cell is the end of the pack, for sure! #fpv #fpvracer #drone #drones #droneracing #droneracer #fpvdrones #fpvrace #multirotor #quadcopter #fpvfreestyle

A post shared by Pat Regan (@patsheaddotcom) on

I was amazed by my first test flight. I managed to cruise around our local abandoned golf course for 19 minutes! Math says that may have been enough time to cover nearly 5 miles. I’m going to need to add a GPS module to this little guy to verify this.

The tiny 5-volt GPS module from Banggood only weighs about 6 grams with the full wiring harness, and it seems to work great. Installing it will push me up to at least 254 grams. That’s fine for testing, but a bummer if 250 grams is your legal limit. I could definitely save 4 grams by using a different VTX and antenna, so I’m not too worried.

This was a boring flight. I started by making big, slow trips around the nearby fairways. I wasn’t sure what I’d see in the OSD when the battery started getting low. There were a lot of wet spots out there, so when the voltage got down under 3.3 volts per cell, I started making short laps around the dry parking lot instead.

When I started the trip, it took nearly 50% throttle to maintain my cruising speed. Once it was down under 3.3 volts, I had to increase to around 60% throttle. I landed when my readings started to drop below 6 volts.

After landing, the battery recovered to 3.5 volts per cell, so it should be in quite good shape still. These lithium-ion packs can be safely discharged below 3.3 volts per cell.

NINETEEN MINUTES!

This is more than I ever hoped for. I did another test with HQ 3x2.5x3 props. On that flight, I was dipping just under 6 volts right at the 16-minute mark. I was forced to land 30 seconds later. I didn’t quite make it back to home base, because at this point it was requiring more than 80% throttle just to stay in the air.

I made a good call when I stopped at nineteen minutes on that first flight.

I started a test flight on my 1606 Kestrel, but I didn’t get to finish it. I crashed into a railing at around six minutes. Then the dopey pilot managed to trip and faceplant into a short concrete wall. Maybe I’ll post some video of that!

That test got cut short when I crashed into a railing that popped up out of nowhere, but I don’t think it was going to make it to even 16 minutes. This was on the Avan 3.5x2.8x3 props.

Can you see the bobbling in the HD video?

I haven’t attempted tuning anything as of yet. The bobbling is big enough that I can plainly see it in the goggles while flying. I figured I should fly 3” and 4” props on the 1306 motors with the 2S battery for a comparison before I started messing around with things.

My Kestrel quads are tuned for 4S. Flying in that 13.5 to 16.8 volt range provides a lot more power to the motors than the 6 to 8 volt range I’m seeing on the Outcast Droneworks battery battery.

I’m confident that bumping up the PID values will make an improvement, but I am a little worried that I won’t ever see perfectly smooth video out of this setup. Tuning is the next step, though, so we’ll find out soon enough!

I’m sorry, but I had to do a little tuning

As soon as I finished typing that last paragraph, I knew I had to go straight outside and attempt to tune that bobble out of my Kestrel. I popped the Outcast Droneworks pack on the charger, pushed 500 mAh into it, and went outside. I didn’t want a full battery, but I didn’t want to tune on a dead pack, either.

I bumped up P and D on pitch and roll a few times. I bumped up my d_min quite a bit. I have a feeling d_min is the real answer here. I believe I increased all these numbers twice. By the third time, I couldn’t see the bobble in my goggles at all!

I did this tuning on the HQ 3x2.5x3 props, because that’s what I was flying last. The HD footage isn’t quite smooth, but it is getting close. This is where the tuning process gets difficult, though. To get any farther, I need to pull footage off the SD card every time I change settings, and I may even need to pull blackbox logs. That’s a lot more work than just peering through the goggles and pushing values higher in the OSD!

At least progress has been made, and it was made quickly. Next time I fly, I’ll push those numbers by another 30% or so. Maybe I’ll luck out!

What is the goal here?!

First and foremost, my Kestrels are freestyle quads. I wanted a freestyle frame with the Acrobrat’s suspension, but the Acrobrat just isn’t for me. I didn’t want to carry as much weight in the frame, and I wanted individual, replaceable, configurable arms. An extra ten grams of battery is worth more to me than ten grams of carbon, assuming I can still keep things sturdy enough that I’m not breaking an arm every week!

With the Kestrel, I wanted to design a frame that would allow me to build a 3” or 4” freestyle quad with long arms for extra stability, and I wanted to get as close to 250 grams as I could without going over. My 1306 Kestrel is 223 grams with a 650 mAh 4S, and my 1606 Kestrel is 273 grams with the same battery.

Both of my Kestrels have TBS Crossfire receivers and 800 or 1,000 mW VTX modules. One of them has a tiny GPS module, and I have a spare GPS module that’s ready to be installed on the 1306 Kestrel.

It seems like these two quads are just begging to fly long range.

Jack of all trades, master of one

Maybe. I enjoy flying freestyle with both my Kestrels, but I am never pleased with the HD footage from the Caddx Turtle. I’m also disappointed that the FPV feed is so much worse than my Runcam Eagle. Upgrading to a Runcam Hybrid would improve the HD situation a little, and nearly match the Runcam Eagle’s FPV feed.

Let’s just assume that the HD video situation will fix itself over time, either by upgrading to a Runcam Hybrid, or upgrading to whatever comes out 6 months from now. I’m quite pleased with how these quads fly, and next year, I might even be happy enough with the video they record.

My Kestrels are both excellent little freestyle quads. They record HD video. The parts cost about $250. That’s less than most GoPro cameras, and I think that’s neat. What else can they do?

As long as you can tolerate Caddx Turtle footage, my own Kestrel builds are good HD freestyle quads. I could use them in a race in a pinch. It is starting to look like they’ll be useful long-range quads, too.

I can leave my awesome, giant ThinkTank backpack at home. I can pack my Kestrel, Taranis, Fat Shark HDO2 goggles, a 19-minute long-range battery, enough 4S batteries to fly freestyle for an hour, and a chair into my small AmazonBasics DSLR backpack. This comes in at around 10 pounds, and that’s a lot less less than half the weight of my fully loaded big bag!

There’s room in my Kestrel frame to use a battery strap to mount a GoPro. Both my builds fly well enough while carrying a GoPro, and I even managed to hover with the 2S pack and GoPro. I don’t currently have any sort of prop guards, but I’m absolutely certain that my Kestrel builds would do a fine job doing the duties of a Cinewhoop.

Zoe and I are working on very different things

Zoe’s MicroHawk is a tiny quad running 2” props. It is built with autonomy in mind, and I believe her build comes in at around 180 grams with the 3250 mAh 2S pack. That’s about 70 grams lighter than my current long range setup! She’s managed a 26-minute hover test, and 20 minutes of cruising.

I guess we’re attacking a similar problem here, but from different directions. I’m absolutely certain her autonomous, long-range MicroHawk build that carries a Raspberry Pi can fly freestyle. That said, I’m willing to bet that my Kestrels will capture cleaner, smoother HD freestyle footage than Zoe’s MicroHawk. Not only that, my comparatively beefy Kestrels are made to take quite a beating!

The reverse is also true. Sure, I can shoehorn a set of 4” biblade props onto my Kestrel and throw an Outcast Droneworks 3250 mAh 2S pack on there. Sure, it’ll manage to cruise for 19 minutes, but that’s a total accident. I’m lucky that this worked out at all!

Everything on my Kestrel is scaled for 4S freestyle. The motors and props are both scaled to be driven by a 16-volt LiPo battery. It is severely underpowered when using a 7-volt lithium-ion battery.. I can probably take it on a cruise up and back down the side of a mountain, but I shouldn’t be doing powerloops and S-turns on the way up. My Kestrel on 2S feels like an overgrown whoop. It can manage to do a powerloop, but is it a good idea?!

Conclusion

I’m excited again. Since I’m always unhappy with the Turtle’s HD footage, my Kestrels have spent more time in my bag than in the air. I really only fly them just to make sure they still fly. I have a good reason to be flying, testing, and tuning my Kestrels again! Woo!

What’s next? I think it is time to try out Betaflight’s RPM filter on the blheli_s ESCs on my Diatone Mamba stacks. I don’t know if it will clear out the last of the vibrations, but it is something I’ve wanted to try on my Kestrels anyway. If that doesn’t work, maybe it will be time to do some blackbox logging and manual filter tuning!

I know I stated that I’m rarely happy with my Turtle footage, but I was just looking for flight snippets to include in this blog, and I realized that I rarely even post short flight snippets to Twitter or Instagram. Just about the only recent footage I’ve posted is the 2S testing. I’m going to have to correct that!

You’ll probably notice that I rarely post YouTube videos with Kestrel HD footage. Scaling the footage down to Instagram or Twitter covers up a lot of what I don’t like about the footage!

What do you think? Are you wanting to do some long-range flying, but you’re living somewhere with a 250-gram weight restriction? Are you building a customized long-range setup, or are you trying to squeeze long-range flights out of a freestyle build like me? Do you think I’m on the right track with these HQ 4x2.5x2 props and the Outcast Droneworks 3250 mAh battery? Let me know in the comments, or stop by the Butter, What?! Discord server to chat with me about it!

I Added a Baratza Encore to Our Kitchen

| Comments

I’ve been using my Baratza Preciso for nearly six years. I’ve had a few problems with it. Nothing major, though. There are plastic parts inside Baratza’s grinders that are designed to give way in the event that a rock or an unroasted coffee bean makes its way into the burrs. It is better to smash a $5 piece of plastic than destroy a pair of $80 burrs or wreck your motor.

My wife has been drinking tea for the better part of a year, but she’s starting to use her Aeropress again. We often run into a situation where I accidentally have an extra day’s worth of bean in the hopper of the Preciso, so moving the grinder up to the Aeropress setting is either wasteful or a pain.

View this post on Instagram

Delicious.

A post shared by Pat Regan (@patsheaddotcom) on

We decided that the simplest thing to do would be to buy another grinder for the kitchen. The first option that popped into my mind was the Baratza Virtuoso. The Virtuoso is nearly identical to my Preciso. It just lacks the micro adjustment wheel.

We opted to save $100 and go with the Baratza Encore.

I didn’t expect to be so impressed with the Encore

Like most grinders, the Encore ships without the hopper installed. The upper burr is left out as well. I was surprised that the upper burr looked identical to the burr in my Preciso!

When we ordered the Encore, I didn’t really care about the specs. I knew it would do a reasonable job at grinding for Aeropress, French press, and pour over. That’s all it needs to do. We already have a grinder for the Rancilio Silvia.

Then I saw that burr, and I got curious. The lower burr is machined differently than the Virtuoso/Preciso lower burr, but it is compatible. You can upgrade the Encore burr to match my Preciso.

Our Baratza Encore In Its New Home

I suppose this is a reasonable option if you don’t want to spend $250 on a Virtuoso. You can get comparable grind quality out of an upgraded Encore, but you’ll save money on the cheaper casing and smaller motor of the Encore. I don’t have a good reason to test this, but it sure sounds like it might be a good value for someone!

Is the Baratza Encore right for you?

If you want to make delicious coffee, you need a burr grinder. If you’re on an extremely tight budget, you might be well served by a manual burr grinder like the Hario Mini Mill or Hario Skerton.

The Baratza Encore is one of the most budget-friendly electric grinders with proper conical burrs. That said, it still costs $100 more than a manual grinder.

Unless you’re making espresso, the Encore will likely serve you quite well. If you have more room in your budget, it wouldn’t be a bad idea to pay more for a Baratza Virtuoso. It was quite obvious that the Encore grinds more slowly than my Baratza Preciso. Maybe the extra speed and small improvement in grind quality is worth the extra $100 to you!

Conclusion

We’ve only had the Encore for a few days, so I can’t tell you much yet about the longevity of the machine. That said, I expect it to hold up as well as my Baratza Preciso has held up over the last six years.

Are you shopping for an entry-level burr grinder? Are you using a Baratza Encore? What do you think of it? Let me know in the comments, or stop by the Butter, What?! Discord server to chat with me about it!

Thoughts on the DJI Digital FPV System

| Comments

Not too long ago, DJI released a new digital video-transmission system for FPV miniquad pilots. I’ve been keeping an eye on it. I’ve been watching videos. I’ve been listening to what people say. I’ve been trying to figure out if this is a system that I’m going to want to buy into.

I am not going to be buying into DJI’s ecosystem at this time. DJI’s new system has a lot going for it, especially if you’re a brand new pilot and haven’t already invested in analog gear.

I’m going to do my best to explain why DJI’s FPV system isn’t for me. I’m going to start with problems that are easy to measure, then work my way towards the less concrete things.

The DJI FPV Air Unit is too big

The Air Unit is the box of electronics and the FPV camera that sit on your miniquad. It is just too big, and in some cases, much too heavy.

It won’t fit nicely into any of my existing freestyle frames. To be honest, this is a minor complaint. I’m cutting my own frames now anyway. Correcting this problem would just involve cutting new bottom and top plates for two or three of my quads.

If you’re not me, you might have to buy new frames. You’ll probably be spending $50 to $100 per frame, right?

The Air Unit weighs about 45 grams. That extra 20 to 30 grams or so compared to my existing VTX and camera won’t be a big deal on my 5” freestyle miniquads, but what about my 3” and 4” sub-250 gram Kestrel builds? My camera and VTX combination on my micros is already lighter than what I use on my 5” rigs, so the Air Unit might add even more weight.

The current size and weight of the Air Unit make it unusable for my 3” and 4” builds.

I fully expect DJI to miniaturize this hardware. When they do, I will have to revisit this topic!

Even if they do miniaturize the Air Unit, we’re not going to see it on whoops or toothpicks any time soon. This brings me to my next problem.

I don’t want to carry two sets of goggles

My ThinkTank backpack is huge, but it is already more than full. I’d have to rearrange everything just to fit the larger DJI goggles in place of my Fat Shark goggles. I definitely don’t want to have to find a way to squeeze both sets of goggles in there!

My goal is to fit everything I need for a day out flying in my bag, so it is already packed pretty tight!

Can’t you plug an analog receiver into the DJI goggles?

Yes. Sort of. There is a way to make this happen, but you have to modify the goggles a bit. I think this will be a fantastic option for people that buy into DJI’s system. You can fly your nice, big, expensive quads with your digital link. Then you can still fly a TinyHawk around the house with an analog receiver.

So far, I haven’t heard any good things about using the analog input on the DJI goggles. Maybe this will get better with a firmware update, but it sounds like for the time being, using the DJI goggles to fly an analog quad isn’t a great experience.

My TinyHawks

The weird analog feed to the DJI goggles might be good enough for playing around with a TinyHawk around the house, but I don’t want to use it with my HD micro freestyle builds.

Don’t you want HD video, Pat?!

My impression so far is that DJI’s HD video feed isn’t a straight-up upgrade over what I have today. Some things are greatly improved. Other aspects, not so much.

It is absolutely amazing that you can get eight pilots in the air at once, and they all have amazing video feeds. When you have good signal, the picture is clear.

I have some concerns about the dynamic range and the speed of the DJI camera’s transition from light to dark.

NOTE: That’s my GoPro HERO5 Session going around the track!

My Runcam Eagle Micro sometimes looks like I’m flying in an oversaturated cartoon landscape, but I can usually see my friend walking in the shade under dense trees. When I’m flying through a parking garage, I can see shapes in the sun outside instead of just blown-out highlights.

Maybe I’m worried over nothing. Maybe if I could fit the DJI Air Unit on my 3” builds, I would ignore this concern completely!

What about the DJI system’s range?

I can’t make up my mind here. We’ve seen Le Drib fly his DJI system inside a building where his analog setup was barely working. We also hear about it randomly dropping out when analog would be fine.

In other words, DJI’s range and overall performance isn’t a straight-up upgrade over what I’m already flying. Sure, it has plenty of improvements, but I still keep seeing the drawbacks. In some situations, the DJI gear outperforms my analog gear. In some situations, my analog gear can do better. In most situations, the only thing I’m giving up is the more detailed HD image.

Price isn’t the problem

I absolutely adore my TBS Crossfire. Knowing that my control link is absolutely rock solid makes me so much more confident. If you’re a new pilot, though, and you’re planning to use DJI’s control link, then the DJI system’s price compares quite favorably to analog.

The DJI FPV Experience Combo costs about $1,000 and comes with goggles, a controller, and enough Air Units and antennas for two quads.

An old shot of my ThinkTank backpack

If you add up Fat Shark HDO goggles ($500), a RapidFire module ($160), a Taranis Q X7 ($105), a Crossfire Micro TX module ($70), two Crossfire Nano RX modules ($35 x 2), and a pair of RaceDayQuads VTX modules ($25 x 2), you’ll end up at $955.

As you build more quads, the analog pricing starts to look better, but not by a ridiculous margin. However, that top of the line analog system I listed isn’t the only option. You can spend half as much on the goggles and video receiver, and you can completely skip the Crossfire stuff. That wouldn’t be as fair a comparison, though.

One important thing to note here is that you can buy into our old analog video system on a budget. Sure, top-of-the-line analog hardware is comparable in price to the DJI FPV system. The goggles I run cost $200 less than the Fat Shark HDO goggles. I’d bet you could get a pretty nice analog setup for half the price, and entry-level hardware can be had for 10% of the price of the DJI setup.

If they cost the same, why buy into analog today?

Your friends are already flying analog. When I went to a MultiGP race for the first time last month, every single pilot was flying analog. These were all people I hadn’t met before, and I could tune in to any of their video feeds to spectate.

When I go flying with my friends, I can tune in to their flights, and they can tune in to mine. They can give me pointers. I can praise them when I see them pull off a neat maneuver. We can all hoot and holler when we see a spectacular crash!

My Falcon Freestyle quad

I’d hate to be the one person in the group using DJI goggles, especially if I’m new to the hobby. If your quad is doing something funny when you yaw 180 degrees, I might need to see it happen through the goggles to help you out. Maybe it doesn’t happen when I fly your quad because the problem is something the pilot is doing.

This alone is enough reason for me to still recommend analog today. For me, FPV is about community. I’d hate to be the one guy out there doing it alone!

DJI FPV goggles aren’t compatible with DJI’s photography drones

What?! This surprised me quite a bit when the system was released. If you told me that I can carry one set of goggles and use it with my FPV miniquads AND a Mavic 2, it would be amazing. I’d go right out and buy a Mavic!

The FPV goggles aren’t compatible. They’re two very different video protocols. Isn’t that a bummer?

Maybe DJI’s products will converge in a few years!

What about Fat Shark Byte Frost?!

I had high hopes for Byte Frost. The video transmitter board is just a standard 30x30 board that will fit right in your stack. I can even fit that in my 3” Kestrel, and it isn’t nearly as heavy as the DJI Air Unit!

Unfortunately, Byte Frost just doesn’t look like it can compete with DJI. In Joshua Bardwell’s test, Byte Frost’s range with directional patch antennas was worse than DJI’s range with omni antennas.

Byte Frost seems to only support four quads at a time, while we’ve all seen DJI’s system allow 8 pilots to fly simultaneously.

That said, it is my understanding that Byte Frost has low, consistent latency. When your signal gets weak, the DJI system’s latency increases and the quality drops. When the Byte Frost signal gets weak, it seems to start dropping bits of the picture, but the latency stays low.

Even though it has a couple significant advantages over the DJI FPV system, I don’t believe things look good for Byte Frost at this point.

Conclusion

Maybe you don’t care about having to carry two sets of goggles. Maybe your entire fleet can carry a DJI Air Unit. Maybe the DJI FPV system is a good fit for you.

It just isn’t a good fit for me, and I bet that’s true for most of you folks, too. Electronics always get smaller and cheaper. I have hopes that the next revision of DJI’s FPV system will be a better fit for more of my fleet, and the revision after that will likely be even better! It doesn’t have to fit on my whoops. If DJI can cover my 3”, 5”, and larger quads, I would feel comfortable leaving my Fat Sharks at home!

What do you think? Are you excited about DJI’s digital video quality? Do you want to fly with a feed that looks more like a GoPro? Or do you think that the community of spectators is still more important? Let me know what you think in the comments, or stop by the Butter, What?! Discord server to chat with me about it!

Betaflight 4.1 and the RPM Filter

| Comments

I’ve been procrastinating for a long time. All my 5” freestyle quads and even my 4” micro Kestrel have the hardware to support Betaflight’s RPM filter. All you need is an F4 flight controller and, until recently, blheli_32 ESCs. Using the RPM filter with Betaflight 4.0 requires a bit of extra tinkering, but it didn’t seem like I big deal.

The trouble was that my quads were all flying great. I worked hard tuning Betaflight 4.0. I wanted to reduce propwash oscillation as much as I could, and I think I did a pretty good job. I turned off as many filters as I could. I loosened up the remaining filters a bit to improve latency. Then I pushed my D-term as far as I could.

I thought it was flying great. When we flew with Alex Vanover, I asked him to fly my quad, and he didn’t seem to think it needed much tuning. If I thought it was flying great, and the fastest drone racing pilot in the world thought it was flying well, why would I mess with it?

I messed with it

Mark Spatz at UAV Tech posted a video about the settings you should start with if you want to try flying Betaflight 4.1 with the RPM filter. Everything is straight forward now. When I set it up, I had to download test firmware for my ESCs, but bidirectional Dshot support is currently in the official blheli_32 release, so you won’t have to worry about that.


I’m flying an iFlight TwinG F7 flight controller. It has two identical gyros, but one of those gyros is rotated 90 degrees. Betaflight reads both gyros and takes the average of those readings. This buys you a few decibels of noise filtering with no increase in latency. Betaflight 4.0 could not perform this sensor fusion while using the RPM filter. Betaflight 4.1 can!

I updated one of my quads to Betaflight 4.1. I set up the RPM filter according to Mark Spatz’s instructions. I set up my rates, but I left the PID settings alone. Then I took my quad to the golf course.

I can’t believe that it flies better!

We’re running out of improvements at this point. When I upgraded from Cleanflight to Betaflight, it was like a quantum leap forward. You’d say things like, “Holy potatoes! I can’t believe it stops smoothly after a snap roll!”

Then I upgraded from Betaflight 3.3 on an Kakute F4 to Butterflight on a Helio Spring. The difference wasn’t as dramatic, but I will say this is the first time I had a quad that could handle propwash well.

Upgrading from the defunct Helio board to my dual-gyro F7 flight controller and Betaflight 4.0 was a nice upgrade. Tuning became a little easier and propwash handling improved. There are also a lot of nice quality of life updates, too.

NOTE: If you have a Helio Spring, you should check out EmuFlight. They’re doing a good job resurrecting Butterflight and the Helio’s IMU-F. Don’t let your old hardware go to waste!

Our quads are already flying amazingly well—nearly perfectly. Can it really get much better?

Yes. Betaflight 4.1 with the RPM filter flies noticeably better, but it is the sort of improvement that you’re only going to notice when you’re pushing things to the edge of what Betaflight 4.0 can handle.

You can always fly around propwash oscillations. When I flew that first pack with the RPM filter, I did my very best to do the opposite. I tried to bring out as much propwash as I could!

I did the move where you fly forward, cut the throttle, then do a 180 degree turn. Then I’d blip the throttle pretty hard and go back the other way. My 4.0 tune did well at this, and so did the RPM filter. No surprises there.

NOTE: I don’t have great before-and-after comparison of my well tuned quad. I tested on my backup quad, which was much closer to running stock Betaflight 4.0 settings. That’s my backup quad in the Tweet above.

Then I started popping up over trees to do some power loops and S-turns. This is the time when I’m most likely to be bummed out about propwash in my GoPro footage. You know when you don’t quite line up the move like you should, and you just can’t hit the throttle until the very last moment. I did my best to simulate those moments.

I’d line up my exit under the tree, fall with zero throttle until the last possible moment, then I’d punch the throttle harder than I should. I’ve practiced doing this smoothly for so long that it is difficult to do it poorly on purpose, but when I did, I couldn’t see any oscillations in my goggles, and it sounded smooth to my ears.

You could see some oscillation in the GoPro footage, but it is extremely brief.

My settings

This is the part where I’d usually just paste in a dump from the Betaflight command line. I don’t want to do that this time. I think it is important to understand a little about what you’re changing.

There are plenty of videos showing you what to do. If that’s the way you prefer to ingest your knowledge, you should check out UAV Tech’s RPM filter guide or [Joshua Bardwell’s RPM filter setup guide][wdrpm]. These are the places where I got my information!

Betaflight 4.1 RPM Filter

On the configuration tab in the Betaflight Configurator, you need to enable bidirectional Dshot. On my F7 flight controller, I’m running a 4K/4K PID loop. You can probably get away with an 8K/8K PID loop, and I’m going to experiment with this, but for now, you should play it safe.

NOTE: I forgot to mention motor poles. If you’re flying 2306, 2205, 2206, or 2207 motors, then the default of 14 is most likely correct. You can check the specs of your motor on the manufacturer’s or vendor’s website, or you can count the magnets. If you’re setting this up on a micro, 14 is likely to be incorrect!

I’ve learned that at if you have bidirectonal Dshot enabled in Betaflight, and your ESC firmware doesn’t support it, then Betaflight will refuse to communicate with your ESCs. At least it shouldn’t go bananas on you if you fail to correctly upgrade your ESC firmware!

Betaflight 4.1 RPM Filter

You’ll need to be running blheli_32 version 32.7 or newer. You should also be able to use the JESC firmware on blheli_s ESCs, but I haven’t tested this.

Betaflight defaults to using three layers of RPM filtering. I believe that gives you a total of 12 notch filters. One for each motor at three different resonance frequencies. I was happy with how my quad flew with one level of RPM filters, but Joshua Bardwell talked me into trying the default of three.

You should set the width of your dynamic filter to 0. With the default of 8, you will be running a pair of dynamic filters that are 4% or 8% above and below the target frequency. We don’t need that with the RPM filter. When you set this to zero, you will remove one of those dynamic filters and decrease your latency.

I’m running my dynamic notch filter with a Q-factor of 250. Joshua Bardwell recommended starting at 200. The higher the number, the narrower the filter, and the lower the latency. I’m unsure how I got up to 250, but it is working fine for me, so I’m sticking to it.

Betaflight RPM Filter Filtering Settings

NOTE: I didn’t adjust any of the checkbox or numbers in the boxes above the RPM filter and below the sliders. These adjust themselves as you move the sliders up and down!

You should lower the dynamic filter’s minimum frequency to 90 hz.

The rest of my filter tuning consisted solely of moving the two sliders farther and farther to the right. I’d move then two or three clicks, go outside, and fly around for a minute. If my motors were still cool, I’d move the sliders again.

I have both sliders maxed out, and my motors barely get warm.

Who should upgrade?

If your quad is flying just fine, and you’re not complaining about propwash oscillation, you should probably just keep doing whatever it is that you’re doing. It is difficult to get better at flying if you keep changing your setup. If you’re happy, just keep flying.

What if your quad doesn’t fly so well? Do you have weird twitches and vibrations? Maybe you just have a failing component that just has to be replaced, and no amount of software will be able to make it fly right. Then again, maybe Betaflight 4.1 and the RPM filter will help out your problematic quad.

Or maybe you’ve been running Betaflight 3.4 or 3.5 for a long, long time. You’ve been hearing good things about Betaflight 4.0, but you just weren’t ready to put in the effort to upgrade your flight controllers. I’d say now is the time to upgrade, especially if you’re going to be able to use the RPM filter with your hardware.

Conclusion

I’ve been thinking about upgrading to a prerelease of Betaflight 4.1 for months. I wish I did it sooner. There’s not much excuse to wait now, because as I was writing this blog post, Betaflight 4.1 was officially released!

What do you think? Am I going to have to buy the JESC firmware for my Kestrels? Have you been running the RPM filter for a while? Were you using it with Betaflight 4.0, and did your quad’s flight characteristics improve even more when you upgraded to Betaflight 4.1? Do you also think it is time for everyone to start upgrading? Let me know in the comments, or stop by the Butter, What?! Discord server to chat with me about it!