Overclocking My QNIX QX2710 Monitors to 120 Hz With X.Org and Linux

| Comments

I don’t enjoy writing step-by-step guides. This will definitely not be that sort of guide, but this post should contain everything you need to get your QNIX QX2710 monitor running at 96 or 120 Hz under Linux with any relatively recent Nvidia card.

Running at 96 Hz was easy. The VESA mode generated by cvt for 2560x1440 at 96 Hz worked just fine. I had a lot more trouble finding a modeline that would work at 120 Hz. I ended up finding a screenshot of someone’s working 120 Hz settings on Windows, and I did my best to convert those numbers into something X.Org could use.

If you’re like me, you’re in search of that modeline. Here it is.

1
Modeline       "2560x1440_120"      459.86 2560 2608 2640 2652  1440 1441 1444 1445 +hsync +vsync 

Now that he is gone, we’ll talk some more why you might want to overclock your monitor and figure out just what that modeline is for.

Why is 120 Hz better than 60 Hz?

More is better, right? Maybe. Overclocking your monitor isn’t going to make any significant difference if you aren’t playing games. I’m staring at my Emacs window while writing this post, and there is no way that I can tell you if this monitor is overclocked. The difference is strikingly obvious as soon as you move the mouse in a first-person shooter.

I didn’t expect the difference to be so drastic. There is definitely a lot of opinion and personal preference involved here, and I have a lot of opinions about this. Too many to fit in a couple of paragraphs. I plan on writing more about this, but I will summarize my feelings.

I don’t ever want to play games at 60 Hz ever again. I have been playing a lot of Borderlands 2 lately, and the Linux port seems to be pretty poorly optimized. I’m often dropping well under 60 frames per second, but there are rare occasions when Borderlands 2 pushes more than 120 frames per second. Those occasions are very obvious, and the game feels so much better.

My machine usually runs closer to 200 frames per second when playing Team Fortress 2, and I have to say that the difference between 60 to 70 frames per second in Borderlands 2 and the full 120 frames per second in Team Fortress 2 is simply amazing. Team Fortress 2 feels so buttery smooth.

Do you have to reach 120 Hz?

Definitely not. It sounds like the vast majority of QNIX QX2710 monitors are able to reach at last 96 Hz. That is a huge upgrade, both mathematically and subjectively. A 40% increase in frame rate is definitely a significant improvement.

Forget about the math, though. From a completely subjective standpoint, I can see a huge difference between 60 Hz and 96 Hz when playing a first-person shooter. I’m certain that I could tell the difference between the two in a blind test. I’m not so sure that I could tell the difference between 96 Hz and 120 Hz.

If your monitor makes it to 120 Hz, I say go for it! If it only makes it to 96 Hz, don’t be disappointed. It is still a huge upgrade, and you’re probably not missing out on much.

Hardware requirements – the monitor

This will only work with the dual-link DVI model QNIX QX2710. The newer “TRUE10” version of the QX2710 with HDMI and DisplayPort connections will not work. The “TRUE10” is known to only be capable of running at about 60 Hz.

These settings may very well work with other inexpensive 1440p Korean LCD monitors, like the Yamakasi Catleap. I only have access to some QNIX QX2710 monitors and a single QX2700, so I can’t verify whether these settings work on other monitors. If these settings do work for you on another monitor, I would definitely be interested in hearing about it.

Hardware requirements – the video card and drivers

I wish I had more data for this section. The only video cards that I have available with dual-link DVI ports are Nvidia cards. These timings may or may not work with AMD or Intel video cards.

I do know that my old Nvidia GTX 460 card was too old and didn’t have the bandwidth to support much more than 60 Hz at 2560x1440. The pixel clock needs to run at nearly 460 MHz to push enough pixels to update every pixel 120 times per second at 2560x1440, and the older Nvidia cards can only run at 330 MHz.

My new Nvidia GTX 970 doesn’t have this limitation. In fact, any Nvidia card with a dual-link DVI port in the 500 series family or newer should have no problem reaching 120 Hz. There are some Nvidia cards since the introduction of the 500 series that are limited to a 400 MHz pixel clock by the driver.

This limitation can be removed from Nvidia’s proprietary driver using the nvlinpatch tool. In fact, if I am understanding the situation correctly, only the 500 series cards require this patch. I don’t have enough Nvidia cards at my disposal to verify this.

I should also mention that I am using the proprietary driver from Nvidia, and I have not tested any of this with the Nouveau driver.

What if your video card is too old?

Even if your video card is old and has a 330 Mhz pixel clock limitation, you should still be able to push your QX2710 past 60 Hz. My old GTX 460 should have been able to manage 86 Hz. I have a tight modeline for 86 Hz, and it works with my GTX 970. Unfortunately, I don’t have an older card with a 330 Mhz pixel clock limit available here to test it.

1
Modeline       "2560x1440_86"       330.00 2560 2608 2640 2652  1440 1441 1444 1445 +hsync +vsync

That’s better than a 40% improvement over 60 Hz. I’ve played a few rounds of Team Fortress 2 at 86 Hz, and I would say that it is a worthwhile improvement.

DVI cables

The Internet often recommends that you use high-quality, heavy-gauge DVI cables. I am doing the opposite. I had no trouble reaching 120 Hz using the cables that came with the QX2710 monitors, and I am now using inexpensive 10-foot dual-link DVI cables.

You mileage may vary. If you have trouble, you can try better cables. It is also probably best to use the shortest possible cables. It is much easier to move a clean signal 3 inches than 3 feet. I thought that the 10-foot cables would be long enough for my setup, and they are, but only just barely!

I’m using up about three feet of cable just to traverse the length of the monitor stand. Cable management would be more comfortable if I had ordered longer cables, but I have no idea if longer cables would manage to support 120 Hz.

Tripp Lite 10’ Dual-Link DVI Cable at Amazon
What are the chances of success?

The general consensus around the Internet is that nearly every QNIX QX2710 monitor will overclock to at least 96 Hz, and that the vast majority will have no problem running at 120 Hz. My verifiable sample size is much smaller, but it seems to agree closely enough with what the Internet believes.

I have a pair of QX2710 monitors, and both of them have been running at 120 Hz for several months without any issues. My friend Brian also owns a pair of QX2710 monitors. One of his QX2710 monitors runs well at 120 Hz. The second monitor will not run at 120 Hz, so he is running it at 96 Hz. I do not believe he has tried any frequencies in between.

In our limited quantity of monitors, that is a success rate of at least 75%. I feel that 96 Hz is a huge upgrade over 60 Hz, so I don’t consider that a failure. That is, of course, only my opinion!

Are there any risks?

There are always risks when running hardware beyond its published limits. In this case, though, the risks seems very minimal. I have no good way to quantify the risk to the monitors, but the risk to the video card is quite minimal.

If you are using an older video card with a pixel clock limited to 400 Mhz, you will have to push it out of spec by about 15%. However, any video card that claims to support 4K resolutions will already have a pixel clock running at significantly higher speeds.

The information I have about the monitors is much less concrete. I do know that overclocking the QX2710 is pretty common, and I have yet to find any horror stories about monitors failing due to overclocking.

Also, my monitors are debezeled, so I can actually touch the metal casing on the back. They are barely warm to the touch. In fact, the box containing the controller board is significantly cooler than the area contain the backlight. I am not worried about my monitors in the least.

Enough already! How do I overlock my QX2710?!

All you need to do is add the correct modelines to your /etc/X11/xorg.conf file and tell Xorg to use them. It is quite simple.

My xorg.conf file
1
2
3
4
5
6
7
8
9
10
11
12
13
14
15
16
17
18
19
20
21
22
23
24
25
26
27
28
29
30
31
32
33
34
35
36
37
38
39
40
41
42
43
44
45
46
47
48
49
50
51
52
53
54
55
56
57
58
59
60
61
62
63
64
65
66
# nvidia-xconfig: X configuration file generated by nvidia-xconfig
# nvidia-xconfig:  version 1.0  (buildmeister@builder58)  Fri Mar 12 02:12:40 PST 2010

Section "ServerLayout"
    Identifier     "Layout0"
    Screen      0  "Screen0"
EndSection

Section "Files"
EndSection

Section "Monitor"
    Identifier     "Monitor0"
    VendorName     "QNIX"
    ModelName      "QX2710"

    Modeline       "2560x1440"          312.25 2560 2752 3024 3488  1440 1443 1448 1493 -hsync +vsync
    Modeline       "2560x1440_60"       312.25 2560 2752 3024 3488  1440 1443 1448 1493 -hsync +vsync
    ModeLine       "2560x1440_75"       397.25 2560 2760 3040 3520  1440 1443 1448 1506 -hsync +vsync
    Modeline       "2560x1440_86"       330.00 2560 2608 2640 2652  1440 1441 1444 1445 +hsync +vsync
    ModeLine       "2560x1440_96"       400.00 2560 2608 2640 2744  1440 1443 1448 1512 +hsync +vsync
    ModeLine       "2560x1440_99"       400.00 2560 2608 2640 2720  1440 1443 1448 1481 +hsync +vsync # about 100 Hz
    Modeline       "2560x1440_120"      459.86 2560 2608 2640 2652  1440 1441 1444 1445 +hsync +vsync

    Option         "DPMS"
EndSection

Section "Device"
    Identifier     "Device0"
    Driver         "nvidia"
    VendorName     "NVIDIA Corporation"
    Option         "NoLogo"              # How is this not the default?! 
EndSection

Section "Screen"
    Identifier     "Screen0"
    Device         "Device0"
    Monitor        "Monitor0"
    DefaultDepth    24
    SubSection     "Display"
        Depth       24
        Modes "2560x1440_120"
    EndSubSection

    Option "NoBandWidthTest" "true"
    Option "IgnoreEDIDChecksum" "DFP"
    Option "UseEDID" "False"
    Option "UseEDIDDPI" "False"
    Option "UseEDIDFreqs" "False"
    Option "ExactModeTimingsDVI" "True"
    Option "ModeValidation" "NoVertRefreshCheck, NoHorizSyncCheck, NoDFPNativeResolutionCheck, NoMaxSizeCheck, NoMaxPClkCheck, NoEDIDModes"

# Single monitor metamodes
#
#    Option "metamodes" "DFP-0: 2560x1440_60 +0 +0"
#    Option "metamodes" "DFP-0: 2560x1440_96 +0 +0"
#    Option "metamodes" "DFP-0: 2560x1440_99 +0 +0"
#    Option "metamodes" "DFP-0: 2560x1440_120 +0 +0"

# Dual monitor metamodes
#
#    Option "metamodes" "DFP-0: 2560x1440_60 @2560x1440 +0+0, DFP-4: 2560x1440_60 @2560x1440 +2560+0"
#    Option "metamodes" "DFP-0: 2560x1440_96 @2560x1440 +0+0, DFP-4: 2560x1440_96 @2560x1440 +2560+0"
#    Option "metamodes" "DFP-0: 2560x1440_99 @2560x1440 +0+0, DFP-4: 2560x1440_96 @2560x1440 +2560+0"
     Option "metamodes" "DFP-0: 2560x1440_120 @2560x1440 +0+0, DFP-4: 2560x1440_120 @2560x1440 +2560+0"
EndSection

You can probably use my configuration file after making some very minor edits. I’ve included modelines for several difference refresh rates between 60 and 120 Hz. All of them work with my hardware. I was unable to find a working 110 Hz modeline, but I didn’t try very hard. If you have a 110 Hz modeline that works, I would love to test it out and include it in the list.

I have quite a few “metamodes” commented out at the bottom of my xorg.conf file. This is how you tell the Nvidia driver how to configure your displays. I have a set of “metamodes” in there for both single and dual monitor setups. You may be able to uncomment the one you want to use, and it may just work.

There is a very good chance that my “metamodes” aren’t configured to use the correct video port for your setup. On my GTX 970 card, “DFP-0” is the first DVI port and “DFP-4” is the second DVI port. This varies from one card to the next, and you can easily identify the ports using the Nvidia control panel.

It doesn’t look right! Everything is dim!

When you run a monitor at a higher frequency, the output tends to be quite a bit dimmer. Smarter and more expensive monitors are probably correcting for this on their own. Since we are more frugal, we have to adjust for this on our own. It is a very simple matter. All you have to do is change your color profile.

There are dozens of color profiles available on the big QNIX forum thread. I spent a lot of time trying out various profiles. More time than was really necessary. I am a bit of a dope, and I had forgotten that I can also use the buttons on the monitor to turn the brightness up!

I’m sure that you’re aware that the QX2710 is a very bright monitor, and I’ve had the brightness set to one of the lowest settings ever since they arrived. Most of the color profiles have notes that say something like, “calibrated with the brightness set 8 clicks up from the lowest setting,” or something very similar. Bumping up the brightness made most of the color profiles look much better.

I didn’t do a good job keeping track of which profile I pilfered from the forum. I have several color profiles sitting in my home directory, but I have given them my own names. I have no idea what their original names were. I will make them all available for download.

Applying one of the color profiles is as simple as passing the file to the xcalib utility:

1
2
wonko@zaphod:~$ xcalib /home/wonko/.xcalib-qnix-120-6500k                     1
wonko@zaphod:~$

Verifying that everything works

The first thing that will make your success apparent is that your display will be dimmer, but that doesn’t really tell you just how successful you were. Our QNIX QX2710 monitors have no on-screen display to tell us what mode they are running in, either. Thankfully, the Nvidia control panel will tell exactly how it is driving your monitor.

I didn’t even need to play any games to visually verify that 120 Hz is smoother than 60 Hz. All I had to do was drag a small window around the screen at a brisk pace. The difference is very obvious.

How can you really verify that everything is working

I have read that our QX2710 monitors may skip frames if you overclock them too far. There are websites and utilities that can help you verify this. The website does not support vsync Linux, and the only program I could find to run locally was for Windows. I had no trouble running the Windows executable under Wine, and it seemed to be working just fine.

All you have to do is run the test program and photograph the screen with a good camera with a nice, fast shutter speed. I don’t have one of those cameras. My best camera just captures a blur of consecutive bars blurring together.

I’m not worried about passing the test. Games look significantly smoother at 96 Hz, and they sure seem smoother yet at 120 Hz. In this case, I am much more interested in the results of the so-called “butt dyno” than the results of a test. If it looks better to you, that’s all that counts!

Conclusion

It was most definitely worth the small amount of effort getting these QNIX QX2710 monitors running at 120 Hz. I didn’t buy these monitors to overclock them, but I already have them, so I may as well get the most out of them. Now that I have overclocked, I don’t ever want to play a game at 60 Hz ever again.

Have you overclocked your monitor, or do you have a fast 144 Hz monitor? Leave a comment and let everyone know what you think!

Craft Coffee - November 2014 - modcup

| Comments

Craft Coffee has really done it this month. They’ve sent me another bag of Ethiopian Yirgacheffe, and it is just fantastic! It is definitely one of my favorite coffees so far—probably in the top three.

Craft Coffee introduced me to Yirgacheffe in my first box of coffee with an absolutely amazing Yirgacheffe from Slate Coffee Roasters. They have sent me more Yirgacheffe beans from other roasters since then, and I have been seeking them out locally.

I’ve settled in on a pretty nice Yirgacheffe from Java Pura that I can buy locally, but it isn’t in quite the same league as the beans that Craft Coffee sends me. The coffee from Java Pura doesn’t taste nearly as fruity, and it is definitely less smooth.

modcup coffee co., Jersey City, New Jersey
Producer Konga Washing Station
Origin Yirgacheffe, Ethiopia
Variety Heirloom
Elevation 1,900-2,100 Meters
Process Pulped Natural
An intriguing mix of bright kiwi and blueberry aromatics culminate in a rich finish of peanut butter and cashew.

I have had the coffee from modcup in my possession for just over a week now, and it is almost gone. I usually try to pace myself. I usually manage to make 12 ounces of coffee last at least two weeks. This won’t make it that far. This coffee is much too delicious.

The notes on the bag seem pretty accurate to me. You can smell the delicious fruit flavors as soon as you open the bag, and it that peanut butter finish reminds me of the coffee from Irving Farms back in June.

I am certain that I have made some of my best tasting lattes ever this month. As usual, Craft Coffee has delivered another winner.

The new packaging

The packaging for Craft Coffee’s 12-oz coffees used to be pretty basic. It came in presealed bags, and they weren’t resealable. They just had the usual wire ties to keep the top of the bag rolled up. You can see what I mean in the picture of last month’s coffee.

The new packaging is fantastic. It is almost like a larger version of the sampler packs. They are resealable, have a base that lets them stand up on their own, and they can be cleanly opened without a pair of scissors. I am most pleased with this upgrade!

Use my referral code “pat1245” and you’ll get 15% off

If you use my referral code (pat1245) when checking out at Craft Coffee, you will get a 15% discount. Not only will you save money, but they tell me I’ll get a free month of coffee with every order. That sounds like a good deal for both of us!

Gift Ideas For Geeks - 2014 Edition

| Comments

It is the gift-giving season again, and finding the right gift can be very hard work. I wrote up a little “gift ideas” blog post like this one last year, and I was extremely surprised with how popular it was. I must not be the only one that has trouble picking out gifts, so I thought I’d put together another list of gift ideas for 2014.

I am cheating a little. Many of these items were on the list last year, because I feel like they are still good ideas for gifts. There are a couple new items, though!

Everything on this list is something that I currently own, use, and enjoy. I do list some alternative sizes and brands, though, and I don’t own all of these. The USB battery packs are an example of this. I prefer the small, low-capacity models, but I also listed some larger models as well, even though I don’t own them.

I tried to cover a wide range of prices to help you find a gift for almost anyone on your Christmas shopping list. I also tried to pick out gifts that just about anyone can use. I didn’t want you to have to worry about whether someone has a PlayStation or Xbox, or a PC or Mac.

USB Battery Pack / Chargers ($9 to $50)

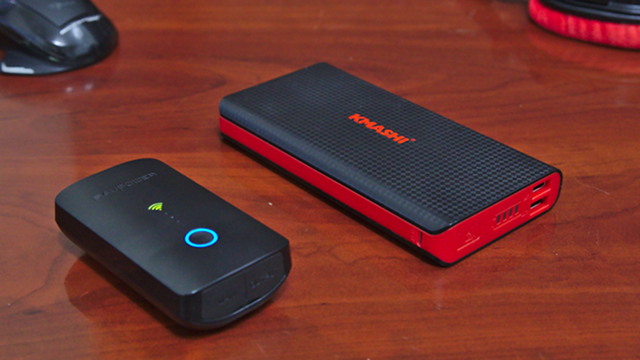
External USB battery packs should come in handy for any geek who needs to keep their gadgets powered up while on the go. I ordered my first external battery pack last year, and I decided to get one of the smallest and most inexpensive models I could find.

It is the Swift Gear Mini 2600 mAh battery pack. It is a small, light, four-inch tube that is small enough that I won’t even notice it in my jacket pocket. It is about the size of a small flashlight. In fact, it is a small flashlight, and a surprisingly bright one at that.

Swift Gear 2600mAh battery pack charging my Nexus 7

I was a bit worried that a 2600 mAh battery pack might not have enough capacity, but I’m happy with the choice I made. It is able to bring my Nexus 4 from 14% charge all the way up to 84% in less than two hours. That is enough to buy me a few extra hours of tethering, which will definitely be helpful next time I’m stuck waiting in an airport. It also manages to bring my Nexus 7 tablet up to 43% from the low battery warning at 14%.

I’ve had my Swift Gear battery pack for more than a year now, and I’ve used it quite a few times. It still works just fine, and the flashlight is very bright and comes in handy more often than I would have guessed. I have noticed a small flaw, though. If I leave it in my bag for several weeks or months, it doesn’t retain anywhere near a full charge.

I also included two larger battery packs in my list. I haven’t used these specific models myself, but they were other models I was considering before I decided which size I wanted. Both of the larger battery packs are capable of charging two devices at a time, and their larger capacity would be handy if you were trying to charge a more power-hungry device like a tablet.

My favorite multitool ($80)

I have had my Swiss Army CyberTool for at least 12 years now, and I would be lost without it. I actually received mine as a Christmas present, and it is the perfect multi-tool for a geek like me that is always building computers and taking apart servers.

The thing that sets the CyberTool 34 apart from most other multitools is its bit driver. It comes with Torx bits, which come in very handy if you run into any HP servers. The bit driver itself is also the correct size to fit brass motherboard standoffs.

Victorinox Swiss Army CyberTool 34

Some people prefer the Leatherman-style tools, and I own a similar Gerber multitool. These are also very handy tools, and I’ve used mine quite a bit, but they’re all centered around that giant set of pliers. I just don’t need pliers very often. If your geek is anything like me, he’ll get a lot more mileage out of the Victorinox CyberTool 34.

Arduino Starter Kits ($55 to $130)

The Arduino is a nifty little hardware prototyping platform, and it is a great way to dip your toe into the world of hardware development. An Arduino board all by itself isn’t very useful. When my first Arduino board arrived, the first thing I did was program it to blink an SOS on its built-in LED.

This isn’t very exciting at all. You need other electronic components if you want to do something interesting. You need parts like LEDs, resistors, buttons, motors, and buzzers. The easiest way to get going is to buy an Arduino starter kit.

I pieced together my own starter kit, but that wouldn’t make a very good gift. The Official Arduino Starter Kit and the Sparkfun Inventor’s Kit are both good choices, and they both come with a similar array of parts. The official kit seems to come with a larger printed guide, while the kit from Sparkfun comes with a nice storage case.

Of the two, I think Sparkfun’s Inventor’s Kit is a better gift and a better value. Sparkfun’s carrying case is a nice touch, and their holder for the Arduino and breadboard looks pretty convenient.

If you’d like to save money, you can go with a more generic kit. This Arduino Uno Ultimate Starter Kit is about half the price of the other two kits. It may have fewer components than the other two kits, but it definitely provides a better “bang for the buck.”

I haven’t had time to work on any interesting projects with my Arduino boards. I’ve been too busy using my 3D printer. The most amazing thing is that my 3D printer is controlled by an Arduino board exactly like the board that I originally bought. It is amazing what an Arduino can be used for!

Amazon Fire TV ($99) or Fire TV Stick ($39), and Amazon Prime

I’ve used a lot of different set top boxes over the years to both play content on my local network and stream TV shows and movies from services like Netflix and Hulu Plus, but I have to say that the Amazon Fire TV has been a significant upgrade. It wakes up quickly, and I can be watching the next episode of my favorite TV shows in seconds.

The speed is my favorite feature of the Fire TV. Moving around in the user interface is lightning fast in comparison to my PlayStation 3 and Roku boxes. It is also a very hacker-friendly device, and I had no trouble installing XBMC (now called Kodi) on our Fire TV. XBMC runs almost as well on the Fire TV as it does on my desktop computer. Having XBMC available is a nice bonus, but is in no way necessary for the Fire TV to be a great set top box.

The Fire TV can stream Netflix and Hulu Plus flawlessly, but the user interface definitely emphasizes Amazon’s own TV and movie content. We have been happy Amazon Prime subscribers for many years, and Amazon’s addition of the majority of HBO’s TV series has really made Amazon Prime free video streaming into a very nice streaming service.

Amazon’s streaming catalog may not be as big as Netflix, and it may not have currently airing TV shows like Hulu Plus, but it is a very solid contender. The recently added HBO shows are also a big plus. It is the other benefits of an Amazon Prime subscription that make it a much better value than Hulu Plus or Netflix. Amazon Prime also gives you free 2-day shipping, a free music streaming service, access to free ebooks, and unlimited photo storage.

My Fire TV Stick didn’t arrive until after I originally wrote this post, but it is here now! For my purposes, the Fire TV Stick is every bit as good as its big brother at a fraction of the price. It has about half the RAM and CPU horsepower, but doubt I could tell you which device is which in a blind test based on their performance.

As long as you’re don’t intend to use your Fire TV for playing games, and your home has a stable Wi-Fi signal, it would be hard for me to recommended the more expensive Fire TV over the Fire TV Stick.

Amazon Fire TV at Amazon Amazon Fire TV Stick at Amazon Amazon Prime Gift Subscription at Amazon
Bodum double wall mugs ($27)

I use my double wall cups from Bodum every single day. They not only look great, but they’re also extremely functional. I use my espresso machine to make an awful lot of lattes, and espresso is a pretty fragile thing. If you pour your tiny shot of espresso into a cold ceramic mug, you will almost immediately bring it down to room temperature and ruin the flavor.

That means I have to warm up my mug first. The double wall cups from Bodum are not only insulated, but the inner layer of glass has very little thermal mass. That means I don’t have to warm up my mugs, and I can start drinking sooner.

My laboratory beaker mug made the list last year, and it is probably made out of the same sort of glass as the Bodum cups. The biggest difference would be the lack of a second layer of glass.

The beaker is definitely the geekier of the two options, but I still prefer the Bodum cups. They’re just more practical. I prefer the 12-oz size Bodum glasses without handles, but they come in an assortment of different sizes and shapes. They even have them in the right size and shape to keep your beer cold and your hand warm!

A Craft Coffee subscription (15% off with code “pat1245”)

Craft Coffee is the perfect gift for a coffee geek. I was given a subscription to Craft Coffee early this year, and I was hooked as soon as the very first shipment arrived. They send three 4-oz sample-size packs of coffee from roasters all around the country every month.

My first shipment from Craft Coffee included an Ethiopian Yirgachiffe from Slate Coffee Roasters. The notes on the bag read, “Light, pillowy and clean, with flavors of dried strawberries, confectioner’s sugar, and breakfast cereal.” I thought this sounded like a bunch of hogwash, but boy was I wrong! It really did smell and taste like breakfast cereal—like Frankenberry cereal.

I felt like this was absolutely amazing. This isn’t flavored coffee. This is just delicious coffee that is picking up flavors out of the soil that it was grown in.

If you do place an order with Craft Coffee, you can use my referral code “pat1245” when you place your order. You’ll receive a 15% discount, and they’ll give me a free month of coffee. People have been using my referral code more often than I would expect, and no one has come back here to complain. I’m assuming that means they also feel that Craft Coffee is an excellent value.

Conclusion

I hope this list of gift ideas has helped you in your search for the perfect gift. If you feel that I missed anything important on this list, please leave a comment and let me know. I’d like to hear your opinion!

The Other Eight by Joseph Lallo

| Comments

I’ve been doing a terrible job reading books this year. I read a dozen books last year, but I’ve only managed to complete five so far this year. I was doing alright up through March, but then I didn’t complete another book until June. I’ve done even worse since then. I’ve been doing such a terrible job that I received an embarrassing email from Goodreads reminding me that I’d been reading the same book for four months.

It isn’t the fault of the book. I place the blame on some combination of Team Fortress 2, Game of Thrones, and Borderlands 2. When the choices are reading a few chapters or playing one more round of Team Fortress 2, Team Fortress 2 usually wins. I also managed to accidentally watch every episode of Red Dwarf for the fourth or fifth time.

Why I chose to read The Other Eight

I have a long list of books written by well-known authors that I would like to read, but I try to sneak in books from authors I’ve never heard of as well. I usually pick those books from the StoryBundle.com bundles.

I have already heard of Joseph Lallo, though. I’ve already read of his science fiction novels, and I enjoyed them both. Those books are very important to me and to this blog, because they are the reason that I follow Joseph Lallo on Twitter.

If I didn’t follow him on Twitter, I would have never found my most excellent editor, Claudette Cruz. She makes sure that I don’t leave out any commas, and fixes all sorts of embarrassing mistakes that I have made. This blog wouldn’t be the same without Claudette’s proofreading!

The Other Eight

The Other Eight by Joseph Lallo

The good news is, superheroes exist. The bad news is, most powers are worthless and most heroes are insane. The Other Eight is the story of the US Army’s latest attempt to find a team of worthwhile heroes and the farcical reality show of a recruitment drive that results from a security leak that makes the secret project public knowledge.

The Other Eight was definitely a fun read, and it is exactly the sort of story you’d expect to find after reading the synopsis. There are plenty of fun characters. My mind was alternating between hearing the voice of Phosphor as either Zeke from the videogame Infamous, or as the engineer from Team Fortress 2. They are similar enough voices, and both felt very appropriate.

Phosphor has a unique super power. He can reach into the bag that he carries and he can pull out a fluorescent bulb, and there will always be another one in there no matter how many he pulls out.

What’s next on the list?

I’ve decided to reread the Red Dwarf novels. I read both while I was in high school, and I was completely unaware that the books were based on a television series. The books incorporate story lines from the television show, while also providing a much deeper backstory.

I haven’t reread any books in years, so this should be interesting!

The Other Eight at Amazon The Other Eight at Smashwords

My Upgrade to Ubuntu 14.10 Utopic Unicorn

| Comments

I don’t tend to get excited when new versions of Linux distributions are released, but I do try to pay some attention to the distributions that I run. This time, though, I managed to completely miss the release of Ubuntu 14.10.

I had some free time over the weekend, so I decided to upgrade my desktop. It was exactly the kind of upgrade I like: the kind of upgrade where nothing went seriously wrong, and I almost can’t tell the difference.

I was lazy this time, and I didn’t bother to remove the xorg-edgers PPA before the upgrade. If you’re using the xorg-edgers PPA, you still might want to roll back those packages before you upgrade from 14.04. I knew what might break, and I know how to manually fix things when they do, so it was worth the roll of the dice to me.

I didn’t notice any changes, but your mileage may vary

I don’t run any of the usual desktop environments. I use the Sawfish window manager along with some components from XFCE. Everything tends to look and function exactly the same between upgrades for me. Just about the worst thing I ever have to deal with is recompiling Sawfish, but that only happens every couple of years.

I’m sure there’s all sorts of changes if you’re running the default Unity desktop.

Waiting for network configuration

This message was the only oddity I’ve experienced since upgrading to Ubuntu 14.10. During boot, a message that reads “Waiting for network configuration…” appears, and the system sits there waiting for quite some time. Then another message appears that reads “Waiting up to 60 more seconds for network configuration…” appears.

I found some solutions on askubuntu.com. The best answer there is almost certainly to make sure that your /etc/network/interfaces file is configured correctly. Unfortunately for me, mine is set up exactly the way I want it. My computer is set up to request a DHCP address on a bridge device instead of the eth0 device, and this seems to confuse the new boot process in Utopic Unicorn.

I ended up using the more heavy-handed fix. I commented out all the sleep commands in the /etc/init/failsafe.conf file.

/etc/init/failsafe.conf
1
2
3
4
5
6
7
8
9
10
11
12
13
14
15
16
17
18
19
20
21
22
23
24
25
26
27
28
29
30
31
32
33
34
35
36
37
38
39
40
41
42
43
44
# failsafe

description "Failsafe Boot Delay"
author "Clint Byrum <clint@ubuntu.com>"

start on filesystem and net-device-up IFACE=lo
stop on static-network-up or starting rc-sysinit

emits failsafe-boot

console output

script
        # Determine if plymouth is available
        if [ -x /bin/plymouth ] && /bin/plymouth --ping ; then
                PLYMOUTH=/bin/plymouth
        else
                PLYMOUTH=":"
        fi

    # The point here is to wait for 2 minutes before forcibly booting 
    # the system. Anything that is in an "or" condition with 'started 
    # failsafe' in rc-sysinit deserves consideration for mentioning in
    # these messages. currently only static-network-up counts for that.

##       sleep 20

    # Plymouth errors should not stop the script because we *must* reach
    # the end of this script to avoid letting the system spin forever
    # waiting on it to start.
        $PLYMOUTH message --text="Waiting for network configuration..." || :
##       sleep 40

        $PLYMOUTH message --text="Waiting up to 60 more seconds for network configuration..." || :
##       sleep 59
        $PLYMOUTH message --text="Booting system without full network configuration..." || :

    # give user 1 second to see this message since plymouth will go
    # away as soon as failsafe starts.
        sleep 1
    exec initctl emit --no-wait failsafe-boot
end script

post-start exec logger -t 'failsafe' -p daemon.warning "Failsafe of 120 seconds reached."

This is not the optimal solution, but it is much better than waiting an extra two minutes for my computer to reboot.

Debezeling My QNIX QX2710 Monitors

| Comments

I have been wanting to remove the bezels from my QNIX QX2710 monitors since they arrived at my door last year. I became even more interested when my dual-monitor mount arrived, because a piece of the base of the QX2710 is a nearly permanent part of the monitor. To remove that piece, you have to open up the monitor. If I have to take apart the monitor, I definitely don’t want to put it back together.

Before After

There’s one thing that has been keeping this project on the back burner—the downtime. I am using JB Weld epoxy, and it takes 15 to 24 hours to fully cure. I didn’t want to lose the use of my monitors for an entire day. I decided to debezel one monitor at a time. That way I could still use my computer.

Why would you debezel a monitor?

There aren’t many circumstances in which I would go through the trouble of debezeling a single monitor. I did end up removing the bezel from the 24” monitor in my arcade cabinet to get it a few millimeters closer to the glass, but that is a special case. Most monitors are sitting on someone’s desk.


Removing the bezels becomes much more functional when you have two or more monitors on your desk, since you’ll be able to move them closer together. It is much nicer having as small a gap as possible between your monitors. My first pair of LCD monitors were 14” and had HUGE bezels. Had I known how easy it would be, I would have debezeled them as well!

My first LCD monitors

I am hoping to see other improvements specific to these QNIX QX2710 monitors. The VESA mount is not attached directly to the LCD panel. It is attached to the rear plastic cover with four screws. The monitors can be made to wiggle quite a bit on their dual-monitor stand. I’m hoping that attaching the VESA mount directly to the LCD panel will eliminate some of that slop. I’m not terribly hopeful, though, because the mount is made of fairly thin sheet metal.

There is another small deficiency caused by the manner in which they attached the VESA mount. It causes the monitor’s plastic shell to flex and opens a small gap at the bottom between the monitor and the bezel. You can also see this causes some of the outermost pixels to be partially obscured by the bezel. You can’t see this problem unless you look for it, but I know it’s there!

Of course, there’s always aesthetics. I think narrow bezels look better, and that might be enough of an excuse to debezel your monitor.

This is not a how-to

I’m not going to spell out a step-by-step process for you. That’s already been done, and it has been done very well. I referred to some YouTube videos and forum posts while I was working to make sure I wouldn’t do anything stupid. It was a very simple process, and it probably took about an hour to get the first monitor all glued up. The second monitor went quite a bit more quickly. I spent most of the time carefully applying the JB Weld and making sure everything was glued up straight and even.

There is an excellent guide at overclock.net explaining the process in great detail. I did not follow his instructions, because I felt that using a piece of plywood to increase the surface area for the epoxy was overkill.

I will tell you about the things I didn’t expect, and that I didn’t plan for.

Is JB Weld strong enough?

My father has been building golf clubs for himself since I was a kid. He was always tinkering and doing things like changing the shaft on his driver, replacing grips, or changing the length of a club.

I remember one very important detail from my days of watching him work on golf clubs. The head of a golf club is attached to the shaft with epoxy. He didn’t use fancy, expensive epoxy. He used a simple two-part epoxy that he bought at K-Mart. I’d be surprised if there’s more than two or three square inches of contact surface there, and I’ve never seen the head fly off of any of his clubs.


What have Pat and Brian been up to lately? To find out you can check out the latest episodes of The Butter, What?! Show


I was hoping to supply some fancy mathematics here to show how much centripetal force the head of a golf club experiences during a swing. I found a lot of math that explains how much force is applied to the ball on impact, but that isn’t very relevant. I did find a chart that tells me that I swing a five iron at a speed of 90 MPH, and I also learned that the head of a five iron weighs somewhere around 9 ounces.

I decided that 9 ounces traveling around a 4’ arc in excess of 90 MPH generates “a lot” of force. My father can hit that same club a good 20 yards farther than I can, so his club head is traveling quite a bit faster. That same chart says the club head of his driver is moving at over 120 MPH, but I’m pretty sure drivers have a pin that holds the head in place in addition to epoxy.

The component box I had to attach to the back of the LCD panel of the QNIX QX2710 only attaches around the edges. Those edges add up to a surface area close to 30 square inches. I am quite confident the JB Weld will hold.

I used regular JB Weld instead of the quick-set variety. This is only because I had some on hand, and I think these partially used tubes have been in my toolbox for over a decade. I did have some of Harbor Freight’s knock off version of JB Weld’s quick-setting epoxy, but the tubes had no information about curing times.

Painting the bezels

Disassembling the metal frame of the LCD panel for painting looks very simple, but I don’t plan on doing it. One of my monitors has a tiny dust mote stuck between the backlight and the panel. I fear that if I take the actual LCD panels apart that I’ll end up with a cat hair stuck in there.

I think the bare metal looks fine except for one minor flaw. There are lines across the frame on opposite corners of the screen. These are the points where they welded two parts together to create a single frame.

The truth is that I don’t notice the gray metal frame at all. The only time I fixate on it is when I’m talking about it. I’ve been repeatedly glancing at the corners of the monitor while writing the last few paragraphs, but I’ll forget about it soon enough.

How long does it take to debezel a monitor?

The first monitor took more time than the second. I was careful when unsnapping the bezel, and I referenced pictures and videos several times to make sure I wouldn’t accidentally rip any wires out.

I also had some confusion. I wasn’t sure which end of the monitor was up, so I didn’t know which way to orient the controller box. You’ll save yourself some time if you take note of which side is up. The innards don’t seem to be identical in all QNIX monitors, so be sure to pay attention.

The second monitor took no time at all. I had the whole thing disassembled and ready for the epoxy in less than five minutes. It probably took another five minutes to apply the JB Weld. I know it takes hours to harden, but I still worry. I wanted to get it coated and attached reasonably quickly.

The second monitor was problematic

After putting the controller box in place, I noticed a significant problem. Even with weight applied to the top, one side wasn’t making good contact with the back of the LCD panel. It just wasn’t straight enough.

The solution was simple, but my execution was poor. I lifted the controller box, and I applied a thick bead of JB Weld on that side. I did a pretty sloppy job, and ended up smearing JB Weld around the back of the LCD panel. It is a much less professional-looking job than the first monitor, but I’m sure it will function just fine.

In my hurry to get that all squared away, I unknowingly dipped my forearm in my mixture of JB Weld. I didn’t notice it at all until I later rested my arm on my desk. I smeared a giant glob of epoxy on my desk.

I thought this was going to be disastrous. I really like this desk. Lucky for me, JB Weld is easy to wipe off!

I don’t always follow directions

The other folks who documented their debezeling always roughed up the surfaces with sandpaper. I probably would have done the same, but I couldn’t find my sandpaper. I’m not worried about it. I’m confident that 30 square inches of JB Weld will hold.

I don’t just ignore important directions. I’m also impatient. The cure time for JB Weld is 15 to 24 hours. I hung the first monitor back up after twelve hours, and I was even more impatient with the second monitor. I think my patience ran out after about eight hours.

If the JB Weld fails and either of these monitors come crashing down, I will be certain to let everyone know.

The results

I have to say that I am extremely pleased with the results. When I disassembled the first monitor, it didn’t look like there was going to be much improvement. The metal frame on the QNIX QX2710 is quite wide compared to the 24” monitor in my arcade table. I measured the metal frame and the plastic bezel with my caliper, and the difference is less than half an inch. That doesn’t seem very impressive.

The difference is more drastic than I expected

Then I hung the debezeled monitor next to the stock monitor. I couldn’t believe how drastic the difference was. It makes these 27” monitors feel so much less bulky.

To my amazement, I managed to glue those VESA mounts on at exactly the same height. The monitors line up on the monitor stand absolutely perfectly. This was one of my biggest worries.

They still wiggle

I was hoping the monitors would be more rigid on their mounts, but it’s still easy to wiggle them about. They might be a little more rigid, but not by much. I think the real problem is that the VESA mounting points are welded to a thin piece of sheet metal. It just has a lot of flex.

I was thinking about 3D printing a small brace to clip the monitors together. It is probably not necessary, but I’m always looking for an excuse to design something new.

Only look at the front

My desk now looks awesome from the front, but don’t try to peek around the back. There are some wires on the back of the QNIX QX2710 that you just can’t hide, and they are all thin, fragile looking wires. The cables that plug in near the top of the monitor are not a problem, because they only reach an inch or two out of the enclosure.

The wires that run to the bottom corner of the monitor to power the backlight are quite thin. I couldn’t do much with that other than tape them to the monitor to keep them from flopping about.

The pair of debezeled QNIX WX2710 monitors

The bigger problem is the board with the power, volume, and brightness buttons. It needs to be there, because there’s always a chance that I’ll need to adjust the brightness. There just isn’t anywhere to neatly attach it. I taped it to the back of the monitor by its wires for now, but I’d like to find a better solution.

It should be simple enough to 3D print some sort of bracket for it. Maybe I can affix it to the monitor’s VESA mount where it can be hidden out of sight.

Conclusion

I’m very pleased with the results, and I’m glad that I finally did it. I’ve been putting off doing this mostly because of the fear that I wouldn’t glue the VESA mounts on at the same height, and that part actually worked out perfectly. When I rest my yard stick across both monitors and measure the gap with my feeler gauge, the distance is less than 0.004”!

I also think it was well worth the time and effort. If you don’t count all the waiting, I spent more time and A LOT more labor on wire management over the last two days.

Have you debezeled your monitor? Is it a QNIX QX2710 like mine? I’d like to see pictures and hear about your experience!

Craft Coffee - October 2014 - Revel Coffee Roasters

| Comments

Craft Coffee sends me 12 ounces of coffee every month, but that only lasts me about two weeks. That means that I have to find other coffee to finish out each month. The beans I’ve been buying the last few months come from Java Pura in Houston, TX. They’re not quite local, but they’re not too far away.

Java Pura beans are very inexpensive at my local Central Market—just $9.99 for a 12-ounce bag. The bags I’ve bought so far were all roasted within the last month, too! So far I’ve tried their Ethiopian Yirgachiffe and their espresso blend.

I’ve been drinking the espresso blend for the last couple weeks. It tastes pretty good. It is oily, and a little too dark for me, but it is ridiculously easy to pull consistent shots with. The lighter coffees from Java Pura, like their Yirgachiffe, have been much more difficult to tune in.

While I have been enjoying Java Pura’s espresso blend, I’ve been patiently waiting for the next selection from Craft Coffee. The espresso blend tastes good, but it is very boring.

Revel Coffee Roasters, Billings, MT

A lovely nectarine brightness can be detected amongst a body resembling jasmine tea and concord grapes before leveling out with a pleasant nip of grapefruit peel.

Revel Coffee Roasters, Billings, MT
Producer Gondo Farmers Cooperative Society
Origin Murang’a, Kenya
Variety SL-28
Elevation 1,700+ Meters
Process Washed
A lovely nectarine brightness can be detected amongst a body resembling jasmine tea and concord grapes before leveling out with a pleasant nip of grapefruit peel.

The first thing that I noticed about the coffee from Revel Coffee Roasters was the smell. It smelled much more interesting than the espresso blend that I’ve been drinking for the last two weeks. The aroma was more like something you would expect to find in the produce aisle at the grocery store than in a bag of coffee beans.

I don’t know if I’m doing something wrong, but this month I am at a completely loss in attempting to identify any of the flavors mentioned in Craft Coffee’s notes. This is the first time that this has happened in eight months. Half the problem might be that I don’t know what jasmine tea or grapefruit peel taste like.

This is a lighter roast, and I still have difficulty pulling consistent shots on my Rancilio Silvia unless I’m using a dark roast. Craft Coffee allows you to choose whether you prefer light or dark roasts, and even with the difficulty they give me, I still prefer lighter roasts. The flavors are more interesting and easier to pick out.

I’m about half-way through the bag, and I’m starting to pull some pretty consistent and delicious shots. The coffee from Revel Coffee Roasters doesn’t stand out like some of the coffees that Craft Coffee has sent me in the past, like Slate Coffee Roasters Yigracheffe or Oren’s Daily Roast’s Sidamo. It is still delicious, and has been tasting better every day as I tune in the grind and shot time.

I miss the three coffee sampler pack

I wish I could still make good use of the sampler pack. The sampler pack usually had two good coffees along with one outstanding coffee. I now worry that I’m missing out on that one amazing coffee each month.

I am now able to consistently pull delicious shots of espresso with my Rancilio Silvia, but it takes me a while to get there. The first shot of espresso from a new bag of coffee usually goes horribly wrong. The second shot is usually drinkable, but not delicious. I’d be likely to burn through an entire four-ounce pouch of coffee from the sampler before pulling a really good shot.

Use my referral code “pat1245” and you’ll get 15% off

If you use my referral code (pat1245) when checking out at Craft Coffee, you will get a 15% discount. Not only will you save money, but they tell me I’ll get a free month of coffee with every order. That sounds like a good deal for both of us!

3D Printed Keychain Connector for USB Flash Drives

| Comments

My friend Brian has been on a mission to reduce the weight and volume of his keychain.

He had some empty space in his fancy new key machine, so he decided to add a USB flash drive. There were a lot of thin USB 2 flash drives that leave out the metal guard around the connector, but Brian wanted his new drive to be a faster USB 3 model. All the USB 3 drives are a little thicker, and they all have the metal guard. We were wondering if it was now a functional requirement.

Brian found some nice USB 3 flash drives, but none of them had large enough keyring holes to fit his fancy keychain. I had an idea, though. I figured it would be easy to print up a little plug that could fit inside the USB connector. That way he could buy any flash drive he wanted.

Even easy prints require three attempts

This is one of the simplest models I’ve designed using OpenSCAD, and it didn’t take more than 10 minutes to have a model that was ready to print. I hadn’t seen this new keychain yet, but I thought the nuts and bolts looked pretty big, so I took a guess and overestimated on purpose. I figured it would be easier to test if the hole was oversized rather than undersized.

Note the one that snapped on its weak axis

I printed this first model on its side, because it was sized to be precisely the same thickness as a USB connector, and the plug was positioned so that two of the edges would be flush with the USB connector.

This print was a complete disaster. The hole for the keyring was huge, and the walls were all so narrow that the print just didn’t stick together very well.

I printed five parts at once, and each one had a plug 2% smaller than the last. This worked out well, because some of them were sturdy enough to test, and I was definitely on the right track.

The second attempt

The second attempt was a bit more well designed. I rotated the object 90 degrees so that it would print with the connector facing up. This allowed me to make the connector the same width and thickness as a USB connector, so the metal would be flush on all four sides.

This seemed like a great idea, but it was a terrible idea. Not only did I have the same problems printing the small, thin parts as I did the first time, but this part was also extremely weak on the most important axis. It would easily snap off at a layer transition, and you’d end up with a chunk of plastic stuck in your flash drive!

Simple is better

Printing the part lying down was a much better way to go. The plug that inserts into the USB drive is printed along more than one axis, so it is much sturdier. Also, the part printed much better because it was so much wider.

The final design

I was even able to make the part flush with the USB connector on three sides, and three out of four sides is good enough for me.

Lessons learned

I’m still new to 3D printing, and I learn something new with each failure. The time I once again learned that orientation is extremely important. In the past, I have had to adjust the orientation of the part to reduce overhangs. I had that covered this time, but I didn’t think about how poorly such a narrow part might print.

I would likely get better results on these narrow parts if my printer was better calibrated. The first two attempts would have been problematic even if they printed perfectly, because they each had a weak axis that might have snapped off in the USB connector. The third part has three walls surrounding the outside edges and solid layers with a 45-degree offset on the top and bottom. That should make it much sturdier!

Craft Coffee - September 2014 - Thirty Thirty

| Comments

This is the second month so far where I’ve opted to receive a single 12-ounce bag of coffee from the fine folks at Craft Coffee. It is definitely a safer choice now that I’m learning to use my Rancilio Silvia espresso machine, and I’ve wasted far less coffee this way, but I really miss tasting three different, delicious coffees every month.

Tasting them is always enjoyable, and it is much easier to write about three different coffees at the same time. I may have to look into increasing the volume of my subscription!

Thirty-Thirty Coffee, Peoria, IL
Producer Finca San Luis Oscar Chacon
Origin Costa Rica
Variety Caturra, Catuai
Elevation 1,450 Meters
Process Natural
Tart grapefruit acidity and blueberry jam flavors complement a crisp clean finish in this fruit forward cup.

I really like this coffee from Thirty Thirty. It seems like a pretty well-balanced cup of coffee to me. It is just a little bit tart, but I can easily pick out the blueberry that’s mentioned in Craft Coffee’s notes.

The blueberry flavor reminds me of the Ethiopian Sidamo coffee I received in June from Oren’s Daily Roast. It isn’t quite the same, though, and I think I can understand why Craft Coffee’s description actually says “blueberry jam.”

I’ve actually been pretty successful at making lattes with the Thirty Thirty coffee this month. I only choked [my] Rancilio Silvia]1 on my first pull. The rest were all drinkable. The best double shots of Thirty Thirty that I’ve pulled were all ristrettos near the 1.5 ounce mark.

Use my referral code “pat1245” and you’ll get 15% off

If you use my referral code (pat1245) when checking out at Craft Coffee, you will get a 15% discount. Not only will you save money, but they tell me I’ll get a free month of coffee with every order. That sounds like a good deal for both of us!

The Nvidia GTX 970, Linux, and Overclocking My QNIX QX2710 Monitors

| Comments

I’ve been thinking about buying a new video card for a long time. I probably started seriously considering it the day my 1440p QNIX QX2710 monitors arrived. My old Nvidia GTX 460 card was fast enough to run most games at 2560x1440 with reasonably high settings. It wasn’t fast enough to enable antialiasing in most games, but the pixels are pretty small from where I’m sitting anyway.

There was something I was missing out on. The QNIX monitors can be overclocked. That means you can run it at refresh rates higher than 60 Hz. I’m told that some can be run at 120 Hz. That means that a new image is drawn on the screen 120 times every second—twice as fast as most monitors. My old Nvidia GTX 460 was too old for that, and it could only drive the panels at 60 Hz.

I’ve been keeping my eye on the Nvidia GTX 760 for the past few months. It would be new enough to overclock my QNIX monitors, and it would be fast enough to justify the upgrade. It just wasn’t going to be enough of an upgrade for me to get excited about, especially considering that I had never even seen the difference between 60 Hz and 120 Hz.

The new Nvidia Maxwell GPUs

Late last week, a friend of mine asked me if I’d seen the news about the GTX 970 and GTX 980 video cards. I hadn’t, so I looked them up. The GTX 980 is way beyond my needs, but the GTX 970 looked very interesting. They hit the shelves the next day, and I ordered a GTX 970 from Amazon almost immediately.

The GTX 760 cards that I’ve been interested in sell for around $230. The GTX 970 costs quite a bit more at $330, but I decided that I’d get a lot of value out of that extra $100. The GTX 970 is significantly faster than and has twice as much video RAM as the older GTX 760. In fact, the GTX 970 is nearly comparable to the GTX 780 Ti that was selling for well over $500 last week. The GTX 970 provides excellent bang for the buck with regard to performance.

Performance alone should be enough to justify buying a GTX 970, but even the cheaper GTX 760 is more than fast enough for my needs. The GTX 970 provides more than just a performance upgrade. The GTX 970 and GTX 980 both bring two interesting new features to the table: Multi-Frame Anti-Aliasing (MFAA) and Voxel Global Illumination (VXGI).

Multi-Frame Anti-Aliasing (MFAA)

I’m pretty excited about MFAA. Antialiasing is used to smooth out the jagged edges that appear when one 3D object is rendered on top of each other. There are a number of different methods used to accomplish this. The most popular method is probably multisample antialiasing (MSAA).

Nvidia is claiming that 4xMFAA looks as good as 4xMSAA while only requiring as much extra processing power as 2xMSAA. I don’t know if these claims are true, but I am looking forward to trying it out for myself. Based on what Nvidia has said about MFAA so far, I was expecting to see an option in the nvidia-settings control panel to force the use of MFAA.

I haven’t been able to find such an option, so I will be keeping my eyes open. It sounds like this will show up in a driver update sometime in the near future.

Voxel Global Illumination (VXGI)

I’m much less excited about VXGI. It is a new way to implement dynamic lighting. It calculates things like reflections and shadows in real time. Not only does will it make for better looking visuals, but it sounds like it’s also much easier for artists and programmers to work with.

I’m not very excited about it, because it won’t improve existing games like MFAA will. It will only be available in new games that choose to support it. I still feel that it is a good reason to choose the GTX 970.

You don’t mess with the Zotac

I ended up ordering a Zotac GTX 970. I don’t think I’ve ever owned a product made by Zotac, but this wasn’t a well-planned purchase. I was awake for quite a while that day before I remembered that I wanted to buy a GTX 970. The Zotac video cards tended to be less expensive, and more importantly, there were also three of them left in stock.

In the old days before DVI, HDMI, and DisplayPort, choosing a quality card was very important. We used to rely on the video card’s RAMDAC to generate the analog signal that would drive the VGA port. Low-quality RAMDACs make for fuzzy images and bleeding pixels.

We don’t have to worry about that with modern displays with digital connections, so I’m much less worried about buying a less expensive video card today. I’ll be sure to update this page if I ever experience a problem.

The Zotac GTX 970 came with a pair of adapters for converting 4-pin hard drive power cables into 6-pin GPU cables, and a single DVI to VGA adapter.

60 Hz vs. 96 Hz and beyond

I did two things immediately after installing my new Zotac GTX 970 card. I immediately fired up Team Fortress 2, maxed out all the settings, and ran around a bit to see what kind of frame rates my fancy new graphics card could muster. Then I started monkeying around trying to get my monitors to run at 96 Hz.

It was actually a pretty simple task, but that’s a little out of scope for this particular blog post. I probably had to restart my X server two or three times, and I was up and running at 96 Hz. Once I verified that it was working, I jumped right back into Team Fortress 2.

99.3 Hz refresh rate

It wasn’t very noticeable at first. When you connect to a server, your view is from a stationary camera, and I was watching RED and BLU guys wander around. Then I spawned and started walking around. That’s when you really notice the difference.

I won’t say that the 60% faster refresh rate is the most amazing thing ever, but it is definitely an improvement. The difference is easy to spot as you aim your gun around in the game. The first thing I said was, “This is buttery smooth.” It really is quite nice. It isn’t nearly as drastic as the jump from jittery, 30-frame-per-second console gaming to solid 60-frame-per-second PC gaming, but it is definitely a nice upgrade.

I did some more work, and I pushed my monitors up to about 100 Hz. I was trying for 120 Hz or 110 Hz, but neither would work for me. I was pretty close at 110 Hz, but I got a pretty garbled and jittery picture on the screen. I’m not unhappy, though. I’m quite happy at 100 Hz.

I should note here that it is only possible to overclock the DVI version of the QNIX QX2710. The QNIX QX2710 TRUE10 monitors with HDMI and DisplayPort models use a different LCD panel and will only run at 60 Hz.

UPDATE: I found some tighter timings and converted them to an xorg.conf modeline, and my both my monitors are running happily at 120 Hz. I have written a detailed blog post about overclocking my monitors to 120 Hz.

Steam for Linux game performance

I don’t really have anything in my Steam library that wasn’t playable with my old GTX 460 at 2560x1440. I had to run most of those games with the quality settings turned down a bit, so I spent some time today opening up games and adjusting their video settings as high as they would go.

Team Fortress 2 settings maxed out

Team Fortress 2 used to run at a little over 100 FPS, but it would drop down into the 60 FPS range when a lot was going on. With the new card, I turned everything up to the max and set it to use 8xMSAA. I haven’t seen the GPU utilization go much higher than 65% while playing Team Fortress 2, but I do still drop down into the 60 FPS range. The CPU is the bottleneck here.

Left 4 Dead 2 was pushing my old video card to its limits at 2560x1440, and that was with most of the settings turned down as low as they would go. It wasn’t running much better than 60 or 80 FPS. At the old settings, the new card didn’t drop below 280 FPS. I’m assuming the game is capped at 300 FPS.

After maxing out every setting, Left 4 Dead 2 is running at a solid 150 FPS with the new card. The game looks so much better, and it feels buttery smooth at 100 Hz!

I had similar success with Portal 2. I can’t say much about how it ran on my old video card because I’m pretty sure I played through the game on my laptop. I can say that with the settings maxed out, it doesn’t seem to drop below about 110 FPS. That was with me running around the room where the final “battle” takes place.

I have a quite a few games that don’t report their frames per second—games like Strike Suit Zero, Wasteland 2, and XCOM: Enemy Unknown. I maxed out all their video settings, and as far as I can tell, they’re running quite well.

Shaming two games with bad performance

One of the games that my friends and I have played a lot of is Killing Floor. The Linux port of Killing Floor runs reasonably well for the most part. There are some maps that just run very poorly. One in particular is the Steamland “Objective Mode” map.

Some areas on the map run at less than 30 FPS with my laptop’s Nvidia GT 230M video card. Those same areas run at less than 30 FPS on my desktop with my old GTX 460 card, and those areas of the map run just as poorly with my GTX 970. It is quite a disappointment.

The other game is Serious Sam 3: BFE. I haven’t played this game much because it runs poorly and crashes all the time. It still runs poorly even with my new GTX 970. I was wandering around near the beginning of the game while smashing things with my sledge hammer.

I kept adjusting various video quality settings while I was doing this. The autodetected settings ran at less than 30 FPS. I kept turning things down one notch at a time waiting to see some reasonable performance. The game became very ugly by the time the frame rate got into the 50-to-70-FPS range. That’s when I gave up.

Conclusion

I’m very happy with my purchase of my Zotac GTX 970 card, even if the video card is now the most expensive component in my computer. It is almost an order of magnitude more powerful than the card it replaced, and it even manages to generate less heat. That’s actually a very nice bonus during the hotter days of the year here in my south-facing home office in Texas. This is the warmest room in the house, and long gaming sessions manage to bring the temperature up a couple of degrees past comfortable.

My computer isn’t the only machine in the house that will get an upgrade out of this. I’ll be moving the GTX 460 into my wife’s computer, and her Nvidia GT 640 will be moving into the arcade cabinet. I’m pretty excited about the arcade cabinet upgrade because I will now be able to route the arcade audio through its wall mounted television. Upgrades that trickle down are always the best upgrades!

The GTX 970 is an excellent match for my pair of QHD QNIX QX2710 monitors. Finally being able to take advantage of their overclockability is awesome, and I should have no trouble running new games at 1440p for at least the next couple of years. Now I just have to hope that they eventually release Grand Theft Auto 5 for Linux and SteamOS!