I picked up my copy of Strike Suit Zero quite a while ago as part of the Humble Indie Bundle X. When this bundle launched, it wasn’t very exciting for me, but I bought it anyway. I don’t think I’ve missed a Humble Indie Bundle yet. It became much more interesting when they added Strike Suit Zero during the second week.
I had never heard of the game before, but it sure looked like the sort of game I’ve been waiting for. Strike Suit Zero looked like a modern Wing Commander-style game, and I played the heck out of Wing Commander and Wing Commander 2 when I was a kid.
I installed the game as soon as I could and gave it a try. The first two missions most definitely reminded me of Wing Commander. The steering with the mouse is pretty similar, but the aiming is very different. In Wing Commander, you have to line up your shots using the crosshairs in the cockpit—you could only fire directly ahead. Your ship fires towards the mouse pointer in Strike Suit Zero, and the pointer turns red when you have a viable shot lined up.
The strike suit
Things were going so well right up until I unlocked the strike suit. Using the strike suit is absolutely nothing like Wing Commander. When you transform into strike mode, your ship becomes almost stationary. In strike mode, the goal is to lock on to many targets simultaneously with missiles or use the auto targeting with the primary weapon.
I did not adjust to this transition at all. I failed this mission over and over again until I finally gave up.
I was traveling at the time, and I only had my laptop with me. On my laptop, the frame rate would drop considerably when lots of things were exploding. Between that and my inability to pilot the strike suit, I didn’t see much point in playing anymore.
Second chances
I tried the game again a few weeks ago, and I am very glad that I did. You can retry previous missions with the upgrades you’ve earned in the harder missions. I decided to go back to the first mission using the strike suit, and I got as much practice as I could by using strike mode at every possible opportunity.
The practice definitely paid off. I’m not sure how many times I had to retry the mission where you acquire the strike suit, but I know it wasn’t very many! After that, it was relatively smooth sailing.
I’m having quite a bit of fun now. The entire game is basically what every space combat movie or television show is all about. You’re one of the guys in the small fighter craft. Most of the time you’re in dogfight with other fighter craft. Sometimes you’re strafing in close to huge battleships taking out their big guns so your own battleships can survive.
I’m a bit stuck right now near the end of the tenth or eleventh mission. I just can’t seem to keep my carriers alive! I’m sure I’ll get it, though.
Closing thoughts
I’m disappointed that I took a dislike to the game so early on. I almost bought gift copies of this Humble Indie Bundle for all my Wing Commander loving friends, but I decided against it as soon as I encountered the strike suit. I don’t know if my wallet is deep enough to buy so many copies at full price, though!
I’m looking forward to finishing the game, and I’m definitely considering buying the DLC. Strike Suit Zero runs great on Linux, but I have had an occasional crash when completing a mission. I only lost progress because of this once. I’m having no trouble running the game at 2560x1440 on my computer.
My third month with Craft Coffee might be the most delicious yet. As soon as I opened the box, I fired up the Espresso machine and made myself a delicious latte using Oren’s Daily Roast. I knew immediately that this had to be the best coffee of the three—it was just SO smooth and delicious.
I was very wrong. All three coffees this month are on pretty equal footing.
You’ll probably notice that I use the word “delicious” quite a bit. This is why I mostly write about technology and not food or drink. I am apologizing for this in advance.
A nose of mixed berry jam introduces a cup bursting with juicy blueberries and strawberries, dark molasses, and a hint of fruity bubblegum, with a sweet and malty finish like a great Belgian ale.
I just had to open this one first. The Ethiopian Yigracheffe from Slate Coffee Roasters in my first package from Craft Coffee was spectacular. That made me decide to buy some Yigracheffe locally from Addison Coffee Roasters. The Yigracheffe from Addison Coffee Roasters was pretty good, and it might even be my new favorite coffee of theirs, but it just isn’t in the same class the beans from Slate Coffee Roasters.
These beans from Oren’s Daily Roast are also from Ethiopia, and they are unwashed beans like the ones from Slate Coffee Roasters. I just couldn’t help myself. I had to try these first.
I’m glad I did. This coffee is fantastic. It is smooth and silky. It doesn’t have the extreme dried strawberry finish that the Slate Coffee Roasters coffee had, but I can easily pick out the blueberry flavor in here.
Rich aromas of raisins and freshly roasted pecans lead into a creamy, full-bodied cup with decadent layers of peanut butter and milk chocolate that fade into a lingering, buttered toast finish.
I don’t know if I goofed up when pulling the first shot, but I had trouble picking up on the flavors mentioned in the summary on the pouch. It tasted great, and I could pick out a bit of a nutty flavor, but that was about it.
The second latte I made was much more flavorful. The smell of raisins was easy to pick out, and the flavor really did remind me of peanut butter. I don’t know that I identified the buttered toast, but the finish and aftertaste were quite pleasant.
There is a chocolate flavor there, but I think I pick up on that in most lattes that I make. I’m always telling people that I know I made a good latte if it reminds me of a hot chocolate.
A lush, easy-drinking Columbian with flavors of caramel, black cherries, and rose water, accented by vibrant aromas of oranges and chocolate-covered graham crackers.
I’m definitely picking up the caramel flavor of this coffee from Willoughby’s, but I’m having trouble finding any of the other characteristics listed on the pouch. I might be picking up a hint of black cherry right as I’m finishing each sip, but it vanishes pretty quickly. I’m not sure if it is really there, or if I’m just convincing myself that it is.
This is another smooth and delicious coffee, just like the other two.
This has been another excellent selection from Craft Coffee. Last month’s coffee was very good, too, but this month the flavors are much more interesting. The coffees in this batch are also some of the least expensive coffees they’ve sent me.
Before they arrived, I was a little pessimistic. I thought it looked like they were going to be making a better profit this month by shipping me cheaper, less awesome coffee, but I couldn’t have been more wrong. This is some really awesome coffee, and they’d all be excellent candidates to replace my “go-to” coffee.
This marks the half-way point of the Craft Coffee subscription I received as a gift three months ago. I’m definitely very pleased with it. All the coffee they’ve sent is delicious and freshly roasted. Every pouch has the date of roasting printed right on it—these were roasted on June 10. That’s roughly one week before they arrived at my door.
It was a delicious gift, and I’m very seriously considering extending my subscription. It is a pretty good value. I don’t think I can have 12 ounces of many of their selections shipped to my home for less than Craft Coffee’s monthly subscription fee, and they’re always sending me something new and delicious.
Use my referral code “pat1245” and you’ll get 15% off
If you use my referral code (pat1245) when checking out at Craft Coffee, you will get a 15% discount. Not only will you save money, but they tell me I’ll get a free month of coffee with every order. That sounds like a good deal for both of us!
I’ve had my Prusa i3 3D printer for more than a month now, and I’ve been having a blast. Hardly a day went by in the first couple of weeks that I wasn’t printing something. Most of the things I was printing were designed by someone else. Some of those things were parts to improve or upgrade my 3D printer.
In fact, I found quite a few very useful additions and upgrades for my printer posted up on thingiverse.com.
Everyone needs a spool holder
There are A LOT of spool holder designs up on thingiverse.com. Most of them are a variation on the same theme: a rod or spindle sitting between a couple of arms. Usually those arms point upwards, but sometimes they hang over the back.
These all seemed pretty crude to me. For the first few days I was using my PVC laptop stand as a makeshift spool holder. It did the job, but it showed me how this kind of design might be problematic, the biggest problem being that you have to lift off the spindle to add or remove a spool. This would likely be a lot less troublesome with a proper spool holder, but it was quite a nuisance with my first makeshift holder.
Then I found Lisa Croxford’s awesome Compact Spool Holder. I think her spool holder is just brilliant. It hangs off the back and holds the spool perpendicular to the printer. Unlike most of the other spool holders that hang off the back, her design doesn’t extend back past the base of the printer.
This means I can actually fit my printer on its new little table—a table that is actually meant to be a night-stand. It is also more stable than using a spool holder than extends 12” behind or above the printer. I have one hanging on either side of the printer.
She recommended that this spool holder be printed with 80% infill, but I completely forgot to make that adjustment when I was slicing the model. I ended up printing them at my usual 30% infill. They seem quite strong to me, but if you have a better memory than me, it would probably be a good idea to increase that infill.
This is a pretty simple idea that came in very handy. I have a spool of bright green filament hanging off the back of my printer, and I have no idea when I’ll use it again. I was using an extra binder clip to keep it from unraveling, but then I saw this handy filament spool clip on thingiverse.com.
I printed off a pair to try them out, and they work great. One of the clips is holding my green filament in place. The other one is clipped onto the printer frame, patiently waiting for the day I need to remove the black filament.
My printer happened to come with the Magma hot end, which is an all-metal hot end. These all-metal hot ends can print just about anything, even nylon, but they have some trouble with PLA. Since it is 100% metal, the Magma hot end needs to be cooled continuously.
The printer comes with a 40 mm fan bolted to the extruder assembly for this purpose, but it doesn’t just keep the hot end cool. Most of the air ends up hitting your print, and this can cause warping. When I first started printing, this fan was also messing with temperature readings of the thermistor.
The “Magma cooling system” at thingiverse.com looked like the perfect solution. It draws air in from the top, blows it directly across the Magma hot end’s cooling fins, and then it expels the air back out the top. This keeps heat from traveling up the hot end to the filament without affecting your print. It may even work well enough to print PLA, but I haven’t tried that yet.
I printed this pretty early on. At the time the printer wasn’t very well calibrated, and I was still printing with a 0.3 mm layer height. This made everything a bit snug. It all fits, but I had to muscle it into place. I also had to use a small file to open up the slots the wedge piece slides into. I have no doubt that it would have fit perfectly if I printed at a 0.2 mm layer height.
When attaching the cooling system, I somehow managed to break two of the blades off of the 40 mm fan. This made the already loud fan even louder. A lot louder.
I’m happy that this happened, though. The replacement fan that I ordered is whisper quiet compared to the fan that MakerFarm ships with these printers. The stock 40 mm fan was the loudest component of this printer. Now you can’t hear it over the sound of the power supply.
The replacement 40 mm fan is almost twice as thick as the original fan. This was good for me, because the machine screws I bought to hold the cooling system in place were way too long.
This is another very simple, yet very useful upgrade. Adjusting the corners of the heated bed usually requires two hands—one underneath to keep the nut from spinning, and another up top to turn the hex key. This isn’t too bad in the front, but adjusting the height in the back requires some interesting contortions.
These little brackets help out by holding the nut on the bottom in place, so you only need one had to loosen or tighten the bolts. I think this is especially useful, because I can slide a piece of paper around under the print head to test the height as I’m adjusting the screws.
These seemed much more exciting last month, when it seemed like I was constantly adjusting the bed. Since learning that I can adjust the Z-axis end stop screw, I’ve barely had to touch the bed leveling screws. Even so, this was a very simple and worthwhile upgrade.
I’m not so sure these bushings are doing much, but they were easy to print, easy to install, and they make the printer look a little cleaner.
They keep the threaded rods for the Z-axis from dancing around their giant holes at the top of the machine. This is supposed to make things a bit quieter and maybe make the Z-axis a little more accurate.
I don’t really care how much noise a Z-axis makes—it only makes one minuscule movement for each layer anyway. I don’t know how much it does for my Z-axis accuracy, either, since I haven’t noticed any sort of waves in my layers.
Mine came out a little on the small side, since these are another thing I printed before calibrating my printer properly. I just wrapped a piece of tape around them, so now they fit very snugly.
There are tons of knobs to choose from to use with your LCD control panel. I chose this one because the edges are knurled, and I wanted to see how the knurling would turn out. It also has an indentation in the top for one fingered spinning.
The knob does its job admirably, and the knurling came out better than I expected. The knob is HUGE. Much bigger than I would prefer. I’ll probably print something smaller at some point, but this one will do for now.
Even though it is one of the most important parts on the printer, the end stop for the Z-axis is very poorly designed. The microswitch is attached to the machine with a small zip tie, so it wiggles around quite a bit. I’d like to replace that with some nuts and bolts, but I don’t have anything small enough in my parts bin.
I found a nice looking Z-axis end stop adapter at thingiverse.com this week. It wraps around the wooden frame of the MakerFarm Prusa i3 and gives the adjustment screw more material to bite on.
I haven’t printed anything yet since installing this part, but I’m already extremely pleased with the result. I don’t think my z-axis adjustment screw was ever straight or secure. It used to hit the switch pretty squarely.
Now that the screw is actually at the correct angle, it just barely touches the edge of the switch. It also feels much more solid, and I actually need to use a screw driver to turn the screw now.
I recently learned that you can level out the Z-axis by turning the threaded rods on each side of the machine. It is easy to get a good grip on the rods because they’re so tall, but it is uncomfortable and seems imprecise.
I found nice looking Z-axis knobs on thingiverse.com. They fit nicely and work great. I can even spin the rods with just one finger now.
I haven’t had a chance to print everything I need. I only learned about some of these parts recently.
Extrusion cooling fan
I definitely need to add a second fan for cooling the extruded material. That would improve my overhangs and hopefully make bridging a possibility. I printed quite a few 20 mm calibration pyramids, and the bridges on those all came out droopy.
I’ve even been wondering if I installed the aluminum mounting plate for the hot end upside down. There’s definitely a groove in there, but I don’t know if it is deep enough to account for the difference in height.
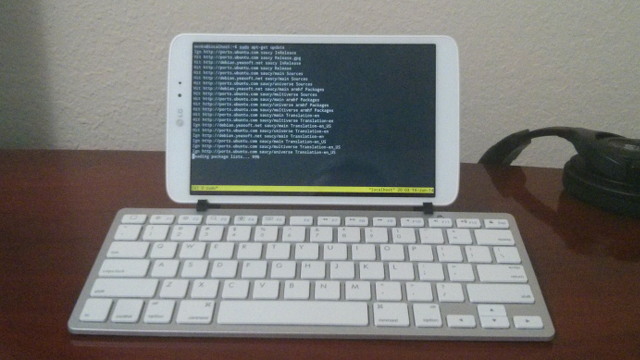
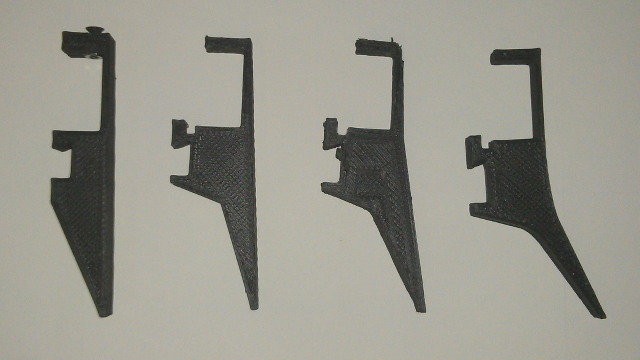
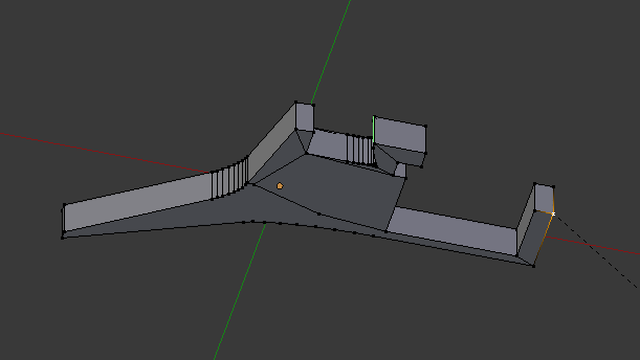
Owning a 3D printer has been a lot of fun so far. I was printing my own custom designed parts in just over a week. I’ve already finished designing and printing tablet stand for my Bluetooth keyboard, and I’m already starting on my third model. I’m very excited about this, because I’m WAY ahead of where I expected to be at this point.
When I got the printer, I’m pretty sure I printed something every single day for almost three weeks. I saw how fast the spool of filament was running down, so I ordered two more. Since then, I’ve slowed down quite a bit. At the time, I was mostly printing things I downloaded from the Internet.
I haven’t printed anything from the Internet in weeks. I’ve only been printing my own designs, so I’ve become the bottleneck. That first two-pound spool will probably last me quite a few months, and I bet the extra four pounds I have will carry me through the beginning of next year.
I upgraded my monitors nine months ago. I replaced a pair of 21.5” 1080p TN LCD monitors with a beautiful pair of QNIX QX2710 27” 1440p IPS LCD monitors. These new monitors were too big for my old do-it-yourself LCD monitor stand. These monitors have tons of pixels and vibrant colors, but the quality of their built-in stands is very low. They are quite wobbly, and both monitors lean just a bit to the left.
I knew that building a replacement stand had to be a top priority. That was nine months ago, and in those nine months I didn’t make time to build a new monitor stand. Last month, I bought a 3D printer. I knew this would be a major time sink, and we already have so many other fun projects to work on, so I decided to just give in and buy a dual LCD monitor stand.
Why use a monitor stand or mount?
There are three reasons I like putting my monitors on a mount that is solidly attached to the desk. It significantly reduces the amount of desk surface the monitors physically occupy. The flimsy built-in stands on the QNIX QX2710 monitors are 10” by 6”. With the monitors hung on a mount, I can move things around underneath the monitors with no trouble.
Second, a good stand will let you adjust the height of the monitor. These monitors were much bigger than the ones they replaced, and their built-in stands had them sitting quite low. On those built-in stands, I sure felt like I was looking way down to see the bottom of the screen. I only raised the monitors about two inches higher using the new stand—any higher and the tops of the monitors will be above my head!
And most important of all, it keeps the two monitors from moving around in relation to each other. There is nothing that annoys me more than two monitors shifting, moving, or tilting, and I don’t like having a gap between the displays. That gap is almost impossible to eliminate without a monitor stand. Even if you manage to hide that gap, it will come back the first time you bump one of the monitors.
Picking out a dual monitor mount for a pair of 27” monitors was surprisingly difficult. There are plenty of stands that say two 27” monitors will fit, but I was more than a little apprehensive. I like to have my monitors angled towards each other at about 135 degrees. The arms don’t need to be as quite as long if you just want them to sit side by side with no angle.
I found all sorts of comments on Amazon telling me that their pair of 27” monitors fit on the stand, but none of them mentioned anything about angles. This worried me a bit, but I figured I would give it a try anyway.
The good news is that you can definitely arrange a pair of 27” monitors at a 135-degree angle (or 45-degree depending on how you’re measuring). The only problem is that things are pretty tight. I was hoping to attach this arm to the rear edge of the desk, but the arms just aren’t long enough. If you want to arrange the monitors at an angle, then you’ll have to sit almost directly perpendicular to the mount.
I figured this might be problematic before I placed my order, and I knew exactly what I would do if this happened. I put the clamp right through the grommet hole on my desk. This worked surprisingly well, and I was able to position my monitors almost exactly where they were before.
Using your brain
I wasn’t using my brain while I was ordering this stand. After I had this dual monitor mount all set up, I figured out what I could have done. I should have bought a triple monitor stand instead. They come with an extra fixed mount in the center, and their two arms look like they’re quite a bit longer. The triple monitor stands are too wide for a pair of 27” monitors. My friend Brian tried, and the arms just wouldn’t bend far enough to get the monitors to touch. They were almost 3” apart!
I found some diagrams of my dual monitor stand and the triple monitor stand in some auction listings on eBay. If they can be trusted, and I did my metric conversions correctly, then each arm should be about three inches longer on the triple monitor mount. That extra six inches would have added a lot of flexibility in the placement of the stand.
A mount by any other name is probably the same mount
There are at least half a dozen identical monitor stands on Amazon sold under different brand names. They all look the same to me, and the packaging mine came in was completely generic. My method for choosing a brand was very simple: I picked the cheapest one with Amazon Prime shipping. I couldn’t think of a good reason not to choose the least expensive of the identical stands.
I don’t really have much to complain about here. The entire thing seems to be made of steel. The vertical support is nearly two inches in diameter, and the arms are one-inch square tubes. All the welds look pretty good to me.
There were a lot of complaints on Amazon about how loose all the joints on this monitor stand are. They aren’t exactly wrong. All the joints were pretty easy to move when it arrived, and the monitors would immediately droop down.
There is an Allen bolt at each joint on the arms, and there is a big nut to adjust the tilt tension of each monitor. You have to torque those tilt tensioning nuts down REALLY tight. Don’t be afraid to crank down on them pretty good.
I wanted to make absolutely certain they wouldn’t drift on their own. Once you torque them down tight enough, the monitor will tilt when you turn your wrench. I ended up sticking a long screwdriver between the mounting bracket and the hinge to use as a pry bar to keep the monitor from tilting. I probably tightened it down an extra quarter of a turn that way. It isn’t going anywhere.
Mounting the monitors is a little tricky
There is a somewhat nicer-looking articulating monitor stand sold by Monoprice. Their stand has a removable bracket. You bolt the bracket to the monitor and then just drop the monitor onto the stand. Unfortunately for us, Monoprice says their stand is only big enough for 24” monitors. The stand from Monoprice doesn’t look as sturdy as the “Mount-It!” stand.
The stand I bought does not have this handy feature. You have to hold the monitor up with one hand and put the screws in with the other. These monitors only weight about 12 pounds, so this wasn’t all that difficult. I did have to move the desk out from the wall and do some minor gymnastics to get the second monitor up, but even that wasn’t too bad.
Washers to the rescue!
The stand came with two different sets of metric M4 screws for attaching the monitors. The short set of 12 mm screws are a little too long for the QNIX QX2710. I had to put three or four washers on every screw to take up the slack. This isn’t ideal, but it is working for now. I’m sure I’ll remember to pick up some 8 mm screws on a random trip to Home Depot. This is fine in the interim.
I have no room to test monitor rotation
The “Mount-It!” monitor mount allows you to rotate each monitor. This lets you switch from landscape to portrait and back again. I don’t have nearly enough clearance to spin these monitors at the height I’ve chosen for them. They’d just bang off the desk if I try.
I have had to rotate each monitor a hair to get them to line up, though, and it seems to work just fine.
Should I debezel these monitors? Absolutely!
You might notice in the pictures that my monitors have half of the built-in stand hanging down in the back. This is because they are a permanent part of the case. The only way to remove them is to crack the entire case open.
I plan on removing them, but once those shells come off, there is no way I’m going to put them back on. Debezeling the QX2710 looks pretty simple. You just have to attach the box containing the electronics to the back of the screen.
Debezeling a pair of QX2710 monitors will be slightly more complicated. The VESA mounts are built into that box that has to be glued to the screen. I have to be very careful if I want these monitors to line up evenly on the dual monitor mount. I have to make sure those boxes are perfectly level and they need to be at the same position on both monitors.
I don’t think it will be much of a problem, but I will have to survive without monitors while the glue dries. The debezeled QX2710 monitors look very nice when painted a matte black, but there is no way that I have enough patience to wait for the paint to dry!
Cable management
I haven’t rerouted my cables yet, because I know I will be tearing this all down when I remove the bezels from these monitors. I also have a feeling that these DVI cables might be a bit short if I route them through this stand’s built-in cable management.
There is a big hole in the back of the main support pole right where it meets the clamp. To make use of that, you have to run the cables up to the top of the pipe and drop them down the tube.
I’m not sure how impressed I am with this solution. It will definitely hide the cables from my view, but I think it will look pretty silly from behind. We’ll see what happens when I get to that point.
I thought I had a brilliant idea, but I was mistaken
On Friday night, I thought I had a great idea. It looked like I could move the monitor mount out of my desk’s grommet hole and still get the monitors in precisely the position that I want them. My trusty tape measure agreed with me. All I had to do was move the 8” segment from one arm to the other. That would easily allow one monitor to extend way out from the back of the desk.
Removing a segment and reconfiguring the arms was a piece of cake. Unmounting and remounting monitors on their VESA mounts took some more juggling and gymnastics. I get everything put back together, and the monitors had no trouble reaching the positions I was aiming for. There was one huge problem.
The longer arm was sagging over ¼” lower than the shorter arm. This looked very silly, and I couldn’t think of a good way to correct for it. I had to go back through all of the juggling one more time, and I am right back where I started.
I should have anticipated this. I learned during the very first iteration of my do-it-yourself monitor stand that sagging is an issue. I learned pretty quickly that trying to make the monitors level was nearly impossible. Forget level. Straight and even in relation it each other is about the best you’ll ever get.
Even when you’re working with heavy-duty steel pipes or tubing, you’re still going to have a bit of flex. Just one degree is very noticeable over a distance of one or two feet!
The verdict
I think I made a good choice. This stand is definitely roomy enough if you have an average desk. I have a large, almost L-shaped corner desk, and I face my chair almost directly at that corner. That corner is almost 40” away from the “front” of the desk. Unless you are in my situation, the “Mount-It!” dual monitor stand should work just fine, but the cost to upgrade to the bigger triple monitor stand is very reasonable.
It is doing a fine job holding up my QNIX monitors, and it should work just as well with any other 27” 1440p monitor, like the X-Star DP2710, the Yamakasi Catleap, or the ASUS PB278Q.
Continuing on my way through the Discworld Reading Order Guide has brought me to Guards! Guards!, the first book in Terry Pratchett’s series of Watch novels. I almost always eat through Discworld books in a few days. A week at the most. This one took a very long time.
Goodreads sends me a very helpful email each month letting me know if there are any new books by authors I’ve already read, and they also remind me how long I’ve been reading my current book. The first time I noticed this, I had started reading Guards! Guards! 49 days ago. As if that wasn’t embarrassing enough, this month it reminded me that I’ve been reading the same book for 71 days!
The book certainly isn’t to blame. I very much enjoyed it, and I look forward to seeing what else the Night Watch get up to in the future. I’ve just been watching too much television and spending too much time messing around with my 3D printer.
Long believed extinct, a superb specimen of *draco nobilis* (“noble dragon”) has appeared in Discworld’s greatest city. Not only does this unwelcome visitor have a nasty habit of charbroiling everything in its path, in rather short order it is crowned King.
Meanwhile, back at Unseen University, an ancient and long-forgotten volume–The Summoning of Dragons–is missing from the Library’s shelves. To the rescue come Captain Vimes, Constable Carrot, and the rest of the Night Watch who, along with other brave citizens, risk everything, including a good roasting, to dethrone the flying monarch and restore order to Ankh-Morpork (before it’s burned to a crisp).
I was intrigued right from the beginning when I learned about Carrot. He’s a rather tall human that was raised by dwarfs. This situation brought back memories of Buddy the Elf, but he showed up in theaters 14 years after Guards! Guards! was published!
It wasn’t only the fresh mountain air that had given Carrot his huge physique. Being brought up in a gold mine run by dwarfs and working a twelve-hour day hauling wagons to the surface must have helped.
He walked with a stoop. What will do that is being brought up in a gold mine run by dwarfs who thought that five feet was a good height for a ceiling.
He’d always known he was different. More bruised for one thing. And then one day his father had come up to him or, rather, come up to his waist, and told him that he was not, in fact, as he had always believed, a dwarf.
The only problem I had with this book was the dialog. Most of the members of the Night Watch speak in some sort of colloquial English accent. The pronunciations of some of the more interesting spelling choices come very slowly to me, and sometimes I have absolutely no idea what they’re talking about.
This is probably my own failing for not being born in England.
My May shipment from Craft Coffee has arrived. I’ve been waiting very patiently, and I was doing my best to stretch my first month’s coffee shipment as far as I could. I cheated a little. We were drinking coffee from our local shop, Addison Coffee Roasters, just about every other day for the last week or so. It is fine coffee, but not as good as the three coffees we received last month from Craft Coffee.
This trio of coffees wasn’t as exciting as last month’s. They’re all delicious, but none of them are jumping out as being special. Last month I couldn’t stop telling people about the “Frankenberry” coffee, and I could pretty accurately guess which of the other two coffees I was drinking without looking at the name on the bag.
This month, all the coffees taste pretty similar to me. It probably doesn’t help that I only drink lattes. All that milk and sugar most definitely hides a lot of the flavor.
These posts about Craft Coffee are the slowest blog posts I’ve ever written, but they may also be the most delicious. Most of the time I have at least half of a rough draft typed up before I even think to stop. These coffee posts seem to drip out of me by about one or two paragraphs per sitting. I won’t be surprised if it takes more than six double shots of espresso.
Clean and complex, with a sweet nose of vanilla, caramel, and roasted cashews giving way to flavors of plum wine, apricots, and chocolate-covered almonds.
I can definitely notice the hint of vanilla in the PT’s Coffee. Maybe I can pick up the caramel. It is definitely a bit nutty, and it might remind me of cashews a bit. It has a nutty aftertaste. Different from the cashew, but I can’t say that it is like almonds or chocolate-covered almonds.
I’m definitely a sipper. It takes me quite a while to finish my latte. I’m really noticing the aftertaste in the long intervals between sips. Not unpleasant.
Ripe red berry aromas introduce a balanced cup with syrupy flavors of maple, green apple, and black cherry, complemented by a clean finish with hints of plums and honey.
On my first pass through these three delicious coffees, I was ready to rank this coffee from Four Barrel at the bottom, but the more I drink the more I’m enjoying it. I don’t think I’m going to be able to pick out a clear favorite this month.
The description on the pouch sounds plausible to me. I don’t eat enough of the fruits listed in their little blurb to know precisely how accurate their description is, and I’m sure I’m drowning out some of these flavors with milk. The coffee from Four Barrel seems a bit tart at first, and it has a slightly sweeter aftertaste.
Delicate honey blossom and dark chocolate aromas mingle with flavors of toasted almonds, caramel, and a hint of meyer lemon before finishing with a lingering tart candy sweetness.
This coffee from Kickapoo Coffee is quite good. It tastes a lot like the offering from PT’s Coffee, but without the hint of vanilla. I’ve been having trouble picking out all the flavors mentioned in the description with this coffee. In fact, I’ve almost run out of Kickapoo Coffee already. I only have about 15 grams left!
I’ve never tasted a Meyer lemon before. Wikipedia says that they are thought to be a cross between a true lemon and a mandarin orange. I had trouble picking it out at first, but now that I have, the slightly lemony aftertaste seems pretty obvious.
This coffee does have a bit of a nutty taste, but I’m not so sure that it reminds me of almonds. I don’t like almonds, so maybe I’m just not good at recognizing them.
This month wasn’t as exciting as last month, but all three of these coffees were among the best I have ever tasted. I’m only to months in to my subscription so far, and I’m already thinking about extending it by twelve months when my subscription runs out.
The six packets of coffee I’ve received so far have all been delicious. I’ve investigated the pricing on the coffee I’ve had so far, and some of it is quite a bit more expensive than the Craft Coffee subscription.
This subscription to Craft Coffee was an awesome gift to receive, and I can hardly wait to see what is coming next month. If you are looking for a gift for a coffee drinker, you’d have a hard time beating a subscription to Craft Coffee.
Use my referral code “pat1245” and you’ll get 15% off
If you use my referral code (pat1245) when checking out at Craft Coffee, you will get a 15% discount. Not only will you save money, but they tell me I’ll get a free month of coffee with every order. That sounds like a good deal for both of us!
Standing desks have become a popular trend in recent years. I decided to see what the hype was all about three years ago. My quick test setup was quite simple. I placed a big box, in this case a rather large CD/DVD carrying case, on top of my arcade cabinet. When I put my laptop on top, this brought the keyboard to just the right height so I could use the keyboard comfortably.
I was only using this for an hour or two each day, and I didn’t stick with it for very long. The biggest problem was that my neck would get sore pretty quickly, because I had to look down at the laptop screen the entire time. This was far from ideal.
Last year, I decided that I missed my cheater standing desk, so I built a better one out of PVC pipe. It is a slight improvement over the rectangular box. The back is elevated a couple inches higher than the front, so I don’t have to look down quite as far. I do still have to look down, though, which means I can’t use it for extended periods.
That’s alright, though. Even with the eventual discomfort, I like having the standing option available. When I’m standing, I feel like I’m ready for action. Like a ninja waiting to attack. Maybe. At the very least, it is a small change of scenery!
Improving the all-PVC design
The original design has the laptop resting behind a pair of T fittings. This keeps the laptop from falling, but those big one-inch circles in front of the laptop get in the way of my palms. I changed the dimensions a bit to try to get them out of the way, but that was only a partial fix.
When I was building this standing desk, I remember saying to myself, “This would be easy to fix if I had a 3D printer.” Now I do actually own a Prusa i3 3D printer, and I was absolutely correct. It was a very easy problem to solve, and it was definitely a good project to work on for my first attempt at 3D design.
It’s a cylinder with an L-bracket on top. How hard can that be?
It was only a little bit harder than I thought, and it only took three iterations to get it right. I knew for certain that my first print would be a failure. I just didn’t know to what extent.
I already knew overhangs would be problematic, but I needed to see what I could get away with. All three iterations of this object started with a tall cylinder at the bottom. I made sure the diameter of that cylinder was about the same diameter as a 1” PVC pipe. That way I knew it would fit into the PVC connector.
The first prototype
On the first iteration, I put a 3 mm disc on top of that cylinder. The disc matched the outside diameter of the PVC connector. I figured that would be a good way to keep it from falling in.
This actually went better than I expected. Most of the overhang on that wider 3 mm disc actually stuck. Even though it looks pretty bad, the longer overhang in the front still came out structurally sound.
This would have been a serviceable design. I could have printed another, trimmed off the stray filament, and called the project finished. But I couldn’t leave it like this. I just had to try again.
The second prototype
I made some small improvements on my second try. I tapered the edges of the top disc. That part printed perfectly. I added similar angles to the front edge as well. That part came out a bit sloppy, but there was no hanging filament this time.
I almost had it this time, but I learned from the first print that the “retaining wall” didn’t need to be quite so high to hold the laptop up. I decided to correct for that in the design, but I did a terrible job. I made the wall too thin and was able to easily snap it in half.
The third time’s a charm
It was easy enough to go back into Blender and make that wall a bit thicker. I decided to make more changes while I was there. I wanted to reduce the messier parts of that overhang in the front.
The first two attempts were unions of four simple objects: two cylinders and two cubes. That’s why the ledge extends so far in the front. I had to make sure the 3-mm-tall cylinder wouldn’t poke out the front.
I was getting quite a bit more proficient with Blender by this point. It wasn’t too much trouble to redo the top so that the front wall was directly over the base cylinder. That eliminated almost all the overhang issues. One of the corners was curling upward a little during the print. I think it was cooling faster than the rest of the object.
I’m very happy with the results
I haven’t used my laptop at all in the last month or so, and it will probably be quite a while before I make use of my standing desk again, but I am very happy with how this entire process went. I was printing nice, consistent objects with my 3D printer within a week, and I had my first useful object designed, printed, and ready to use less than a week after that. This is much more progress than I ever expected to make in just two weeks.
These caps for the ends of my PVC laptop stand are very simple objects, but I’m still excited that I was able to make them.
Plans for the future
I think I really need a fan to cool the extruded filament to print good overhangs and bridges. I found a nice-looking fan mount that I’d like to try out. It was designed with a different hot end in mind, so I’ll need to do some measuring first to make sure it will fit correctly. I sure hope it prints well without a fan!
I’ve already started working on my next custom object. It’s going to be a custom grommet for my desk. I already upgraded the stock grommet by gluing in a 3-outlet AC power adapter and a small powered USB hub. This has been very convenient. I can easily charge just about anything, and I don’t have to reach far to plug in USB joysticks.
I had to take that grommet out last week to install a clamp for a dual monitor stand, and I’ve been missing it ever since. I’ve started modeling a replacement that fits around the stand’s big clamp using Blender. It should be a nice-looking upgrade over the jury-rigged grommet assembled with glue. I even hope to have room for an RJ-45 jack this time.
I bought a 3D printer. I’ve wanted one ever since reading about the old MakerBot Cupcake almost five years ago. Now I finally have one, and I’m very excited. Things have come a long way in four years. The printer I chose has a build area twice as wide, twice as long, and over 50% taller than those old MakerBot Cupcake machines.
I decided to buy a used printer
I knew which printer I wanted—A Prusa i3—and I wanted it to have an extruder that used 3mm filament. I was also more interested in the Prusa i3 printers with aluminum frames. I thought this would be enough information to make choosing a printer easy.
It turns out that there are a lot of different sizes to choose from in the Prusa i3 family. Not only that, but sometimes you get to choose one of four different controller boards and four different nozzle sizes, and that is just at one store. Different vendors also offer different types of hot ends.
I thought I had my choices narrowed down to just two printers from two different vendors. At this point, it was already getting late, so I figured I’d mull things over the next day. I did decide to see if there were any printers for sale nearby on Craigslist.
I lucked out. There was a Makerfarm 8” Prusa i3 for sale not even 20 minutes away from here. This was such an easy decision. I didn’t have to choose a hot end. I didn’t have to choose electronics. I didn’t have to choose a nozzle size. Best of all, this printer was already assembled, and I didn’t have to wait two weeks or more for it to show up at my doorstep. There were no Prusa i3 printers available with Amazon Prime shipping.
What I ended up with is a Makerfarm 8” i3 printer with an LCD screen, not the newer i3v model. It has a heated bed and the magma hot end with a 0.4 mm nozzle. It also came with at least half of a spool of 3 mm glow-in-the-dark filament, two sheets of glass for the build surface, a bottle of Garnier Fructis Full Control hair spray, an ATX power supply, and pretty much all the odds and ends that would have come with the printer.
If you are interested in keeping track of my progress, I picked up the printer and had it up and running last Tuesday evening.
When I got home, I plugged the printer right in and watched the print head and bed move around. I plugged the printer into my computer, and I immediately started pushing buttons in Pronterface to move the print head around. It was working. This was exciting.
I had already sliced up a Space Invader magnet the night before, so I was ready to start printing almost immediately. Shortly after hitting print, I started seeing checksum errors. The Internet suggested that I try different USB cables and ports. I did that, and I even tried using my laptop. It just didn’t work.
This was the first point that I started to notice that I have no idea what I’m doing. I was just firing up Pronterface directly. I didn’t notice that there were scripts to start Pronterface that load the correct configuration for your printer. I used mendel.sh and everything started working correctly.
My first print wasn’t the best. There were gaps between the perimeter and the infill. The corners were a bit round, and edges were pretty jagged. I wasn’t sure what was wrong, but my little glow-in-the-dark Space Invader looked like a thing of beauty to me!
I went through the settings in Slic3r. I had imported those settings from files I downloaded from the Makerfarm website, so I was surprised to see that the “nozzle diameter” was set to 0.8 mm. I turned that down to 0.4 mm, and my second Space Invader came out much better. I guess the printer just wasn’t laying down enough plastic the first time.
Temperature problems
I had temperature problems the first day. It was taking a very long time for the hot end to reach its operating temperature, and it would randomly drop 20 or 30 degrees in an instant. When this happened, wiggling the cables would cause it to jump back up near the correct temperature.
I figured that there must be a loose connection to the thermistor or the thermistor wasn’t seated correctly. I took apart the extruder assembly and removed all the Kapton tape holding the wiring to the nozzle. The thermistor seemed to be in there just fine, and all the wires seemed to be joined correctly.
I put everything back together. While I was at it, I decided to use some zip ties to clean up some of the wiring. The wires for the heating element, thermistor, and fan were all just hanging free, and they were all different lengths. I tied them all together, routed them so they wouldn’t get in the way, and pulled them all back a bit so they are now all the same length.
The temperatures stopped dropping suddenly, but the hot end still wouldn’t heat up well at all. I found a suggestion that I should wrap the nozzle of my magma hot end in several layers of Kapton tape. This keeps the fan from messing with the temperature readings, and it worked like a charm.
However, when I reassembled things, I screwed something up. There’s an aluminum plate in the extruder assembly that holds the hot end in place. I put it in upside down. This meant the hot end could spin freely and wiggle around all over the place. This certainly wasn’t helping me get clean prints out of this Prusa i3.
Printing the 5mm Calibration Cube Steps
This is another obvious moment where I had no idea what I was doing. I started a print of the 5 mm Calibration Cube Steps, watched it lay down a few layers, and I walked away. When I came back to see how it was doing, the print head was happily moving around but it wasn’t extruding at all. It had been doing that for a while. I managed to get the filament a bit tangled on the spool.
I cleared off the built plate, sprayed the plastic bits off the hobbed bolt with a can of air, reloaded the extruder, and fired off the print job again. This time it finished, but it was awful.
There was well over 1 mm of difference in the length and width, and the height wasn’t looking so good either. I did some research and poked around in the printer. It sure seemed like the belts were pretty loose. This explains why the infill doesn’t always meet the perimeter and why the magnet holes in my Space Invaders looked more like rounded squares than like circles.
I was able to snug up the tension on the X axis easily enough. I only had to loosen the bolts on the motor and move it back a little bit. The Y axis was more problematic—it was already as tight as it would go. I remembered seeing that someone on the Internet added tension to one of his belts using the metal spring from a clothespin.
This works great. You just have to make sure you put the clothespin spring in a spot where it won’t hit anything when the axis is at its minimum or maximum. I know how to fix this correctly, but I sure don’t want to have to take the bed off again any time soon.
A major catastrophe
I am happy to report that this time it wasn’t entirely my own incompetence that caused the problem. This time I get to blame either the guy who assembled the printer or the designer. More than likely, though, a little of both.
My friend Brian ordered me a two-pound spool of black ABS filament IC3D Printers. I’m pretty sure this is his down payment for some 3D prints. I was waiting very patiently for this black filament to arrive so that I could print a filament spool holder to attach to the printer.
I chose the Compact Spool Holder and Guide from the large selection of spool holders available at Thingiverse. I am extremely pleased with it. It is compact, seems quite sturdy, and it is much less convoluted than most of the others. I will definitely be printing a second one for the other side of the printer.
This was Saturday night. I started the print of the spool holder. I had a few bad starts because I had trouble getting the new black filament to stick to the bed. This was due to incompetence on my part. I had misinterpreted the meaning of the “first layer height” setting in Slic3r. I assumed that it would put the print head closer to the bed if I put a smaller number in there. This was the wrong assumption. I bumped it up all the way to my nozzle width, and things are working much better now!
I watched two or three millimeters of my new spool holder print, and then I headed out for dinner. When I got back, the job was completed, but the part didn’t come out quite as straight as I would have hoped. As I was wiggling it loose from the build plate, I noticed how easily the plate was moving around.
Then I noticed some tiny lock nuts under the printer. Four nuts had wiggled loose, so two of the bearings on one of the metal rails were completely disconnected from the build plate!
I’m amazed at how well the spool holder came out under these circumstances. It doesn’t look quite right, but it is still usable, and it is doing its job splendidly right now. This slightly deformed part will probably remain in service for a long time.
A disappointing Saturday night actually has a silver lining
I did get a little more familiar with the workings of the printer on Friday night. I had to pull the build plate off to reattach the bearings. This whole area seems a bit problematic to me.
The screws that hold the bearings on are only just barely long enough to put the lock nuts on. In fact, you can’t even put the lock nuts all the way on. While I was putting things back together, I was wondering why they didn’t just ship longer screws. I later learned that they can’t. If the screws were much longer, they would bump into the frame of the printer. They’d need to source custom-length screws that are just one or two millimeters longer.
I’m guessing the previous owner was afraid he’d break something if he torqued them down too tight. I’m not afraid. I think I torqued them down quite nicely. I’ll be surprised if I get bitten by this design flaw again.
I had things reassembled too late that night to do a test print, but things were working so much better the next day. I only printed two items on Sunday.
The first thing I printed was the filament guide loop to go along with my new spool holder. The round end lifted up off the bed during the print, so it didn’t come out perfect. It came out amazingly round, though, much rounder than the failed print earlier in the week using the glow-in-the-dark filament.
I also printed another 5 mm Calibration Cube Steps. As far as I’m concerned, it came out nearly perfect. The length, width, and height are all about 0.1 mm of the 25 mm target. Pronterface claimed the printed height was going to be 24.9 mm, so I’m probably within the margin of error for my layer height and extrusion width.
There’s also no gap between the infill and the perimeters anymore. In some spots it looks like there is tiny gap, but I can’t even get the edge of a razor blade in there. I guess the printer just needed to fall apart to solve all my problems!
The verdict
I thought I made the right decision in buying a used 3D printer right up until the night that the thing fell apart. That night I wasn’t so sure. I was very happy with my decision again the next day after seeing that first print after the repair.
Not having to wait two weeks for my printer to arrive was great. Seeing the printer make an object just a few hours after getting it home was even better. If this were a kit, I’d have probably spent that much time just figuring out if all the pieces were there.
I was also surprised to learn that the wooden Prusa i3 printers are more rigid than their metal counterparts, so I lucked out there. The used printer cost me at least $50 less than the cheapest equivalent metal Prusa i3 on my list, and it came with a bunch of extra stuff.
Between the time, money, and extra parts, I would have to say that I got a pretty good deal. I just designed my first two parts using Blender, and I will be printing them tomorrow. I can’t wait to see how bad of a job I did on them!
I just got back from a long trip back home to visit and help out my parents. Having oodles of cloud storage sure made the trip easier.
When I used Dropbox, I had a very limited amount of space, so I was very selective about what I chose to keep synced up. This meant that I had to keep a lot of things manually synced up between my laptop and desktop, or else I might be missing some important data while I’m out of town. I could have easily paid for more Dropbox space, but I didn’t exactly trust Dropbox with all of my data anyway, so I would still end up having the same problem.
Self-hosted Seafile to the rescue!
Hosting my own Seafile server gives me access to virtually unlimited cloud storage space, and Seafile’s client-side encryption means that I can be confident that my data is safe. I can upload as much as I like, and I don’t have to be nearly as careful about choosing which files I can safely upload.
One of the things I never uploaded to Dropbox was my configuration files. Specifically and most importantly, my shell configuration. Some people store their dot files in public Github repositories, but I’m a little too paranoid for that. I always worry that I’d be the guy who accidentally drops a hard-coded password somewhere, and it will be sitting there in my revision history for eternity for the entire world to see.
Being surprised by configuration synchronization magic
Way back in January, while out of town on my laptop, I set up some functions to make my shell notify me whenever a long running process completes. My laptop yells “bazinga” whenever a long running job completes. It has been doing this for months, and I haven’t thought much of it, but I do like that it calls my attention when it’s needed.
When I got home last month, and I started using my desktop computer once again. It also now yells “bazinga” when a job completes. It did this all by itself without any intervention from me. That by itself is interesting. What’s more interesting to me is that I didn’t notice it for days. I forgot that this was something I set up after I left, and I’m surprised how long it took me to realize what happened.
I made a terrible mistake, and a cautionary tale
I made a terrible mistake. Last year, soon after I set up Seafile, I decided that it would be best to clean up my photo collection before syncing them up to the server. Shotwell can clean up duplicate copies of photos, and this feature worked brilliantly. I was safe, and I made a backup copy of the entire photo collection before initiating this process.
While I was on my laptop, though, I noticed all sorts of pictures that were completely missing. These were important photos, and I their absence almost hindered our “Great Bar Photo Caper.”
I’m still not sure what exactly happened. My Shotwell database here on my desktop has tons of photos from my backup copy in it. I may not know what happened, but at least I know how to fix it.
The lesson here is that you should make sure that you are syncing and backing up what you think you are.
Steam’s cloud isn’t as thorough as I hoped
I never think twice about my save games and setting for Steam games with cloud sync enabled. Every time I finish playing Team Fortress 2, it tells me my data is syncing, and I feel reassured that my data is safe. I recently learned that my Team Fortress 2 settings aren’t quite as safe as I thought they were.
Your items, weapons, and load outs are all synced just fine, but it is very selective about which configuration files are synced. I wanted to play a quick round on my laptop, but none of my custom key bindings were there. I felt especially lost without my medic bindings.
One of the first things I did when I got home was move my Team Fortress 2 config directory into a Seafile library. I don’t ever want to have this problem again. My medic.cfg, soldier.cfg, and demoman.cfg should be with me wherever I go from now on.
There’s another lesson to be learned here. Don’t blindly assume that someone else is doing the job you expect it to.
Having safe, nearly unlimited cloud storage space is very convenient
Keeping my important data and applications in sync between my desktop and my laptop was always difficult. It seemed like I was always missing something important every time I traveled. I ended up solving that problem back in 2006 by replacing them both with a bigger, faster laptop. This worked great. If you only have one computer, all your data is always with you.
I bought a new desktop computer last year, so I don’t have that same convenient guaranty anymore. I was away from home for over three months this year, and I still managed to have almost every single file I could have needed right there with me.
The best part is everything I worked on while I traveling showed up on my desktop computer just a few minutes after I powered it up. Ten years ago, I would have been booting my laptop back up every few days looking for files that I forgot to copy.
I won’t ever have to do that again, since all of my data is safely encrypted and stored on my Seafile server.
UPDATE: This blog post is getting starting to get old. I’m still subscribed to Craft Coffee, but the service has changed a bit. You can read more about it my most recent blog post about Craft Coffee!
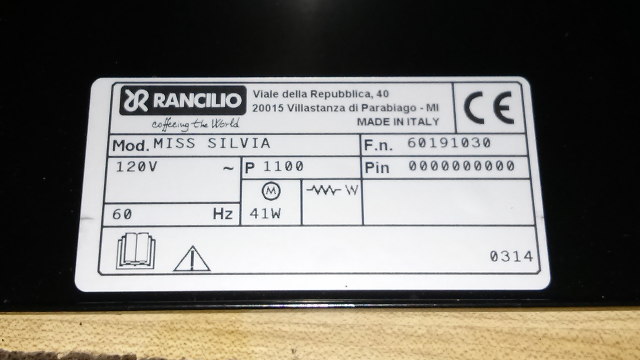
I enjoy coffee. I use my low-end pump driven espresso machine to make a latte for myself almost every day. When I first bought the espresso machine, I was grinding cheap coffee beans from the grocery store. Just about the fanciest brand I used was Dunkin Donuts.
I was happy enough with the Dunkin Donuts lattes for a few years. That all changed when I moved back to Dallas/Fort Worth metroplex. I went to the Central Market with my wife. I don’t like grocery shopping, and I really don’t like these fancy, upscale grocery stores. My opinion changed when we walked past the giant wall of coffee at the Central Market store in Plano.
They have coffee beans from many different roasters. One of them is only a few miles from here, and one or two are from Houston. I’m pretty sure I scooped out a small amount of at least a half dozen different beans from about three different roasters. On that first visit, I even managed to pick out the coffee that would be my favorite for a couple of years, the Premium House Blend from Addison Coffee Roasters.
In fact, I’m drinking one of their coffees right now. It is their Premium Espresso Blend, and it was probably almost a tie for my favorite coffee. I was pretty certain that this pair of coffees would be the end of my journey. I still try out other beans when I refill at the Central Market, but nothing has displaced my two favorites until now.
My friend Brian got me a coffee subscription from Craft Coffee. This sounded pretty awesome. Craft Coffee will send me three 4 ounce packets of premium coffee beans from top artisan roasters. When the first shipment arrived, I figured I should write up a little review.
It looks like they will all be single-origin roasts, and this had me just a little bit worried. I’ve hit some real duds in the past when I’ve tried single-origin beans.
I didn’t need to worry. All three of the coffees I received so far are delicious. I really wish that I could still say that my favorite coffee comes from a local roaster just a few miles from here. I really do, but I can’t. All three of these new coffees have jumped straight to the top of my list!
Light, pillowy and clean, with flavors of dried strawberries, confectioner’s sugar, and breakfast cereal.
I knew this coffee was going to be delicious as soon as I fired up the grinder. The whole kitchen started to smell a bit like Frankenberry cereal. At least, I believe that’s what it smelled like. I haven’t seen Frankenberry in over a decade. At any rate, it smelled delicious.
These are also the tiniest coffee beans I’ve ever seen. In fact, all the beans in this shipment are small, but they’re not as small as the ones from Slate Coffee Roasters. These beans are also the most beautiful light brown color.
It doesn’t just smell delicious. It also tastes delicious. I had my first latte a few days ago using these beans. At the time, I could definitely identify that it was sweet, and there was definitely some sort of slightly tangy aftertaste that I just couldn’t identify.
Now that I’ve read the description, the strawberry flavor is unmistakable. Now that I know it is there, I just can’t ignore it. This coffee really makes me think of breakfast cereal.
The label also told me that this coffee was “natural,” as opposed to “washed.” This worried me a bit. I’d never had coffee like this before. As it so happens, my misgivings were entirely misplaced.
Articulate cranberry acidity leads through deep brown sugar and delicate caramel sweetness into a clean, dry walnut finish.
On scales of both sweetness and acidity, I would have to say that this coffee from Joe’s occupies the middle ground between the other two. It might seem almost as sweet as the coffee from Slate Coffee Roaster, but it has a complete lack of strawberries.
On my first pass through all three coffees, I would have chosen the one from Slate Coffee Roaster as my favorite. When I tried it again, I wasn’t so sure. I’m starting to think that Joe’s might be the one that I prefer out of these three.
Hibiscus and lime acidity settle into intense cane-syrup sweetness and a clean, green-tea-like finish.
The coffee from Ritual Coffee roasters is quite good, but it is my least favorite of the three. It tastes more like a plain, ordinary cup of coffee than the other two.
I definitely believe the description on the bag. It is a bit more acidic than the other two, and it is sweeter than the coffee I normally drink. If I had tasted this one first, I bet you I would have been amazed by how good it is. Then I’d have tried the other two, and I would have been surprised by just how much better coffee can be.
I wasn’t sure how well a coffee-of-the-month-club was going to work out, but so far I very much like the idea. Judging by how empty the first three pouches of coffee are now, I am predicting that each delivery from Craft Coffee will last me a little more than two weeks.
My coffee subscription was a gift, but I didn’t think I should write about it without investigating the pricing. At the annual subscription rate, Craft Coffee costs a little more than twice as much per ounce as my usual coffee that I buy locally.
I believed that I was up high enough on the coffee-pricing curve. I thought that paying more would only buy me a tiny fraction of an improvement in taste. I was wrong. I was very wrong.
So far, I think that a Craft Coffee subscription is worth every penny. They’ve shipped me three most excellent coffees, and I can’t wait to sample each of the remaining 15 varieties of coffee in my subscription.
I will also be keeping an eye on the selection at my local roaster. If they have any beans and roasts similar to those that Craft Coffee has sent me, I will be very curious to see how they compare!
Update
Today is Wednesday, May 22, and I just received the email notifying me that my next round of coffee from Craft Coffee is on its way. The tracking says it will be delivered on Friday.
I was able to stretch first shipment of coffee out over almost the entire month, but I had to cheat a little. I stopped at the Central Market last week and picked up about eight ounces of Addison Coffee Roasters beans. I was excited to see that they also have Ethiopian Yirgacheffe beans. Addison Coffee’s Yirgacheffe is roasted darker, and it doesn’t have any of the dried strawberry flavor like the beans from Slate Coffee Roasters. It still tastes good, and it costs a lot less than Slate Coffee Roasters’ Yirgacheffe.
I don’t have enough beans to pull a shot of any of the three bags from Craft Coffee. Two of them were close, so I filled out the shots with two or three grams of Addison Coffee. I’m drinking my last cup of Joe right now. The rest will be gone tomorrow, and I’ll be waiting patiently for Friday to arrive.
Use my referral code “pat1245” and you’ll get 15% off
If you use my referral code (pat1245) when checking out at Craft Coffee, you will get a 15% discount. Not only will you save money, but they tell me I’ll get a free month of coffee with every order. That sounds like a good deal for both of us!