Cocktail Arcade Cabinet Build: Postmortem - The Things We Got Wrong

| Comments

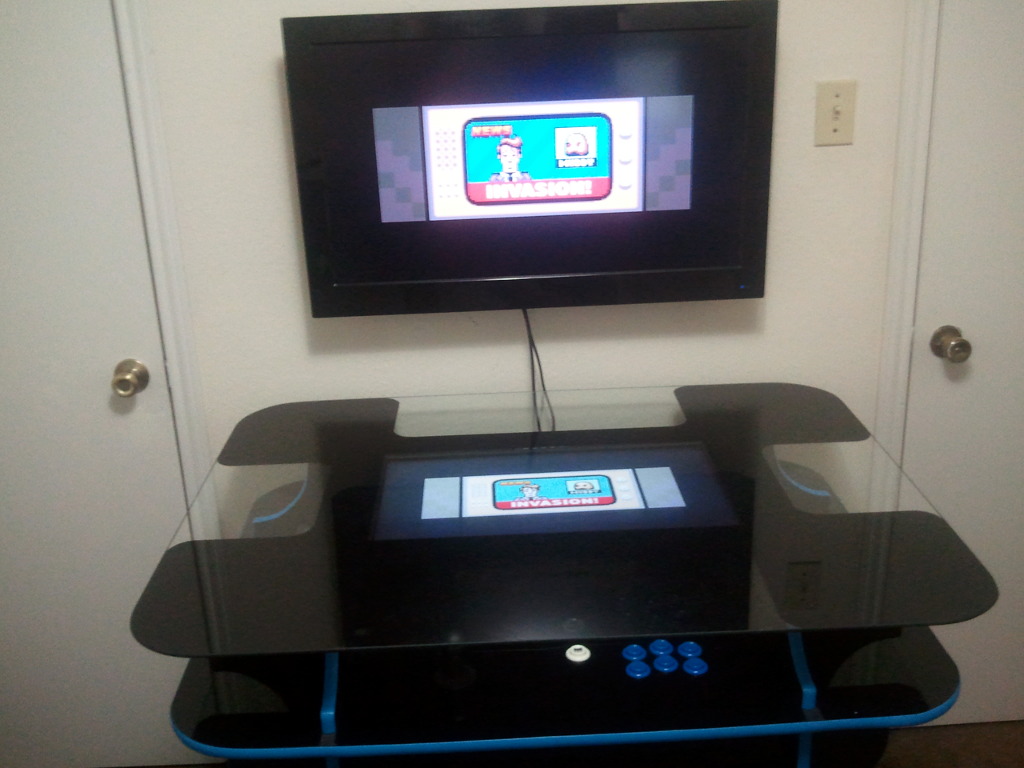
I’m very happy with the cocktail cabinet that we built. It was a lot of fun to build and it is even more fun to play!

I made a few less-than-optimal choices in the design of this cabinet. I’m not going to call them mistakes (except maybe the choice of monitor). I’ve had a chance to visit an arcade or two since the cabinet was finished. I was worried that seeing a bunch of real arcade machines would make me disappointed in our work.

My feelings while visiting those arcades were actually quite the opposite! In most ways, our cabinet looks much, much better than the majority of real, old-school arcade machines. The most noticeable difference is the lack of artwork on our cabinet. This was our choice and it fits in with everything else in my office much better this way.

Here’s a list of some of the things I might have liked to do differently.

Test fitting joystick under unpainted plexiglas

The buttons are fine, but the joysticks…

When I was shopping for parts, I primarily had the Mortal Kombat series of games in mind. The HAPP joysticks I chose seem very much like what I remember from my days of playing Mortal Kombat II back in high school. They have the right shape and feel. You can even get Raiden to teleport by pulling the stick towards you and letting it fly out of your hand, just like on the real cabinet.

The HAPP joysticks aren’t terribly precise, and the quality of each of the four joysticks I bought varies quite a bit. My player-one controller likes to make an odd clunk when you push it to the left… It will engage the switch, feel like it is at the end of its throw distance, then it will clunk and move a tiny bit more. All of them do this sort of thing some of the time, but not nearly as often as player one.

I haven’t actually played much Mortal Kombat. I’ve spent more time playing modern indie games than I have spent playing actual old-school arcade games. These big, imprecise joysticks with their longer throw aren’t very well suited to anything besides Mortal Kombat and other similar games.

I would definitely choose a different joystick.

Arcade cabinet joystick close up

The table is too tall

I wanted an adult-size cocktail table with a bit of leg room. We got the controller height right—there’s about an inch of knee clearance under the control box when you sit down at the table. I miscalculated on the amount of vertical clearance we needed between the control panels and the glass tabletop.

I was aiming for 5 ½” of clearance. We ended up with 5 5/8” of clearance. That’s 1/8” more than we were hoping for, and that ended up being almost 2” more than is really necessary. That would put the cabinet at a more usable height of 32 inches instead of the 34 inches we ended up with. Most tables and desks are 29 to 30 inches. Our cocktail cabinet is approaching counter top height, which is usually about 36 inches.

If we had to, we could probably squeeze a half-inch or more out of the depth of the control panel boxes, too.

Yardstick included to show scale

Quarter inch glass is a bit thin but it works

I’m very glad that we went with glass. If we went with plastic it would have had to be very thick to be rigid enough to work with our design. To use acrylic we would have had to support it from underneath with wood or particleboard, and that would have made the table even taller.

The quarter inch piece of glass we used was surprisingly inexpensive. Our 32” by 42” piece of glass with rounded corners cost less than $60 from a local shop. A thick enough piece of plastic would have been way more expensive and we would have had to radius the corners ourselves. Definitely check your local glass retailers because this was way less expensive than the glass we were finding on the Internet. All the good Internet prices were on certain pre-cut sizes. We had ours cut to exactly the dimensions we wanted.

The thin glass has made me nervous on more than one occasion. When I saw someone sitting at the end with their elbows on the table and putting a bit of weight on it, I couldn’t believe how much the glass was flexing. With our large surface we probably should have gone with 3/8” glass.

Some buttons are installed

Some molding problems

We have a pair of ninety-degree bends in the t-molding at each control panel. The problem is that there is only about an inch of molding after the bend. You can see it popping out a bit in the above picture. We ended up having to glue some of these small sections in. If I had anticipated this problem I would have eliminated it from the design.

I’m also unhappy that I have one seam where I have a single piece of molding circling the entire cabinet at the control panels. The seam is in the center of the player-four seat, and I currently have that side up against the wall. I don’t like knowing that it is hiding back there, though. Unfortunately, I don’t think I could have designed this one away. That single ring of light blue molding is one of my favorite features of the cabinet.

Close up while applying the sticky-back vinyl

Stick on vinyl…

The sticky-back vinyl looks and feels great. In my opinion, it is too expensive and it is much too time consuming to apply it. Due to the high shipping costs, the vinyl was over 20% of the total cost of the cabinet (and I almost goofed up; we barely had enough to cover the cabinet).

It also took a very long time to cover the cabinet. The cabinet build took us a very large number of hours. I think if we did it again, most of the steps would take half the time, but not on the vinyl. You have to be very meticulous when you put it on, and trimming all the edges perfectly takes a lot of time.

I would like to try using melamine board on the next cabinet. It is only a bit more expensive than particleboard, but even if we had to paint it we’d save a ton of time compared to using vinyl.

Finished cabinet with the lid off

Choose the right display

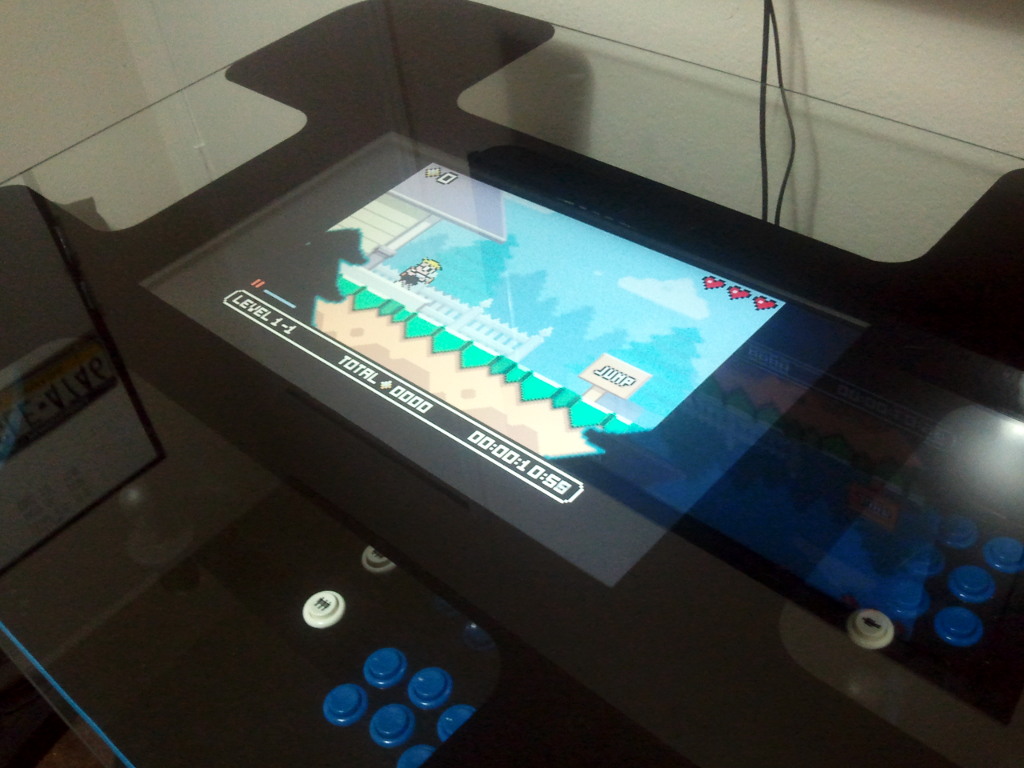
I already wrote about the problems with my choice of monitor, it only has a good viewing angle from three sides. If I build another four-player cocktail cabinet I will probably use a 26” or 32” LCD television. However, because of the asymmetric vertical viewing angle of an LCD monitor we are probably getting a better view right now at the player-three seat than we would with even an IPS display.

I’m not sure if I would build another four-player cabinet. Most of the time we play one or two-player games. With the size of our table it is more convenient to play single player games from the player one seat with the screen split with MAME’s cocktail mode.

Outside of MAME and MESS, this isn’t an option. All the other games have to face the player three seat. This means that all native games are effectively limited to one player.

A trackball would have been useful…

I really should have included a trackball. I thought it would be a bad idea to put one underneath a sheet of glass and in such a small, enclosed space.

I’ve been playing more native games on the cabinet than emulated games. Most native games require a mouse for something, even if it is only to start a new game. I’ve been doing a reasonable job cheating at this, but it is a pain in the neck.

Shell Environment Upgrade and Cleanup: Part 2 - Migrating from oh-my-zsh to Prezto

| Comments

My migration from oh-my-zsh to Prezto actually began quite some time ago, and I accidentally made things much more complicated than they needed to be. I was completely switched over while Prezto was still a fork of the oh-my-zsh github repository. At some point in time, Prezto was moved to its own repository.

I happened to not be paying attention at the time, and my local copy of Prezto got way out of sync. Merging was going to be quite a headache. This seemed to be the perfect time to start fresh and only move what I actually needed from the old repository to the new.

Migrating oh-my-zsh’s custom directory to Prezto

I currently have 16 scripts that were in my ~/.oh-my-zsh/custom directory. They’re mostly bite-sized, ranging in size from a single line up to a few dozen. I took the lazy way out here and created a Prezto module called custom.

Useless little screenshot of Prezto for zsh

I moved all my scripts from ~/.oh-my-zsh/custom/ to ~/.zprezto/modules/custom/scripts and created an init.zsh to loop through and sort them all.

init.zsh:

for file in /home/wonko/.zprezto/modules/wonko/scripts/*.zsh; do
  source $file
done

It is pretty simple but it is getting the job done.

Next step: Persistence of config files

I already wrote a small persistence module that I’m using but it is only just barely half-baked at this point. I have a basic persist command to automatically store files in a git repository and I have a forget command to restore them to their previous state.

They work, but their error handling still needs work. I’d hate to release this and have someone lose a file because of a stupid bug.

It also still needs a higher-level command to globally restore all the persisted data on a new system. A command to revert all persisted files back to normal files wouldn’t hurt, either.

I haven’t been working on this part at all. I got too distracted working on zsh-dwim. zsh-dwim is quite a bit more interesting and, for right now, I’m much more excited about it!

Cleanup of zsh-dwim

| Comments

I went ahead and cleaned up zsh-dwim (Do What I Mean) quite a bit. If you haven’t been following along, zsh-dwim attempts to predict your intended next command when you hit control-u. I also recorded a short screen cast demonstrating some of what happens when you hit control-u.

Removing the Perl dependency

I decided that I may as well bite the bullet and move all the transformation logic to zsh from the original Perl “helper” script. Early on, I was worried that zsh code would be too ugly, but I have too many ideas that would be hard to implement with the code base split up like that.

All the transformation logic now uses zsh and sed. I was hoping to use zsh’s built-in substitution abilities, but they were lacking some important features. The “scp to mv” transformation looked like it would have been really ugly without sed.

Cleaning up the if/then spaghetti

When I was testing this idea I only had two transformations, so a pair of if/then statements didn’t seem like a problem. Now that there are ten, it is starting to get ugly.

I ended up moving all the transformation definitions into a zsh hash and I created a little helper function to add new definitions to that hash. When you call zsh-dwim, it loops over that hash testing for relevant transformations. This means we can now add transformations anywhere in our shell configuration.

Adding a transformation looks like this now:

  _dwim_add_transform '^mkdir ' \
    'BUFFER=$(echo $BUFFER | sed -re "s/^mkdir /cd /")'

What’s coming down the road?

There’s still a lot of repetitive nonsense to eliminate. I need to factor out all those “BUFFER=$(echo $BUFFER | … )” bits. They’re repeated in every single transformation.

I’d also like to make use of more data in deciding which transformation to run. For instance, it might only make sense to call ssh-keygen if the ssh command fails.

The zsh-dwim repository is ready to be pulled into Prezto as a git submodule. It can probably be used as a plugin with oh-my-zsh pretty easily, and the init.zsh file can probably be sourced right into plain old zsh without, hopefully, any problem at all.

Initial Release of zsh-dwim

| Comments

I’ve had a small idea rolling around in my head for while now. While operating in a shell, there are certain commands that often follow others. Sometimes there is a problem. You attempt to ssh into a host and it fails due to a host key mismatch, so you need to run ssh-keygen to remove the key. This happens to me fairly frequently when I am building temporary virtual machines.

Sometimes one command tends to follow another in chronological order. You might list the contents of an archive and then want to extract it. Maybe you stopped a service and want to start it back up shortly thereafter.

I thought it would be nice to bind a key to attempt to insert the next command that I’m going to be looking for. I’m sick of changing ssh to ssh-keygen, adding the -R, and removing the username@ from an ssh command to remove its host key from my ~/.ssh/known_hosts file.

What’s working so far?

The code is ugly, but I have a few useful things working. For instance, commands like these:

1
2
3
service apache2 stop
ssh crazylongusername@blog.patshead.com
apt-cache show apache2

…turn into commands like these when you hit control-u:

1
2
3
service apache2 start
ssh-keygen -R blog.patshead.com
sudo apt-get install apache2

If the command line is empty, the previous command will be recalled from history first.

How does it work?

There’s a little zsh function that passes the command line to a Perl script. The (rather ugly) Perl script runs through a list of possible transformations and returns the new command back to zsh.

Why isn’t it all in zsh? Why is the Perl script a disorganized pile of conditionals?

The Perl half started as a quick hack just to see how workable this idea was. I enjoyed using it quite a bit, so it ballooned up fairly quickly. I started the job of porting it back into zsh before I posted the code up on github. It didn’t look like zsh’s regular expression capabilities were very advanced or easy to use. I may be wrong about this. I may have been looking in the wrong place.

That doesn’t explain why it is still if after if after if. I thought about moving all the regular expressions out to a config file, or at least setting up a dispatch table. I thought it would be best to wait and see if any more complicated transformations pop up.

Why control-u?

Why not? I wanted to use something easy to reach and the default binding for control-u was something I never use.

Where will it go from here?

I’m not sure. I mostly come up with ideas as I’m working in my shell. I’d like to set up some more circular command lists. There a group of about four or five ls commands in there now that loop back around to the beginning. I’m thinking I might do something similar for dig/ping/mtr, and I bet there are plenty of related commands like that that all take similar arguments.

I’d love to hear some ideas!

Where to get it

I uploaded the repository to github, and the README explains how to get it.

I have it set up to install directly into Prezto, but it should be pretty trivial to get it to work as an oh-my-zsh plugin or on its own without any fancy configuration framework.

Inexpensive Universal 120-Watt Laptop Power Supply

| Comments

I created a problem for myself late last year. I drove almost nine hundred miles and left my laptop’s power supply at home. It seemed like I had three choices.

  • Drive to the local Fry’s (or similar) and buy a new one
  • Have someone go find my power supply and ship it to me
  • Order one and wait for it

I checked the websites of a few local stores. My gargantuan laptop requires a rather huge 120-watt power supply. As it turns out, these are quite rare and the only one that might have existed locally was pretty expensive. Some quick math told me that I could have one delivered over night for a good bit less.

That left me with two options. I’ve been saying for years that I should have a spare, universal laptop power supply that I can just keep in my laptop bag. This seemed like a good excuse to get one.

I ended up ordering this “Syba 120W Universal Notebook AC to DC Power Adapter with 11 Power Tips”. I was hoping to find one with a USB charging port, but there wasn’t really a ton of selection at 120 watts. Also, in agreement with the pictures on Amazon, the charger actually has the brand name “Spyker” on the side.

I’ve had it for nearly a year now and so far it has been working just fine with my HP DV8T laptop.

The box has a list on the back specifying which tips work with certain makes and models of laptop. I had the brillant idea to take a picture of the list before I discarded the box. I should have looked at the picture first.

Native Linux Games for an Arcade Cabinet: Irukandji

| Comments

I feel like I’ve done Charlie over at Charlie’s Games a bit of a disservice here. I am pretty sure Irukandji was the very first native Linux game I purchased for my arcade cabinet. Since that day, nearly two years ago, I’ve written about over a dozen of the games I’ve installed on my arcade cabinet. Some of those games aren’t even actually native to Linux!

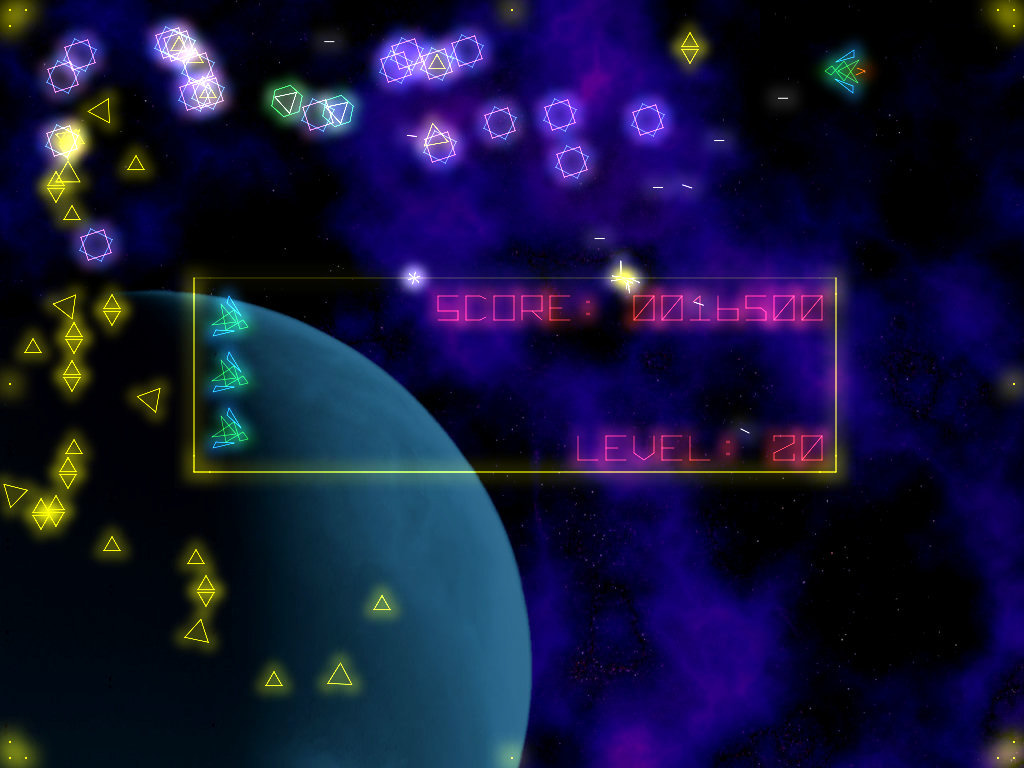
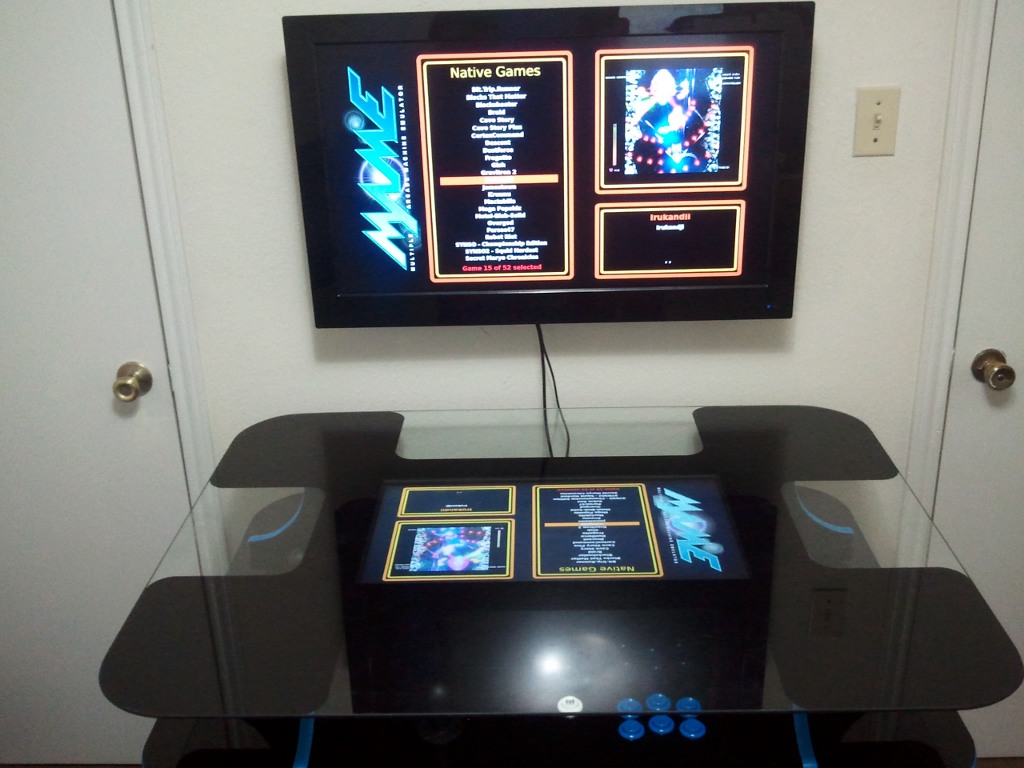
Irukandji on the WahCade menu Big glowing fish Lots of small, glowing fish My terrible score

I recently went though two years’ worth of OS upgrades and I have also been tweaking all my games to work properly with my arcade cabinet’s new secondary display. When it came time to configure Irukandji I ran into a few problems.

At first, all was well, except that I had no sound. I don’t recall this being a problem before my OS upgrade, but I can’t say with absolute certainty. My arcade cabinet had an older version of Irukandji installed, so I upgraded it.

This fixed the sound, but as soon as I set it to run full screen it would segfault. I had the same problem on my laptop. I exchanged a few emails in the middle of the night with Charlie. He was extremely helpful, and he very much pointed me down the right track when he explained to me that Irukandji runs natively at 800x600.

With that information in hand it was a simple matter to use disper to set the television output to 800x600 with “aspect ratio stretching.” The NVidia driver is now actually driving the television at 1280x720 but stretching the virtual 800x600 display up to the correct size.

The controls

Irukandji is one of those games that is awesome enough to not require a single mouse click to control. Moving around the menus is done with the arrow keys, and choices are selected with the “fire” button. Easy peasy.

There is only one tiny problem I have. I had to map buttons to the “enter” and “q” keys. “Q” is used to quit the game. I needed to map “enter” to confirm the submission of my excellent high scores.

I’m very good at hitting “q” instead of “enter.” If you see any names in the high score list with large quantities of the letter “q” at the end, those are most likely me.

The game

The game is quite awesome on an arcade cabinet. It is another shoot ‘em up, and I can never get enough of those. I seem to be collecting quite a few games with these shiny, glowy, neon graphics. They always look right at home on an arcade cabinet.

I didn’t get to play this one much when the arcade cabinet was new. My video flipping requirement made the game slow down quite a bit with my original video card. I’m hoping to rectify that situation in the upcoming weeks!

Space Phallus

I had previously avoided installing Space Phallus on the arcade cabinet. Before we moved, our young six-year-old nephew used to play games on the arcade cabinet pretty regularly. I didn’t really want to have to be the one to explain what a phallus was, what it was using as ammunition, or what it was firing at.

I don’t have to worry about that now. Space Phallus will hopefully be making its debut on my arcade cabinet in the near future.

Scoregasm and Bullet Candy Perfect

I wish I planned a bit better. Twin-stick arena shooters almost never fit my control layout. Even if I had a pair of arcade joysticks at any of the seats, they’d often be difficult to use for most twin-stick shooters due to the fact that they’d be digital controls.

Maybe Scoregasm or Bullet Candy Perfect will fit on my next arcade cabinet!

Yet Another Shaky Cameraphone Video

Thank you again, Charlie, for helping me get your excellent game back up and running on my arcade cabinet!

Shell Environment Upgrade and Cleanup: Part 1 - Requirements and Planning

| Comments

My ~/bin directory and Bash configuration had been slowly growing since some time around 1998 or so. Every few years I would cut back the weeds, but it had definitely been steadily growing right up until I switched to zsh a few years ago. That gave me an opportunity to cut pretty deeply and throw out a lot of cruft that I just don’t use anymore.

It has been a few years, and I think it is time to do a little weeding again. I would also like to try to make some improvements and additions.

Some of the goals

  • Clean up my zsh configuration
    • only define aliases for tools that are actually installed
    • move away from oh-my-zsh
  • Better, more automated revision control of config files
  • Single command to install my config on a new machine (like ssh-copy-id on steroids)
  • On new machines, automatically install
    • Required infrastructure (zsh, git)
    • Commonly used programs (ack, bwm-ng, autojump, tmux, etc)

Moving past oh-my-zsh

I really like the layout of oh-my-zsh’s directory structure. I used to maintain a single, large .bashrc file full of random aliases, functions, and environment variables. With oh-my-zsh, any file I drop in ~/.oh-my-zsh/custom/ will be included for me. I have a few hundred lines of code in there spread over two dozen files.

I’ve run into a problem with this several times, though. oh-my-zsh loads your custom config files first, then it loads its plugins. There have been times when I want to override just one little alias or settings that a plugin sets up for me, and the cleanest way to do that seems to be editing the plugin.

Tracking changes to files that ship with oh-my-zsh is made easy by git, but it doesn’t feel very natural to have to do this with oh-my-zsh… I’m equally happy maintaining my own fork of oh-my-zsh or just maintaining a set of configuration scripts within oh-my-zsh. I don’t think I should have to do both.

I’ve already begun switching to Sorin Ionescu’s Pretzo, which is a fork of oh-my-zsh. Sorin has eliminated oh-my-zsh’s line between plugins, libraries, and custom scripts. Everything in Pretzo is a “module.”

Better revision control of configuration files

Today I am maintaining four git repositories for files in my home directory. One each for ~/.oh-my-zsh, ~/bin, ~/.sawfish, and ~/.emacs.d. My ~/.xsession file lives in ~/.sawfish with a symlink back to my home directory. I used to keep my .bashrc in ~/bin but my .zshrc lives in my oh-my-zsh repository.

I came across a really great idea while investigating oh-my-zsh forks. It seems to have completely vanished from the Internet since I found it, though. He had a pair of scripts called persist and forget for moving configuration files into a git repository and leaving behind a symlink in their place.

He didn’t push the idea as far as I would have liked. His implementation could only store individual files. I would like to be able to persist entire directory trees with a single command. I also need a way to recreate the symlinks on other machines.

Pushing my shell config and ssh key to new machines

I’m a big fan and a heavy user of ssh-copy-id. It is a good, lazy way to push your public key out to a new server. I’d like be able to run a single command to push my ssh public key and my entire shell config out to fresh servers with a single command.

Inexpensive Neoprene Case/Sleeve for the Nexus 7 Tablet

| Comments

eForCity black and red neoprene case Both cases for size comparison Cosmos Neoprene 7

Cosmos Neoprene 7” Purple Tablet Case

The purple Cosmos brand case was five dollars, and Amazon Prime shipping got it here in just a few days.

It is quite a bit smaller than the black eForCity sleeve and has to stretch quite a bit to fit the Nexus 7. I really like the snug fit, but I wouldn’t want to have to fight to put it in on a regular basis.

eForCity Black / Red Zip Sleeve Case

The black case with the red stripe was only two bucks with free shipping. We bought three of these and they took about three weeks to arrive. The material these are made out of is quite a bit thinner than the Cosmos. The case is also noticeably larger. The tablet can actually move around a bit while it is in the sleeve. Contrary to the item description, these cases are black on the inside and outside. They are not reversible.

I’m happy with the two-dollar cases. I just wanted to have something on hand so that I won’t scratch up the screen when I throw my tablet in my laptop bag. Chris had to have one of the purple cases. She said she was too lazy to knit another case this time.

Native Linux Games for an Arcade Cabinet: Jamestown

| Comments

Due to some unforeseen circumstances and a hearty amount of procrastination, I am very, very far behind with my little arcade game write-ups. The last game I “reviewed,” if you can even classify these as such, was Super Meat Boy. Since then I’ve bought at least three more Humble Bundles and a handful of other games.

Those newer Humble Bundles include quite a few games that should be a good fit for the arcade controls, like “Dustforce,” “Wizorb,” and “Canabalt.” I was also hoping to shoehorn “Shank” onto the cabinet, but I’m quite a few buttons short.

I’m sorry about the dangling wires in the pictures. I only just hung the TV for the arcade cabinet upgrade a few days ago and I haven’t gone shopping for any materials to hide those cables with. Hopefully they’ll be hidden next time!

Me blowing up while trying to take a picture Shooting at a larger enemy Title screen Upside down for some extra speed

Still writing about Humble Indie Bundle #4

I’m a big fan of shoot ‘em ups. I’d guess that I started out playing quite a bit of Parsec on our TI 99/4A when I was small. Later, I moved up to games like Gradius, Lifeforce (a.k.a. Salamander), and Zanac. I certainly played A LOT of Zanac. So I was pretty excited to find another new retro-style shoot ‘em up to play on my arcade machine.

I’m having a lot of fun playing Jamestown so far. I only just finished “The Badlands” and unlocked “New Madrid” on the “difficult” setting. The bullet hell hasn’t gotten hellish enough to be too hard for me yet, but I do find myself having to use a “continue” more often than I’d like.

I haven’t even gotten around to purchasing any of the other ship types yet. I need to finish writing this so I can get back to playing!

The controls

The game was ridiculously simple to set up on the arcade cabinet. You only need arrow keys plus three buttons to play the game. I mapped a fourth button to the escape key to bring up the menu.

All the menus can be navigated by moving a mouse pointer around using the arrow keys.

The obligatory shaky cam video

Cocktail Arcade Cabinet: Software, Emulators, and Hardware Specs (“Always” Up to Date!)

| Comments

I’m in the middle of my cabinet upgrade and I’m modifying all sorts of configurations and settings. The work is going slow. I can’t help wasting time playing games every time I get another emulator set up to run on the second display.

Cabinet with external monitor Cabinet after being assembled for the first time

I thought this would be a good time to start writing up an inventory. I’m going to add to these lists as I go, and hopefully I will manage to keep them up to date.

The Computer Hardware

  • Athlon X2 3800+ (2 cores, 2 ghz)
  • 1 GB RAM
  • Random Motherboard with 6 SATA ports
  • Random old 2 port 3ware SATA RAID controller (just for an extra SATA port)
  • Cheap $1.50 USB Bluetooth dongle
  • Six (6) 1 TB SATA disks (RAID 6, for network storage)
  • One (1) 320 GB SATA disk (OS and Games)
  • NVidia GTS 240 1024 MB (112 CUDA cores)

Operating System

Just upgraded (it is early in October now) to Ubuntu 12.04 from 10.10.

I’d been rather lazy about this. As long as it could store files and play games I didn’t really want to touch it.

Why am I trying to force everything to 1080p or 720p?

With the older NVidia driver, the TV will only run at a handful of resolutions. When I force a resolution other than these, the NVidia driver scales the output to one of these two resolutions. This was slower, but it meant that everything was always running at the correct aspect ratio.

The most recent NVidia driver will drive the TV at a few more useful resolutions. Unfortunately, it stretches resolutions like 640x480 from 4:3 to 16:9. I can’t correct this with settings on this particular TV, either.

Nintendo Entertainment System

For NES emulation I am using MESS. I’m trying to use MESS whenever I can because its split-screen cocktail mode is very useful on my arcade cabinet.

Switching from cocktail to normal mode requires quite a few button presses and joystick moves. Bring up the menu… Change the display mode… Change the rotation… It feels a bit like punching in the Konami code but without the muscle memory to assist you. I need to automate this.

The performance is excellent. It’ll play split-screen or normal at 1080p without any frame skipping. MESS is pretty picky about which ROM files it will run, though. I’ve tried to run a “hacks” like ZeldaC and Mario Adventure but they both fail to run.

Super Nintendo Entertainment System

Up until today I was using MESS for SNES emulation. I’ll have to check and make sure that I’m not crazy, but I am almost certain it ran fine in “cocktail” mode at 960x540.

My new television will not run at 960x540. I couldn’t go any lower than 1280x720. At that resolution it was dropping 50% of the frames in “normal” mode.

For now I switched it to snes9x-gtk. It is running at 1080p with bilinear filtering without a problem.

PC Engine

This is another one that MESS manages to do a great job at emulating. No frameskipping at 1080p in either cocktail or normal orientation.

Sega Genesis

From a performance perspective, this one runs flawlessly under MESS. No frameskipping at 1080p in cocktail or normal orientations.

I do currently have a strange issue, though. The “player 3” joystick will not work at all. I’ve remapped the keys in MESS exactly like I have for the NES, SNES, and PC Engine. I can use the buttons to shoot or jump just fine, but it refuses to move the around.

MS-DOS

DOSBox seems to run at 1080p with the same “amazing” framerates I remember getting from the real hardware.

I haven’t found many old DOS games that I would want to play, though. So far I only decided on three:

Arcade Emulation

I use MAME for all my arcade emulation, of course. I haven’t tweaked it for the new television yet, but I know it’ll run “cocktail,” two-player Mortal Kombat 2 with no frame skipping at 1080p.

Native Games (and “nearly” native Windows games)

I’ve written entries about some of these games already. I’m going to slowly build this list as I reconfigure and test these games on the new display. I’ve already noticed a few games that now run fine at 1080p that I was running at tiny resolutions like 640x384.

Inverting the display for my poorly chosen monitor is a huge performance killer.

Actual Native Linux Games

  • a7xpg – 640x480, perfect
  • Bit.Trip Runner – 1080p, perfect
  • Braid – 1080p, 60 FPS
  • Cave Story Plus – 1080p
  • Dustforce – 720p, FPS too low (need to investigate)
  • Fotonica – 1080p, perfect
  • Irukandji – 800x600 (native)
  • Jamestown – 1080p, perfect
  • noiz2sa – 640x480, perfect
  • Parsec47 – 640x480, perfect
  • Rico – A Tale of Two Brothers – 1080p, perfect
  • rRootage – 1080p, perfect
  • Super Hexagon 1080p, perfect
  • Secret Maryo Chronicles – 1080p
  • Syder Arcade – 1080p, perfect
  • Swift*Stitch – 1080p, requires mouse
  • Titanion – 640x480, perfect
  • Torus Trooper – 640x480, perfect
  • Thomas Was Alone – 1080p, perfect
  • Tumiki Fighters – 1080p, perfect
  • Val and Rick – 640x480, perfect
  • Voxatron – 1080p, 35 FPS
  • VVVVVV, 1024x768, perfect
  • Wizorb – 1080p, perfect

Flash games running in a full screen Google Chrome browser

These are mostly playable but usually a little slow. Adobe’s Flash player for Linux isn’t nearly as well optimized as it is on Windows. Most of these run just fine on my laptop, so a CPU upgrade would probably straighten them right out.

  • Canabalt – Same low frame rate at any resolution
  • KRUNCH – 1024x768, low frame rate
  • Offspring Fling – 640x480, 20-22 FPS
  • Pakkuman’s Defense – 640x480, a bit sluggish

Windows games running under Wine

  • Arcadia – 1024x768, perfect
  • Knytt Underground – 1080p, perfect
  • Mactabilis – 1080p, perfect
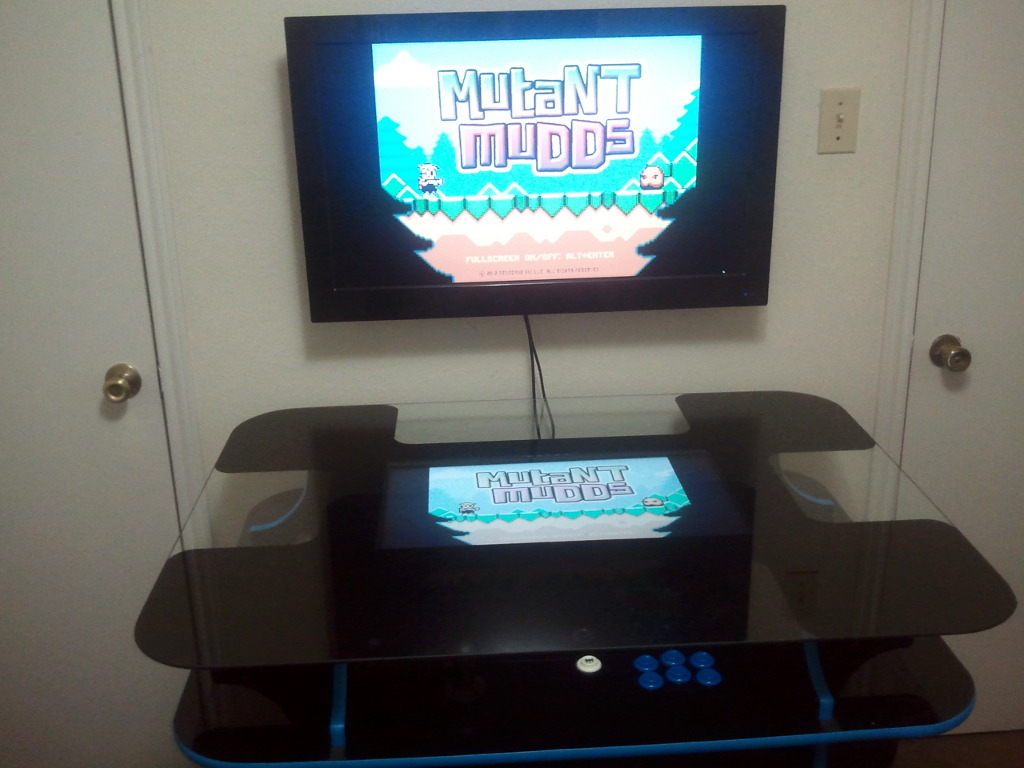
  • Mutant Mudds – 1080p, perfect
  • Omega Race 2009 – 1024x768, perfect
  • Pid – 1080p, perfect
  • Space Fury – 1024x768, perfect
  • Spelunky – Plays fine. (Very slow in score room. Problematic when quitting.)
  • Star Castle – 1024x768, perfect
  • Tiny Plumbers – 1080p, Wine 1.5.17, very minor slowdowns, better at 1080p than 640x480!
  • Super Mario Bros. X – “Full Screen”, very minor frame skipping. No noticeable frame skipping on my laptop, so it just needs more CPU
  • SYNSO:CE – 1080p, Much smoother since at least Wine 1.5.29
  • Vatn Squid – 800x600, smooth gameplay, slows down between rounds
  • War Twat – 1080p
  • Zektor – 1024x768, perfect

Windows games running poorly under Wine

  • Viriax – 640x480, Seems to have some slowdowns during gameplay

Native Linux Games that require an analog gamepad

For my purposes, these don’t qualify as “arcade” games because they can’t be played with the digital controls that are installed on my arcade cabinet. Most of these are best played on a gamepad with a pair of dual analog sticks.

  • Bastion 1080p, smooth. It doesn’t “see” enough buttons on my gamepad to be playable
  • Bullet Candy Perfect – 1080p, perfect
  • Psychonauts – 1080p, perfect
  • Scoregasm – 1080p, perfect
  • Shank – 1080p, perfect
  • TORCS – 1080p, 30-60 FPS
  • Speed Dreams – 1080p, 30-60 FPS