Eachine Q90C Flyingfrog - Your Gateway to FPV

| Comments

I ordered the Eachine Flyingfrog three months ago. It looked like an interesting package. For about $90, you get everything you need to get a taste of flying an FPV quadcopter. There’s a brushed-motor quad, a remote control, and a set of FPV goggles. You even get a battery and a simple USB charger.

I’ve been carrying this box around in my car for weeks, but I keep forgetting to give it a try. I recently added a Ryze Tello photography drone to my oversized backpack. These two drones are trying to meet different needs, but there will be some overlap for some people. Even though they are meant to serve different purposes, there are two obvious similarities. They both use 8520 brushed motors, and they are both priced at around $100.

You won’t be doing any photography with the Flyingfrog. A lot of people seem to think they’ll have fun flying their Tello in FPV using their phone. If you’re more interested in flying FPV than taking pictures, you’ll have a lot more fun with the Flyingfrog.

It will be a while before I collect enough photos and video to decide if the Tello is worth the price, so I figured I should write about the Q90C Flyingfrog first!

You get what you pay for

I’m going to get this part out of the way. The experience isn’t great. The goggles work, but the screen is tiny and difficult for me to focus on. The remote control works, but they have a huge dead zone near the center of the sticks.

It isn’t like flying a proper FPV racing or freestyle quad. I’ve flown several micro quads with brushed motors just like the Q90C Flyingfrog, but I flew all of those other brushed quads with a $200 radio. There are no dead zones on Taranis or Spektrum radios. As an experienced FPV pilot, the dead zones on the Flyingfrog’s remote control are infuriating.

You still get a lot for your money

I started flying FPV quadcopters more than a year ago. At the time, all the veterans told me how good I had it. I only had to pay $200 for a radio, $100 for a set of entry-level goggles, $250 for an overpowered bind-n-fly racing quad, $50 for a charger, and $25 per battery. It was so much cheaper than when they got into the hobby two years earlier.

That was still over $600 just to get in the air. Things have improved since last year. You can probably get in the air today with a BFight 210, a Taranis Q X7, and a $50 set of box goggles for well under $400. The BFight 210 is an excellent quad at an amazing price.

That’s still three or four times more money than the Eachine Flyingfrog, and that $400 only gets you entry-level gear. Do you want to spend $400 just to learn whether you’re interested in the hobby?

Even with its faults, I think the Flyingfrog is an excellent way to try FPV. Let’s talk about what’s in the box.

The goggles

Why am I talking about the goggles first? If you decide that flying FPV quadcopters is a fun hobby, the goggles are the only thing in the box that you will be able to use with your future quadcopters.

The goggles work surprisingly well. They’re the smallest set of box goggles I have ever used, but they also have the smallest screen. They have an internal battery that charges over USB. They are standard 5.8 Ghz analog FPV goggles.

I can definitely fly with these goggles. The reception is surprisingly good, and I have even flown one of my most expensive FPV quads with them. They work fine, but I switched back to my Fat Shark goggles as soon as I verified that the Eachine goggles work!

If you do get into the hobby, you’ll definitely want to upgrade the goggles. That said, though, you could most certainly limp along with these goggles for your first few months. You’ll also be glad you have a spare set. They will make an excellent set of spectator goggles.

The Q90C Flyingfrog quadcopter

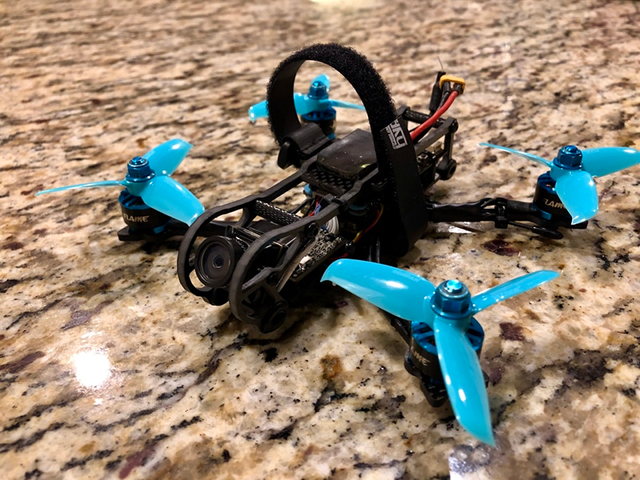
The Flyingfrog is an overgrown Tiny Whoop. It is a bit large for flying indoors, but that didn’t stop me from trying. It has enough power to fly outdoors on a breezy day, and it can manage to do some simple acrobatics.

The Q90C has props guards, and I would highly recommend using them indoors. The trouble is, the prop guards are way too fragile for a quadcopter this heavy. I don’t even think mine has been in the air for 30 minutes yet, and I’ve already broken two.

It works a lot like our full-size miniquads. It can fly in angle, horizon, or manual modes. In angle mode, the quadcopter will level itself, and it will only tilt to a limited angle. Beginners usually prefer this mode—if you get in trouble, just let go of the left stick and the quad will flatten itself out.

If you want to do acrobatics, you’ll want to fly in the Flyingfrog’s manual mode. Manual mode is equivalent to Betaflight’s rate mode. That means you have to keep the throttle above zero during acrobatic moves—even when you’re upside down! Most pilots use Betaflight’s air mode so we can drop our throttle all the way and still have a responsive quadcopter.

This is difficult for me to get used to, and this is why I fell out of the sky in my video when trying to do a power loop!

The radio

We refer to it as a “radio” or “transmitter”. You might call it a remote control. It is the thing with the sticks that allows you to control your quadcopter.

The Q90C radio feels terrible. For the price, though, I find it difficult to complain. It has huge dead zones at the center position of each stick. When you’re trying to perform delicate maneuvers, you’ll push the stick slowly, then all of a sudden the quad will respond to your input more rapidly than you intend.

This makes it difficult to fly with precision, but the Flyingfrog isn’t exactly a precision machine. It is a toy meant to give you a taste of what it feels like to fly a real FPV racing quad. It does that job well enough. If you’ve never flown before, you’ll probably get used to it quickly.

Flying in the simulator

This is probably the best part about the Flyingfrog. You can use the included hardware to fly in most FPV simulators!

Setting it up is a bit convoluted. You have to plug the Flyingfrog quadcopter into your computer. Then you hit the CH/GAME button on the remote control. It should be detected as a USB joystick.

I tested it in the Liftoff simulator running on Linux. Everything worked just fine.

The simulators are awesome. For Christmas, we got my 13-year-old nephew a 5” BFight 210, a Taranis X9D+, and everything else he would need to fly FPV. We put him in the simulator for an hour or so two days in a row. We took him out to the park, and he flew around the big, open field.

That night, we let him practice flying through race gates in Liftoff. The next day, he was flying through our race gates with his real quad. It took me a month of real-world practice to do that without having a simulator.

If you can fly well in the simulator, you are probably ready to fly a real racing quad!

What is the upgrade path?

I firmly believe practicing in the simulator is the fastest and cheapest way to learn to fly. Being able to use the Eachine Flyingfrog’s controller in the simulator is a good first step, but you will quickly hit a wall. Even if you could manage to get used to the dead zones, the stick gimbals are quite awful anyway.

The first thing you should do is upgrade your radio. You’ll want to upgrade to something you can use with all your future quadcopters. You should definitely get a FrSky radio. I am a fan of the $190 Taranis X9D+, but the $110 Taranis Q X7 is also a fine radio. You can plug either of these radios into your USB port to use with the simulators. They are the radios of choice for most FPV racing and freestyle pilots.

Once you’re ready for a full-size miniquad, there are a lot of options. I’ve already written about two of them. You can build your own, or you can buy something that has already been assembled. The parts are comparable. It is a lot like the difference between buying a computer or building your own.

My friends and I are all fans of the BFight 210. I’ve written about it several times. At around $140, it is quite inexpensive, but you get a lot for your money. It flies great out of the box, and it is light for a 5” miniquad. My friends regularly get 9-minute flights out of theirs. Even if you are heavy on the throttle, it is tough to get less than 5 minutes out of a single battery.

Most experienced pilots build their own quads. You’re going to be spending time repairing them, so you may as well build exactly what you want. I wrote about my 5S quadcopter builds for 2018. Those two quads are fairly high-end, and extremely durable. You can build something like that for around $350. You can spend more. You can spend less. It just depends on what your goals are!

You could also stick with micro quads. Brushless micro quads are finally starting to feel and fly very much like a full-size miniquad. I carry a Leader 120 in my backpack. It is priced at about $90—same as the Flyingfrog kit, but it doesn’t come with goggles, transmitter, or receiver. It is a fantastic little quad. I’d pay quite a bit more than $90 for it, but it is awesome that I didn’t have to!

Other alternatives

I was talking to my friend Mike. He borrowed my Flyingfrog and Ryze Tello for a Boy Scout event. When he stopped by to pick up the gear, we chatted about other alternatives.

Maybe you don’t want to get straight into FPV. Most of us started our journey flying toy drones line of sight. Mike recommends the SYMA X5C-1 from Amazon. For less than $60, you get a relatively large quadcopter, a couple of batteries, a controller, and some spare props. That’s everything you need to get started and keep flying for a while!

The SYMA drone is too big to fly indoors. If you want a cheap, indoor toy, you should be looking at the Eachine E010. For around $13 shipped, you’ll have everything you need to get flying. The Eachine E010 is a clone of the Blade Inductrix. It doesn’t have enough power to fly outside unless it is a completely wind-free day, but it is fantastic for flying around in the house!

I’ve not flown the Eachine branded model, but I have flown toy drones that look identical. I imagine they come out of the same factory. They fly just fine, but you get what you pay for. That said, they’re cheap enough that you can buy one for everyone in the family!

If you don’t want to wait for the $13 quadcopter to arrive from China, the JJRC H36 Mini Drone at Amazon looks identical to the Eachine. It is currently $20 with Prime shipping.

Eachine also has a Flyingfrog-style combo package—the Eachine E013, but it includes a Tiny Whoop clone instead of a Flyingfrog. I haven’t tried it, but Stew at UAVFutures says it is pretty good. I assume it is comparable to my Flyingfrog. It is also $30 cheaper than the Flyingfrog!

I like the lower price, and if you want to fly indoors, the Eachine E013 is probably a better fit than the Flyingfrog. Unfortunately, it doesn’t look like the E013 can be used to control a simulator.

Conclusion

If you haven’t flown an FPV quadcopter, the Eachine Q90C Flyingfrog is an inexpensive way to test the waters. Before I got into FPV, I had a $230 Spektrum DX6 radio and a $60 Blade Nano QX. I had no camera and no goggles. The only advantage I had with that setup over the Flyingfrog was the high-quality radio.

The Spektrum radio was a huge advantage, but I would have happily given that up at the time for FPV—especially if I got to keep the other $200 in my pocket!

If you want to try FPV, it is hard to beat the Eachine Q90C. You can spend $90, and be flying around your back yard or a park in no time.

How did you get started in FPV? Do you agree that the Eachine Flyingfrog would be a good way for a newbie to test the waters? Do you have a better idea? Let us know what you think in the comments, or join us on our Discord server!

My Favorite Lens - The Tamron F/2.8 28-75mm

| Comments

It has been almost two years since I bought my first DSLR—a used Canon XSi. The first upgrade I bought was a Canon 50mm f/1.8 prime lens. Being able to use such a huge aperture on that ancient camera was a fantastic upgrade. It wasn’t much later that I discovered the Yongnuo 35mm f/2 lens. It was just as good as the Canon 50mm, but it was a much more appropriate lens for me to carry with me.

It was the correct lens more often, but there were still plenty of situations where I needed a longer lens. I did some research, and I found the Tamron F/2.8 28-75mm. It covers more than the range of my prime lenses in both directions, the aperture opens nearly as wide, and a used Tamron 28-75mm doesn’t cost much more than my two prime lenses. Were the prime lenses a mistake?

NOTE: I haven’t searched through thousands of photos to find the very best in my collection. These are just photos that I like, and that I enjoy. Most of them were used in other blog posts!

Yes, the prime lenses were a mistake. Sort of.

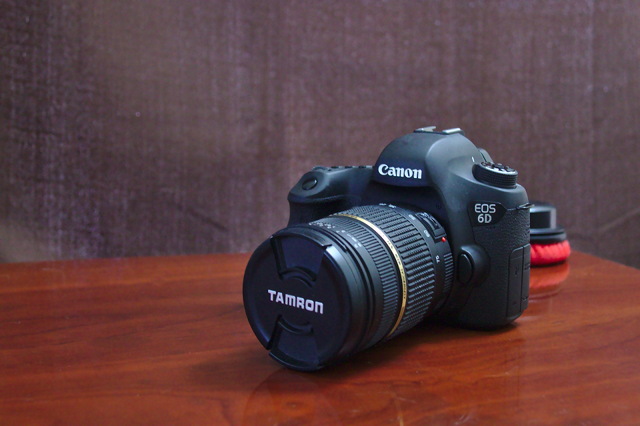
I like having the prime lenses in my bag, but I rarely use them now. I can’t even tell you when I last had one on my camera. I do sometimes miss the size and the weight savings, but the Tamron 28-75mm is much more versatile, and F/2.8 is close enough to F/1.8 most of the time. In fact, F/2.8 is often way too wide open on my current camera—a full-frame Canon 6D.

I learned a lot shooting with the primes, but I’d recommend that you skip the prime lenses and jump straight into the Tamron F/2.8 zoom lens.

Brian Moses at Beer Brewing Night

I already wrote quite a bit about my two primes. If you still want a prime, here’s the short version of my advice. Buy the Yongnuo 35mm f/2.0 for a crop-frame camera or the Yongnuo 50mm f/1.8 for a full-frame camera—in those conditions, they have roughly the same effective zoom.

But this Tamron lens doesn’t have image stabilization!

I know. There are comparable lenses that have stabilization, but they cost quite a bit more. The rule of thumb is that you can take a stable shot if your shutter speed is the inverse of your focal length. That means you should be capable of taking a steady shot at 75mm with a shutter speed of 1/75.

This only starts to get problematic in dim lighting. It was rare that I longed for image stabilization with this lens on my old Canon Rebel XSi, and the lighting would need to be extremely dim to prevent me from getting a shot with my Canon 6D.

BFight 210 Racing Quad

I took this into consideration when I was buying this lens. I knew image stabilization would buy my two or three stops. I also knew that a camera upgrade would get me at least two or three stops worth of usable ISO. I figured the extra $500 would be more valuable to me on my next body.

This worked very well for me. Your situation my be different, so your mileage may vary!

The Tamron F/2.8 28-75mm on a crop-sensor camera

The Tamron F/2.8 is a full-frame lens. You can use full-frame glass on a crop-sensor camera, but that doesn’t always work in the other direction. I tried to future proof as much as I could, so I was only shopping for lenses I could use on my eventual full-frame camera.

When I was shooting with my crop-sensor Canon Rebel XSi, I felt like the Tamron zoom lens was all I’d ever need. Crop-frame cameras enlarge your photos by about 60%. Their smaller sensor can’t see all the light coming in—they effectively ignore some of the light that would hit a 35mm sensor.

That extra zoom makes 75mm feel like 120mm. That’s not exactly telephoto territory, but it sure brings things in much closer than the naked eye. You can easily shoot on the other side of the street.

The Tamron F/2.8 28-75mm on a full-frame camera

The Tamron 28-7mm zoom is still my favorite lens. In fact, it spends most of its time mounted on my Canon 6D. It is a fantastic lens for shooting indoors. I can use it for taking close-up shots of small, inanimate objects, and it is a reasonable portrait lens when zoomed to 75mm.

My only complaint since upgrading to a full-frame camera is that I had to buy a lens to supplement my Tamron zoom lens. Full zoom on the 28-75mm with the Canon 6D is an awful lot like shooting with a nifty-fifty on a crop sensor. That’s about as far as I need to zoom when I’m indoors, but I surely can’t get a good shot of something on the other side of the street!

Long Exposure Bus

It is actually quite rare that I shoot outside, but I decided to add a telephoto lens to my bag. I ended up buying an ancient, used Tamron f/4.0-5.6 70-300mm lens. I wasn’t careful, and I believe I ended up with a pre-DSLR lens for film cameras! It does a fine job on a sunny day, but it works best if you keep the aperture wider than f/8.

Would you still buy the Tamron f/2.8 28-75mm for a full-frame camera?

Yes. I believe I still would. The Canon f/4 24-105mm would be a great upgrade, but it also costs a lot more than the $250 I paid for my used Tamron. I could buy a lot of interesting toys with the money I saved.

Canon 6D vs. Sony a7s

That said, you may shoot differently than I do. If I spent most of my time shooting on the streets, I would find the extra 30mm to be invaluable. For my uses, 75mm is more than enough to shoot people that are less than 20 feet away, and I’d hate to give up the f/2.8 of my Tamron zoom lens!

Conclusion

I have been shooting with my Tamron f/2.8 28-75mm lens since May 2016, and I’ve been using it on my Canon 6D since September 2016. In that time, it has rarely been removed from my camera. My wife took her Canon 60D on a week long trip once, and I let her take the Tamron with her. I felt lost several times that week. I was probably only shooting here at my desk for the blog, and I was using my Yongnuo 35mm prime. It is a fantastic lens, but it felt weird having to use it!

If I lost this lens, I would buy another in a heartbeat. I would go straight to Amazon and order one with zero hesitation. It is versatile, sharp, and the price is unbelievable.

Do you own a Tamron f/2.8 28-75mm lens? Do you own one its competitors? Let us know what you think of it in the comments!

Failing to Extend the RAID 10 on My KVM Server

| Comments

When I built my homelab server in 2015, I built it with future upgrades in mind. Since it was acting as my home NAS, room for more hard drives was important, and I chose a case with plenty of 3.5” hard drive bays.

Netflix, Hulu, and other streaming services have greatly reduced my storage needs. Last year, I had nearly a terabyte of free space on my NAS. The fastest-growing part of my collection of important data was the raw photos from my Canon 6D. I seem to take about 80 GB each year, so I assumed my first hard drive upgrade would be at least three or four years away.

Then I started flying FPV quadcopters. Last year, I recorded 209 GB of FPV quadcopter video. Most of that was low-bitrate, standard-definition DVR video recorded on my goggles. Last month, I started capturing FPV footage with a GoPro HERO5 Session. Those video files are much bigger, and I’ve already collected 151 GB of video this year. I won’t be surprised if I end up with 100 GB of video each month!

I bought another 4 TB 7200 RPM disk for my KVM server. That will give me an additional 2 TB of storage.

How many disks are currently in your RAID 10?

There are two disks in my RAID 10. Linux’s software RAID allows RAID 10 arrays to have just two disks or even odd numbers of disks.

I could have created a RAID 1 with those two disks, but that complicates adding additional disks. You can add a third disk to a RAID 1, but it won’t increase your available space—it will increase your redundancy with a third copy of your data.

If you have a RAID 1, and you want to increase your available storage space, you will have to use another pair of disks to create a mirror. I didn’t want to have to buy my disks in pairs.

With my two-disk RAID 10, I can install a third disk and extend my array. Linux’s software RAID 10 implementation will make sure there are two copies of every block spread across all three disks—two copies of each block spread across as many disks as you have in the array!

What’s involved in adding another disk to a RAID 10?

It is pretty simple, but there are quite a few layers involved.

  • Partition the new disk
  • Add the new partition to the RAID 10
  • Extend the LVM Physical Volume (PV)
  • Extend the LVM Logical Volume (LV) where my qcow images reside
  • Grow the file system that resides on this LV

That will take care of the KVM host, but it won’t do anything to directly address my lack of storage in my NAS virtual machine. I will also need to grow the NAS virtual machines’s qcow image.

  • Resize the NAS qcow image
  • Grow the NAS’s EXT4 file system to match the larger qcow image

I hit a road-block

This was supposed to be a straightforward blog post. Adding a disk to a RAID 10 is simple. I’ve done it before. No problems. This time, though, I seem to have outsmarted myself. I managed to get to the “Add the new partition to the RAID 10” step when I encountered a problem.

1
2
3
4
5
6
root@kvm:~# mdadm --add /dev/md1 /dev/sde1 
mdadm: added /dev/sde1
root@kvm:~# mdadm --grow /dev/md1 --raid-devices=3
mdadm: Cannot reshape RAID10 in far-mode
root@kvm:~# mdadm --grow /dev/md1 --layout=n
mdadm: Cannot reshape RAID10 in far-mode

I intentionally created this array using far-copies for the increased read performance. I didn’t know that it would take away my ability to reshape the array!

What to do next?

This should be easy to remedy, because I am running LVM on top of my RAID 10. I just need to migrate the data off the existing array, recreate the array using near-copies, then migrate the data back. LVM will do all the heavy lifting for me without any downtime outside of the hardware swap.

I have enough free disk space to make that happen right now. My two-disk RAID 10 is the same size as my new, single 4-TB drive. I could add that 4-TB drive to the Volume Group (VG), remove the RAID 10 from the VG, and then recreate the RAID 10.

I’m not brave enough to do that. I don’t have a lot of trust in a single, brand-new hard disk. I’d feel much more confident using a mirrored pair of disks as my temporary storage.

I asked my friend Brian if he had any spare 4-TB drives around. He is the NAS guy, so he usually has spare parts sitting around. I figured it’d be easier to borrow a drive from Brian than order another disk. It won’t actually be easier, but it’ll save me a few bucks, and it’ll be an excuse to write another blog post. That’ll have to do.

RAID is not a backup!

I try to say this as often as I can. RAID helps you prevent downtime. RAID may increase your disk throughput. RAID is not a replacement for backups.

Your RAID will probably protect you from a disk failure. It may or may not protect you when two or more disks fail. In fact, you may very well lose another disk when the array is rebuilding.

Your RAID won’t protect you from ransomware. It won’t protect you from accidental file deletions. It won’t protect you if you save corrupt data over an important file.

I have good backups, so why am I worried about using a mirror as temporary storage for this data migration?

Pretty much everything in my home directory is synchronized almost instantly to the cloud. My blog posts, my shell scripts, and even my save games are synchronized to my Seafile server.

Until recently, the largest files I had to regularly back up were the raw photographs from my Canon 6D. That adds up to less than 100 GB every year. All those raw files are stored in the cloud, on my laptop, and on my NAS.

Now I fly FPV quadcopters a couple of times a week. Every time I go out now, I come home with around 20 GB of GoPro footage.

Is this footage worth backing up? Almost definitely not. Just browsing through yesterday’s video is a time-consuming process. The older these videos get, the less likely I am to use them. Once I’ve compiled a video and uploaded it to YouTube, I don’t think I’ll ever touch the original video files again.

I’m not syncing these videos to the cloud, but I’d prefer not to put them in jeopardy on purpose.

I’d also be bummed out if I had to restore all these virtual machines. A little extra work up-front may prevent a whole bunch of problems later on!

Conclusion

I’ll get back to this in a few days. Brian used this as an excuse to upgrade his personal NAS to 8-TB disks. His 8-TB drives will be here soon, and I’m sure he’ll start the process of upgrading shortly after they arrive.

In the mean-time, I’m going to zero out the new drive and see if it gives me any problems! Once the drive arrives, I’ll document the process of juggling Physical Volumes (PVs). Once that is done, I should be able to document the process I was hoping to run through in this blog post!

1
2
root@kvm:~# dd if=/dev/zero of=/dev/sde1 bs=1M status=progress
1333833760768 bytes (1.3 TB, 1.2 TiB) copied, 7171.01 s, 186 MB/s 

This is the part where I usually ask my audience a question, but I don’t have a good question this time. If you have questions about any of this, please leave a comment below or join our Discord server!

IP Over InfiniBand and KVM Virtual Machines

| Comments

Two years ago, I added InfiniBand cards to two machines on my home network, and it was a very inexpensive upgrade. My raw network throughput between these two machines has increased from 1 gigabit per second to around 6.5 gigabits per second, and the two cards and one cable cost less than $60.

I’m not seeing the full 20-gigabit speeds that these cards should be capable of maintaining, because I only have 4x PCIe slots available in these two computers, and the older, more inexpensive cards operate at PCIe 1.0 speeds. If I had 8x PCIe slots, the speeds of these cards should double, and more expensive InfiniBand cards support PCIe 2.0.

IPoIB InfiniBand iperf Bandwidth Test

I’m quite pleased with my results, though. My Samba sequential throughput tops out at around 320 megabytes per second. This is a limitation of my low-power server and Samba’s single-thread-per-client limitation—faster InfiniBand cards wouldn’t change that. I can usually double that throughput when running three or more file transfers at the same time.

Why am I writing this two years later?

I’m not. Most of this blog post has been sitting in a draft for two years. I’m just fact-checking and adding a few closing paragraphs today. I’ve done a bad job here.

I don’t just write these blogs for you. They’re also documentation for my future self. If my KVM machine with InfiniBand burns down in a fire, I know I could get a new machine up and running. I ran into minor issues when I got this all set up the first time, and if I don’t document this, I’ll most likely run into the same problems again!

Limitations of IP over InfiniBand

You can run IP over InfiniBand, but that isn’t what it was designed for. It works great, but it operates at layer 2—that means you can’t bridge over the InfiniBand interfaces. This isn’t a huge problem, but it does require more effort than when you’re using something like 10 Gigabit Ethernet.

I ended up creating two new private subnets for my InfiniBand network—one subnet for the physical hosts to use, and another subnet on a virtual bridge for the KVM virtual machines. The routing between those subnets should have been easy, but I had trouble getting good speeds.

To get great speeds out of IP over InfiniBand, you need to set the MTU of each interface to 65520, and you can’t miss any interfaces. I had trouble setting the MTU of the bridge device. You can’t set the bridge’s MTU when there are no interfaces connected to it, and I couldn’t set the MTU of the bridge to 65520 until I connected a virtual machine and set the virtual machine’s MTU to 65520. This is fun, right?

What about Ethernet over InfiniBand? (EoIB)

Ethernet over InfiniBand would solve all my problems, but it would create new difficulties.

When I set this up two years ago, all of the EoIB implementation was maintained outside. This wouldn’t have been convenient for my setup. There are only two InfiniBand devices on my network, and one of those is my desktop computer. I often run bleeding edge kernels with scheduler patches on my desktop. Would they be compatible with the current versions of the EoIB modules? Probably not.

Some quick searches on Google lead me to believe that this may no longer be the case, at least if you’re running RHEL or Centos.

Why not skip this nonsense and use 10gbe?

I convinced my friend Brian to go the 10-Gigabit Ethernet route. His pricing says he can do two cards and a cable for less than my InfiniBand setup, and he’s getting a solid 9.8 gigabits per second and Samba speeds just like mine. So if you’re only connecting two machines, 10gbe is probably a wise decision.

InfiniBand starts to become a much better value as you connect more machines. There are 8-port InfiniBand switches on eBay as low as $50. The options for 10gbe switches start at more than ten times that price!

Brian is doing well with three machines, but adding a fourth 10gbe device will be problematic for him. I’m still in search of a good excuse to add a third InfiniBand device to my network!

IPoIB between physical hosts

IP over InfiniBand was extremely easy to set up. You just have to make sure your InfiniBand network adapters are in “connected” mode—they default to the much slower “datagram” mode.

1
2
3
4
5
6
7
8
auto ib1
iface ib1 inet static
        address 10.42.253.2
        netmask 255.255.255.0
        pre-up modprobe ib_ipoib
        pre-up echo connected > /sys/class/net/ib1/mode
        mtu 65520 
        post-up route add -net 10.42.252.0 netmask 255.255.255.0 gw 10.42.253.1

Once I got into connected mode, my iperf test numbers went up to over 6 gigabits per second. That’s well short of InfiniBand’s 16-gigabit-per-second limit—InfiniBand encodes data using 10 bits per byte. This is just about as fast as I can go with my combination of a PCIe 1.0 InfiniBand card in my available 4x PCIe slot.

I guess I’m going to have to route!

It should be easy to set up a handful of IP subnets and route from my desktop to the KVM server, then from the KVM server to a virtual machine, right? It turned out to be much more difficult than I had anticipated. It took me an embarrassingly long time to pinpoint my problem, too. You’ll get to benefit from all the time I spent investigating this conundrum.

My Ethernet subnet is 10.42.254.0/24. My two InfiniBand ports are on the 10.42.253.0/24 subnet—10.42.253.1 is the KVM server and 10.42.253.2 is my desktop computer. I created a lonely bridge device on the KVM server named ibbr0—InfiniBand Bridge Zero. This bridge isn’t connected to any physical Ethernet devices, and its subnet is 10.42.252.0/24.

1
2
3
4
5
wonko@kvm:~$ ip route
default via 10.42.254.1 dev eth0 
10.42.252.0/24 dev ibbr0  proto kernel  scope link  src 10.42.252.1 
10.42.253.0/24 dev ib1  proto kernel  scope link  src 10.42.253.1 
10.42.254.0/24 dev eth0  proto kernel  scope link  src 10.42.254.200 

I added a second virtio network interface to my NAS virtual machine and connected it to ibbr0. At first, this seemed to work quite well, since I was able to ssh from my desktop to the NAS virtual machine via this route.

As soon as I ran iperf, though, I knew something was wrong. To say the speeds were slow would be an understatement. I was seeing speeds less than one megabit per second!

Don’t forget to enable packet forwarding!

I didn’t forget to enable packet forwarding on my KVM host, but I did forget to write about it here! If you don’t have ip_forward enabled, your host won’t bother to route packets for you.

To manually enable forwarding, you can run this command:

sysctl -w net.ipv4.ip_forward=1

To permanently enable IP packet forwarding, you can add this line to your /etc/sysctl.conf file:

net.ipv4.ip_forward=1

There are similar sysctl options to enable forwarding of IPv6 packets.

Don’t miss any MTU settings

I set the MTU of my new network device on the NAS virtual machine to 65520. This partially solved my problem. I was seeing 5 or 6 gigabits per second from the virtual machine to my desktop, but I still couldn’t even reach T1 speeds in the opposite direction.

To be honest, I was starting to pull my hair out at this point. Why was it slow in one direction? Every network interface I could think of had its MTU set to 65520. I even tried running socat on the KVM server to bypass the additional route, and that got me up to 1.5 gigabits per second. Why couldn’t I hit that when routing?

As it happens, I missed setting the MTU on an important interface. No matter how hard I tried, I just couldn’t set the MTU on ibbr0. You do need to set the MTU on the bridge device, but you can’t set the MTU on the empty bridge.

When my NAS virtual machine starts up, it creates a virtual Ethernet device named vnet0 and attaches it to ibbr0. Once I set the MTU on vnet0, it lets me set the MTU on ibbr0. From that point on, I can get InfiniBand speed traffic through to my NAS virtual machine!

I do lose some speed when talking to the virtual server—roughly one gigabit in each direction. This is over five times faster than my Gigabit Ethernet connection, so I’m still quite pleased with the results!

Configuring the network interfaces

Setting up the IP-Over-InfiniBand configuration is easy enough.

/etc/network/interfaces on the KVM host
1
2
3
4
5
6
7
8
9
10
11
12
13
14
auto ib1
iface ib1 inet static
        address 10.42.253.1
        netmask  255.255.255.0
        pre-up modprobe ib_ipoib
        pre-up echo connected > /sys/class/net/ib0/mode
        pre-up echo connected > /sys/class/net/ib1/mode
        mtu 65520

auto ibbr0
iface ibbr0 inet static
        bridge_ports none
        address 10.42.252.1
        netmask 255.255.255.0

Setting the MTU on the bridge device took a little more effort. I only have one virtual machine that benefits from InfiniBand speeds—my Network Attached Storage server. I need to set the MTU after my NAS virtual machine is booted. Thank goodness QEMU offers hooks for this sort of thing!

/etc/libvirt/hooks/qemu
1
2
3
4
5
6
7
8
9
10
11
12
13
14
#! /bin/bash

## If KVM machine named 'nas' is started

if [[ "$1" = "nas" ]]; then
  case "$2" in
    started|restore)
      for x in $(brctl show ibbr0 | grep vnet | awk -e '{ print $4 }');do 
        ip link set "$x" mtu 65520
      done
      ip link set ibbr0 mtu 65520
    ;;
  esac
fi

The configuration inside the NAS virtual machine is much more straight-forward. Just bring up the interface, and add the route to the InfiniBand subnet.

/etc/network/interfaces on the NAS virtual machine
1
2
3
4
5
6
auto eth1
iface eth1 inet static
        address 10.42.252.2
        netmask  255.255.255.0
        mtu 65520
        post-up route add -net 10.42.253.0 netmask 255.255.255.0 gw 10.42.252.1

And finally, here’s the InfiniBand configuration on my desktop.

/etc/network/interfaces on my desktop
1
2
3
4
5
6
7
8
9
auto ib1
iface ib1 inet static
        address 10.42.253.2
        netmask  255.255.255.0
        pre-up modprobe ib_ipoib
        pre-up echo connected > /sys/class/net/ib0/mode
        pre-up echo connected > /sys/class/net/ib1/mode
        mtu 65520
        post-up route add -net 10.42.252.0 netmask 255.255.255.0 gw 10.42.253.1

Conclusion

Setting this up wasn’t difficult. The MTU issue wasn’t easy to spot. Now that I’m aware of it, though, it is simple enough to circumvent.

My InfiniBand setup has been running for more than two years now without any issues. At first, it was running on my power-sipping AMD 5350 KVM host. I’ve since transplanted the hardware to my new Ryzen 1600 KVM box. I didn’t have to reconfigure anything. I just moved the hard drives and InfiniBand card to the new machine, booted it up, and everything just worked.

InfiniBand CX4 Cable

I store the raw files from my Canon 6D and the quadcopter videos from my GoPro Session on my NAS virtual machine, and I interact with all those files over InfiniBand. For the most part, it is comparable to working with the files on the local machine. If I had to start from scratch, I would still choose InfiniBand.

Are you using InfiniBand or 10-Gigabit Ethernet at home? I’d enjoy hearing about your experiences! Feel free to leave a comment or join us on our Discord server!

Ditching My 4S LiPos for 5S

| Comments

I recently started flying my quads on 5S LiPo batteries, and it has been an awesome upgrade. Until recently, I didn’t have enough 5S packs to spend an entire afternoon flying. I only had five 5S batteries, so I’d always end up flying a few 4S packs every time I went to the park.

That changed when I acquired a big, heavy 10,000 mAh 6S battery for field charging. I’m no longer limited to five 5S batteries. Now I’m carrying enough capacity to charge a dozen of my 1300 mAh 5S packs, and I can parallel charge six of those packs in about 23 minutes.

Last night, I pulled all the 4S packs out of my giant quadcopter backpack, and I ordered a few more 1300 mAh 5S batteries from chinahobbyline.com.

I don’t have enough data for science

Proper science requires rigor. Science requires consistent, repeatable tests. That is something I don’t have, but I have flown enough packs that I’m starting to feel confident in my earlier assessments.

When I fly a 1500 mAh 4S with a GoPro Session mounted to my quad, I lose quite a bit of flight time. Without the GoPro, I can often approach five minutes of flight time. Strap a GoPro to the roof, and I am lucky if I can hit three minutes. The extra weight of the GoPro is tolerable, but you can sure tell that it is there.

When I fly a 1300 mAh 5S, it doesn’t matter whether I have the GoPro or not. Most of my flights tend to last four to five minutes. I’m sure the weight of the GoPro is having an impact on my flight times. It can’t be by much, because I have plenty of flights at both ends of the range with and without the GoPro.

This is where my science is lacking. None of my flights are the same, and I fly with the GoPro more often than without—I only fly without the GoPro Session if I forget to bring it to the park.

Why 5S? Why not 6S?

Cost is my primary reason for choosing 5S. I can buy a 1300 mAh 5S LiPo for $25, and it will have more punch than the most expensive 4S pack. When I hammer the throttle, my cheap 5S pack sags to 3.2 volts per cell. That’s still 15.2 volts. You’ll have trouble finding a 4S LiPo that can keep the volts that high at full throttle!

I was also hedging my bets on my current quadcopter builds. I’m running 2600 KV motors—T-Motor F40 Pro V2 motors on one quad, and ZMX FinX30 motors on the other. These are great motors for 4S. If 5S wound up being too much juice, I could just continue flying on 4S.

I tried one of Brian’s 1400 mAh Tattu 6S batteries. The first minute of my flight was great. I was gently cruising around and blipping the throttle. The quad didn’t spin out of control or burst into flames—that’s usually good news!

Then I did a short punch out. It was oscillating quite a bit, but I’m sure some tuning of the TPA breakpoint would fix that. After I hit the top of the punch out, I began steering the quad to keep it away from the parking lot. That’s when I lost video.

I don’t know exactly what happened. The GoPro footage looks like there was a failsafe. The VTX definitely lost power. When it hit the ground, the video feed came back. I didn’t see the Betaflight logo, so I don’t think the flight controller rebooted. The impact knocked my GoPro Session mount off, and it rolled about 30 feet from the quad, so I didn’t get to hear whether the ESCs rebooted or not.

If I had to go back, I might have chosen the 2400 KV version of the F40 Pro motors. They’d be more appropriate for attempting 6S, and they’d still fly fine on 4S!

How fast is 5S?

It depends how you define fast. When I talk about fast, I’m almost always talking about acceleration. I don’t want a Buggati Veyron that can hit 250 MPH. I want a car that can hit 60 MPH in an insanely short amount of time—I can do that over and over again on a trip to the grocery store!

I feel the same way about my quads. I run Racekraft 5051 props. They have tons of bottom-end power, but they sure peter out at the top end. I brought the speed gun and some aggressive Avan biblade props to the field last weekend. I figured they’d have more top end than my Racekraft 5051 props.

My ZMX FinX30 Quad

Unfortunately, I couldn’t get my quad to fly well on the biblades. It was shaking and vibrating like crazy. I probably need to turn some filtering back on, but I didn’t have a laptop with me at the time. We didn’t want to waste the opportunity for a speed run, so I flew the 5051 props as fast as I knew how.

I only did two passes. The first pass was most likely the fastest, but we didn’t manage to get a reading on the speed gun. It was perfect. Brian says I was only about 8 feet from the ground the whole time, and I ran straight past him. It was a fresh 5S pack, and I managed to get it to sag all the way to 3.02 volts. That’s the most sag I’ve ever seen, so I must have been pushing it hard. The quad was only armed for five seconds when I was already past Brian and the speed gun!

The second pass wasn’t as well executed. I was flying less directly at the gun, I was gaining too much altitude, and I crashed right after the run. It felt like a failsafe—Brian says I must have outrun the radio signal!

The speed gun reading on that pass was 95 MPH. In my opinion, that is a respectable number for these stupidly aggressive props. I’m sure we’ll be trying some less aggressive, more aerodynamic props. I don’t think I’ll have any trouble breaking 100 MPH.

What is this talk about field charging?

In our local quad group, we’ve talked about field charging quite a bit. More often than not, we come to the same conclusion. We’d rather invest in more packs for the quads and do all our charging at home.

Our opinions have been changing, though. Most of us have upgraded from four-button chargers to ISDT Q6 Pro chargers. The ISDT chargers are fantastic for charging in the field, because they are small and powerful. I’ve plugged it into the car at the park several times.

It has been handy when new pilots are participating, and they don’t have enough batteries to fly all day. I’ve let new pilots use my batteries in the past, and I’ve had more than one of them come back smashed. If I charge their batteries, I don’t have to put my own at risk!

Several of us are now flying different battery voltages. We carry tiny 3S packs for our micro quads, 4S packs for [our older 5” quads][bf], and 5S or 6S for our newest quads. How many of each battery should you carry? Having a generous assortment of batteries will add a lot of weight to your bag.

10,000 mAh 6S Field Charging LiPo Battery

Charging at the car is fine, but I’ve found that I can only push the charger to four or five amps with the cigarette lighter port in the bag. I know I can get more juice directly from the battery terminals, but that’s a much bigger hassle, and charging in the car only works if we’re flying near the car.

I wound up buying a big, honking 10,000 mAh 6S LiPo from Hobby King for $70. They have a lot of these big LiPos ranging from 10,000 mAh 3S to 20,000 mAh 6S. It seems like one size is always on sale.

This battery is big enough to charge a dozen of my 1300 mAh 5S packs, 16 or 17 1300 mAh 4S packs, or a seemingly infinite number of 3S micro quad batteries. These big field charging packs are only rated for 10C, but on a pack this big, that’s 100 amps. It has no trouble driving the ISDT charger at its maximum charging rate of 14 amps. We can parallel-charge six batteries in less than 25 minutes.

NOTE: I need to verify the math on the 1300 mAh 4S packs. It should be close.

Conclusion

I don’t want the worlds fastest racing quad. I don’t want to race at all. I want my quad to be powerful enough that I don’t notice the weight of a GoPro. I want my quad to have as much power available when it is time to land as it did when I plugged the battery in. My 5S quad with 2600 KV motors gives me all that.

I also don’t want to have to pay for premium batteries, because I damage them all the time. I can buy three China Hobby Line 5S LiPos for less than the price of two premium 4S LiPos.

If my experience so far is any indication, the future of miniquads is almost certainly 5S or 6S batteries. Are you running 5S or 6S? Tell us about your experience in the comments, or join our Discord server and tell us about it!

Outsourcing My Self-Hosted Cloud Storage

| Comments

Five years ago, I was on the hunt for a Dropbox replacement. I wanted something that was open source, and something that I could host myself. The solution needed to be scalable There are a lot of options with varying feature sets.

I wrote a few paragraphs about each project as I tested them. I got farther with some solutions than others. Some packages didn’t have client-side encryption, so they were immediately scratched off my list. Some slowed to a crawl when I tried to sync more than a few thousand files. I needed to sync at least 100,000 files, so they weren’t going to work.

Once my testing reached Seafile, I never looked back. Seafile lets you break your files up into groups called libraries. In 2013, each Seafile library could easily scale up to 20,000 files. That was just enough to manage the largest folders in my home directory, and their efficiency has improved greatly over the last five years.

Catastrophe strikes!

I’ve used a colocated server for all my hosting needs for nearly a decade. The machine I’ve been using for the last four or five years is a 16-core Xeon with 48 gigabytes of RAM and four 2 TB hard drives. It had virtual machines hosting several websites, some random game servers, a Zimbra email server, DNS servers, and my Seafile server.

Late last year, my aging server finally died. The most important services running on that machine are the web servers that host my blog and Brian’s blog. We were smart enough to start using a CDN a few years ago. Cloudflare had the majority of our pages in cache, so we weren’t going to experience a serious interruption there.

Without the web servers, we wouldn’t be able to publish new content, so we both wanted to get back up and running pretty quickly. I have an extra 1U server here in my home office. I needed to decide whether I should get that up, running, and ready to go. Would it be cheaper and easier to migrate to the cloud?

It is definitely easier and faster, but my initial math didn’t make it all that much cheaper. All the reputable email provides charge by the user, and my storage needs are fairly high. My quick math put me within $10 or $20 of what I was already paying for my colo. I already own the hardware, so I wasn’t worried about that cost. This is a topic for another blog post!

Where should I host Seafile?

For my web hosting, it was a toss-up between Linode and DigitalOcean. I went with DigitalOcean, because they had better pricing on additional storage. I would need at least 350 GB just for my Seafile server’s data—that includes my data and my wife’s data.

I quickly set up Nginx on a $12 DigitalOcean VPS, and it has been happily hosting our websites ever since. Once that was done, I started investigating managed Seafile services. There aren’t a lot to choose from, and most of them are a lot more expensive than Dropbox or Google Drive.

I found a host that was cheap enough to make me nervous. Prometeus.net offers managed Seafile hosting on servers in Romania starting at around $30 per year. That gets you 200 GB of storage. I had to go with the 400 GB plan for just under $50 per year.

Adding 400 GB of storage to my DigitalOcean VPS wouldn’t cost me $50 per month, but it wasn’t all that far off! Not having to maintain a Seafile server instance has value, too, so I figured Prometeus was worth a shot!

Is cheap Seafile hosting slow?

Prometeus’s Seafile hosting is definitely on the slow side. I’m used to the speeds I get when syncing to my colocated server in downtown Dallas. It was only a few hops away, and it had no trouble maxing out my 100 megabit FiOS link. I could easily upload a gigabyte of data every minute or two.

UPDATE 2019-05: We uploaded my wife’s data to a Seafile server at Prometeus.net this month. We synced 100 GB of data in less than five hours. It probably uploaded much faster than that, but that’s about how long I walked away for!

Syncing my 320 GB of data to Romania was glacially slow. It took almost a solid week to upload all my data. Once my data got up there, it wasn’t so bad. It has been a long time since I used Dropbox, but they never managed to max out my FiOS link, either!

My Seafile Libraries

Seafile has me covered in two valuable ways. It keeps the files on my desktop, laptop, and tablet in sync. Most importantly for me, that means my blog posts can be edited from anywhere. If I save this blog post right now and open my laptop, it will be right where I left off. Blog posts are tiny, so they still sync almost instantly. Raw photos from my DSLR are a bit slower to sync, but they still usually only take a few minutes.

I also rely on Seafile for my backups. Seafile’s synchronization gives me three local backups of the most current state of my data. The server provides me with 90 days of history.

I feel like that has me covered pretty well. If a hard drive fails, I have local backups. If a file gets damaged, overwritten, or deleted, I can get it back from the server. If the cheap server disappears, I still have three local copies of my data.

Relying on Seafile for backups has been amazing. I don’t miss the old days of daily or hourly backups. All my changes are backed up in 20 or 30 seconds. Not only are my changes backed up, but they’re synced to at least one other machine almost instantly. How can it get any better?

Can you trust these guys with your sensitive data?

When you create a Seafile library, you can choose to encrypt it. If you do encrypt your libraries, all encryption and decryption is done on your end. The server doesn’t have access to your encryption keys.

You should encrypt your libraries. If you do, the folks at Prometeus don’t have access to your data. Seafile is open source, so it is possible to verify that the keys aren’t transferred to the server. I’m using the Seafile client from the Ubuntu repositories, so I’m trusting that the folks at Canonical aren’t sneaking anything into the binary.

I’m not worried about Prometeus stealing my data. I don’t have anything all that sensitive anyway.

Does Seafile’s deduplication work with encryption?

The short answer is yes. The truth is slightly more complicated.

Seafile slices your file up into pieces before uploading them to the server. Each block is hashed, and if the server is already storing a block with the same hash, then the client doesn’t need to upload the block. This saves time, bandwidth, and space on the server.

When encryption isn’t enabled, I believe Seafile deduplicate between any library stored on the server. If you share the server with your friends and family, and you all have a copy of the same large video, only one of you will have to upload it and only one copy of the data will be stored on the server.

If you’re using encrypted libraries, then the Seafile server can only deduplicate within the confines of a single library. This is a limitation that I am happy to live with, because I encrypt most of my libraries.

Why not just use Dropbox?

I don’t trust Dropbox. They hold the keys to access your data. This is true of Dropbox and many of their competitors. Some of Dropbox’s competitors claim that they encrypt your data on the client, and they have no way to access your data on their end. Unfortunately, their client software is usually closed source, so you have no way to verify whether or not they are doing things correctly.

Seafile is open source. If I had any idea what I was doing, I could look at the code and make sure it isn’t doing anything scary. I don’t have any idea what I’m doing, but my hope is that someone else does. This isn’t a fool-proof plan, but I’d rather put my faith in the open-source community than a profit-driven company.

My friend Brian has been using CrashPlan, but they recently shut down their consumer-facing business. That leaves him searching for a comparable service. I’ve been using Seafile for quite a few years, and I expect to be using it well into the future.

If the business entities behind Seafile wind up changing direction, the software won’t have a definitive drop-dead date. I’ll expect to be able to continue on doing what I’m doing until the software gets old, rickety, and completely abandoned—I will be able to move along on my own schedule.

What if the Seafile hosting provider disappears?

That will be a bummer. I’ve already gotten more than $50 of value out of the service. In the worst case, I’ll just have to set up my own Seafile server again. I’m not worried about having to do that, but it would be much better if I don’t have to!

Conclusion

Prometeus’s Seafile hosting is an excellent value. The speeds are reasonable, and the storage is affordable. If you’re already running your own Seafile server, and you are looking to move to a hosted solution, I’d say go for it. Upgrading Seafile on your own server is easy. Running garbage collection is easy. Even so, I’m excited about not having to worry about doing either one again.

Baratza Preciso Grind Consistency Issue

| Comments

I have had an ongoing problem with my Baratza Preciso. I don’t know how long I’ve had this problem. I don’t want to say it has been getting worse over time, but the failing part finally gave way last week, so I actually know what’s been going on all this time.

What’s the problem? Sometimes I need to move the micro-adjustment dial down when I’m tuning in a shot of espresso. Usually it works fine. Every once in a while, my grind will get extremely coarse instead of finer!

A delicious latte

I’ve had to replace the burr holder before, so that’s always the first thing I check. It has three thin tabs on the sides. These tabs are meant to break if a rock or hard bean gets jammed in between the burrs—better to break a $4 part than destroy the burrs or motor!

Every time I would check, the burr holder would be fine. I would reassemble everything, and it would grind just fine. This would happen every month or so, and it didn’t make any sense to me.

I recently learned that I didn’t need to disassemble everything to correct the grind issue. I could just rotate the hopper all the way to the coarsest setting, and then rotate it back. Problem solved. That made even less sense!

Permanent failure

The problem showed up again last week, but it wouldn’t solve itself. I inspected the burr holder, and sure enough, two of the tabs were half broken. The last time I broke a burr holder, I ordered four or five replacements, so I had them on hand. I replaced the burr holder, and I still couldn’t get a fine grind out of the machine.

The other likely culprit is the adjustment ring. I followed Baratza’s troubleshooting instructions, but I wasn’t convinced that it was broken. They recommend pushing down on the edges of the adjustment ring. If one or more sides are loose, then you have a broken adjustment ring.

I’ve broken an adjustment ring before, and this didn’t feel the same. It might have been slightly looser on one side, but I’m not so sure.

The adjustment ring was the problem

The adjustment ring itself looked just fine. The ring that secures the adjustment ring to the motor housing was damaged. I can see exactly what was broken, but I can only guess at what was actually happening.

The adjustment ring has three tabs on the bottom. These tabs fit through slots in the lower ring. When you rotate the adjustment ring, those tabs are then locked under the lip of the lower ring. One of the three segments of that lower ring was damaged.

Damaged Baratza Preciso retaining ring

This is what I think was happening. Sometimes when I was setting the grind finer, there was enough extra force to pop one of the adjustment ring’s tabs out of the damaged slots. I’m guessing that when I rotate the hopper all the way to the highest setting, the adjustment ring would manage to fall back into its slot.

It just so happens that the lower retaining ring finally cracked enough that it just can’t grind anymore.

I believe that my grinder’s little brother, the Baratza Virtuoso, would be susceptible to this problem as well.

Conclusion

Baratza is awesome. I made an excellent choice when I bought the Baratza Preciso four years ago.

Baratza’s support is top-notch, and their troubleshooting and repair videos are amazing. Best of all, I can order a replacement for every single component inside my Baratza grinder. As far as I know, that’s true of all their grinders.

If I had to buy a new grinder today, it would be another grinder from Baratza.

My FPV Quad Builds for 2018

| Comments

Late last year, my favorite racing quad met its end. An inductor worked its way loose from my Shuriken X1’s flight controller. It could have been a minor repair, but the Shuriken X1 was a dead end for me. Its all-in-one mainboard could only be repaired or replaced with another identical unit.

I wanted to be able to try some modern hardware. I wanted an F4 flight controller with the Betaflight OSD. I wanted a VTX that could be controlled via that same OSD. I also wanted to build a setup that would let me try 5S and 6S batteries.

That didn’t have to happen all at once, though. I kept the Shuriken X1’s 2305 T-Motor F40ii motors, 30a BLHeli ESCs, and my Runcam Eagle 2 camera. I ordered a Holybro Kakute F4 AIO FC, Holybro AtlAtl VTX, and an OwlRC Dragon frame. All the new hardware could handle 6S batteries.

UPDATE: The OwlRC Dragon frame has just barely enough room for 5.5” props. I’ve been running DAL Cyclone T5544C props on my new Hyperlite Flowride, and they’re fantastic. They are at least as powerful as my beloved Racekraft 5051 props, but they’re more efficent and A LOT smoother.

I’ve had jittery at full throttle on this build for a while now, but I wasn’t willing to give up the performance of the Racekraft 5051 props. The less aggressive profile of the 5.5” props have improved my FPV video feed quite noticeably!

Video problems led to a whole new quad

I had extremely wonky video on my new build, and I just couldn’t clean it up. I added a 1000uf 25v capacitor. I swapped cameras. I swapped the camera back and forth between the 5-volt regulator and direct battery power.

Wonky VTX video:

Then I swapped out the ancient OneShot ESCs for a set of 35A Wraith32 ESCs. That didn’t help either, but at least I was ready for higher-voltage batteries. That’s when I ordered my first 5S battery!

The only thing left to replace was the motors. I wanted to upgrade to T-Motor F40 Pro V2 motors, but they weren’t available yet. I had to wait a while, but they were a fantastic upgrade over my old F40 motors. The stators are 20% taller, but the new motors don’t add any additional weight. The new motors generate 30% more power, and they seem to be more efficient!

VTX Video with new motors:

The new motors fixed my video problems. I still get a bit of noise at full throttle, but it isn’t a problem. At this point, though, I have a brand new quadcopter!

I had to build a second one

My new F40 Pro V2 quad is amazing. It has more power than I’ll ever need. I thought the same thing about my Shuriken X1. The new quad on 4S makes the X1 look tame. Strapping on a 5S battery turns things up to 11!

I had some minor problems with my build. Loose wires. Problematic VTX antenna placement. These things are easy to fix, but they take too much time and effort to repair in the field. Every time I had a minor problem, I’d have to switch over to my BFight 210.

T-Motor F40 Pro V2 Quad Waiting To Be Assembled

The BFight 210 is a fantastic little FPV racer. It flies smooth, and it is super efficient. Its light weigh makes it pretty quick, but compared to my new quad, it’s a snail.

I also keep hearing that the best way to improve is to fly the same quad every time. Every time I switch from the F40 quad to the BFight and back, I have to spend time adjusting.

Choosing motors for the second OwlRC Dragon quad

I was tempted to order another set of T-Motor F40 Pro motors, but that seemed so boring. They’re amazing motors, and they’re a known quantity, but I wanted to try something different. The new motors needed to be in the same class as the F40 Pro V2 motors.

I’ve had my eye on the ZMX FinX30 motors for quite a while. The FinX30 are 2207 2600KV motors, and they’re a couple grams lighter than my 2306 F40 Pro V2 motors. Miniquadtestbench.com says they generate a bit more thrust than the T-Motors.

The ZMX FinX30 are lighter, more powerful, and have a magical magnetic-field-manipulating bell. They’re also the same price as the T-Motor F40 Pro V2. How could I not give them a try?

The parts list for my 2018 quads

Here’s the parts lists. The total cost for each quadcopter was somewhere around $380.

  FinX30 Quad F40 Quad
Frame OwlRC Dragon DSX5
Motors ZMX FinX30
2207 2600 KV
T-Motor F40 Pro V2
2306 2600 KV
Props Racekraft 5051
ESCs 4x Wraith32 35A
FC Kakute F4 AIO v2 Kakute F4 AIO v1
VTX Holybro AtlAtl HV
Camera Runcam Eagle 2 Runcam Eagle 2 Pro
Antenna Generic cloverleaf TBS Triumph
Receiver FrSky R-XSR

Aside from the motors, the two builds are nearly identical.

UPDATE: Skip the Wraith32 ESCs. They fly great. They’re durable. I’ve been crashing them into stuff for three or four months now. I’ve only managed to knock an LED off of one so far.

I’ve built a third quad this year. I wanted to try a top-mounted battery, so I’m trying the Hyperlite Flowride frame. I’m using almost all the same parts as the builds in this blog, except I’m using a Holybro Tekko32 4-in-1 ESC and a Runcam Micro Eagle.

The Tekko32 is fantastic. It is reasonably priced, flies great, and seems to be almost completely noise free. I wouldn’t buy the Wraith32 ESCs again. I’d go with a Tekko32 4-in-1 or even four Tekko32 ESCs.

F40 Pro V2 2600KV vs ZMX FinX30 2600KV

I am not a professional pilot. I’m lucky if I can call myself an amateur. If I couldn’t see which quad I was flying, I doubt I could tell you which motors I was flying. They’re both powerful and responsive. They both handle 5S really well—they barely get warm!

According to the blackbox logs, both motors have no trouble hitting 9G of acceleration on the Z axis during a punch out.

At first, I was running them with Racekraft 5046 props. They’re my favorite prop on the BFight 210 and the Shuriken X1. Then I watched Bob Roogi’s video on the ZMX FinX30 motors. He suggested that big, powerful motors like these really open up when you use aggressive props. They’re powerful enough that the efficiency difference isn’t as big when running aggressive props.

I was skeptical. The Racekraft 5051 felt great on my Shuriken X1, but they drained my battery so fast. Could the 5051 work well with these more powerful motors?

They’re fantastic. Just like on the Shuriken X1, the 5051 props make these quads feel so much more powerful. They have so much low-end power. It is so easy to catch yourself when you’re falling fast. It is almost like the air feels thicker.

Do you know what the best part is? They’re not destroying my batteries. I can still cruise around at 40 to 50 MPH for six or seven minutes. When I’m heavy on the throttle, I don’t feel like I’m getting shorter flight times than on the Racekraft 5046, either.

The Racekraft 5051 are even better with a 5S battery!

What’s all this talk about 5S batteries?!

I already wrote a lot of words about 5S batteries, so I’ll keep it short here. Building a 6S-capable quad was an excellent decision. It didn’t add much to the cost, and flying 5S on 2600KV motors is so much fun.

We used to think the Shuriken X1 sounded angry and loud. These days, I’ll be cruising around the park and decide to do a punch out or scream across the field. I’ll hear people say, “What the hell was that?!” and someone will usually reply, “That sounds like Pat again!” If you enjoy showing off every once in a while, you should be running 5S.

Stack of 5S LiPo Batteries

I’ve been flying my 5S batteries with the throttle limited to 80% on the Taranis. Even with the throttle limit, the quads still have significantly more punch at the top end than they do on 4S. However, the throttle range is more comparable to 4S. When I fly a 4S, I flip the switch to move the throttle limit to 100%. That way, both batteries feel about the same when I’m trying to hit gates or gaps.

A $23 5S LiPo performs better than a $40 4S. Even when I’m at the tail end of a 5S pack, and I sag down to 3.2 volts per cell when I punch the throttle, that is still 16 volts. My worst sag on 5S generates more thrust than any fresh, fully charged 4S LiPo. I don’t think I’ll be going back to 4S.

I’m finally carrying a GoPro Session 5

I’ve tried carrying action cameras several times, and I’ve always been disappointed. My most powerful quad was the Shuriken X1. Strapping a camera on its roof made it feel heavy. It didn’t accelerate well, and the weight distribution made it corner like a truck. Yuck.

My new quads are a bit lighter and 30% more powerful than my X1, and the GoPro Session 5 makes the quads almost 20% heavier. Those numbers seemed promising—it’d still be an upgrade even with the additional weight of a GoPro!

My new quads have the same problem as my Shuriken X1. The battery is mounted on the bottom and the GoPro is on the top. With this setup, doing a flip or a roll is a bit like spinning a dumbell—all the weight is on the outside edges.

My worries were unnecessary. The OwlRC Dragon quads feel great with a GoPro on top. I almost want to tell you that I can’t even tell that there’s a Session 5 on the roof, but that would be a slight exaggeration. It flips and rolls with plenty of authority—enough that I wouldn’t be able to tell you whether there’s a camera on top. The quads definitely feel heavier when I’m heavy on the throttle, and flight time is shorter by about a minute.

That’s on 4S. When I fly 5S with the 80% throttle limit, it feels amazing. If I had to guess, I would say that the quads have more punch on 5S with the throttle limit and a GoPro than they do with 4S and no GoPro.

The flight controller and VTX

The Holybro Shuriken X1 served me well, and I’ve beaten the crap out of it. Several of my friends own one as well, and they’ve had pretty good luck, too. Our success has encouraged me to keep my eye on products from Holybro.

Holybro’s Kakute F4 and AtlAtl HV VTX are used in Holybro’s Kopis 1. The Kopis 1 is the successor to the Shuriken X1. I’ve been drooling over the Kopis 1 ever since its release. It is a well made quad built using premium parts. It may be the successor to the Shuriken X1, but it doesn’t perform like one. I think of the Kopis 1 as a premium BFight 210. The Kopis has efficent motors, but they’re not all that powerful.

I’ve essentially built myself a much more powerful Kopis 1. I’m pleased about this.

I’m using the AIO version of the Kakute F4. That just means it has an integrated PDB. My first build has the original version of the Kakute. Version 2 started shipping shortly after I built the first quad. I have no problems with the original Kakute. Holybro moved the pins around on the second revision.

I like that the Kakute F4 has a soft-mounted gryo. That means I don’t have to soft mount the entire flight controller, and this layout seemed to work well in my Holybro Shuriken 180 Pro.

I’m excited about the Holybro AtlAtl VTX. Your channel and output power can be controlled by Betaflight using the Tramp protocol. It supports pit mode along with power outputs of 25 mw, 100 mw, 200 mw, 400 mw, and 600 mw. I usually fly at 100 mw.

The Kakute F4 V2 is the flight controller Joshua Bardwell used to test the Betaflight Kalman filters. I’m hoping I’ll also be able to run 32kHz/16kHz on my Kakute F4 flight controllers as well!

Wraith32 35A BLHeli_32 ESCs

I didn’t go out of my way to find the best BLHeli_32 ESC. I wanted something fast, and a four-pack of Wraith32 ESCs was available with 2-day shipping at Amazon for about $58. That’s less than $15 per ESC, and the reviews of the Wraith32 are all favorable. They’re even listed on Joshua Bardwell’s ultimate FPV shopping list.

They’re also 6S-capable, so I was sold. I have nothing to complain about. The Wraith32 work just fine. They have current sensors and telemetry, but I’m not using it. Each ESC has a bright light on top.

If you want to use Betaflight’s turtle mode, be sure to upgrade to BLHeli_32 version 32.3 or higher. Earlier versions don’t support dshot commands!

The OwlRC Dragon DSX-5 frame

Choosing a frame is hard. I like both the HyperLite FLOSS and HyperLite Flowride frames. They’re inexpensive, well made, and extremely light. Those narrow arms aren’t ideal for individual ESCs, though. The Flowride wasn’t available when I built these quads.

I also like the X-Hover Stingy and the Armattan Chameleon and Armattan Rooster. They’re all nearly three times as heavy and cost three times as much as the HyperLite FLOSS. They’re really sturdy frames, but I don’t want to pay that much for all that extra weight.

OwlRC Dragon frame with ZMX FinX30 Motors

Joshua Bardwell easily convinced me to try the OwlRC Dragon frame. It is half the price of the Stingy or Rooster. At about 90 grams, the Dragon falls somewhere in between the FLOSS and the Chameleon’s weight.

The Dragon isn’t a heavyweight, but it is quite sturdy. It has replaceable 5-mm-thick arms. Once you get everything bolted together, the Dragon is extremely rigid. I’ve been crashing it into tons of trees and grass. I even obliterated a Runcam Micro Sparrow when I flattened a graphite race gate at full throttle.

I can’t say that I’ve hit any concrete with the Dragon frames yet. That’s what it took to finally break an arm on my Shuriken X1 after eight months of crashes. The Shuriken X1 had 4-mm-thick arms, but they were wider. In fact, the arms on the X1 and the Dragon have the same cross sectional area, so I’m quite confident in the Dragon!

My friend Brian Beverage built his second FPV quadcopter using the OwlRC Dragon frame and a lot of parts similar to my own. In fact, he had his up and running with F40 Pro V2 motors while I was still running the F40ii motors.

Runcam Eagle 2 vs Eagle 2 Pro

I am a fan of the Runcam Eagle line of CMOS cameras. A lot of people dislike the pixelated look of the Eagle cameras, and most people seem to prefer cameras with a native 4:3 aspect ratio. I am not one of those people.

I started my FPV journey with 16:9 box goggles. Those goggles encouraged me to buy 16:9 cameras. All those 16:9 cameras led me towards the 16:9 Fat Shark Dominator V3 goggles. Now that I have a good set of 16:9 goggles, I want all my cameras to match.

I’m not excited about the sharp, pixelated video of the Eagle line of cameras, but I’ve gotten used to it. I feel that the problem of sharp edges is far outweighed by the Eagle’s phenomenal wide dynamic range. When you fly directly at the sun with a Runcam Eagle 2, you can easily see detail on the ground, and the sun is just a small, white disc.

I’ve had my Runcam Eagle 2 since July. It has been by far my favorite camera. I bought a Runcam Eagle 2 Pro for my other Dragon quad in December. It is a better camera than the original Eagle 2, but not by a huge margin.

I wouldn’t buy either one today. The Runcam just released the Micro Eagle. I won’t be buying any more full-size cameras. I’ve tried the Micro Sparrow in the hopes that it would perform well enough, but the Sparrow is now Eagle. The Micro Eagle is the heaviest and most expensive micro camera.

Conclusion

I couldn’t be happier with my new builds for 2018. They’re extremely durable, stupidly powerful, and a ton of fun to fly. I still feel compelled to upgrade these and build even faster quads, but I’m doing my best to avoid that temptation. I want to fly these until I crash enough that they start giving me trouble!

When I broke my BFight 210’s frame, I replaced it with a 6” FLOSS frame. After flying the ZMX FinX30 motors, I’m extremely tempted to put a set of FinX23 motors on the old BFight. They’re cheaper and lighter than the FinX30 motors, but they can generate more thrust than my old T-Motor F40ii motors. They look like an amazing, inexpensive, and tempting upgrade for the BFight 210!

Are you flying a similar build? Are you using the FinX30 or F40 Pro V2 motors? Are you also experimenting with 5S batteries? Please leave a comment and tell us about your experiences!

Should I Build A 6S-Capable Racing Quad?

| Comments

If you came here looking for the short answer, I’m just going to give it to you. Yes. Absolutely. If you’re already building a high-end racing quad, it may only cost you a few extra dollars to use ESCs that support up to a 6S LiPo. I’m now running low-end 5S LiPos on both of my favorite quads with 2600 KV motors. I don’t expect to go back to 4S!

That’s the tl;dr. If I were you, I’d want a deeper explanation. I am not at the end of this experiment yet, but I’m pleased with the results. My first flight on 5S put a big enough grin on my face that I went home and ordered four more. I’m going to walk you through my journey and thought process. You can tell me what you think of my progress in the comments!

Choosing ESCs for my T-Motor F40 Pro V2 2600 KV quad

My build didn’t start out with F40 Pro motors in mind. I had a set of T-Motor F40ii motors from my dead Shuriken X1, and I thought they needed a new home. They’re strong, sturdy motors. I didn’t want to see them go to waste.

T-Motor F40 Pro V2 Parts

This is what I ordered.

I reused the Runcam Eagle 2 and the stock 30a ESCs from the Shuriken X1. It flew just fine, but it was just awful. I couldn’t get clean video out of it. Not even close.

I figured my old ESCs might have been noisy, so I added a capacitor. That didn’t work, so I decided to replace the ESCs. I chose 35a Wraith32 ESCs. They were only a few dollars more than other BLHeli_32 ESCs, but they also happened to support 6S. They didn’t fix the video problem, but now all my hardware was safe to use with 5S or 6S!

I continued to fly it even with the video problem—it was still a fast, angry quad, but it wasn’t much fun with the horrible video. I was guessing I had an unbalanced motor, so I started waiting patiently for the T-Motor F40 Pro V2 motors to be released.

The fresh motors cleared up the problem. My video still isn’t perfect at full throttle, but it is more than flyable. I now had a quad that could run on higher-voltage batteries, and I was excited. I couldn’t wait to try some!

I have two similar quads now that I run on 5S. One has F40 Pro V2 2600 KV motors, a Runcam Eagle 2 Pro, and a Holybro Kakute F4 V2. The other has ZMX FinX30 2600 KV motors, a Runcam Eagle 2, and a Holybro Kakute F4 V1.

Why 5S?

I built this quad on the assumption that 5S or 6S would be problematic. I figured I’d try 5S, and it’d be fun to show off, but ridiculous or too expensive to fly regularly. I chose high KV motors because I enjoy flying with them. I was hedging my bets. I wanted something that would fly great with my existing 4S packs, but I knew that could be a problem at higher voltages.

T-Motor F40 Pro V2 5S Quad

I still wanted to try 5S batteries, and I’m glad I did. At full throttle, these two quads have ridiculous power. Spectators always have something to say when I start hitting the throttle and screaming across the field.

Watching some of KababFPV’s videos encouraged me to add a throttle limit to my Taranis. Setting the throttle limit to 75 or 80 percent on 5S doesn’t seem to impact my acceleration or top speed in any significant or noticeable way, but it does give me extra usable range on my throttle stick and more flight time.

Cheap 5S batteries are better than premium 4S batteries!

I was confident that this would be true, but seeing the voltage numbers on my OSD and doing the math was still surprising.

I’ve been running CNHL 1300 mAh 70C 5S LiPo batteries. At the time I ordered, they were $22.99 each with free shipping. I bought four.

Assortment of 4S and 5S LiPo Batteries

The longer you’re in the air, the more your battery tends to sag when you punch the throttle. I am not an aggressive pilot, but I enjoy collecting data for science. When these batteries get low, and I punch the throttle, they sag down to around 3.1 volts per cell.

If my 4S LiPos drop that low, they’re only delivering 12.4 volts. When the 5S dip that low, they’re still delivering 15.5 volts. That’s the kind of voltage you’ll see while cruising around on a 4S!

What does this mean in practice? I have more punch with my 75% throttle limit on 5S than I ever had on 4S. I also have more punch on a nearly depleted 5S than you can ever get out of a fresh 4S. How awesome is that?

The best part is, the 5S batteries are cheap! You can spend $40 or more on a Tattu R-Line battery in an attempt keep your sags above 13 volts, or you can spend $25 or less on low-end 5S batteries that won’t drop below 15 volts.

Batteries will be cheaper, but what will this really cost me?

If you’re already using premium parts in your build, then ensuring that your build can run on 5S or 6S batteries doesn’t cost much more. Runcam cameras can accept much more voltage than 6S. My Holybro Kakute F4 flight controllers can handle 6S, and it is the same flight controller Joshua Bardwell used to test Betaflight 3.3’s Kalman filters.

The Holybro AtlAtl is a solid VTX that can be controlled by Betaflight, and it has no problem with a 6S input.

I already had all these parts on hand. The only thing I had to do was choose ESCs that support 6S. There are plenty of choices, but my Wraith32 ESCs are only about $15 each, and I was able to get a set of four with free 2-day shipping from Amazon.

I could have saved $10 or $20 by choosing different BLHeli_32 ESCs that could only operate at 4S. That seems like a small price to pay for this big performance bump.

Why not 6S?

I plan to try 6S. My friend Brian is working on a low-KV 6” build using 6S batteries. I’ve plugged his batteries into one of my quads, and nothing exploded. I even flew a bit using one of those batteries on my old T-Motor F40ii motors. It was awful! The quad was extremely twitchy and didn’t even seem happy at half throttle.

I just told Brian to remind me to try one of his 6S next time we’re flying. I don’t think it will be the right choice for me, but I want to see how it feels now that my quad has a better tune!

Assortment of 5S LiPos

All my motors are 2600 KV. I’m surprised and impressed that my motors barely heat up even after a spirited run on 5S. They’re not cold, but if I ate a slice of pizza at that temperature, I might say it was a cold slice. Not quite room temperature, but not nearly as hot as my phone feels when playing Neon Chrome.

This may seem obvious, but a 5S LiPo can push your motors 25% harder than a 4S. A 6S LiPo can push the motor 20% harder than a 5S and 50% harder than a 4S. A 50% increase power in huge.

I’ve also been helping Brian find 6S LiPos for his experiment. They aren’t cheap, and the selection isn’t all that wide. The selection of 5S options may not be plentiful either, but I quickly found two inexpensive and appropriately sized options for my quads.

What is VBAT compensation?

I feel dumb. I always assumed the VBAT compensation on the PID tuning tab was meant for sagging batteries. I used to turn it off.

I’ve since learned that it works surprisingly well when switching between 4S and 5S batteries. I have enabled VBAT compensation, and I tuned my PIDs in when running on 5S. Even when I switch to a 4S, the quad still feels nearly as locked in as when I’m running 5S. I’m hoping the same will be true next time I try one of Brian’s 6S LiPos!

Which 5S am I running?

My bag is full of Infinity 1500 mAh graphene 4S LiPos. They’ve served me well. They are not only inexpensive, but they’re also the best 4S LiPos I’ve ever tried. The runner-up for me were the Venom 1300 mAh 4S. The Venom batteries cost a lot more, and they would sag quite a bit deeper.

I couldn’t find any appropriately sized Infinity 5S LiPos. I wanted a 5S with a capacity comparable to my existing 1500 mAh 4S packs. If you do the math, a 1500 mAh 4S and 1200 mAh 5S have a similar Watt hour rating. You can also be lazy like me and assume weight is equivalent to capacity.

My batteries:

My first test battery was the 5S Dinogy 1300 mAh. It is a fine battery. It cost $24.99 with free shipping. Its weight is about the same as my Infinity batteries. My first flights were fast, fun, and it seemed like my flight times would even be higher on 5S. I was already convinced that 5S would be my future, so I went to order more!

The price had gone up to $27.99 since my original order, and I knew it would take three weeks for the new batteries to arrive. I didn’t want to pay more, and I didn’t want to wait that long. It was time to start shopping around for other options.

I found the CNHL 1300 mAh 5S for $22.99 on ChinaHobbyLine’s website. They have free shipping on orders over $50, they ship from the US, and they use USPS Priority Mail. I ordered four batteries on a Friday, and I had them on Monday or Tuesday. Why on Earth did I order four batteries? I should have ordered five. That would be enough to fill my parallel charging board to capacity with 5S batteries.

What if I want a 4-in-1 ESC?

I’ve been thinking about upgrading my BFight 210. I already broke the frame and moved the guts to a 6” FLOSS 2 ultralight frame. I thought it might be fun to try some ZMX FinX23 motors, and if I go that route, it might be nice to have the option of running my 5S LiPos on there.

The arms on the FLOSS frames are quite narrow, so I will have to shop around for a 6S-capable 4-in-1 ESC board. There isn’t a big selection of 4-in-1, 6S-capable, BLHeli_32 ESC boards. They’re out there, though, so you shouldn’t have much trouble finding one for your build.

I keep hearing that the current crop of 4-in-1 boards don’t hold up well with 6S if you push them too hard. The racing leagues are now allowing 5S and 6S batteries, so I expect there will be a lot of improvement here in the near future!

More voltage translates to increased efficiency

This statement is factually correct, but I haven’t been able to collect much data. Our weather here this winter has been near freezing one weekend, then 70 degrees the next. Batteries work poorly when they’re cold.

Flight times are amazing on the warm days, and poor on the cold ones. This has been making comparisons more difficult. I may not have enough data for a solid conclusion, and my 4S and 5S LiPos aren’t as directly comparable as I’d like. My CNHL 1300 mAh 5S LiPos are 19% heavier than my 4S, and they tend to stay in the air roughly 20% longer. That almost makes me want to chalk the longer flight times up to the increased capacity. The Dinogy 1300 mAh are almost as light as my Infinity 4S 1500 mAh packs, but I want to say they fly about as long as the CNHL packs. I need to fly more to confirm that.

Here comes the convoluted bit. My quads have significantly more pep with an 80% throttle cap on 5S than with no throttle cap on 4S. With these throttle settings, carrying a GoPro Session 5 with a 5S feels much like running a 4S without the added weight of the camera.

What about carrying a GoPro on 4S? It flies adequately with the extra camera weight on 4S, but the 1300 mAh 5S is able to stay in the air longer. My few 4S runs with the GoPro lasted three to four minutes. The 5S usually lasts five minutes.

It is awesome to finally carry a GoPro!

So far, being able to comfortably carry a GoPro Session is my favorite part about my 5S upgrade. I’ve tried carrying action cameras before, and I always hated it. I tried strapping a camera to my Shuriken X1 several times. No matter what I did, it always felt like a boat. It felt more like a truck than a sports car.

My new T-Motor F40 Pro v2 and ZMX FinX30 motors are both so much more powerful than the motors on the Shuriken X1. Even on 4S, the quads still feel great, but the 5S really opens them up!

Both sets of new motors produce more power than I can currently make use of. Even if I were still running 4S, I still would have attempted flying with a GoPro Session. I’d like to think I’d have been pleased enough with the performance. I bet the Session would have still become a permanent fixture on my quads.

But thank goodness I don’t have to settle for the 4S performance and flight times! I’m finally carrying a GoPro, and I’m finally able to record awesome footage, and even with the extra weight, my quads are faster than ever before. How awesome is that?!

Final thoughts

I couldn’t be happier with my upgrade to 5S. I built these quads with the intention of running my existing 4S packs, and I’m stoked that they both perform so well on 5S. Their motors aren’t getting warm, they have so much more punch, and their flight times have improved.

I don’t have to buy expensive Tattu R-Line 95C batteries for $40 in an attempt to squeeze every last bit of performance out of my quads. I can almost buy two 5S batteries for the price of a single 100C R-Line battery, and the 5S will outperform the R-Line in every way without even being pushed to its limits.

If most of your build will support 5S or 6S, then you should absolutely choose 5S- or 6S-compatible parts for the rest of your build. The boost in performance is so much fun, and being able to buy cheaper batteries will lead to big savings over the long term.

I’m still in the early stages of this experiment, but I like where things are going!

Are you running 5S or 6S on high-KV motors? Do your experiences match mine? Or are you running 6S on low-KV motors? I’d love to hear your thoughts in the comments!

Leader 120 Micro FPV Quad: Amazing Performance on a Budget

| Comments

Early last year, I discovered the KingKong 90GT micro drone, and it was fantastic. The 90GT is too big to fly indoors, but it was more than powerful enough to fight a strong breeze outside.

It didn’t take us long to figure out that we could relocate the motors to make room for bigger props. Upgrading from 1.9” to 2.5” props made it feel like a completely different quad! Thrust went up by 50% and I was getting an extra minute of flight time.

NOTE: The video above is from my old micro drone. It is the KingKong 90GT upgraded from 1.9” props to 2.5”.

These micro quads are a lot of fun to fly, and you can fly them in situations where a 5” racing quad might be inappropriate, or even dangerous. Ever since upgrading the KingKong 90GT, I’ve been on the lookout for a more powerful micro FPV quad.

The KingKong FlyEgg 130 was a dud

As soon as I saw the KingKong FlyEgg 130, I asked my friends at Gearbest if they would send me one to review, and they were kind enough to oblige. It arrived with a faulty camera. I was impatient, so I soldered my old KingKong 90GT camera into its place. It didn’t quite fit the frame, but I was able to make it work.

My first flight seemed extremely promising. It was an upgrade in every possible way over the KingKong 90GT, but I had a crash on my second battery, and I managed to bend a motor. That was the beginning of the end, and I hadn’t even flown the FlyEgg for 10 minutes yet!

Failing to upgrade the FlyEgg 130

I figured it might be worthwhile to install some premium motors on the FlyEgg 130, so I ordered a set of Brotherhobby 1106 motors. The number 3 motor was problematic. I could hover, but if I hit the throttle, it would fall out of the sky. I tried adjusting motor timings, increasing minimum throttle, swapping out motors, and even replacing the 4-in-1 ESC. Nothing would help.

I even ordered a replacement 4-in-1 ESC, but I still had the same problem. I’d sunk enough time and money into making this work. I was bummed out, and I didn’t even want to think about the FlyEgg 130 anymore.

It looks like they’re using entirely different motors on the KingKong FlyEgg 130 now. Maybe the new motors aren’t as soft as the original ones! Even so, I don’t imagine the FlyEgg 130 is worth the additional cost compared to the Leader 120.

The Leader 120 is amazing

I got an email from Gearbest telling me the Leader 120 micro FPV quad was on sale for about $80! I’d never heard of it, so I looked for flight videos on YouTube. It looks like there were some issues with the earliest batch, but it sounds like all the problems are ironed out now.

The Leader 120 is an upgrade in every way over my beloved KingKong 90GT. The Leader 120 has bigger motors, bigger props, a better camera, more modern flight controller, and it can run on a 3S battery. Full Speed managed to cram all this hardware into a quad that costs 30% less than my 90GT!

2S or 3S batteries for the Leader 120?

I already had a handful of 550 mAh 2S LiPos for my KingKong 90GT. I also had a 400 mAh 3S and a 550 mAh 3S on hand for the KingKong FlyEgg 130. This gave me a good base for experimentation!

The Leader 120 flies amazingly well on 2S. If you’re just watching it cruise around, you probably wouldn’t notice that it isn’t flying on 3S. It is fast on 2S, and has decent punch. If you’re trying to do acrobatics, you’ll really appreciate a 3S battery.

I enjoyed the Infinity 550 mAh 3S batteries, so I ordered half a dozen for myself. The Leader 120 is super fast on 3S. We clocked it at 69 MPH with the radar gun! I’m confident that I could squeeze a little more out of it. I’d sure like to see a speed gun run break 70 MPH.

I had to order a Leader 120 for my nephew

I ordered a second Leader 120 as soon as I got home from the maiden flight of my own Leader 120. It is a fast, agile, stable, and sturdy little quadcopter. We gave my nephew a full FPV setup including a BFight 210 for Christmas. I figured an amazing and inexpensive drone like the Leader 120 would be an excellent addition to his hangar.

I sent him the Leader 120 and all my 450 and 550 mAh 2S batteries. The Leader 120 flies quite spiritedly on 2S, but I imagine it will be tame enough that he can have fun flying it around in his neighborhood.

The Leader 120 is a Plug-N-Play drone

What does Plug-N-Play mean? I’m not entirely sure that there’s a standardized definition. Usually it means the quad ships with everything up to but not including the receiver. You get the quad with motors, flight controller, camera, video transmitter, and a battery.

You don’t get a receiver, radio transmitter, or FPV goggles. The Leader 120 is compatible with most serial receivers, including FrSky, FlySky, and Spektrum.

Leader 120 Micro FPV Drone

I had a spare FrSky compatible D8 serial receiver, and that’s what I used for the first few weeks. It was the cheap receiver that shipped with my BFight 210. It doesn’t have diversity, and the range is terrible. I had a few failsafes with it when I was flying right near the edge of video range. That’s only a few hundred feet with the Leader 120’s tiny 25mw VTX.

I upgraded my Leader 120 to a real FrSky R-XSR receiver. Now it can fly as far as any of my full-size miniquads, assuming I can still see the video. There was even a free UART pad for telemetry, and the Betaflight LUA scripts even let me adjust the PIDs!

I reused the generic D8 FrSky-compatible receiver in our nephew’s Leader 120. It should work well for him, and the reduced range should help keep him out of trouble. If you’re flying with a Taranis radio, I’d recommend using at least an XM-Plus receiver. They’re small, reliable, and have excellent range.

Are these tiny micro FPV quads worth the money?

This is extremely subjective. It will depend on your circumstances, and my own opinion on micros has shifted a bit with all the progress that’s been made since my beloved KingKong 90GT.

My good friend Brian enjoyed his 90GT at least as much as I did, and that convinced him that he wanted to build a premium 3” micro quad. The parts for that micro have cost him more than $300, but he’s had a lot of fun building it, and he enjoys flying it. He’s also been constantly upgrading it!

That’s about what it cost me to build an amazing 6S-capable 5” FPV quad using premium parts: T-Motor F40 Pro v2 motors, 35a BLHeli_32 ESCs, a nice F4 flight controller, and a premium smartaudio VTX on an OwlRC Dragon frame.

You can get a fantastic beginner-level 5” quad like the BFight 210 for around $140. That’s less than the price of many of the micro quads, and the BFight flies a lot better than a micro.

That’s the problem with most of the micro quads. They’re fun to fly, but they don’t feel nearly as locked in as a 5” racing quad. Fortunately, they’re getting closer and less expensive!

The Leader 120 handles so much more like a real racing quad than my KingKong 90GT ever did. It isn’t quite there yet, but that gap is no longer a huge chasm. The Leader 120 costs less than $90. My weaker, slower KingKong 90GT cost about $130. I am amazed at what you can get for your money.

That said, 5” quadcopters still offer the best value. There has been a lot of competition at that scale for a long time. There’s no shortage of motors, ESCs, and flight controllers at many price points in the 5” class. The bigger quadcopters are also easier to work on and repair.

So why would I want a micro quad?!

You can fly a micro quad in many situations where a big, angry 5” quad would be inappropriate. A 5” racing quad sounds scary. They’re heavy enough that they carry a lot of momentum. I wouldn’t want to be hit with a 600-gram quad that is ripping through the air at 85 MPH.

Fewer people will notice your 2.5” or 3” micro quad. They’re quiet. They don’t usually travel as fast as a 5” quad, and they weigh less than 140 grams. It would be much harder to smash through a windshield with a micro quad, and I’d be surprised if anyone would bleed out if they got cut by a prop.

Leader 120 Micro FPV Quad and My Cat, Rascal

I don’t advocate flying your 3” micro in crowds, but they’re much more suitable to smaller spaces than a full-size miniquad. Last week, we were in a huge, open field at a park. We fly there a lot, and there’s usually plenty of room for us. That wasn’t the case for a significant window of time on our last trip.

To one side was the parking lot, our pilots, and spectators. In another direction, there was a guy slowly walking his dog. Then another group of people showed up and meandered around. We were effectively boxed into a triangle for about twenty minutes. Even at a slow pace, we were always two or three seconds away from being dangerously close to something.

I’m happy to have the Leader 120 in my bag, because it let me fly two or three batteries while everyone else was effectively grounded. I’m certain that I’ll always carry a micro with the rest of my quads. It doesn’t take up a lot of space in my cavernous backpack, and it is a ton of fun to fly!

Should your first FPV quad be a micro?

My friend Brian and I talk about this all the time. He spent a lot of his time early on flying his KingKong 90GT. I agree that it was a fantastic way to practice and gain confidence, but it eventually turns into a hindrance. We just couldn’t fly our KingKong 90GT like a full-size miniquad. You have so much more control when you fly a heavier 5” racing quad, and the 90GT didn’t have enough thrust to recover from acrobatic maneuvers.

These points have always made me discourage people from starting with a micro quad. You’ll hit your skill ceiling pretty quickly, and you won’t be able to advance any farther. I tend to encourage people to start with a real miniquad like I did.

Except I didn’t start flying with a full-size miniquad. You could easily argue that my PH145 was an overweight, overgrown micro quad. It was heavy, so I wouldn’t notice a gentle breeze like I would in a real micro, but it was relatively safe and under-powered.

I’m officially changing my advice. Modern micro quads like the Leader 120 are fantastic. They feel more like a 5” racer than the KingKong 90GT ever could. I don’t see any problem starting your FPV journey with a 2.5” or 3” micro quad. It is a safe, inexpensive, and fun way to enter the hobby!

UPDATE: I crashed my Leader 120 really hard!

Last week, I upgraded my Leader 120 to Betaflight 3.2.4. I copied the stock PIDs over. I expected that would be a good starting point for tuning, but I didn’t even have to do anything. Snap rolls and flips are locked in. There’s still some prop wash, but it isn’t bad.

I assumed the Betaflight default minimum throttle of 4.5% was too high, so I dropped it to 3.5%. It seemed to be flying just fine like that. The Leader 120 has trouble if your minimum throttle is too low. I did a bunch of sharp, snappy moves with the 3.5% setting, and it was fine.

Then I tried to power loop a tree. This was really hard to do out of the box, because the min throttle is set to around 10%. As soon as you go inverted with that 10% minimum, you are seemingly racing towards the ground. My memory was wrong while I was at the field, and I assumed 4.5% was the default.

My power loop yesterday went great at first, but my low minimum throttle setting was way too low. One of the motors didn’t spin back up fast enough, and I spun out of control at the very top of my loop and crashed into the sidewalk.

I broke a beefy battery strap—a battery strap meant for 5” quads! My battery ejected, and I even bent and arm. I was able to bend it back, but I wasn’t able to fly again that day. I didn’t have any appropriate battery straps with me in the field.

I bent the arm and props back into shape. I hovered it at home, and it seems like it will be fine. It is going to be raining all week. I can’t wait to get out to try it again.

I’m proud of the little guy. Any crash that can break a 20mm battery strap is a hard crash. He held up very well!

Final thoughts

The Leader 120 is an amazing piece of hardware, and its price point is nothing short of amazing. For $90, you get a surprisingly good micro CMOS camera, peppy and durable motors, durable props, and a fast, smooth flying experience. I have no idea how you can beat this combination of price and performance.

The Leader 120 isn’t perfect, but I didn’t expect perfection for $90. My only serious complaint about the Leader 120 is its 25mw VTX. As long as you’re in range, it works quite well. The Leader 120 may be tiny, but it is super fast—especially when using a 3S LiPo. It takes no time at all to reach the end of your reliable video range.

Leader 120 Micro FPV Racing Quad

In practice, that’s a minor complaint. The farther you fly, the harder it is to recover your quad when it crashes. The difficulty only increases when you’re flying a micro. Even freshly mowed grass is deep enough to almost completely conceal one of these tiny quads. Staying within a few hundred feet with a micro is a good idea anyway.

Do you fly a Leader 120 or one of the other Full Speed micro quads? Do you have a micro quad that you prefer? Are you flying micro quads or other FPV quads near Plano, TX? Post a comment, or come chat with us in the drone channel on our Discord server!