My Take on “The Go Command”

When I first saw Zachary Wasserman’s Go Command, I wasn’t entirely convinced that it was a good idea. I figured you could get similar functionality with less typing by enabling autocd, properly configuring binfmt_misc, and setting the execute bit on pretty much every single file…

Those three things would be quite convoluted, and setting the execute bit on every single file would make me a bit nervous… Alexy’s go command is safer, easier to implement, easier to carry along with you, and can give us much finer-grained control over the process.

To me, the go command feels like it could be called the dwim command. I wanted my own go command to do more than change directories and open files in my text editor.

I wanted to limit mine to only open appropriate files in my text editor. I didn’t want to be accidentally opening images or videos in Emacs. I also decided that if a file shouldn’t be opened with a text editor, that it should be handed off to xdg-open. That lets me open images, videos, office documents, and anything else I can think of with the same command.

I also felt it was important to integrate autojump because I am horribly addicted to it. So much so that my muscle memory always wants to type j instead of g… I’m sure if I can start remembering to correct myself, I will have that trained out of me in a week or two.

Here’s the current revision of my take on the go command. It works fine on botth zsh and bash. It fails gracefully if xdg-open or autojump are not found. If you would like to give it a try, you can just copy and paste it into your ~/.zshrc or ~/.bashrc (whichever is appropriate for your shell).

My `go` command
1
2
3
4
5
6
7
8
9
10
11
12
13
14
15
16
17
18
19
20
21
22
23
24
25
26
27
28
29
30
31
32
go() {
   if [ -f "$1" ]; then
     if [ -n "`file $1 | grep '\(text\|empty\|no magic\)'`" ]; then
       if [ -w "$1" ]; then
         $EDITOR "$1"
       else
          sudo $EDITOR "$1"
          #$EDITOR /sudo::"$1" # For emacsclient+tramp
       fi
     else
       if [ -e "`which xdg-open`" ]; then
         if [ -n "$DISPLAY" ]; then
           xdg-open "$1" > /dev/null
         else
           echo "DISPLAY not set:  xdg-open requires X11"
         fi
       else
         echo "xdg-open not found:  unable to open '$1'"
       fi
     fi
   elif [ -d "$1" ]; then
     cd "$1"
   elif [ "" = "$1" ]; then
     cd
   elif [ -n "`declare -f | grep '^j ()'`" ]; then
     j "$1"
   else
     echo "Ran out of things to do with '$1'"
   fi
 }

 alias g=go

From my perspective, there isn’t any value in automatically running an ls every time I change directories. I prefer to see as many previously run commands on my screen at a time as possible, and an 80x24 terminal is already pretty cramped as it is. Even in the rare instances where I vertically maximize, my terminal I still don’t want to look at the noise of multiple extraneous directory listings staring back at me. You mileage will most likely vary, though.

The disadvantage of the go command

Using three separate commands provides the shell with context to help it provide better completion options to you. I don’t think this is a big loss if you don’t use autojump, though. I haven’t figured out how I want to set up the zsh completion settings for my go command yet. For now, I will just limp along with the basic completion settings.

This is the sort of problem we see with commands like oh-my-zsh’s x/extract command. It will perform a basic extraction for just about any archive you throw at it, but you lose the ability to complete on files inside the archive.

Happy Friday the 13th!

  • Update 2010-05-18: I moved this code into an oh-my-zsh plugin and submitted a pull request a few days ago.
  • Update 2010-05-20: Added a bit of functionality. If the file to edit is read only ,it will be opened using sudo.

My First btrfs Failure and the State of Ubuntu’s btrfs Support

I had my first btrfs file system failure this week. The root/home btrfs volume on the Intel X25-M SSD in my laptop became unmountable on Sunday night. It was functioning just fine with no signs of any problems, but it wouldn’t mount after a reboot. I’ve really been waiting for this sort of thing to happen. There has been quite a lot of improvement to btrfs with regards to stability since I formatted this partition.

I tried to run an fsck from the console of the Ubuntu installer, but it failed. I don’t recall the error message, but after the error came up, all CPU and disk activity ceased. I wasn’t terribly interested in recovering the file system anyway. I run a daily backup to an ext4 partition on my laptop’s second hard drive anyway.

Installing a fresh copy of Ubuntu and restoring my data and configuration only took about two hours. That includes the time it took to download and burn a Xubuntu 11.04 installation disc.

I also keep a backup of the output of dpkg --get-selections. You can pretty much just feed that back into dpkg --set-selections, but on this restore I chose not to do that. I’ve been accumulating a lot of package cruft of the last few years and I figured this was a good excuse to do some spring-cleaning.

The state of btrfs support in Ubuntu’s installer

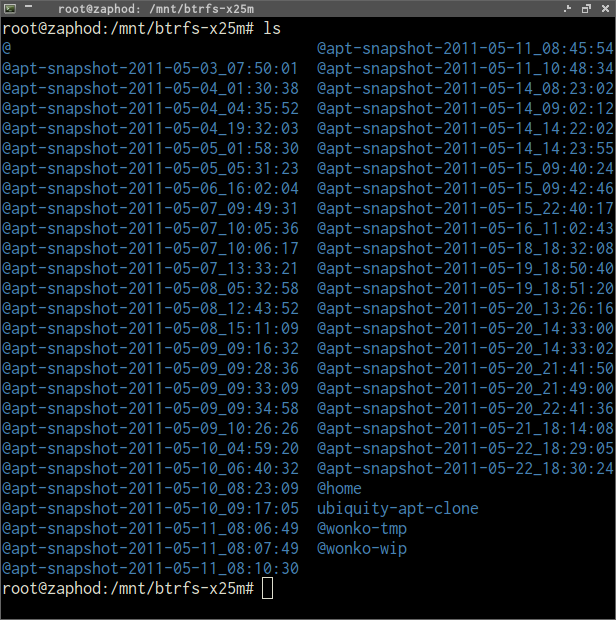
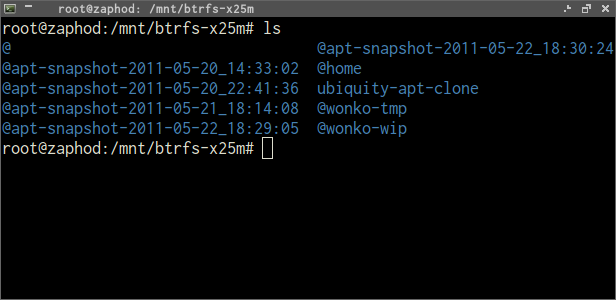
I am very impressed with the way Ubuntu is handling btrfs. I was worried that they were still going to be mounting the primary volume as root; they don’t do this! They create @ and @home subvolumes and mount these as / and /home. I like this convention of using the @ sign. I was previously using a subvolume called root for / and home for /home.

This saved me a lot of recovery time. I was expecting to have to play a game of “musical snapshots” to get things organized like this. Organizing things this way makes it easier to boot off of a previous snapshot.

I did not let the installer format my btrfs partition, though. I wanted to correct a mistake I felt I made the last time I formatted that partition. mkfs.btrfs defaults to using mirrored metadata. I’ve been thinking that that is just a waste of performance and write cycles on an SSD. I’ve already had two instant total failures of my SSD and that seems to be a very common failure mode for solid state drives. I don’t think I’m likely to have to deal with bad sectors inside the metadata areas.

I don’t know if the Ubuntu installer would have created the file system with mirrored metadata. I didn’t think it was worth taking the time to find out.

I’m not giving up on btrfs

I don’t think I have had a complete and total non-hardware related file system failure in over ten years. That failure was with a reiserfs file system and it almost completely put me off of ever using reiserfs again. I only used reiserfs one single time since then and it was to save space with tail packing.

I knew what I was getting into with btrfs, and I know things will continue to get better. I’m not willing to give up on having regular snapshots to pull files out of. I’ve gotten into the habit of just editing my “only” copy of config files without making a quick backup copy first. It is just easier to yank a copy out of a recent snapshot on the times I actually do screw things up than it is to make backups that I don’t end up needing.

I’m also extremely happy that I can boot off of snapshots of previous installs. I wasn’t terribly happy with my upgrade to Ubuntu 11.04. I always take a manual snapshot before big updates like that, so it was trivial to boot off of my 10.10 snapshot. I was then able to chroot into the 11.04 volume and run some apt-get upgrades in there so I could watch for an update to a package relevant to the issues I was having.

Displaying Conky on an Old Android Phone

I have had my old HTC Dream sitting around collecting dust for months. I have been trying to come up with a cool use for it for months. After all that time, I think I finally may have come up with a good use: running a small Conky status display on it via VNC.

External Conky display on an Android phone using VNC

How to do it

Install a VNC server and Conky:

1
apt-get install vnc4server conky-all

I am running Ubuntu and chose to install the VNC version 4 server. This ought to work on Debian as well.

Download and install my Conky configuration file and VNC xstartup file:

1
2
3
4
wget https://blog.patshead.com/Assets/conky-phone/conkyrc-phone -O ~/.conkyrc
mkdir ~/.vnc
wget https://blog.patshead.com/Assets/conky-phone/xstartup ~/.vnc/xstartup
chmod +x ~/.xstartup

Then fire up the VNC server:

1
vnc4server -geometry 480x320 :10

If all goes well, there should be a VNC server waiting for a connection on port 5910. I am currently using the Mocha Lite VNC client on my phone. It is the second client I tried and I am not very happy with it. If I end up finding this hack useful, I will probably try to hunt down a better client. I’d like one that will let me disable the status bar and hide the mouse pointer.

My Conky configuration is rather boring. I just trimmed, condensed, and slightly expanded on an old configuration I used to use a long time ago. It is quite utilitarian.

How useful is this?

I am not entirely sure how useful this is going to be; I haven’t been running this for very long. It has already kept me from having to fire up htop a few times already.

I would like to come up with a good way to attach the phone to my monitor stand if I actually end up finding it useful.

Disable the ‘Resize Window Grippers’ in Ubuntu 11.04 Natty Narwhal

I upgraded my laptop from Ubuntu 10.10 to 11.04 a little over a week before it was scheduled to be released. I ran into three problems:


Update 2011-05-10:

  • X.org was still crashing… Upgrading using the xorg-edgers ppa repository seems to have fixed it.
  • After reinstalling due to my recent btrfs crash, the Shadowgrounds games are now working fine. I know I was using Pulseaudio before the upgrade; Xubuntu installed Pulseaudio but it is not running. I am assuming this is the only difference.

The first problem was a showstopper, and I didn’t have the time to investigate the issue at the time so I just booted using the btrfs snapshot of 10.10 that I took before the upgrade. I’ve been running on that snapshot until this morning. I haven’t crashed yet, so hopefully that bug has been squashed…

That left me with these annoying grippers on my terminal and chat windows. They obscure a bit of text in the corner of terminals and they don’t fit quite right over the text input areas in my Pidgin windows. I’m sure they look out of place in other windows as well.

Some searching turned up a simple fix in one of the answers on askubuntu.com. At the time I am writing this, the answer has no up votes and I don’t have enough reputation on the site to place a vote. If you have reputation please go give it a vote!

To remove the resize handles you just have to add the following to your ~/.gtkrc-2.0 file:

1
2
3
4
5
6
7
style "default-style"
{
  GtkWindow::resize-grip-height = 0
  GtkWindow::resize-grip-width = 0
}

class "GtkWidget" style "default-style"

Disable the grips in Gnome 3 / Ubuntu 11.10

I was surprised and disappointed to see the window grips return to my Gnome Terminal windows after upgrading to Ubuntu 10.10. A bit of searching gave me the “fix” for Gnome 3.

Just add this to your ~/.config/gtk-3.0/gtk.css file:

1
2
3
* {
  -GtkWindow-resize-grip-default: false;
}

Native Linux Games for an Arcade Cabinet: Cave Story

Cave Story is a platform game for the PC that was released back in 2004, it was also recently ported to the Nintendo Wii and DS. It is an excellent game that has a very old school feel to it and it is a perfect fit for an arcade cabinet.

Cave Story screenshot

The controls

The controls mapped pretty well to my six-button layout. I used the Cave Story configuration tool to set the game’s keys to something more convenient, and then I used xmodmap to match up the keys to my arcade table’s player-three controls. I was able to fit all the important keys onto the six buttons—things like “jump,” “shoot,” and the keys to switch weapons.

Like I do with most native games, I mapped the “start” button to the escape key. I also ended up mapping two keys, the first two buttons on my player-one control panel to “F1” and “F2.” Cave Story uses these keys for confirmation when exiting.

Cave Story screenshot

The Game

I had a lot of fun playing through Cave Story. It reminded me of the many hours I spent playing Metroid when I was younger. The controls feel crisp, the game play mechanics are fun, and the variety of weapons is pretty good.

Cave Story isn’t the kind of game you can just sit down with and play for five or ten minutes, like you can with something like the shooters from ABA Games. You have to explore and fight your way forward far enough to get to a save point with this one.

I played through the majority of the game in a few long sittings, and I am pretty sure I’m down to the final boss battle. I just happened to get distracted with real life for a week or so at that point and just haven’t gotten back to it yet.

Improve Your oh-my-zsh Startup Time (Maybe)

Update 2012-10-17: The slow start up with the newer zsh package was my own fault. In my transition to Prezto, I unintentionally removed the skip_global_compinit=1 from my .zshenv file. The global start up scripts for zsh-beta don’t call compinit, but the newer ones in the zsh package do.

Update 2012-10-16: I’m using Prezto now, but I did notice something interesting today that probably still applies to oh-my-zsh. Ubuntu 12.04 has zsh and zsh-beta packages. Oddly, the zsh package is a more recent version than the zsh-beta package.

The older zsh-beta starts up almost five times faster:

1
2
3
4
5
6
7
8
9
$ /usr/bin/time /bin/zsh-beta -i -c exit
0.07user 0.04system 0:00.13elapsed 89%CPU
$ /bin/zsh-beta --version
zsh 4.3.12-dev-1-cvs (x86_64-unknown-linux-gnu)

$ /usr/bin/time /bin/zsh -i -c exit
0.47user 0.12system 0:00.64elapsed 92%CPU
$ /bin/zsh --version
zsh 4.3.17 (x86_64-unknown-linux-gnu)

For now I’m using zsh-beta, but I will have to investigate this further.

Update 2010-04-29: All of my changes to oh-my-zsh that are listed here were pulled into the master repository last night. Just about everything here can be ignored now except for the part about adding skip_global_compinit=1 to your ~/.zshenv if you are running Ubuntu (and possibly other distros). Adding that line still saves me almost a half second of startup time.

I’ve been very happy with zsh and oh-my-zsh except for one thing: the slow startup time. I’ve been putting up with a huge delay every time I open a new terminal, and I open terminals quite often. I did manage to solve the problem even with a total failure of my google-fu. To find the cause of the problem, I was in need of some sort of benchmark.

End of Updates

The benchmark

This turned out to be easy. I just ran /usr/bin/time zsh -i -c exit and took note of the elapsed time. The time to beat was an abysmal 1.65 seconds. That was 0.6 seconds slower than bash!

My first failure

First I tried to compile everything in my .oh-my-zsh directory using zcompile. It was a complete waste of time; there was no improvement what so ever.

My second failure

I started removing files from ~/.oh-my-zsh/lib and ~/.oh-my-zsh/custom. I couldn’t manage to get the startup time down below 1.2 seconds, and I was losing huge pieces of functionality. I was hoping I could pinpoint one or two particularly slow files to investigate, but that wasn’t the case.

Grasping at straws

I even tried moving my ~/.oh-my-zsh directory to a tmpfs partition. Of course this made no difference. The files were already cached anyway.

Getting to 0.49 seconds

I almost gave up. OK, I did give up. I didn’t find the solution until the next day…

The biggest slow down was in the system-wide zshrc file in /etc/zsh. On my Ubuntu 10.10 system the slow down is the call to compinit on the second-to-last line. Following the advice of the comment and adding skip_global_compinit=1 to my ~/.zshenv bought me over one full second.

Squeezing out a little more

There are calls to compinit in a few files in ~/.oh-my-zsh/lib and ~/.oh-my-zsh/plugins. I already have a call to compinit in one of my own scripts in ~/.oh-my-zsh/custom, so I tried commenting out the calls in the two occurrences in ~/.oh-my-zsh/lib (I don’t have any plugins enabled). Each one saved me about 0.07 seconds. That brings me down to 0.35 seconds, about 0.7 seconds faster than bash!

I’m not sure why oh-my-zsh has so many calls to compinit. I’m pretty sure every plugin calls it once. I haven’t noticed any changes in the way completion works, and I don’t think I will. As far as I can tell, compinit should only need to be called once.

Getting a bit more invasive

I removed all the calls to compinit, including the one in my own script in ~/.oh-my-zsh/custom. Then I added a single call to compinit to the end of the `~/.oh-my-zsh/oh-my-zsh.sh’ script. This shaved off another 0.12 seconds, bringing my total down to 0.23 seconds. I don’t think there is any need for me to push things any more than this.

Official CyanogenMod Release for the Nook Color Has Working Video Playback

CyanogenMod 7-RC4 dropped just a few days ago and it is a very exciting release as far as the Nook Color is concerned. As of release candidate four, CyanogenMod is officially supporting the Nook Color, and hardware acceleration of video and OpenGL is now working.

CyanogenMod 7-RC4 is the first firmware I burned to the internal flash memory. Everything went pretty smoothly. I only made one mistake that slowed me down; I tried to use Clockwork Recover 3.0.0.6. You have to use 3.0.1.0 to install CyanogenMod.

It is probably one of the safest Android devices that we have. It always attempts to boot off of the microSD card first. If there is no boot loader there, it will attempt to boot off of the internal flash.

The tablet seems to run a bit smoother now. I’m not entirely certain if this is because the internal flash is more efficient than my microSD card or if it is due to improvements to the firmware.

Video playback capabilities of the Nook Color

It looks like the PowerVR 530 in the Nook Color can accelerate H.264 baseline profile video with a resolution up to 848x480. It would have been nice to be able to play back some pixel-perfect 1024x600 video, but this isn’t bad at all.

I’ve encoded a few videos with HandBrake. I started with the “Apple Universal” HandBrake preset and tweaked up the settings a bit to get better looking video with smaller file sizes. I exported my Nook Color presets just in case anyone wants to download them. I’m pretty happy with the results with the RF set to around 20 or 21.

My Galaxy S phone has no trouble playing back 720p H.264 high profile video files, not that it has that much resolution anyway. I’ll probably just encode all my portable videos for the Nook Color, since most of my devices can play those just fine.

Nook Color HandBrake Presets File

Knitted Case for Our Nook Color

With the tablet inside With the tablet sticking out With the tablet removed

Chris knitted this awesome little case for “her” Nook Color, so that she can carry it in her purse without worrying about scratching the display. It fits great. She sized it so that it is just a bit narrower than the tablet, so it stretches just a bit. That way it won’t slide off.

When I start carrying my own tablet I want her to knit me one to loosely match the pattern of the Doctor Who scarf.

Converting the Nook Color to a Full Blown Android Tablet is Stupid Easy

I’ve been wanting a better Android tablet for quite a while now. I’ve had the Eken M001 for quite a while now, but it isn’t a very usable tablet (especially after I bricked it). The battery doesn’t last long, the resistive touch screen absolutely horrible, and it is quite slow.

I’ve been hoping to see a tablet with a good capacitive touch screen for under $300. I saw a tweet the other day mentioning that the Nook Color’s Bluetooth hardware is now functional when running Cyanogenmod 7. I did some quick research and decided I just had to buy one.

I apologize in advance for the horribly shaky video footage.

The Hardware

The hardware isn’t that far behind the Samsung Galaxy Tab. The Nook Color is about the same size as the Tab, has a similar 1024x600 IPS LCD display, and they both have 512 MB of RAM. The Nook Color ships with the CPU clocked at 800 MHz, 200 MHz slower than the Galaxy Tab. I’ve been running mine overclocked to 1 GHz without any problems so far, so this isn’t a problem.

The Nook Color has a PowerVR 530 GPU, the Galaxy Tab has a PowerVR 540 GPU. I’m not sure how much of a difference there is between the two chips, but I do know that I don’t have any software on my Galaxy S phone that can push its PowerVR 540 to its limits.

The biggest problem with the Nook Color is the lack of hardware buttons… There are workarounds for the lack of menu and back buttons but I find myself always reaching for the missing hardware buttons.

The Nook Color is also missing a few other features that most of the other tablets have. It has no cameras and it has no video output capabilities. It also lacks GPS, but this seems normal for most of the Wi-Fi only tablets.

The Stock Firmware

The Android firmware that ships loaded on the device is very limited. It has a book reader, web browser, and a few games. That’s about all that is there. It sounds like there are ways to load third party software, but I didn’t investigate those.

Running Third Party Firmware

Hacking the Nook Color is surprisingly simple; it will boot directly off of a properly partitioned and formatted microSD card. All you have to do is correctly write one of the many available bootable SD card images to a microSD card, stick it in the tablet, and power it up.

For the last few days I’ve been running an SD card bootable image of Cyanogenmod 7 that I found on the xda forums. It has been running quite well so far.

There are a few Problems

Video playback performance is poor. I’m hoping this will improve, but I’m not going to bet on it.

Update 2011-03-21: I played back a few standard definition videos using the stock firmware. They played perfectly without any frame dropping.

Update 2011-03-24: It sounds like the PowerVR 530 GPU in the Nook Color can accelerate video with a resolution of up to 848x480.

Update 2011-03-31: CyanogenMod 7 RC4 now has working hardware accelerated video playback! Youtube, Flash, and mpeg4 files all play back perfectly.

Some apps that try to use GPS crash. Weatherbug and Speedtest.net are the two apps that crashed on me. Google Maps runs without any trouble, though.

The touch screen isn’t perfect. It seems to have problems picking up button presses around the edges, especially up in the top right-hand corner. I haven’t tried booting up the stock firmware to see if the problem exists there as well.

Update 2011-04-05: I’ve been running the CM7 tablet tweaks build for a few days now. Moving the status bar to the bottom makes the problems I had with the touch screen a non-issue. It sounds like this work will be rolled up into the CM7 core before too long.

Is it worth the price?

I think the Nook Color is a very good deal. It is half the price of the most comparable tablets and I feel that it provides way more than half the value.

This one is actually for my girlfriend to use. I’m already thinking about buying another one for myself…

btrfs - Six Months Later

I’ve been running btrfs on my laptop for a little over six months now. I’m very happy with the current state of the file system and I am finally starting to trust my data to it a little more. I am still running daily backups just to be on the safe side.

Last month, I split up my laptop’s second hard drive, a 320 GB spinning platter drive. It is now about one third ext4 and two thirds btrfs. I used the ext4 partition to store backups and KVM disk images.

I believe that when I started using btrfs, I was running Ubuntu’s 2.6.35 kernel. I’ve been compiling my own vanilla kernels since then and I am currently running 2.6.38-rc6-git6. There are a few issues I’ve had with btrfs, and they haven’t improved during any of these kernel upgrades. These issues have been easy to work around, though.

Problem Removing Snapshots

I have cron jobs that snapshot my root and home volumes on an hourly, daily, and weekly basis. I was also taking a snapshot every five minutes, but this caused me too many problems. Creating and removing one snapshot every five minutes was causing the snapshot process to hang up. When this happened, the laptop would need to be rebooted to get snapshotting to start working again.

I was able to improve the situation, but I couldn’t completely eliminate the problem. It was just easier to turn off the five-minute snapshots.

KVM/QEMU Disk Access Speed

There is a huge I/O amplification when KVM accesses disk images stored on btrfs. KVM will show a few hundred kilobytes per second of I/O while at the same time htop will show tens of megabytes per second.

This can be improved a bit by setting cache=none for the KVM disk image, but even with that setting the I/O is amplified by over a ten-to-one ratio.

I’m really looking forward to the day that I can store virtual machine disk images on btrfs. Snapshots and bcp copies of images will save me both disk space and disk I/O.

Some Good Features Just Ahead

There is a lot of good work being done recently. There was a bit of a taste of deduplication work done a few months ago. I am definitely looking forward to being able to deduplicate my virtual machine disk images.

The first patches are in to add online scrubbing to btrfs. The scrubbing will compare the blocks stored on disk with the previously recorded checksums. This will help identify silent corruption of data.

It also sounds like we’ll have a working btrfsck tool in the near future as well.

I’d like to thank everyone working on btrfs for the great job they have been doing. Keep up the good work, and happy PI Day!