UPDATE: I used this hardware for two years. It was a fantastic build, and it performed exactly as I expected it to. The AMD 5350 and 5370 processors were fantastic little chips, but they’re not in production any longer. That makes them difficult to find, so they’re no longer a good value.
I’ve been looking for an excuse to use a Ryzen processor in something. An upgrade to my KVM homelab server seemed like a great idea. My power consumption has doubled, but it still seems reasonably low to me. Especially when you consider that my CPU performance increased by nearly six times!
I built that Ryzen homelab server so many years ago now. If you’re shopping today, you should check out Brian Moses’s Topton N5105 NAS motherboard. It is efficient, small, has plenty of SATA ports, a couple of NVMe slots, and even has four 2.5 gigabit Ethernet connections!
- Building a Low-Power, High-Performance Ryzen Homelab Server to Host Virtual Machines
- I Am Excited About the Topton N5105 Mini-ITX NAS Motherboard!
Back in the late nineties, I had two desks with three CRTs, two permanent desktop computers, and a laptop. My desk at the office didn’t look much different. At the time, you needed to have several computers around if you needed to run different operating systems, or even different versions of the same operating system.
Then VMware showed up, and I was hooked on the concept of virtualization immediately. It was the best thing since sliced bread. I no longer needed to keep several computers running at my desk. All I had to do was load one machine up with as much RAM as possible. That’s what I did, and that’s what I’ve been doing for the last 15 years or more.

My needs have shifted quite a bit in that time, though. At some point, I replaced VMware with VirtualBox, and then I replaced VirtualBox with KVM. In recent years, I haven’t been booting up virtual machines as often as I used to. In the last few months, though, I’ve been running more software that needs to be highly available. Not in the “five nines” availability sense, mind you. I just don’t want things like my home automation to stop working while I reboot my desktop computer for a kernel upgrade or a gaming-related problem with the Nvidia driver.
My requirements
I wanted to build something energy efficient. My current needs don’t require much CPU at all, so I don’t need a 16-core, 32-thread monster homelab machine like my friend Brian, but I’d like to squeeze in as much CPU power as I can. I don’t need a lot of disk space, but I’ve been wanting to play around with Linux’s new dm-cache module, so I planned on buying more disk than I actually needed.
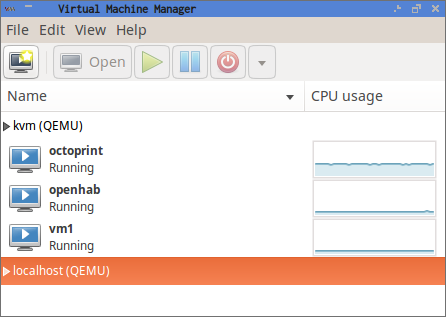
This new server currently only needs to be able to perform two important duties. It needs to be able to run my 3D printer, and it needs to be able to run my home automation software: openHAB. A single Raspberry Pi with an SD card could easily manage both these tasks, but I want to make sure I have enough horsepower for other tasks that I might want to offload from my desktop in the future.
tl;dr: My parts list
- AMD 5350 Processor $53.43
- ASRock AM1B-ITX Motherboard $40.24
- Antec One case $54.99
- Crucial Ballistix Sport 16 GB Kit 77.99
- Corsair CX 430 Power Supply $44.00
- 2x 250 GB Samsung 850 EVO SSDs $97.98 x 2 ($195.96)
- 2x 4 TB Toshiba 7200 RPM hard drives $139.99 x 2 ($279.98)
Total price: $746.59
Budget-friendly alternative parts list
Less memory, no solid-state drives.
- AMD 5350 Processor $53.43
- ASRock AM1B-ITX Motherboard $40.24
- Antec One case $54.99
- Crucial Ballistix Sport 8 GB Kit $43.99
- Corsair CX 430 Power Supply $44.00
- 2x 4 TB Toshiba 7200 RPM hard drives $139.99 x 2 ($279.98)
Total price: $517.63
UPDATE: This blog post is getting old, and the parts I used are becoming harder to find. The AMD 5370 processor is a straight upgrade over my AMD 5350 processor. It is a little easier to find, but it is still getting pretty old. I’m going to have to revisit low-power KVM server build later this year.
- AMD 5370 Processor at Amazon
Choosing a motherboard and CPU
My first plan was to use an Intel Celeron J1900 CPU. The motherboards with four SATA ports and an integrated J1900 cost about $80, they sip power, and they’d easily surpass my minumum requirements. It almost seemed like a no-brainer.
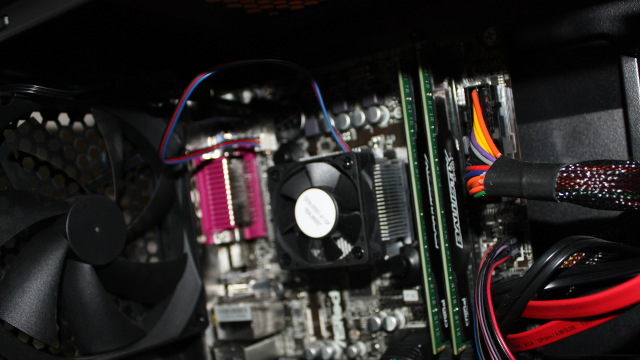
However, I am glad I did a little more research. I ended up buying an AMD 5350 processor and a matching motherboard. My research told me that the 5350 is 15 to 20 percent faster than the J1900, and it should only use 3 watts more at idle. Also, the Intel J1900 boards all used laptop DIMMs. The AMD 5350 motherboard and CPU ended up costing a few dollars more, but I probably saved that money when I was able to buy less expensive RAM.

I prefer to use AMD processors whenever it makes sense. There are fewer situations where this makes sense every day, but this does happen to be one of them. Intel divides up their market by not offering certain features on different processors in their line-up. There have been plenty of times when newer, more expensive Intel processors are missing features that their older processors had. I’ve been bitten by this before when I replaced a Core Duo laptop with a Core 2 Duo, and the Core 2 Duo didn’t have VT extensions.
This isn’t something I’ve experienced with AMD processors. With AMD, I expect to find newer, better, faster processors to have all the features of the previous generation of processors.
Also, the AMD 5350 has a huge advantage over the J1900—the 5350 is nearly 20 times faster when it comes to AES encryption. Using all four cores, the Intel Celeron J1900 wouldn’t even be able to keep up with a single SSD. The AMD 5350 should have no trouble keeping pace with the full throughput of a pair of SSDs using only a single core. This is very important for me, because I intend to encrypt my disks.
All the comparable AMD and Intel motherboards I looked at top out at four SATA ports. It would be nice to have more, but I can always add a SATA PCIe expansion card.
- AMD 5350 CPU at Amazon
- ASRock AM1B-ITX Motherboard at Amazon
How much RAM? As much as possible.
I learned two or three things very quickly when I started using VMware over 15 years ago. Unless you’re trying to crunch lots of numbers, CPU is probably not going to be your bottleneck when trying to shoehorn more virtual machines onto the same server. You’re going to run out of memory first.

That said, you can almost always shoehorn one more virtual machine onto a server. On more than one occasion in the early VMware days, I reduced the memory of all the virtual machines on my desktop by 10% or so just to make room for one more machine.
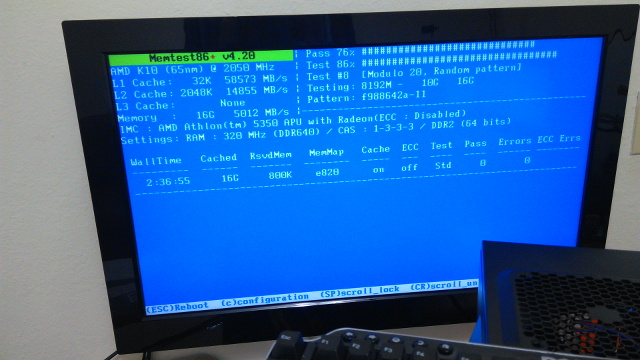
Memory is cheap and plentiful now, so there was no reason to not max out the memory in this little server. That’s only 16 GB—half as much as my desktop. It’s also much more than I expect this virtual machine host to ever need.
Choosing storage
The choice of storage hardware depends very heavily on the software being hosted inside your virtual machines. For my use cases, I don’t need a lot of storage. I could get away with using a pair of small solid-state drives in a mirror. They’d be nice and quiet, and would barely use any power.
However, I want to experiment with dm-cache. dm-cache allows you to use a fast storage device like an SSD as a read/write cache for slower devices. My hope is that dm-cache will allow the noisy, power-hungry spinning platter hard drives to spin down most of the time. I need both SSDs and conventional hard drives in order to test dm-cache.
I chose to mirror a pair of Samsung 850 EVO SSDs to use as the boot device and dm-cache device. The Samsung EVO 840 drives have done extremely well in the SSD Endurance Experiment, so I thought Samsung’s newer models were worth trying. They’re fast, durable, and reasonably-priced. That’s a good combination.
I also bought a pair of 4 TB Toshiba 7200 RPM disks. I was planning to buy 5 TB Toshiba drives, because they are a better value, but they were on backorder when I was building this server. Backblaze seems to have nice things to say about the 4 and 5 TB Toshiba hard drives, and I’m still a little unhappy with Seagate. The Toshiba drives were also priced a little better than the other drives I liked.
I set up the drives using Linux’s software RAID 10 implementation. Most people don’t know that Linux lets you create a RAID 10 with only two drives. This is handy, because it makes it extremely easy to add drives to the RAID later on. Also, Linux’s RAID 10 implementation allows you to use odd numbers of drives in the array. That means I can add a third 4 TB drive later on for an extra 2 TB of usable space.
Even if dm-cache ends up being terrible, I’ll still end up with a versatile server. I can always store most of my virtual machines on the SSDs, and use the 4 TB drives as a NAS.
- 2x 250 GB Samsung 850 EVO SSDs at Amazon
- 2x 4 TB Toshiba 7200 RPM hard drives at Amazon
- RAID Configuration on My Home Virtual Machine Server at patshead.com
- Choosing a RAID Configuration For Your Home Server at Butter, What?!
Choosing a case
This is usually the easy part. I’m pretty easy to please when it comes to cases. If it were still easy to find beige cases, I’d probably still be buying them today. Since I can’t do that, a simple black case is usually my preference.
Since I was already planning on using a mini-ITX motherboard, I started out focusing on small cases. The Cooler Master Elite 130 and Cooler Master Elite 110 were both at the top of my list. They’ve both small, reasonably priced cases with just enough room for all the components I was using. They’re also big enough to fit a standard ATX power supply, and that makes shopping a little easier.
This would have been a fine way to go, but I decided it would be best to have room to add more hard drives later. My friend Brian has used the SilverStone DS380B case in at least one of his do-it-yourself NAS builds. It is an awesome case, but I decided to be a cheapskate and use a simpler case. I ended up buying the Antec One.

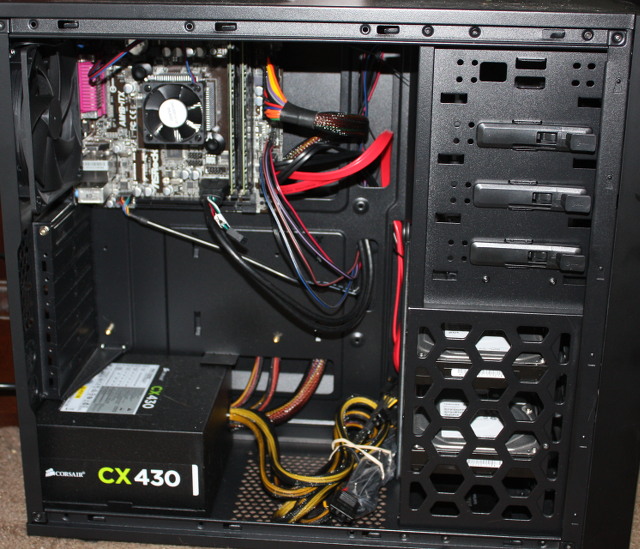
I’m very pleased with the Antec One case. Much more pleased than I had expected. It has five 3.5” drive bays, so I can easily add three more drives. If that’s not enough, I can always 3D print some adapters to mount hard drives in the three 5.25” drive bays. I doubt it would ever come to that.
The tool-less 3.5” drive bays are mounted transversely, so you don’t have to worry about bumping into other components when removing or inserting drives. This was one of the features I always wished my desktop computer’s NZXT Source 210 case had.
The Antec One case also has a pair of 2.5” drive bays. The second 2.5” drive bay is my only complaint about this case. Instead of being a normal drive bay that you slide the drive into, it is instead a set of four screw holes on the floor of the case. I was able to connect the cables to the second SSD in that “bay,” but I don’t like the way the cables press on the floor of the case.
If you’re looking for a case with lots of drive bays, hot-swap drive bays, or just easier to access drive bays, check out my friend Brian’s list of his top three DIY NAS cases at Butter, What?!
- Antec One ATX Case at Amazon
- Brian’s Top Three DIY NAS Cases as of 2019 at Butter, What?!
Choosing a power supply
Generally speaking, larger power supplies tend to be less efficient when operating at a small percentage of their maximum capacity. There are also different levels of “80 Plus” certification that define how efficient a power supply is while operating at different percentages of its maximum load.
The difference between the lowest and highest “80 Plus” certifications is between 10 and 14 percent depending on load. The components in this build don’t consume much power, so I don’t think it is worth investing in a more efficient power supply. That extra 10 percent efficiency will only save about three watts. That’s only only 1 kWh every two weeks.
I ended up buying the Corsair CX430 power supply. It is a good value, reasonably quiet, and I could fill the Antec One case with hard drives and still have plenty of power to spare.
- Corsair CX 430 Power Supply at Amazon
Notes on dm-cache
I made some poor choices in my initial setup in regards to dm-cache. Some dm-cache automation has been integrated into newer releases of the LVM toolset, but I’m running Ubuntu 14.04 LTS on my new server, and its LVM tools are too old for this. Also, it sounds like the LVM dm-cache automation requires that both the cached device and the cache reside in the same volume group. That isn’t how I wanted to set up my volumes.
I seemingly managed to get dm-cache configured, but it didn’t seem to be working correctly. I set up cache and metadata devices, and I created and mounted a dm-cache device. It worked in the sense that I was able to mount the new cached block device, and I was able to run benchmarks against it.
Unfortunately, it never generated any reads or writes on the SSD. The underlying RAID device was also constantly writing at about 1 MB per second all night.
UPDATE: I upgraded the operating system on my virtual machine host to Ubuntu 16.04 since writing this blog post. I’ve done more testing with dm-cache, and I am very pleased with the performance upgrade!
- Using dm-cache On My Virtual Server Host To Improve Disk Performance
- Can You Run A NAS In A Virtual Machine?
Benchmarks
One of the first things I do when choosing a CPU is browse the results over at Geekbench.com. It is a pretty good CPU benchmark, and the test results are broken down quite well, so you can see if your chosen CPU will meet your needs. This is how I knew that the J1900’s AES performance wouldn’t be at all suitable for my needs.
The results at Geekbench tend to vary quite a bit. There are a lot of reasons why benchmark results may vary. Some people’s machines may be overclocked, or they may have faster memory installed. I always assume that my own machine will end up with a benchmark score somewhere around the average.

I’m very pleased to say that my Geekbench scores for my AMD 5350 are good enough to land on the first page of results, and most of the faster results are running at a higher clock speed. This is better than I hoped for, and quite a bit better than most of the Intel J1900 results.
The disk benchmarks are less interesting. They usually perform as expected. It was a fun benchmark, though, because this is the first time that I’m running a mirrored pair of solid-state drives at home.
According to Bonnie++, the Samsung 850 EVO SSDs in a RAID 1 are getting 291 MB/s sequential write speeds and 575 MB/s sequential read speeds. That roughly matches the write speeds of the Crucial M500 in my desktop computer, while reaching almost double the speed of the single M500 on reads. That’s about what I was expecting to see, because the mirror allows data to be read independently from each drive.
1 2 3 4 5 | |
The results for the Toshiba 7200 RPM drives were predictable as well. The speed of a spinning drive is proportional to the disk’s rate of rotation and the density of the data. A 7200 RPM disk is going to read about 33 percent faster than a 5400 RPM disk. A single platter that holds 1 TB is going to read faster than a similar platter than holds 500 GB, because more data passes under the heads on each rotation.
The two Toshiba 4 TB disks in the RAID 10 array are getting about 140 MB/s sequential write speeds and 388 MB/s sequential read speeds. Spinning drives usually read faster than they write, and when you combine that with the read speed boost of the RAID 10, you end up with read speeds almost three times as fast as the write speeds.
That doesn’t tell the whole story, though. The Bonnie++ benchmark shows that the Toshiba RAID can only manage 560 seeks per second. These old school Toshiba disks can’t even come close to competing with the Samsung EVO SSDs on seeks per second. In fact, poor old Bonnie++ won’t even display the seek times for the Samsung EVO drives—the number is just too high. It ought to be in the tens of thousands per second range, though.
Power consumption
I am very happy with the numbers I’ve seen on my Kill-A-Watt meter. At idle, with a few virtual machines booted up, the new server consumes about 34 watts. The workload in the virtual machines has enough slow, steady writes that the 3.5” hard drives will never get to spin down. That pair of disks account for about 9 watts—that’s about 25% of the idle power consumption.
If you choose to build this server with only solid-state drives, then your power consumption would be quite a bit better than mine! I’m hoping that dm-cache will be able to cache some of that disk access that’s keeping the spinning media busy.
Power usage under load isn’t bad, either. The server stays just below 50 watts most of the time while running disk and CPU benchmarks concurrently, but with a few spikes up to 52 watts. For reference, my desktop computer uses over 120 watts at idle.
This is close enough to the J1900 at idle, and I feel that the 15 to 20 percent better performance of the AMD 5350 is worth the extra consumption under full load.
Moving these virtual machines from my desktop computer to my new power-efficient server means I can now turn off my power-hungry desktop while I’m asleep or out of the house. That would be a direct savings of over $30 per year. With the weather here in Texas, I’d probably save almost as much in air conditioning costs as well, with the ancillary benefit of having a cooler home office.
The conclusion
I’m very pleased with this energy-efficient server I put together. It easily met my energy consumption goals, and it has more than surpassed my CPU and storage needs. The AMD 5350 is a good little processor that doesn’t even break a sweat keeping up with full disk encryption on the fast Samsung 850 EVO solid-state drives.
I’m hopeful that dm-cache will work well. The server has been up and running for almost three weeks now, but I’ve been too busy with other projects to spend time playing with dm-cache. I’d like to write more about dm-cache and other topics related to this virtual machine server in the near future.
Do you have a server at home to host your virtual machines? It is relatively quiet and power efficient like this one, or is it a loud rack mount server with Xeon processors and ECC RAM like the one this blog lives on? Tell us about it in the comments, or come chat with us about it on our Discord server!