Update: I got a bill from FedEx today for $37.20 to cover the customs fees. The invoice has no account number, so apparently I can’t pay it on their website. I sure wish they told me that before I spent twenty minutes bumbling around their website and setting up an account.
$37.20 is less than I would have paid in sales tax locally, so that seems pretty fair to me. That brings the total for these two beautiful monitors up to $651.00.

Update: It is now July of 2015, and one of these QNIX QX2710 monitors has failed. I’m still very happy that I decided to buy these monitors almost two years ago, and I just bought another QX2710 to replaced the dead monitor. I did briefly investigate some other options before ordering the replacement, but buying another QX2710 was still the best choice for me.
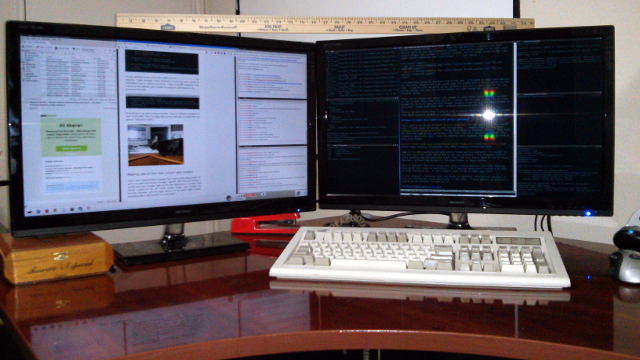
A couple of days ago, I upgraded from a pair of 21.5” 1920x1080 TFT LCD monitors to a pair of 27” 2560x1440 IPS LCD monitors. I’ve really wanted to make this upgrade ever since a friend of mine bought a QNIX QX2700 late last year, but my laptop didn’t have the dual link DVI-D port that is required to drive these inexpensive 1440p monitors from Korea. Since building my new Linux desktop, I no longer have this limitation, and I just couldn’t resist this upgrade.

Why the QNIX QX2710?
The least expensive 1440p monitor I could find was the Asus PB278Q 27-inch 1440p monitor for $553.99. It only ended up costing me about $60 more to purchase a pair of 27-inch QNIX QX2710 monitors. This was a much better value for me, but there are some caveats.
The more expensive monitors, like the Asus PB278Q, can be connected using HDMI 1.4, DisplayPort, or dual-link DVI, and they can display just about any resolution you choose. The QNIX QX2710 and other similar Korean monitors, like the X-Star DP2710, can only be used with a dual-link DVI-D port, and they must be driven at their native 2560x1440 resolution. They lack the hardware to scale other input resolutions up to their native resolution.
My Nvidia GTX 460 has a pair of dual-link DVI-D ports, so this wasn’t a problem for me.
Update: I’ve upgraded to an Nvidia GTX 970 and overclocked both QX2710 monitors to 120 Hz.
I also ended up choosing a glossy screen. Glossy screens usually have a better contrast ratio than matte screens, and I have total control of the lighting in my office, so there’s never anything behind me to glare on the screens.
The QX2710 was not exactly plug and play on Linux
This actually surprised me a bit. This is the first time in over a decade that I’ve plugged a monitor into one of my Linux machines without immediately seeing a picture.
The problem seems to be that the EDID information returned by the monitor is completely invalid. Since Xorg didn’t know what the monitor was capable of, it ended up defaulting to an output resolution of 1024x768. The QX2710 didn’t seem to know what to do with this, and it seemed to run through a series of full screen test patterns.
I thought it would be as simple as adding a “modeline” for 2560x1440, just like we often had to do in the good old days. It was a tiny bit more persnickety than that, though. I also had to add a few options telling Xorg to ignore the EDID info.
1 2 3 4 5 6 7 8 9 10 11 12 13 14 15 16 17 18 19 20 21 22 23 24 25 26 27 28 29 30 31 32 33 34 35 36 37 38 39 40 41 42 43 44 45 46 47 48 49 50 | |
I’m not entirely certain if all the EDID and the ExactModeTimingsDVI are required. I went through a few iterations of trial and error based on information from a number of sources. I tried various “modelines” that I found on the Internet, but I ended up using one generated by the cvt command line tool.
1 2 3 4 | |
Everything is up and running smoothly, and my desktop resolution is now 5120x1440. This is a huge step up from the pair of 1024x768 LCD panels I had back in 2001.

Making use of the new screen real estate
I don’t use a tiling window manager, but I have some tiling scripts set up for my preferred window manager, Sawfish. With the old monitors, I usually had each monitor split up into two asymmetric columns. The narrow column on the left might contain Pidgin chat windows or terminal windows, and the large column on the right might contain something like a web browser or a text editor.


I’m completely amazed by how much room I have now. I decided to split each monitor up into three columns—one wide column down the middle with a narrow column to each side. I had to trim the width of the columns a tiny bit to make room for the new narrow column, but even the narrow columns are wide enough for an 80-column terminal window.
Those narrow columns are almost tall enough to stack three 80x24 terminal windows on top of each other—they only miss by a single row for each window. It is close enough for me to be very excited, though, because I can fit a giant Emacs window in the center column with three 80x23 terminal windows on each side.
This is so much better than trying to find a legible font that would let me squeeze four 80x24 terminal windows on a single 15” 1024x768 monitor.
Where to buy? Do I need a pixel perfect guarantee?
There seem to be plenty of QNIX monitors available through Amazon, but you’ll save a little money if you buy them through eBay. I bought mine on eBay from someone called dream-seller. There was a delay in shipping, though. They told me there was some pretty bad weather over there due to a typhoon, and Google sure seemed to agree with them. Once the monitors were shipped, though, they arrived in less than a week.
Some of the QNIX monitors are sold with a “pixel perfect guarantee”. I thought it was well worth the extra $20 to $30 to get that guarantee. The LG panels used in these monitors are from the batches that Apple, Dell, and Asus didn’t want to use in their monitors, so there may be quite a few dead pixels in these batches.
Many of the ones that were listed that didn’t have a guarantee said that they may have up to five stuck or dead pixels. If I had one dead pixel, I wouldn’t be able to stop staring at it. I don’t know what I’d do if there were five!
I also imagined a warehouse with two stacks of monitors, with perfect monitors in one pile and monitors with dead pixels in the other. I knew exactly which stack I wanted my new monitors to come out of.
- [QNIX QX2710 QHD Monitors][qe] at eBay
- QNIX QX2710 QHD Monitors at Amazon.com
There’s more work to be done
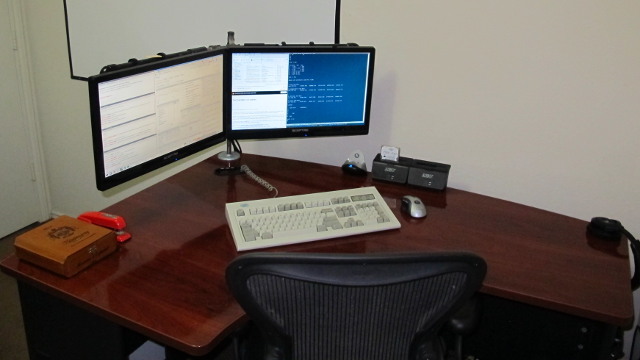
These monitors were just too big for my dual-monitor stand. I hung them up there briefly, but it just wasn’t going to work out, and they seemed to be sitting up much higher than my old displays. I felt very small looking up at them.
They new monitors are on their stock bases for now, which is a little weird for me. My old monitors were mounted about five inches above the surface of the desk. Sitting on their own, these monitors are only a little over two inches above the surface of the desk. I feel like I’m looking down at them.

I’m planning on buying some unistrut and modifying my existing monitor stand to fit these gargantuan monitors. They really are quite large. They’re set up at about a 45-degree angle, or is it a 135-degree angle? I guess it depends on where you measure it from. They butted right up against each other, and together they measure over 45 inches from end to end.
Update: QNIX QX2710 and Ubuntu 14.04 (Trusty Tahr)
I had a little bit of trouble with my QNIX monitors after upgrading to Ubuntu 14.04. Whenever the screensaver would power down the screens, they would almost immediately power back up. This would be so bad if they weren’t also being set to an unsupported mode that makes them draw ugly, bright, green vertical lines down the right side of the screen.
I didn’t notice it the first time that it happened, and I ended up with burned in vertical lines that took about ten minutes to fade away. The problem turned out to be the new light-locker program that hands control of the display back to lightdm when the screen is locked.
I opted for the easy fix. I just uninstalled light-locker, and everything is working just fine now.
1
| |
Update – July, 2014: Dead pixel scare
I thought I found a dead pixel on one of the monitors. I found it within two inches of a mote of dust that seems to be stuck between the panels. I took a picture to post here, and in that close up, the dead pixel doesn’t look so dead. It looks like a little more than half of two different pixels are being blocked out.
![]()
I have no idea how dust finds its way inside of an LCD panel, but this isn’t the first time I’ve had this happen. A large chunk of something managed to work its way into one of my old laptop’s LCD panels.
I still plan to debezel these monitors, but I thought I should post this finding first. The dust was definitely not there when these monitors arrived last year, and I don’t want anyone thinking I did something stupid while I was removing the bezels!
I can only assume that the dust dropped into place while I was setting up my new monitor stand. Maybe it will shake loose when I’m taking them down to take the bezels off.
Update – August, 2014: Faux dead pixel update
Earlier today, I checked to see if that pixel sized dust mote was still there. I found a bright white window, and moved it over to the location of the dust mote. It was still there. I don’t know why, but I decided to give it a good solid thwap with my finger. The dust immediately vanished!
I must have worked it loose, and it fell out of site. The smaller speck of dust is still there, and I couldn’t dislodge it in the same way. It seems to be much more out of focus and fuzzy than the other one, so I’m assuming it is between the LCD and the backlight, while the bigger one was in front of the LCD panel. Maybe it will work its way loose on its own.