UPDATE: Even though this post is six years old, plenty of folks are still visiting it. I am still using this hardware, but at some point many years ago I swapped the Ryzen 1600 motherboard and CPU into my desktop, and I moved my ancient FX-8350 setup into my homelab server. Either motherboard and CPU is overkill for my homelab needs, but my workstation was very much in need of that CPU bump.
If you are shopping for homelab or NAS parts today, you should check out the Topton N5105 NAS motherboard that Brian Moses is selling. It is super power efficient, has plenty of SATA ports, two NVMe slots, and four 2.5 gigabit Ethernet connections. If I were building a fresh server today, that is for sure the motherboard I would be using!
Many of us in [the Butter, What?! Discord community][bwd] are swapping out our big, aging homelab machines for inexpensive power-sipping mini PCs. They are a fantastic value, don’t take up much space, and they don’t generate much heat.
Two years ago, I decided to build a power-sipping homelab server to host a handful of Linux KVM virtual machines. I am in Texas, and my home office faces south. It is on the second floor, and it sure seems like this room gets less ventilation than all the other rooms—when the rest of the house is cool and comfortable in July and August, I’m often a few degrees warmer than I’d prefer.
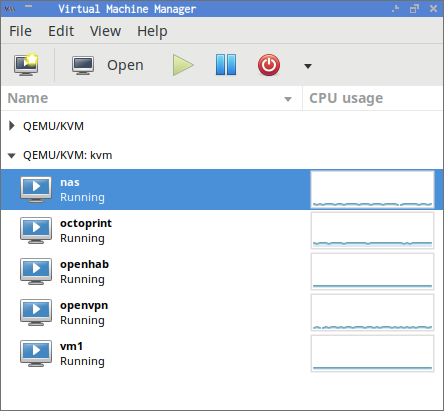
My hope was to add as few watts of heating to my office as possible while still providing more than enough compute power to meet my needs. I have been extremely pleased with the AMD 5350 CPU I used in that build. My Kill-A-Watt meter says that little server uses 34 watts with four or five virtual machines idling away—9 watts of that is used by the hard drives! It can barely reach 50 watts under full load.
That little AMD 5350 server is only high-performance when measured against the tasks I require of it. It more than meets my needs, but the components I used to build it are no longer being manufactured. I’ve also been looking for an excuse to use an AMD Ryzen processor. Upgrading my KVM homelab machine seemed like a good excuse to make use of a Ryzen CPU, and testing out a Ryzen CPU seemed like a good excuse for an upgrade!
- Do All Mini PCs For Your Homelab Have The Same Bang For The Buck?
- Pat’s NAS Building Tips and Rules of Thumb at Butter, What?!
- 40-Gigabit Infiniband: An Inexpensive Performance Boost For Your Home Network
- Building a Low-Power, High-Performance Server to Host Virtual Machines
- Building a Homelab VM Server at mylinch.io
- Can You Run A NAS In A Virtual Machine? at patshead.com
- Adding Another Disk to the RAID 10 on My KVM Server at patshead.com
- Choosing a RAID Configuration For Your Home Server at Butter, What?!
- Brian’s Top Three DIY NAS Cases as of 2019 at Butter, What?!
The parts list
I lucked out. All of the boring components from my previous build are still available at Amazon. I had to buy a new processor, motherboard, and memory. The case, power supply, hard drives, and solid-state drives are all still available, so I reused them.
This is one of the easiest upgrades I’ve done in a long time. I swapped out the old motherboard, dropped the new one in place, and it booted right up. No fuss, no muss!
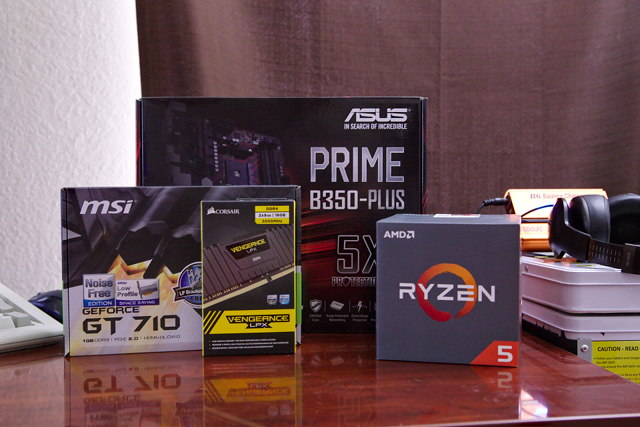
The last time I built a KVM homelab server, I included two parts lists. The parts I actually used, and a more budget-friendly list. I’m going to do the same thing again this year, but I’m going to add a third parts list that maximized performance!
My parts list
- AMD Ryzen 5 1600 6-core CPU with Wraith Spire Cooler – $209
- ASUS B350 motherboard – $90
- Antec One case – $55
- 16 GB (2x 8 GB) DDR4 – $140
- Corsair CX 450 power supply – $40
- MSI Nvidia GT 710 GPU – $33
- 2x 250 GB Samsung 850 EVO SSDs – $208
- 2x 4TB Toshiba 7200 RPM hard disks – $250
Total Cost: $1025
Budget-friendly alternative parts list
Less memory, no solid-state drives.
- AMD Ryzen 3 1200 4-core CPU with Wraith Stealth Cooler – $109
- ASUS B350 motherboard – $90
- Antec One case – $55
- 16 GB (2x 8 GB) DDR4 – $140
- Corsair CX 450 power supply – $40
- MSI Nvidia GT 710 GPU – $33
- 2x 4TB Toshiba 7200 RPM hard disks – $250
Total Cost: $717
My parts list
More cores, more memory, more storage. The 1800X does not come with a heat sink and fan.
- AMD Ryzen 7 1800X 8-core CPU – $429
- ARCTIC Freezer 13 Heat Sink – $37
- ASUS B350 motherboard – $90
- Antec One case – $55
- 64 GB (4x 16 GB) DDR4 – $540
- Corsair CX 450 power supply – $40
- MSI Nvidia GT 710 GPU – $33
- 2x 250 GB Samsung 850 EVO SSDs – $208
- 4x 4TB Toshiba 7200 RPM hard disks – $500
Total Cost: $1932
Note: My build used the Corsair CX 430 power supply, but its price has gone way up and it seems to be in short supply now. I’ve listed the Corsair CX 450 in my parts list instead. I don’t expect this to be problematic!
Build it your way!
I’m excited about this build. You can drop the SSDs and scale the CPU back to a Ryzen 1200, and you’ll still end up with a fast virtual machine host that won’t break the bank. If that’s not what you need, you can fill up all the SATA ports and quadruple the RAM. It will cost you nearly $2,000—more if you spec out larger disks. You’ll have one hell of a machine!
In all honesty, the Ryzen 1200 parts list would have suited me just fine. The big Ryzen 1800X parts list is complete overkill for my use case. Settling somewhere in the middle was the best fit for me.

Do you need to keep a whole mess of virtual machines running most of the time? You probably want to upgrade the RAM. Even if you’re running a lot of virtual machines, they may be spending most of their time idling, so the Ryzen 3 1200 processor might work just fine—spend your money on RAM instead of CPU!
Maybe you only run a handful of virtual machines like me, but maybe yours work a lot harder. You can upgrade the CPU instead!
Build it your way. If you want to copy my exact build, that’s just fine, but I intend for this to be more of a baseline. It should be easy to scale the parts up or down to fit your workload.
tl;dr: Performance and power consumption
As always, I am going to write at length about my goals, my decision process, and the results. I also know that you probably don’t want to read any of that. These are the important statistics.
- Geekbench 3 Scores: 4,309 single-core, 23,651 multicore
- Idle power consumption: 56 watts (50 watts with no VMs)
- Max power consumption: 120 watts (mostly under 100 watts)
- SSD mirror performance: 588 MB/s read, 298 MB/s write, 14,500 IOPS
- HDD mirror performance: 398 MB/s read, 143 MB/s write, 550 IOPS (old test, sorry!)
lvmcache performance: 300 MB/s read, 130 MB/s write, 878 IOPS
P3 Kill-A-Watt at Amazon
Why only 16 GB of RAM?!
This server is designed to fit my needs, and my needs are rather humble. The last time I built a low-power KVM host, I bought as much RAM as I could, and I advocated that everyone should do the same—you can never have too much RAM! That little mini-ITX motherboard would only support 16 GB of RAM. That was more than I needed, and it wasn’t possible to go overboard.
This new machine’s motherboard supports up to 64 GB of RAM, and I’m not even making good use of my old server’s 16 GB of RAM. My KVM host server has only three important jobs. Each of those tasks has a dedicated virtual machine. I have a simple NAS VM, an Octoprint VM to manage my 3D printer’s jobs, and an OpenHAB VM that manages my home automation. All of these tasks could be handled by a single Raspberry Pi, and even allocating 1 GB of RAM to each of these virtual machines is overkill. That leaves me plenty of RAM for other tasks.
I also included a pair of solid-state drives in my build. If you’re on a tight budget and you need more RAM to run more virtual machines, I would skip the SSDs. I wanted to experiment with dm-cache and lvmcache, and I needed solid-state drives for that experiment.
RAM is inexpensive, but it is also extremely easy to upgrade. I have two empty DIMM slots, so it will be easy to add another 32 GB of RAM at some point in the future.
Why did you choose the Ryzen 5 1600?
I’ve been patient. I’ve been waiting for the Ryzen 3 processors to be released. I’m confident that even the Ryzen 3 1200 would meet my needs, but I was hoping they’d be more power-efficient than their faster siblings.
The Ryzen 3 1200 has the same 65-watt TDP as all the Ryzen CPUs up to and including the Ryzen 7 1700. I know that TDP is just an upper thermal limit, but my research says that the Ryzen 3 1200 is only a few watts more frugal at idle than most of his bigger brothers.
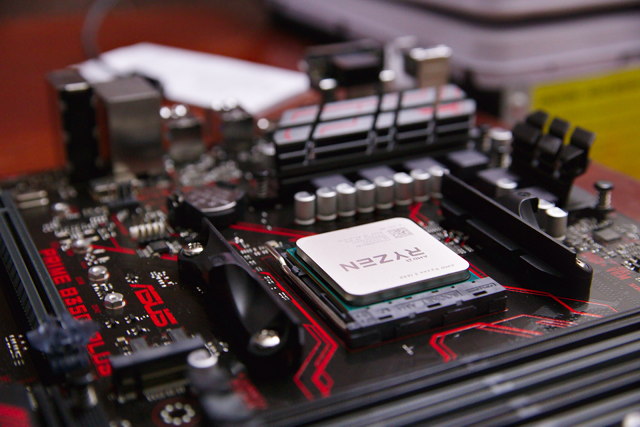
As soon as I learned that, I found myself on the slippery slope aiming directly towards the Ryzen 5 1600. None of the Ryzen 3 processors have hyperthreading. The Ryzen 5 1400 is the first CPU with hyperthreading, and it was my biggest jump in cost—$55 more!
Like the 1200, the Ryzen 1400 only has 8 MB of L3 cache. You can spend $25 more to double that cache and increase the clock speed by another 10% with the Ryzen 5 1500X. That seemed like a good deal. More cache almost always gives a good bump in performance.
I couldn’t stop there. Another $20 would get me two more cores. This is a virtual machine host, so more cores are what I want.
You can definitely keep going, but I decided to stop there. Michael Lynch used an 8-core Ryzen 7 1700 in his homelab server build. That’s an inexpensive and tempting upgrade over my Ryzen 5 1600, but going past the 1600 moves the TDP from 65 watts to 95 watts. One of my hopes is to keep my power consumption and heat generation down, so I didn’t want to push it that far. I didn’t want to pay the additional cost just to generate more heat—the 1600 is already overkill for my own purposes!
- Pat’s NAS Building Tips and Rules of Thumb at Butter, What?!
- Can You Run A NAS In A Virtual Machine? at patshead.com
Why the Antec One case?
When I built the previous server, I looked at a handful of small cases for mini-ITX motherboards. I decided not to go that route, because I like having a roomy case. You never know when you might want to fill up those six hard drive bays! All the extra room makes cable management easy, too.
I ended up using the Antec One ATX case. It looked so empty at the time with the AMD 5350’s mini-ITX motherboard only occupying a small fraction of the space. Even so, I was pleased with my choice at the time. Now that I’m stuffing a full-size ATX motherboard in there, I’ve realized that I saved myself even more trouble by using a full-size ATX case!
The Antec One is currently my favorite ATX case. It is inexpensive and well made. The tool-less 3.5” drive bays are mounted transversely, so you don’t have to worry about bumping into other components when removing or inserting drives. If you’ve ever tried to wiggle a hard drive past a video card or RAID controller, you’ll really appreciate this!
If you’re looking for a case with lots of drive bays, hot-swap drive bays, or just easier to access drive bays, check out my friend Brian’s list of his top three DIY NAS cases at Butter, What?!
- Antec One case at Amazon
- Brian’s Top Three DIY NAS Cases as of 2019 at Butter, What?!
Power supplies are boring!
Generally speaking, larger power supplies tend to be less efficient when operating at a small percentage of their maximum capacity. There are also different levels of “80 Plus” certification that define how efficient a power supply is while operating at different percentages of its maximum load.
The difference in power consumption between the lowest and highest “80 Plus” certifications is between 10 and 14 percent depending on load. I’m reusing the power supply from my previous build, and the components in that build didn’t consume much power, so I didn’t think it was worth investing in a more efficient power supply. That extra 10 percent efficiency will only save about three watts. That would have been only one kWh every two weeks.
I ended up buying the Corsair CX430 power supply. It is a good value, reasonably quiet, and it still provides more than enough power for my new, fast Ryzen 5 1600X. I could fill my Antec One case full of hard drives, and I still wouldn’t use half of the Corsair CX430’s maximum capacity.
- Corsair CX450 ATX power supply at Amazon
Socket AM4 motherboards are also boring
In my opinion, socket AM4 motherboards are quite boring. For my purposes, though, most of them are comparable and rather inexpensive!
The most common motherboards for Ryzen CPUs have four DIMM slots and six SATA ports. There are some with eight or even ten SATA ports, but I’m not building a NAS, so six will be more than enough.

Some Ryzen boards have only two DIMM slots, but all the four-slot motherboards I was considering were less then $100. In fact, I would have paid more for a motherboard that could hold more RAM. Four slots is the limit, though.
I chose the Asus Prime B350-Plus motherboard. It supports up to 64 GB of RAM, has six SATA ports, and has more PCIe and PCI slots than I will ever need. Asus rarely lets me down, and this motherboard has all the features I need at a good price.
The extra SATA ports will come in handy. The AMD 5350 motherboard only had four SATA ports. I had planned on adding an inexpensive PCIe SATA card when I eventually run out of storage. Last year, I filled my only available PCIe slot with an Infiniband card. Having a 40-gigabit network connection is awesome, but that blocked my storage upgrade path!
- 40-Gigabit Infiniband: An Inexpensive Performance Boost For Your Home Network
- ASUS B350-Plus motherboard at Amazon
Wait a minute! Why do I need a video card?!
Almost every Ryzen motherboard I looked at has HDMI, DVI, and VGA ports—including my Asus B350. Unfortunately, I couldn’t find any with on-board video. Those video ports are for the upcoming AMD APU chips. I’m excited that AMD is using the same socket for both their processors with integrated graphics and also for their high-end models. I’m disappointed that I had to buy a discrete video card.
I have some old, low-end video cards somewhere in my closet. I almost used one of those instead, but I wanted to make sure my build could be easily replicated.
I used an Nvidia GT 710 PCIe card. They only cost around $30, and they have a TDP of only 15 watts. I don’t imagine mine is consuming anywhere near 15 watts—I’m not even booting into a GUI! I’m certain it is contributing at least a few watts to my total power consumption, but I have no good way to measure it.
What about power consumption?
The Ryzen 1600 has more performance in a single core than all four of my old AMD 5350’s cores combined, and with all six cores, active the 1600 is well over five times faster! I knew going into this that the Ryzen wouldn’t be as power-friendly as the 5350, but just how much worse is it?
When I boot my KVM host, the virtual machines do not spin up automatically. The disks that hold the virtual machine disk images are encrypted, so I have to ssh in to unlock those disks on the rare occasions when the server reboots. If you’re not building a server to host virtual machines, I imagine this is the idle power consumption number you’re most interested in.
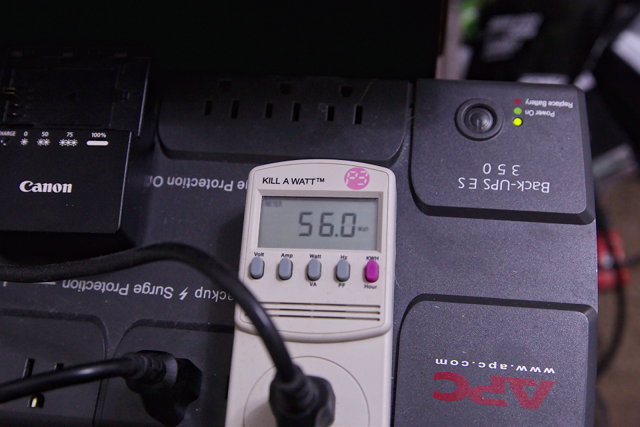
At this point, the idle Ryzen machine sits at almost exactly 50 watts. Be sure to upgrade to a recent kernel! My 4.11 kernel uses nearly 10 more watts than my 4.12 kernel! With any luck, this will continue to improve.
Once my virtual machines are all booted, my Ryzen 1600 homelab server bounces between 56 and 59 watts on the Kill-A-Watt meter.
That’s more than a 20-watt increase over my old AMD 5350 server. In fact, the old AMD 5350 server couldn’t even use this much electricity no matter how hard I pushed it.
It sounds like a huge increase in power consumption when I say it has increased by 64%, but it is only as much power as a couple of 100-watt LED bulbs, so it really isn’t too bad.
Power consumption under load has gone up quite a bit, too. If I run some benchmarks to keep all the cores active on the Ryzen 1600, power consumption usually bounces around somewhere in the 90-watt range with spikes up to 120 watts.
As far as homelab virtual machine hosts go, I’m quite pleased. My friend Brian built an awesome homelab server using a pair of used 8-core Xeon processors from eBay. His server is about 20 percent faster than mine, but it also has a pair of processors each with a 115w TDP—his server idles at 85 watts!
- Building a Homelab Server at Brian’s Blog
- Pat’s NAS Building Tips and Rules of Thumb at Butter, What?!
- Can You Run A NAS In A Virtual Machine? at patshead.com
What’s this about a 16-core Xeon server?!
My friend Brian built a rather beefy homelab server last year. I am pretty sure I was the one that convinced him to build it. It is a really mean machine. For some reason, a lot of servers used to ship with a single Intel e5-2670 Xeon processor, and it was common to immediately remove that single CPU and replace it with a pair of faster processors.
That means the e5-2670 is easy to find on eBay, and they usually cost around $100 each. You just pop a pair of those chips into a $200 to $300 server-grade motherboard, and you’re all set. This was a tremendous value 12 months ago. It is still a good value if you need more than 64 GB of RAM or you’re one of those folks that feels like you need to have ECC RAM at home.
When I’m getting paid for my work, my servers are always equipped with ECC RAM. It is an easy decision to make when you’re spending someone else’s money, and you don’t want some sort of hardware problem waking you up in the middle of the night. I have yet to have a stick of RAM fail after successfully passing a few runs of memtest86, so plain old RAM will do just fine at home.
- Building a Homelab Server at Brian’s Blog
- Why I Chose Non-ECC RAM for my FreeNAS at Brian’s Blog
Benchmarks
I already had a pretty good idea of how the benchmarks would go long before I ordered any of the new hardware. The solid-state drives and hard disks have been chugging along for more than two years, and I tested those quite thoroughly when they arrived. My disks are encrypted, so there was a small chance that the faster CPU would be better at keeping up with that, but it isn’t the case.
I always scour through Geekbench CPU benchmarks before choosing a CPU, and my own tests landed right where I expected them. I’m including Geekbench 3 instead of Geekbench 4 results in this blog post, because that’s what I used to test the original server three years ago.
The old AMD 5350 was a snail compared to the Ryzen 1600. The laptop-grade AMD 5350 managed 1,249 for the single-core score and 4,037 for the multi-core. The Ryzen 1600 just blows those numbers out of the water with a score of 4,309 for single core and 23,651 multi-core.
A single Ryzen 5 1600 core is faster than all four 5350 cores combined, and the Ryzen is nearly six times faster overall. I’d say this is a solid improvement and well worth the extra 20 watts of power consumption!
Most of the disk benchmarks ran a little more slowly this time. I’m not testing fresh disks this time, and the server is running and doing its job. My virtual machines don’t push the I/O subsystem hard, but you’d be surprised how much a small amount of disk activity can throw off a benchmark.
I was able to test the solid-state drives, but I don’t have easy, direct access to the spinning hard disks anymore. They’re sitting behind an SSD cache now!
The write performance of the Samsung 850 EVO SSDs dropped from 298 MB/s to 209 MB/s, while read speeds held steady at 606 MB/s—that’s just about 15 MB/s faster read speeds than three years ago. This makes perfect sense to me. A blank SSD usually has better write performance than a full SSD, and lvmcache has filled up the SSDs now.
The overall write speeds are down, but raw disk throughput isn’t the only reason to use a solid-state drive. Going from the hundreds of IOPS you get out of a spinning disk to the tens of thousands of IOPS you get out of a solid-state drive is a drastic improvement!
I did benchmark my lvmcache setup. The results of the benchmarks are disappointing. The results are worse than my old benchmarks of the hard disks with no SSD cache at all.
How did you configure your disks? What is lvmcache?
Lvmcache is built on top of dm-cache. It allows you to use solid-state drives as a persistent read/write cache on top of your slower hard drives. It is akin to ZFS’s ZIL and L2ARC, except that lvmcache uses a single cache for both read and write caching.
My KVM server is set up with a pair of 4 TB 7200 RPM disks in a RAID 10. I know from the comments on the previous homelab server blog post that you’re quite likely to be wondering how you can have two disks in a RAID 10. Linux’s MD layer allows you to put any number of disks into a RAID 10 configuration—even odd numbers of disks!
In practice, my two-disk RAID 10 is just a mirror. The only significant difference is that the RAID device’s header claims that it is a RAID 10 array and not a RAID 1.
The advantage of using RAID 10 comes with future growth. I can add disks to the RAID 10 one at a time, and no matter how many disks I add, I will always have exactly two copies of each block. Adding disks to a Linux MD RAID 1 array will only increase your redundancy.
My RAID 10 array is encrypted, and this is where all my virtual machine disk images are stored.
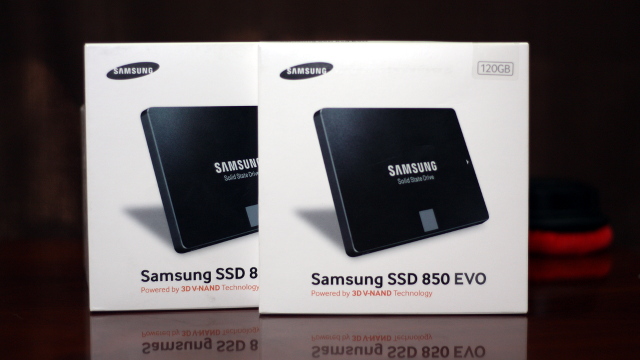
I also have a mirrored pair of 250 GB Samsung 850 EVO solid-state drives. I have a 32 GB partition on each SSD. These two partitions are combined into a RAID 1 array—it is easier to boot off RAID 1! This 32 GB volume is where my base operating system lives, and it is not encrypted.
The remainder of each solid-state disk is mirrored as well, and that space is dedicated to use as the caching layer for my lvmcache.
My adventures with lvmcache probably deserve their own follow-up blog post. Lvmcache doesn’t benchmark well, but that isn’t surprising. Lvmcache is meant to be a long-lived cache. It doesn’t speed up short-term operations—that’s what the disk cache in RAM is for. It speeds up disk access that happens on a regular basis over time.
I wrote a more in depth post about my server’s RAID configuration. If you’re not sure about how you’d like to configure your disks, you can also check out my post over that Butter, What?! about choosing a RAID configuration for your home server.
- RAID Configuration on My Home Virtual Machine Server at patshead.com
- Pat’s NAS Building Tips and Rules of Thumb at Butter, What?!
- Choosing a RAID Configuration For Your Home Server at Butter, What?!
- Using lvmcache On My Homelab Server
- Can You Run A NAS In A Virtual Machine? at patshead.com
The conclusion
I’m extremely pleased with this upgrade. The new Ryzen processors are an excellent value, and their power consumption is quite reasonable. I’m excited about the wide range of performance options that will fit into this build, too. You can spend $100 less than I did and get yourself a Ryzen 1200—that would have been more than enough horsepower for my purposes, but faster is more fun, right?
There’s also room to grow in the other direction—the Ryzen 1800X is 50% faster than my Ryzen 1600, and there will be even more processors available for this socket in the future. I’m hoping the chips with integrated graphics will be a good upgrade.
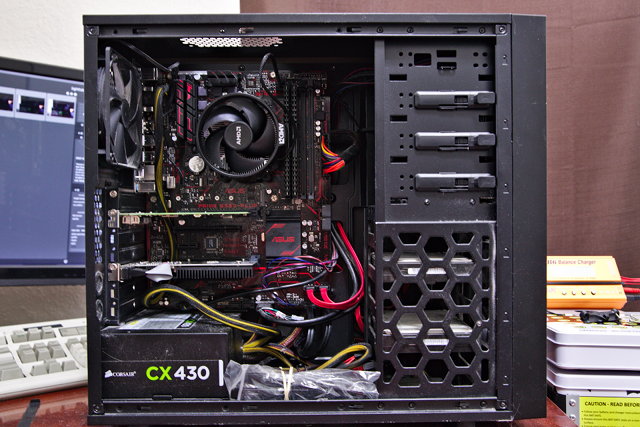
Benchmarking this build has gotten me even more interested in upgrading my aging desktop. This Ryzen 1600 is significantly faster than the overclocked FX-8350 in my workstation. I built it in 2013, so this shouldn’t be a surprise. I’m planning on using the same motherboard in my desktop, but I expect to use either a Ryzen 1600X or 1800X instead.
I am going to miss the old AMD 5350 server. It did its job well, and I’m certain it could have served me well for another couple of years. I’m glad I upgraded, though, because the old machine was out of SATA ports. I’d hate to be forced into a major upgrade just because I ran out of disk space, and my new photography hobby has me accumulating RAW files at an alarming rate. Adding another disk to my server is inevitable, and it will be a piece of cake now!
Do you have a server at home dedicated to hosting virtual machines? Are you using Linux and KVM? Leave a comment and let me know what you’re doing, or stop by our Discord server and chat with us about it!
- Pat’s NAS Building Tips and Rules of Thumb at Butter, What?!
- Can You Run A NAS In A Virtual Machine? at patshead.com\
- 40-Gigabit Infiniband: An Inexpensive Performance Boost For Your Home Network
- Adding Another Disk to the RAID 10 on My KVM Server at patshead.com
- RAID Configuration on My Home Virtual Machine Server at patshead.com
- Choosing a RAID Configuration For Your Home Server at Butter, What?!
- Brian’s Top Three DIY NAS Cases as of 2019 at Butter, What?!
