I have been 3D printing for eight years. If the first layer wasn’t sticking on my first printer, I would just make sure the nozzle was at a reasonable height then load up the glass build plate with more hairspray. There wasn’t much hairspray wouldn’t fix.
The Prusa MK3S with its PEI sheet has been a huge upgrade. Every now and then I print something that is a little persnickety, and I have to put down a layer of glue stick to make sure some tiny perimeters don’t peel up. For the most part, though, the PEI does a good job holding my prints and releasing them afterward.

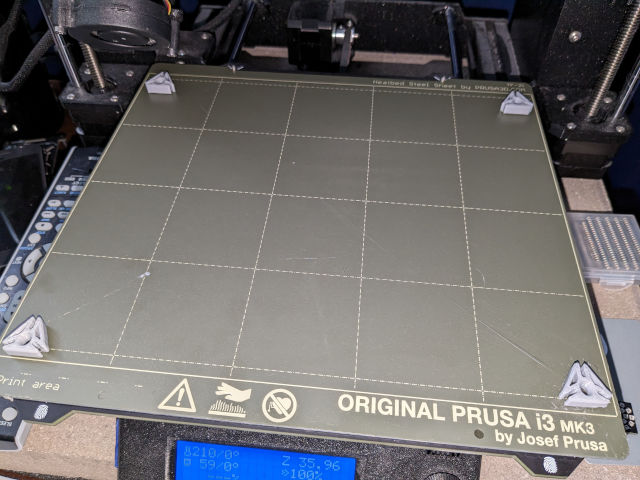
NOTE: The problematic corner still needed a bit of glue stick with these tiny, angular filament clips!
My experience hasn’t been perfect. I have a lot of trouble with bed adhesion close to the edges. Even with Prusa’s 49-point mesh bed leveling, the extremes are either a bit too close or too far. I also suspect that one corner of my PEI sheet is just crummy.
I have tried adjusting the bed level correction. I think I have improved things, but I haven’t completely eliminated the problem. I assume this problem is a result of the PINDA probe being way over to the right. That means it has no way to probe really close to both edges of the bed.
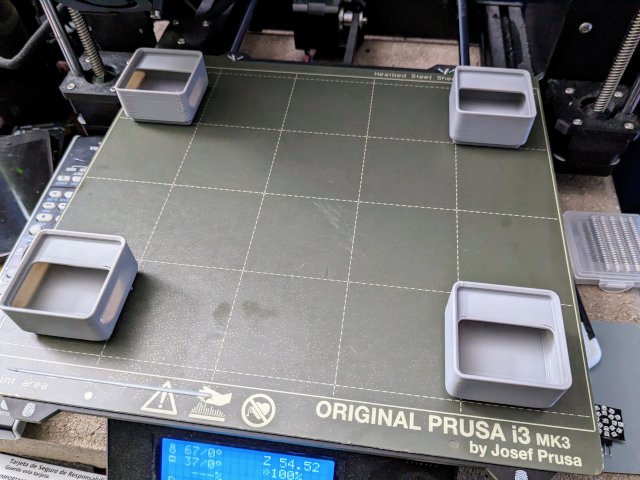
I was hunting for a new solution this week, because I have a different problem. I grabbed a spool of Anycubic gray PLA for $19 to print a mess of GridFinity bins. I had some trouble with adhesion on a long bin, so I started doing some troubleshooting.

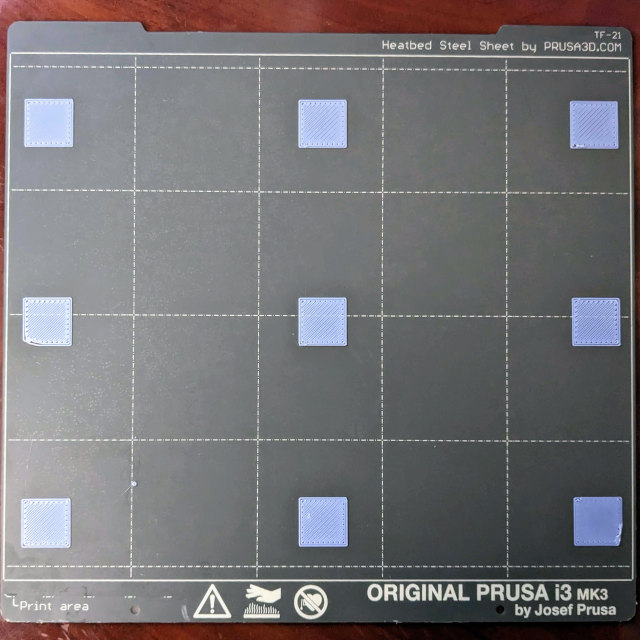
NOTE: I didn’t get as close to the edge on the right as I thought I would!
My first layers are more than a little inconsistent with this filament. I suspect it just isn’t very good filament.
Never troubleshoot your overall first-layer issues with crummy filament. You’ll probably just screw things up for when you swap back to nice filament. Even so, I wanted to continue printing cheap GridFinity bins.
- How Fast Can I 3D-Print With My Prusa MK3S? (this needs a big update!)
This one simple trick seems like a good idea!
PrusaSlicer and SuperSlicer default to a 0.42 mm extrusion width for the first layer. Other slicers use a wider extrusion for the first layer. Why would you want to use a wider extrusion for the first layer?
The wider extrusion width makes up for being a bit too far from the print bed or minor underextrusion.
If everything is calibrated well, everything will work out very much like the defaults. If you’re printing just a hair too far above the surface, that extra extrusion means that you are more likely to still get just enough squish to lock the filament to the PEI.

In my case, this means I can calibrate for a perfect first layer near the center of my PEI sheet, but I am still getting enough contact out at the problematic corners and edges for my print to stick.
You’d get to see a diagram here if I were artistic, or if I had a pen for my 2-in-1 tablet!
Won’t wider extrusions make the printer lay down too much plastic?
No. The slicer does the math correctly. If the first layer would be 30 lines wide with a 0.42 mm extrusion width, then the first layer will be about 25 lines wide with a 0.5 mm extrusion width.
The lines will be wider, so they will be spaced farther apart.
A tiny update!
While I was writing this blog I was thinking about why I stopped at 0.5 mm extrusion width for the first layer. I’ve heard that double the nozzle width should be acceptable, and I am already printing infill at 0.6 mm. Why not push things a little more?!

I am now running with 0.75 mm extrusion width on the first layer. It seems to be working great. Even my problematic corner managed to stick, even though my Z-offset is definitely a bit higher than it should be. Look at the size of those lines!
I don’t trust this filament, so I am not going to try to tune my first layer until I finish off the spool with Gridfinity bins. The Z-height doesn’t make a lot of sense to me. The top-left square is close to correct. The bottom-right is usually my difficult corner, and that one is printing a bit too close, but the top-right square is closer than the middle-right square.
Conclusion!
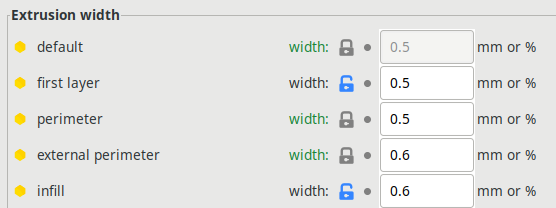
I am using a 0.5 mm extrusion width in SuperSlicer with the Arachne perimeter generator. I am not sure if Arachne is being used on the first layer, but I assume that it is. I might try pushing this up to 0.6 mm because that is what I’ve been using for infill. If it works well for infill, then it ought to work for the first layer. The first layer is the slowest, so printing fewer lines ought to be a decent speed increase!
What do you think? Have you been having trouble with your first layer? What have you tried doing to correct it? What 3D printer are you using? Have you tried wider extrusion for the first layer? Let me know in the comments, or stop by the Butter, What?! Discord server to chat with me about it!