My First Custom 3D Prints

| Comments

Standing desks have become a popular trend in recent years. I decided to see what the hype was all about three years ago. My quick test setup was quite simple. I placed a big box, in this case a rather large CD/DVD carrying case, on top of my arcade cabinet. When I put my laptop on top, this brought the keyboard to just the right height so I could use the keyboard comfortably.

I was only using this for an hour or two each day, and I didn’t stick with it for very long. The biggest problem was that my neck would get sore pretty quickly, because I had to look down at the laptop screen the entire time. This was far from ideal.

Last year, I decided that I missed my cheater standing desk, so I built a better one out of PVC pipe. It is a slight improvement over the rectangular box. The back is elevated a couple inches higher than the front, so I don’t have to look down quite as far. I do still have to look down, though, which means I can’t use it for extended periods.

That’s alright, though. Even with the eventual discomfort, I like having the standing option available. When I’m standing, I feel like I’m ready for action. Like a ninja waiting to attack. Maybe. At the very least, it is a small change of scenery!

Improving the all-PVC design

The original design has the laptop resting behind a pair of T fittings. This keeps the laptop from falling, but those big one-inch circles in front of the laptop get in the way of my palms. I changed the dimensions a bit to try to get them out of the way, but that was only a partial fix.

When I was building this standing desk, I remember saying to myself, “This would be easy to fix if I had a 3D printer.” Now I do actually own a Prusa i3 3D printer, and I was absolutely correct. It was a very easy problem to solve, and it was definitely a good project to work on for my first attempt at 3D design.

It’s a cylinder with an L-bracket on top. How hard can that be?

It was only a little bit harder than I thought, and it only took three iterations to get it right. I knew for certain that my first print would be a failure. I just didn’t know to what extent.

I already knew overhangs would be problematic, but I needed to see what I could get away with. All three iterations of this object started with a tall cylinder at the bottom. I made sure the diameter of that cylinder was about the same diameter as a 1” PVC pipe. That way I knew it would fit into the PVC connector.

The first prototype

On the first iteration, I put a 3 mm disc on top of that cylinder. The disc matched the outside diameter of the PVC connector. I figured that would be a good way to keep it from falling in.

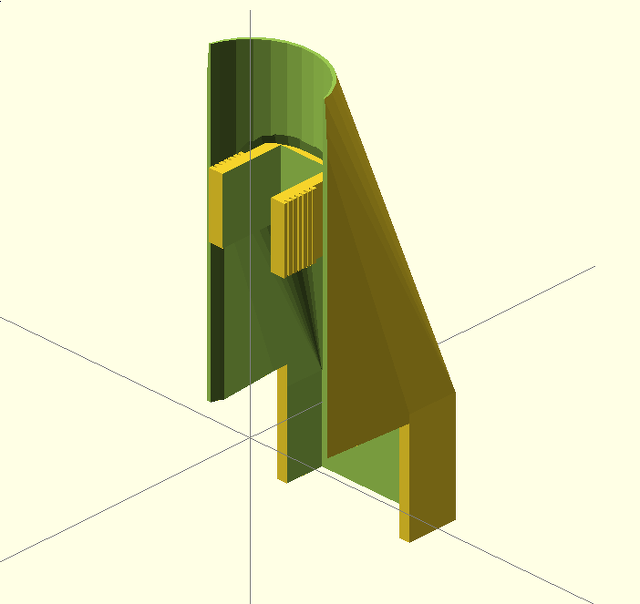
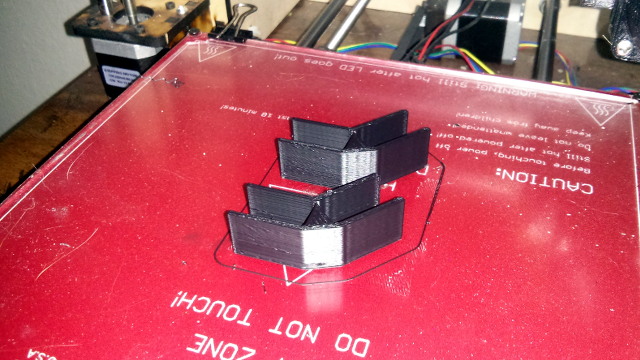
A view of the object in Blender showing the large 90-degree overhangs Most of the first layer of the overhang sagged a lot Even with the problems, it was still a sturdy and usable part

This actually went better than I expected. Most of the overhang on that wider 3 mm disc actually stuck. Even though it looks pretty bad, the longer overhang in the front still came out structurally sound.

This would have been a serviceable design. I could have printed another, trimmed off the stray filament, and called the project finished. But I couldn’t leave it like this. I just had to try again.

The second prototype

I made some small improvements on my second try. I tapered the edges of the top disc. That part printed perfectly. I added similar angles to the front edge as well. That part came out a bit sloppy, but there was no hanging filament this time.

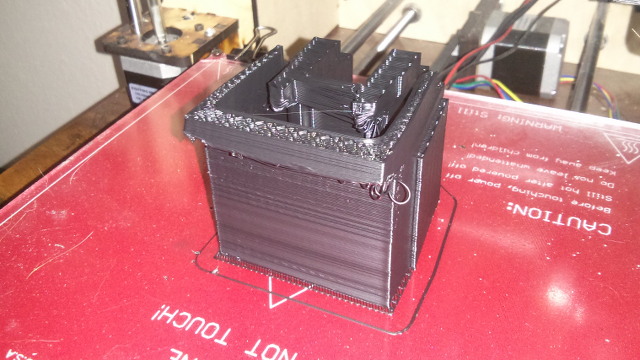
If only I hadn't made the front wall so thin You can see the curling issue in the front corners

I almost had it this time, but I learned from the first print that the “retaining wall” didn’t need to be quite so high to hold the laptop up. I decided to correct for that in the design, but I did a terrible job. I made the wall too thin and was able to easily snap it in half.

The third time’s a charm

It was easy enough to go back into Blender and make that wall a bit thicker. I decided to make more changes while I was there. I wanted to reduce the messier parts of that overhang in the front.

The first two attempts were unions of four simple objects: two cylinders and two cubes. That’s why the ledge extends so far in the front. I had to make sure the 3-mm-tall cylinder wouldn’t poke out the front.

You can see all the newly beveled edges in Blender The front wall is thick, sturdy, and just tall enough The front overhang is a bit rough, but none of the filament was sagging!

I was getting quite a bit more proficient with Blender by this point. It wasn’t too much trouble to redo the top so that the front wall was directly over the base cylinder. That eliminated almost all the overhang issues. One of the corners was curling upward a little during the print. I think it was cooling faster than the rest of the object.

I’m very happy with the results

I haven’t used my laptop at all in the last month or so, and it will probably be quite a while before I make use of my standing desk again, but I am very happy with how this entire process went. I was printing nice, consistent objects with my 3D printer within a week, and I had my first useful object designed, printed, and ready to use less than a week after that. This is much more progress than I ever expected to make in just two weeks.

My laptop on the new stand

These caps for the ends of my PVC laptop stand are very simple objects, but I’m still excited that I was able to make them.

Plans for the future

I think I really need a fan to cool the extruded filament to print good overhangs and bridges. I found a nice-looking fan mount that I’d like to try out. It was designed with a different hot end in mind, so I’ll need to do some measuring first to make sure it will fit correctly. I sure hope it prints well without a fan!

I’ve already started working on my next custom object. It’s going to be a custom grommet for my desk. I already upgraded the stock grommet by gluing in a 3-outlet AC power adapter and a small powered USB hub. This has been very convenient. I can easily charge just about anything, and I don’t have to reach far to plug in USB joysticks.

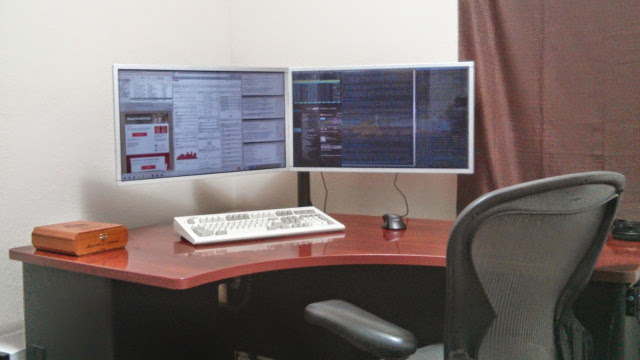
I had to take that grommet out last week to install a clamp for a dual monitor stand, and I’ve been missing it ever since. I’ve started modeling a replacement that fits around the stand’s big clamp using Blender. It should be a nice-looking upgrade over the jury-rigged grommet assembled with glue. I even hope to have room for an RJ-45 jack this time.

I Bought a 3D Printer: I Have No Idea What I’m Doing

| Comments

I bought a 3D printer. I’ve wanted one ever since reading about the old MakerBot Cupcake almost five years ago. Now I finally have one, and I’m very excited. Things have come a long way in four years. The printer I chose has a build area twice as wide, twice as long, and over 50% taller than those old MakerBot Cupcake machines.

I decided to buy a used printer

I knew which printer I wanted—A Prusa i3—and I wanted it to have an extruder that used 3mm filament. I was also more interested in the Prusa i3 printers with aluminum frames. I thought this would be enough information to make choosing a printer easy.

It turns out that there are a lot of different sizes to choose from in the Prusa i3 family. Not only that, but sometimes you get to choose one of four different controller boards and four different nozzle sizes, and that is just at one store. Different vendors also offer different types of hot ends.

I thought I had my choices narrowed down to just two printers from two different vendors. At this point, it was already getting late, so I figured I’d mull things over the next day. I did decide to see if there were any printers for sale nearby on Craigslist.

I lucked out. There was a Makerfarm 8” Prusa i3 for sale not even 20 minutes away from here. This was such an easy decision. I didn’t have to choose a hot end. I didn’t have to choose electronics. I didn’t have to choose a nozzle size. Best of all, this printer was already assembled, and I didn’t have to wait two weeks or more for it to show up at my doorstep. There were no Prusa i3 printers available with Amazon Prime shipping.

Complete with my newly printed spool holder and filament guide Close up showing the spool holder

What I ended up with is a Makerfarm 8” i3 printer with an LCD screen, not the newer i3v model. It has a heated bed and the magma hot end with a 0.4 mm nozzle. It also came with at least half of a spool of 3 mm glow-in-the-dark filament, two sheets of glass for the build surface, a bottle of Garnier Fructis Full Control hair spray, an ATX power supply, and pretty much all the odds and ends that would have come with the printer.

If you are interested in keeping track of my progress, I picked up the printer and had it up and running last Tuesday evening.

Up and printing in about an hour

When I got home, I plugged the printer right in and watched the print head and bed move around. I plugged the printer into my computer, and I immediately started pushing buttons in Pronterface to move the print head around. It was working. This was exciting.

I had already sliced up a Space Invader magnet the night before, so I was ready to start printing almost immediately. Shortly after hitting print, I started seeing checksum errors. The Internet suggested that I try different USB cables and ports. I did that, and I even tried using my laptop. It just didn’t work.

This was the first point that I started to notice that I have no idea what I’m doing. I was just firing up Pronterface directly. I didn’t notice that there were scripts to start Pronterface that load the correct configuration for your printer. I used mendel.sh and everything started working correctly.

1
2
3
wonko@zaphod:~/opt/Pronterface/Software-master$ ls *.sh *.cmd
huxley.cmd  huxley.sh  mendel.cmd  mendel.sh  ormerod.cmd  ormerod.sh
wonko@zaphod:~/opt/Pronterface/Software-master$ 

My first print wasn’t the best. There were gaps between the perimeter and the infill. The corners were a bit round, and edges were pretty jagged. I wasn’t sure what was wrong, but my little glow-in-the-dark Space Invader looked like a thing of beauty to me!

Space Invaders in their native habitat The belts were both very loose when printing the one on the right

I went through the settings in Slic3r. I had imported those settings from files I downloaded from the Makerfarm website, so I was surprised to see that the “nozzle diameter” was set to 0.8 mm. I turned that down to 0.4 mm, and my second Space Invader came out much better. I guess the printer just wasn’t laying down enough plastic the first time.

Temperature problems

I had temperature problems the first day. It was taking a very long time for the hot end to reach its operating temperature, and it would randomly drop 20 or 30 degrees in an instant. When this happened, wiggling the cables would cause it to jump back up near the correct temperature.

I figured that there must be a loose connection to the thermistor or the thermistor wasn’t seated correctly. I took apart the extruder assembly and removed all the Kapton tape holding the wiring to the nozzle. The thermistor seemed to be in there just fine, and all the wires seemed to be joined correctly.

I put everything back together. While I was at it, I decided to use some zip ties to clean up some of the wiring. The wires for the heating element, thermistor, and fan were all just hanging free, and they were all different lengths. I tied them all together, routed them so they wouldn’t get in the way, and pulled them all back a bit so they are now all the same length.

The temperatures stopped dropping suddenly, but the hot end still wouldn’t heat up well at all. I found a suggestion that I should wrap the nozzle of my magma hot end in several layers of Kapton tape. This keeps the fan from messing with the temperature readings, and it worked like a charm.

However, when I reassembled things, I screwed something up. There’s an aluminum plate in the extruder assembly that holds the hot end in place. I put it in upside down. This meant the hot end could spin freely and wiggle around all over the place. This certainly wasn’t helping me get clean prints out of this Prusa i3.

Printing the 5mm Calibration Cube Steps

This is another obvious moment where I had no idea what I was doing. I started a print of the 5 mm Calibration Cube Steps, watched it lay down a few layers, and I walked away. When I came back to see how it was doing, the print head was happily moving around but it wasn’t extruding at all. It had been doing that for a while. I managed to get the filament a bit tangled on the spool.

I cleared off the built plate, sprayed the plastic bits off the hobbed bolt with a can of air, reloaded the extruder, and fired off the print job again. This time it finished, but it was awful.

There was well over 1 mm of difference in the length and width, and the height wasn’t looking so good either. I did some research and poked around in the printer. It sure seemed like the belts were pretty loose. This explains why the infill doesn’t always meet the perimeter and why the magnet holes in my Space Invaders looked more like rounded squares than like circles.

I was able to snug up the tension on the X axis easily enough. I only had to loosen the bolts on the motor and move it back a little bit. The Y axis was more problematic—it was already as tight as it would go. I remembered seeing that someone on the Internet added tension to one of his belts using the metal spring from a clothespin.

This works great. You just have to make sure you put the clothespin spring in a spot where it won’t hit anything when the axis is at its minimum or maximum. I know how to fix this correctly, but I sure don’t want to have to take the bed off again any time soon.

A major catastrophe

I am happy to report that this time it wasn’t entirely my own incompetence that caused the problem. This time I get to blame either the guy who assembled the printer or the designer. More than likely, though, a little of both.

My friend Brian ordered me a two-pound spool of black ABS filament IC3D Printers. I’m pretty sure this is his down payment for some 3D prints. I was waiting very patiently for this black filament to arrive so that I could print a filament spool holder to attach to the printer.

I chose the Compact Spool Holder and Guide from the large selection of spool holders available at Thingiverse. I am extremely pleased with it. It is compact, seems quite sturdy, and it is much less convoluted than most of the others. I will definitely be printing a second one for the other side of the printer.

This was Saturday night. I started the print of the spool holder. I had a few bad starts because I had trouble getting the new black filament to stick to the bed. This was due to incompetence on my part. I had misinterpreted the meaning of the “first layer height” setting in Slic3r. I assumed that it would put the print head closer to the bed if I put a smaller number in there. This was the wrong assumption. I bumped it up all the way to my nozzle width, and things are working much better now!

I watched two or three millimeters of my new spool holder print, and then I headed out for dinner. When I got back, the job was completed, but the part didn’t come out quite as straight as I would have hoped. As I was wiggling it loose from the build plate, I noticed how easily the plate was moving around.

Then I noticed some tiny lock nuts under the printer. Four nuts had wiggled loose, so two of the bearings on one of the metal rails were completely disconnected from the build plate!

I’m amazed at how well the spool holder came out under these circumstances. It doesn’t look quite right, but it is still usable, and it is doing its job splendidly right now. This slightly deformed part will probably remain in service for a long time.

A disappointing Saturday night actually has a silver lining

I did get a little more familiar with the workings of the printer on Friday night. I had to pull the build plate off to reattach the bearings. This whole area seems a bit problematic to me.

The screws that hold the bearings on are only just barely long enough to put the lock nuts on. In fact, you can’t even put the lock nuts all the way on. While I was putting things back together, I was wondering why they didn’t just ship longer screws. I later learned that they can’t. If the screws were much longer, they would bump into the frame of the printer. They’d need to source custom-length screws that are just one or two millimeters longer.

I’m guessing the previous owner was afraid he’d break something if he torqued them down too tight. I’m not afraid. I think I torqued them down quite nicely. I’ll be surprised if I get bitten by this design flaw again.

I had things reassembled too late that night to do a test print, but things were working so much better the next day. I only printed two items on Sunday.

The first thing I printed was the filament guide loop to go along with my new spool holder. The round end lifted up off the bed during the print, so it didn’t come out perfect. It came out amazingly round, though, much rounder than the failed print earlier in the week using the glow-in-the-dark filament.

The glow-in-the-dark loop isn't even close to round The guide loop peeking out over the LCD display

I also printed another 5 mm Calibration Cube Steps. As far as I’m concerned, it came out nearly perfect. The length, width, and height are all about 0.1 mm of the 25 mm target. Pronterface claimed the printed height was going to be 24.9 mm, so I’m probably within the margin of error for my layer height and extrusion width.

There’s also no gap between the infill and the perimeters anymore. In some spots it looks like there is tiny gap, but I can’t even get the edge of a razor blade in there. I guess the printer just needed to fall apart to solve all my problems!

The verdict

I thought I made the right decision in buying a used 3D printer right up until the night that the thing fell apart. That night I wasn’t so sure. I was very happy with my decision again the next day after seeing that first print after the repair.

Not having to wait two weeks for my printer to arrive was great. Seeing the printer make an object just a few hours after getting it home was even better. If this were a kit, I’d have probably spent that much time just figuring out if all the pieces were there.

I was also surprised to learn that the wooden Prusa i3 printers are more rigid than their metal counterparts, so I lucked out there. The used printer cost me at least $50 less than the cheapest equivalent metal Prusa i3 on my list, and it came with a bunch of extra stuff.

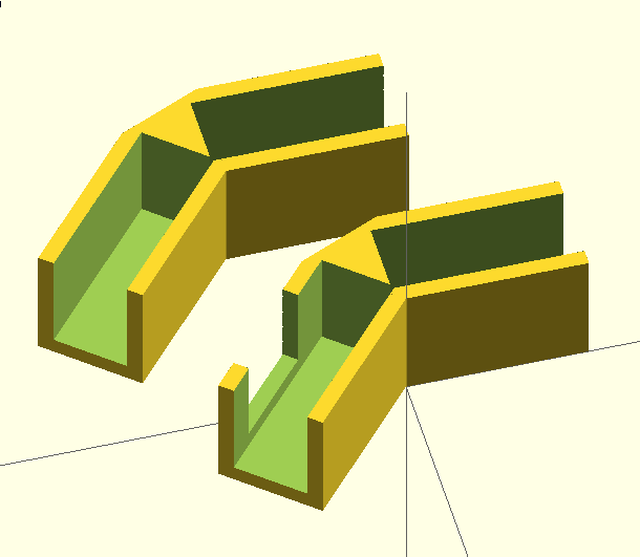
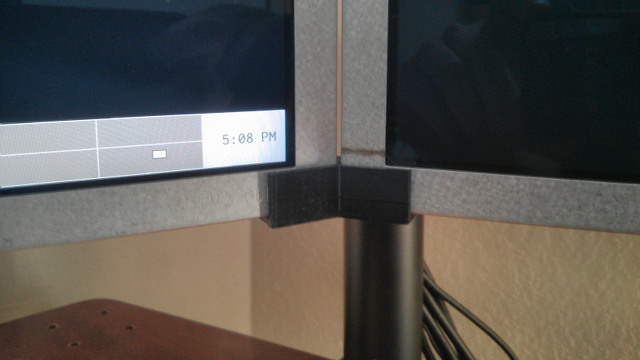
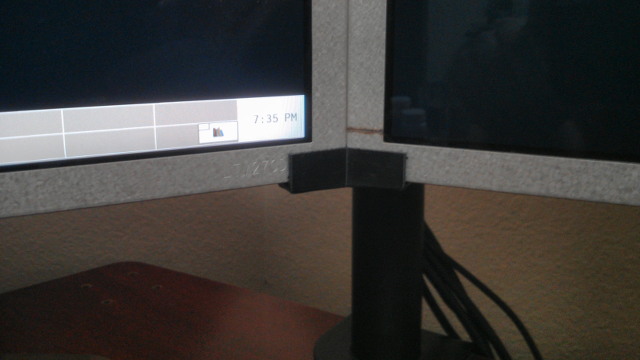
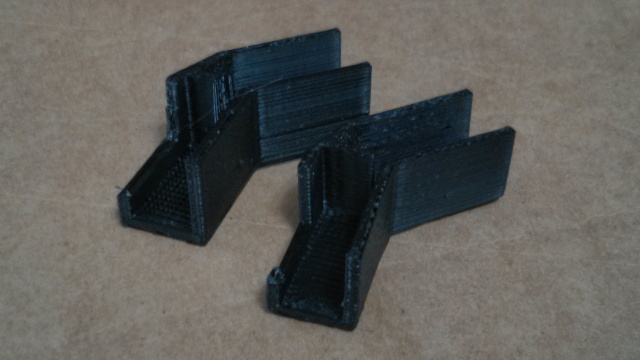
Between the time, money, and extra parts, I would have to say that I got a pretty good deal. I just designed my first two parts using Blender, and I will be printing them tomorrow. I can’t wait to see how bad of a job I did on them!

Traveling With Seafile and Limitless, Self-Hosted Cloud Storage

| Comments

I just got back from a long trip back home to visit and help out my parents. Having oodles of cloud storage sure made the trip easier.

When I used Dropbox, I had a very limited amount of space, so I was very selective about what I chose to keep synced up. This meant that I had to keep a lot of things manually synced up between my laptop and desktop, or else I might be missing some important data while I’m out of town. I could have easily paid for more Dropbox space, but I didn’t exactly trust Dropbox with all of my data anyway, so I would still end up having the same problem.

Self-hosted Seafile to the rescue!

Hosting my own Seafile server gives me access to virtually unlimited cloud storage space, and Seafile’s client-side encryption means that I can be confident that my data is safe. I can upload as much as I like, and I don’t have to be nearly as careful about choosing which files I can safely upload.

One of the things I never uploaded to Dropbox was my configuration files. Specifically and most importantly, my shell configuration. Some people store their dot files in public Github repositories, but I’m a little too paranoid for that. I always worry that I’d be the guy who accidentally drops a hard-coded password somewhere, and it will be sitting there in my revision history for eternity for the entire world to see.

Being surprised by configuration synchronization magic

Way back in January, while out of town on my laptop, I set up some functions to make my shell notify me whenever a long running process completes. My laptop yells “bazinga” whenever a long running job completes. It has been doing this for months, and I haven’t thought much of it, but I do like that it calls my attention when it’s needed.

When I got home last month, and I started using my desktop computer once again. It also now yells “bazinga” when a job completes. It did this all by itself without any intervention from me. That by itself is interesting. What’s more interesting to me is that I didn’t notice it for days. I forgot that this was something I set up after I left, and I’m surprised how long it took me to realize what happened.

I made a terrible mistake, and a cautionary tale

I made a terrible mistake. Last year, soon after I set up Seafile, I decided that it would be best to clean up my photo collection before syncing them up to the server. Shotwell can clean up duplicate copies of photos, and this feature worked brilliantly. I was safe, and I made a backup copy of the entire photo collection before initiating this process.

While I was on my laptop, though, I noticed all sorts of pictures that were completely missing. These were important photos, and I their absence almost hindered our “Great Bar Photo Caper.”

I’m still not sure what exactly happened. My Shotwell database here on my desktop has tons of photos from my backup copy in it. I may not know what happened, but at least I know how to fix it.

The lesson here is that you should make sure that you are syncing and backing up what you think you are.

Steam’s cloud isn’t as thorough as I hoped

I never think twice about my save games and setting for Steam games with cloud sync enabled. Every time I finish playing Team Fortress 2, it tells me my data is syncing, and I feel reassured that my data is safe. I recently learned that my Team Fortress 2 settings aren’t quite as safe as I thought they were.

Your items, weapons, and load outs are all synced just fine, but it is very selective about which configuration files are synced. I wanted to play a quick round on my laptop, but none of my custom key bindings were there. I felt especially lost without my medic bindings.

One of the first things I did when I got home was move my Team Fortress 2 config directory into a Seafile library. I don’t ever want to have this problem again. My medic.cfg, soldier.cfg, and demoman.cfg should be with me wherever I go from now on.

There’s another lesson to be learned here. Don’t blindly assume that someone else is doing the job you expect it to.

Having safe, nearly unlimited cloud storage space is very convenient

Keeping my important data and applications in sync between my desktop and my laptop was always difficult. It seemed like I was always missing something important every time I traveled. I ended up solving that problem back in 2006 by replacing them both with a bigger, faster laptop. This worked great. If you only have one computer, all your data is always with you.

I bought a new desktop computer last year, so I don’t have that same convenient guaranty anymore. I was away from home for over three months this year, and I still managed to have almost every single file I could have needed right there with me.

The best part is everything I worked on while I traveling showed up on my desktop computer just a few minutes after I powered it up. Ten years ago, I would have been booting my laptop back up every few days looking for files that I forgot to copy.

I won’t ever have to do that again, since all of my data is safely encrypted and stored on my Seafile server.

My First Shipment from Craft Coffee Has Arrived

| Comments

UPDATE: This blog post is getting starting to get old. I’m still subscribed to Craft Coffee, but the service has changed a bit. You can read more about it my most recent blog post about Craft Coffee!

I enjoy coffee. I use my low-end pump driven espresso machine to make a latte for myself almost every day. When I first bought the espresso machine, I was grinding cheap coffee beans from the grocery store. Just about the fanciest brand I used was Dunkin Donuts.

I was happy enough with the Dunkin Donuts lattes for a few years. That all changed when I moved back to Dallas/Fort Worth metroplex. I went to the Central Market with my wife. I don’t like grocery shopping, and I really don’t like these fancy, upscale grocery stores. My opinion changed when we walked past the giant wall of coffee at the Central Market store in Plano.

The old wall of coffee at Central Market in Plano, TX

They have coffee beans from many different roasters. One of them is only a few miles from here, and one or two are from Houston. I’m pretty sure I scooped out a small amount of at least a half dozen different beans from about three different roasters. On that first visit, I even managed to pick out the coffee that would be my favorite for a couple of years, the Premium House Blend from Addison Coffee Roasters.

In fact, I’m drinking one of their coffees right now. It is their Premium Espresso Blend, and it was probably almost a tie for my favorite coffee. I was pretty certain that this pair of coffees would be the end of my journey. I still try out other beans when I refill at the Central Market, but nothing has displaced my two favorites until now.

Craft Coffee

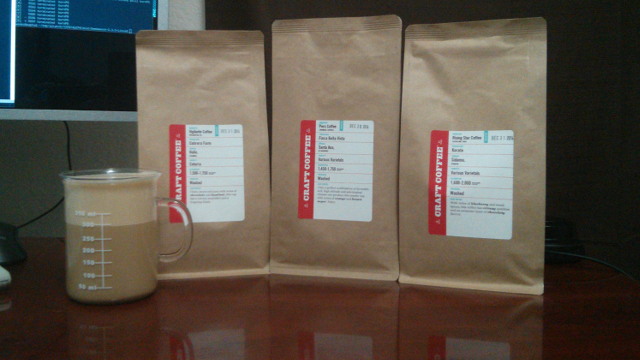
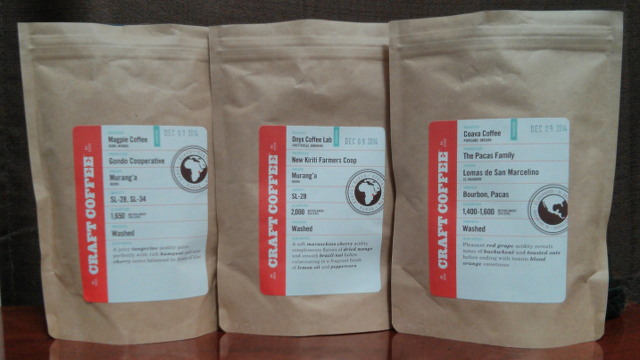
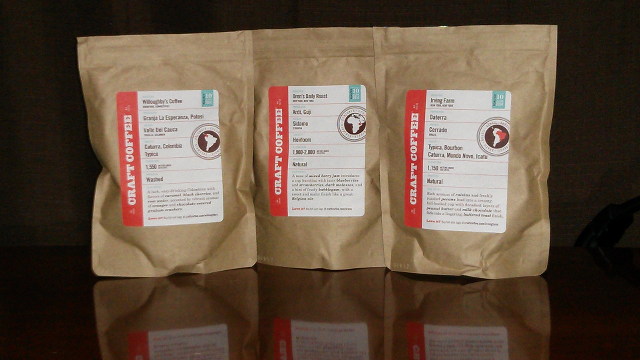
My friend Brian got me a coffee subscription from Craft Coffee. This sounded pretty awesome. Craft Coffee will send me three 4 ounce packets of premium coffee beans from top artisan roasters. When the first shipment arrived, I figured I should write up a little review.

It looks like they will all be single-origin roasts, and this had me just a little bit worried. I’ve hit some real duds in the past when I’ve tried single-origin beans.

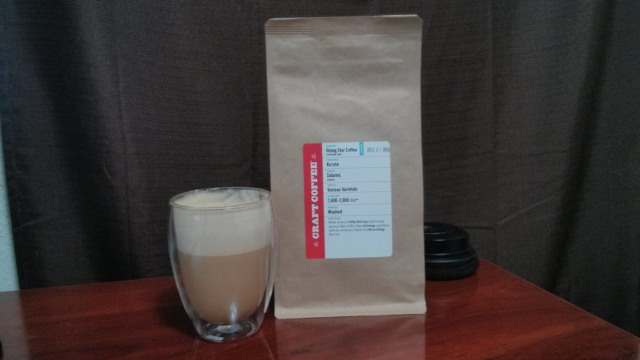
My first shipment from Craft Coffee

I didn’t need to worry. All three of the coffees I received so far are delicious. I really wish that I could still say that my favorite coffee comes from a local roaster just a few miles from here. I really do, but I can’t. All three of these new coffees have jumped straight to the top of my list!

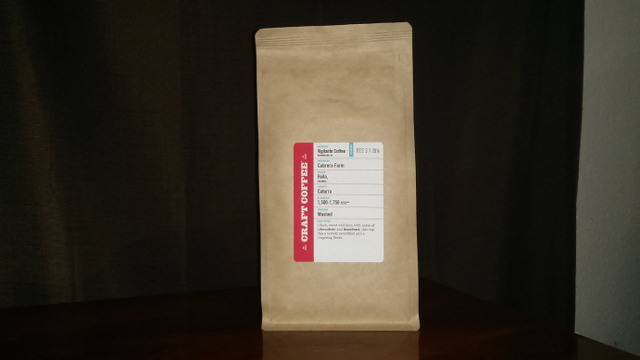
Slate Coffee Roasters, Seattle, WA
Producer Various smallholders
Origin Aricha, Yirgacheffe, Ethiopia
Variety Heirloom
Elevation 1,950-2,150 Meters
Process Natural
Light, pillowy and clean, with flavors of dried strawberries, confectioner’s sugar, and breakfast cereal.

I knew this coffee was going to be delicious as soon as I fired up the grinder. The whole kitchen started to smell a bit like Frankenberry cereal. At least, I believe that’s what it smelled like. I haven’t seen Frankenberry in over a decade. At any rate, it smelled delicious.

These are also the tiniest coffee beans I’ve ever seen. In fact, all the beans in this shipment are small, but they’re not as small as the ones from Slate Coffee Roasters. These beans are also the most beautiful light brown color.

It doesn’t just smell delicious. It also tastes delicious. I had my first latte a few days ago using these beans. At the time, I could definitely identify that it was sweet, and there was definitely some sort of slightly tangy aftertaste that I just couldn’t identify.

Now that I’ve read the description, the strawberry flavor is unmistakable. Now that I know it is there, I just can’t ignore it. This coffee really makes me think of breakfast cereal.

The label also told me that this coffee was “natural,” as opposed to “washed.” This worried me a bit. I’d never had coffee like this before. As it so happens, my misgivings were entirely misplaced.

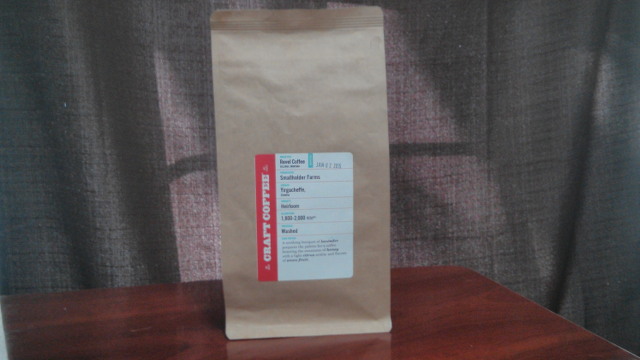
Joe, Brooklyn, NY
Producer Baroida Estate
Origin Eastern Highlands, Papua New Guinea
Variety Typa, Bourbon, Arusha, and Heirloom
Elevation 1,650-1,800 Meters
Process Washed
Articulate cranberry acidity leads through deep brown sugar and delicate caramel sweetness into a clean, dry walnut finish.

On scales of both sweetness and acidity, I would have to say that this coffee from Joe’s occupies the middle ground between the other two. It might seem almost as sweet as the coffee from Slate Coffee Roaster, but it has a complete lack of strawberries.

On my first pass through all three coffees, I would have chosen the one from Slate Coffee Roaster as my favorite. When I tried it again, I wasn’t so sure. I’m starting to think that Joe’s might be the one that I prefer out of these three.

Ritual Coffee Roasters, San Francisco, CA
Producer Cotecaga Washing Station
Origin Nyamasheke, Rwanda
Variety Bourbon
Elevation 1,500-1,900 Meters
Process Washed
Hibiscus and lime acidity settle into intense cane-syrup sweetness and a clean, green-tea-like finish.

The coffee from Ritual Coffee roasters is quite good, but it is my least favorite of the three. It tastes more like a plain, ordinary cup of coffee than the other two.

I definitely believe the description on the bag. It is a bit more acidic than the other two, and it is sweeter than the coffee I normally drink. If I had tasted this one first, I bet you I would have been amazed by how good it is. Then I’d have tried the other two, and I would have been surprised by just how much better coffee can be.

The Verdict

I wasn’t sure how well a coffee-of-the-month-club was going to work out, but so far I very much like the idea. Judging by how empty the first three pouches of coffee are now, I am predicting that each delivery from Craft Coffee will last me a little more than two weeks.

My coffee subscription was a gift, but I didn’t think I should write about it without investigating the pricing. At the annual subscription rate, Craft Coffee costs a little more than twice as much per ounce as my usual coffee that I buy locally.

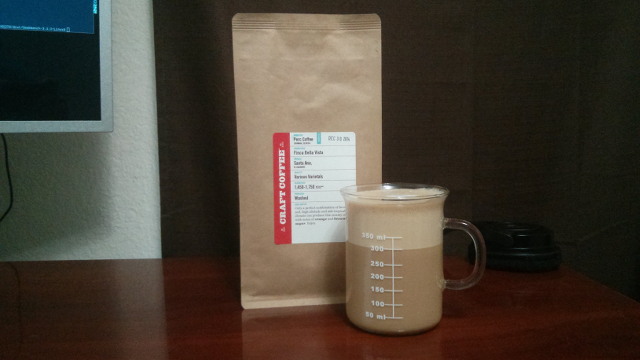
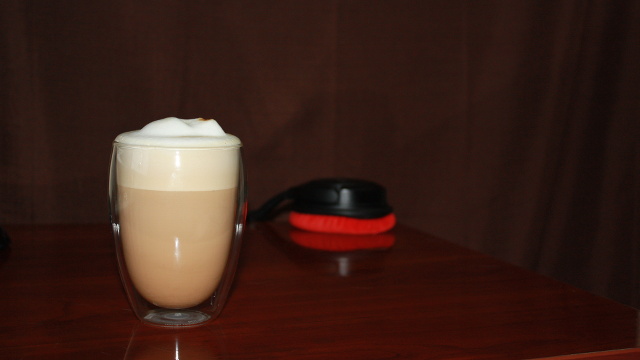
A latte in a double walled Bodum glass

I believed that I was up high enough on the coffee-pricing curve. I thought that paying more would only buy me a tiny fraction of an improvement in taste. I was wrong. I was very wrong.

So far, I think that a Craft Coffee subscription is worth every penny. They’ve shipped me three most excellent coffees, and I can’t wait to sample each of the remaining 15 varieties of coffee in my subscription.

I will also be keeping an eye on the selection at my local roaster. If they have any beans and roasts similar to those that Craft Coffee has sent me, I will be very curious to see how they compare!

Update

Today is Wednesday, May 22, and I just received the email notifying me that my next round of coffee from Craft Coffee is on its way. The tracking says it will be delivered on Friday.

I was able to stretch first shipment of coffee out over almost the entire month, but I had to cheat a little. I stopped at the Central Market last week and picked up about eight ounces of Addison Coffee Roasters beans. I was excited to see that they also have Ethiopian Yirgacheffe beans. Addison Coffee’s Yirgacheffe is roasted darker, and it doesn’t have any of the dried strawberry flavor like the beans from Slate Coffee Roasters. It still tastes good, and it costs a lot less than Slate Coffee Roasters’ Yirgacheffe.

I don’t have enough beans to pull a shot of any of the three bags from Craft Coffee. Two of them were close, so I filled out the shots with two or three grams of Addison Coffee. I’m drinking my last cup of Joe right now. The rest will be gone tomorrow, and I’ll be waiting patiently for Friday to arrive.

Use my referral code “pat1245” and you’ll get 15% off

If you use my referral code (pat1245) when checking out at Craft Coffee, you will get a 15% discount. Not only will you save money, but they tell me I’ll get a free month of coffee with every order. That sounds like a good deal for both of us!

Extending My Home Network With Ethernet over Powerline Adapters

| Comments

It has been quite a while since we made the decision to drop our cable television service. We’ve just been patiently waiting for our two-year Verizon FiOS contract to expire. The contract expired about a month ago, so we dropped our phone and television service and upgraded our Internet connection from 35/35 megabit to 75/35.

New 75/35 FiOS Speedtest Old 35/35 FiOS Speedtest

We did have a minor issue. Our television in the living room is just about as far away from our Wi-Fi access point as you can get, and our PlayStation 3 and other set top boxes all seem to have rather poor wireless hardware. We also live in a building with other tenants, and that means we see lots of wireless interference. I can pick up over a dozen networks from here, and I’m probably close enough to connect to almost all of them.

Some of the networks in range of my desk

I’m embarrassed by the solution

My friend Brian had a similar problem a couple of years ago. He’s in a single-story home, and his router and access point were in one corner of the house, and he was getting very poor signal to the opposite corner. He wanted to try a Wi-Fi repeater or powerline Ethernet adapters, but I shamed him into running a proper network drop.

He decided that if we were going to do the work, that running a single drop wasn’t going to cut it. He decided to wire up every room in the house with Ethernet. I supplied the cable, he bought the jacks, and we put in the time and got it done.

I’m in an apartment. I have hundreds of feet of cable left on my spool, but I just don’t have the access to run a network drop clear across the apartment. I wish I did.

I happened to see a pair of D-Link DHP-309av powerline Ethernet adapters on sale, so I bought them. I’m not especially proud of the decision, but they’re doing a great job.

Not quite 200 megabits per second

I don’t know what these DHP-309av units actually max out at in the real world. One of the lights shines red, amber, or green, depending on the quality of your connection. My pair are reading amber. The manual uses the word “better” to describe this state. A red light means “good,” and a green light signifies “best.” These aren’t the words I would have chosen.

My “better” quality connection gets me between 30 and 40 megabits per second in either direction. That’s better than I ever see over Wi-Fi, and it also means that the television and desktop computer downstairs won’t be competing to make use of our limited Wi-Fi bandwidth.

I also picked up an inexpensive Gigabit Ethernet switch, a TP-LINK TL-SG1005D. That way I can plug in multiple devices by the television, and I was able to run a long cable down the wall to plug in Chris’s desktop computer.

An additional 30-megabit path is a huge improvement

We used to have a desktop, a laptop, various set top boxes, and up to five Android devices all sharing the Wi-Fi signal. That was only about twenty megabits per second to share between them, and that’s assuming that the PlayStation 3 wasn’t actively limping along at a lower bitrate—that just slows everyone else down. We’ve better than doubled the available bandwidth to the living room.

75/35 FiOS over powerline adapter

I haven’t seen any buffering in Netflix or Hulu on PlayStation 3 since the upgrade, and the video quality never drops. It is very nice to have the PlayStaton 3 and its horrible wireless adapter off of our wireless network.

The USB Wi-Fi adapter on Chris’s desktop computer wasn’t very good, so she’s seeing quite an improvement as well.

Encrypting the powerline network

Setting up encryption on these D-Link DHP-309av is pretty simple. You press the button on one adapter, and then walk over and hit the same button on the other adapter. That’s it. It sounds easy.

There’s just one problem: I have no way to verify that my signal is encrypted. It probably is, but there’s no indicator light or web interface to tell you that it is active. I just have to hope that it is working, or that no one else is plugged in close enough to snoop on my signal.

The verdict

I’m quite pleased with the results. A fraction of our first month’s savings from dropping cable television service bought me all the hardware I needed to greatly improve our Netflix and Hulu experience in the living room. What more could I ask for?

The Great Bar Photo Caper

| Comments

I’ve been going to a bar / restaurant near my hometown since the late nineties. They serve good food in generous potions and very cheap beer. They also have an array of very old, sometimes creepy photos covering the walls in their dining room.

In the old days, my friends and I would probably end up at this bar at least once a week. Since moving out of town, though, I don’t get to see the place very often. I finally got there with my friends for the first time in years, and we had a brilliant idea: We decided that we had to sneak one of our own pictures onto the wall.

Choosing a photograph

This was really, really hard. It had to be something that had a personal significance to us, but it also had to fit in well with the other pictures. We didn’t want it to be easily noticed.

Our first choice was just awesome. Unfortunately, we didn’t think it would stay on the wall for very long. It was a picture of one of our friends appearing to enjoy having his sausage sampled in his kitchen while wearing a tuxedo. We edited the photo to make it black and white and look very mottled and old. It looked perfect, and we were all very happy with our work.

Unfortunately, we didn’t think this photo would have much longevity. We’ve seen younger people eating here. We didn’t think it would be appropriate, and we figured one of these young people might point it out to their parents, and it would be taken down. I have to note here that this picture is still residing in the frame. It is just hiding behind the new picture.

Making a better choice

Some of us attended the same elementary school, Frances Willard Elementary in Scranton, PA. In the hallway near the main entrance hung a photo of the woman our school was named after, Frances Willard. This picture was very creepy when we were six or seven years old. It was rumored that the ghost of Frances Willard was haunting our school, and her eyes seemed to follow you as you walked past her picture.

Frances Elizabeth Caroline Willard (September 28, 1839 – February 17, 1898) was an American educator, temperance reformer, and women’s suffragist. Her influence was instrumental in the passage of the Eighteenth (Prohibition) and Nineteenth (Women Suffrage) Amendments to the United States Constitution. Willard became the national president of Woman’s Christian Temperance Union (WCTU) in 1879, and remained president for 19 years. She developed the slogan “Do everything” for the women of the WCTU to incite lobbying, petitioning, preaching, publication, and education. Her vision progressed to include federal aid to education, free school lunches, unions for workers, the eight-hour work day, work relief for the poor, municipal sanitation and boards of health, national transportation, strong anti-rape laws, and protections against child abuse.

Wikipedia Entry on Frances Willard

When we were in elementary school, we had no idea who Frances Willard was or why you would name a school after her. We were just excited about Ghostbusters, The Transformers, Voltron, and G.I. Joe, and we were busy watching the Space Shuttle Challenger explode on live TV in our classrooms. Frances Willard’s Wikipedia entry says that her vision included federal aid to education, free school lunches, and protections against child abuse. These all seem like good enough reasons to name a school after her.

We do realize that there is a touch of irony in hanging a picture of a prohibitionist in a bar. If anyone actually recognizes who she is when they see her, I certainly hope they get a good laugh out of this fact.

How can we hang the photo quickly?

Our original plan was pretty terrible. We noticed a few frames that were damaged or didn’t have glass. We figured we could print a photo at the correct size and sneak it in right over the top of an existing picture.

This was going to present us with some issues. Our potential targets were all different sizes, and they are scattered all around the walls. The odds of luck being on our side are never high, so we didn’t think we’d ever end up sitting near the frame we were prepared to hijack. We really needed a better plan.

I just happened to stumble on an image from the book Show Me How: 500 Things You Should Know – Instructions for Life from the Everyday to the Exotic that explained how to hang your own art in a museum. We didn’t need to be as sneaky as the fellow in the book, but we did purchase our frame.

We also decided to use poster tack to attach the picture to the wall. This made it very easy to quickly stick the picture to the wall, and it won’t leave any damage behind if they decide to remove our sneaky photograph.

Executing the plan

Jimmy brought the framed picture, and I brought the sticky tack. In the parking lot, we put about an inch or two of poster tack on each corner of the frame. Then Jimmy put the picture frame into the large pocket of his jacket, and we entered the restaurant.

We had to wait until the place emptied out a bit, so we had plenty of time to finish our food. The waitress took our empty plates, and Jimmy ordered another beer. Jimmy decided that he would spring into action after she delivered his beer.

Before the caper After the caper

The actual execution went quickly and smoothly. Someone had suggested that sticky tack wouldn’t be capable of holding the picture to the wall, but it is holding to the wall extremely well. It won’t be coming down unless someone intentionally tries to remove it. In fact, we joked that it would probably be the only picture in the place to still be on the wall after a nuclear holocaust.

We did a great job of making sure the picture would blend right in and did everything properly, right down to the smallest detail. Almost all the other pictures in the bar are attached to the wall with one or two drywall screws. We even made certain that the frame holding our picture of Frances Willard had a drywall screw of its own.

It was difficult not to continually marvel at the perfect crime. We had to keep reminding each other to stop looking at our work, and I had to keep telling Jimmy to stop touching it. He was just too impressed by how sturdy it was, though, and he just had to keep poking at it. I kept telling him that if he called too much attention to our handiwork, someone might notice and take it down!

We all know people like to steal things from bars, but do you know anyone else who has gone to such lengths to leave something behind?

My Upgrade to Ubuntu 14.04 Trusy Tahr

| Comments

I had a large block of free time yesterday, so I decided to make an early upgrade to my laptop to the Ubuntu 14.04 beta. I almost always wait until at least the first release candidate is available, but I figured that I may as well give it a go early this time. I imagine that I’ve had a simpler time since I actually run Xubuntu, and I don’t have to deal with the rapid pace of changes to Unity.

Everything seemed to go very smoothly at first

When I upgraded from Ubuntu 13.04 to 13.10, I had a few minor issues. All of the issues were with my own software. Besides the ones I listed on my blog, I also had some minor headaches. I had a few Emacs packages and settings that weren’t too happy with the new Emacs release, and my rbenv needed to be updated before I could publish any new blog posts with Octopress.

I didn’t have any of these problems when upgrading from Saucy Salamander to Trusty Tahr. Everything worked fine. I always like an upgrade that goes almost entirely unnoticed. It turned out that this wouldn’t be the case.

OpenGL windows aren’t behaving when using the Sawfish window manager

Everything was fine until I fired up the Steam client. Then things got pretty stupid. If I minimize the Steam window or switch to another virtual desktop, an image of the Steam window will eventually appear on the screen. Eventually my Google Chrome window started behaving the same way, probably because I have most of the experimental OpenGL Chrome features enabled.

Switching to the default XFCE window manager corrected the problem. Compiling new Sawfish packages didn’t help, but I was able to temporarily fix the problem. I’ve started running the Compton compositor along with Sawfish. This eliminates the problem, but I’m not very happy with this solution. The last time I tried out Compton, it significantly shortened the battery life of my laptop.

My Google-fu didn’t turn up any useful information about this problem. I’m hoping that it will be fixed by the official release of Ubuntu 14.04, or that the bug will affect other people that are using more standard software from the official Ubuntu repositories.

Are you having a similar problem? Were you able to fix it? Hopefully a proper fix won’t be too difficult!

Update on misbehaving Steam and Chrome

When I got home a few days ago, and I upgraded my desktop to the official, non-beta release of Ubuntu 14.04. I was expecting to have the same problems, but I didn’t. At least not right away.

I decided to turn on some of the OpenGL acceleration settings in Google Chrome, and that’s when things got weird. I started having exactly the same problems that I had on my laptop. I was very excited, because I thought that I had found a solution to my problem, and I immediately changed all of those settings back.

That didn’t fix the problem, so I logged out and back in again. When I fired up Steam, it downloaded an update. Now the problem is half fixed. I can’t minimize my Steam window without having it randomly pop an image of itself over the top of things, but if I leave the window up it no longer intrudes on other workspaces.

This is a bit inconvenient, but I’m a virtual desktop addict, and I don’t minimize windows very often.

Screen blanking problems with my QNIX QX2710 monitors

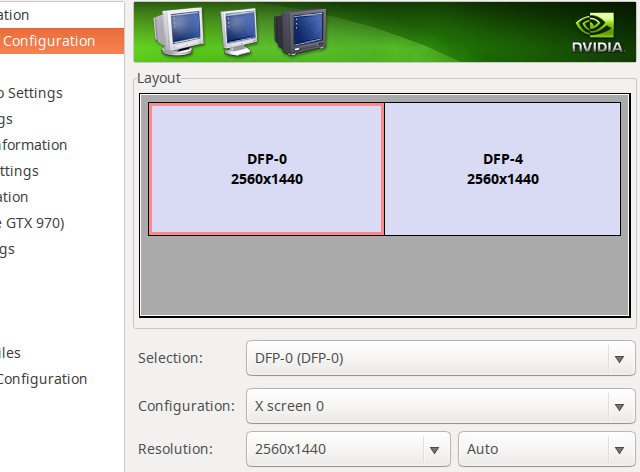
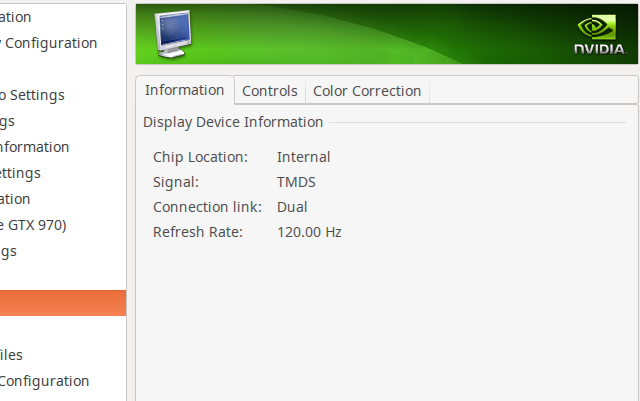
My Korean QNIX QX2710 monitors would reactivate at an unsupported resolution a few seconds after the screensaver powered them off. It was one of the nasty unsupported modes that puts ugly, bright vertical lines down the right third of the display. I didn’t notice it right away, and it left some lines burned in on both monitors for about ten minutes.

The culprit turned out to be this new light-locker program. It moves control back to lightdm whenever the screen is locked, and I’m guessing that lightdm was changing the screen resolution or something. My quick fix was to remove light-locker.

1
wonko@zaphod:~$ apt-get remove light-locker

Constellation Games by Leonard Richardson and The Monarch of the Glen by Neil Gaiman

| Comments

I might be reading a little too quickly. Just two weeks ago, at the end of my Casino Royale post, I mentioned that I was going to choose my next book from one of the various Humble eBook Bundle or StoryBundle collections that I’ve already purchased. I have already finished two ebooks from StoryBundle since then.

My poor organizational skills

When I purchased my first two StoryBundle.com bundles, I made it a point to tag them accordingly when I imported them into Calibre. Then I got lazy or forgetful, and that didn’t happen anymore. Not having the books tagged made it very difficult to choose my next book, so I went through my old emails and tagged books from a dozen different ebook bundles.

While I was tagging books, I noticed that StoryBundle’s Epic Fantasy Bundle was still on sale, and I hadn’t bought it yet! I even lucked out because there was a Neil Gaiman novella in there, but it felt like cheating!

The Monarch of the Glen by Neil Gaiman

This one was a short and easy-to-read novella. I read the first chapter before going to sleep, and quickly finished off the rest during the next evening. It takes place after the events of American Gods and follows Shadow in his travels to Scotland.

I don’t know how much I can say about something so short. I enjoyed The Monarch of the Glen just as much as I enjoyed American Gods. This time I had a better idea of what to expect going in, though.

Constellation Games by Leonard Richardson

I ended up reading Constellation Games from StoryBundle’s Video Game Bundle. The synopsis sounded interesting, and Cory Doctorow thought it was a brilliant novel. That was enough reason for me to give it a try.

Constellation Games is the story of Ariel Blum, a video game developer living in Austin, TX, and making first contact with a coalition of alien species. It felt like a fresh and novel viewpoint for a first-contact story. Most of the books that I’ve read involving first contact end up being told from the viewpoint of some genius with eight doctorates. Telling the story from the point of view of a game dev blogger was very easy to relate to.

It was also fun reading a book that doesn’t seem to take itself too seriously. There’s a lot of humor in here. All of the comedic science fiction that I’ve read has been British, and almost all of it was written by Douglas Adams. I enjoyed reading a more American take on the genre.

“Ah, and the lovely Jenny,” said Tetsuo, pinching her hand carefully in what I guess was a suave gesture. “I didn’t know you had a private car and driver!”

“That was a taxi,” said Jenny.

“That explains why it was so ugly,” said Tetsuo.

Leonard Richardson Constellation Games

I only read a few pages of Cory Doctorow’s Little Brother. It was overloaded with leet-speak buzzwords. It felt too much like watching Hackers, so I put the book down pretty quickly. Constellation Games suffers from the same problem, but not to the same extent.

I would say that I definitely enjoyed reading Constellation Games, and I look forward to reading anything else Leonard Richardson decides to write. I would also be very interested in playing Caveman Chaos, a fictional game from his book.

zsh-dwim: I Feel Like a Genius, Belatedly

| Comments

I’ve been stuck on my laptop for the last few months, and I’ve been doing my best to tolerate its old, slow, spinning hard drive. I’ve also been tweaking all sorts of settings in an attempt to make things more tolerable. I installed the preload daemon, and that seemed to help things a bit.

That wasn’t enough, though, so I started tweaking various sysctl settings. I’m pretty old school, and I have old habits. I never use the sysctl command. I always use cat to peek into the files in /proc/sys/ and echo to change their values. On one hand, this gives me tab completion of all those file names that I never remember. On the other hand, it takes quite a few keystrokes to turn those cat commands into echo commands.

This is exactly what zsh-dwim is made for. Wouldn’t you think I’d realize this right away? I didn’t. I didn’t think of this until a few days after I was done messing around with sysctl settings!

I’m very excited about this new zsh-dwim transformation. It saves a lot of keystrokes, and I wish I’d thought of it sooner! Unlike using sysctl, this transformation works with variables under both /proc/sys/ and /sys/.

This will be very handy the next time I have to tweak a bunch of kernel settings, and it has given me some ideas for the future of zsh-dwim. I keep thinking of zsh-dwim in terms of actually swapping out parts of the current command. I believe that I should also start thinking in terms of simple cursor placement as well.

You can find zsh-dwim at GitHub.

Ten-Year Anniversary of Using Darcs and Git for My Emacs Config

| Comments

I just happened to take a look at the log of my Emacs configuration Git repository yesterday. I don’t know what made me page through the entire log, but I was very excited to see that the oldest log entry was dated March 13, 2004. That’s ten years to the day!

1
2
3
4
5
commit 0bfa6223629f72065f65fd44c2741d48a9019f07
Author: thehead <thehead@patshead.com>
Date:   Thu May 13 16:31:21 2004 -0400

    Initial Import

That was the day that I migrated my Emacs configuration files from CVS to Darcs. I didn’t import my CVS history. Having history is handy when I mess something up and can’t figure out what I did wrong. Only recent history is useful for that. I didn’t think that ancient history was worth the trouble of importing one commit at a time into Darcs.

I miss Darcs

At the time, Git didn’t exist yet. It was still over a year from its first release. I had already chosen Darcs as my preferred “next generation” version control system. Back in 2004, I still had a separate laptop and desktop. We didn’t have Wi-Fi hotspots in every coffee shop, and we didn’t have convenient things like Seafile or Dropbox to keep our files in sync.

Distributed version control with Darcs was an amazing upgrade, and storing configuration files in Darcs was very convenient. I didn’t have to hope that I remembered to check out my projects before I left home or worry about finding an Internet connection if I forgot.

I was a late adopter of Git. I didn’t migrate my Darcs repositories to Git until March 2011. In my opinion, Darcs has a much more user-friendly command-line interface, and I also preferred the Darcs concept of “every copy is a separate branch.”

If you switch branches often, Git will be faster and more convenient, but it was handy knowing that each copy of each Darcs repository automatically acted like a distinct branch. Combining that feature with Darcs’s excellent merging made it easy to commit small, host-specific changes to local repositories.

Finally giving in to peer pressure

I had to give up on Darcs. Git may be a pain in the neck in comparison, but there’s just too much friction when the rest of the world has decided to use Git. It looks like I converted my Emacs repository three years ago.

I’m surprised so much time has passed already. I think I’m still less comfortable with Git today than I was just a few months into using Darcs. Git is not only less intuitive than Darcs, but I run into merge conflicts much more often than I ever did with Darcs. Git’s merging feels like a hammer compared to the scalpel of Darcs’s “patch theory.”

Do you keep your configuration files in version control? Are you also using Git?