I Bought an Asus Vivobook Flip 14 2-in-1 Convertible 2-in-1 Tablet

| Comments

I don’t know how exciting this is. The Asus Vivobook Flip 14 is not a bleeding-edge piece of hardware. It is definitely not one of the nicest 2-in-1 ultrabooks, but the price was just too good for me to pass it up.

Costco had the maxed out version of the Vivobook with a Ryzen 7 5700U, 16 GB of RAM, and a 1 TB NVMe for $600. That was $100 less than the Vivobook Flips on Amazon with half the RAM and half the storage, and a good bit less than other brands and models with an 8-core Ryzen chip.
I didn’t expect to buy this laptop

I post good deals every day on the Butter, What?! Discord server, and this looked like a good deal. I’ve been saying that I should keep lugging my giant gaming laptop around until there’s a good deal on a 6000-series Ryzen 2-in-1, but nobody has even released one of those yet. I imagine it will be a long time before I’ll see a good discount on something like that!

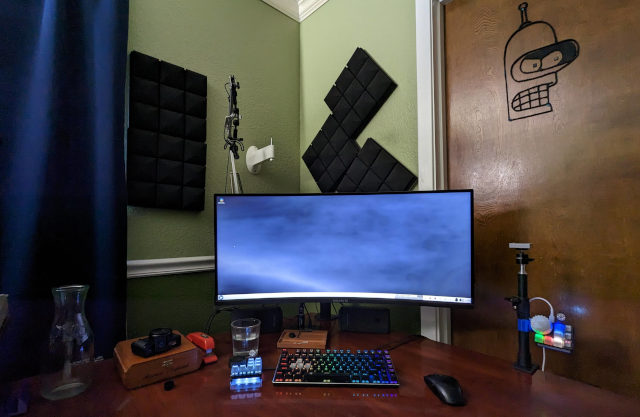
NOTE: That’s the Asus Flip 14 sitting in its temporary home to left of my two monitors.

Since I don’t have a membership, Costco charged me a $30 fee. After the fee, shipping, and taxes, my Vivobook Flip 14 cost me $692.78. I was expecting to use my American Express card to extend the 2-year warranty to 3 years, but Costco doesn’t accept the card. I was however surprised find a card in the box that explained that registering the warranty with Asus would provide me with a year of accidental damage protection. That was a nice bonus!

I’ve been wanting a nice 2-in-1 for a years

I’ve had my little 12” Chuwi tablet six years. It was a really nifty, and really inexpensive device. It has the same beautiful 2160x1440 screen as the Microsoft Surface Pro from the same year, and sitting on the couch surfing Reddit on a tablet like that was delightful.

The trouble with the Chuwi Hi12 was its slow Atom Z8350 with barely enough RAM to run a web browser. It was just enough to tease me with how awesome a giant tablet would be, but it was slow enough to be miserable to use for most tasks.

What am I giving up here by saving money?

I skimmed through some reviews, and the worst thing that everyone seemed to agree on was that the Asus Vivobook Flip feels like a cheap, plastic laptop. That is kind of what I expected to hear, and I am OK with this. The Asus isn’t a super thin wedge like the 13” Dell or HP 2-in-1 models, but it seems to be pretty well made for a block of cheap plastic.

I didn’t need reviews to tell me the disappointing things about this laptop. They are all right on the spec sheet.

The screen is only 250 nits. That’s the same brightness as my old Acer gaming laptop, and I know I have to switch Emacs from solarized-dark to solarized-light to be able to use it at a picnic table. I have a lot of thoughts on this, but I think they should wait until after I’ve put some miles on the machine.

I don’t know why, but this Asus convertible laptop doesn’t charge via USB-C. It has a port, but it doesn’t support USB-PD. I assume this means it doesn’t support video output via USB-C. The Vivobook Flip 14 is quite a few years newer than my Acer VX15, so I can’t imagine what their excuse is here.

The weather hasn’t yet permitted me to take the Asus on a field trip to the park, but the screen is plenty bright enough around the house at about 30% brightness.

The Vivobook has an HDMI port, but it is only version 1.4. That means it can support 1080p60 or 4k30. That would be a real bummer if I ever expected to dock this thing.

I am mostly OK with this. It is very likely that I will plug this tablet into a TV to play some FPV simulators like Liftoff and Velocidrone. I may never plug it into a monitor.

None of these limitations are things that make me want to spend hundreds of dollars more to circumvent. The super premium Lenovo Thinkpad X1 Titanium Yoga has comparable hardware under the hood, but it has better build quality and one of the brightest screens available in a 2-in-1. It costs somewhere around $1,600 to $1,800.

There was a deal on a 13” Ryzen 5700U Lenovo Yoga 6 convertible while my new laptop was in transit. This particular Lenovo has a 20% brighter screen, charges via USB-C, and the video output is the USB-C port, but it also had half as much storage. This may have been the better value, but I’m not going to nitpick.

This convertible isn’t my primary workstation

This will be the device I grab when I ride my electric unicycle to the park. I’ll use it to scroll through Twitter and Reddit on the couch.

It is going to be a handy device, and it is going to make my life easier and more enjoyable, but this most definitely does not have to be the ultimate convertible laptop for me to get a ton of mileage out of it.

I think the Asus Vivobook Flip 14 is going to get the job done just fine.

Will it run Linux?

I’m sure it can boot Linux, but that’s not really what I’ve been wondering. Will Linux have support for the accelerometer? Would something like Ubuntu and Gnome know how to flip the screen to the correct orientation when I rotate the device? Does any of the touch-screen support work well on Linux?!

I have no idea, though Reddit seems to think I might do OK right out of the box with Ubuntu and Gnome!

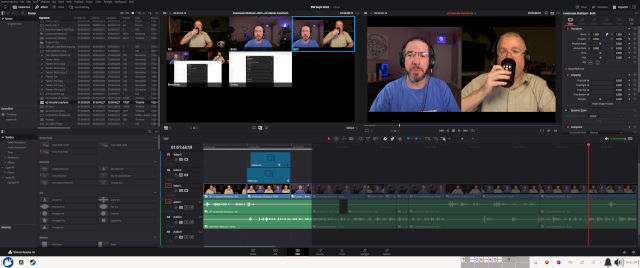
My plan is to attempt to use Windows. I want to treat the Vivobook like I treat my Android devices. It is just going to be an appliance with a web browser, Emacs, Davinci Resolve, and a stack of games.

We will see how that goes. I don’t have a whole lot to complain about so far.

14” probably isn’t too big for tablet, but 16:9 is really tall!

I have only been using the Vivobook Flip for two days. The first thing I noticed is how ridiculously tall it is when I prop it up on my lap in portrait orientation, and it hasn’t gotten any less ridiculous!

My Chuwi Hi12 has a 3:2 aspect ratio. That seems more appropriate for a big tablet, but I imagine LCD panels like that are rare. You’ll probably get a better deal when the manufacturer can just pick a common 16:9 panel off the shelf!

How is the battery life?

I don’t really know what counts as good battery life, and I certainly haven’t done any exhaustive testing. I’ve just messed around with the brightness, looked at the estimated battery life meter, and did math. The numbers in the next paragraph are very rough estimates.

With the brightness cranked to the max, I should be able to surf sites like Reddit, Hacker News, or Twitter for nearly 6 hours or watch YouTube for a little more than 3 hours. It looks like I can get an extra hour of YouTube by turning the brightness down to about 30%, which is a comfortable indoor brightness.

I am under the impression that I could increase these numbers quite a lot by using a different browser. It looks like Edge might give me more like 5 to 6 hours of YouTube or Netflix playback at full brightness.

That is a pretty big difference, so it might be worth using Edge to watch YouTube and Netflix when I know that I will have to spend an entire day away from power. Using Firefox is more comfortable for me, because that’s what I am already using everywhere else. All my bookmarks, add-ons, tabs, and history are already in sync!

NOTE: I am going to need to revisit all those Firefox numbers. Setting gfx.webrender.all to true seems to have put it on par with Edge for video playback battery efficiency.

It has been nearly 20 years since I bought a laptop that runs all day on battery. It’ll be nice having one again. It looks like I could eke out more than 9 hours of Emacs in the kitchen at 70% brightness!

How do you carry this thing?

I have a simple AmazonBasics 11.6” shoulder bag. I actually like it a lot! It only cost me $11, and it actually holds quite a lot of stuff for such a small bag. I know it says 11.6” on the label, but I’m pretty sure it just barely fits most 13” ultrabooks just fine, and it very nearly fits my 14” Vivobook.

I wound up ordering the 14” version of the same bag. It is only about an inch wider and taller than my old bag, so it really shouldn’t seem much bigger, but it feels so much bigger! The 11.6” bag seems like a purse. The 14” bag looks and feels like comically sized version of a laptop bag I would have carried 20 years ago.

I do wish my new laptop fit in the smaller bag. Both the 11.6” and 14” bags can easily hold a charger, an assortment of tools, connectors, and cables, and I can even squeeze the Nintendo Switch in there. It is good that I can actually close the zipper on the 14” bag, and I can also squeeze more gear in if need be.

If I really need to take more a ton of gear with me, I have larger backpacks. If I am traveling, I can even squeeze the entire AmazonBasics 14” shoulder bag into my old Targus laptop backpack.

I can of course just walk out of the house with just the bare laptop!

Conclusion (for now!)

I am quite pleased with my purchase of the Asus Vivobook Flip 14. I am reading Hacker News while sitting in a comfy chair. I can carry my laptop to the park on my electric unicycle without having to ride with a 12-pound bookbag on my back. I have a mobile OBS recording studio, and I can even finish this blog post while roasting coffee in the kitchen.

Sure, I could manage many of these things with my heavy old laptop, but almost everything is an improvement with the new hardware!

What do you think? Are you using an Asus 2-in-1 convertible laptop? Are you using a different 2-in-1? Do you think I should have splurged on a higher-end laptop? Do you agree with me that every laptop should have a 360-degree flip-around screen in 2022? Let me know in the comments, or stop by the *Butter, What?! Discord server to chat with me about it!

Is lvmcache Effective on a Desktop or Workstation?

| Comments

The answer you should take from me is that I don’t really know yet. At least, I don’t know just how well it is working because lvmcache is quite difficult to benchmark. The truth is that I’m not all that interested in benchmarks. I want to know how my experience of using my computer feels with a big, slow disk behind a fast NVMe cache.

What problem am I trying to solve?

Games load faster from an SSD. Scrubbing around in Davinci Resolve when there are many 4K videos on the timeline is smoother when reading from an SSD. I wish everything could fit on an SSD.

One of the two SSDs in my desktop started failing last month. I only had 1 TB of solid-state storage space, and it was getting really tight. I store most all my video on my NAS, and my NAS has a 100-GB lvmcache. It works great, and editing video over Infiniband with an lvmcache is very much like editing video on a local SSD.

Steam games are getting huge, and I am working toward eliminating the RAID in my NAS. I have a 14 TB hard drive off-site with a copy of all my data. The plan is to eventually stick a 14 TB drive in both my NAS and my desktop PC. I don’t feel the need to do this before the aging drives in my NAS fail, but the idea is on my mind.

How can I store several terabytes of data on my computer without buying a ridiculously expensive NVMe drive while still making sure everything feels like it is stored on an NVMe? I don’t want to feel that 200 IOPS of cheap spinning metal. I want to feel the 100,000 IOPS of a nice NVMe!

This experiment is my life now!

I bought a 1 TB Samsung 980 NVMe. I installed Ubuntu 22.04, left about 300 GB available for lvmcache, then stuck and old 4 TB 7200 RPM hard drive in my machine. This seemed like a good test to verify that lvmcache would be viable on my desktop.

Here’s where I’m at. My Ubuntu install and the data in my home directory are eating up only about 113 GB on the 1 TB Samsung NVMe. So far, I have installed 700 GB of Steam games on the 4 TB drive. I have also copied this year’s video files from my NAS to the 4 TB drive. That’s around 800 GB of video files.

Everything is encrypted, which does limit my throughput on the NVMe quite a bit, but I am still seeing 1.2 to 1.5 gigabytes per second. This is a topic for its own post.

What am I hoping to see?

lvmcache is a hotspot cache. It doesn’t just blindly cache every single read or write operation that happens on the slow disk. Things should only stick in cache if they are used regularly. The trouble is that I have absolutely no idea how lvmcache makes these decisions.

I could micromanage things. I could install one or two 100 GB Steam games on my NVMe, and when I am no longer playing those games, I could move them to the slow storage. I could copy the video files that I’m currently working on to the NVMe, then push them to slow storage when I am done.

I really don’t want to have to spend this much time managing where files live.

My hope is that if I play a game regularly, it will be promoted to the NVMe cache. My other hope is that as I am scrubbing around in the files for this month’s episodes of The Butter, What?! Show, that they will wind up being cached.

The best part is that I don’t need entire games or all of my video files to be cached. There’s a good chance that the early parts of a 150 GB game will start exiting the cache while the later parts of the game enter the cache as I slowly make progress. My video files from January will fade from cache, while this week’s recordings will be accessed quite often.

The cache sure seems to be doing its job!

I noticed the cache doing its job while I was testing to make sure my Nvidia drivers and fsync-enabled kernel were working well together. I kept loading “Sniper: Ghost Warrior Contracts.” The game plays a cut scene every time a level loads, and it lets you skip the rest of the scene when it is finished.

Each time I loaded the game, the message letting me know I could skip the cut scene was happening sooner. I fired up dstat, and I could see the game regularly reading at 70 megabytes per second from the slow drive and 150 megabytes per second from the cache drive!

As far as I was aware, it was letting me skip the cut scene for this level at precisely the same point as it would let me skip on my old Crucial M500 SSD. Could we go any faster?

I copied the game directly to my NVMe and fired it up again. The results were the same.

When a game loads, it isn’t just reading data from disk and plopping it into memory. It is doing work with that data. For this particular game, my CPU and GPU are definitely the bottleneck on load times.

This is definitely a good start.

Watching Davinci Resolve was fascinating!

I still have no idea how lvmcache decides what to keep and what to evict from cache. I do know that it tried to bypass the cache on long sequential writes, and that seemed to be confirmed when I plopped 120 GB of video footage from our last Butter, What?! Show live stream into place. If I were smarter, I would have watched dstat during the copy so I could better confirm this.

I was running dstat the next day when I started editing the footage in Davinci Resolve, and the results were really cool!

As soon as you drop a video on the timeline, Resolve reads through the entire thing to generate an audio waveform. You can see in the screenshot above that it was reading along at around 30 megabytes per second from the slow drive, and at the same time the NVMe cache was being written to. I most definitely didn’t expect this, and it is quite awesome!

Some of my multicam timelines get quite layered and convoluted. This might very well be because I have no idea what I am doing. The important thing is that there aren’t any hiccups or glitches. I don’t seem to ever be waiting for the disk to catch up to me.

I might split this into two caches

This is working well enough so far, but I have some concerns.

My cache is only 300 GB, and it is now normal for me to work with 120 GB to 180 GB of video at a time. It is currently very likely that I will be accidentally pushing games out of my cache once a month.

The lazy answer may just be to use a much bigger cache, and the 400 GB of unused space on my root filesystem suggests that might not be a bad idea. I am not confident that this will accomplish what I am hoping. Video files from two months ago have less value to me than a game I haven’t played in six months.

I’m not going to adjust anything while I’m still using this old 4 TB drive, but when I install a 14 TB drive, I am planning to split the drive and cache into two volumes.

I will have one volume for things that have long-term value to me. That would be the Steam games. The other volume would be for the data that I want cycling itself out of the cache.

I haven’t found another home for my 480 GB Crucial M4 SSD. Maybe I will use that for the video cache. An a7S3’s fanciest video modes only capture video at 150 megabits per second. My old SSD shouldn’t have much trouble streaming 10 of those files at a time, so it ought to be overkill for video editing.

It’d probably be better to steal 300 GB from my root partition, but using the SSD would be simpler.

As long as my NAS hard drives continue to not fail, I will have plenty of time to contemplate this.

How much room will I need for my root and home partition?

I am mostly guessing at everything. I figured 300 GB was a good size for a cache, and I set some aside for a big, useless swap partition. Whatever was left went to Ubuntu.

I am realizing now that big files are always going to wind up eventually being diverted to the slow disk. I most definitely could have set aside more space for cache. I probably should have.

I don’t think it would be a problem for me to use 80% of my 1 TB NVMe as cache, but it is nice to have some wiggle room if something winds up being slower than expected on the big drive.

NVMe vs. SSD

My computer doesn’t feel any different with the NVMe. It does boot significantly faster, but my old Ubuntu install that I’ve been upgrading since 2012 had a weird issue where it was waiting for something for 30 seconds while setting up my Infiniband link. Rebooting only happens every few weeks, so I never got around to troubleshooting that problem. Let’s just say that anything would feel like it boots faster when you eliminate that huge delay!

I’m sure that if you handed me a stopwatch, I could measure that some programs open faster. I know that copying files around will be faster, but it wasn’t exactly slow before.

Upgrading from a 7200 RPM hard disk that averages 150 IOPS to my first SSD that pulled 1,500 IOPS made my computer feel like a totally different machine. Upgrading from my Crucial M4 that could do 5,000 IOPS to the Samsung 980 that can do 100,000 IOPS was nice, but not terribly exciting.

That said, don’t buy a SATA SSD today. If you have an available NVMe slot, fill it with a decent NVMe. NVMe drives that can manage 3 gigabytes per second don’t cost more than SATA SSDs.

If I am only pulling 150 MB/s from the cache, do I need an NVMe?

No. For most use cases on your workstation, you probably don’t. Like I said, though, don’t buy a SATA SSD unless you don’t have a slot available for an NVMe.

Even if you set up identical tests, fire up dstat, and you see that your SATA SSD or NVMe cache read for similar amounts of time, and they both top out at around the same throughput, you still might speed up your workload with the NVMe.

Imagine that your task quickly reads 150 megabytes, does some work for a few seconds, reads another 150 megabytes, does some more work for several seconds, and this repeats over and over again. It’ll take the SATA SSD about 500 ms to pull that data, while your stupidly fast 7-gigabyte-per-second NVMe might be able to do it in 40 ms.

What’s next?

It is a bummer that lvmcache is difficult to benchmark. It is meant to fill up and settle in over longer periods of time. That’s OK by me because I want a cache that will learn what I really need cached over time, and I hope it works out well.

The plan is to sit tight for now. I am just going to do the things I usually do while the cache settles in. Once that happens, I plan to make a small tweak to the fantastic lvmcache-statistics script. It shows cache hit and miss rates since boot.

1
2
3
4
5
6
7
8
9
10
11
12
13
14
-------------------------------------------------------------------------
LVM [2.03.11(2)] cache report of given device /dev/mapper/zaphodvg-slow

Cache hit rate since:  Fri Apr 22 08:12:26 AM CDT 2022
Current time:          Fri Apr 22 08:13:16 AM CDT 2022
-------------------------------------------------------------------------
- Cache Usage: 99.9% - Metadata Usage: 6.6%
- Read Hit Rate: 99.9% - Write Hit Rate: 99.9%
- Demotions/Promotions/Dirty: 16926/18475/0
- Feature arguments in use: metadata2 writeback no_discard_passdown 
- Core arguments in use : migration_threshold 8192 smq 0 
  - Cache Policy: stochastic multiqueue (smq)
- Cache Metadata Mode: rw
- MetaData Operation Health: ok

I am going to tweak it to show hits and misses since starting the script. That will let me drop RAM caches and fire up a game or edit a video and see what the cache is up to since starting the new task.

I will also be able to run a big game, make a note of the lvmcache-statistics output, then do my very best to ruin the cache with hundreds of gigabytes of fresh video files. Then we can see how much of the game managed to stay in the NVMe cache.

Conclusion

I am excited. I am definitely not noticing just how slow that 4 TB drive actually is, which is a huge win as far as I am concerned. This means I will be able to drop a slow 14 TB in here, and I won’t have to worry about managing which files live on the fast or slow storage. That is awesome!

What do you think? Are you using lvmcache on your desktop? Are you using another cache like bcache? How is it working out for you? Let me know in the comments, or stop by the Butter, What?! Discord server to chat with me about it!

I Almost Switched Back To Debian From Ubuntu!

| Comments

I’m not even sure where to begin. The problem I encountered this week has been brewing for years. My desktop is running Ubuntu 18.04. That’s a pretty old release now, and it has finally started getting more difficult to install modern software. I became particularly aware of this when I wanted to try using Gamescope to force a native game to use AMD’s FSR, but there’s no reasonable way to build Gamescope on Ubuntu 18.04.

NOTE: Gamescope doesn’t work with the current NVidia driver, but it sounds like that will be changing in the near future.

How did I get here?!

I usually keep my machines updated to the new Ubuntu release every six months. Every now and then I fall a few months behind, and it is annoying to wind up upgrading twice in three months, but it usually isn’t a big deal.

Then I got busy and missed one entire upgrade. At that point, it just felt like it would make sense to wait for the next LTS at 20.04. When the time came around for that upgrade, things got busy. We had medical emergencies. There was a pandemic. I seemed to constantly have podcasts I needed to work on, and I didn’t want an update to goof me up in the middle of an edit.

Now here we are. Nearly four years after missing the 18.10 upgrade, and two years after missing the 20.04 upgrade. All my podcast interviews and Butter, What?! Show episodes are edited and uploaded, and my second SSD is failing.

Seems like a great time to move ahead!

Why I am installing from scratch?

I have been upgrading the installation on this machine since 2012. There’s a lot of cruft on here. I’ve gone through the switch from Upstart to systemd. That seems to have left me in a weird spot where there’s a weird wait during boot while bringing up my 40-gigabit Infiniband network.

1
2
3
4
5
6
7
8
9
10
11
pat@zaphod:/var/log/installer$ ls -l
total 2324
drwxr-xr-x 2 root root    4096 Aug  8  2012 cdebconf
-rw-r--r-- 1 root root   36622 Aug  8  2012 hardware-summary
-rw-r--r-- 1 root root  382433 Aug  8  2012 initial-status.gz
-rw-r--r-- 1 root root     104 Aug  8  2012 lsb-release
-rw-r--r-- 1 root root      62 Aug  8  2012 media-info
-rw------- 1 root root 1223132 Aug  8  2012 partman
-rw-r--r-- 1 root root   61388 Aug  8  2012 status
-rw------- 1 root root  657282 Aug  8  2012 syslog
pat@zaphod:/var/log/installer$

Those are good enough reason to start from scratch. I’m also on a quest to eliminate my reliance on my NAS. My plan is to stick a big, honking, slow hard drive behind a large lvmcache in my desktop. I am leaving plenty room on my new 1 TB Samsung 980 NVME for that, but I’m not in a rush to get started on that project. I do have a spare 4 TB hard drive here, so I might experiment with this soon.

I know 4 TB isn’t exactly big or honking, but it’ll let give me an idea of what I can expect, and it is plenty big enough to store a year’s worth of video footage.

Why the Samsung 980 and not the Samsung 980 Pro or Samsung 980 EVO

This could be a blog post of its own! My inexpensive secondary SSD has been throwing errors and disappearing from the SATA bus. It happened once a few months ago, and it seemed to be a fluke. When it happened twice in one night, I went went shopping.

My desktop only has a PCIe 3.0 m.2 slot, and my Ryzen 1600 can’t properly manage to run LUKS encryption nearly fast enough to keep up with the pricier PCIe 4.0 NVME drives that can push more than 7 gigabytes per second. The drives my speed can be had for as little as $80 per terabyte.

The 1 TB NVME drives on sale that night were a Western Digital SN750, a Samsung 970 EVO, and my Samsung 980. The EVO was priced a bit higher, while the other two were nearly the same price.

I’ve had good luck with all my Samsung SSDs. It is rated for 600 TB of writes over its lifetime, and it has a 5-year warranty. These are all important, because this will be an lvmcache and the boot drive of my primary workstation. I’d prefer that it not be likely to fail!

What really piqued my interest was that instead of having a DRAM cache, the Samsung 980 has a 48 GB cache of fast flash sitting in front of the really slow QLC flash.

48 GB worth of writes is A LOT. I expect that dropping down to the slow QLC write speeds will rarely happen to me.

Ubuntu 22.04 let me down twice

My failed SSD timing isn’t great. We are less than two weeks away from 22.04 entering beta, and not many more weeks from the release. I had to decide between installing 22.10 and upgrading in a few weeks, or just limping along with a potentially flaky distro for a bit. I chose the latter. This hasn’t been a problem.

I am fully aware that I am asking for some weird disk configuration. I would normally just set up a small /boot partition and a single large LUKS encrypted partition for LVM to live on top of, but I don’t want my lvmcache to be encrypted. The slow hard drive is going to be encrypted, so encrypting the cache would be wasting CPU cycles, and I can’t encrypt nearly as fast as the NVME as it is.

That means what I really want is an unencrypted LVM Physical Volume (PV) with one or more encrypted Logical Volumes (LV).

Ubuntu’s manual partition tool in the installer doesn’t seem to let you configure LVM at all. I scratched my head a bit, then decided to just install Ubuntu 22.04 to its own 200 GB partition.

When I got booted up, I tried to open Firefox and I got an input/output error. Weird. apt said Firefox was installed, but it was telling me that it was a Snap. Even though apt thought the Snap was installed, it really wasn’t. This was easy to fix, but I have to admit that I was a bit freaked out about one of my core pieces of software being a Snap.

Let’s try Debian!

When I started my Linux journey 25 or more years ago, I was using Slackware. I remember it literally taking all night to compile a kernel on my 386-40 with 4 MB of RAM, though that dropped to less than an hour when I upgraded to 8 MB! Then I used SuSE for a year or so before switching to Debian.

When Ubuntu came out, it was awesome. Sure, it is great that Ubuntu made things easier for the average user, but to me Ubuntu was Debian with a 6-month release cycle. At the time this was huge, because it felt like we were stuck with Debian Potato for 3 years.

Every few years, Ubuntu has been drifting farther and farther away from Debian. Some of this is good, some of it is bad, some of it just doesn’t matter. I’m not excited about software moving out of apt and into Snaps. I completely understand why I would want to sandbox my web browser, but Snaps have been goofy for me in the past. They update on their own, and you have very little control over it.

Every few years, I think about switching back to Debian. Seeing Firefox in a Snap made me think it was really time.

I am having a hard time remembering exactly how the Debian installer was going to allow me to layer LUKS encryption and LVM, and I don’t have any evidence of the situation left to check on! I only remember that it wasn’t perfect, but I was doing better than the Ubuntu installer was allowing.

Memories of Debian Potato came flooding back to me!

It was easy to install the proprietary NVidia driver. Then I looked at copying over my Firefox profile. Debian Bullseye was a major version behind what I was running, so it wouldn’t import my Firefox profile. The common recommendation here seemed to be that I should try out the Flatpack Firefox. That worked, but I had to massage things a bit.

Then I noticed that obs-studio in apt was a major release behind. Flatpak seemed to be the right answer, but it took a bit of research to learn that you also have to install the NVidia OpenGL Flatpak that matches your driver. This seemed to work, except NVENC video encoding doesn’t work.

Oh boy! That lead to a whole array of building blocks that are outdated on Debian Bullseye. Getting obs-studio with NVENC working on Debian sure looked like it would be a Herculean effort.

There were a handful of other minor problems, and I am pretty sure I would have exacerbated them all had I tried to build myself everything needed to get NVENC working in obs-studio.

Back to Ubuntu 22.04

I am writing this on Ubuntu 22.04. I’m not quite settled in. I don’t have everything moved over. I may still reboot my old Ubuntu install on my old SSD to play Velocidrone tonight. I am probably 75% of the way ready to go.

The latest Emacs packages are happy with my convoluted config with my handful of outdated and pinned packages. The Firefox Snap seems fine, and it happily imported my profile. Pidgin and my purple-hangouts plugin seem happy. obs-studio just works. Davinci Resolve Studio 17.4 is working beautifully so far.

I had to install an old libopenssl package from a previous Ubuntu release to get my ancient rbenv working for Octopress. This is almost definitely the wrong fix, but it let me create a template for this post, and I’m assuming it will let me publish this to the Internet.

My NVME isn’t divided up how I really want. I left a 300 GB partition free to use as lvmcache, and Ubuntu is installed on a 600 GB LUKS partition with no LVM. This bums me out for a few reasons, but I am up and running, and it will do the job.

Why not something like Arch?

I am embarrassed to say that I thought about downloading Arch.

I dislike rolling releases. Sure, I caused myself some real headaches by locking myself down to Ubuntu 18.04 for so long, but I also saved myself a lot of frustration.

I don’t want to deal with a weird update on a random day keeping me from editing an interview. I want to be able to plan for some potential downtime for things like this. I’m in the middle of a few weeks of this sort of downtime right now!

Conclusion

I miss Debian, but running Debian on a workstation in 2022 sure looks like it would be challenging. Flatpaks and Snaps seems like a great solution, but when they need to interact with low-level things like NVENC, they just fall short.

If you can make something work on one distro, you can probably make it work on any distro, but I need to foundation of my machine to be solid. I can’t go ripping out so much stuff just to get NVENC to work, just like I wouldn’t want to rip out so much stuff on Ubuntu 18.04 just to get Gamescope going.

I will definitely be remembering this experience the next time I think about jumping ship back to Debian like it is still 2002!

I Think I Am Going To Buy an Open-Source LumenPNP Pick and Place Machine from Opulo.io

| Comments

I don’t even know where to begin this blog post. Do I tell you what a pick and place machine is? Do I give you the backstory about how our OoberLights project got to where it is today, and why buying an open-source LumenPNP might be a really good fit for us? Do I tell you that I have no idea what I’m doing?!

We’re going to talk about the OoberLights because producing these boards are what’s driving my decision. Other than that, I don’t know where I am going here. I’m writing this to help me make a decision. I hope that this train my thoughts are currently riding will be helpful for you as well!

NOTE: I just realized that I’ve never written anything about the adorable and hopefully reasonably priced OoberLights Micro boards! I need to correct that soon!

Let’s condense the OoberLights history down to a few paragraphs

It was a cold evening in Scranton, PA sometime around 2006. No. We don’t really have to go back that far, and I have no idea how accurate that year is.

A long time ago, I saw an LED imitation of a Dekatron on hackaday.com. I thought it would be neat to replace the num lock, caps lock, and scroll lock lights on my IBM Model M keyboard with tiny Dekatrons. I figured I could use them as CPU meters, disk usage meters, and I could spin LEDs around to indicate network speed.

Some number of years ago, I told a friend of mine about this. He said, “Why don’t we do it with Neopixels? Why not do concentric rings? Why not make them bigger?!” We ended up with a monstrosity of a board with 90 LEDs and an ESP8266. It was sized to fit in a 5.25” drive bay in your little home server.

Right as we ordered prototypes, the pandemic and its associated supply chain issues hit. The prices of our components went up, and some of our components were almost impossible to buy in any reasonable quantities. So we put the project on hold.

We eventually scaled back to something closer to my original vision. We dropped the outermost concentric ring, skipped the idea of having any brains, and squeezed the LEDs as tightly together as we could. We now have a simple board with 21 LEDs that has about the same footprint as a Cherry MX keycap.

Money is hard

We ordered a a batch of 20 prototype OoberLights Micro boards from PCBWay. The boards were panelized, populated, and soldered for us. We ordered because PCBWay was running a deal. If I remember correctly, we wound up paying the same rate for PCBA per board as you would normally pay for 100 boards. We got a much better deal than the normal rate.

We paid $24 for the unpopulated PCBs and $98 for the LEDs and assembly work. The total for the order after shipping was $129. That’s $6.45 per OoberLights Micro.

Talking about money is hard!

I feel a bit uncomfortable talking about this. We have a product here that we want to sell to you. I’m about to tell you that they may cost us $2.30 per unit. This is going to make you wonder why I set the price in the store to $15. I don’t know if it will be set to $15.00, but whatever the number is, you’ll want to know why I’m putting $12.00 of yours into my pocket when I hand you a $3 doodad!

Not only that, but what if I told you today that I expect the OoberLights Micro boards to sell for $10? What happens next month when I learn that I can’t make that happen and I raise the price to $15? How are you going to feel about that?!

Some of the numbers are extremely concrete, like what we actually paid for the prototypes. Other numbers are more nebulous, like how much we think PCBWay will charge us if we order 1,000 units in a single batch. I am quite comfortable talking about the former, but the latter make me a little nervous!

Back to how difficult money is!

Our ingenious PCB designed has spent time punching numbers into PCBWay. If I remember correctly, he says we get the cost of each fully assembled unit down to $2.36 if we order at least 1,000 units in one go. That’s about $2,500.

We would still need to order one more batch of prototypes. At full price, I expect that would be 20 prototypes for a little over $200.

That’s pretty reasonable. We’d need some sort of packaging. We need to buy shipping materials. Even so, I would think we could list them in the store for $12 or so. That’s not bad!

This is risky. What if our container falls of the boat on the way over from China? What if $2,500 get confiscated at a border crossing? What if nobody buys them, and I find a box with 973 OoberLights Micro boards in my closet in 2035?

If you’re placing a $2,500 order every month, and one goes wrong, that isn’t going to be the end of the world. If our first big batch goes wrong, the whole project is probably in big trouble!

How much will it cost with a LumenPNP?!

The printed circuit boards are cheap. They were only a little over a dollar each when we ordered 20. They’ll get even cheaper as quantity goes up, but for the sake of this post, I will just that they’re going to cost us a buck.

What if I buy reels of WS2812 LEDs? What if I run my own pick and place machine? How much will each OoberLights Micro board cost?

Here’s the lazy and naive answer. It is $2.18 per board. That doesn’t include the cost of the LumenPNP. That doesn’t include labor. That doesn’t include the time and energy it will take me to assemble and learn how to use the LumenPNP. That’s just the cost of components, and I’m just taking a guess at how much the boards will cost from PCBWay.

I don’t have a value to assign to the labor

I have no real idea of how much time I will have to spend in front of the pick and place machine. The first few times running the machine will be rough. Then it will get easier. Then it will eventually become an easy, normal process.

No matter how efficient I get, even if you value my time at minimum wage, I don’t believe it will be possible to match PCBWay’s price per board of $2.36.

And that first batch of boards that we make in house is going to be expensive! We will have to amortize the cost of the $1,145 LumenPNP kit over quite a few batches before it pays for itself.

The LumenPNP would help us minimize our risk

This is another thing that is difficult to assign any sort of dollar figure to. What are the odds of receiving 1,000 dead OoberLights Micro boards in our first batch? Are they going to fall off the boat? What are the chances that we just can’t sell 1,000 boards?!

Here’s what I do know.

We could actually make a single assembled prototype board for about $3.00 with the LumenPNP! How awesome is that?!

We don’t have to buy 1,000 fully assembled boards to get down to a good price point. We could instead make dozens of OoberLights Micros at a time.

The LumenPNP seems to be a lot less risk. If this all winds up being a horrible idea, I would much rather have a LumenPNP and $200 of unused Neopixels on my hands than 1,000 OoberLights boards that nobody wants. I could always sell the LumenPNP and the unused Neopixels to recoup some of our money!

The LumenPNP will make us more flexible

A small batch of unpopulated PCBs from PCBWay takes a week or two to arrive. A small batch of fully assembled OoberLights Micro boards took about six weeks to arrive.

What if we decide to add or remove a ring of LEDs to make a bigger or smaller OoberLights board? If we are assembling the boards in house, we can have the prototypes ready in two weeks, and if they work well, we can just start populating PCBs and have them in our store the same day.

If we don’t have a LumenPNP, we’d have to wait at least 6 weeks just for the prototypes. Then when we see that they work, we’d have to spend another $2,500 to buy the first 1,000 boards. Then we’d have to hope we can actually sell them!

I have been starting a lot of sentences with the word “then.”

Things get even better once we have three different size OoberLights boards. As stock runs low on each part, we can just produce the ones we need. We won’t have to order 1,000 at a time. We can produce just a few dozen at a time.

The LumenPNP comes with its own risks

What if I can’t manage to assemble the kit? What if I am unable to calibrate the thing and get it picking and placing? What if I can’t figure out how to get some sort of reflow oven going?!

The LumenPNP is an overgrown 3D printer. I’ve assembled enough 3D printers that I am confident this won’t be too much of a challenge.

A pick and place has a lot in common with a 3D printer or CNC router. I will be genuinely surprised if I can’t puzzle this thing out, and if I can’t, I’m sure I can find some help!

What about more expensive industrial pick and place machines?

When I mentioned that Stephen says the LumenPNP can place 500 components per hour, a friend of mine pointed me at the Neoden 3V Advanced saying that it was ten times as fast for only eight times the cost!

The Neoden is definitely faster, but not my such a large factor. The Neoden can only do 5,000 components per hour without vision. With vision, the maximum speed is 3,500 components per hours, but the recommended speed is 1,000 components per hour. That’s only twice as fast as the LumenPNP.

Let’s just ignore the fact that I can’t afford an $8,000 machine just for this project, and lets just make the assumption that Stephen’s 500 component per hour number is pushing the LumenPNP as hard as the Neoden 3V Advanced would be pushing itself at 3,500 CPH.

Our OoberLights Micro boards only have 21 components. What if we fit a panel of 50 units in the pick and place at the same time? It would take a little more than two hours for the LumenPNP to populate those boards. The Neoden 3V Advanced might be able to do the same in around 20 minutes.

That seems too fast! If it takes me 10 minutes just to load either machine with fresh LEDs and PCBs between each job, that means the LumenPNP will be operating 92% of the time while the Neoden will be waiting for me to do work at least 33% of the time.

In my garage, it sure seems like it’d be a better value to own two, three, or even four LumenPNP machines. By the time I finish loading one and kicking off the next job, the next machine will be finishing up.

Is the Neoden 3V Advanced the right machine to be comparing to? I have absolutely no idea, but it is an inexpensive commercial machine, so it seems like a reasonable thing to look at!

What if you really do need to produce thousands of OoberLights Micro boards?

We can still farm out the work to PCBWay! Just because we can do the work in house doesn’t mean we have to.

If we start selling 100 or 200 OoberLights Micro boards each month, then it would most definitely be an awesome idea to have PCBWay make us a big batch!

Am I going to order a LumenPNP?

The answer to this question is almost definitely yes. It is Thursday as I am writing this. I am pretty sure I was completely convinced that this was a good idea when Jeremy and I interviewed Stephen Hawes on the Create/Invent podcast on Tuesday. I’ve been trying to find a good reason not to pull the trigger.

I haven’t found one yet, but I decided that I should at least wait until Monday. There’s currently a six week lead time on LumenPNP orders, so it will be two months before I get to post a blog titled I Bought A Pick and Place Machine: I Have No Idea What I’m Doing. That will be fun!

Conclusion

I wrote everything above on Thursday. It is Friday morning now, and I am about to quickly reread this before publishing. The more I talk about the LumenPNP out loud, the more convinced I am that buying one is absolutely the right thing to do.

What do you think? Are you running an open-source pick and place machine? Is your machine the LumenPNP or something else? How is it working out for you? Is it as reliable as my Prusa MK3S? Let me know in the comments, or stop by the Butter, What?! Discord server to chat with me about it!

Using the Buddy System For Off-Site Hosting and Storage

| Comments

I’ve been referring to this as the buddy system for a while, though I might be abusing the term a little. Last year, I bought a Raspberry Pi and a 14 TB hard drive for around $280. I loaded it up with my favorite cloud synchronization software and dropped it off at my friend Brian Moses’s house.

Using the buddy system for my cloud storage needs has a few advantages over Dropbox or Google Drive. I’m currently eating up about 5 TB of storage, and that would cost me $300 per year with Google, so I am already saving money. I also get to be a little extra paranoid. My data is encrypted on the client. That encrypted data is stored on an encrypted file system. The only way to access my Pi is through my Tailscale network.

I’ve been thinking a lot about the buddy system over the last year. I have a lot of things to say, so I figured it was time for a blog post!

You have to trust your buddy

Some of these problems can be mitigated, but there are so many bad things that could happen if you can’t trust your friend!

From my end of this bargain, I don’t feel the need to trust Brian all that much. There are enough layers of encryption, firewalls, and VPNs in the way to make me feel comfortable. Not to mention the fact that my data isn’t really all that sensitive. I wouldn’t leave a copy of my data sitting at someone’s house if I weren’t comfortable with a burglar walking off with it.

Brian is most definitely assuming more liability here. I could be snooping around his network. I could even be downloading illegal content and getting him in trouble with his ISP. I can imagine even worse things I could do from there.

A mesh VPN like Tailscale makes the buddy system easy

I definitely wouldn’t have gone back to hosting my own Seafile server without Tailscale. Tailscale is a zero-configuration mesh VPN. Every one of my devices running Tailscale is connected directly to each other via a Wireguard VPN connection. That means I can always hit my Raspberry Pi at Brian’s house no matter where my desktop, laptop, or phone are currently sitting.

Some of my Tailscale hosts

There are other similar offerings, like ZeroTier and Innernet, and I am certain they would handle the job just fine, but one of my favorite features of Tailscale’s service is their machine-sharing option. I share my Seafile server with my wife and with my Create/Invent Podcast co-host. Chris has a few hundred gigabytes stored up there, and having nearly unlimited storage makes it easy for Jeremy and I to share giant video podcast episodes.

To keep things secure, I configured the firewall to block everything except the Tailscale daemon’s port. My Raspberry Pi is nearly invisible on Brian’s home network. The only way to connect to the ssh or Seafile services is through my Tailscale network.

How can the host mitigate the trust issue?

I’ve known Brian for 25 years. We shared an apartment for a couple of those years. Brian knows that I won’t try to get him into any trouble.

Requiring this level of trust puts a lot of constraint on the buddy system. Wouldn’t it be nice to be able to safely widen this network up? Instead of Brian and I trading servers, it’d be awesome if we had a third acquaintance. I colocate with Brian, he colocates with our acquaintance, and our acquaintance colocates with me. We could turn it into a bit of a ring, or we could be doubling up on our off-site copies of our data.

We could host those servers in our router’s DMZ. That’ll keep our friends away from the stuff on our local network. Then we can firewall off the DMZ so only the Tailscale UDP ports can pass. Then our friends would have to use a Tailscale exit node to keep their software on the Raspberry Pi up to date, and I could definitely live with that.

Is that safe enough? Probably. Maybe. Assuming your router and firewall aren’t buggy, I imagine the only thing you really have to worry about at this point is non-Tailscale connections going out on the Tailscale port. Are you paranoid enough to worry about this?

Here’s my problem with locking this down. If your supposed friend is industrious enough, I bet they’re going to find a way to sneak out of their jail and potentially get you into trouble. If they’re going to try to circumvent your security, are they really your friend?

In any case, I think putting even a trusted friend in your DMZ is a fine idea, but I don’t think I want to put someone’s device on my home Internet connection unless I trust that they’re not going to abuse it.

Why not share a server or two?

Brian and I definitely talked about this. It would be easy for Brian to up an empty virtual machine for me and map me a slice of his NAS, and it would be just as easy for me to do the same thing.

This plan brings a little more risk along for the ride, but Brian knows I won’t be attempting to break out of my VM, and I don’t expect Brian to attempt this either.

Even so, I still decided against this. Giving me two power outlets and switch port for my Raspberry Pi and USB hard drive is easy. Brian didn’t have to set up a guest machine for me. He didn’t have to install an OS in a virtual machine. He didn’t have to set up any special networking rules. He just had to plug in my Raspberry Pi.

The Pi didn’t add much to the cost over the USB hard drive, it is easier to repair if something goes wrong, and it puts most of the burden on me. Not only that, but you can send a setup like mine to someone less skilled. I could mail a Pi and a USB hard drive to my father in Pennsylvania, and I bet he could plug it into his gear.

Is the buddy system worth the risk?

If you have a lot of data, the money you save will start adding up pretty quickly. I did a bad job accounting for when my hypothetical Google Drive storage would have crossed from $200 to $300, but I would be paying for my second year soon, and I will be ahead by more than $300. My data is growing, so I could very well be saving $400 next year.

via GIPHY

If you trust your friend, this is easy. If you had to call your friend and explain a situation about a dead body, and the first thing he’d do is ask how many shovels to bring, you have little to worry about. Your biggest risk is that a third party hacks into that poor little Raspberry Pi.

I’d bet I could trust most people I know if I stuck their Raspberry Pi in a DMZ and locked their server down to only allow Tailscale’s UDP ports out.

Conclusion

I had a lot of reasons for writing this blog rolling around in my head. The first reason being that I wanted to make sure that if any of my acquaintances asked me to host their Raspberry Pi at my house, I would be able to articulate exactly why that would be risky for me. Also, though, I wasn’t exactly certain of how I felt about the possible risks and how much effort it would be to mitigate them.

For a variety of reasons, I am not physically prepared to lock down someone else’s Pi on a VLAN in its own DMZ. If I were, I’m beginning to think that I’d be willing to do this. Maybe. Before I wrote this blog, I was completely against the idea, but I am warming up to it.

What do you think? Is it worth swapping servers with a buddy to save $200, $300, or more every single year? Is it worth accepting the risk that a friend might download dozens of terabytes of movies and force your ISP to drop you as a customer? Do you feel you could mitigate that risk well enough to not worry about it?

Let me know in the comments, or stop by the Butter, What?! Discord server to chat with me about it!

My Self-Hosted Cloud Storage with Seafile and Tailscale is Already Cheaper Than Dropbox or Google Drive!

| Comments

Back in February, I decided it was time to go back to hosting my own cloud storage again. I originally started hosting my own Seafile server back in 2013. I stopped colocating that server hardware in 2018, shut down my old Seafile server, and I wound up paying another company to use their Seafile service.

There were two problems sneaking up on me this year. I was rapidly approaching the storage limits of my hosting provider, and there was a huge chunk of my video data that I wasn’t syncing, because I didn’t have anywhere near enough space available.

In February, I took inventory of my total storage requirements. If my memory is correct, I was using right around 3.2 TB. The options for syncing that much data to a Dropbox-style are all rather costly. Dropbox was $120 per year for 2 TB of storage, and Google Drive was $100 for the same. That would have made my annual bill either $200 or $240.

NOTE: Google Drive sync only works with third-party clients. It would be more accurate for me to compare my costs to Dropbox, since that is the service I would actually use instead of Seafile. I’m OK with comparing to Google Drive pricing, though, because their prices are lower, and that makes things more of a challenge on my end!

I decided to spend about $290 for a Raspberry Pi 4 and a 14 TB Seagate USB hard drive. I dropped it off at Brian Moses’s house, and it has been chugging along without much trouble for the past 10 months.

I expected to save money, but I didn’t expect it to happen so soon!

In fact, I completely missed the point where I crossed into the black. I just had it in my head that if I had gone with Google Drive, I would have paid $200 back in February, and then I’d be having to pay another $200 after the first year was over. I knew that once I made it to February 2022, I would have paid back my initial investment and been ahead by about $110.

I forgot to take into account the fact that my data is growing. I checked earlier this month, and my Raspberry Pi’s hard drive is 41% full. That’s just over five terabytes.

Saefile Raspberry Pi Storage

NOTE: I did a bit of housekeeping and garbage collection while writing this post, but I’m still over 4 TB!

I imagine I flew past the 4 TB mark during the summer. If I were using Google Drive, I would have gotten a warning that I was running out of space, and I would have had to do some work to pay for more storage.

This means I’ve already paid for my Raspberry Pi and 14 TB hard drive, and I’ve even managed to put about $10 in my pocket!

You can’t really buy 6 TB of storage on Google Drive

At least, I don’t think you can. Even if you want to spend $300 per year on storage, they won’t let you put that much data on a single account. I’m pretty sure you’d have to do something goofy like set up three separate accounts. That would be yucky.

A Dropbox business plan supposedly has unlimited data, but they charge $20 per month per user, and there is a three user minimum. That’s $720 per year. If you have two friends, and you need to store a boatload of sync a boatload of data, that might be a good deal. It isn’t a good fit for me. I don’t have dozens of terabytes of data to sync!

Using Google Drive as my pricing benchmark seems like a good compromise. Google’s sync client isn’t great, and they don’t support Linux. Dropbox’s sync client is excellent, and it does work on Linux, but I feel like using their pricing makes my setup seem like too good a value. There are cheaper services from smaller companies, but they aren’t all that much cheaper.

Why am I using Seafile?

My Seafile server’s job is to synchronize my files. That’s just about the only feature I truly expect out of the software or rely on.

It pushes copies of every change I make to my desktop, laptop, and NAS. If this is your goal, Seafile isn’t the only game in town. Syncthing does this job very well, and is a much simpler piece of software. The last time I tested Nextcloud, it wasn’t up to the task of syncing my quantity of files, but that was 9 years ago. I expect their situation has improved tremendously in the mean time!

The Seafile client encrypts my data locally. The server doesn’t have the keys to access my files. This is extremely important to me. This keeps me safe if anyone on the Internet manages to hack into my Raspberry Pi. Nextcloud might be able to do this now, but I don’t believe Syncthing is up to the job yet.

Seafile also keeps historical copies of all my files. I have most of my Seafile libraries set to keep three months of history. A new version of every file is recorded just about every time I hit save. There are probably already 18 revisions of this blog post on my server already.

Seafile is at the heart of my backup and disaster recovery plan

The first thing my backup plan attempts to mitigate is hardware failure. Seafile doesn’t sync changes instantly, but it isn’t far off. I can save a file on my desktop, and the update will usually show up on my laptop in about 30 seconds. If I have that file open in Emacs on both machines, it will even automatically refresh itself.

If the SSD in my desktop melted right now, I could walk across my office, open up my laptop, and pick up where I was a couple of minutes ago. Nearly instantaneous backups are absolutely amazing.

My Seafile Libraries in December 2021

The next disaster I am defending against is the natural kind. What if my home office floods? What if my house burns down? What if there’s a burglar?!

If I’m lucky, I get to walk out the door with my laptop. If I can’t, there will be a full copy of all my data six miles away on my Seafile server. It would be nice to have more distance between me and my off-site backup, but I’m willing to live with this.

The last problem boils down to software failure. What if my new Emacs extensions decides to write garbage into all my Markdown files? What if I accidentally delete my home directory? What if I get hit with ransomware that encrypts then deletes all my important files?

The bummer here is that this change will be happily synced to all my computers. The good news is that history will still exist on the Seafile Pi. It’ll take a good number of clicks, but it won’t be too much trouble to restore.

My implementation of a 3-2-1 backup

What is 3-2-1 backup? It means you should have at least three copies of your data. Your data should be on at least two different mediums. At least one of those copies needs to be at a remote location.

In the old days, we usually wanted the second medium to be tape. These days, most people are happy enough making sure the second medium is just a different device. It is important to make sure that second device is out of band.

What do I mean by out of band? If your backup is to an always connected USB hard drive or a file share on your NAS, then your accidental rm -rf might delete your backup, or that piece of ransomware might take your backup right along with it! If you can see a get to a file with your file manager, it is quite likely not safe from accidents, viruses, or ransomware.

I have four copies of most of my data: on my desktop, laptop, NAS, and the Raspberry Pi. The copy on the Seafile server can only be accessed via the Seafile client using its own protocol. I wouldn’t be surprised if a dedicated attacker could exploit this connection somehow, but a random piece of malware or an accidental rm -rf certainly isn’t going to have a way to delete anything in the server’s history.

The Seafile server is six miles away.

Am I really $10 ahead? Will I really save another $300 by 2023?

This first year involved a bit of financial risk. I don’t know what sort of warranty I have on my Pi or 14 TB Seagate hard drive, but the odds of that hard drive dying are a good bit higher than zero. Having to pay for a new replacement hard drive would have set me back quite a bit on this journey.

Please don’t forget that time is money. I invested some numbers of hours of my time in February in the hopes that I will be able to save $200 or $300 each year for the next two or three years.

How much time did it take to get my Pi server up and running? I didn’t keep track, and it took me a lot longer because I was documenting the process in various ways as I was going.

If we ignore the blogging aspect of things, I will be surprised if I spend anywhere near 8 hours between installing and maintaining my Seafile Pi during the first two or three years.

It is probably important to note here that I’m comparing pricing to other services based on the storage I am actually using. I don’t have 6 TB of cloud storage. I have 14 TB. That would be more like $700 per year from Google Drive.

Should you be hosting your own cloud storage?

Most people shouldn’t. Most people fit in the free or nearly free tiers of Dropbox or Google Drive. The savings really start to become clear as your storage needs approach or exceed 2 TB.

Self-hosted cloud file synchronization isn’t exactly a drop-in replacement for a service provider. There are some advantages that I appreciate very much, but there are also a number of important disadvantages.

Dropbox is making sure your data is replicated to multiple locations. Google is making sure there are backups and redundancy. Even if that weren’t the case, they are doing work that would take you at least a few hours.

Maybe I have to do a little work, but I also know my files aren’t leaving the computers that I own. I don’t have to worry about Google restricting my files.

Dropbox’s unlimited business plan is potentially a really good value at $750 per year, but I can buy a lot of storage for my Raspberry Pi server with that $750. That could be something approaching 60 TB, and as long as those drives don’t fail, that would be $750 back in my pocket next year.

The important thing to note here is that I am quite willing to suffer through a cloud storage outage. If Brian’s 3D printer catches on fire and takes out my Raspberry Pi, I can order a new Pi and hard drive from Amazon and have it here in two days. I have a copy of the MicroSD card that I can pop into a fresh Pi in a few seconds, and I’ll be resyncing my Seafile libraries in no time.

I wouldn’t have done this without Tailscale and the buddy system

The worst part about hosting my first Seafile server was that it was exposed to the Internet. I had to watch for Debian or Seafile security alerts like a hawk. I had to drop whatever I was doing and get to work patching things when updates were available. That was a lot of work!

I’m hosting Seafile on my Tailscale mesh VPN network. My Raspberry Pi’s firewall is blocking just about everything on the Ethernet port except Tailscale, so there are only four or five computers that are even able to connect to my server.

There’s only one downside to this for me, but it isn’t a big one. I can’t use Seafile’s built-in file sharing abilities. Tailscale lets you share individual machines with other Tailscale users, and I have shared my Seafile server to both my wife and my co-host on The Create/Invent Podcast.

My Raspberry Pi is colocated at Brian Moses’s house. It is sitting underneath his Prusa MK3 3D printer, and it is connected to his gigabit Internet connection. This is essentially free for me, though I of course offered to plug a similar device into my network whenever he gets around to it.

I’m looking forward to the next year or two!

If you had asked me to implement this same setup half a decade ago, I would have been hesitant. I used to have a stack of USB 2.0 drives in a RAID 5 that I would plug into my Core Duo laptop for backups and extra storage, and those drives were more than a little flaky.

In that same era, hard drives were getting pretty awful. Every time I’d buy a stack of hard drives to build a RAID, I usually had a failed disk within the first couple weeks, and it was normal for a disk to fail about once a year after that.

Things have changed. Two of the 4 TB drives in my virtual machine server are six years old, and the other two aren’t all that much fresher, and they’re all still happy. Until we flipped the breaker to shut down Brian’s office last week to install a fancy old Wink Relay smart switch, my Raspberry Pi server had an uptime over 180 days with no weird USB errors or hiccups.

My investment has paid for itself, and I absolutely won’t be surprised if the hard drive lasts long enough to pay for itself three or four times over.

NOTE: It is important to take measures to not wear out your Pi’s microSD card. You can use raspi-config to use an overlay filesystem, which is a fantastic idea. I just made sure to disable as much logging as I can, since that’s what 99% of the writes end up being.

The math looks better if you buy a smaller hard drive!

My 14 TB drive isn’t quite the largest USB hard drive available, but it is far from the smallest. I didn’t need to go this large. An 8 TB drive would have cost less, and it would probably take me three years to fill it up, but the 14 TB drives are usually the lowest costs per terabyte. It is also better to have extra space than too little space!

The 6 TB version of my Seagate USB drive was on sale for $104 during the first week of December. That and the Pi would have cost me around $160. That’s 50% more storage for $35 less than the annual price of 4 TB of storage from Google.

Not only that, but sometimes the best computer is the one you already have. There’s an old Intel Core i3 laptop with 8 GB of ram in my closet. I could have used that instead of the Pi, and I would have saved about $55. Not only that, but every laptop comes with a built-in UPS!

You don’t have to do exactly what I’ve done. There are so many ways to accomplish the same thing! You can use a smaller drive. You can use an older, weaker Pi. You can run Syncthing or Nextcloud, or you could even use ZFS push to send backups to the Pi.

NOTE: All of this is a little weird during the current supply chain conundrum. It is difficult to buy a Raspberry Pi 4 for the price I got less than a year ago, and I have no idea when that will get better. I am particularly excited about the idea that you could build a 14 TB micro server for about 20% more than the cost of the disk. It is still neat today that you can do it for less than 33% more than the cost of the disk, but the more that gap increases, the less cool it is!

Conclusion

I couldn’t be more pleased with my off-site Raspberry Pi cloud storage server. I have convenience. I have piece of mind. I have security. I am maintaining my privacy. I’m saving money. What more could I ask for?

I only have one disappointment. I bought Pi with 2 GB of RAM for my Seafile project, but I swapped it with the 4 GB Pi from my Pi-KVM build. Neither requires more than a few hundred megabytes of RAM, and I figured I’d eventually find something else to host off-site on my Tailscale accessible Raspberry Pi server.

My Seafile Pi is using less than 300 megabytes of RAM right now, and I haven’t come up with anything to host out there. Maybe you can give me some suggestions?!

What do you think? Am I crazy for not just paying Dropbox for my sync and remote storage needs? Do you expect I’ll be doubling my investment in savings by this time next year? Are you already doing something similar, or do you have plans to build something similar? Let me know in the comments, or stop by the Butter, What?! Discord server to chat with me about it!

You Might Need A Macro Pad: The JC Pro Macro 2 Mechanical Keypad

| Comments

When I started co-hosting The Create/Invent Podcast last year, I started casually shopping for macro pads or a Stream Deck. We were recording our interviews locally with OBS Studio, and on the rare occasion that we did a live stream, we were pushing the stream to YouTube via OBS as well.

The most common and basic use for a Stream Deck here would be assigning each camera or scene in OBS to a different key, so you can focus the live stream on the right person.

My Collection of JC Pro Macro Pads

Then we started using Riverside.fm to record our interviews, and they also have functionality for streaming our interviews to YouTube. That’s when I stopped investigating macro pads, because there really isn’t much I can control while live streaming with Riverside.fm.

Then my friend and Create/Invent Podcast co-host Jeremy Cook designed a macro pad, and now I have absolutely no idea how I survived without one.

I have four of Jeremy’s JC Pro Macro pads

Jeremy has been sending me prototype PCBs since he got started, but I don’t want you to think I’ve been just getting free toys as an incentive to post about them on my blog. Jeremy has only sent me printed circuit boards. I’ve had to buy keys. I’ve had to buy keycaps. I’ve had to buy Arduino Pro Micro boards, and I’ve even physically broken and had to replace a couple of those!

The secret to acquiring cheap Cherry MX key switches and keycaps!

I’m not sure this is truly a secret. I’ve been posting cheap mechanical keyboard deals on Butter, What?! for years. Some of those mechanical keyboards have hot-swappable switches. That means you can just pull them right out of the board, and you don’t have to desolder anything.

I’ve noticed that the E-YOOSO 87-key keyboard goes on sale all the time, it has hot-swappable key switches that just pull right out, and the switches and caps are the sort that work with LEDs! At its usual $26 price tag, it is a good deal. There seems to be a coupon code every week that pushes it down under $20, and I got mine for $18. I was bummed out taking it apart, because it seems like a fine keyboard for its price.

At the price I paid, it winds up being under $0.20 per switch with keycap. The bummer is that you can’t really use all the keycaps, because each row is a different shape. You can see the problem in picture of my CNC pendant macro pad. I thought it was more important to have the letters X, Y, and Z on those keys than to have the correct shape!

If you and your friends are looking to save some money, maybe pooling together to make a handful of macro pads would be a good value! There are enough switches on the E-YOOSO keyboard to build 10 macro pads, and I think Jeremy’s pricing on the PCB is a really amazing value. Maybe you have a friend who is proficient at soldering. You could have him do all the soldering work in exchange for a free macro pad!

Who knows. I’m sure you and your friends can figure something out.

What can you do with a JC Pro Macro Pad?

You can do a lot with the sample Arduino code Jeremy has posted so far, and I imagine there will be more of that available before the Kickstarter ends. I’m pushing the limits quite a bit further, but not in a clean way that’s ready to be easily consumed.

What I’ve strung together here are layers of kludges. It is working, it is a good proof of concept, but some parts need replacing and others need quite a lot of smoothing over. I’m going to include all my code in this blog.

Before we get to how I’m doing it, here is a list of the interesting things I’ve been doing:

  • I can send commands from the PC to the pad via USB serial
  • I can update the color of individual LEDs from the PC
  • I can update the color, direction, and speed of “spinners” on the OoberLights Micro
  • I am adjusting key LEDs based on the state of their function (red for speakers, green for headphones)
  • I am changing LED colors based on the focused window title
  • I am changing key function based on active or present windows
  • Different number of button presses have different functions

In what way is all of this a hack? There’s a script I run in the background that is calling out to xdotool once a second to check window titles. There’s another script doing math on the output of the ifconfig command to show me upload and download speeds on my OoberLights Micro board.

I have the keys and knob on the JC Pro Macro set up to output oddball key combinations like control-alt-F12. I forward those keys on to a script that checks the active window title to decide which real key to pass back on using xdotool. You might turn the knob right, the pad generates control-alt-F12, my window manager passes that on to my custom script, the custom script verifies that Davinci Resolve isn’t active, so your turn of the knob sends a volume up keycode.

This is absolutely the wrong way to do this, but it is the most convenient to set up, and I can make changes to things effortlessly. I feel like the right way to do this is to set up alternate layouts on the macro pad, then just send a command to the macro pad to change layouts when appropriate. If I did that, though, I’d be flashing the Arduino over and over again.

Can you be more specific about the unique things you’re using your macro pad for?

Of course I can!

I like Jeremy’s idea of being able to have custom modes for different applications. This is similar to layers in the QMK firmware. I just didn’t want to have to remember to switch modes, so I am adjusting the keys based on window title.

Most of the time, the knob is just a regular volume knob. If I’m currently editing video in Davinci Resolve, the knob nudges the play head forward or back by a single frame. There’s also a button I can hit that toggles the knob between one frame at a time or one second at a time, and the color of the light on that key tells me which mode I’m in.

I took that a step farther with my OBS Studio keys. Those keys become active any time OBS Studio is open—it doesn’t even have to be the active window! For lack of a better idea, those keys glow red, yellow, and green, just like a traffic light. They’re pretty simple. They’re just tied to three different scenes in OBS Studio.

Controlling my studio lighting with Home Assistant and the macro pad

There’s some good home automation going on in my office. When I’m not in here, the lights are off. If I’m at my computer or in my recliner, the basic lighting turns on.

I also have video lighting at my desk and workbench. I don’t have a good way to detect when those should be used correctly, so I have to manually change to those Home Assistant scenes. I was doing this in the web user interface, but now I have it bound to my macro pad.

Home Assistant Podcast Lights

When I first set this up on the original prototype macro pad, I was using three different keys. That seemed quite wasteful, and it encouraged me to work a little harder.

I now have four lighting modes bound to a single key. If you click it once, it turns off my overrides and the automation takes over. That sets the key to a green light.

Two clicks gives me a red light and my single podcasting light, three clicks goes cyan and gives me the brightest lighting possible, and four clicks goes purple and only lights up my workbench. This is a lot like double-clicking a mouse, but I was sure to put these in the order I most use them!

The lighting overrides in Home Assistant are more complicated than I’d like them to be. It is a Node Red loop that keeps checking a global variable, and I’m setting that global variable by calling hass-cli via the macro pad.

A button to toggle between headphones and speakers

This one bums me out a bit because I don’t like doing things that the system should be able to do for me. For a long time, I used a set of JBL Elite 700 Bluetooth headphones, and for a short time I connected my Bose QuietComfort 35 Gaming headset via Bluetooth. That was automated for me. When I turned the Bluetooth headphones on, my computer switched to them. When I shut them off, my computer switched back to the speakers. Easy!

Now I’m plugging my Bose headset in to reduce latency. Now there’s no way for the computer to puzzle out whether or not I have my headphones on, so I mapped a two-handed, three-fingered key combination to toggle my audio output. Something I wouldn’t accidentally hit, but something I could hit in the middle of a video game if I decide to switch outputs.

One of the first things I did when configuring my JC Pro Macro pad was assign a button to swap audio outputs. I had no idea how much nicer this would be!

Sure, it takes two hands to put my headphones on, but it is still nice having an entire hand free while changing audio outputs. I can continue to adjust the fit of my headset. I can pick up my phone to check messages. If the game I’m playing loads quickly, I can already be mousing around the menus. It just feels better.

Not only that, but I’m setting the color of the headphone button based on the audio output. If the light is green, things are safe, and my output is going to the headphones. That means I won’t accidentally pick up speaker noise on my mic while podcasting. Isn’t that cool?!

I’m only scratching the surface with Davinci Resolve

As soon as I attached a big old knob to the rotary encoder, I knew that this had to be made to work with my video editor. I only have two functions set up here.

In the default mode, one click of the knob moves the play head a single frame. When I toggle the second mode, each click moves the play head one second. This makes it easy to fine-tune a cut down to exactly the right frame, even when the timeline is zoomed out too far to be that precise. It also allows you to spin the knob quickly to zip around at higher speed.

I watched a video explaining how to use the real Davinci Resolve keyboard, and so far I haven’t been smart enough to replicate its fancier functionality. With their keyboard, you’re able to hold a key while turning the knob to do things like move the connecting point between two clips forward or backward along the timeline.

I’d love to be able to do that, and Resolve has an extreme number of functions that you can map to keyboard controls, but I can’t for the life of me figure out how to replicate their own keyboard’s trim function!

I love my network traffic meter!

When I got the first prototype of the JC Pro Macro pad in my hands, I immediately noticed the four solder pads on the right side behind the keys. I thought it would be a neat place to wire up some OoberLights, but we didn’t have a small enough OoberLights board for that. We do now!

The new OoberLights Micro boards are about the size of the base of a Cherry MX keycap. There are three rings of RGB LEDs. The outer ring has 12 pixels, the middle ring has 8 pixels, and the center ring is just a single pixel. I think blinkenlights are cool, but what can you do with these pixels?!

I’m using a shell script, math, and my spinner Arduino code to display rotating bandwidth meters on my JC Pro Macro. A green pixel spins clockwise to show my download traffic, and a blue pixels spins counterclockwise to show upload traffic.

It isn’t perfect. I have had a bug making the pixel jump in any counterclockwise spinner when changing speed, and getting the speed right for a bandwidth meter has been challenging. I wasn’t sure what to do when there is nearly zero traffic, so they’re always spinning at an extremely slow rate. When they stand still, they look too boring!

This is most definitely just the tip of the iceberg. I have an OoberLights Micro board plugged into a Raspberry Pi, and I’ve managed to add a clean mounting bracket to my favorite 3D-printed Pi case. It won’t be long before I have network spinners and disk usage pie charts on my Raspberry Pi Seafile server!

I’m using a macro pad as a pendant for my Shapeoko CNC

This deserves an entire blog post of its own, but I want to code up some improvements first.

My Shapeoko XXL CNC machine is plugged into a Raspberry Pi Zero W running CNCjs. One of my old laptops is sitting next to the Shapeoko. That laptop connects to the CNCjs web interface, and I sometimes use the laptop to make CAM and design adjustments between cuts.

Much of the time, though, I don’t even power up the laptop. I have an old Nexus 7 Android tablet out there connecting to the CNCjs tablet interface. This works great, but you have to actually touch the screen in the correct places, and that means you have to look at the tablet.

A common thing to do is jog the Z-axis down 0.1 mm at a time until it touches a piece of paper. That’s how you know the tool is just above your material. If you’re using the touch screen, you can’t see the tool, the paper, and the button. You also can’t feel the buttons.

Using a macro pad as a pendant is fantastic. I get the tool close, choose the Z-axis, and then set the jog speed to 0.1 mm. Every click of the wheel will move the router down 0.1 mm, and it is extremely easy to feel the wheel without looking. I can keep my eye right on the tool and never have to worry about touching the wrong part of the screen!

Jeremy’s macro pad is on Tindie and Kickstarter

I’ve done a bad job, and I have been pretty slow at writing this blog post. Jeremy’s Kickstarter campaign for the JC Pro Macro 2 is already way more than half over. By the time Google search starts sending many of you fine readers in my direction, it will probably already be over!

At the time I am writing this, you can only get the 8-key version of the JC Pro Macro pad on Kickstarter. The original 5-key version is available on Tindie, but I’m sure the 8-key version will be stocked on Tindie after the Kickstarter orders have been fulfilled.

I like the original, smaller version of the macro pad. Five keys is actually a pretty good fit for use at my desk, but I’ve grown attached to using the light-up keys as functional indicators, and the original pad lacks those lights.

Five keys is probably just enough to use as pendant for my CNC router, but the extra key and the lights make it easy to see which axis I’m about to drive and just how fast it is going to move.

Conclusion

I don’t really have a conclusion. I feel like I’m only just scratching the surface of what my macro pad can do for me. All my software is a hack, and I’m slowly working on reining that in to make things a little less wonky.

I’ve gotten a little derailed from the macro pad stuff by our OoberLights Micro boards. You can’t imagine how excited I am to see an actual, working, spinning bandwidth meter attached to my macro pad.

What do I really want to know? I want to know what you think! Are you using a macro pad or the Stream Deck? Which macro pad are you using? Does the JC Pro Macro look like a good fit for you? Is there a better macro pad I should be using?! Let me know in the comments, or stop by the *Butter, What?! Discord server to chat with me about it!

Self-Hosted Cloud Storage with Tailscale and a Raspberry Pi: Six Months Later

| Comments

I’ve been using Seafile for my cloud storage and sync needs for more than eight years. I spent quite a few of those years hosting Seafile on my own colocated server, then I outsourced the hosting to a third party, until six months ago when I brought the operation back in house.

I’m not new at this. As expected, I didn’t have any real problems. Things are certainly built on a more fragile foundation this time, but reliability has still been great.

Eight years ago, my Seafile server lived in a datacenter in downtown Dallas with redundant links to the Internet. I don’t remember how fast those connections were, but they were faster than the gigabit Ethernet adapter in my old 1U servers. My server was built like a tank, had redundant power supplies, and my data lived on a small RAID 10 array.

My new Seafile server is a Raspberry Pi 4 with a single 14 TB USB hard drive, and it lives on my friend Brian’s home network. He has a symmetric gigabit fiber connection from Frontier. I have the same ISP, but I have a 200-megabit symmetric fiber link.

There’s only been one unexplained hiccup

Sometime in my new Seafile server’s first month of service, it completely disappeared. I couldn’t ping it. The Tailscale admin interface said it hadn’t seen it check in since the night before. Brian couldn’t ping it, but that’s to be expected, because just about everything on my Seafile server is blocked on the local interface. Including ICMP packets. The only way in is via Tailscale.

Brian power-cycled it for me, and everything came right back up. It hasn’t happened again since.

In an effort to keep my Pi’s microSD card going, I have disabled just about everything that writes to the root file system. This includes disabling just about every ounce of logging, so even if there would normally be a trail to follow, I wouldn’t have anything to look at.

I have to manually restart Seafile when there’s a power outage

My Raspberry Pi isn’t plugged into a UPS at Brian’s house. If the power blips, my Pi reboots.

The root file system isn’t encrypted, so Linux boots back up without a problem, and it immediately connects to my Tailscale network. The 14 TB external hard drive is encrypted, and it needs me to enter a passphrase to unlock it. If there’s a power outage, I have to ssh in and run a script that mounts the encrypted file system and starts Seafile.

This should happen less often now, because Brian invested in a Tesla solar and Powerwall setup. If there’s another outage any time soon, I will be quite surprised!

Why am I hosting my own cloud storage and file-sync service?

First, there’s the problem that I’m running Linux. Google Drive doesn’t have an official sync client, and Dropbox has been doing goofy things with their Linux client.

Then there’s the paranoia factor. In almost every IT department I’ve ever worked in, I have had the ability to read your email. I’ve never wanted to, and I always thought it was creepy when management wanted to check an employee’s email history. In every one of those IT departments, there has always been at last once person that was EXCITED to tell you that they can read your email. They thought it was awesome.

Last time I checked, Dropbox has the ability to decrypt your data. I have no idea how Google Drive works. These are big companies, and my brain immediately imagines the clones of my old coworkers that are excited about being able to poke around in our data. If you saw the glee in their eyes, you wouldn’t want them nosing around in your files.

Then there’s cost.

Let’s talk about cloud storage pricing!

I’m currently up at 4.4 TB of data on my Seafile server. That includes my data, my wife’s data, and some episodes of The Create/Invent Podcast. Well over 3 TB of that data is my own.

Google’s largest storage plan is 2 TB for $99.99 per year. I don’t think they’ll let you stack two plans to get to 2 TB, but if they did, I guess it would be $200 per year.

Dropbox’s individual plans are 2 TB for $119 per year or 3 TB for $199 per year. I don’t fit into either of these plans, but at least I am close!

I can move up to a Dropbox business plan, but the minimum number of users is three. That puts it at 5 TB for $450 per year, or you can pay $720 for unlimited storage.

How much did I pay for my Raspberry Pi and 14 TB hard drive?

The 14 TB USB 3 hard drive cost me $230, and a 2 GB Raspberry Pi kit cost me $54. That’s less than $300.

NOTE: I cheated a bit here! I had a 4 GB Raspberry Pi 4 here as part of my Pi-KVM kit. The whole Pi-KVM setup only uses about 200 megabytes of RAM. Seafile fits quite nicely in 2 GB of RAM, but my Seafile Pi is up and running 24/7, and it is located off-site. I figured I may as well put the 4 GB Pi out there, since there’s a chance I might decide to host something else on there!

Addendum to the note: I took a peek, and my Seafile server was using 1.8 GB of RAM after about six weeks of uptime. I restarted Seafile a few days ago, and it is sitting at around 300 MB of RAM. There must be a leak of some sort. If you’re on a small Pi, you might want to schedule Seafile to restart every once in a while!

I’ve been using Google’s storage pricing for arithmetic that justifies my choices because they’re a little cheaper than Dropbox. I am aware that Google won’t actually let me stack a pair of 2 TB plans onto my account, and I’m mostly ignoring the fact that I am well on my to needing more than two plans’ worth of storage.

I am six months into my experiment, and the gamble is well on its way to paying off. Not having to pay Google has saved me $100, so I am more than 1/3 of the way to paying off my hardware.

Comparing self-hosted to Google Drive or Dropbox is difficult

If you sign up for Dropbox, you don’t have to do any real work yourself, and that is awesome. You just install their client, and everything starts syncing. It is absolutely fantastic, and this has a HUGE value!

Then you read stories about people getting locked out of the Google accounts. Sometimes it is an absolute nightmare getting things straightened out. I don’t know how to measure the risk of losing my data to something like this, but I’d imagine it is infinitesimally small.

I am quite confident that having to fight to get my Google account turned back on even once would feel like it cost me hundreds of dollars of time, effort, sanity, and frustration.

We hope that Google and Dropbox are doing a good job replicating our data, but it is pretty opaque to us. We have no idea what is really going on up there.

I know for a fact that my Seafile server has no redundancy. Even so, that server is an integral part of my backup plans. Seafile is configured to keep all my data for 90 days. If I save a jpeg 20 times today, each version will be available on the server—assuming I’m not saving faster than the files can sync!

I know that safety net can disappear instantly. The most important data on my Seafile server is synced to my desktop, my NAS, and my laptop. If the Seafile server disappeared right now, I would still have three copies of that data. The NAS even has a few snapshots.

I don’t have three copies of all my data outside the Seafile server. The video I regularly record is just too big to fit on my desktop’s SSDs or even my laptop’s second hard drive. I sync the current year’s video files to my laptop, but the previous several years just won’t fit. I’m keeping it simple here, but this paragraph could easily be turned into a 1,500-word blog post.

I might be giving up on RAID

Maybe. Sort of. What I’m really going to be giving up on is the centralized file server. I’ve been slowly working toward this for at least the last eight years, but the tiny SSDs we had back then were holding me back, and I really did need bigger volumes than a single hard drive could give me, so I needed to build RAID 6 or RAID 10 arrays.

Things are different now. I can easily fit a year’s worth of the content I generate on a single SSD. My laptop is pretty beefy, so it has room for an NVMe drive along with a 2.5” hard drive.

There are four hard drives in my server. I bought them a long time ago, so they’re small, but they cost $150 each. Today I could shuck two 10 TB drives to stick in my server and desktop, and grab a 4 TB or 5 TB 2.5” drive for my laptop. Then I could sync every bit of my data to three different drives on three completely different machines in my house, and I’d still have a fourth copy with full history on a Raspberry Pi off-site.

I enjoy the idea of replicating my data almost instantly among a redundant array of inexpensive computers.

It is nice that I don’t have to move entirely in one direction. I’m straddling the fence between centralized and decentralized storage today, but the drives will start failing as my NAS ages. When they do, I’ll likely just find myself accidentally sitting fully on the other side of this fence!

I’m using the buddy system for my off-site backup and storage, and so should you!

Every good backup plan includes backing up your data at a second location. More locations would be even better, but I’ll settle for just the one.

There’s a copy of my data on my NAS, desktop, and laptop. If I drop the laptop, I won’t lose anything, but if the house burns down, I’d be in big trouble! That’s why my Seafile server is hosted on a Raspberry Pi at Brian Moses’s house.

Uptime isn’t critical. If the power went out at Brian’s house for a few days, that would be OK. If either of us were having issues with our Internet connections, that would be fine. I don’t need to spend extra to host my Seafile service in a real datacenter with redundant connections to the Internet and on-site power generation.

My little Pi server is sipping about as much power as a 100-watt-equivalent LED light bulb, so I’m not much of an imposition. I’m also more than willing to return the favor.

You should think about finding a buddy to swap Raspberry Pis with, but it should definitely be someone you trust not to exploit your Internet connection for nefarious purposes!

Having cloud file syncing is living in the future

In the old days, if you wanted to share files, you would use a centralized file server. Everyone working on a project would map a share on that NAS, and they’d access the files on that remote machine. If that server lived on the other side of the world, it might feel quite slow working with the files. It might only take a few extra seconds to open a document or spreadsheet, but working with a remote database might be quite slow.

When using a sync service, every time a file is changed, that change is pushed to your local machine. When I am editing video files for The Create/Invent Podcast, they are already on my local SSD, so I am always editing a local file. All the video files are on my desktop and laptop, so I can work on them anywhere. Even if I’m on a slow 3G cellular connection.

Most of the work I do, like this blog post, is stored in text files, and I commit those files to Git repositories. The trouble with this is that I have to remember to commit my changes. Sometimes, those changes aren’t really ready to be committed and pushed to the server.

If I forget to push my changes, and I walk out the door with my laptop, it can be challenging to continue my work. Tailscale will let me easily sneak back in to fix this mistake, but what if I don’t have Internet access on my laptop?

This used to be a pretty common scenario, but I’m rarely completely without an Internet connection. With Seafile, I don’t have to worry. My laptop is up and running right now. As long as it takes me at least 30 seconds or so to walk away from my desk and pack up my laptop, this blog post I’m working on right now will automatically be synced to my laptop. I can ride to the park, open my laptop, and I won’t have to wait to work.

I couldn’t have done it without Tailscale

I realize that I’m repeating a lot of what I already said six months ago. I’m trying to emphasize the most important bits while adding as much new information as I can. One of those important bits is Tailscale.

I stopped hosting my own Seafile server because I was sick of rushing to keep my software updated. If a security flaw was patched in Nginx or Seafile, I had to rush as quickly as I could to get my server updated. It was sitting out there facing the entire Internet. Anyone could be poking at it.

I was already using Tailscale for a few months before I decided to host my own Seafile server again. I knew I wasn’t going to put the new server on the Internet. I knew it was going to only be accessible on my Tailscale network.

Tailscale is a zero-config mesh VPN. You install the Tailscale client on two or more machines, log into your Tailscale account, and all those machines can talk directly to each other over point-to-point Wireguard VPN connections. Tailscale is ridiculously easy to set up, it is reliable, and the pricing is fantastic for us home users.

My Tailscale machines can talk to my Raspberry Pi no matter where they are located. My Seafile server is at Brian’s house in Texas, while I could be on hotel WiFi in New York with my phone connected to T-Mobile 5G. All three machines can ping each other directly.

Tailscale also lets you share machines with other Tailscale users. My wife has her own Tailscale network that includes her laptop, desktop, and phone. I’ve shared my Seafile server and our Home Assistant server with her. She can sync all her files, and she can check the thermostat when she’s away from home. How cool is that?!

I’ve also shared my Seafile server with my Create/Invent Podcast co-host, because neither of us have enough spare room on our Google Drive accounts to hold much more than a single episode of the show. I just export my work, it lands in our shared library, and it starts syncing right away.

Conclusion

Should you be hosting your own cloud storage and cloud sync service? Maybe. Especially if you have to store and sync more than 2 TB of data. Don’t forget that your time is valuable, and setting up a Pi and keeping all your software up to date will add up to at least several hours. Maybe you’ll find that tedious, maybe you’ll find it enjoyable.

I wholeheartedly believe hosting my own Seafile server on a Pi using Tailscale was the right choice for me. My Pi’s hard drive is encrypted. Seafile encrypts every block on the client side. My network traffic is encrypted with Seafile. I know my colocation provider has no interest in breaking into my stuff.

I am saving money. I’ll be saving more money as my storage needs keep growing. I’m pleased with my increased level of privacy.

What do you think? Did I make the right choice by hosting my own cloud storage and sync? Should I be spending $450 per year on Dropbox instead, or did I make the right choice spending about $280 on this hardware? Let me know in the comments, or stop by the *Butter, What?! Discord server to chat with me about it!

CloudFree Smart Plugs Run Tasmota and Monitor Power Use

| Comments

Brian snagged me a handful of the original CloudFree smart plugs for Christmas. I immediately opened them up, attached them to my network, and I put various lights around my office under the control of Home Assistant.

The exciting thing about the CloudFree devices is that they don’t require the servers in the cloud to operate. They arrive at your door preloaded with the open-source Tasmota firmware. You just have to configure them with the hostname and credentials of your Home Assistant server, and they will automatically be detected.

I wanted more, but I was bummed out that they were out of stock.

They’re in stock now!

When we talked to Kenny from CloudFree on The Create/Invent Podcast, he told us that the version 2 plugs are a huge upgrade. He’s discontinued the original switches, and he was waiting patiently for a big shipment of the new switches to arrive from overseas. They’re shipping now, and I’m quite excited.

The new switches cost a bit more, but I think they’re worth it. They’re rated for 15 amps instead of just 10. They have power monitoring just like a Kill-A-Watt power meter. Their new form factor also allows you to plug two plugs into the same outlet.

What am I doing with my six CloudFree smart plugs?!

My own Home Assistant setup is still quite dumb. I’m collecting lots of data, but I haven’t automated anything yet. It is currently just a glorified remote control with zero automation.

I’m hoping to use the power monitoring to help in automating my Rancilio Silvia espresso machine. If it is drawing power more often, that means I’m making a latte. I should be able to use Node Red to use that information to create a virtual sensor in Home Assistant that keeps track of the last time I made coffee.

The idea being that I can automatically power down the espresso machine an hour or so after using it. Then Home Assistant can power it back up when I wake up the next day. Figuring out when I’m awake will be its own can of worms.

Bonus feature of the CloudFree v2 smart plug

This doesn’t seem terribly surprising, but I was excited when I realized that you don’t need any home automation infrastructure or even a WiFi access point to connect to in order to make use of the CloudFree plug’s power metering.

An unconfigured Tasmota device announces itself as a WiFi access point. You connect to that access point with a phone or computer to configure the plug. You would normally put in your home’s access point name and password, then you might put in the information to access your Home Assistant server.

CloudFree v2 Smart Plug user interface

The main page of the web interface shows power usage details. Just about everything you might use a Kill-A-Watt meter for is on this page.

How awesome is that? I might have to keep one of these in my laptop bag. Not only can you meter power, but you can of course still toggle the switch over WiFi. Have you ever had to holler across a building to have someone power cycle a device for you?

Power metering isn’t configured optimally from the factory

This isn’t a big deal. The plugs use Tasmota’s default telemetry reporting settings. That means they send data to Home Assistant every 60 seconds.

When I installed my first CloudFree plug on my Rancilio Silvia, it didn’t seem to be reporting any information at all. Then I noticed the kilowatt hour meter was indeed slowly climbing. The trouble was that my espresso machine’s heater doesn’t run long enough to be active when data is uploaded to Home Assistant.

My quick Google-fu told me to change the TelePeriod setting. The minimum is 10 seconds, and this certainly did the job. I was seeing my espresso machine jump to 800 watts every time it turned on.

This worked, but it wasn’t the correct answer. Adam from the Local Bytes store told me to check out Tasmota’s PowerDelta setting. This doesn’t use a timer. Telemetry is sent to Home Assistant whenever the power usage increases by a set number of watts. I set mine to 5 watts.

Now there is almost no delay between the espresso machine heating up and Home Assistant knowing about it.

What’s next?

Kenny Stier from CloudFree told us how he uses the power metering to make his deep fat fryer smarter. He is able to power up the fryer from his phone before he heads home, and the power metering on the CloudFree smart plug lets Home Assistant tell him that the oil is up to temperate. That’s pretty slick!

I’m going to work on putting together the last few pieces of my own puzzle here. In my old OpenHAB setup, I used a combination of data to determine whether I was sleeping or not. Are my computers idle? Is my phone charging? Has the Fire TV been used in the last hour? Is my phone screen off? Is my phone at home? If all of this was true, I was probably asleep.

My charging habits are a bit different these days, so I’m going to need to figure out how to determine when my espresso machine needs to turn on in the morning. Once I do that, I’ll just need to figure out when to have Home Assistant turn it back off.

What do you think? Are you using power metering to aid in your home automation actions? Are you using Tasmota? Are you flashing your own plugs, or are you paying a few extra dollars to let CloudFree do it for you? Let me know in the comments, or stop by the Butter, What?! Discord server to chat with me about it!

GVM RGB20W On-Camera LED Video Lights

| Comments

I’ve only had my GVM RGB20W light for a day or so. I don’t have a ton to tell you about it, but as soon as I got the light in my hand I was able to answer a question that didn’t seem to be asked anywhere on the Internet. That seems like a good enough reason for a quick write-up.

Let’s just get that question out of the way. How do they get a high CRI rating out of RGB LEDs?!

The answer is that they don’t. There are three sets of LEDs in here: daylight, warm, and RGB. When in correlated color temperature (CCT) mode, the daylight and warm LEDs are mixed to provide the correct color temperature. When in RGB mode, the daylight and warm LEDs go dark.

When they say this is a 20-watt light, I am assuming the total output at 100% in either mode reaches around 20 watts. So it should be a 20-watt bicolor LED in CCT mode or a 20-watt RGB LED. Maybe. Probably.

What am I doing with the GVM RGB light?

I didn’t actually set out to buy this light. My friend Brian Moses wanted one of these lights, but they come in packs of two at Amazon. He asked if I wanted to split a pack, and I said sure.

For around $125 you get two lights, two 9-volt power supplies, and two mediocre light stands. I think it was a pretty reasonable value.

NOTE: Twitter’s compression demolishes the video quality, but at least I can still tell that the lighting is better!

Ever since signing up to be co-host of The Create/Invent Podcast, I have been trying my best to improve my video recording setup here at my desk.

I was bouncing a random 100-watt quivalent LED bulb in an IKEA Tertial arm lamp off of a card then onto my face. This left me looking a bit green, so I upgraded that to a 100-watt equivalent high-CRI Cree bulb. That helped a lot with my white balance, but my camera still needed to correct towards magenta.

The GVM light is most definitely an upgrade. I’m struggling a bit trying to figure out where to mount it and how to diffuse it, but the white balancing my Sony ZV-1 with a gray card is working great. It isn’t pushing towards magenta at all. It is dead center, and that is fantastic.

I really wanted a fancier light

I was eyeballing the much more expensive GVM 80-watt chip-on-board (COB) light with a soft light dome for $160. Mostly because I really want a nice light dome.

I just can’t use something like that at my desk, and this is where I need to be to record episodes of The Create/Invent Podcast and The Butter, What?! Show.

The body of the big GVM light is probably 8” to 12” deep, and the dome is another 18” or 24” deep. There’s just not enough room between me and the wall for that light.

Even if I could squeeze it in, I would have to take it down between shoots, and I really want something more permanent. I would feel uncomfortable with that giant light dome looming over me while I’m working.

Is it really 20-watts?!

I can’t tell you for sure. I don’t have equipment to measure this.

Here’s what I can tell you. The Cree bulb I’m replacing claims to be an 18-watt bulb, and Cree is a reputable LED manufacturer.

The GVM light definitely seems brighter, so I have no reason not to believe them. It is probably a 20-watt light.

Conclusion

I don’t have a ton to say. It seems like the GVM RGB20W is a fine video light, but I haven’t used it long enough to tell you much else.

Are you using the GVM RGB20W video light? Are you using other lights from GVM? Did I make a good choice with this light? Should I have bought something completely different? Let me know in the comments, or stop by the Butter, What?! Discord server to chat with me about it!