ThinkTank FPV Airport Helipak - Should You Spend $200 on a Drone Backpack?

| Comments

I spent $200 on a backpack for my quadcopters. Well, more accurately, my wife spent $200 on a backpack for my quadcopters. Is it a dumb idea? What was wrong with the old $13 tactical backpack? Wouldn’t it be way more fun to spend that $200 on another racing quad?

I just asked a lot of questions. I asked myself all these questions and more when I was shopping for a backpack upgrade, and I bet you’re asking these questions, too.

Most people shouldn’t spend $200 on a backpack

It was not a dumb idea. It has been one of the biggest upgrades to my flying experience—I’ll go into more detail shortly. There was nothing wrong with my $13 30-liter tactical backpack.

If you’re just starting out, don’t buy a $200 bag. Aside from some trouble with one of the zippers, my inexpensive tactical backpack from eBay is still working well. I passed it on to my nephew when we gave him a BFight 210 for Christmas. I’m sure he’ll get tons of use out of it.

My 30 Liter Tactical Drone Bag

I used that backpack for eight or nine months, and it served me well. I could cram a lot of stuff in and on the bag: a dozen batteries, an assortment of tools, lots of spare props, a couple of micro quads, and two or three 5” racing quads.

If you don’t currently have a solution for carrying your drones, you can’t go wrong with everyone’s favorite tactical backpack. It is extremely versatile, but I wouldn’t buy it again. The AmazonBasics DSLR backpack is better suited to carrying FPV quads and gear.

If you already have a backpack, and you’re happy with it, I think you should stick with your current solution. The best bag might be the one you already have. Spend your $200 on a Furibee Fire Dancer or BFight 210 instead!

What I was looking for in a quadcopter backpack

All the FPV content is on YouTube, so I end up watching lots of videos. When you watch these videos, you’ll see folks using these giant backpacks. When they open them up, all their gear is right there. All ready to be used.

With my tactical backpack, I had to unpack quite a few things before I could start flying. That unpacking takes about three minutes, and I end up having to spread my stuff out. I had to unstrap two quads, pull out my battery back, then pull out my Taranis case.

That sounds easy enough, but then I still have to unpack my Taranis and goggles from their case before I can even start powering things up.

Packing everything back up takes more time than unpacking.

My Quadcopter Stuff Sprawled Out On A Picnic Table

I wanted a backpack that I could set down on the ground next to my chair. Then I could just unzip it, open the flap, sit down, and start pulling things out as I need them. Everything should have a home in the bag, and I should be able to drop stuff back in its slot when I’m not using it.

There are three popular bags that seemed like they could meet my needs: the Lowepro QuadGuard BP X3, the BetaFlight Hive, or the ThinkTank FPV Airport Helipak. You already know which one I picked, so lets talk about why I eliminated the other two options.

Why not the Lowepro QuadGuard BP X3 or Betaflight Hive?

I had one major problem with both these bags. They expect you to strap your quads to the back of the bag. I think this is problematic, because when you open the backpack, the back becomes the bottom.

That means you might have to unstrap all your quads before you even get started. I really wanted to avoid that.

I like the Betaflight Hive’s dedicated compartment for your transmitter, but you’re out of luck if you use a Spektrum radio.

The Betaflight Hive has a really cool tool holder that pops out of the bag. This looks like a nice touch. Unfortunately, they used several rows of elastic straps, and everyone seems to think it is a pain to get your tools back into the straps.

I don’t like the Lowepro BP X3’s solution to transmitter storage. It is well thought out, but you end up storing your quadcopters on top of your transmitter. That means you have to take your quads out of the bag to get to the transmitter.

This made me realize what my goal actually is. I want to avoid having my gear in a last-in, first-out situation.

With my old tactical backpack, I had to unstrap my quads to get to my batteries, and I had to unload my batteries to get to my transmitter.

The ThinkTank FPV Airport Helipak

The ThinkTank bag is as big as its name. It is ginourmous. It is so big that you can easily fit three 5” quads inside in the bag’s default configuration. In fact, I was able to fit every single thing that was inside or strapped on my tactical backpack inside the Airport Helipak and I still had room to spare!

My ThinkTank FPV Airport Helipak Hanging On My Door

As its name implies, the ThinkTank Airport FPV Helipak just barely fits under the size limit for carry-on bags. I must admit that I only checked the airlines that I’m likely to use. It will be allowed on United or American Airlines flights, and Southwest allows even bigger carry-on bags. I assume this is the reason the word Airport is included in this bag’s long name.

This bag works differently than the Lowepro X3 or Betaflight Hive. The Helipak opens like a normal backpack. There’s plenty of room to strap two or three quads to the back of the Helipak. You’ll have to come up with your own solution for attaching them—I use loops of bungie cord.

I thought it would be a bad idea to strap quads to the back, since they’d get in the way when you want to open the bag. I have gone out to the field with one quad strapped to the back, and it isn’t a problem. You can open the bag with the quad still attached. It would be difficult to run out of room for quads in this bag!

What fits inside?

An exhaustive list of every item in my bag would be long and uninteresting. Here’s the important stuff that I’m currently carrying.

The ThinkTank bag has a tripod strap on each side. It seems to be the same design that they use on their camera bags. I have a tripod with a FauxPro action cam on one side, and I have my 4” racing drone on the other. The 4” drone would fit in the stack of quads on the inside, but I rarely fly it, so I didn’t want it to be in the way.

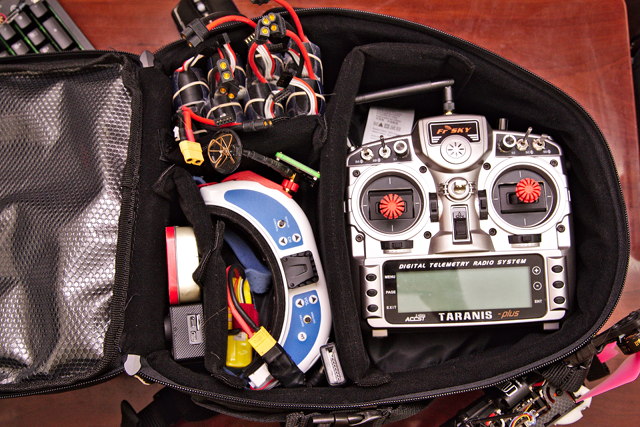
My ThinkTank Backpack Loaded With Stuff

As you can see from the photo, almost all of this gear is easily accessible. You never have to pull one item out to get to another. The Taranis X9D Plus fits on its side. One of the compartments will fit four rows of 3 batteries, and it is tall enough to make that stack two batteries tall. I’m excited that I can fit 24 batteries in here without reconfiguring anything!

Everything is quickly accessible except for the quads. The drones are stacked on top of each other, so if you want to fly the quad on the bottom, you need to take all the others out. If I have a complaint about this bag, this is it. Thankfully, it is a very minor complaint and it rarely impacts my flying.

I make sure my quads are stacked in the correct order. The one I want to fly is on top, and my worst backup quad goes on the bottom. This seems to be a reasonable arrangement.

The only thing that goofs this up is the 6” quad. With my configuration, the props don’t actually fit in the slot I have for my drones. The frame fits, though, and the Hyperlite Floss 2 frame isn’t much taller than the props. I just stick the 6” on top with the props sticking out past the dividers. This works well, but I always have to pull this drone out of the bag.

What’s in the lid?

There is another zippered compartment on the lid. It has room for a 15.6” laptop, and there are a few small compartments in there.

I rarely bring a laptop out to the field, but I could see this being quite useful when traveling. I don’t like to keep important things in this compartment, because it is more difficult to access once the bag is already open. I tend to drop things on the inside of the lid when I’m flying to make sure I don’t lose them.

I made sure to put important tools that I use every day inside the main compartment. I put the tools that I only use once in a while, like my XT60 soldering iron, in the laptop compartment. So far, I’ve reattached and ESC wire on only two occasions.

What if I don’t want to put my quads inside the bag?!

I’m happy to carry my quads inside the bag. It keeps them out of the way, and they don’t get snagged on anything when you’re unloading your bag from the car. If that’s not your thing, or you just need to fit even more stuff inside your bag, the ThinkThank Helipak has you covered.

Each side of the bag has a pouch on the bottom and a strap on the top. These are made for carrying tripods—it is obvious that ThinkTank is a camera bag company! I have no trouble using these straps to carry extra 5” or 6” quads. In fact, I carry a 4” quad using one of these straps.

There’s also a series of loops running down each side of the back of the bag. I needed to carry an extra BFight 210 to the field one day, and I was out of room everywhere else. I tied some short lengths of ¼” Bungie cord loops to the top pair of fittings, and I was able to hook one motor into each loop.

ThinkTank FPV Airport Helipak with a 6 Inch Quad

In a pinch, I think I would be willing to pack three quads on the back and one on either side of the bag.

I was worried about carrying drones on the back of the bag. In my opinion, the biggest drawback to the Lowepro QuadGuard and Betaflight Hive is how the back of the bag becomes the bottom of the bag when you have to open the lid. That means you have to remove all your quads from the back before opening it.

Wouldn’t you have the same problem with the ThinkTank Helipak? Even though the back is the lid, won’t you still have to remove all the quads to comfortably open the bag?

To my surprise, I didn’t have to. I just flopped the bag open, and the BFight 210 was resting comfortably on the ground. I didn’t have to worry about it, because the whole weight of the backpack wasn’t resting on the quad.

Some nice touches

ThinkTank did a great job designing a backpack with the FPV quad pilot in mind. The internal compartments are quite configurable. I took two dividers out, but I left everything set up very much like it came from the factory.

I moved some of the dividers to make some of the compartments have a snug fit, and I made the compartment for the quadcopters a little bigger. My pair of stretch-x OwlRC Dragon frames were a little long for the stock configuration. The props rub a bit on the way in, but it doesn’t take much wiggling to get them in place.

How Did This Get Here?

The entire top half of the bag has elastic tool holders all around the sides and the floor, and all of the larger removable panels have the same elastic tool holders as well. I have all sorts of wrenches, drivers, and antennas stuck in those holders. ThinkTank has done a fantastic job at making sure I’m not wasting any space.

Velcro is your friend

The rough, hook side of Velcro sticks to the inside of camera bags. This should be obvious, because all of these big FPV backpacks are just overgrown camera bags, and all their dividers connect using Velcro.

If you want to stick something to the side, all you need is some stick-back Velcro tape. So far, I only have a couple of battery checkers stuck to the wall of my battery compartment. I’m sure there are other neat things I could be sticking to the walls.

Cheaper alternatives

I’ve been quite happy with my $13 tactical backpack from eBay. I kept my Fat Sharks and Taranis X9D in a Turnigy transmitter case, and that Turnigy case just barely squeezed into the big compartment of the backpack. There is plenty of room left over at the top of the compartment for a big battery bag. There are tons of places to strap drones to the outside, and plenty of pockets left over for props and micro drones.

My Turnigy Goggle and Transmitter Case

Now that I’ve experienced the ThinkTank FPV Helipak, I wanted to find a better budget bag. Something that provides many of the same features, but at a fraction of the price. I think I’ve found that bag.

My favorite alternative is the AmazonBasics DSLR backpack. It is priced at $27 with 2-day Prime shipping. That’s about what I paid for my cheaply made tactical backpack and Turnigy radio case, but it does the job of both!

The AmazonBasics backpack probably achieves 80 percent of my goals at around 15 percent of the price of the ThinkTank FPV Airport Helipak. The AmazonBasics bag is much smaller than the $200 bags, so I wouldn’t be able to carry nearly as much gear, but it is a very capable bag for the price.

AmazonBasics DSLR Backpack As A Drone Bag

You won’t be able to fit any quads inside the AmazonBasics backpack, but that’s true of most of the purpose-built FPV backpacks as well. Strapping two 5” quads to this backpack was easy. I tied one into the elastic webbing on the back and a second into one of the tripod straps on the side. You could probably squeeze one more quad into the webbing and another into the second tripod strap, but I think that would be pushing the limits.

You can still lay the bag next to your chair, open the lid, and have quick and easy access to your transmitter, goggles, batteries, and tools. My goal with the ThinkTank bag was to avoid the last-in-first-out situation as much as possible, and the AmazonBasics DSLR backpack manages that for your most important gear.

AmazonBasics DSLR Backpack As A Drone Bag

The DSLR backpack has a second compartment that’s large enough to hold a small laptop. It fits my 12” Chuwi 2-in-1 tablet just fine. You won’t fit a 15” laptop in there, though. I’d probably skip the laptop and stuff that compartment full of spare props!

Watch out! There is a larger AmazonBasics DSLR and Laptop backpack. It may be bigger, but it doesn’t have the bungie cord strap woven through the back, and that is one of the best features of the smaller bag.

Is a $200 backpack worth the money?

All my hopes were confirmed the first time I took my new ThinkTank bag out to the field. It used to take me three or four minutes just to get set up. I had to unstrap quads from my bag, pull out my battery bag, and then pull out and unzip my Turnigy case.

I’ve never managed to be up and flying as fast as I am with the ThinkTank bag. I just put down the bag, open the main compartment, and I pull things out as I need them. I don’t have to waste time attaching antennas to my goggles. I don’t have to unpack my transmitter from a diaper. I just pick up what I need and start flying.

My Stuff Sprawled Out On A Picnic Table

Packing up is much faster, too. I’m starting to get into the habit of putting things back in their place when I finish using them. The transmitter and goggles don’t land perfectly in their compartments between flights, but they’re close.

When I’m finished flying my last battery, I’m already nearly packed up. I just have to do a bit of tidying and close the zipper. In fact, I’m usually throwing my ThinkTank backpack in the car while I’m watching everyone else spend time doing exactly what I used to have to do.

My ThinkTank Helipak In The Field

If I can save five minutes on packing and unpacking each time I fly, and I manage to get out flying once a week, that will be a savings of more than four hours every year. I imagine I’d save almost as much time using the AmazonBasics DSLR backpack. Is four hours of your time worth $27 to you? Is it worth $200? Four hours per year is worth $200 to me, and I expect to fly way more often than just once per week!

The sun is currently setting at around 5:30 p.m. Sunset has been our enemy lately. Being able to fly one more battery before sunset or before it starts raining is valuable.

The verdict

The best drone bag is the one you already have. If you’re mostly happy with what you have, then you should absolutely keep using it. For most of you reading this, your $200 is better spent on a better transmitter, an FPV goggle upgrade, or another racing quad.

Maybe you’re new to the hobby, and you don’t have a bag. You have a racing quad, a set of box goggles, and you’re using a Flysky i6 transmitter. A $200 backpack is probably not an upgrade that will give you the most enjoyment. You can’t go wrong with the $27 AmazonBasics DSLR backpack. You will eventually outgrow it, but it will take a you a long way!

When should you buy a bag like the ThinkTank FPV Airport Helipak? Have you run out of gear to upgrade? Do you already have Fat Shark goggles, a Taranis transmitter, and more racing quads than you have time to fly? Is your free time limited enough that you value five or ten minutes saved in the field and at home?

If your answer to those questions is yes, then I highly recommend the ThinkTank FPV Airport Helipak. It is one of the best upgrades I’ve ever made to my overall flying experience.

The BFight 210 is Awesome and the Demise of My Shuriken X1

| Comments

Not long after publishing my first blog post about my BFight 210, my favorite quad died. I was flying the Holybro Shuriken X1 at the park. I noticed I had some spectators on the sidewalk, so I decided to fly more spiritedly.

You’re thinking that I was pushing myself too hard. You’re thinking that I was going too fast, couldn’t hit a gap, and I smashed into something. This is exactly how I thought the Shuriken X1 would meet its end.

BFight 210 on an OWLRC Dragon DSX5 frame

That isn’t the case. I suddenly lost video, and my Shuriken X1 just fell from the sky. The problem was obvious on a quick inspection. A component had been knocked loose on the board. I didn’t learn until later that night that it was an inductor.

It must have been hit in an earlier flight, and the constant vibrations finally broke the connection. It should be an easy fix, but I figured it was time to upgrade. The Shuriken X1 uses a single, oddly shaped circuit board for its flight controller, power distribution, and VTX.

I ordered an OWLRC Dragon frame, a Holybro Kakute F4 flight controller with integrated PDB, and an AtlAtl VTX. The plan was to pair these new components with the Shuriken X1’s 30a ESCs and its powerful Tiger Motor F40 II motors.

More importantly, this forced me to fly the BFight 210, and I flew it a lot!

Four weeks with the BFight 210

The BFight 210 is a fantastic machine for the price. It has some minor issues, but those problems were easy to mitigate.

  • The FrSky compatible receiver has a short antenna
  • VTX remote control interferes with SBUS—cut the white VTX wire!
  • VTX works better with a capacitor

Something I didn’t mention in my first blog post is that the video signal on the BFight 210 isn’t the best. I assumed it was just because I was using the sleeved dipole antenna that came with the drone, but switching to a circular polarized antenna didn’t clear up all the issues.

I decided to solder a 25V 1000uf Nichicon capacitor to the point where the XT60 cable meets the circuit board. The improvement to the video signal is significant. These capacitors cost less than a dollar, and I will definitely be adding one to all my drones!

The BFight 210 is light and fun. I’ve been throwing it all over the local parks. S-turning over trees, power looping trees, but mostly I’ve been practicing my low-to-the-ground flying. I’m getting a lot better at hitting gaps and openings in tree branches.

The biggest surprise for me is how efficient the BFight 210 is. When I’m cruising around low to the ground trying to hit gaps, it isn’t uncommon for me to get more than ten minutes out of a battery. The batteries come back with about 3.75v per cell. I’ve even had a couple of batteries last more than eleven minutes!

I let my friend Brian take the BFight for a spin. He ordered one for himself the next day. I also ordered one for a Christmas present. It flies smooth, and has more than enough power for a beginner.

I broke an arm

I’ve been worried about the BFight 210’s ultralight-style frame. The frame weighs 60 grams. The arms are narrow, and they’re only 4mm thick. Mine has taken a beating, but I finally lost an arm.

BFight 210 with a broken arm

BFight 210 frames cost less than $35. That gets you four extra arms and a bunch of extra standoffs and screws. I thought about buying another BFight frame, but I decided against it.

I ended up ordering another OWLRC Dragon frame, even though the first one hadn’t arrived yet. I’m going to include my three spare arms with my BFight 210 Christmas gift!

The order of events

It would have been nice if the BFight 210’s arm lasted another couple of days. It would have been nice to hold an OWLRC Dragon frame in my hands before I ordered one for a BFight 210 upgrade. Here’s the way things went.

When I placed my order at ReadyMadeRC.com, the shipment from Banggood had yet to reach the United States. I chose Priority Mail shipping, so I expected the frame from ReadyMadeRC.com to arrive first, but it didn’t!

I decided that I wanted to have a 5” quad in the air quickly, so I decided to set the new flight controller aside and upgrade the BFight 210.

The BFight 228!

Transplanting the BFight 210 to the OWLRC frame was easy. I spent more time looking for missing tools and heat shrink tubing than I did working on the quad.

On my BFight 210, the motor wires were routed towards the center of the quad and soldered to the ESC from the inside edge. I knew I wouldn’t be able to route the same way, but they do have enough length to fit on the larger frame.

I didn’t have to solder. I just unscrewed everything from the old frame, and mounted it on the new frame.

The OWLRC Dragon is a 5mm frame—that’s 1mm thicker than the BFight 210. That means I couldn’t use the BFight 210’s 6mm motor screws, so I ordered a pack of 7mm M3 screws.

The OWLRC Dragon frame is a stretched frame, but it still bears quite a resemblance to the BFight 210 frame. It is about 30 grams heavier, but it is a lot sturdier.

How does it fly?

It is a bit heavier, but the BFight 228 flies great! It doesn’t feel slower, and it’s smooth and nimble.

Since my Shuriken X1 took its final voyage, I’ve been spending a lot of time flying the BFight 210 near the ground and in proximity to trees, and hitting gaps between branches. More specifically, I’ve spent a lot of time flying through and around a tree we affectionately refer to as “The Lady Tree.”

I’ve been trying to fly through the back of “The Lady Tree,”“ yaw around, and fly back through the way I came. I fail a lot. Sometimes I turn too far. Sometimes I can’t manage to fly low enough on the way back.

What happened the first time I made an attempt with the Dragon frame? I made a perfect pass. Thought, back around, and through again. No problem.

Did all my practice pay off? Does the Dragon frame handle better? I’m not certain, but I think it is a combination of both. I don’t remember having much luck pulling this off before breaking the BFight 210 frame. I’m confident that the new frame handles better!

The Furibee Fire Dancer 215

My friend Brian received his new Furibee drone the same day I was upgrading my BFight 210. It is a nice-looking drone, especially for the price—it is only about $30 or $40 more than the BFight 210!

As soon as I saw it, I said it looked like a BFight 210, but then I picked it up. The Furibee 215 feels a good bit heavier, and it should. The Furibee has bigger motors than the BFight 210, and the arms are 25% thicker—it should be harder to break than the Bfight 210!

I hope Brian lets me take it for a spin! It looks like it should be faster and sturdier than the BFight 210. Is it worth the extra money?

Brian didn’t let me fly his Furibee Fire Dancer!

A bunch of us went flying at the park over the weekend, and Brian didn’t let me fly his new drone!

In truth, I didn’t even think to ask. I had too many drones of my own to test out. I’d already put quite a few batteries through my BFight 210 upgrade a few days earlier, but I had only just finished my Shuriken X1 transplant less than 24 hours earlier. I haven’t flow my X1 in a month, and I was too excited about flying it again to think about much else!

I did get to watch the Furibee Fire Dancer GT 215, though, and it looks like an excellent quad for the price. It looks and sounds faster than the BFight 210, and the frame is a good bit sturdier. It doesn’t seem quite as fast as any of our Shuriken X1 drones, but they each have $100 worth of T-Motor motors—we’d have all been surprised if the Fire Dancer could match an X1!

My Shuriken X1 rebuild

I didn’t keep all that many parts from my Shuriken X1. Just the motors, ESCs, and the XT60 cable. These are the parts that went into my Shuriken X1 rebuild.

T-Motor F40 motors on an OWLRC Dragon

I’ve only had it out one day so far. I was in a hurry to get it up and running, and the only spare camera I had was my Runcam Micro Sparrow. I wanted to move the Eagle from my BFight 228, but for all I knew, this new quad wouldn’t fly right. We were meeting to fly in less than 12 hours, and I wanted to make sure I had a good, working quad to fly!

I managed to let the smoke out of one of the Shuriken X1’s ESCs. I used one of the 30a ESCs from my old Shuriken 180 Pro. It is physically smaller than the other ESCs, and I’m more than a little worried that it’s limiting the power of my quad. I’ll have to experiment to find out!

Smashed Runcam Sparrow Micro

I ended up smashing that poor Runcam Sparrow. I was power looping drone gates, and I ran into the side of a gate at high speed. My video immediately turned white.

I cracked the Runcam Micro’s plastic casing, and the lens was nowhere to be found. I also caused the gate to fly apart, and I pulled one of its stakes out of the ground. Judging by the sounds of the small audience we had in attendance, it must have been quite glorious!

My friend Brian Beverage got some great video of the crash, too!

Impressions of the OWLRC Dragon frame

Both of my drones are flying great with the Dragon frame. I’m using Betaflight’s new dynamic filter, and I am able to turn off both gyro notch filters without any ill effects.

I haven’t done any PID tuning yet. The stock Betaflight PIDs are flying all right. My snap rolls are making me believe my roll terms aren’t far off. Snap flips on the pitch axis feel a little off—I assume the stretch-x frame has a lot of leverage on the pitch axis.

It has been a way too windy for PID tuning this week, and I’m not yet running my favorite props anyway. The BFight 210 came with two sets of Gemfan 5152 props. I’ve been wanting to try them out, and my current stock of my favorite props are all pink. The black and clear Gemfan props were more photogenic!

I’ll have my pink Racekraft 5046TCS props on both quads next time I go flying. With any luck, there will be less wind, too!

Minor complaints about the OWLRC Dragon frame

Just like the BFight 210 frame, the OWLRC Dragon doesn’t provide much protection for your camera. It would be nice if the standoffs extended forward a bit more, but it isn’t a deal-breaker for me.

I wouldn’t mind having more room inside the frame. I have a lot of empty space behind my flight controller, but there’s only just barely enough room for the camera up front. I wouldn’t complain if the central pod was moved forward a bit. That’d open up some space in front and allow for more protection of the camera.

I don't like top mounted antennas!

The tolerances are tight. I have two frames here, and each frame has two side panels. The tabs on one of those four panels didn’t want to fit into the top and bottom plates. The other three are quite snug, but they fit fine.

After finally getting it into place, and reassembling my drone a couple of times, that tight plate isn’t a problem.

Conclusion

You have a BFight 210. You broke an arm. Should you buy a fresh BFight 210 frame for $35?

I don’t think you should. I think it is a great excuse to upgrade your frame. I’m happy with my choice of the OWLRC Dragon frame, but there are other good choices.

Brian’s Furibee Fire Dancer uses a clone of the TransTEC Lightning frame. It looks like a great frame for less than $70. It is 10 or 12 grams lighter than the Dragon, but it feels quite sturdy to me!

It showed up too late for me, but KababFPV’s new Hyperlite Flowride looks like a great frame, and it is only $45. It weighs about the same as the Dragon, and it looks just as sturdy. I like the Flowride’s camera position. The camera and stack housing is shorter and narrower. I think that’s the way to go, but it will only fit micro size cameras. I’m not ready to give up my Runcam Eagle 2!

Tips For First Time FPV Quadcopter Pilots

| Comments

We’ve had three drone-building classes at TheLab.ms makerspace in Plano, TX. We built a different quad at each class: a big 450 mm quad, my small PH145 quad, and a standard 210mm FPV racing quad.

Shortly after each of those classes, at least one student has lost a quad or nearly lost a quad.

The first missing drone

After the first class, one of the 450 quads was being flown line of sight for the first time. It was the pilot’s first time flying, and it was a bit windy. The quad got too far away, and he couldn’t figure out which way it was going.

Our experienced pilot hadn’t arrived at the field yet, and no one knew what to do. We watched that drone turn into a dot out in the distance and then completely disappear. We’ve haven’t seen or heard about that drone again.

The second near-loss

One of our students finished the second drone build quite late. We took his PH145 out into TheLab.ms’s parking lot, and I hovered it around to make sure everything was functioning. The owner wanted to give it a try. It had more power than the Blade Nano he’d been practicing with, and he ended up parking the PH145 on the roof of our little strip mall.

It didn’t have an FPV camera set up yet, but it did land upright. I was able to pilot it back down to the ground.

Someone lost a PH145

One of the PH145 pilots was learning to FPV, and he was at a big, open park. It was one of the first times he was out flying FPV. It sounds like he was doing quite well, but he got too close to the ground.

Me And My PH145 Quadcopter

Bumping into the ground is common, and it usually isn’t a problem. He hit the ground, rolled 20’ or 30’ and ended up in a large pond. He was in the goggles, so he had no idea where it rolled in.

We nearly lost a LAB210 on build day

I was at the park, but I didn’t get to see any of this. I think Brian Moses was assisting two of the pilots that were flying line of sight while I was flying a quick battery in my Shuriken X1. I did hear some of it, though!

Brian Beverage was flying his brand new 5” racing quad line of sight for the first time at Oak Point Park. It is a huge park, and we were in a big open field. It is at least 1,200’ long and around 400’ wide.

TheLab.ms 210mm Racing Quad

Brian’s new drone was getting a little high up, and it was far enough away that it was just a dot in the sky—the dot of despair! They thought he was over the forested part of the park. It is too dense to walk through, and if he disarmed there, he probably would have gotten stuck in the top of a tree—a tree we couldn’t see!

Somehow, he managed to figure out his orientation and fly back. He was lucky. Brian Moses didn’t think we’d ever see that drone again.

The first missing LAB210 quad

I feel terrible about this one, and I need to accept some of the blame for this one. We had a drone flying meetup at a big, wide-open field about a week after the class where we built the 210mm racing drones. Brian Moses and I went out a bit early to set up some gates and fly a few packs—we figured we’d be instructing more than flying once everyone showed up.

But no one showed up. We flew until about an hour after the event was scheduled to start, then we started packing up. It was up near 90 degrees, I was out of water and batteries, and Brian and I were the only ones flying drones. It seemed like it was time to head out.

On the way out of the parking lot, I passed one of the new pilots from the class. I explained the situation. He said they were going to fly on their own. I figured they’d be fine.

They ended up flying in FPV for the first time. They flew quite high and rather far away. In their attempt to get back, they ended up over on the other side of the thick wall of trees and brush when they ran out of battery and their drone. There is a field over there, but it isn’t maintained. It is all tall, dense grass. You can’t see anything in there.

Tips for new FPV pilots

You’re a new FPV pilot. You want to be safe, and you don’t want to lose your drone. Here’s a list of tips for you.

There’s nothing new here. Brian and I say all of these things quite often, but there’s no guarantee that we’ve managed to say these things to every student. Compiling a list seemed like a good idea!

When in doubt, disarm

If you’re having any trouble, and you don’t know what to do, you should hit your disarm switch. Falling out of the sky is often your best option.

You don’t want your quad to get so far away that you’ll never find it. You don’t want your quad to crash into expensive property or people. It is much better to just fall out of the sky. You might break a prop. You might break a motor. Hopefully you won’t lose the whole drone!

At the angle I hit that tree, I was worried that I’d fly out directly towards the area where we were all sitting. I was moving my hand to flip the switch before I ever could have seen that.

Get some line of sight under your belt

I spent a month or two flying line of sight before I ever put on a pair of goggles. I flew the tiny Blade Nano QX around the house for a month, and then I flew my PH145 line of sight outside for two or three weeks.

You don’t have to become a line-of-sight master—I’ve gotten much worse at it! It is a good way to get a feel for the controls, and a great way to get a hang of controlling your throttle.

My Old Drone Bag

A lot of people are putting time into the simulators. Supposedly, that lets you skip the hours of learning line of sight, and you can skip directly to the first-person view.

I am certain that practicing in the simulator is a faster path to FPV proficiency, but observations tell me that you shouldn’t skip your line of sight practice completely.

Stay away from people, roads, and cars

Don’t hurt anyone. Don’t damage anyone’s property. Don’t scare people that are driving.

Be safe. Don’t ruin the hobby for everyone else. If you take out someone’s windshield, you’ll make things harder for the rest of us!

Always have a buddy

Always. Always have a buddy. When you’re in the goggles, you have a different perspective on the world. One tree often looks just like another. Your buddy should be watching your drone. He should tell you when you’re getting too far away or doing something dangerous. He should also be watching for unexpected pedestrians!

Always Have A Buddy

He’ll also be able to tell you where you crashed or disarmed. If he can’t, you’re flying too far away!

Altitude is your friend

If things get sketchy, it is almost always a good idea to gain altitude. It will give you time to recover. If there’s a more experienced pilot present, it may give you time to hand over the controls.

Too much altitude is scary

Altitude may be your friend, but too much altitude is scary. The FAA says you have to keep it under 400 feet. I prefer not to fly much more than twice as high as the trees—it is boring up there, and the higher up you are, the more difficult it is to safely get back to the ground.

In this video, you can see that I’m flying up above the trees, but as I’m coming back towards the ground there are trees on just about every side of my drone. I’ve been flying in FPV for eight months, and this still makes me nervous. If you went back six months, I probably couldn’t do this without hitting something.

Losing altitude is easy. Losing altitude and ending up where you want can be much more difficult!

Don’t fly FPV in angle or horizon mode

It is safest to keep moving forward when you’re flying in FPV. Angle and horizon modes work well if you want to hover in one place, but that’s how you bang into things in FPV. You might think you’re standing pretty still, but the breeze might be moving you backwards or sideways. You can only see in front of you.

Air mode or rate mode is a bit like driving with cruise control. You can tip your drone slightly forward, let go of the sticks, and the drone will maintain that angle of tilt. At that point it is just a matter of maintaining altitude with the throttle and steering with yaw.

Lots of new pilots argue with me about this. I even tried to fly FPV in horizon mode when I first started. It was a terrible idea then, and it is a terrible idea now.

Start small and work your way up

I spent dozens of hours learning to fly line of sight before I ever strapped a set of goggles on. Even then, flying FPV was difficult. I was extremely proud of myself when I managed to put the goggles on, take off, fly a slow lap around a big field, and make a rough landing 20 feet from where I was sitting.

You’re going to have enough failures doing the easy stuff, so don’t try the hard stuff first.

Push your skills

I know I said to start with the easy stuff, but that doesn’t mean you shouldn’t push yourself. I burned through more than a few batteries just learning how to circle the park at about 30’ or 40’. I was moving a little faster each time, and I was doing a better job of coming in for a landing.

I started working some rolls into my laps around the park. It took me quite a while to get comfortable with those, but I kept practicing.

My friend Alex encouraged me to learn to fly near the ground. For a long time, that meant flying six to ten feet from the ground. Then Alex made me go fly in a field full of trees. I didn’t think I could do it, but I managed. I crashed a lot, but I managed!

Some of our group took a different path. While I was learning to fly in proximity of trees and the ground, they were learning to do tricks up in the sky: loops, rolls, and split-Ses. I was more than a few months behind on learning to do a split-S!

Watch your batteries

Most of us are running 1,300 or 1,500 mAh 4S LiPo batteries on our 5” quads. If you drain them all the way, you’ll significantly shorten the life of your batteries.

I used to watch the mAh readout in my goggles, and I would start to fly home to land at around the 1,000 mAh mark. That was back when I used to fly rather slow, and it was a good plan at the time.

An Assortment of LiPo Batteries

These days, I only watch my voltage. When you’re hard on the throttle, you’ll see your voltage sag into the low 13 volt range. I don’t pay much attention to that. I watch my voltage when I’m cruising and maintaining just enough throttle to stay airborne.

When my cruising voltage drops to 14.5 to 14.7 volts, I know it is time to land. It won’t hurt if I go a little deeper, but by that time, you’ll notice your punch outs getting weaker.

VTX etiquette is important!

There is a limited amount of bandwidth available for our FPV video signals. If you power up your drone while I’m in the air, you run the risk of knocking out my video signal!

If you’re on the same channel as your friend, you will stomp all over their signal, and they will almost definitely crash. Even if you’re not on the same channel, your VTX may generate noise on their frequency as it is powering up. This is very common, and it will probably cause a brief drop out in your friend’s goggles.

title

My friends and I mostly do freestyle flying at parks. We’ve found that it is best to walk ten or twenty feet away from where the pilots are sitting before powering up your drone—the farther the better! It is especially important to not fire up your quad directly in front of another pilot’s directional antenna.

You’ll usually hear us saying things like, “Can I plug in?” or “Are you safe? Can I plug in?”

You don’t want to plug in while someone is about to hit a gap, or when they’re on course to get stuck in a tree!

We’ve been getting better at practicing our etiquette, and most of us have upgraded our equipment. When we were using cheap Eachine or Furibee goggles, we’d almost always see a tiny blip when our friend plugged in their drones—even if they were 20 feet away! I never see a blip in my Fat Sharks with my RX5808 diversity module.

Don’t be the last to show up and the first to leave

Setting up a track and putting up race gates is a lot of work. Taking them down and packing them up isn’t much fun, either!

Don’t be the guy that shows up after everything is set up and then leaves before its time to clean up. If you’re having fun flying the track, you should help tear it down.

People are understanding, and they won’t be upset if you only do this once in a while. Don’t make it a habit—people will notice!

Conclusion

Practice safe flying. Some of this may seem like common sense, but when you’re new at this, you might not realize how difficult flying a quadcopter in FPV can be!

Don’t put people or property in danger. Don’t scare anyone. Don’t be afraid to push yourself past your limits, but don’t push too far too fast. Find your limits first, then push past them a little at a time.

BFight 210

Learning takes time, but everyone I know seems to be making constant progress. They’re also enjoying themselves at every step on their journey. I had fun when I was flying line of sight. I had fun when I was lucky to circle around a big, empty field in FPV. I had fun when I could barely fly through a drone gate. I’m currently having just as much fun practicing s-turns and power loops over trees!

Don’t let it bother you if your friends are better pilots. They’ve probably have a lot more stick time than you, and you can get there with practice. They were at your skill level once, too, and they were still having a ton of fun flying!

Did I miss any important tips? Please leave a comment and let me know what I left out!

I Switched From A Spektrum DX6 To A Taranis X9D Plus Transmitter

| Comments

UPDATE: I’m designing an open-source 3” HD micro FPV quadcopter frame. I call it the Kestrel. You should check it out!

I started flying FPV quadcopters back in January. That was nearly ten months ago, and I was using a Spektrum DX6. My friend Brian bought a Spektrum transmitter last year to use with the 450mm quadcopter he was building. I didn’t build one of the 450mm quadcopters, but I kept saying that I’d kept saying I’d eventually build and FPV drone.

Brian must have gotten sick of waiting for me, because he bought me a Spektrum DX6 for Christmas. I’ve been using that transmitter until recently, and it has served me fairly well.

The Spektrum DX6 is user friendly, but it hasn’t been ideal. I didn’t have telemetry. I didn’t have any sort of RSSI feedback. And lately, I’ve been seeing more and more failsafes on my quad.

Switch to FrSky or buy new DSMX receivers?

All my drones have cheap DSMX receivers. Most of them worked well when they were new, but I’ve been having random problems during the last month or so. I figured I could solve my problem with new, name-brand receivers.

Spektrum DX6 and Taranis X9D Plus

There aren’t many people in the FPV racing or freestyle communities use Spektrum equipment. I checked out Le Drib’s YouTube channel. He flies with Spektrum gear, and he recommends a $40 receiver. I’m sure it is a fine receiver, but I would need at least three or four for them, and it looks too large to fit on my KingKong 90GT!

So I was staring at $150 to $200 worth of receivers, and wondering if they’d actually solve my problem. I didn’t like this idea.

I ended up spending a total of about $350 on a Taranis X9D+ and five tiny R-XSR FrSky receiver modules. I could have saved about $50 if I was patient, but I wanted these parts to arrive quickly, so I ordered them from Amazon with Prime shipping.

I could have saved $150 to $200 if I just bought nice receivers for my Spektrum radio. That may have fixed my problem, but it seemed like a lot of money to spend without getting a real upgrade.

The R-XSR modules are tiny, and I had no trouble fitting one on my KingKong 90GT. They also support telemetry. Six months ago, I would have thought telemetry was stupid—I can see everything I need in my goggles! I didn’t know that you can set your PIDs and VTX channel from your Taranis radio. For the Lua script to work, you need telemetry.

I also have a working RSSI readout, which is just amazing to me!

Why the Taranis X9D+? Why not the Taranis Q X7?

I don’t like the way the Taranis Q X7 feels in my hands. It is angular instead of rounded, and I feel like I have to reach farther for the switches.

The Taranis Q X7 is a fine radio. In fact, I’ve been recommending it to everyone participating in TheLab.ms’s FPV racing drone build. The price is great, it is every bit as capable as the Taranix X9D Plus, and you only need a USB cable to practice in the simulators.

The feel of the Taranis X9D+ was all the reason I needed to spend the extra $80. Since owning one, though, I’ve come up with some good reasons to skip the Taranis Q X7.

The Taranis Q X7 takes AA batteries. I’m not entirely against this. I have plenty of Amazon’s Eneloop clones. I have enough AA batteries that I can carry a spare set just in case the transmitter goes dead in the field.

The X9D+ comes with a battery pack and a built in charger. It lasts a long time, and I just need to remember to plug the radio into the wall after I go out flying a few times. A similar battery pack for the Q X7 will set you back about $20. That helps narrow the difference in price, and the Q X7 still won’t have a built in charger.

The Taranis X9D+ has a bigger, higher resolution display. I also prefer the 6-button interface over the QX 7’s wheel.

Why not the Taranis X9D+ Special Edition?

I have to say I was tempted. The Special Edition is a good value. It includes the hall-effect gimbals, a removable SMA antenna, and upgraded switches. If you’re into flashy accessories, the Taranis X9D Plus Special Edition is available in an assortment of colorful shells.

These are things I would enjoy having. Except for the bling. I don’t need the bling.

There were no Special Editions available at Amazon, and I was in a hurry. At any rate, replacing the gimbals and upgrading the antenna will make for good blog posts in the future!

You can’t go wrong with the [Taranis X9D+ Special Edition][xd9se]. I believe it is worth every penny. Don’t worry. If you buy a Taranis SE, I won’t be jealous for long. I will catch up to you in the near future!

R-XSR vs XM-PLUS

I’m told the XM-PLUS is a fine FrSky receiver, and it costs $10 less than the R-XSR. The XM-Plus doesn’t support telemetry, while the R-XSR does.

I was going to buy an XM-Plus for my KingKong 90GT. I don’t think it has a pin to connect the telemetry, and it doesn’t even have an OSD. I didn’t think there was much point in putting the R-XSR on there.

Brian talked me out of it. When my upgraded 90GT finally dies, I will likely replace it with something more modern, and I bet that replacement will support telemetry and have an OSD. Why buy an XM-Plus that I’ll never want to use on another drone?

The R-XSR is ridiculously tiny, supports telemetry, and it comes with a pair of diversity antennas. I chose the model with removable antennas—I’ve already broken two or three antennas in the past!

I’m a fan of Joshua Bardwell’s method of attaching antennas. He uses a zip tie and some heat shrink tubing to attach antennas to the quadcopters arms. The antennas on the R-XSR module were just long enough for me to accomplish this on both my Shuriken X1 and my BFight 210.

Taranis does what Spektrum don’t

I’ve only had the Taranis X9D+ for a few days, and I feel like I’m only scratching the surface of what it can do. These are some of the things I’m already doing with my Taranis X9D that I couldn’t do with my Spektrum DX6:

  • RSSI display in my goggles
  • RSSI display on my radio
  • audible RSSI warnings on my radio
  • Volume control knob on my radio
  • Custom WAV files
  • PID tuning on the radio’s display
  • 10 additional channels for less money

Two of those are stretching the truth. I have the PID tuning script on my Taranis X9D+, but I am a dope, and I didn’t hook up the telemetry wire on any of my drones, so I can’t actually use it. I plan to correct this situation soon!

I could have added custom audio to my Spektrum DX6, but it was a pain in the ass. You need to use some special utility from Spektrum to convert the files and manage your database of sounds. That software is for Windows, and I use Linux, so that wasn’t worth the effort for me. With the Taranis, you just need to copy a 16 KHz or 32KHz mono WAV file to an SD Card. It doesn’t get much simpler than that!

I keep mentioning the various RSSI displays. I couldn’t be more excited about this. If the Spektrum gave me an RSSI reading, I would have been able to better troubleshoot my connectivity issues.

Is Spektrum build quality better?

No. I’ve always been a little disappointed in my Spektrum DX6. Many of the switches were loose from the factory, and no matter how often I tighten the retaining nuts, they eventually start slipping again.

All the switches on the Taranis X9D Plus are rock solid. Why can’t Spektrum get this right? If I’m paying $30 or $40 more for ten fewer channels, the least they can do is tighten everything up before it leaves the factory!

I do have to give Spektrum credit for the beefy antenna housing on the DX6. It is a big, solid lump of plastic. There’s no way you’ll accidentally break that thing. I do hear that people often end up breaking the antenna on their Taranis X9D+ radios.

The Taranis antenna may be more fragile, but it gives you the option of aiming the antenna—the Spektrum DX6 antenna is fixed. When I had signal quality issues with the Spektrum DX6, the only thing I could do is reorient the radio in the hope that it would improve my situation.

Future upgrades

I say these are future upgrades, but I’m impatient, and I already ordered all these parts.

I’m matching two of the upgrades from the [Taranis X9D Plus SE][xd9se]: the M9 hall-effect gimbals and the removable antenna. I’m using an RP-SMA connector instead of SMA. Most 2.5 gHz Wi-Fi antennas are RP-SMA. They’re more readily available, and I have plenty of dipole 2.4 gHz RP-SMA antennas around the house.

I’m going to be missing out on the upgraded switches of the Special Edition, but I’m not too worried about that. I’ll also be running the plain, boring, stock Taranis X9D+ shell—I may decide to paint it! To make up for that, though, I’m adding putting in two additional mods.

The X9D+ has the electronics inside to support one more switch. I’ll be using the 6-position rotary switch. I have no idea what I’ll use it for, but it only costs $10, so I may as well add it while I have the case open!

I also ordered a larger speaker. It is supposed to make the audible alerts more clear. It is a cheap upgrade, and I’ll be in there anyway!

Conclusion

I’m extremely happy with my switch to the Taranis X9D Plus. The connection to my drone is more reliable and I finally have an RSSI readout in my goggles.

If you’re thinking about buying into the Spektrum ecosystem, I would strongly encourage you to look elsewhere. I’ve been telling myself things likes, “This is good enough,” and “This is almost as good as a Taranis!” for months. The Spektrum DX6 wasn’t good enough. It wasn’t as good as a Taranis.

Amazing FrSky receivers cost half as much as a good Spektrum receiver, and they’re super tiny.

I’ve easily matched all the functionality of my Spektrum DX6 and then some, and I’m only just scratching the surface. All my VTX modules are too old for this feature, but I’m looking forward to being able to configure my channel and transmit power from my Taranis. I’m also looking forward to learning just what OpenTX’s Lua scripting allows you to do—I can’t wait to write some Lua!

Did you make the switch from Spektrum? What made you change ecosystems? Are you flying racing quads near Plano, TX? Leave a comment, or come chat with us in the drone channel on our Discord server!

Choosing The Parts For TheLab.ms FPV Racing Drone Kit

| Comments

So far, we’ve had two successful drone building events at TheLab.ms makerspace. We built large 450mm quadcopters at the first class. They’re big enough to fly line of sight, and the components are large and easy to work with. They’re also big enough to carry a payload. That could be a camera on a gimbal, or it might be a smaller drone attached to a payload release mechanism!

At the second build class, we assembled copies of the PH145—my own 3D printed nylon quadcopter. It is a 145mm quadcopter with 3” propellers. It is a bit on the heavy side, and it pushes the limits of those small propellers. It is a sturdy little drone, and it was a great drone for learning to FPV. The heavy-duty prop guards help, because it bounces off obstacles and recovers well.

Brian and I decided that it was time to build a racing-style quadcopter.

UPDATE: We’ve built six or seven of these quads so far. Brian Beverage wrote about his experience build one of TheLab.ms’s FPV racing quadcopters.

Why a racing quad?

We’ve both learned a lot over the past year. Brian suggested that we do another build of the PH145, but I didn’t want to get on board with that. Components for a 5” quad are more readily available, and the prices are much better. A 5” racer is an improvement over the PH145 in almost every way. It will be more efficient, much faster, and it will cost $100 less to build.

We also thought about building another 450mm drone. The build process is easy, because everything is so big. They’re efficient, so it is easy to get a 10 to 15 minute flight time out of them. Those big props also allow for carrying a fairly sizable payload.

Racing quads are fun and cool. That alone is enough reason to build one. They aren’t as easy to assemble as the 450mm quads, but they’re not much trickier than the PH145.

A racing drone won’t have the payload capacity of a big 450mm drone, but I’m certain you could still attach one of Brian’s payload release mechanisms. It may not lift a liter of water as comfortably as Brian’s 450, but it should still be quite capable!

The bottom line is that a 5” racing quad is the most popular form factor. People want to fly them, and parts are easy to find!

Is it still a racing quad when you use budget parts?

I wanted to call this build “My First Racing Quad.” If you’re new to FPV quads, you’re going to crash, and you’re going to crash a lot. We wanted everyone’s initial investment into the hobby to be relatively low, and we wanted to make sure that repairs didn’t cost too much. Most of the parts in TheLab.ms’s quadcopter kit cost less than $10. The frame costs less than $20, and the flight controller is less than $25.

These budget parts are not as good as premium parts. The Tiger Motor F40-II motors on my Shuriken X1 are priced at around $25 each. They’re a bit smaller than the motors we chose for TheLab.ms’s build, but they are more powerful, more durable, and more efficient. Is it worth using premium motors on your first racing quad? I don’t feel that it is. I still can’t fully utilize all the thrust of my X1!

It may be difficult to win races with the cheap parts, but you can definitely participate. I’m not a racer. The flying I do would be considered freestyle or proximity flying. You don’t need ridiculous motors to have fun doing this! In fact, the purpose built freestyle quads tend to be heavier and use smaller motors.

When you’re just starting out, it doesn’t matter. You’re going to be breaking things, and you’re going to be happier replacing a $10 motor. I’ve broken lots of motors and a few cameras. You will, too!

The parts list

Stew from UAVFutures was a major influence on our parts list. I had already picked out motors, escs, and a flight controller. I believe I was narrowing down frame options when I remembered that Stew has an excellent $99 quadcopter build video. He chose a lot of the parts I had already picked out, so I used his video to finish out my list.

Stew used some extremely low end parts to fit his build into $99. I wanted our build to have an on-screen display, so we used a different flight controller. We also upgraded our camera, video transmitter, and motors.

The total cost for our parts from Banggood.com comes it at around $155. The kit we’re selling at TheLab.ms also includes a $22 battery. TheLab.ms is selling the kits for the class for $200.

I’m going to explain why we chose each part. I’m going to start with the motors and work my way in from there.

The simplified parts list

These are the parts we used. They were all acquired from Banggood.com.

Racerstar 2306S 2700KV motors

Stew’s build uses the Racerstar 2205 motors. These motors are common in budget racing drone builds. The 2205 motors were my first choice until I discovered Racerstar’s 2306S motors.

They’re bigger motors, and they don’t even cost $1.00 more. Bigger isn’t always better, so I did some research.

I’ve read a lot of bad things about Racerstar motors in general. I expected this, though, because they’re cheap and you get what you pay for. We bought than 40 of the 2306S motors. I’ll report back once we’ve used all of them.

I did see a video from Kabab FPV on YouTube. He seems to think the 2306 Racerstar motors are made from thicker or better aluminum than the 2205 Racerstar motors. He seems like a knowledgeable enough guy, so I’m taking his word for it.

TheLab.ms's LAB210 Racing Quad's Racerstar 2306S Brushless Motor

The Racerstar 2306S motors have a ridged protrusion on top that the 2205 lacks. I like this feature a lot. It should help keep the props locked in place.

I’ve already flown one of TheLab.ms’s racing quads, and I am pleased with the motors. They’re got a good amount of punch, and the drone feels smooth. I didn’t do any crazy freestyle flying, because the drone belongs to one of the members of our makerspace, and the rates are set much lower than I’m used to.

The Racerstar 2306S motors have more punch than I expected. They’re not as efficient as the T-Motor F40 motors on my Shuriken X1, but that was to be expected. TheLab.ms’s drone can fly gently for five or six minutes. If I fly my Shuriken X1 like that I can manage seven or eight minutes. I usually push the X1 hard enough that I only get three or four minutes out of a battery. I can’t wait to see how long TheLab.ms’s drone can stay in the air when we push it that hard!

I’m glad we chose the Racerstar 2306S. They’re working well, and they are huge. They look really mean!

Racerstar 20A ESCs

Stew’s build uses a 4-in-1 ESC module. I’m not a big fan of these. They require less soldering, and they’re easier to work with. The problem is that if you burn out one ESC, then you have to replace the entire module!

How often do ESCs burn out? I’m not sure, but two of my friends had to replace an ESC last month. Using four separate ESCs will keep the repair costs lower.

All budget ESCs are similar enough. We chose 20 amp ESCs, because our Holybro Shuriken X1 drones max out at less than 90 amps. That’s only 22 amps per motor, and we don’t expect the Racerstar motors can draw as much power. The highest we’ve seen so far on TheLab.ms’s drone is 65 amps, so the 20 amp ESCs should be plenty.

We definitely wanted to use ESCs that support DSHOT. DSHOT is a digital protocol that the flight controller uses to communicate with the ESCs. With the old analog protocols, you had to calibrate your ESCs. DSHOT eliminates this requirement, so there’s one less thing for new folks to have to deal with!

Omnibus Pro F3 flight controller

The Omnibus Pro F3 meets all our requirements and it is inexpensive. Most importantly, though, I used it recently in a build of my own, so we knew what to expect from it!

It has an integrated Betaflight OSD module. This is a seemingly minor but important upgrade over the MWOSD module most of us have been using. You can configure the Betaflight OSD from the Betaflight Configurator app, and the OSD has access to more settings than MWOSD.

TheLab.ms's LAB210 Racing Quad's OMNIBUS F3 Flight Controller

The Omnibus F3 Pro also includes a current sensing circuit. This allows the flight controller to monitor your amp draw and keep you appraised of how many mAh you’ve consumed—this is like the fuel gauge for your drone.

I’m excited that we get to have an OSD and current sensor on an F3 flight controller for only $22. I’m disappointed with how convoluted the wiring needs to be to support the current sensor. I probably should have found us a flight controller with an integrated PDB.

Power distribution board (PDB)

There’s not much to say about the PDB—they’re all boring and quite similar. We chose a PDB with a 5v and 12v regulators. It also has pads for distributing power to our ESCs.

The Lisam LS-210 carbon fiber frame

We picked an inexpensive frame with lots of room for components. The Lisam LS-210 frame is usually priced at $14 to $17 dollars. The frame is the piece of our build that I’m the least excited about.

It is a unibody frame. That means that when you break an arm, you have to replace the whole thing. Fortunately, the entire Lisam LS-210 frame costs about as much as a pair of arms for my Shuriken X1. Unfortunately, it’ll be more work when you have to repair an arm!

TheLab.ms's LAB210 Racing Quad

I am a fan of modern, compact frames. The Lisam LS-210 is a bigger, older style frame, but it is good for a first-time drone builder. There’s a lot more room in the middle of the frame, so you don’t have to work as hard to fit all your components!

We wanted a frame with a top mounted battery, and the Lisam LS-210 is a good fit for that. We’ve busted three or four batteries so far on our Shuriken X1 quads. You’re much more likely to hit the ground with the bottom of your drone, and when your battery is down there, it absorbs most of the impact. That’s not good for a beginner!

A 200mw video transmitter and a cheap but usable camera

Stew had to use a tiny camera and a low-power video transmitter to keep his build under $100. I have micro drones with similar cameras and VTX units, and I wouldn’t recommend anyone use those tiny, cheap parts unless they are building a micro drone!

I use a Runcam Eagle 2 on my racing quads. It is a fantastic camera, but its price tag is too high for a first-time build. We chose the Eachine 1000TVL CCD camera. They’re usually available for $10 or $12. I would be surprised if there’s actually a CCD sensor inside this camera.

NOTE: The above video was recorded earlier this year on my PH145 drone using the same Eachine 1000TVL FPV camera.

I’ve used several of these Eachine cameras. They’re not nearly as good as a $40 Runcam Eagle 2 or a $25 generic HS1177 CCD camera, but they’re definitely quite usable. I’ve smashed one of these directly into a tree at high speed, and I was pleased that the replacement camera only cost me $12!

We wanted to use a 200mw VTX module with a circular polarized antenna. There are dozens of different yet nearly identical VTX modules available from Banggood.com. I don’t recall precisely why we chose this particular module, but it seems to work well enough.

1500 mAh 4S Infinity graphene LiPo battery

We are including a battery with each racing quadcopter kit. We chose the 1500 mAh Infinity graphene battery from Banggood.

The 1300 mAh version of this battery was one of the first drone batteries I ever bought. I’ve tried other, more expensive brands, but I’ve been slowly phasing those out. Every 4S LiPo that I carry in my drone bag is now an Infinity graphene battery. I have a mixture of standard and race version of the 1300 and 1500 mAh batteries.

I’m definitely a fan of these batteries. They don’t sag as much or as quickly as the more expensive batteries that I used to use. When I’m running Racekraft 5040 propellers, my $30 Venom 75C 1300 mAh would trigger a low-voltage warning on my Shuriken X1 on full throttle punch outs almost immediately after take off.

The $20 Infinity Graphene 1300 or 1500 mAh won’t trip the low-voltage warning until I’ve flown enough to consumed 600 to 800 mAh. In my opinion, these batteries are a fantastic value!

Kingkong 5040 Tri-Blade Props

We ordered a whole mess of Kingkong 5040 props from Banggood. They seem quite durable, and they’re quite inexpensive.

People are extremely opinionated about props. I’ve heard good things about these Kingkong props, and they seem like a great starter prop.

I buy all my props from Amazon—I don’t plan ahead well enough to wait for props to arrive from China! I run Racekraft 5051 props, and they cost almost three times as much from Amazon, but they usually arrive within two days.

Why should I build a racing quad?!

There are a lot of really nice bind-n-fly racing drones, and some of them are cheaper than our racing drone kit at TheLab.ms. You don’t have to build a quadcopter. You absolutely can buy a drone that arrives at your door fully assembled.

The fully assembled racing drones are fantastic. Most of my own drones were fully assembled at the factory. It is often cheaper to buy a ready to fly drone than it is to buy similar components to build your own!

There is still a lot of value in building a quadcopter—especially when it is your first quadcopter! If you’re new to FPV, you are going to crash, and you’re going to crash a lot. When you crash, you break things. When you break things, you have to fix things.

If you buy a drone off the shelf, you won’t know how anything works. You won’t know how to fix it. When you build your own quad, you’ll know exactly how it fits together.

If you build our drone kit at TheLab.ms, you’ll probably be able to repair it. If you can repair a drone from TheLab.ms, you’ll also be able to repair my Shuriken X1—like most racing drones, it has very similar components!

I don’t think I can build a quadcopter!

If you can build a computer, you can build a quadcopter. The concepts are similar. You choose components, make sure they’re compatible, and connect them together. There’s a bit of soldering involved in building a drone, but it is fairly straight forward.

At TheLab.ms, we are trying to eliminate some of the complications. You don’t have to worry about which parts are compatible. You don’t have to figure out how correctly wire all the components into the flight controller. If you’re not proficient at soldering, there will be people in the classroom to help you out!

I don’t want to build a quad! What should I buy?

I can understand why you wouldn’t want to build a quadcopter. It is a time consuming process. There are plenty of bind-n-fly quadcopters to choose from. Many cost less than our kit. Quite a few of those bind-n-fly racing quads not only cost less than our kit, but they’re made with better parts—at TheLab.ms, we just can’t reach those economies of scale!

If you’re on an extreme budget, you can’t go wrong with the Eachine Wizard X220. You can find the Wizard bundled with everything you need to get flying for less than $200. The bundle includes a battery, a simple balance charger, a FlySky receiver, and a FlySky transmitter. The only thing missing is the goggles!

If you want something with a little more pep, I don’t think you can go wrong with the BFight 210—especially if you’re using a Taranis FrSky transmitter. The folks at Gearbest sent me a free BFight 210 to review, and I’ve been flying it more often than my Shuriken X1 so far. It is good deal lighter than either the Eachine Wizard or my Shuriken X1, and it is fun to fly!

The BFight 210 is still a budget racing drone, and it isn’t without problems, but those issues are relatively minor. The BFight 210 usually costs around $180, but I’ve seen it go on sale for around $150.

BFight 210 at Oak Point Park

If you’re not on a limited budget, my first instinct would be to recommend the Holybro Shuriken X1. Several of us have been flying them for more than six months, and we all love the X1. The electronics are starting to become outdated, but it is still an amazing drone. It is extremely sturdy and ridiculously powerful—too powerful for a beginner!

Holybro Shuriken X1

The Shuriken X1 is getting harder to find, because it has been replaced by a newer model—the Holybro Kopis 1. We’ve all been drooling over the Kopis 1, but none of us have bought it yet. It isn’t a straight upgrade over the Shuriken X1—it is more of a lateral move, but with cutting edge electronics. The Kopis 1 is less powerful than the X1, but it is a good deal lighter.

If my Shuriken X1 exploded today, I would immediately order a Kopis 1 to replace it. The Shuriken X1 and Kopis 1 both sell for around $250 to $300.

NOTE: I haven’t personally flown the Eachine Wizard X220 or the Holybro Kopis 1.

Why isn’t everything included in TheLab.ms’s kit?

TheLab.ms’s quadcopter kit includes almost everything needed for the drone to fly. It includes a battery, but it doesn’t include a receiver. Why didn’t we include a receiver?

The receiver allows your transmitter to communicate with your quadcopter. The receiver has to be matched to speak the same protocol as your transmitter.

TheLab.ms’s kit also leaves out the transmitter, FPV goggles, and LiPo battery charger. These are all rather personal items, and their prices vary quite drastically.

If you want to go the inexpensive route, you can get everything you need to fly FPV for a little over $100. You’ll do fine and be equipped to have a ton of fun with the cheap gear, but we’re recommending better hardware.

Transmitters, FPV goggles, and battery chargers recommendations definitely deserve their own blog posts. I’ll try to briefly summarize my favorite options.

Transmitter and receiver options

The FlySky i6 transmitter is a great value at around $50. You’ll get both a transmitter and receiver in the box. I’ve flown a quadcopter with this transmitter, and it works just fine. Your range will be more limited, and the sticks don’t feel as smooth as the more expensive options.

Our recommendation is the Taranis Q X7. It is an upgrade in almost every way over the FlySky i6. It can be found for a little over $100 if you shop around. You’ll have to supply your own receiver module. We’re recommending either the R-XSR or the XM-PLUS. b Unlike the Flysky i6, the Taranis Q X7 can be plugged into your computer’s USB port. It will act as a joystick, and it can be used with many different FPV drone simulators. You can do this with the FlySky i6, but you have to buy extra adapters and cables. By the time you buy those cables, you’ve closed a lot of the gap between the price of the QX7 and the i6. I’d rather pay the difference and upgrade to the better hardware!

Until recently, I was flying with a Spektrum DX6. I wouldn’t recommend going that route. I’ve since upgraded to a Taranis X9D Plus. If you’re willing to spend a few extra bucks, it is a nice upgrade over the Taranis Q X7. I find the X9D+ to be more comfortable in my hands. It has a better screen than the Q X7, and it comes with a battery pack and charger.

Choosing FPV goggles

I keep hearing the same advice everywhere, and I agree with it. Buy the cheapest goggles you can find. They’ll be more than enough to get you started, and they’ll last you quite a while. I used my cheap goggles for seven or eight months before I decided to upgrade to an expensive set of Fat Shark goggles.

My favorite set of cheap goggles are the FuriBee VR01 box goggles. This blog post is getting long, so I’ll just point you to my review of the FuriBee VR01 goggles.

If you’ve never flown a quadcopter, you shouldn’t be in a hurry to buy FPV goggles. Take your time and do some research. Try on other people’s goggles if you can. The people I fly with at TheLab.ms have an assortment of different goggles and headsets. Most of us are more than willing to let you try out our stuff!

Choosing your battery charger

Chargers range in price from $20 to $300 and beyond. I’m using one of the $20 chargers. It is an imitation B6 balance charger—often referred to as a “four button” charger. I didn’t know what I was looking for at the time. I was willing to buy a genuine IMAX B6 charger, but I didn’t know how to verify that they were genuine. I didn’t want to spend $45 on a fake, so I purposely ordered a knock off, and it works just fine.

LiPo batteries are dangerous. You might burn your house down.

Conclusion

I’m excited about the racing quadcopter we assembled at TheLab.ms. It is an awesome starter drone—reasonably priced and inexpensive to repair. It may not be as fast as my Holybro Shuriken X1, but if this is your first drone, I’m certain you’ll find our quad to be super fast!

If you’re near Plano, TX and want to get into FPV racing or freestyle, you should definitely come out to TheLab.ms! Our community will be happy to help you get going. You can come build our quadcopter, or we can help you choose a prebuilt drone. Either way, you’re definitely welcome to come fly with us!

BFight 210 FPV Racing Quadcopter

| Comments

Last month, my friends at Gearbest sent me a free KingKong FlyEgg 130 micro drone. I had a lot of trouble with it—a flaky DSMX receiver, a dead FPV camera, and I broke a motor in the first crash. I still want to write about the FlyEgg 130. It is a neat little drone, and I definitely want a 3” drone with an all-up weight of around 120 grams in my bag. Upgraded parts are on the way, so that blog post is probably a couple of weeks away.

BFight 210 FPV Racing Drone

Gearbest didn’t have identical, individual replacement parts in stock, and it seemed silly to replace the whole drone. They sent me a free BFight 210 racing quad to try out instead!

The BFight 210

This is a different style of machine than the quad I regularly fly—the Holybro Shuriken X1. Compared to the BFight 210, my Shuriken X1 is heavy and quite powerful. Its expensive T-Motor F40 motors are fantastic, and they have no trouble compensating for the extra weight.

The BFight 210 is about 75 grams lighter than my Shuriken X1. Its motors aren’t as big and powerful, but the BFight 210’s lower weight makes it feel great in the air.

In fact, I couldn’t stop talking about how different it felt while I was flying my first battery on the BFight 210. It feels lighter than the Shuriken X1. The X1 seems like a heavy Corvette with wide tires grabbing hard around the turns, and a huge motor forcing that massive car down the road.

The BFight 210 reminds me of my Miata—it doesn’t need much effort from the tires or the motor to throw its light frame through the corners. That said, the BFight 210 isn’t as far behind the Shuriken X1 as my old Miata was from a Corvette!

The BFight 210 has more modern hardware than my Shuriken X1. The ESCs support DSHOT, and the VTX can be controlled by your transmitter. I’m looking forward to finally being able to test out turtle mode in Betaflight 3.2!

The DSMX version of the BFight 210 is problematic

It was easy enough to follow the directions to pair my Spektrum DX6 to my DSMX BFight 210. The product descriptions clearly states that you can’t change VTX channels from your transmitter unless you’re using a FrSky transmitter. They don’t tell you that a DSMX transmitter will cause your VTX to continuously change channels as fast as it can!

I had to snip the white wire connecting the flight controller to the VTX. I am now able to control the VTX from its push button.

This isn’t the only problem with the DSMX version. The DSMX receiver module that BFight chose to include with the drone has a single antenna, and that short antenna is soldered right to the board. It isn’t even long enough to properly clear the frame. I lost signal for a short time during my first two batteries.

I’ve been running into minor annoyances with my Spektrum DX6 lately. The BFight 210 has given me enough reason to order a Taranis X9D and a handful of R-XSR receiver modules. In a couple of days, I’ll be Spektrum free!

You won’t have either of these problems with your BFight 210 if you’re running FrSky!

The BFight 210 is a budget racing quad

My Shuriken X1 was completely ready to go from the factory, and I expect the same is true of the X1’s replacement—the Holybro Kopis. Both of these drones cost $100 to $150 more than the BFight 210.

You get a lot of drone for your money with the BFight 210, but there are a few inexpensive things that I wish they included in the box.

The BFight 210 comes with a dipole whip antenna. These are quite durable and save you 5 grams of weight, but I was disappointed in my video feed with this antenna. The drone does come with an adapter to connect an RP-SMA antenna, and I installed it as soon as I got home from my first flight session with the BFight 210.

BFight 210 faux battery straps

In lieu of a proper battery strap, the BFight 210 ships with a couple of Velcro cable ties. I’m sure they’ll get the job done, but it wouldn’t have cost them much to include a proper battery strap.

Also, my BFight 210 didn’t ship with props. I didn’t plan on using the props that came in the box, but I would have liked to check them out!

I bolted on a set of Racekraft 5046 props. They seem like good propellers for the BFight 210. They feel good, and unlike on my Shuriken X1, they didn’t sag my battery into low voltage warnings until the battery was nearly drained.

The FPV camera

The BFight 210 ships with a generic-looking Sony HS1177 CCD camera. It looks comparable to the CCD camera that shipped with my Shuriken X1. It is a capable camera, but I’m spoiled by my Runcam Eagle 2.

I think the camera is interesting, because it includes a tiny joystick on the back for operating the OSD. I don’t know how easy it would be to use in the field, but at least you don’t have to remember to bring your joystick cable!

The camera is not protected in a crash, and the camera only mounts with two screws. I let my friend Alex have a shot at the controls, and he bumped into some twigs at the top of a small tree. It knocked the camera angle out of whack, and I wasn’t able to tighten it back up with the screws.

This was easy to fix when I got home. I put a small piece of 3M foam mounting tape on each of the carbon fiber camera mounts. It keeps the camera snug, and I don’t expect to have any problems now. At least until I hit a sturdy tree branch head-on!

The 2205 2300kv motors

I am impressed with the FLOVERFLY 2205 motors. Cheap motors are often capable of generating almost as much power as a high-quality motor, but they are often terribly inefficient.

We are using Racerstar 2306S motors on our budget FPV quadcopter kit at TheLab.ms makerspace. They are quite powerful, but they use a lot more power than the T-Motor 2306 motors on my Shuriken X1.

I pushed the BFight 210 a little harder on my second battery—mostly just doing a couple of short punch outs. I was rather tame on my first day of flying, because I was worried about losing signal with the terrible DSMX receiver, and the park was rather crowded. I did a few punch outs to see how much power the motors had.

However, most of my time in the air was spent flying in proximity to trees near the ground. I was also talking to my friends while I was flying, and that always leads to slower flying! I landed my second 1300 mAh battery when it got down to around 3.7v per cell, and it was in the air for over 7 minutes!

That’s about as long as my Shuriken X1 can manage on a gentle flight like that, and the X1’s motors cost more than half of the total price tag of the BFight 210!

The frame

The BFight 210’s frame reminds me of the FLOSS frame. It must be rather light, and it has narrow arms that are each held on by two screws. Everything is packed in near the center, and it sits quite low.

BFight 210 FPV Racing Drone

I’m worried about how narrow these arms are. They’re narrow, but at least they’re made from a thick piece of carbon fiber! It took me six months to break an arm on my Shuriken X1, but those arms are more than twice as wide.

I haven’t been able to find replacement frame parts for the BFight 210. This worries me a bit, but not a lot. If I do break an arm, there are plenty of inexpensive frames available from Gearbest or Banggood.

I’ll report back when I manage to break the frame!

I love and hate 4-in-1 ESCs

The BFight 210 ships with a 30 amp 4-in-1 ESC module that support bl_heli_s and DSHOT. It works great, and a 4-in-1 ESC is easier to work with and tidies up the build quite nicely.

There is a downside to using a 4-in-1 unit. If you blow out one ESC, you have to replace all four. Our group burns up ESCs on a regular basis. Sometimes they burn out in a crash when the propeller rips chips right off the top of the ESC. Thankfully, this won’t happen with a 4-in-1 ESC!

I burned out an ESC on my KingKong FlyEgg 130. The motor than I bent in my first crash fried the ESC a few batteries later, so now I’m waiting for a replacement 4-in-1 board.

At the rate things are going, it looks like everyone will be using 4-in-1 ESCs in the future. So I guess I can’t complain too much!

The OMNIBUS F3 flight controller

I am a fan of the OMNIBUS F3. I recently used an OMNIBUS F3 Pro in a 4” quad build, and that led to us using them in 10 FPV quadcopter kits at TheLab.ms makerspace. They’re inexpensive, they have plenty of UARTs, and they’re fairly easy to work with.

My only complaint in my own builds is wiring up the current sensor. When BFight builds the drone for me, I don’t have to worry about that!

The VTX

If you have a FrSky transmitter, you can control your VTX settings from your transmitter. This is quite handy. It would be better if it were one of the VTX modules that’s compatible with Betaflight, but the BFight 210 is a few months too old for that to have worked out.

I can’t use my transmitter to control the VTX, so I have to hit the little button hiding inside the frame. It will be tough to reach that button in the field, and I’m not sure I’ll be able to decipher the LEDs when they’re hiding inside the frame, either.

That said, it is a switchable 25/200/600mw video transmitter—I wish my Shuriken X1 could be set as low as 25mw! It seems to do its job quite well.

BFight 210 vs Holybro Kopis!

I’ve probably put more than a hundred of battery packs through my Shuriken X1, and it has served me well. I’ve been comparing the BFight 210 to my X1 all throughout this blog post. It is an easy comparison for me to make, but it probably isn’t all that useful for you. The Holybro Shuriken X1 is getting harder to find. Holybro seems to have replaced the X1 with the Kopis racing quad.

Everyone has been saying good things about the Kopis. It is lighter than the X1, has more modern electronics, but it has less powerful motors. The X1 has more power than I need anyway, and it sounds like the Kopis flies like a dream.

Unlike the BFight 210, the Kopis and the X1 both use top-of-the-line parts. Do you need those more costly parts? The Kopis is a better drone than the BFight 210 in every way except price. Is that premium hardware worth an extra $150?

The answer to those questions will be different for everyone. For me, my BFight 210 is probably going to be my backup quad. If I smoke an ESC or break an arm on my Shuriken X1, I’ll pack it up and fly the rest of my batteries on the BFight 210.

If my Shuriken X1 fell into a lake today, I think I would come home and order a Holybro Kopis. The Kopis is light like the BFight 210, but it is sturdier, more powerful, and more efficient. It also has a nicer VTX module that integrates with Betaflight.

If you’re on a limited budget, or you’re buying your first FPV racer, then the BFight 210 might be a good fit for you.

Standard components

The BFight 210 uses standard components in its 30.5mm stack. If you break your ESCs, flight controller, or VTX, you can find suitable replacements or upgrades without much trouble.

This has been my biggest complaint about my Shuriken X1. It uses a single, custom circuit board for the PDB, flight controller, and VTX. The X1’s frame doesn’t have standard 30.5 mm mounting points. If one component on that board goes, everything needs to be replaced.

I can’t sneak in a newer F4 flight controller into my Shuriken X1, because it just won’t fit. They’ve corrected this with the Kopis!

The verdict

If you made it to my blog, you’re probably already interested in buying a BFight 210, and you’re trying to decide whether or not you should pull the trigger. I think it is a fine drone. It has plenty of power, it flies smoothly, and it feels so light in the air. I don’t think you’ll regret buying one.

The BFight 210 feels like it has 80 percent of the performance of my Shuriken X1, but at a little more than half the price. It is a very good value, and in reality, the BFight 210 is more drone than I can handle. If you’re new to FPV flying, or you’re as much of a rookie as I am, the BFight 210 will be plenty of racing drone for you.

That said, I love the extra power of the Shuriken X1. The other day, I was ripping around the park with the BFight 210. Then I fired up the X1, and as soon as I took off, I did a big punch out. There were a few dozen kids nearby participating in soccer practice, and I heard a whole bunch of them hooting and hollering when they heard the X1 rip into the sky.

The Shuriken X1 always gets attention from a crowd. They barely noticed the BFight 210. Partly because it isn’t as fast, and partly because it isn’t as loud!

The BFight 210 has some interesting competition at the same price point. I keep hearing good things about the Furibee X215. There should be one on the way to my friend Brian, but they seem to be having trouble keeping them in stock. I’m sure he’ll let me try it out when it gets here. I’ll be sure to report back.

The BFight 210 has its problems, but they’re all minor. You can upgrade the VTX antenna and battery strap for less than ten dollars, so I wouldn’t let that hold you back.

Are you flying a BFight 210? What do you think of it? Would you recommend it to others? Let us know in the comments!

Fat Shark Dominator V3 FPV Goggles

| Comments

I’ve been using my extremely inexpensive Furibee VR01 FPV headset for three months while I waited for the Aomway Commander goggles to become readily available. I’d probably still be using the Furibee headset today, but I really missed having a DVR. I also wanted to tidy up my drone backpack, and I knew a smaller set of goggles would go a long way towards that goal.

Fat Shark Dominator V3 FPV Goggles

I bought a set of Fat Shark Dominator goggles and an Open Source RX5808 diversity module made by RJX Hobby. I added a compact patch antenna and a stubby pagoda antenna. The whole setup cost about $450. This is a big step up from my $50 headset!

Of course, the Aomway Commander goggles seemed to show up in stock everywhere about a week after my Fat Sharks arrived. Some friends have them already, and I have to say I’m more than a little jealous. They saved a lot of money, and they may have gotten the better headset!

The tiny field of view

Compared to any box-style headset, the Fat Shark goggles have the field-of-view of a postage stamp. My Dominator V3 goggles have a 32 degree field of view. The most expensive Fat Shark goggles top out at 45 degrees, but the reviews say those 45-degree Fat Shark goggles get blurry near the edges.

I can’t find the specs on my Furibee headset, but the Internet says my old Eachine EV800 goggles have an 82-degree field of view. I know the Furibee VR01 isn’t quite as wide, but it shouldn’t be far off.

Many people prefer a larger display, and I wasn’t certain I would enjoy making this transition. It is a different experience to say the least!

FuriBee VR01 FPV Goggles

I tend to fly in closer to the ground when I’m coming in for a landing. In fact, I was bouncing off the ground during most landings at first. I was used to the ground being a lot farther away from the center of the screen!

I noticed right away that it is much easier to execute front or back flip. The ground seems to come into view sooner. When using the bigger goggles, the edges of the screen are at the boundaries of your peripheral vision—you have to move your eyes downward to focus on the ground.

With the 32 degree Fat Shark goggles, your primary vision can take in almost the entire display. You can see the ground coming back into view towards the end of a flip without looking down.

I’m seeing this as an advantage, and I believe the Fat Shark Dominator goggles have made me appear to be a better pilot!

Fat Shark goggles are awesome!

If you can handle the tiny field of view, the Fat Shark goggles offer an amazing flying experience. The picture is clear. The RealACC diversity receiver is amazing, and its range fantastic.

The goggles are sturdy and well made, and supposedly the warranty and post-warranty support from Fat Shark is top notch.

The Dominator V3 goggles are comfortable enough. It is also nice to not have a giant box sticking out of my forehead when I lift the goggles up. They’re not terribly comfortable when you raise the goggles above your eyes to see the real world. Something in the center pushed right into my forehead. If I raise them a little higher this isn’t a problem, but then they feel like they’re going to pop off my head.

Fat Shark goggles are also terrible!

Flying in the Fat Sharks is fantastic, but the user experience is far from ideal. Aomway addressed most of my complaints about my Fat Shark goggles.

You have to plug in one cable to power the goggles and a separate cable to power the fan. It is my understanding that the goggles can handle more voltage than the fan. Why couldn’t Fat Shark include a ten cent voltage regulator? Aomway did a good job here—they only need one power cable for their goggles.

Using a separate module for the receiver is a great idea, but the receivers aren’t user friendly. All the nice receivers have a display, but it is on the outside of the goggles. You can’t see what channel you’re on, which antenna you’re using, or how much signal you have unless you take the goggles off and check the display.

Aomway has improved some of this. Their goggles show your current channel and battery voltage on the display. Aomway also has an on-screen indicator for the DVR instead of that stupid, tiny red light that the Fat Sharks have.

Unfortunately, the Aomway Commander goggles don’t show your signal strength on the display. This is something that the Eachine VR D2 Pro goggles do well.

Aomway Commander V1

If I waited a few more weeks, I probably would have bought the Aomway Commander goggles. I would have saved myself almost $150, and many of my complaints about the Fat Shark Dominator V3 goggles aren’t present in the Aomway goggles.

The Aomway Commander goggles have diversity receivers built in, so there is no need to buy a seprate module! I’ve been burned by crummy diversity modules in the past, so this worried me. Then I checked out Joshua Bardwell’s diversity module shootout video, and I decided to stop worrying. The Aomway goggles perform more than adequately against the La Forge and RealACC diversity modules.

I only have one real complaint about the Aomway Commander goggles. They have no indication of the signal strength of each receiver, and they don’t tell you which antenna is active. The readout on my RX5808 diversity module is far superior. I just wish that readout was on my screen!

What if my vision isn’t perfect?

I am near sighted, but not terribly so. This hasn’t been a problem in any of the box-type headsets that I’ve used.

Fat Shark goggles are different. They use fancy optics to make a tiny LCD panel look like a large display sitting out in the distance. The farther away things are, the more blurry they appear to me. I have a lot of trouble reading my on-screen display in Fat Shark goggles.

You can order a set of custom diopters that match your prescription. I’d like to do that in the future, but I’m overdue for an eye exam. I opted to order the inserts made by Fat Shark. You get a pair of -2, -4, and -6 diopters for around $15.

I’m certain that my existing prescription is a little stronger than -2. I tried the -4 inserts, and they’re too blurry. The -2 are quite close, and they work well enough for now.

Which receiver module should I buy?

The less costly diversity modules don’t cost much more than a basic receiver. Buying a diversity module is a no-brainer, but which diversity module should you buy?

The La Forge diversity module is the top-of-the-line receiver module for your Fat Shark goggles. My friend Brian uses one, and it looks like a fantastic piece of hardware.

I opted to go with the Open Source RX5808 diversity module made by RJX Hobby. The RX5850 diversity module is half the price of the La Forge V2 module, but cost wasn’t the primary influence behind my choice. I wanted to upgrade my goggles, and I wanted my upgrade as soon as possible. The La Forge wasn’t available with Prime shipping from Amazon, and the RXJ Hobby diversity module was. That was more than enough to tip the scales in favor of the cheaper module!

The La Forge diversity module is a fork of an Open Source RX5808-based receiver. The RJX Hobby module is built to the specs of the Open Source project, while the La Forge fork is heavily modified.

The firmware for the Open Source receiver has been lagging behind the La Forge until recently. The Achilles firmware for the RX5808 receivers seems to have closed that gap. Unfortunately, it is often difficult to flash the new Achilles firmware.

I tried a few times and gave up. I’m running the stock firmware on my RX5808 module for now. It is more than adequate for my needs. I figure I’ll attempt upgrading the firmware on a rainy day!

The La Forge takes up both module bays on your Fat Shark goggles. In theory, separating the antennas like this should be an advantage. In practice, I’m not sure that it is noticeable. I prefer having both antennas on the same side of the goggles. It seems more clean and compact.

I’ve written a lot, but I haven’t answered the question. Which receiver module should I buy?

The only two modules I considered were the La Forge v2 and the RX5808 module from RJX Hobby. I wouldn’t be unhappy if I spent a few more bucks on the La Forge module, and I am extremely pleased with my RX5808 module.

I don’t think you can go wrong with either of these modules!

But the Aomway Commanders and Fat Shark Dominators are wide screen!

People that have been flying a few years seem to prefer 4:3 cameras and displays. I am not one of those people.

Most of the inexpensive, starter FPV headsets are widescreen. All my headsets have been widescreen, and I’ve done my best to buy widescreen cameras. My first, cheap FPV camera had a widescreen sensor, but I believe every ready-to-fly drone I have has shipped with a 4:3 camera.

I don’t find it disorienting flying with a 4:3 camera on a 16:9 screen—these wide-angle lenses are already distorting the image quite a bit! That said, things look much better when you pair a nice 16:9 camera with your 16:9 display.

I’m using a 16:9 Runcam Eagle 2, and I’m extremely pleased with the results. It is a huge upgrade over the Sony HS1177. I like flying towards the sun at the end of the day and still being able to see the ground, trees, and gates!

Carrying your goggles

I wasn’t just shopping for a goggle upgrade. I want to save space in my drone backpack. There’s plenty of room in there for a set of Fat Sharks. I can’t just throw the goggles into a soft backpack with the antennas attached, and I don’t want to have to spend time attaching and detaching antennas every time I fly.

My Fat Sharks and Spektrum DX6 In Their Home

I bought the Turnigy transmitter carrying case. The case is just barely big enough to hold my Spektrum DX6 and my Fat Shark goggles. I have to wiggle the goggles into place just right in order to fit them in place with the antennas still attached, and I have to rotate my Pagoda antenna out of the way.

The Turnigy case has been an excellent upgrade. It fits perfectly in the large pocket of my off-brand tactical backpack, and there’s still enough room at the top of that pocket for two 6-packs of LiPo batteries.

Fat Shark Case With Transmitter and KingKong FlyEgg 130 Micro Drone

I can also strap one of my micro drones to the Turnigy case and leave my backpack at home. There’s plenty of room in the case to hold all my micro-drone batteries, so I can pack light when I’m flying light!

Conclusion

This was a good upgrade. I’m confident that I would be just as pleased with the Aomway Commander V1 goggles as I am with my Fat Shark Dominator V3 goggles. If I bought the Commanders, I bet that this blog post would be pointing out all the weird deficiencies I found in their design!

title

Starting my FPV journey with an $80 box headset was definitely the right choice. The money would have been better spent eight months ago on a spare drone than a pair of Fat Shark goggles. At the time, I had no idea I would enjoy the hobby as much as I do!

If you’re just starting out, I highly recommend trying an inexpensive box-style headset like the Furibee VR01. You won’t regret having a spare headset later on.

Upgrading to Fat Shark style goggles was most definitely the right choice for me. My drone bag is lighter and more streamlined, and my unpacking and repacking experience in the field has improved quite a bit. It is also nice having a smaller case to take with me when I’m only flying micro drones!

I’m having a great time using my Fat Shark goggles, and I’m not turning back.

Craft Coffee - Three Years Later

| Comments

I’ve been drinking coffee from Craft Coffee for more than three years now. My friend Brian got me a six-month subscription to their coffee discovery service. My first shipment of coffee from Craft Coffee is extremely memorable, and it was easily the best coffee I had ever tasted.

Craft Coffee Latte

Even so, I didn’t expect to maintain my subscription past that initial six-month period. I took notes about all the coffees I was drinking, and I even wrote blog posts about each shipment. After drinking eighteen different coffees, I thought I would discover which coffees and roasters were my favorite, so I could start buying all my coffee directly.

The first six months went by quickly, and I was surprised how much I enjoyed the coffee-delivery service. The beans from Craft Coffee didn’t cost more than buying direct from the roasters—in fact, Craft Coffee’s prices were often lower. I was hooked and ready to continue my subscription!

I’ve been drinking free coffee for a long time

Craft Coffee has a refer-a-friend program. When you refer one of your friends, they get a 15% discount and you get a delivery of coffee. When I wrote blog posts talking about my Craft Coffee experiences each month, I included my refer-a-friend code.

To my surprise, people were using that code. It didn’t take long before they were using that code often enough that I couldn’t drink the coffee fast enough!

I believe this disclosure is important. If you use my referral code (“pat1245”), you will get a 15% discount at Craft Coffee, and I will get some free coffee.

Why did I stop writing reviews of each delivery?

It was fun attempting to review coffee for a while, but it quickly got repetitive. There are a lot of topics where I have confidence in my writing abilities, but reviewing food and drink isn’t one of those topics.

Most of the time I felt as though I was constantly saying “This coffee is great!” and “I like it!” These aren’t terribly informative statements.

Then why are you writing about Craft Coffee again?!

Craft Coffee has changed direction since I became a customer. The change happened without me noticing, and it happened a long time ago—two years ago! I didn’t witness the change because they continued to offer their coffee-discovery service to their existing customers.

I still love Craft Coffee, but people making decisions based on my old reviews are using outdated information. I figured it was time to try some of the coffees available through their new service.

A fresh replacement for your daily coffee

Craft Coffee wants to be “a fresh replacement for your daily coffee.” This makes a lot of sense to me—it is exactly how I was using their original coffee discovery service. They have offerings that start as low as $8.99 per 12-oz bag and single-origin beans at $16.99 per 12-oz bag.

A Bag Of Craft Coffee

Their low-end prices are quite competitive with many of the coffees in my local grocery store—right around the price of a 12-oz bag of Peet’s or Dunkin Donuts—so I knew I had to try them out. I placed an order for their lightest roast option in their lowest tier. They call this coffee “Day In The Life.”

I have to admit that I was more than a little worried. I’ve never had much luck making a decent latte with coffee beans from the grocery store in this price range. Would this “Day In The Life” blend even be worth drinking?

I was pleasantly surprised. It wasn’t something you could compare to my very first cup of Craft Coffee, but it was pretty good! I made triple-shot lattes with nearly half of the bag with the help of my friend Miss Silvia, and I don’t think I pulled a single bad shot. I like to think I’m getting pretty good at making lattes, and these were better than any I’ve had from my local Starbucks.

My wife probably put a quarter of the bag through her Aeropress, and I gave the remainder of the bag to a coffee enthusiast friend. Even he had nice things to say about the “Day In The Life” coffee.

I can’t say it’s comparable to a good single-origin coffee, but it is quite pleasant. If you told me this was the only coffee I could drink for the rest of my life, I wouldn’t even be upset!

Single-origin beans

Since I was pleased with Craft Coffee’s lowest tier, I thought it would be safe to skip the middle tier—if I enjoyed the lowest price offering, I don’t see why I wouldn’t enjoy the rest!

The coffee-delivery service that I’d been grandfathered into seems to ship me blends more often than single-origin beans. Most of my favorite coffees have been single origin, so I moved directly to the single-origin bags of coffee are $19.99.

A Latte and a Bag of Craft Coffee

They sent me a bag of excellent coffee from Columbia. It is difficult to pull a good shot of espresso when using light-roast beans. I’ve lowered the pressure a bit on my Rancilio Silvia, and that helps a lot, but single-origin beans are sometimes a bit tricky still.

The first three or four triple shots I pulled were quite good, but when I finally got it dialed in on the fifth or sixth shot, it was amazing. All sorts of flavors started showing up! This problem is entirely my own fault. Dialing in light-roast espresso shots is difficult, but I’m delighted with the results whenever I manage to pull a perfect shot!

Unbeknownst to me, I actually drank an entire bag of single-origin beans from this tier last month. My friend Brian uses Craft Coffee’s single-origin beans to make 5-gallon batches of nitro cold-brew coffee—it is amazing stuff! He gets his coffee five or six bags at a time, but he did a bad job managing his deliveries. He received a large coffee delivery while he still had more than three gallons of coffee left.

His mistake was good luck for me, because I left his house one day with a couple of bags of [Craft Coffee][cc] from Kenya. By the time I got it, it wasn’t terribly fresh, but it was still delicious!

Should I keep my coffee-discovery plan?

This has been a conundrum for me, and I’ve changed my mind at least twice. In my opinion, a latte made using good, light-roast, single-origin beans is simply amazing. If you’re using an espresso machine, this may be something to think about. If you’re using any other brew method, you can ignore this entire section. Just get the single origin—it is delicious!

Pulling shots with light-roast beans can be tricky. Single-origin beans tend to be even less forgiving. I have adjusted the pressure on my Rancilio Silvia to be one or two bar lower than the usual pressure. This helps a ton, but I still often end up with lots of gushers—especially with single origin!

Top Down Latte

I went through two or three bags of the delicious Columbian single origin. When I pulled a good shot, it was delicious. Unfortunately, the pressure was blasting through the puck more often than I cared for. Every bad pull made me want to switch back to blends.

Then a bag of single origin from Peru showed up at my door. It has the most complicated tasting notes I have ever seen. The first few words describe the coffee as a shape-shifter, and I agree wholeheartedly with that assessment. I don’t think I’ve gotten two lattes that taste the same out of this bag yet, but every shot I’ve pulled has been delicious!

Craft Coffee tells me that the single-origin beans will change roughly every four weeks. I had no trouble pulling shots with the beans from Kenya or Peru. If I have to be careful pulling shots a couple of months every year so I can enjoy these delicious single-origin beans, I’m fine with that. It isn’t much of a price to pay to drink such delicious coffee.

Craft Coffee isn’t the only coffee-subscription service

Craft Coffee was the first service I tried, but I have tasted others. I’ve had some absolutely delicious beans from Angels’ Cup. Their prices are good, their beans are always fantastic, and I highly recommend their service.

I’d be willing to subscribe to Angels’ Cup only for their delicious coffee, but their appeal doesn’t end there. They have an intriguing blind-tasting app for Android and IOS.

Rascal The Cat

Every bag of Craft Coffee comes with a detailed description of the beans. Angels’ Cup leaves all that off and only prints a number on each bag. You drink the coffee and punch the number into the app.

The Angels’ Cup app will ask you questions about the roasting of the beans, how the coffee tastes, and about the aroma. It will let you know how close you got to what the roaster thought about the coffee. Isn’t that neat?

I’m still sticking with Craft Coffee

I am aware that I may have a bias. I haven’t paid for Craft Coffee in years. A surprising number of people find their way to my older Craft Coffee reviews each month, and enough of you fine folks use my coupon code to keep me drinking free coffee. Only just enough to keep me drinking, though. I’m not swimming in coffee beans like some sort of Scrooge McDuck!

I’m excited about this because I enjoy drinking coffee, and it is nice to get something back from this blog. In all these years, no one has left a comment to tell me that I’m an idiot for recommending Craft Coffee. I haven’t gotten any angry emails from people telling me that I wasted their money.

If I’ve steered you wrong, please don’t hesitate to let me know! Leave a comment or send me an email.

Angels’ Cup is cool because it keeps you surprised. Surprise is fun, but I don’t need to be surprised. I need a good cup of coffee every day, and that’s exactly what Craft Coffee gives me. They’re giving me exactly what I want—a fresh cup of coffee every day.

I absolutely do appreciate it if you use my coupon code at Craft Coffee (“pat1245”). As I said earlier, it will save you 15% and earn me a free bag of coffee. If you don’t want to use the coupon, that’s fine. I still think Craft Coffee is worth trying!

My Favorite 2S LiPo Batteries For Micro Drones

| Comments

As soon as I finished ordering my KingKong 90GT, I was immediately on the hunt for batteries. The 90GT comes with a single 350 mAh 7.4v Lithium-Polymer battery. I knew that wouldn’t be enough. I like to have half a dozen batteries in my bag for each of my drones.

There are a lot of good deals on batteries in China, but I didn’t want to wait that long, so I was only shopping for batteries at Amazon with Prime shipping.

I ordered three different batteries.

These batteries showed up a few days before the KingKong 90GT, so I had plenty of time to charge them up.

Infinity 550 mAh and Friends

The Gens Ace 1,000 mAh was the best value per mAh at Amazon. I figured it would be too heavy, and it is. The 90GT can barely lift that big, honking battery off the ground. After modding my 90GT to accept 2.4” props in place of the stock 2” props, it can almost fly with the 1,000 mAh battery.

The [350 mAh batteries][hs were my favorite battery from Amazon. They’re cheap, light, and they work well enough. Especially for the price. I have five of them in my drone bag, and I’ve been using them quite a lot. They kept my stock 90GT in the air for 3.5 to 4 minutes. They keep my modded 90GT with its bigger props in the air for 4.5 minutes or so. I’m extremely pleased with the free KingKong 90GT modification that allows for 30 percent larger propellers!

The Gens Ace 450 mAh batteries are superior in almost every way to the generic 350 mAh batteries. They keep the 90GT airborne for an extra minute or so, and the drone feels a bit more acrobatic the entire time it is in the air. Unfortunately, you can nearly buy two 350 mAh for the price of a single 450 mAh. I’d rather spend my money on twice as many batteries than have an extra minute of flight time.

Infinity graphene LiPo batteries

I have quite a few Infinity graphene 1300 mAh and 1500 mAh 4S batteries. They’re awesome batteries, and the prices are great. The only problem is waiting two or three weeks to receive them from Banggood.

So far, I’ve crashed and busted two Infinity graphene batteries. Almost six months ago, I busted a cell in one of my 1300 mAh batteries with my Shuriken 180 Pro. Then just last week, I crashed one of my friend Brian’s brand-new 1500 mAh Infinity graphene batteries.

I’ve learned how to remove a dead cell from a 4S LiPo battery. It isn’t that difficult, especially if the broken cell is on the outside. This got me wondering if I could convert a 4S graphene battery into a pair of 2S graphene batteries for the KingKong 90GT.

There is an Infinity 550 mAh 4S graphene battery, and I almost bought one.

Infinity 550 mAh 2S 7.4v batteries

Then I noticed that Infinity makes a 550 mAh 2S LiPo! It isn’t graphene, but I figured it was worth a try anyway. They’re only about $8 each, so I ordered four of them.

They’re fantastic batteries! My KingKong 90GT with upgraded props has never felt so fast and responsive, and it felt that way right up until the battery went dead.

That’s when I noticed the biggest difference between the awesome Infinity 550 mAh 2S and every other battery I’ve run through the KingKong 90GT. I had accidentally discharged that first battery all the way down to 2.8v per cell!

You might be wondering why I’m so excited about this. With every other battery I’ve tried, the KingKong 90GT falls out of the sky right around 3.7v per cell. It’ll just be flying along, and the flight controller will reboot.

Why can the 90GT drain the Infinity batteries so far?

I’m guessing it is the wiring. The generic batteries and Gens Ace LiPos have smaller gauge wire for the balance leads and the JST connectors. The Infinity batteries have big, fat wires for both. Smaller wires offer greater resistance, and greater resistance leads to a voltage drop.

I am surmising that the thicker wires allow the flight controller to draw enough voltage to stay alive longer.

How much longer do they last on a charge?

I’m not sure yet. On my first day out with the four new batteries, I think I was getting a little over five minutes of flight time on each battery. That’s only about 30 seconds longer than I usually get out of my 350 mAh batteries.

It isn’t a great comparison, though. If I push the 350 mAh batteries hard, they don’t even make it to four minutes. I was definitely flying fast on all the 550 mAh batteries, and they don’t slow down until they’re dead.

When I ran out of 550 mAh batteries, I strapped in the Gens Ace 450 mAh. It was noticeably weaker than the Infinity batteries. I decided to try a few power loops. The first one went great, but nobody saw me do it. That meant I had to do it again!

I was doing these pretty high up. The 90GT doesn’t have nearly as much thrust as my Shuriken X1, and I’m used to the extreme power of the X1. When you’re headed towards the ground in the X1, you just blip the throttle and it recovers from the fall and launches into space.

The KingKong 90GT is a great little micro drone, but it takes a while to recover from a dive compared to the X1. I hit the concrete pretty hard last week when full throttle just wasn’t enough. I figured I’d be safer higher up.

Bent Motor On My KingKong 90GT

I wasn’t. On my second attempt at a power loop, my flight controller rebooted due to low voltage right near the top of the loop. I feel like I was able to count to 5 before the 90GT hit the pavement.

I bent and destroyed one of the front motors. It’ll be a week or so before I can fix it, so I won’t be collecting much more data until then.

I popped the 450 mAh on my ISDT battery tester when I got home. It was just under 3.8v per cell. I’m guessing that it dipped under 3.7v per cell while I was accelerating into my power loop. The Infinity battery would most definitely have completed that maneuver without any trouble!

Is the 550 mAh too heavy for the stock KingKong 90GT?

I haven’t been able to test this. The biggest battery I’ve successfully flown on the stock 90GT is the Gens Ace 450 mAh. The Infinity 550 does weigh more.

I’m confident that the 550 mAh will fly just with the stock 90GT’s 2” propellers. It will definitely be pushing things to the limit, though.

In fact, these batteries are on the heavy side even with 2.4” or 2.5” propellers on my KingKong 90GT. Blackbox data says my maximum thrust on the Z axis falls around 0.5 g. That’s quite significant on a drone that tops out at about 3.6g under ideal conditions.

I’m definitely trading some performance and efficiency for increased flight time, but I don’t think the punch-out tests tell the whole story. Increasing my all-up weight from 72 grams to 90 grams isn’t idea, but the Infinity 550 mAh sure seems to make up for that in its ability to supply higher voltage for an extended period of time.

Banggood or bust

You almost have to buy the Infinity 550 mAh batteries from Banggood. There are none available with Prime shipping, and they cost three times as much at Amazon. They’re a great battery, and an amazing value at about $8 each. I don’t think I’d pay $24 or more!

Repaired KingKong 90GT

If you’re in a hurry like I was when I first ordered my KingKong 90GT, I’d recommend you get some generic 7.4v LiPo batteries from Amazon. They all seem to work well enough, and they’ll definitely keep you in the air.

If you can plan ahead, though, I highly recommend that you do. The two to three-week shipping time on the Infinity 550 mAh 2S is a bummer, but the results are probably worth the wait!

Building a Low-Power, High-Performance Ryzen Homelab Server to Host Virtual Machines

| Comments

UPDATE: Even though this post is six years old, plenty of folks are still visiting it. I am still using this hardware, but at some point many years ago I swapped the Ryzen 1600 motherboard and CPU into my desktop, and I moved my ancient FX-8350 setup into my homelab server. Either motherboard and CPU is overkill for my homelab needs, but my workstation was very much in need of that CPU bump.

If you are shopping for homelab or NAS parts today, you should check out the Topton N5105 NAS motherboard that Brian Moses is selling. It is super power efficient, has plenty of SATA ports, two NVMe slots, and four 2.5 gigabit Ethernet connections. If I were building a fresh server today, that is for sure the motherboard I would be using!

Many of us in [the Butter, What?! Discord community][bwd] are swapping out our big, aging homelab machines for inexpensive power-sipping mini PCs. They are a fantastic value, don’t take up much space, and they don’t generate much heat.

Two years ago, I decided to build a power-sipping homelab server to host a handful of Linux KVM virtual machines. I am in Texas, and my home office faces south. It is on the second floor, and it sure seems like this room gets less ventilation than all the other rooms—when the rest of the house is cool and comfortable in July and August, I’m often a few degrees warmer than I’d prefer.

Virt-manager

My hope was to add as few watts of heating to my office as possible while still providing more than enough compute power to meet my needs. I have been extremely pleased with the AMD 5350 CPU I used in that build. My Kill-A-Watt meter says that little server uses 34 watts with four or five virtual machines idling away—9 watts of that is used by the hard drives! It can barely reach 50 watts under full load.

That little AMD 5350 server is only high-performance when measured against the tasks I require of it. It more than meets my needs, but the components I used to build it are no longer being manufactured. I’ve also been looking for an excuse to use an AMD Ryzen processor. Upgrading my KVM homelab machine seemed like a good excuse to make use of a Ryzen CPU, and testing out a Ryzen CPU seemed like a good excuse for an upgrade!

The parts list

I lucked out. All of the boring components from my previous build are still available at Amazon. I had to buy a new processor, motherboard, and memory. The case, power supply, hard drives, and solid-state drives are all still available, so I reused them.

This is one of the easiest upgrades I’ve done in a long time. I swapped out the old motherboard, dropped the new one in place, and it booted right up. No fuss, no muss!

New Parts For My Homelab Upgrade

The last time I built a KVM homelab server, I included two parts lists. The parts I actually used, and a more budget-friendly list. I’m going to do the same thing again this year, but I’m going to add a third parts list that maximized performance!

My parts list

Total Cost: $1025

Budget-friendly alternative parts list

Less memory, no solid-state drives.

Total Cost: $717

My parts list

More cores, more memory, more storage. The 1800X does not come with a heat sink and fan.

Total Cost: $1932

Note: My build used the Corsair CX 430 power supply, but its price has gone way up and it seems to be in short supply now. I’ve listed the Corsair CX 450 in my parts list instead. I don’t expect this to be problematic!

Build it your way!

I’m excited about this build. You can drop the SSDs and scale the CPU back to a Ryzen 1200, and you’ll still end up with a fast virtual machine host that won’t break the bank. If that’s not what you need, you can fill up all the SATA ports and quadruple the RAM. It will cost you nearly $2,000—more if you spec out larger disks. You’ll have one hell of a machine!

In all honesty, the Ryzen 1200 parts list would have suited me just fine. The big Ryzen 1800X parts list is complete overkill for my use case. Settling somewhere in the middle was the best fit for me.

Random Photo of Rascal The Cat

Do you need to keep a whole mess of virtual machines running most of the time? You probably want to upgrade the RAM. Even if you’re running a lot of virtual machines, they may be spending most of their time idling, so the Ryzen 3 1200 processor might work just fine—spend your money on RAM instead of CPU!

Maybe you only run a handful of virtual machines like me, but maybe yours work a lot harder. You can upgrade the CPU instead!

Build it your way. If you want to copy my exact build, that’s just fine, but I intend for this to be more of a baseline. It should be easy to scale the parts up or down to fit your workload.

tl;dr: Performance and power consumption

As always, I am going to write at length about my goals, my decision process, and the results. I also know that you probably don’t want to read any of that. These are the important statistics.

  • Geekbench 3 Scores: 4,309 single-core, 23,651 multicore
  • Idle power consumption: 56 watts (50 watts with no VMs)
  • Max power consumption: 120 watts (mostly under 100 watts)
  • SSD mirror performance: 588 MB/s read, 298 MB/s write, 14,500 IOPS
  • HDD mirror performance: 398 MB/s read, 143 MB/s write, 550 IOPS (old test, sorry!)
  • lvmcache performance: 300 MB/s read, 130 MB/s write, 878 IOPS

  • P3 Kill-A-Watt at Amazon

Why only 16 GB of RAM?!

This server is designed to fit my needs, and my needs are rather humble. The last time I built a low-power KVM host, I bought as much RAM as I could, and I advocated that everyone should do the same—you can never have too much RAM! That little mini-ITX motherboard would only support 16 GB of RAM. That was more than I needed, and it wasn’t possible to go overboard.

This new machine’s motherboard supports up to 64 GB of RAM, and I’m not even making good use of my old server’s 16 GB of RAM. My KVM host server has only three important jobs. Each of those tasks has a dedicated virtual machine. I have a simple NAS VM, an Octoprint VM to manage my 3D printer’s jobs, and an OpenHAB VM that manages my home automation. All of these tasks could be handled by a single Raspberry Pi, and even allocating 1 GB of RAM to each of these virtual machines is overkill. That leaves me plenty of RAM for other tasks.

I also included a pair of solid-state drives in my build. If you’re on a tight budget and you need more RAM to run more virtual machines, I would skip the SSDs. I wanted to experiment with dm-cache and lvmcache, and I needed solid-state drives for that experiment.

RAM is inexpensive, but it is also extremely easy to upgrade. I have two empty DIMM slots, so it will be easy to add another 32 GB of RAM at some point in the future.

Why did you choose the Ryzen 5 1600?

I’ve been patient. I’ve been waiting for the Ryzen 3 processors to be released. I’m confident that even the Ryzen 3 1200 would meet my needs, but I was hoping they’d be more power-efficient than their faster siblings.

The Ryzen 3 1200 has the same 65-watt TDP as all the Ryzen CPUs up to and including the Ryzen 7 1700. I know that TDP is just an upper thermal limit, but my research says that the Ryzen 3 1200 is only a few watts more frugal at idle than most of his bigger brothers.

Cool Ryzen Motherboard Photo

As soon as I learned that, I found myself on the slippery slope aiming directly towards the Ryzen 5 1600. None of the Ryzen 3 processors have hyperthreading. The Ryzen 5 1400 is the first CPU with hyperthreading, and it was my biggest jump in cost—$55 more!

Like the 1200, the Ryzen 1400 only has 8 MB of L3 cache. You can spend $25 more to double that cache and increase the clock speed by another 10% with the Ryzen 5 1500X. That seemed like a good deal. More cache almost always gives a good bump in performance.

I couldn’t stop there. Another $20 would get me two more cores. This is a virtual machine host, so more cores are what I want.

You can definitely keep going, but I decided to stop there. Michael Lynch used an 8-core Ryzen 7 1700 in his homelab server build. That’s an inexpensive and tempting upgrade over my Ryzen 5 1600, but going past the 1600 moves the TDP from 65 watts to 95 watts. One of my hopes is to keep my power consumption and heat generation down, so I didn’t want to push it that far. I didn’t want to pay the additional cost just to generate more heat—the 1600 is already overkill for my own purposes!

Why the Antec One case?

When I built the previous server, I looked at a handful of small cases for mini-ITX motherboards. I decided not to go that route, because I like having a roomy case. You never know when you might want to fill up those six hard drive bays! All the extra room makes cable management easy, too.

I ended up using the Antec One ATX case. It looked so empty at the time with the AMD 5350’s mini-ITX motherboard only occupying a small fraction of the space. Even so, I was pleased with my choice at the time. Now that I’m stuffing a full-size ATX motherboard in there, I’ve realized that I saved myself even more trouble by using a full-size ATX case!

The Antec One is currently my favorite ATX case. It is inexpensive and well made. The tool-less 3.5” drive bays are mounted transversely, so you don’t have to worry about bumping into other components when removing or inserting drives. If you’ve ever tried to wiggle a hard drive past a video card or RAID controller, you’ll really appreciate this!

If you’re looking for a case with lots of drive bays, hot-swap drive bays, or just easier to access drive bays, check out my friend Brian’s list of his top three DIY NAS cases at Butter, What?!
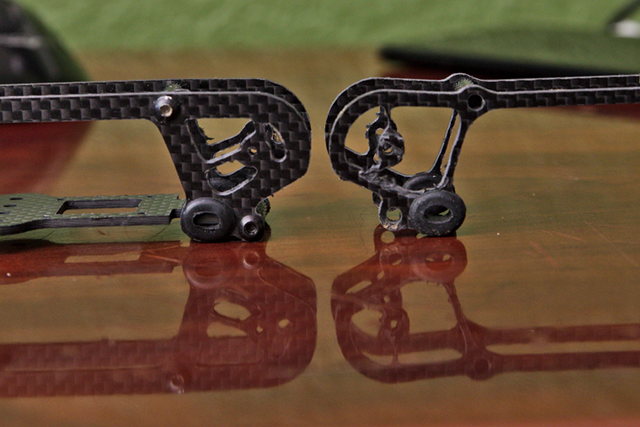
Power supplies are boring!

Generally speaking, larger power supplies tend to be less efficient when operating at a small percentage of their maximum capacity. There are also different levels of “80 Plus” certification that define how efficient a power supply is while operating at different percentages of its maximum load.

The difference in power consumption between the lowest and highest “80 Plus” certifications is between 10 and 14 percent depending on load. I’m reusing the power supply from my previous build, and the components in that build didn’t consume much power, so I didn’t think it was worth investing in a more efficient power supply. That extra 10 percent efficiency will only save about three watts. That would have been only one kWh every two weeks.

I ended up buying the Corsair CX430 power supply. It is a good value, reasonably quiet, and it still provides more than enough power for my new, fast Ryzen 5 1600X. I could fill my Antec One case full of hard drives, and I still wouldn’t use half of the Corsair CX430’s maximum capacity.

Socket AM4 motherboards are also boring

In my opinion, socket AM4 motherboards are quite boring. For my purposes, though, most of them are comparable and rather inexpensive!

The most common motherboards for Ryzen CPUs have four DIMM slots and six SATA ports. There are some with eight or even ten SATA ports, but I’m not building a NAS, so six will be more than enough.

Repeat of the Cool Motherboard Photo

Some Ryzen boards have only two DIMM slots, but all the four-slot motherboards I was considering were less then $100. In fact, I would have paid more for a motherboard that could hold more RAM. Four slots is the limit, though.

I chose the Asus Prime B350-Plus motherboard. It supports up to 64 GB of RAM, has six SATA ports, and has more PCIe and PCI slots than I will ever need. Asus rarely lets me down, and this motherboard has all the features I need at a good price.

The extra SATA ports will come in handy. The AMD 5350 motherboard only had four SATA ports. I had planned on adding an inexpensive PCIe SATA card when I eventually run out of storage. Last year, I filled my only available PCIe slot with an Infiniband card. Having a 40-gigabit network connection is awesome, but that blocked my storage upgrade path!

Wait a minute! Why do I need a video card?!

Almost every Ryzen motherboard I looked at has HDMI, DVI, and VGA ports—including my Asus B350. Unfortunately, I couldn’t find any with on-board video. Those video ports are for the upcoming AMD APU chips. I’m excited that AMD is using the same socket for both their processors with integrated graphics and also for their high-end models. I’m disappointed that I had to buy a discrete video card.

I have some old, low-end video cards somewhere in my closet. I almost used one of those instead, but I wanted to make sure my build could be easily replicated.

I used an Nvidia GT 710 PCIe card. They only cost around $30, and they have a TDP of only 15 watts. I don’t imagine mine is consuming anywhere near 15 watts—I’m not even booting into a GUI! I’m certain it is contributing at least a few watts to my total power consumption, but I have no good way to measure it.

What about power consumption?

The Ryzen 1600 has more performance in a single core than all four of my old AMD 5350’s cores combined, and with all six cores, active the 1600 is well over five times faster! I knew going into this that the Ryzen wouldn’t be as power-friendly as the 5350, but just how much worse is it?

When I boot my KVM host, the virtual machines do not spin up automatically. The disks that hold the virtual machine disk images are encrypted, so I have to ssh in to unlock those disks on the rare occasions when the server reboots. If you’re not building a server to host virtual machines, I imagine this is the idle power consumption number you’re most interested in.

Ryzen Machine Idling At 56 Watts

At this point, the idle Ryzen machine sits at almost exactly 50 watts. Be sure to upgrade to a recent kernel! My 4.11 kernel uses nearly 10 more watts than my 4.12 kernel! With any luck, this will continue to improve.

Once my virtual machines are all booted, my Ryzen 1600 homelab server bounces between 56 and 59 watts on the Kill-A-Watt meter.

That’s more than a 20-watt increase over my old AMD 5350 server. In fact, the old AMD 5350 server couldn’t even use this much electricity no matter how hard I pushed it.

It sounds like a huge increase in power consumption when I say it has increased by 64%, but it is only as much power as a couple of 100-watt LED bulbs, so it really isn’t too bad.

Power consumption under load has gone up quite a bit, too. If I run some benchmarks to keep all the cores active on the Ryzen 1600, power consumption usually bounces around somewhere in the 90-watt range with spikes up to 120 watts.

As far as homelab virtual machine hosts go, I’m quite pleased. My friend Brian built an awesome homelab server using a pair of used 8-core Xeon processors from eBay. His server is about 20 percent faster than mine, but it also has a pair of processors each with a 115w TDP—his server idles at 85 watts!

What’s this about a 16-core Xeon server?!

My friend Brian built a rather beefy homelab server last year. I am pretty sure I was the one that convinced him to build it. It is a really mean machine. For some reason, a lot of servers used to ship with a single Intel e5-2670 Xeon processor, and it was common to immediately remove that single CPU and replace it with a pair of faster processors.

That means the e5-2670 is easy to find on eBay, and they usually cost around $100 each. You just pop a pair of those chips into a $200 to $300 server-grade motherboard, and you’re all set. This was a tremendous value 12 months ago. It is still a good value if you need more than 64 GB of RAM or you’re one of those folks that feels like you need to have ECC RAM at home.

When I’m getting paid for my work, my servers are always equipped with ECC RAM. It is an easy decision to make when you’re spending someone else’s money, and you don’t want some sort of hardware problem waking you up in the middle of the night. I have yet to have a stick of RAM fail after successfully passing a few runs of memtest86, so plain old RAM will do just fine at home.

Benchmarks

I already had a pretty good idea of how the benchmarks would go long before I ordered any of the new hardware. The solid-state drives and hard disks have been chugging along for more than two years, and I tested those quite thoroughly when they arrived. My disks are encrypted, so there was a small chance that the faster CPU would be better at keeping up with that, but it isn’t the case.

I always scour through Geekbench CPU benchmarks before choosing a CPU, and my own tests landed right where I expected them. I’m including Geekbench 3 instead of Geekbench 4 results in this blog post, because that’s what I used to test the original server three years ago.

Geekbench 3 Results for the Ryzen 5 1600

The old AMD 5350 was a snail compared to the Ryzen 1600. The laptop-grade AMD 5350 managed 1,249 for the single-core score and 4,037 for the multi-core. The Ryzen 1600 just blows those numbers out of the water with a score of 4,309 for single core and 23,651 multi-core.

A single Ryzen 5 1600 core is faster than all four 5350 cores combined, and the Ryzen is nearly six times faster overall. I’d say this is a solid improvement and well worth the extra 20 watts of power consumption!

Most of the disk benchmarks ran a little more slowly this time. I’m not testing fresh disks this time, and the server is running and doing its job. My virtual machines don’t push the I/O subsystem hard, but you’d be surprised how much a small amount of disk activity can throw off a benchmark.

I was able to test the solid-state drives, but I don’t have easy, direct access to the spinning hard disks anymore. They’re sitting behind an SSD cache now!

The write performance of the Samsung 850 EVO SSDs dropped from 298 MB/s to 209 MB/s, while read speeds held steady at 606 MB/s—that’s just about 15 MB/s faster read speeds than three years ago. This makes perfect sense to me. A blank SSD usually has better write performance than a full SSD, and lvmcache has filled up the SSDs now.

The overall write speeds are down, but raw disk throughput isn’t the only reason to use a solid-state drive. Going from the hundreds of IOPS you get out of a spinning disk to the tens of thousands of IOPS you get out of a solid-state drive is a drastic improvement!

I did benchmark my lvmcache setup. The results of the benchmarks are disappointing. The results are worse than my old benchmarks of the hard disks with no SSD cache at all.

How did you configure your disks? What is lvmcache?

Lvmcache is built on top of dm-cache. It allows you to use solid-state drives as a persistent read/write cache on top of your slower hard drives. It is akin to ZFS’s ZIL and L2ARC, except that lvmcache uses a single cache for both read and write caching.

My KVM server is set up with a pair of 4 TB 7200 RPM disks in a RAID 10. I know from the comments on the previous homelab server blog post that you’re quite likely to be wondering how you can have two disks in a RAID 10. Linux’s MD layer allows you to put any number of disks into a RAID 10 configuration—even odd numbers of disks!

In practice, my two-disk RAID 10 is just a mirror. The only significant difference is that the RAID device’s header claims that it is a RAID 10 array and not a RAID 1.

The advantage of using RAID 10 comes with future growth. I can add disks to the RAID 10 one at a time, and no matter how many disks I add, I will always have exactly two copies of each block. Adding disks to a Linux MD RAID 1 array will only increase your redundancy.

My RAID 10 array is encrypted, and this is where all my virtual machine disk images are stored.

Samsung 850 EVO

I also have a mirrored pair of 250 GB Samsung 850 EVO solid-state drives. I have a 32 GB partition on each SSD. These two partitions are combined into a RAID 1 array—it is easier to boot off RAID 1! This 32 GB volume is where my base operating system lives, and it is not encrypted.

The remainder of each solid-state disk is mirrored as well, and that space is dedicated to use as the caching layer for my lvmcache.

My adventures with lvmcache probably deserve their own follow-up blog post. Lvmcache doesn’t benchmark well, but that isn’t surprising. Lvmcache is meant to be a long-lived cache. It doesn’t speed up short-term operations—that’s what the disk cache in RAM is for. It speeds up disk access that happens on a regular basis over time.

I wrote a more in depth post about my server’s RAID configuration. If you’re not sure about how you’d like to configure your disks, you can also check out my post over that Butter, What?! about choosing a RAID configuration for your home server.
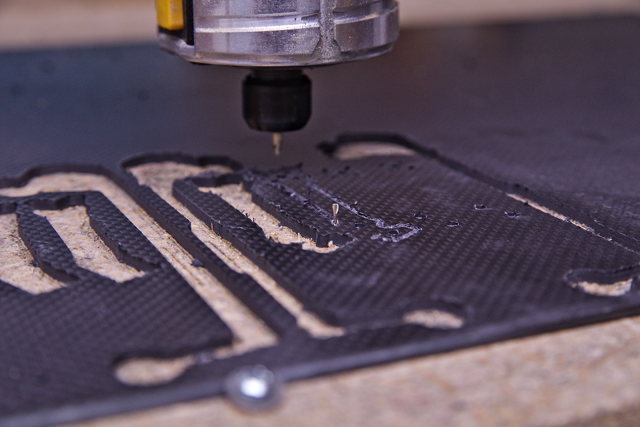
The conclusion

I’m extremely pleased with this upgrade. The new Ryzen processors are an excellent value, and their power consumption is quite reasonable. I’m excited about the wide range of performance options that will fit into this build, too. You can spend $100 less than I did and get yourself a Ryzen 1200—that would have been more than enough horsepower for my purposes, but faster is more fun, right?

There’s also room to grow in the other direction—the Ryzen 1800X is 50% faster than my Ryzen 1600, and there will be even more processors available for this socket in the future. I’m hoping the chips with integrated graphics will be a good upgrade.

The Assembled Ryzen 1600 Server

Benchmarking this build has gotten me even more interested in upgrading my aging desktop. This Ryzen 1600 is significantly faster than the overclocked FX-8350 in my workstation. I built it in 2013, so this shouldn’t be a surprise. I’m planning on using the same motherboard in my desktop, but I expect to use either a Ryzen 1600X or 1800X instead.

I am going to miss the old AMD 5350 server. It did its job well, and I’m certain it could have served me well for another couple of years. I’m glad I upgraded, though, because the old machine was out of SATA ports. I’d hate to be forced into a major upgrade just because I ran out of disk space, and my new photography hobby has me accumulating RAW files at an alarming rate. Adding another disk to my server is inevitable, and it will be a piece of cake now!

Do you have a server at home dedicated to hosting virtual machines? Are you using Linux and KVM? Leave a comment and let me know what you’re doing, or stop by our Discord server and chat with us about it!