I enjoy flying 3” micros. In fact, the first quadcopter frame I designed was a 3D-printed nylon frame sized for 3” props. I would have enjoyed trying 4” props, but my 3D printer isn’t big enough to print that style frame in a large enough size to accommodate bigger props.
I’ve been avoiding HD cameras on micro quads. I helped my friend Brian build a 3” quad with the original Runcam Split Mini—the first model with two boards. It was a fiddly build. If I remember correctly, his 20x20 stack was five boards high: 4-in-1 ESC, flight controller, the pair of Runcam Split boards, and a VTX. It was a lot of little wires to manage in a microscopic amount of space. Finding quality 20x20 components was very difficult at the time, too.
After all that work, the footage from the Runcam Split wasn’t all that exciting. Micros just don’t fly as smooth as their 5” cousins, and everything just looks weird to me without GoPro’s Superview. It also doesn’t help that the bitrate on the Split seemed like it could use a boost.
A lot has happened since the Runcam Split’s debut. There are quite a few roomier 3” freestyle frames now, but the only one that truly piqued my interest is Ummagawd’s Acrobrat frame. The Split has competition these days with the Caddx Turtle and the Foxeer Legend.
There have been a lot of advancements in the electronics, too. 20x20 ESCs work better and are more reliable. It is easy to find good 20x20 flight controllers with fast F4 chips, and Betaflight has improved dramatically in the last year or so. My little Leader 3 flies quite a bit better than any micros we were building when the Split Mini was first released. The Leader 3 arrived fully assembled and only cost around $120. The parts for Brian’s old HD micro build cost $262.57.
Micro components are getting more reliable, and the selection of reasonably priced parts has improved tremendously since then. I think it is time to revisit the idea of a 3” HD micro quad.
- My 3” HD Micro Frame Model at Thingiverse
- Leader 3 Micro Quad at patshead.com
- My 3D-Printed Drone Frame at patshead.com
- Brian’s Psuedo Micro Quadcopter at Brian’s Blog
Ummagawd’s Acrobrat
I am excited about the Acrobrat, but it doesn’t quite fit in with my needs. The Acrobrat is heavy and quite large. In fact, I used to have a smaller 4” quad at one point. My 4” quad isn’t a good comparison, because it was a tiny racing frame, but that quad was already so much bigger than any of my current 2.5” or 3” micros!
The extra weight is understandable, even if I’m not exactly thrilled about it. It is much easier to fly freestyle with a heavy quad. I can’t properly huck my Leader 3 over a tree. It only weighs about 150 grams, so it has a lot of trouble maintaining momentum under the drag of the air.
With my 680 gram 5” quad and a sharp blast of the throttle, I can go inverted before I even reach the tree. With the Leader 3, I had better be mostly past the tree before I stop accelerating forward.
I believe Tommy is doing a fantastic job. His idea to use rubber bushings to separate the clean and dirty sides of the quad is amazing. He has designed a great frame for an amazing 3” freestyle quad.
With the large footprint of the Acrobrat, I’d be tempted to run a 4” setup. I’d like to try going in both directions. I want a smaller, lighter Acrobrat for 1106 motors, and I’d like to test out a 4” Acrobrat with larger motors. I am more than a little curious about what sort of 4” quad I could squeeze in under 250 grams!
- Acrobrat 3” Freestyle Frame at Rotor Riot
Albert Kim’s Crossbow frame
I like the way Albert Kim thinks. He also wants a light, 3” HD quad with camera isolation and 1106 motors. I was excited when I saw the prototype of his Crossbow frame from Tomoquads.
His 3D-printed TPU camera mount is smart. It is simpler than Tommy’s bushings, but I’m a little worried that it will be too stiff. All the TPU filament I have on hand is flexible, but it isn’t very soft. Tomoquads might be using softer TPU, but the stiffness of TPU isn’t my only problem with the concept.
Tommy’s Acrobrat design puts the mass of the battery, camera, and side plates on the same side of the suspension. It is difficult for vibrating motors to transmit Jello to the 80 or 90 gram combined mass of the camera, side plates, and battery.
The Runcam Split Mini’s camera weighs less than 10 grams. The TPU would need to be extremely soft to allow a 10 gram camera to keep itself steady in the middle of vibrations.
When I started designing my frame, there was probably an 80% chance that I was going to emulate the Crossbow’s TPU camera mount. It is simple, clever, and 3D printing is right in my wheelhouse. I’d rather print something here than have to track down and order rubber bushings!
- Tomoquads 3” Crossbow Frame at Tomoquads
What are my goals?
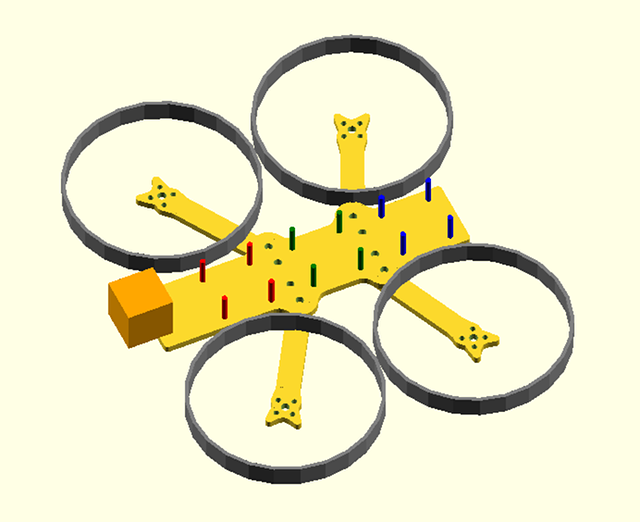
I am designing my HD micro frame using OpenSCAD. It is a parametric design, and the design will be open source.
What does parametric mean in this context? It means the design of the components is built up from measurements. If you want to use 1106 motors, you can punch in 9 mm for the motor hole spacing. If you want to go up to 2207 motors, you can punch in 16 mm, and the motor mount will scale up. The base will grow, and the tips of the motor guards will extend.

So far, I’ve planned ahead well enough to make the following elements configurable:
- Motor hole spacing
- Arm length
- Arm angle
- Arm width
- Prop diameter (for the mock prop ring)
I’m thinking about adding parameters for fuselage length, but I believe it would be best to keep the configuration to the arms. Most people can’t cut their own carbon, so I think it would be better to keep the center of the quad standardized. All of the necessary customization to accommodate different size propellers or various X, H, and stretch-X geometries can be realized with changes to only the arms.
What happened? I didn’t even talk about the goals yet!
I’m planning to emulate Tommy’s bushing idea from the Acrobrat. I ordered a big bag of reasonable bushings from McMaster-Carr. They should arrive in a few days. I won’t tell you about the bag of giant bushings that I accidentally ordered. They’re wider than a 1407 motor!
I have a complaint about both the Acrobrat and the Crossbow. It probably isn’t a big deal, but it still irks me. The carbon doesn’t run parallel to the arms. It is close on the Acrobrat, but it is nearly 45 degrees out of alignment on the Crossbow. The extra bracing in the front of both frames probably helps, but when the strands of carbon don’t run the entire length of the arm, you end up relying on the epoxy for rigidity and durability.
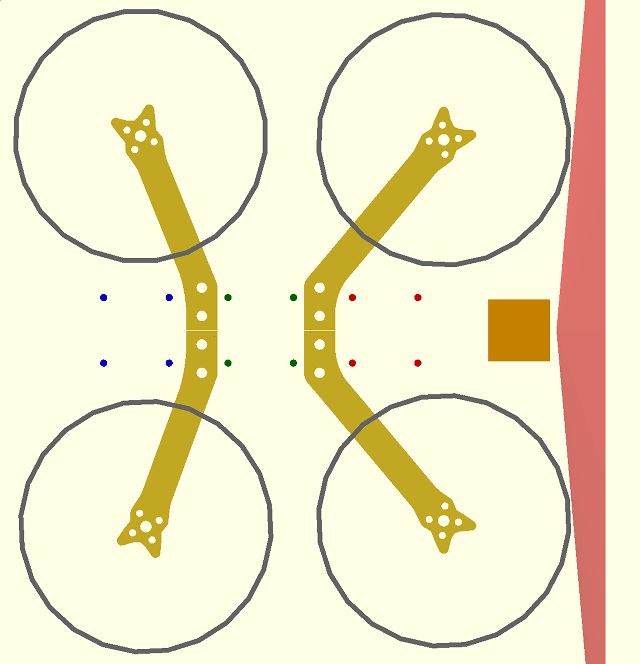
This is part of the reason I’m attempting to use individual, replaceable arms. That makes it easy to cut the carbon with the strands running parallel to the arm. Individual arms will also save me a lot of wasted carbon material, and it will make it easy to change the configuration of the quad.
Here’s a list of my design goals:
- Individual, replaceable, configurable arms
- Standard fuselage for all configurations
- Scalable from 2.5” to 4”
- Scalable from 1106 to 1806 motor mounts
- Three 20x20 mm stacks
- Props completely out of view of the HD FPM camera
- Top-mount battery
- Acrobrat-style bushings
- 3” Freestyle micro HD with sub-200 gram all-up weight
- 4” Freestyle micro HD with sub-250 gram all-up weight
My new Shapeoko XXL CNC router is in the hands of UPS, and as I write this, it is out for delivery! I’ve already ordered three 400x500 mm carbon fiber sheets from GetFPV: 1 mm, 2 mm, and 3mm.
I plan for the arms to be 3 mm, the bottom and side plates to be 2 mm, and the small brace plate under the arms will be 1 mm.
- I Bought a CNC Machine: I Have No Idea What I’m Doing at patshead.com
This is too long! I didn’t read it! What’s the elevator pitch?
I’m designing a smaller Acrobrat-like freestyle frame for HD FPV cameras with easily configurable arm geometry. It should allow 3” builds under 200 grams, and 4” builds under 250 grams. I hope! The design will be open source.
I want this frame to be a good upgrade path from your existing 2.5” or 3” bind-n-fly micro. Pick up a Runcam Split Mini or Caddx Turtle, transplant the guts of your Leader 3, and start recording awesome HD freestyle footage!
Does that seem like a reasonably accurate summary?
- Runcam Split Mini 2 at Amazon
- Caddx Turtle V2 at Amazon
When will it be ready?
I have trouble even guessing at this. I’ve never operated a CNC router, and I’m still waiting for UPS to drop it off—I bet it will be here before I finish writing this, though!
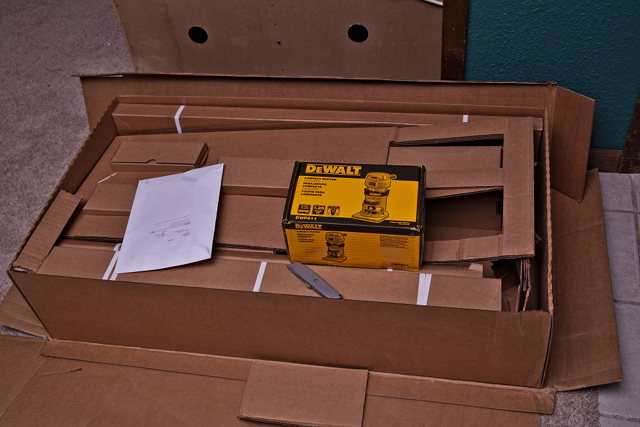
The Shapeoko is a kit, so I’m going to have to assemble it. Then I’m going to have to test it. Carbon fiber is relatively expensive and messy, so cutting frames won’t be my first project. It might not even be my second! But who knows. I’ll probably get impatient!
I don’t have the time or funds to test every configuration
Designing a frame is fun. If I can transplant my Leader 3 hardware into this frame and stick an HD camera on it, I’ll be happy. I don’t need to go past that, but I’d sure like to!
I’ve noticed that the quads in my bag tend to fall into three different buckets: I have my Tinyhawk for indoor flying, my 5” and 6” quads for capturing proper HD freestyle footage, and I have my 3” micro quad for more considerate outdoor flying.
I think building this frame out to fit 4” props would be fantastic. Power and efficiency go up dramatically compared to 3”, and it wouldn’t need to be all that much heavier. Conservative motor sizing and a reasonable 4S LiPo should put a sub-250 gram 4” build easily in reach.
I’m not so sure I want to buy the parts to build that quad. In my mind, it would just fall into the same bucket as my 5” quads. I would very much be interested in finding someone that wants to build that quad. There are parts of the world where the 250 gram weight limit is a real problem.
#calculated pic.twitter.com/mEVUvQ2Rdp
— Pat Regan (@patsheadcom) January 25, 2019
NOTE: That isn’t a micro. That’s my 5” freestyle rig.
If you’d like to be the guinea pig for a 4” version of my frame, please get in touch with me. Tell me about your plans, and I’ll work on getting you a frame. You can stop by and chat with me on our Discord server. Keeping it under 250 grams isn’t required, but it would be a much more interesting build!
I need to get my own 3” designed, cut, and flying first. I don’t think it would be right to send a crummy design that doesn’t work right out to someone without at least a little testing first!
How is the design going?
I’m much farther along than I expected! The arms seem reasonable, and they look correct at every length and angle I’ve tested. The mounting holes are there, and they line up with the mounting holes in the frame. I’m a little impressed by that, because it is easy to leave an important number out of your math somewhere in OpenSCAD and have things not quite line up!
The bottom plate is about half finished. It needs tabs to fit into the side plates’ grommets. I’m waiting for the grommets to arrive. The grommets are round, but I’ll be fitting them into oval holes. I’ll 3D-print some test parts with a variety of dimensions to see what shape works best.
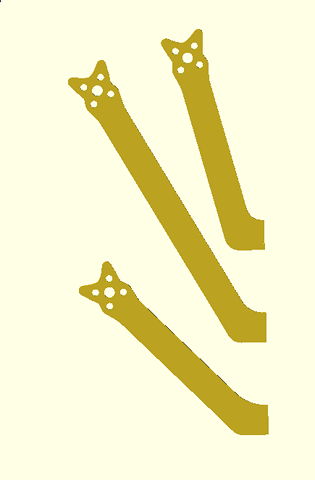
A wider oval will accommodate a wider tab on the bottom plate. The wider the tab, the less likely it will be to break in a crash. If it goes too wide, the bushing will lose a lot of its springiness. Testing will be required!
The bottom plate also needs some cutouts to save weight. That will be quick and easy.
I imagine there will be several iterations of the side plates. I’ve decided to separate the side plates with 20mm standoffs—that’s 5mm narrower than the Acrobrat. This is 1 mm wider than the FPV camera, and the narrower bottom plate should help shave a few grams off the frame.
Once I get the side plates ready, I plan to 3D print the components for a test fitting.
- My 3” HD Micro Frame Model at Thingiverse
How can I keep up to date on the progress?
Of course, you can check back on my blog for updates. I’ve spent nearly ten years writing about my various projects as I’m working on them, and I don’t intend to stop now!
There will be videos on my YouTube channel, and I regularly post photos and random thoughts on Twitter. I would greatly appreciate it if you subscribe to my YouTube channel or follow me on Twitter. Interactions are even better!
I am set up on Patreon, but I’m doing a bad job of advertising it and making use of it. Maybe I should get better at that!
If you have questions, comments, or critiques, you can leave a comment or stop by our Discord server. I’d love to know what you think, and I would enjoy your input!
NOTE: I finished the final draft of this blog post before UPS arrived with the Shapeoko, but it will be a few hours before the photos and screenshots are ready. The CNC router was delivered before I managed to publish this!
- My 3” HD Micro Frame Model at Thingiverse
- I Bought a CNC Machine: I Have No Idea What I’m Doing at patshead.com
- Pat’s YouTube channel
- Pat Regan on Twitter
- Pat’s Patreon
- Leader 3 Micro Quad at patshead.com
- My 3D-Printed Drone Frame at patshead.com
- Acrobrat 3” Freestyle Frame at Rotor Riot
- Tomoquads 3” Crossbow Frame at Tomoquads
- Runcam Split Mini 2 at Amazon
- Caddx Turtle V2 at Amazon