UPDATE: There’s lots of information about the Shuriken 180 Pro in this blog post. I’ve since upgraded to a Shuriken X1. If you haven’t already bought the 180 Pro, I highly recommend you skip it and go straight to the Shuriken X1.
If you are a regular follower of my antics, then you know that I’ve been working on designing the PH145 drone’s 3D-printed frame. I’m both surprised and elated by just how well the PH145 has turned out. While I was designing the PH145 and pricing out the parts, I was also keeping an eye on the competition.
As the cost of the PH145 started to solidify, I started shopping around to see just how much drone you could buy for the same price. I don’t expect all my readers to be the do-it-yourself types, so I wanted some that would be ready to fly right out of the box.
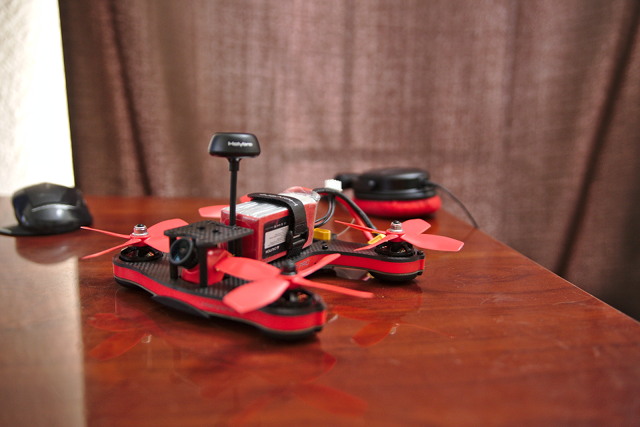
I told my friends at Gearbest.com that I was interested in one of their FPV racing drones, and they were nice enough to send me a Holybro Shuriken 180 Pro!
tl;dr summary
I love this Holybro Shuriken 180 Pro. It is fast—definitely faster than the PH145. It is also durable. I’ve already crashed it a few times, and the props survived some rather hard hits in the grass. The Shuriken’s exposed props are easily broken in a gentle crash on asphalt or concrete—that’s why I like the enclosed props on the PH145.
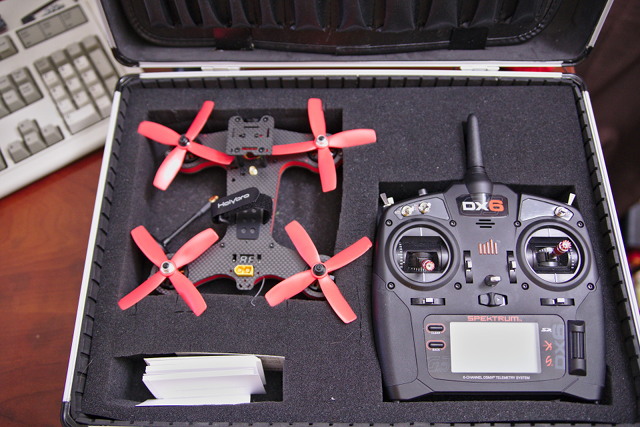
I don’t think I can break this frame in a crash, and props are cheap. If you’re thinking about buying the Holybro Shuriken 180 Pro, it is time to stop thinking. It is sturdy and a ton of fun, so go buy one already!
UPDATE: I did break the Shuriken 180 Pro in a crash!
I said that the Shuriken 180 Pro is a sturdy basher, and I stand by that statement. I have crashed into pavement, and I have smashed camera first into trees at high speeds. It took quite a crash to cause serious damage to the Shuriken 180 Pro.
It landed on its face from what seemed to be a fairly high altitude. It must have hit way harder than I’ve ever crashed before. We didn’t get to see the crash. It came down in an empty parking area. The aluminum camera mounts were bent, the plastic camera holder was shattered, the two front motors were bent, and the impact pushed the battery forward and dislodged the VTX antenna from the circuit board. When I plugged the battery back in, sparks and magic smoke came out.
I was able to salvage the camera, two motors, and four 30 amp ESCs.
After the crash, I went straight home and ordered a Holybro Shuriken X1. I wasn’t quite ready for a quadcopter with that much power, but it only took me a few weeks to get used to it.
Knowing what I know now, I wouldn’t bother with the Shuriken 180 Pro. It is inferior in almost every way to the Shuriken X1.
Shuriken 180 vs Shuriken 180 Pro
UPDATE: The Shuriken 180 has been discontinued.
I am sometimes a little slow on the uptake. I didn’t even realize there were two different Shuriken 180 drones. I was looking at the specs of the older Shuriken 180, and I’m pretty sure I thought it had the price tag of the Shuriken 180 Pro!
The older Shuriken 180 is almost a direct competitor to my own PH145 drone. The Shuriken 180 has bigger motors and props than the PH145, while the PH145 weighs a bit less and is a lot safer in a crash. The Shuriken 180 costs about $175 shipped. That’s a little cheaper than my PH145, and the Shuriken arrives at your door fully assembled!
I’m sure the Shuriken 180 is a great quadcopter, but I don’t own one, so I don’t have first hand experience with it. I do have a Holybro Shuriken 180 Pro sitting here on my desk. The Pro version costs about $40 to $60 more, but you do get a lot more quadcopter for your money.
The Pro version has a better camera, and the 1806 2700KV motors have been upgraded to 2205 2750KV motors.
Like I said, the cheaper model looks like a great drone, and it would be a ton of fun to fly it. If you’re new to racing drones or FPV, and you want to save a few bucks, I’m sure you’ll have a blast with the base model Shuriken 180. I recommend that you spend the extra $40 and upgrade to the Shuriken 180 Pro.
- Holybro Shuriken X1 FPV Racing Drone
- Holybro Shuriken 180 Pro at Gearbest
- Holybro Shuriken 180 at Gearbest
Why not the Shuriken X1?
The Holybro Shuriken X1 looks like it is out of my league! I think it weighs a bit less than my Shuriken 180 Pro, but it has bigger motors and 5” propellers.
The Shuriken 180 Pro is small and dense, and it has two plates sandwiched together. All the wiring and electronics are hiding between those plates.
The Shuriken X1 is built on an open carbon fiber plate, and the wiring and ESCs are just strapped to the top of the frame. There is nothing wrong with this—all our home built drones look just like this. We do this to save weight and cost.
It looks like the Shuriken X1 is a rocket compared to the Shuriken 180 Pro, but I think the Shuriken 180 Pro will be able to take more of a beating. The Shuriken X1 doesn’t cost much more than the Shuriken 180 Pro, and speed is so much fun, but I know it will lead to more crashes.
My friend Brian’s Shuriken X1 just arrived a few days ago. I’ve seen it fly once, and it is absolutely bananas. I’m already afraid to recommend the Shuriken 180 Pro as a starter drone—it flies smooth, but the power is a lot to handle. The Shuriken X1 has a ridiculous amount of thrust. Brian seems more than a little worried about learning how to FPV with it!
UPDATE: I know I have interjected this information twice already, but I think it is important to mention it again. The Shuriken X1 is ridiculously fast, very sturdy, and a huge upgrade over the Shuriken 180 Pro.
I was flying in just five minutes!
It was so easy to get this thing airborne. There were only two things that slowed me down, and they were both my fault. The DHL delivery guy knocked on my door while I was in the middle of pulling a double shot of espresso. I rushed to sign for the package so I could stop the espresso machine before the pull ran too long.
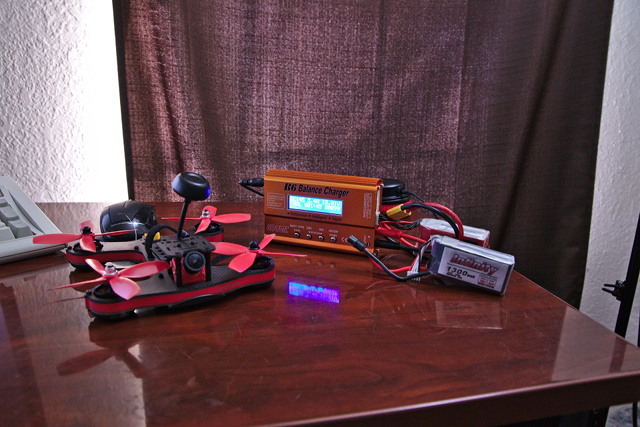
It was definitely a longer shot than I prefer, but it made an acceptable latte, and I was determined to finish that latte before I went outside to test out the Shuriken 180 Pro! While I was drinking, I created a new profile on my Spektrum DX6 controller. It took me longer than I’d like to admit to find the bind button on the drone, but once I found it, I was paired up in seconds.
I also wanted to switch the video transmitter to 600mw. The jumpers are tough to remove, but I had it switched before my latte was gone!
I strapped in one of my 1500mAh 4S batteries, plugged in my Eachine EV800 goggles and DVR, and went outside. I was able to zip around the parking lot with ease. There’s not enough room out there for me to fly FPV.
The first flight
The Holybro Shuriken 180 Pro arrives with Betaflight installed on its flight controller. I’m not certain, but the PID settings looked like they were set to the defaults. Even so, it felt pretty good out of the box.
It was obviously faster than my PH145 quadcopter, but it is just as easy to control. I was quite relieved that the Shuriken wasn’t a Ferrari to my PH145’s Honda Civic. It feels more like comparing a base model Corvette to a Corvette ZR-1.
I don’t have the tools to measure thrust, but I can measure weight and can make educated guesses based on data gathered from the Internet. According to the blackbox data, my 240g PH145 drone can pull about 3.2g of acceleration on the Z-axis. The heavier Shuriken 180 Pro hits numbers just over 3.8g with the “indestructible” tri-blade DAL 3045 bullnose props that I’m currently running. I need to test with the stock 4-blade 4040 props—I bet they pull a little harder!
I don’t remember what I did wrong, but I don’t have DVR video of the first few minutes of flight. This is the video of the second half of my first battery.
I’m an absolute beginner, but as far as I can tell, the PID settings feel pretty good out of the box. The yaw rate felt really low to me. It didn’t take long to fire up the Betaflight Configurator to adjust the rates. I bumped the yaw rate to 1.15 and the roll/pitch rate to 1.3. This is just my personal preference.
- Holybro Shuriken 180 Pro at Gearbest
The FPV camera—my only complaint!
The FPV camera actually works really well. It has a CCD sensor, and it is a big upgrade over the CMOS camera I used on my PH145. The transmitter can be toggled between 25mw and 600mw. The extra broadcasting power is awesome!
I easily get too far away at the park with my PH145 drone, and I have to turn around quickly before the signal completely disappears. The 600mw transmitter lets me get all the way to the edges of the park. This is an upgrade I will be making on the PH145!
My only complaint is that the camera angle isn’t adjustable enough. It is hanging on a swivel, but there is absolutely no room to operate the swivel. At first, I thought I would be stuck at the default 45 degree angle. This is fine if you know what you’re doing, but I’m not yet skilled enough to FPV at the speeds this angle encourages!
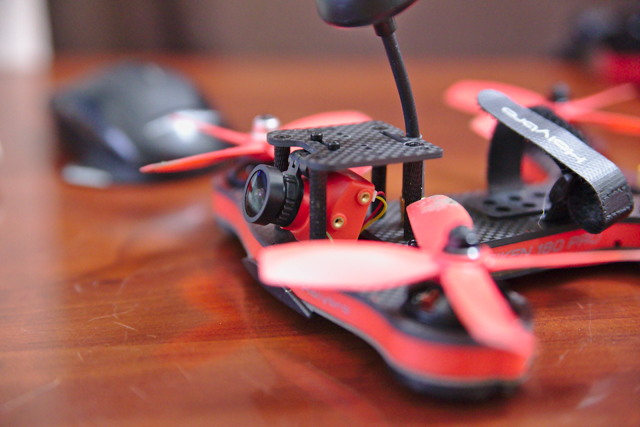
You can adjust the angle by moving the camera to a different set of mounting holes. That will give you about a 15 degree angle. It also moves the camera out past the front of the frame.
The aluminum standoffs need to be just a few millimeters longer. That would allow for easy camera angle adjustments.
- Holybro Shuriken 180 Pro at Gearbest
My first FPV flight with the Shuriken 180 Pro
I am impatient. There were 20 mph winds and a 40% chance of rain here in Plano, TX on the afternoon the Shuriken 180 Pro arrived at my door. I didn’t care. I had to go out to the park and try out the new drone!
The wind was fierce. It was blowing straight towards the parking lot, and I had to tilt the drone about 20 degrees into the wind to maintain a hover. I decided to try flying FPV anyway!
This thing is fast! I took to the air, and I accelerated away from myself for a few seconds. When I turned around, I could see myself in the camera, but I was so tiny! I cruised around in the air for a bit, then I decided to head back. When your camera is at a 45 degree angle and you level off, you can’t see much of the ground at all.
Everything worked out fine, except for the fact that I’m terrible at flying FPV. I flew out into the field, turned around, and flew back. Then the wind wanted to take me out over the parking lot, and that’s a place I didn’t want to be.
I was able to come back out over the field, and I wanted to land, but I didn’t know how high up I was. The drone fell much farther than I expected—it seemed to fall for quite a few seconds after I cut the throttle.

It didn’t take any serious damage. Just a few chips in the props.
This thing is sturdy
This is definitely not a drone built purely for racing. They probably could have made it a lot lighter, and it still would have been a sturdy enough craft.
This little drone with its 4” propellers weighs just as much as the Shuriken X1, and the X1 has room for 5” propellers! I imagine that extra weight provides the structure that makes the Shuriken 180 Pro more capable of surviving a hard crash. I’m sure we’ll find out, because I am a terrible pilot!
Batteries and flight time
I tried out all my 4S batteries, because that’s the sort of thing I tend to do. I’ve only been flying the Shuriken 180 Pro for a few days, so I don’t have a ton of data yet.
I’m seeing five to six minutes of flight time on both my 1500mAh 4S LiPo and 1300mAh 4S graphene LiPo.
My PH145’s favorite battery is the 850mAh Venom 4S LiPo. While the lightweight PH145 sees six minutes of flight time with the 850mAh, the heavier and higher-power Shuriken only sees 3.5 minutes. The beginning of that flight is fun—the Shuriken does feel zippier with that 12 percent weight reduction, but the little battery feels quite drained and weak for the last minute or so.
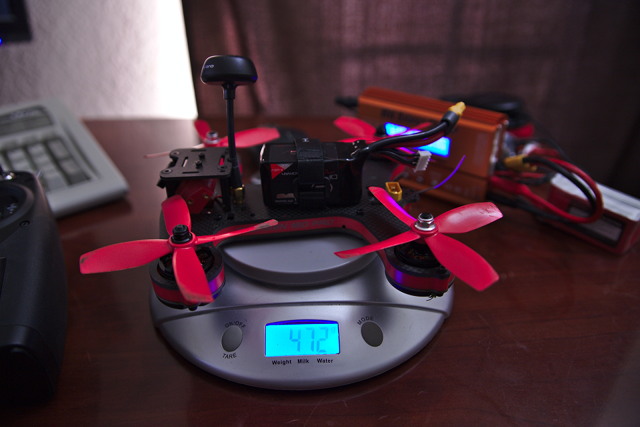
The 850mAh Venom 4S LiPo batteries are a lot of fun—the Shuriken 180 Pro only weighs 471g when flying with one! I already have five of them for my PH145, so I’ll also be flying them in the Shuriken. I don’t recommend that you buy any, though. They cost just as much as a 1300mAh or 1500mAh 4S LiPo, but the 850mAh only provide about 2 minutes of good, fast flight time.
- GARTT 1500mAh 4S at Amazon
- CrazePony Graphene 1300mAh 4S at Amazon
- 1300mAh 3S at Amazon
You may want to relocate the FPV antenna
The antenna is stiff, and it is the tallest part of the Shuriken 180 Pro. That means it is going to be under a lot of stress when you crash. The SMA antenna connector is soldered right onto the Shuriken’s circuit board. That single, large circuit board isn’t just for the video transmitter. The flight controller is part of the same board, so if you break that antenna connector, you may have to replace the entire board.
I’ve already ordered some short SMA antenna extensions from Amazon. They’re inexpensive, and I think it is wise to protect that connector—I do crash an awful lot!
- SMA Extension Cable 2-pack at Amazon
Propellers
The Shuriken comes with two sets of 4-blade 4040 propellers. I know I crash all the time, so these aren’t going to last long.
I ordered a set of supposedly indestructible DAL 3-blade 4045 bull nose propellers. My research says they can generate 900 grams of thrust on 2205 2750KV motors. Most other 4” 3-blade props generate 650 grams to 750 grams of thrust. We’ll have to see how that compares to the stock 4-blade props!
Even if they don’t generate as much lift, at least they might be indestructible! I am most assuredly in need of some indestructible props. I had to replace three props after my first crash on asphalt. It was more like a hard landing than a crash.
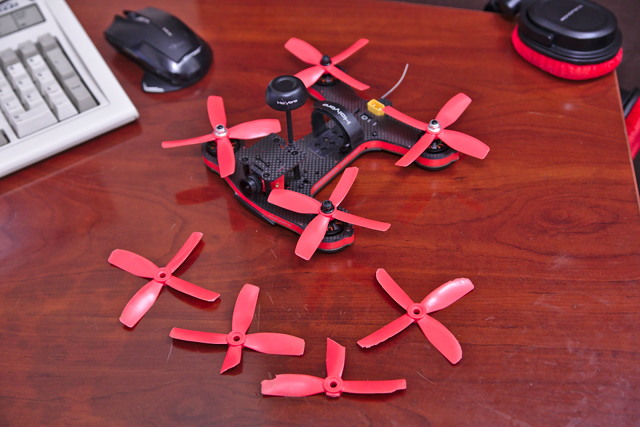
I smack the PH145’s prop guards into concrete and asphalt all the time, and it rarely damages a prop. I recommend flying the Shuriken 180 Pro in areas where you’re more likely to crash into grass!
- DAL 4045 Tri-Blade Indestructible Props at Amazon
The 600mw FPV transmitter is a huge upgrade
This is an upgrade I will be making to the PH145. Its transmitter is only 25mw, and it doesn’t take much distance before the picture in the goggles starts getting snowy and scary. In TheLab.ms parking lot, I can’t even get 20 parking spaces away before I nearly lose video. It’ll go much farther at 25mw at the park, but still not nearly as far as I’d like.
You can see how quickly my signal degrades in TheLab.ms parking lot in this FPV recording of my PH145.
The 600mw transmitter in the Holybro Shuriken 180 Pro is a huge upgrade. I can make it all the way across the parking lot at TheLab.ms, and I accidentally flew farther away on my first trip at the park than I could ever fly with the 25mw transmitter!
The verdict
I love the Holybro Shuriken 180 Pro. I’m glad my friends at Gearbest decided to send me one, because I don’t think I would have been smart enough to buy something like this on my own! It is fast, agile, and a ton of fun. I know I’ll be flying it all the time.
Half the fun of the PH145 has been designing and building the quadcopter, and I have enjoyed finding and correcting its shortcomings. If you don’t enjoy building things, and you just want to get up in the air, the Holybro Shuriken 180 Pro would be an excellent choice. If you’re anything like me, you’ll crash a lot, so stock up on propellers!
If you’ve never flown a quadcopter, you should start with something like the Blade Nano QX or the KingKong 90GT. The Nano is a very inexpensive way to get started—it is how I got started! We’ve since discovered the tiny KingKong 90GT brushless FPV drone. It costs a bit more, but it can still be flown outside on windy days. It isn’t nearly as beginner friendly as the Blade Nano, but it will take you much farther on your FPV journey!
- Holybro Shuriken 180 Pro at Gearbest
- Holybro Shuriken 180 at Gearbest
- Holybro Shuriken X1 at Gearbest
- Holybro Shuriken X1 FPV Racing Drone at patshead.com
- The KingKong 90GT Micro Drone Is Bananas at patshead.com
- Spektrum DX6 transmitter at Amazon
- PH145 FPV Quadcopter