Confidence is important when flying FPV freestyle. If you’re nervous and shaky when you’re aiming for a gap or trying to clear a tree, you’re much more likely to miss the gap or get stuck in the tree.
When I was flying FrSky receivers in my quads, I was often nervous when flying over trees. At the time, I didn’t think I was hitting failsafes all that often, but I bet I was losing my control link once every week or so. I didn’t think it was all that problematic at the time, but every time I lost control, it was like resetting my confidence’s timer.
I’d be nervous for a few days—especially when I was upside down over a tall tree! I’d start getting my confidence back, and then I’d hit another failsafe.
Having reliable gear is important, and my gear wasn’t reliable enough. I invested a few hundred dollars into TBS Crossfire hardware, and this problem was almost completely eliminated. You can’t completely eliminate failsafes, but they are no longer a regular occurrence for me.
You can often spend some of your hard-earned money to buy yourself some extra confidence.
Flying an expensive FPV quad can be scary!
The first time I decided to fly my quad over a little creek, I was nervous. My thumbs were shaky. I wasn’t really prepared to climb down the ten-foot ledge or go swimming to retrieve my stuff. Visibility under all the trees wasn’t great, so I was worried a ghost branch would pop up at the last second.
I swapped my $200 GoPro HERO5 Session for my older $100 GoPro Session. I was still sending $650 or so down into that creek. I could lose a $40 Crossfire Nano, a $60 ESC board, a $45 Runcam Eagle, and all sorts of other bits and bobs. A slew of $50 components adds up quickly!
Be brave, @patsheadcom. And don't hit a ghost branch!
— Pat Regan (@patsheadcom) December 28, 2018
I did come close to a ghost branch. pic.twitter.com/bkBIgWV4ze
These days, I have an even less risky option. My 3” Kestrel build with Caddx Turtle V2 HD camera costs less than $250. I have a lot more confidence when I’m sending $250 into a precarious situation!
Start with inexpensive quads
If you’re new to the hobby, you’re going to goof up. You’re going to obliterate a quad. You’re likely to lose a quad.
We hosted three different quadcopter build classes at TheLab.ms makerspace. We cautioned everyone. After a large 450 mm quad flew away on someone from the first class, we started really hammering those words of caution into everyone. Even so, someone lost a quad within a few days of each class! They were so far gone that we never saw them again.
I’d rather see you get this out of your system with a junker of a quad. I’d be bummed out if I helped you build something like the $600 quads I fly, and you wound up losing it the first time you went out flying by yourself. I’d much rather see you lose a $130 BFight 210. Does anyone know what the modern equivalent of the BFight 210 happens to be?!
The BFight 210 was great. At least four of my friends flew them, and they flew them a lot! They’re light, inexpensive, and surprisingly durable 5” FPV quads. They are a little under-powered, but they’re efficient. Beginners are regularly getting 10-minute flights out of their BFight 210 quads, but they’d feel much too heavy with a GoPro strapped to the top.
That’s OK, though. Losing a GoPro is a bummer. You should definitely buy accidental damage insurance, but that insurance only works if you manage to recover the camera! The first time I strapped an HD camera to the top of my quad, it flew off in a crash. The TPU mounts we use today work much better, but losing your camera or your entire quad is still a risk.
You’ll be braver with less than $150 in the air than you would be when risking $350 or $500 on a flight!
A light, budget-friendly build of my 3” Kestrel can be squeezed in at around $250. 3” quads don’t feel as solid and locked in as a 5”, but it is a great way to get started if you really must have HD recording capabilities right away.
Upgrade the gear in your hands first
You use a lot of expensive gear when you fly, but the only piece of equipment that’s really at risk is the quadcopter and its payload. The rest of your gear is sitting safely in your hands or on your head!
When I started out, I used a cheap 200 mW VTX on my quad, and a cheap set of box goggles. Even with a directional antenna, we felt like flying 1,200 feet away at a low altitude in an open field was pushing the limits of our video quality. I used to tolerate some pretty awful video in those days. What do you expect from a $12 VTX and a $50 set of goggles?
Upgrade your goggles and video receiver
Today, I use a better VTX, and I’ve upgraded to a set of Fat Shark Dominator goggles with an [ImmersionRC RapidFire module][rf]. My new setup costs ten times more than my first set of box goggles, but I couldn’t imagine going back!
I rarely use a directional antenna on my RapidFire module. I almost always fly with a pair of omni antennas. We often fly at an abandoned golf course here in town, and I regularly fly 1,500 feet away without a directional antenna. I didn’t even realize I’ve been flying that far until I checked a map! I’ve even dropped down into a creek to fly under a bridge that was 1,200 feet away.
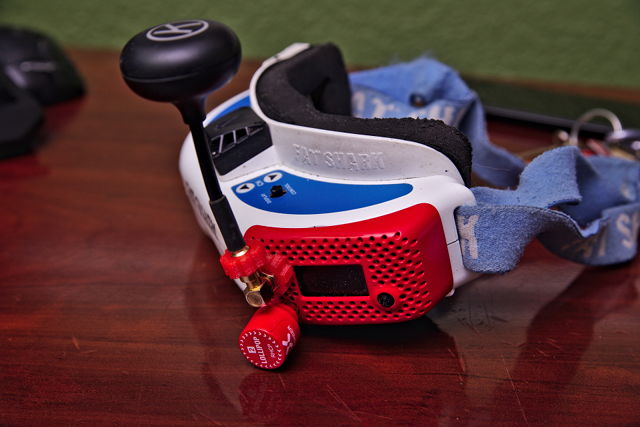
Needless to say, upgrading to a RapidFire module has been a huge confidence boost. Most of the time, though, the RX5808 module that I had when I bought my Fat Shark goggles was just fine, and a huge upgrade over the cheap box goggles.
Upgrade your radio
If you went the cheap route on your radio, with something like a FlySky FS-i6 or Turnigy Evolution, you should think about upgrading your radio before upgrading your quad. Crossfire modules have dropped in price to compete with FrSky’s R9 gear, and I would almost recommend skipping FrSky’s 2.4 GHz hardware.
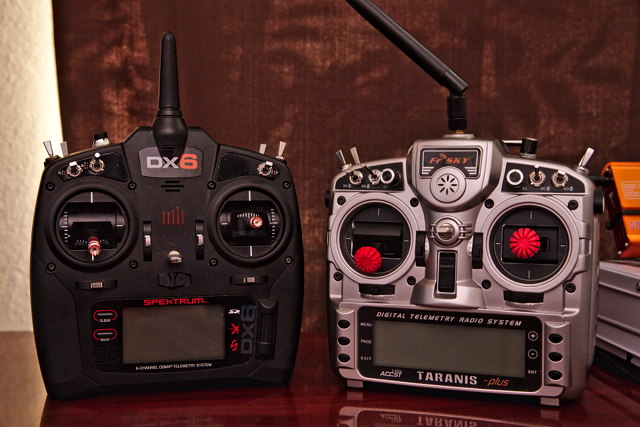
I’m still a fan of the Taranis X9D+. It costs a bit more than the Taranis QX 7, but it comes with a rechargeable battery, a charger, and it is compatible with Crossfire without any soldering. Buying a rechargeable battery for the QX 7 eats into your savings, and having to remove the battery to charge it is a pain. The NiMH battery in the X9D+ isn’t great, but it sure is convenient!
The Underground FPV Nirvana radio looks interesting, too. I fly with my thumbs, so it would be a comfortable radio for me. The FlySky antenna can be folded out of the way, and it is compatible with Crossfire right out of the box.
Upgrade your charging setup
This won’t help you fly, but it might save you some time and effort, and that time savings will pay off over the long run.
I started out using one of the cheap “4-button” chargers. It maxed out at around 5 amps. That wasn’t a problem, until I learned how to parallel charge.
I’ve since upgraded to an ISDT Q6-Pro, and I have the charger attached to a Bat-Safe. The Q6 Pro maxes out at around 14 amps. I can charge six 1300 mAh 5S packs in just over 22 minutes.
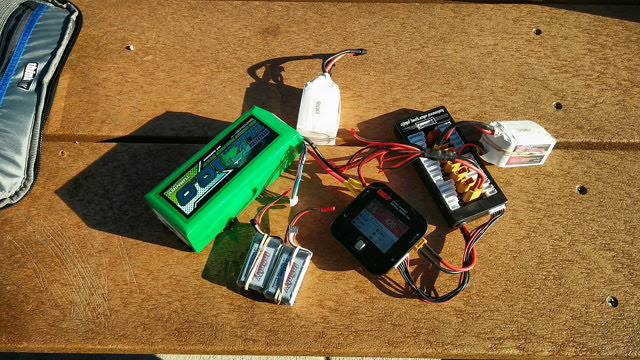
The ISDT charger has a nicer interface, and it can balance charge roughly three times faster than my old charger. I believe this is why the ISDT charges so much faster than my old charger, even when both are pushing the same amperage.
Waiting an hour for six batteries to parallel charge on my original charger wasn’t a huge problem, but it was an annoyance if I needed to charge more than six batteries—six identical batteries, even!
It is nice to be able to charge a set of 5S, a set of 6S, and a set of micro-sized 4S packs in about an hour, even if it doesn’t actually help me fly any better!
Upgrade your bag
I remember being very excited when a whole bunch of research pointed me towards the $15 tactical backpacks. There were quite a few people excited about them, including Stew from UAV Futures. It was a good deal, and I really did like that bag.
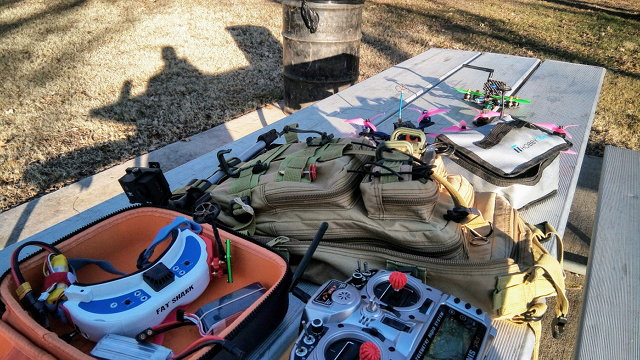
I didn’t realize how much time I was wasting every time I went flying. I usually had to unstrap a couple of quads from the outside of the bag, and I had to unpack my box goggles, Taranis, and my battery bag before I could get started. I also needed room to set all that stuff down somewhere near the bag.
When I was done flying, I had to carefully fit all that stuff back into my bag. It took a few minutes to unpack, and then roughly twice as long to repack the bag.
I’ve since upgraded to an expensive FPV backpack—a ThinkTank FPV Airport Helipak. I’m not saying you should go out and buy a $200 backpack, but I’m so happy that I did!
With a big bag like this, I just set it down, open the lid, and start flying. Everything has its own spot, and nothing important has to be loaded underneath other items. I can remove or replace batteries, my Taranis, my goggles, or a quad quickly and easily. I don’t set anything down next to my bag anymore.
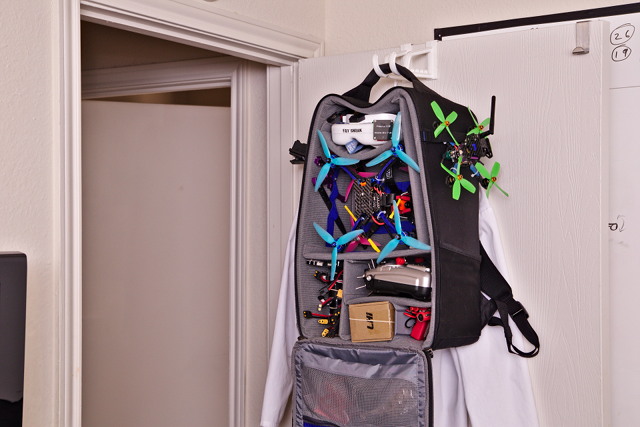
When I put down my radio or goggles, they go right back in their assigned home. When it is time to leave, I don’t have much more to do than zip up my bag and pack up my chair.
This may seem like a minor victory, but I’m saving myself ten to fifteen minutes every time I fly. Sometimes that means I can get one or two more batteries in before it gets dark. Is that worth $200? How much is it worth to you to get one more pack in, and how many times does this have to happen before the bag has paid for itself?
You don’t have to spend $200 on a backpack. I also have an AmazonBasics DSLR backpack. It is much smaller, so I can’t pack everything in there—the soldering iron and field charging battery have to stay at home!
It is great for when I hop on my electric bike to ride to the park. My fully-loaded ThinkTank bag weighs 26 pounds. The smaller backpack never weighs more than 12 pounds.
With that smaller bag, I can either bring my 3” Kestrel and 90 minutes’ worth of battery, or I can bring my 5” Flowride and 20 minutes’ worth of batteries. I can’t fit as much in there, but I operate it just like the ThinkTank bag—everything has a place, and gear goes back in that place when I’m not using it.
Either bag is more efficient in the field than the old $15 tactical backpack. People often say that the best bag for your FPV gear is the bag you already have. No matter what sort of bag you use, you should do your best to make efficient use of it.
Conclusion
Sometimes you can spend money to buy confidence. If you keep burning out ESCs, have a flaky gyro on your flight controller, or your quad sometimes just does a flip of death for no reason, then you are just going to have to spend some cash to fix it. If you just can’t see where you’re going, you might have to buy a better camera or VTX.
I don’t know about you, but my nerves can’t always handle flying 680 grams and $750 in new or scary situations. My thumbs get shaky if I might smash a heavy quad into somebody’s car, or I might drop my quad and GoPro into a lake or river.
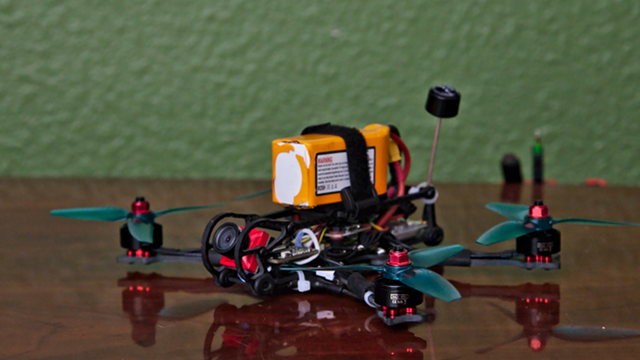
I like having a $250 HD quad to get myself warmed up in new places or situations. I hope to be a better pilot one day, and those situations won’t feel new or scary anymore. Until that day, I’m going to make sure I carry an inexpensive quad!
What do you think? Do you sometimes get shaky thumbs when flying in a new or sketchy spot? Do you carry an old quad or a cheap quad for those situations? Tell me about in a comment, or stop by and chat about it on out Discord server!