Last month, I bought my first drone—a Blade Nano QX. A friend recommended this quadcopter to me, and he said it would be a great way to learn to fly a drone with my Spektrum DX6 transmitter. I think he steered me in the right direction, and I’ve been having a blast.
The Blade Nano QX is quite sturdy. I’m getting much better at flying it, but I still crash it quite often and quite hard! I knew the frame wasn’t going to last forever, and I enjoy modeling 3D-printed designs, so it wasn’t long before I started thinking about design ideas.
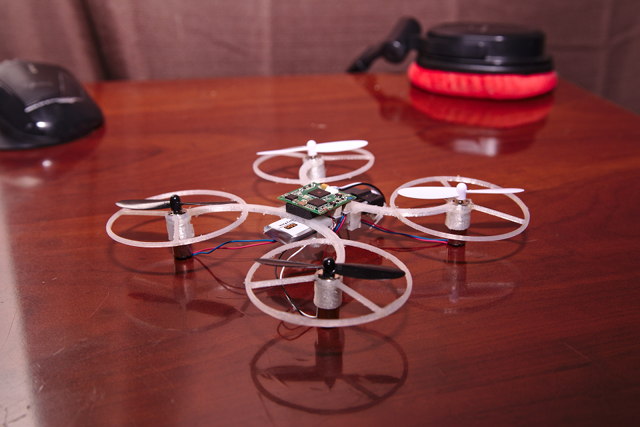
My plan was to 3D print a new frame for the Blade Nano QX flight controller and motors. I also ordered a set of 8.5x20mm motors—they’re absolutely huge compared to the stock 6x15mm motors, but the Nano’s brain couldn’t control them properly.
I have a Micro Scisky flight controller with integrated DSM2 on order, but it won’t arrive for several weeks. In the mean-time, I’m going to focus on the 6x15mm stuff, and I’m going to work on making this build a Blade Nano QX++.
- My Customizable Quadcopter at Thingiverse
- Blade Nano QX Bind-N-Fly at Amazon
- Spektrum DX6 transmitter at Amazon
- My First Quadcopter
The early ideas
It is nearly impossible to beat the Blade Nano QX frame with a 3D-printed part. The Nano is injection-molded, and the walls of the arms are extremely thin. These thin walls are rigid, because they have a curved top.
The injection-molding process doesn’t have to worry about gravity, either. You can’t 3D print out in open air—the plastic is subject to the effects of gravity during the print, so everything has to be supported by something. My goal is to build a frame as tough and light as the Blade Nano QX.
I decided my design would be printed with the top of the quadcopter facing down. That would keep the flight controller and the propellers at a similar height, and it would allow me to build landing gear and a battery holder on the bottom.
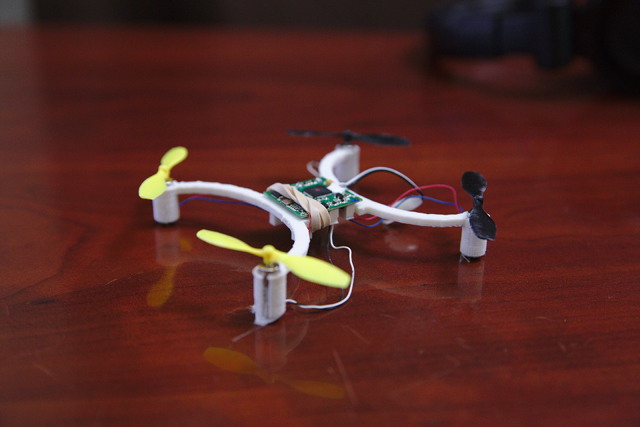
I could have gone with a simple cross shape, but that seemed boring. Instead, I used curved arms. I don’t usually do a good job making curvy things with OpenSCAD, but this wasn’t too bad. Most things in OpenSCAD are the union, difference, or intersection of cubes, spheres, and cylinders.
My quadcopter’s arms are the difference of a couple of disc-like cylinders. Then I squish that perfect circle on one axis with OpenSCAD’s scale function. The math to make sure that leftover curve will connect the motors to the flight controller is simple enough, although I did guess at that number instead of doing the math at first.
1 2 3 4 5 6 7 8 9 10 11 12 13 14 15 | |
From here, I take a difference of that ring shape and a large enough cube. That leaves me with an arch.
Now I have a fun way to connect the flight controller mount to the motor mounts. How am I going to mount the motors?
I know cylindrical motor mounts will work best, but I also know that everyone will have their 3D printer calibrated a little differently. The mounts need to be tight enough to keep the motor from spinning, yet loose enough that you can still fit the motor inside. The tolerances are tight enough that things might vary from one spool of filament to the next. If the motor mounts aren’t tight enough, the motors will spin freely and rip out their wires. If the motor mounts are too tight, you’ll never get the motors in place.
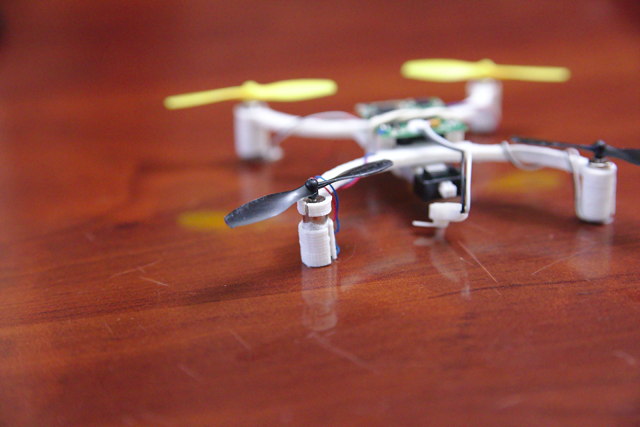
I hoped to avoid that by using C-shaped motor mounts. They worked reasonably well in ABS, but they completely failed in Taulman 910 nylon filament. I spun two motors hard enough that the wires were pulled out.
From here, it is all just a matter of working out the math to place the motors and arms in the correct places.
- My Customizable Quadcopter at Thingiverse
The first test flights
Shortly before the first 3D printed test, we were experimenting with my Blade Nano QX at TheLab.ms makerspace. One of my friends had his 450mm quadcopter with 10” blades with him. We set it up on a desk, and we spun it up just fast enough that it was about to take off. Then I tried to see how close I could fly my Nano to it.
The effects were surprising. I started out near the ceiling, and I tried to lower the Nano onto the bigger quadcopter. I could only get so close before I couldn’t descend anymore. We all found this potential air vortex to be interesting, and I’m not quite sure what happened next, but I did somehow manage to penetrate this air stream. My Nano hit one of the blades, and was thrown across the room into the wall. One of the arms was ripped in half.
Not to be discouraged, I opened up my laptop and fired up the 3D printer. I printed my early prototype. It was only 90mm from motor to motor, which is actually a lot smaller than the Blade Nano. My motor mounts ended up being a little too small, but a little cutting and some tape got everything temporarily mounted.
My prototype was in trouble as soon as it was airborne! It was impossible to control, ridiculously fast, and downright crazy. We chalked it up to the small size and the tape.
The next day, I printed a correctly sized drone that didn’t require tape. It wouldn’t fly correctly, either, but it was flying a bit better. I could get it into the air, but the drone wanted to fly forward and to the left. I tried to correct for this with the controls, but the longer it was in the air, the more it would lean in that direction!
I ordered a replacement Blade Nano QX frame from Amazon. After installing everything on the new frame, everything was flying better. Not perfectly, but I didn’t realize that right away. Something was wrong.
- My Customizable Quadcopter at Thingiverse
The foam flight controller “mount” is important!
There was a lot of discussion about why my 3D-printed frame wouldn’t fly. In my test flights, I used a rubber band to hold the flight control board and battery to the frame. I guess this transmits all sorts of vibrations to the controller, and it just can’t compensate for it.
Separating the controller from the frame with the foam worked great, but my quadcopter still wasn’t flying right. As it turns out, one of my 6x15mm motors was dented. I imagine this happened during the incident with the large drone. After swapping it out, my little ABS drone was flying just as well as the Blade Nano QX frame!
Upgrading to nylon
I’ve been tempted to try printing with nylon for years. The hot ends in a lot of 3D printers have a PTFE tube down the center. Nylon is printed at between 260 and 275 degrees Celsius. PTFE begins to melt at 260 degrees Celcius, so these printers don’t have a chance of working with nylon. My 3D printer has an all-metal hot end, so 275 degrees Celcius is no problem.
Printing my own microquad frame with Taulman 910 nylon filament seems like a good test run before printing something like the DJ105 quadcopter frame.
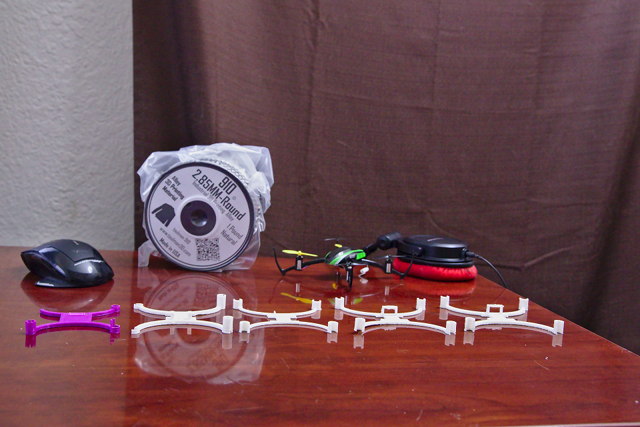
Nylon is difficult to print, but I could tell right away that it is a lot sturdier than ABS or PLA. I ended up with a lot of whiskers and spiderwebs all over my quadcopter frames. I tried to tweak some of that out using Slic3r, but it seems like it is inevitable. When the print job is done, the leftover nylon in the hot end oozes out of the extruder very quickly, just like it does during the print.
All that stray nylon is a pain to clean off, because it is too sturdy to just rip or pull off. I have to trim everything with a knife and scissors.
The nylon feels extremely sturdy. I don’t think I can crash a quadcopter with brushed motors hard enough to break the nylon. I did break several ABS motor mounts. The ABS mounts that I broke were three walls thick. I reduced the nylon motor mount walls to only two walls, and I don’t think they’re in any danger of breaking.
The nylon flexes much more than ABS or PLA. The larger frame I built for the 8.5x20mm motors flexes a little under its own weight. I’m thinking about adding some sort of bracing to reduce this flex.
- My Customizable Quadcopter at Thingiverse
- Taulman 910 Filament at Amazon
Nylon allows for thin prop guards
I didn’t add propeller guards to my design at first. I’ve printed enough kilograms of ABS to know that I’d need very thick prop guards to survive an impact. I figured adding a set of prop guards would be a good way to see what nylon could do.

I believe my first set of prop guards were about 0.8mm tall and 1.6mm wide. That was too thin, so I bumped it up to 1.6mm x 1.6mm. That’s what I put on the first 8.5x20mm motor drone. I have it in my hand here now, and these prop guards will work great. I’ve thrown this drone at the floor with the motors and props installed, and it just bounces around. No damage at all!
- Taulman 910 Filament at Amazon
What’s next?
I’m waiting on a Micro Scisky flight controller to arrive from China. The Micro Scisky is a compact flight controller for use with brushed motors, and it has an integrated ESCs and a built-in DSM2 radio. It runs the same software as the Naze32 flight controllers all my friends used in their 450mm drone builds—CleanFlight or BetaFlight.

When the Micro Scisky controller arrives, I plan to get straight to work fitting it into this 3D model and getting my 8.5x20mm quadcopter off the ground. I’m already getting impatient. I probably should have ordered one with Amazon’s two-day shipping!
I’m confident my 820 drone will be powerful enough to carry a first-person-view (FPV) camera. That sounds like a lot of fun, and it will let me get in some FPV flying practice before moving on to my next drone.
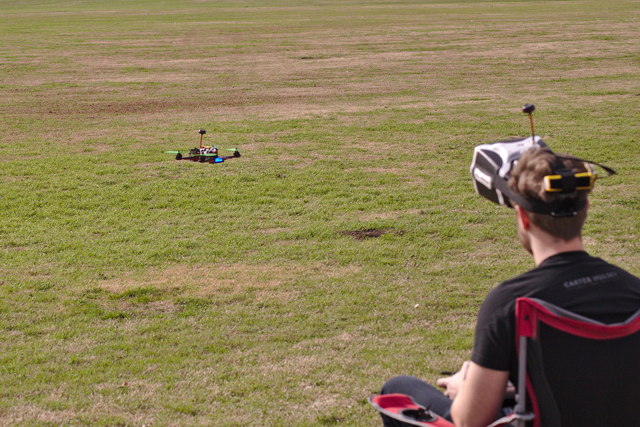
I’ve been researching both the RS90 and DJ105 quadcopters on Thingiverse. They’re both amazing designs for small, brushless drones. I was leaning towards building a DJ105 drone, but it uses 2.5” propellers. Those aren’t very common, and there aren’t a lot of motors that will fit the DJ105’s tiny frame.
UPDATE: I designed a parametric 3D-printed nylon quadcopter. I call it the PH145. It uses 3” propellers, 1306 4000KV brushless motors, and a 4S LiPo battery. It is loud, fast, and extremely sturdy! You should check it out!
- My Customizable Quadcopter at Thingiverse
- PH145 FPV Quadcopter
- RS90 and DJ105 quadcopter frames at Thingiverse
- Blade Nano QX Bind-N-Fly at Amazon
- Spektrum DX6 transmitter at Amazon
- My First Quadcopter
- Taulman 910 Filament at Amazon
- I Bought A 3D Printer: I Have No Idea What I’m Doing