I was hoping to avoid writing another post like this again this year. While I was writing the last one, I decided that it would be a much better idea to write up a short review each time I finish a book.
That didn’t happen, though. I didn’t read anything at all until March, and I blasted straight through three books in about four weeks’ time. By then it was just too late. I’m going to try to do a better job this year.
I may not have done a good job writing about these books, but I sure did a good job keeping track of them. I meticulously entered all my data into my Goodreads.com account as I was reading.
I’m very pleased with Goodreads. Each month, they do a pretty good job of warning me that new books have been released by authors that I’ve previously read. I might have missed Fate of Worlds and The Long War this year if it weren’t for these monthly alerts.
The list
Lots and lots of John Scalzi
This happens to me all the time. I try my very best not to read books by the same author back to back. Sometimes I just can’t pick out my next book, and I get lazy. It is easy to just pick another book from the same author’s catalog. Old Man’s War happened to be in the first Humble eBook Bundle, and that was a good enough reason for me to read it.
I enjoyed it quite a bit, and the Internet was buzzing about Redshirts, so it seemed like a good choice for my next book. The premise sounded great, and I really liked the first two thirds of the book. In my opinion, this is right around where the book probably should have ended. This is probably the reason I didn’t get back to Scalzi’s books until October.
I’m glad I picked back up where I left off. I had a good time reading the next two books in the Old Man’s War series, and I look forward to reading more this year.
I should also mention that I find John Scalzi’s ridiculously large recliner very intriguing.
The Making of Karateka
Karateka was one of the first games I played on my Apple 2 when I was a kid. I still remember the first time I made it to the end of the game and defeated Akuma. I walked through the door, up to Princess Mariko, and she killed me with one solid kick to the face. I had no idea that I wasn’t supposed to walk up to her in a fighting stance!
I got this book as part of a bundle from StoryBundle.com. I thought it sounded a little interesting, but I didn’t think I would enjoy reading someone’s diary. I was very wrong about that. This was by far my favorite book of 2013.
The book brought back a lot of old memories, and it was very interesting to learn exactly how one of my old favorite games came into existence. It was nice to read about the old days when one person could single handedly create a state-of-the-art video game from scratch.
Larry Niven’s Known Space
It is always so easy to just choose another book in a series that you’re already familiar with, and I’ve read just about every one of Niven’s Known Space and Ringworld books. It was nice to see a couple of new books in this universe show up this year.
Just one Terry Pratchett book
I really enjoy Terry Pratchett’s work, and I always devour his books very, very quickly. That’s why I’m surprised that I only read one of his novels last year. The Long War, the sequel to The Long Earth, was written by Terry Pratchett and Stephen Baxter: two authors whose work I enjoy very much.
I’ve read some complaints about this book. They say that the story doesn’t really go anywhere, and it raises more questions instead of answering questions from the first book. This didn’t bother me at all, because the journey was a lot of fun.
The Long Earth series feels to me like the work of Stephen Baxter with a little bit of Pratchett’s whimsy thrown in, and that’s just fine by me.
My failures of 2013
I hate to give up on a book, but I did so twice this year. Earlier in the year, I started reading Terry Pratchett’s Dodger. I just couldn’t get into it. I put it away after about 60 pages.
I started reading Kim Stanley Robinson’s Blue Mars back in November. I very much enjoyed reading the first two books in the series, but they are quite long and mostly pretty dry. The chapters are long, and you’ll often spend several pages in a row reading descriptions of Martian geography and weather.
This isn’t necessarily a bad thing, but I knew that if I started reading it that I wouldn’t be finished before the end of the year. I knew I was going to be traveling, so I thought it would be better to be reading something lighter. I only made it a dozen pages in before I decided to read Betrayer of Worlds instead.
Plans for 2014
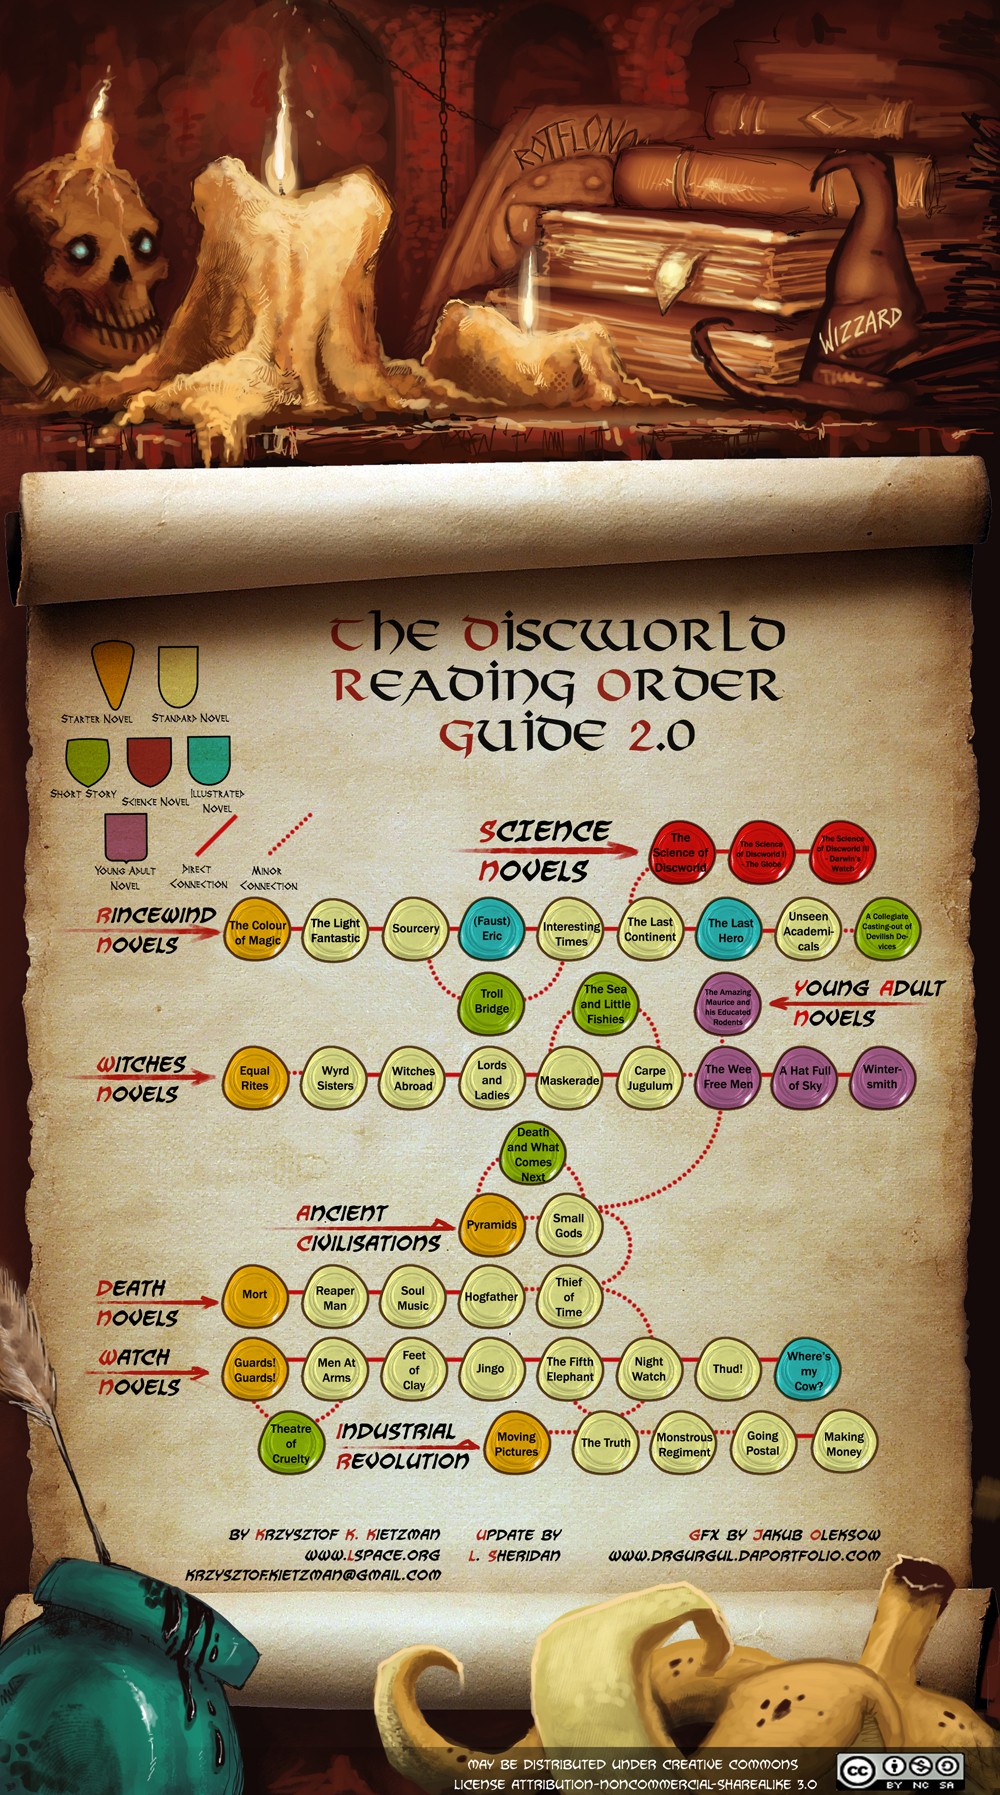
I decided to start off the year by continuing my journey through Terry Pratchett’s Discworld series. We’re barely a week into the new year, and I’m already down the very end of Thief of Time. Susan has already saved the day, and the story is winding down.
I’m going to do my very best to write a little about each book I read this year, and I’m going to try to do it shortly after I finish each one. These posts are more for my benefit than anyone else’s, so I’m going to try not to post them too often!

