I’ve been going to a bar / restaurant near my hometown since the late nineties. They serve good food in generous potions and very cheap beer. They also have an array of very old, sometimes creepy photos covering the walls in their dining room.
In the old days, my friends and I would probably end up at this bar at least once a week. Since moving out of town, though, I don’t get to see the place very often. I finally got there with my friends for the first time in years, and we had a brilliant idea: We decided that we had to sneak one of our own pictures onto the wall.
Choosing a photograph
This was really, really hard. It had to be something that had a personal significance to us, but it also had to fit in well with the other pictures. We didn’t want it to be easily noticed.
Our first choice was just awesome. Unfortunately, we didn’t think it would stay on the wall for very long. It was a picture of one of our friends appearing to enjoy having his sausage sampled in his kitchen while wearing a tuxedo. We edited the photo to make it black and white and look very mottled and old. It looked perfect, and we were all very happy with our work.
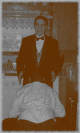
Unfortunately, we didn’t think this photo would have much longevity. We’ve seen younger people eating here. We didn’t think it would be appropriate, and we figured one of these young people might point it out to their parents, and it would be taken down. I have to note here that this picture is still residing in the frame. It is just hiding behind the new picture.
Making a better choice
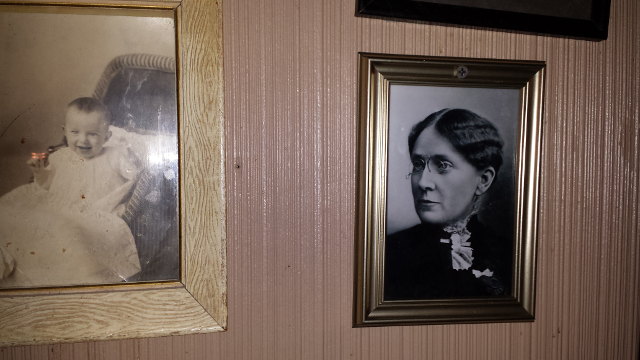
Some of us attended the same elementary school, Frances Willard Elementary in Scranton, PA. In the hallway near the main entrance hung a photo of the woman our school was named after, Frances Willard. This picture was very creepy when we were six or seven years old. It was rumored that the ghost of Frances Willard was haunting our school, and her eyes seemed to follow you as you walked past her picture.
Frances Elizabeth Caroline Willard (September 28, 1839 – February 17, 1898) was an American educator, temperance reformer, and women’s suffragist. Her influence was instrumental in the passage of the Eighteenth (Prohibition) and Nineteenth (Women Suffrage) Amendments to the United States Constitution. Willard became the national president of Woman’s Christian Temperance Union (WCTU) in 1879, and remained president for 19 years. She developed the slogan “Do everything” for the women of the WCTU to incite lobbying, petitioning, preaching, publication, and education. Her vision progressed to include federal aid to education, free school lunches, unions for workers, the eight-hour work day, work relief for the poor, municipal sanitation and boards of health, national transportation, strong anti-rape laws, and protections against child abuse.
When we were in elementary school, we had no idea who Frances Willard was or why you would name a school after her. We were just excited about Ghostbusters, The Transformers, Voltron, and G.I. Joe, and we were busy watching the Space Shuttle Challenger explode on live TV in our classrooms. Frances Willard’s Wikipedia entry says that her vision included federal aid to education, free school lunches, and protections against child abuse. These all seem like good enough reasons to name a school after her.
We do realize that there is a touch of irony in hanging a picture of a prohibitionist in a bar. If anyone actually recognizes who she is when they see her, I certainly hope they get a good laugh out of this fact.
How can we hang the photo quickly?
Our original plan was pretty terrible. We noticed a few frames that were damaged or didn’t have glass. We figured we could print a photo at the correct size and sneak it in right over the top of an existing picture.

This was going to present us with some issues. Our potential targets were all different sizes, and they are scattered all around the walls. The odds of luck being on our side are never high, so we didn’t think we’d ever end up sitting near the frame we were prepared to hijack. We really needed a better plan.
I just happened to stumble on an image from the book Show Me How: 500 Things You Should Know – Instructions for Life from the Everyday to the Exotic that explained how to hang your own art in a museum. We didn’t need to be as sneaky as the fellow in the book, but we did purchase our frame.
We also decided to use poster tack to attach the picture to the wall. This made it very easy to quickly stick the picture to the wall, and it won’t leave any damage behind if they decide to remove our sneaky photograph.
Executing the plan
Jimmy brought the framed picture, and I brought the sticky tack. In the parking lot, we put about an inch or two of poster tack on each corner of the frame. Then Jimmy put the picture frame into the large pocket of his jacket, and we entered the restaurant.
We had to wait until the place emptied out a bit, so we had plenty of time to finish our food. The waitress took our empty plates, and Jimmy ordered another beer. Jimmy decided that he would spring into action after she delivered his beer.


The actual execution went quickly and smoothly. Someone had suggested that sticky tack wouldn’t be capable of holding the picture to the wall, but it is holding to the wall extremely well. It won’t be coming down unless someone intentionally tries to remove it. In fact, we joked that it would probably be the only picture in the place to still be on the wall after a nuclear holocaust.
We did a great job of making sure the picture would blend right in and did everything properly, right down to the smallest detail. Almost all the other pictures in the bar are attached to the wall with one or two drywall screws. We even made certain that the frame holding our picture of Frances Willard had a drywall screw of its own.
It was difficult not to continually marvel at the perfect crime. We had to keep reminding each other to stop looking at our work, and I had to keep telling Jimmy to stop touching it. He was just too impressed by how sturdy it was, though, and he just had to keep poking at it. I kept telling him that if he called too much attention to our handiwork, someone might notice and take it down!
We all know people like to steal things from bars, but do you know anyone else who has gone to such lengths to leave something behind?
