So You Want To Get Started Flying FPV Drones: 2020 Edition

| Comments

The other day, Jeremy Cook from The Create/Invent Podcast invited me on the show to talk about getting started with the hobby of FPV drones. We just finished recording. During the episode, I said I would put together a write-up covering all the things we talked about.

I wrote about this same topic almost exactly twelve months ago. A lot has changed since then! Most of what I said then still applies, but there are a few new products available now that can help a newbie get started.

I’m definitely going to rehash quite a bit of what I wrote about last year, but that’s just the nature of this sort of post. I don’t want you to have to jump back and forth between blog posts. I want all the necessary information to be right here.

TL;DR: There are lots of options here! What’s your simple recommendation?!

This is really easy to answer. Buy the BetaFPV Advanced Kit. Don’t even think about flying the Meteor75 drone that is included in the kit. Just plug that LiteRadio 2 into your computer and play Velocidrone, Liftoff, or DRL.

Then fly the Meteor75. If you get proficient in the simulator, you’ll quickly outgrow the Meteor75, but it will still serve you well for flying indoors. Then pick up a TinyHawk II Freestyle. It is an amazing value. It will bind to your BetaFPV LiteRadio 2, and it really does fly so much like our 5” miniquads.

BetaFPV Advanced Kit

At this point you’ll have a reasonable radio, goggles, an indoor whoop, and a pretty good 2.5” micro for outdoors. You will have been flying enough that you will probably know exactly what you want to fly next!

If you are saying things like “$200 is too much to spend!” or, “My pockets are deep! I want to go straight to real miniquad!” then you should keep reading. There is no single correct recommendation that applies to everyone.

FPV isn’t a cheap hobby

You don’t have to spend a ton of money to get started, but I think it is important to explain just how much money this hobby actually costs before getting you hooked on a $165 starter bundle.

My battery-charging setup cost about $150. My purpose-built FPV backpack cost $200. My FPV goggles cost $500, and they don’t even work until you add a $150 video receiver module. The radio transmitter I use to control my drones cost $180.

That’s the gear I use with every single one of my drones. Each of my 5” freestyle quads cost about $450, and I have to spend a few hours building them myself. What’s my time worth? Who knows!

I usually carry two or three of these quads in my bag. I fly with a GoPro strapped to the top of my quad. Those cost $200 to $300, and I carry two GoPros in my bag.

I also carry around $200 worth of batteries.

I’m invested in the hobby. You could do everything I do for a lot less money, but I find that premium hardware doesn’t break as often when I crash it!

FPV isn’t an expensive hobby

There are so many hobbies that are much more expensive than FPV. I’ve spent more on a turbo charger and exhaust upgrade than what I paid for my drone backpack and everything inside. Things like Snowmobiles, ATVs, and dirt bikes are much more expensive.

I usually compare FPV to golfing. You can get yourself everything you need to be flying an entry-level 5” freestyle quad for around what a high-end driver would cost.

You don’t have to pay to rent a golf cart. You don’t have to pay greens fees. Your gear costs money. Repairs cost time and money. The flying is free!

That said, I carry a $500 set of Fat Shark HDO goggles with a $150 video receiver plugged into it. My 5” freestyle quads cost $500 each, and I carry two or three of them. I use a $200 radio with a $70 Crossfire Micro TX module installed. I carry all that stuff in a giant $200 backpack.

You can spend more than I do, but you can also spend a lot less and still have just as much fun. I just want you to know what you might be in for!

There’s a lot of maintenance involved in flying FPV!

You’re going to crash. You’re going to break things. You’re going to have to be able to fix things. You can get started without worrying about this stuff, but you will eventually need to learn how to use a soldering iron.

Choosing parts and building a quad is a lot like building a computer. With the computer, you have to choose a motherboard that’s compatible with your choice of CPU. You drop the CPU into the appropriate socket, you put your GPU in a PCIe slot, and all this stuff bolts into a case.

Quadcopters are similar. Motors connect to ESCs, ESCs connect to flight controllers, and this stuff gets bolted to a frame. The difference is that most of these things are soldered together with lengths of wire.

When you smash into something and bend a motor, you’ll have to be able to solder three wires to install a new one.

You can help avoid repairs by buying premium components, but that only postpones the inevitable. More expensive gear might survive more small crashes than cheaper hardware, but you will most definitely be involved in crashes that will break fresh expensive components in a single collision.

Who is FPV for?

We have friends that fly FPV with all sorts of different goals. Some want to fly long range to explore. Some want to cruise around. We have friends that participate in local races. Many of us fly freestyle.

I can’t speak for everyone else in our local group, but I think I’ve figured out why FPV is so appealing to me.

When I was younger, I used to modify cars and drive too fast. Building miniquads and flying FPV scratches similar itches, except it doesn’t cost as much as cars or turbochargers, and it is orders of magnitude safer!

I’ve already mentioned building computers. The first computer I built was a 40 MHz 386, and I’ve been building my own personal machines ever since. Choosing PC parts and quadcopter parts are similar exercises.

That leads into my love of video games. I started my gaming career playing games like Space Invaders, Donkey Kong, and Parsec. Then I had games like Super Mario Bros., Metroid, and Zanac. Then I spent a lot of time playing games like the Gran Turismo series and Grand Theft Auto San Andreas. These days I play a lot of Team Fortress 2 and Dead Cells.

I like games with high skill ceilings. I feel like I am an extremely competent FPV pilot, but I have friends that are better than me, and when I fly with professionals, I can see exactly how far I am from that ceiling!

What do I need to do to get started?!

I wish I could just give you a single, definitive answer. There are several good paths you can take to enter the hobby, and the route you take will depend on what you’re interested in.

You can do what I did three years ago and just dive right in. Spend a bunch of money and buy some sort of goggles, a transmitter, and build an FPV drone. This was fun, but learning was slowed down by the frequency of the crashes, and I wound up spending a lot of money on repairs!

There are better options today.

You need to learn three mostly unrelated skills

Learning to fly is a skill, and it is the skill that requires the most practice. That isn’t the only skill an FPV pilot has to acquire. This is unfortunate.

You have to learn to configure your quadcopter. For most of us, that means you need to learn to use the Betaflight Configurator. This is where you set up the way your quad feels, configure it to talk to your radio receiver, and set up exactly what your switches and sticks actually do. You don’t need to learn a lot to get by, but this hole goes quite deep.

You also need to learn to configure your radio transmitter and bind it to your various drones. This is the easiest part, but it really does gum up the works for a lot of people.

This doesn’t even count repairing or building a quad. That’s another skill you’ll need.

Attacking all three problems at once is a herculean task. I’m going to be breaking down your options starting with the easiest and least expensive option. These options aren’t really a list. You can’t really progress from the beginning to the end. Each of these options is a place to get started.

With the first option, you can get started extremely quickly and not have to worry about breaking or fixing drones. The next two options involve actual drones, but they’re configured from the factory. You just open the box, charge the batteries, and start flying.

Things get more difficult from there.

Get the BetaFPV Literadio 2 and a simulator

The new radio from BetaFPV is a rather recent development, and it is quite impressive. I’ve only gotten to try it once, but I was quite pleased with the experience.

The Literadio 2 is only $40. It is compatible with FrSky D8 and D16, which means it will work well with just about any bind-n-fly drone you might want to buy. It felt a little weird to me, because the throw on the gimbals is so short. It reminded me of the FrSky X-Lite radio.

You can plug the Literadio into one of your computer’s USB ports, and it will show up as a USB gamepad. This will let you fly in several fantastic FPV drone simulators.

  • The Drone Racing League $9.99 on Steam
  • Liftoff Drone Simulator $19.99 on Steam
  • Velocidrone $15

We’ve been meeting more and more people who started flying in a simulator, and they’re usually amazing pilots. It took most of us 6 months to a year to be proficient pilots. These guys spend a month flying in a game, buy their first real drone, and they’re doing fancy tricks their first time out!

I’m about to tell you about the TinyHawk bundles. The advantage of the BetaFPV radio is that you will be able to use it with more drones than just the TinyHawk, and it will even give you better control over the TinyHawks.

Pros:

  • Least expensive way to try out the hobby
  • All the hardware and software to get going is only $50 to $60
  • You won’t waste time chasing your drone when you crash
  • You won’t spend money on repairs
  • You will learn quickly, easily, and cheaply
  • The Literadio 2 will last you a while
  • The Literadio isn’t a premium radio, but it is a step up from toy grade

Cons:

  • You will be sitting at your computer instead of flying!
  • You will have to configure your first drone to work with the radio

That last con is why the TinyHawk bundle and the BetaFPV Advanced Kit are so awesome. In the future, you’ll be binding quads to your radio and configuring them all the time. The first time can be tricky.

NOTE: Even if you want to start on the simulator, you should probably start with the BetaFPV Advanced Kit. It comes with this same radio, so you can use it with the simulator. With the kit you’ll also have a quad that’s bound to your radio, and that quad is configured and ready to fly!

Get a proper radio transmitter and a simulator

Instead of spending $40 on a radio that you will probably outgrow, you can instead spend $120 to $200 or more on a radio that you will use for many years.

I fly a Taranis X9D Plus that costs about $190. The Taranis Q X7 is around $120, and it isn’t any less capable for FPV than my X9D Plus. The Radiomaster T16S looks fantastic for around $160.

Taranis X9D+ and Spektrum DX6

There are a lot of choices here. Almost any of these radios will accept a TBS Crossfire or FrSky R9 long-range radio module. I use a TBS Crossfire module in my Taranis X9D+ for better range.

Pros:

  • You may never buy another radio
  • All the other pros of the LiteRadio 2 apply

Cons:

  • You will still be sitting at your computer instead of flying!
  • You will have to configure your first drone to work with the radio
  • Would you want to learn to change your oil before driving your first car?

If I can just spend $120 on a real radio, why would anyone buy the BetaFPV LiteRadio 2?!

I actually do have some good reasons to start with a LiteRadio 2 even if you can afford a $200 radio without even thinking about it!

I wouldn’t mind upgrading to a TBS Tango 2 radio transmitter. The Tango 2 only supports TBS Crossfire. This is fine for most of my fleet, but my TinyHawk and TinyHawk Freestyle only support FrSky. This is common for bind-n-fly whoops. My Taranis with a Crossfire module can bind to just about anything.

I kind of wish I had a BetaFPV LiteRadio 2 for my two smallest quads and a TBS Tango 2 for everything else. I’d leave my BeatFPV radio in a small bag with my whoops, then I would just have to move my goggles from one bag to the other. I don’t need the best-feeling radio in the world to fly my micros!

I think this would be a great path to take. Get a LiteRadio 2. Fly it in the simulator. Fly your first micro quad with it. Fly your first 5” miniquad with it. When you eventually decide you want TBS Crossfire, pick up a Tango 2.

A LiteRadio 2 and a Tango 2 added together cost about as much as a Taranis Q X7 and Crossfire Micro TX module. Even if you decide to upgrade to a Taranis instead of a Tango 2, you could still give your LiteRadio to a friend to get them hooked!

The Emax TinyHawk Ready-To-Fly bundles

These are fantastic. Especially if you’re itching to get in the air with real hardware!

For less than $200, you get a drone with an FPV camera, a basic set of FPV box goggles, a toy-grade but usable radio transmitter, a charger, and a battery or two. You should even be able to throw in a 6-pack of extra batteries without breaking $200, and if you buy a TinyHawk bundle, you will want more batteries!

NOTE: That’s my TinyHawk Freestyle. The TinyHawk II Freestyle has a much better camera and a more powerful video transmitter.

Emax now has a version of their TinyHawk bundle that includes the TinyHawk II Freestyle instead of the underpowered indoor TinyHawk II. The TinyHawk II Freestyle is much too powerful to fly indoors! It will have no trouble reaching 60 to 70 mph. It accelerates faster than any car on the road. It needs a wide-open space.

I own both the original TinyHawk and the original TinyHawk Freestyle, but I use them with my own radio and goggles. I do not own the Ready-To-Fly transmitter or goggles.

Pros:

  • The TinyHawk bundles are configured and ready to fly immediately
  • The TinyHawks will work with most of the common real radio transmitters
  • You can use the goggles with your next quad
  • You can use the simulators

Cons:

  • The BetaFPV Advanced kit looks like a better option?!
  • You will outgrow these basic goggles
  • You will need a new radio transmitter when you get your first real miniquad
  • The radio transmitter is an imprecise toy
  • The indoor TinyHawk can get carried away by the wind outside!
  • The TinyHawk Freestyle will be dangerous indoors!

NOTE: I’ve been recommending the TinyHawk Ready-To-Fly bundle for ages. It has been fantastic. I have tried it. I fly a TinyHawk myself, and that makes it easy to recommend. However, you should look at the BetaFPV Advanced Kit. I haven’t flown it, but it looks like a better investment to me!

The BetaFPV Advanced Kit

I have to mention this kit since it appeared as I was writing this post. At first, I only saw the BetaFPV Starter Kit 2, and I thought it looked amazing at $129. Then I noticed that it uses brushed motors. That’s a bummer, because brushed motors aren’t durable and they wear out. I could forgive that at the price.

Then I learned that the radio in the starter kit is a less capable version of the LiteRadio 2 that is missing the FrSky protocols. Without those protocols, the radio is really only useful with the drone shipped with the starter kit. That bummed me out.

The BetaFPV Advanced Kit

NOTE: I’m going to suggest avoiding the BetaFPV Starter Kit. If you really need to save the $70, you can probably piece together something better for a similar price. If you can’t afford the extra $70, then you also don’t want to be stuck with the radio in the Start Kit. Get the Advanced Kit!

Then I found out that there is an advanced version of the kit. This sure looks like the best way to get started to me. You get the full LiteRadio 2, a BetaFPV Meteor75 with its durable brushless motors, a couple of batteries with a simple charger, and a nice case for $199.

Pros:

  • Bound to the radio, configured, and ready to fly immediately!
  • You won’t outgrow the LiteRadio 2 immediately
  • You can use the LiteRadio 2 with any FrSky compatible Bind-N-Fly quad!
  • You can use the LiteRadio 2 with simulators
  • You can use the Meteor75 whoop with your next FrSky compatible radio

Cons:

  • Frame not as sturdy as the TinyHawk, but the frame is cheap
  • If you try this outside, the wind might carry it away!
  • I’ve tried the radio, but I haven’t personally flown the Meteor75

With the BetaFPV kit or either of the Emax TinyHawk kits, you will want to make sure you buy extra batteries! Each flight will only last you 3 to 5 minutes.

I’m ready to move up to a real quad. What do I do?!

I’m just now realizing that this blog post is going to be over 3,000 words. I was intending to list a bunch of bind-n-fly quads, like the $200 iFlight Cidora. I was going to list kits of parts that you build yourself like the $200 Rotor Riot CL1 kits. I was also going to talk about Brian’s amazing Toothpick 3 build, which is basically an ultra premium TinyHawk Freestyle.

If you’re looking to spend more, I don’t think you could go wrong by having Alex Vanover build and tune a custom FPV miniquad for you. Alex tells me he can do his standard analog racing build for about $400, or he can build something to your specs for $150 plus the cost of the parts. I’ve seen Alex’s builds, and they always look clean. I haven’t flown one, but I don’t think many people put as many hours on their quads as Captain Vanover, so I’d expect them to be quality builds.

By the time I elaborate on all these things, we’ll be up well over 5,000 words. That makes me think that detailed advice for the next step on your journey belongs in a different blog post!

What about DJI’s digital FPV system?

This complicates things. If you asked me a year ago whether a new pilot should use analog video or DJI’s digital system, I would have said analog. For sure. At that time, the DJI system improved a lot of things, but it was trailing behind analog in a number of ways.

DJI has been updating their software quite regularly. Every update has closed that gap just a bit. All those updates over the last 12 months have changed things quite a bit.

If you buy the most expensive analog gear, DJI’s pricing doesn’t look bad. If you’re on a tight budget, though, you can fly just fine on analog for a fraction of the price.

You can’t cram DJI’s system into tiny quads. Tiny Whoops can’t carry that much weight. Anything with props smaller than 3” with DJI’s system will be heavy and not fly well. On a 5” build, you won’t notice the extra weight.

The biggest problem with DJI’s digital FPV system is community. So far, we’ve had two people fly with us using DJI gear. Both of them also carried Fat Shark analog goggles with them, and one of them had both analog and digital quads in their bag.

The rest of us can’t tune into their digital flights. We can’t see the cool stuff they do. We can’t give them advice. We can’t help them diagnose weird issues while they’re flying.

This will probably change to be more in favor of DJI’s system in a year or two. It you already know you’re going to enjoy the hobby, and you don’t want to just dip your toe in the water to try it out, I wouldn’t blame you for investing in DJI FPV gear right away!

I want to fly an actual quadcopter, but I want to spend as little as possible!

You should check out the Eachine E010. It isn’t an FPV drone. It isn’t durable. It isn’t powerful. However, it is often only $12. You get a toy drone, a cheap radio controller, a battery, and a charger.

The Eachine E010 is a lot like the first toy drone I owned, except it is so much cheaper. It can’t compete with the TinyHawk or the Meteor75. It is just a toy, but it does fly.

I’d rather see you spend $40 on a BetaFPV LiteRadio 2 to play in the simulator, but if you really must have a toy drone, this is the way to go. I like giving these as gifts to my non-pilot friends!

Make sure you get the Mode 2 model with the throttle on the left.

Conclusion

After getting all amped up to write about fancier machines, this feels like an abrupt conclusion! I hope I’ve done a good job covering the reasonably priced options.

The BetaFPV Advanced Kit really goofed me up here. It wasn’t available when I recorded the podcast with Jeremy, and I only became aware of it part-way through this write-up. It is almost exactly the bundle I’ve been hoping to see.

This was a long one! How did I do? Have I made good suggestions to beginners trying to enter the hobby? Do you agree that the BetaFPV Advanced Kit and using a simulator is the way to go? Do you have a better option? Did I miss something important? If you have answers to these questions, or you have your own questions leave a comment below or stop by the Butter, What?! Discord server to chat with me about it!

How Fast Can I 3D-Print With My Prusa MK3S?

| Comments

UPDATE: This blog post is so old and out of date, but it is still getting quite a lot of visits from Google search! I should organize my current PrusaSlicer profiles so I can export them and re-upload them.

UPDATE 2: I have mostly given up on going any faster with the Prusa MK3S. I did upgrade to a 0.6 mm CHT-style nozzle, and that has been a fantastic upgrade, but I also added a Sovol SV06 to my collection a couple of months ago. I am running Marlin’s input shaping on the Sovol SV06, and I am able to print a Benchy in 23 minutes. We won’t be getting input shaping on the Prusa MK3S, and running Marlin on the Prusa seems like it will lead to disappointing trade-offs.

I’ve had my new Prusa MK3S for two weeks so far. The first day was a blast! I had the machine unboxed, plugged in, connected to Octoprint, and then printing a dozen brackets for Tindie in about 20 minutes. I thought this was fantastic, but before the night was over, I even had a successful TPU print completed.

I knew before even ordering the machine that the Prusa MK3S would be much slower than I’m used to. My old MakerFarm Prusa i3 had monstrous stepper motors and an insanely powerful extruder. I was printing with a layer height of 0.3mm and 85mm/s perimeters, and I also had my acceleration cranked up to more than 2,500.

The Prusa 0.3mm Draft profile speeds were so much lower than what I’m used to. The Prusa community seems more interested in improving print quality. I’m often prototyping functional parts. If I can print a part in 45 minutes instead of 2 hours, then I might be able to print 4 or 5 iterations in a day instead of 2 or 3. That’s huge!

How far can I push the speeds without ending up with a sloppy mess?!

Let’s start by modifying the 0.15mm SPEED profile

I inched my way through the speed tweaks to the 0.15mm profile with many objects. I don’t think I have a handy comparison between the output of Prusa’s profile and my own. I’ll work on that printing some comparisons soon, but probably not until I feel like I’m done tweaking the 0.16mm profile.

For now, lets walk through some of the major changes. I’ll use the Marvin keychain and PrusaSlicer’s estimates for this. The estimates aren’t exact, but they’ll give you an idea of where we’re going. The Prusa 0.15mm profile says Marvin will take 48 minutes to print.

NOTE: I’m pretty sure the robot was printed with an early version of my 0.16mm profile.

The first thing I noticed was that many of the Prusa profiles default to grid infill. Cubic infill prints nearly as quickly, but it is stronger. Sort of. That means we can lower our infill percentage without significantly degrading the strength of our parts.

Switching to cubic infill increased print time by one minute. We are probably ending up with more infill due to the way the shifting layers of cubic infill are lining up with our spherical dude. If we drop down to 15% infill, we wind up at 47 minutes. Not a huge savings, but I would be willing to bet the savings would be more on a larger model.

The next thing I noticed was that the Prusa profiles don’t combine infill across layers. At a layer height of 0.15mm, you can tell PrusaSlicer to combine infill every two layers, and your infill will be 0.3mm. This means you spend half as much time printing infill, but you don’t have to give up the resolution on the perimeters.


Combining infill every two layers brings Marvin down to 41 minutes. These settings give a bigger speed up on larger prints. Our friend Marvin doesn’t have much infill!

On my old printer, I used to print with a 0.16mm layer height. I did this because my printer had no trouble printing infill at a height of 0.32mm. This is a tiny adjustment, but it brings us down to 39 minutes. We saved some time by going from 169 layers down to 158 layers.

At this point, we haven’t done anything that would significantly impact the appearance of the finished part.

Then I made small changes to most of the print speed and acceleration settings. I’m not sure I’m happy yet, but the rest of my changes bring the job down to 36 minutes.

This is as far as I got before I started messing around with the 0.3mm DRAFT profile. Just for reference, the slicer says Marvin will take 23 minutes with Prusa’s draft profile and 21 minutes with my draft profile. It isn’t a big difference with such a small part!

Working on the 0.30mm DRAFT profile

I worked on this profile while printing pairs of my CNC edge clamps. Prusa’s stock draft profile estimates a print time of 42 minutes.

I worked quickly on this profile because I was able to copy many changes from my 0.16mm profile. I bumped the layer height up to 0.32mm. That saved me two layers and one minute. We can’t combine infill layers here because 0.32mm is already pushing a 0.4mm nozzle to the limit!

Switching to cubic infill and dropping to 15% infill brought us down to 39 minutes. Then I dropped the solid top and bottom layers each by one. That brings printing time down to 33 minutes. With our thick layer height, that’s still quite thick!

Then I started bumping up speeds. During the test print, everything was looking fine, so I spun the knob on the printer to increase print speeds by 15% in real time. That worked fine, so I bumped just about everything up by another 15%. I don’t think I’m at the limit yet, but I’m pleased with where I’ve landed.

PrusaSlicer is estimating that a pair of my edge clamps will take 27 minutes to print. Better than that, though, I have real data! My fastest profile so far printed a pair of clamps in 26.5 minutes. Prusa’s draft profile took 43.5 minutes. That’s about a 60% improvement.

How terrible does your 0.32mm profile look, Pat?!

I took six sets of brackets to Brian Moses’s house. I told him he needed to identify which brackets printed in 26 minutes and which printed in 43 minutes. He couldn’t do it.

None of them look amazing. They’re all drafts. I can see some minor differences in my fastest print, but it is more than acceptable and hardly noticeable.

What about acceleration?

I’m doing a bad job here. I’ve been bumping up acceleration numbers in the Print Settings, but I haven’t yet been smart enough to bump up the maximum allowed acceleration numbers in the Printer Settings.

I’m guessing that any acceleration bumps I’ve made haven’t actually been doing anything. Maybe I will work on that next time I’m testing?!

Acceleration increases made a HUGE difference in performance on my old printer. Without some strong acceleration, you just don’t get up to those 90mm/s infill speeds on small prints!

Conclusion

All the original Prusa 3D printers are fantastic machines. Josef Prusa has managed to cram so much functionality, reliability, and quality into a reasonably priced package. They will get beautiful prints right out of the box, and the community is huge.

Even if you’re like me, and you want faster prints out of your Prusa MK3S, you can definitely manage that too. It just takes a little tweaking, and I’ll most likely be pushing these profiles a little farther. I’m certain that some of these tweaks could be applied to the Prusa MINI as well!

What do you think? Am I printing fast enough? I’ve already made the big tweaks that each chop 10% or 15% right off the top of my print times. Should I be fighting for a few more percentage points of improvement? Have you tried my profiles? What do you think? Let me know in the comments, or stop by the Butter, What?! Discord server to chat with me about it!
Eight Hours With My New Prusa MK3S 3D Printer

| Comments

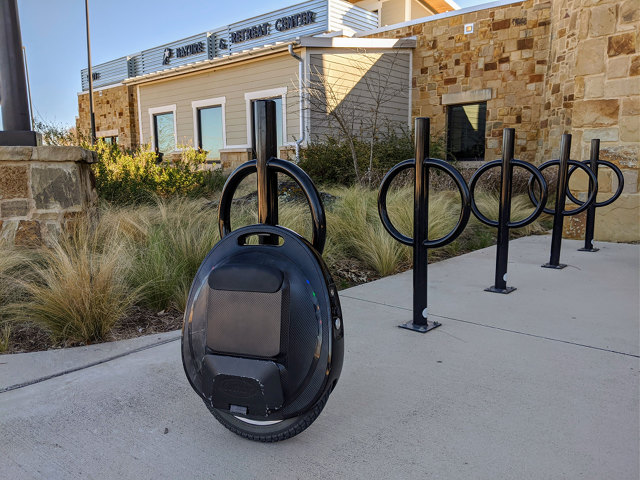
I’m excited about this. I have to say that I expected to be writing a post talking about my first day with my new Prusa MK3S, but I had a very successful first evening with the machine. I started unboxing around dinner-time, had my first PLA print running through OctoPrint in about 20 minutes, and the 90-minute job finished before we left for our 10-mile electric unicycle ride.

When I got home, I managed to get my first TPU job running, and I had a replacement GoPro mount for my FPV freestyle miniquad ready to go a few hours later. It finished while Brian and I were playing Team Fortress 2.

Why is this exciting?

I ordered the fully assembled and tested Prusa MK3S. The kit is $749, while the machine I bought was $999. The bill after taxes and shipping came to $1,111.31. I paid an extra $250 to avoid the time and headache of assembling and configuring my machine. I’ve tinkered with enough 3D printers over the last six years. I just want to start 3D-printing my designs again!

I cut open the box with my trusty Saros EDC knife, removed some custom packing foam, lifted out the printer, and put it on my 3D-printer stand. It is in the same spot where my old printer lived, so I just plugged my old power and USB cables right in. All I had to do next was remove some zip ties, follow the instructions on the printer’s display to unload the test filament and load my own, and I was ready to print.

I was able to go from a neatly wrapped box to watching a handful of brackets printing away in less than 30 minutes. I know that I’m cheating a bit. I already had OctoPrint running in a VM for my last printer. I only had to make minor modifications there to get things working for the Prusa MK3S.

I would have been printing even sooner if it weren’t for those meddling kids!

By meddling kids, I mean the guy who configured things for the OctoPrint virtual machine. That would be me.

With KVM, it is easy to pass through a serial device from the host to a virtual machine. The problem I had was that my old printer’s RAMPS board runs at 250,000 baud. KVM’s simple serial passthrough didn’t like that at all, so I had to go one layer higher and assign the actual USB device to the VM.

My Old 3D Printer

If a driver on the host claims the device when it is plugged in, then you won’t be able to assign it to a VM. I spent five minutes or so puzzling out what I did four years ago.

The answer probably won’t be of much value to you, but I’m going to tell you anyway. I blacklisted the cdc_acm driver that the RAMPS board on my old 3D printer used. The EINSY board in the Prusa MK3S uses the same driver.

If it weren’t for this little wrinkle, I may have been up and printing in 10 to 15 minutes instead of 20 minutes!

PLA was a breeze

I should tell you that I modified Prusa’s slicer profiles a few days before the printer arrived. The default profiles are just glacially slow. I started with the “0.15mm SPEED” profile, and these are the things I remember changing:

  • Bumped layer height from 0.15 to 0.16
  • Set infill to every other layer for 0.32mm infill
  • Increased infill acceleration from 1000 to 1800
  • Bumped internal perimeter speed from 60 to 70 mm/s
  • Bumped first layer speed from 20 to 30 mm/s
  • Cubic infill instead of rectilinear

I’ve done a bad job. I couldn’t verify this. I made about half these changes, then saved the profile. Then I made more changes, sliced the first print, then I forgot to save the changes!

I only printed 8 brackets in my test print, because I knew I needed to print a TPU mount the same evening. When I was testing my changes to the print profile, I was checking the estimate with 32 brackets from my Tindie store on the plate. The time dropped from roughly 6:45 to 5:15. I figured that was a reasonable first attempt at pushing things faster!

Brackets printed on my Prusa MK3S

Prusa’s “0.30 mm DRAFT” mode is still faster. I believe it was estimating 3:30 for a set of 32 brackets. I’d prefer to keep my 0.16mm perimeters, though. We’ll see how close I can get without making my prints look nasty!

I switched to cubic infill as soon it was available, and I’ve never looked back. I’m not going to look for data to back up my memory here, but I recall cubic allowing for more strength with less infill. Cubic infill is all straight lines just like rectilinear, so cubic allows you to increase your print speeds or increase your strength for free. That is assuming my memory is correct and testing hasn’t proven otherwise since then!

TPU was a headache

My friend Brian recommended that I print TPU on painter’s tape. He tells me it is a pain in the butt getting TPU off of a PEI surface. I’m taking his word for it!

I used the “Sainsmart TPU” filament profile along with the “0.20 mm QUALITY” print profile. I don’t need my GoPro mount fast, but I definitely needed it to succeed!

I heard some clicking noises from the extruder during the first layer. After canceling the job and moving the print head out of the way, it was obvious that my first layer was squished. My old printer’s massively powerful extruder would have just powered through this, but the MK3S extruder wound up bending the narrow filament.

TPU GoPro Mounts printer on my old and new printer

NOTE: Prusa MK3S on the left, heavily crashed part from MakerFarm i3 on right.

I took a set of calipers to my painter’s tape. It is 0.12mm thick! I used the live z adjustment on the next attempt, and things were better. The first layer looked great! Unfortunately, the extruder still got gummed up.

I went into PrusaSlicer and attempted to disable retraction. Things went much better this time, and 90 minutes later I had a GoPro mount in my hands!

I failed to completely disable retraction. There are several retraction settings, and I’m guessing I missed one. Early in the print, I was marking the filament every half inch or so with a Sharpie. I could see the retractions happening, but I could also verify that the printer was indeed still extruding!

Why the Prusa MK3S?

My old 3D printer was a beast, but it was lacking a lot of modern conveniences that every Prusa printer ships with. When my old printer’s heated bed connection melted, that seemed like a good excuse to buy a new, modern printer. I was certain I was going to order the little Prusa MINI.

The Prusa MINI really does have all the features and performance I need. In all honesty, I don’t 3D-print nearly as much as I used to, and I’ve 3D-printed even less since buying a CNC router.

A $350 Prusa MINI seemed like a great value. It has enough build surface for me. It has the silent Trinamic stepper drivers. It has automatic mesh bed leveling. That’s all I really need, and I really wanted to try one out!

Then I saw that that Prusa MINI wouldn’t be shipping until some-time in September. That was in May. Could I survive without a 3D printer for 4 or 5 months? The preassembled Prusa MK3S claimed it would ship in 5 weeks. That seemed a lot better!

Due to the current global situation, it took about 10 weeks to ship. It did manage to get here just in time, though. I broke one of my TPU GoPro mounts on my drone on Sunday. The Prusa MK3S arrived Monday, and I was able to have a fresh mount installed on the quad that night.

That didn’t really explain why you chose the Prusa MK3S!

I could have repaired my old MakerFarm i3. It would have been simple to solder the heated bed wires directly to the RAMPS board. In many ways, that printer outclasses the Prusa MK3S. The MakerFarm’s stepper motors are at least 30% bigger, its extruder was an absolute beast that could power through anything, and 3mm TPU filament is so much easier to work with.

It is an old printer. It is missing so many modern features. I had to check and set my Z-axis offset between every print because parts of the printer expand as they heat up. The MakerFarm printer was loud. Its extruder may have been a beast, but it was ancient, outdated, and was quite drippy.

I could have repaired the failure. I could have bought Trinamic stepper drivers and shoehorned them onto the RAMPS board. I could have bought a BLTouch probe for automatic bed leveling.

These are all features I desired. I could either spend money and time upgrading the old machine, or I could just bite the bullet and replace the whole thing. It definitely cost more money, but I saved a heck of a lot of time, and my old printer has already found itself a new home.

Why the Prusa and not something like an Ender 3?

The Creality Ender 3 is a fine printer at an amazing price. The Ender 3 is basically what you get if you try to replicate my old MakerFarm printer, except you replace every part with the lowest-cost hardware that will do the job.

This is fine. The Prusa MK3S is doing the same thing, isn’t it? It isn’t literally the best 3D printer in the world. The impressive thing about Josef Prusa’s engineering is that he has managed to strike a seemingly perfect balance between features, cost, performance, and reliability.

If I had bought an Ender 3, it would have been an upgrade in a few places, a downgrade in a few others, but I would have been at roughly the same point I was six years ago.

My old 3D printer

The Prusa MK3S got me the features I really wanted. Those quiet stepper motors are fantastic. When you put it in stealth mode, the loudest thing on the printer is the fans. I’m also really excited about the automatic mesh bed leveling.

I got to do something that I could never really do with my MakerFarm printer. I sliced an object, hit the “send to printer” button, and then I checked the box that says “start print after upload.”

I didn’t have to check my Z-axis offset three times before printing. I didn’t even open OctoPrint. I just clicked OK, waited a bit, and my part was successfully printing. This is such a nice upgrade!

I have no idea if I could do that with an Ender 3.

What’s next?

I started writing this blog post the morning after I finished those two prints. I didn’t quite make it to the conclusion before getting distracted. I’ve been tweaking PLA profiles to increase speed, and I’ve been looking for things to print to test those profiles!

I’m using the same layer heights as I used on my old printer. One of my early and still-clean prints was an Osmo Pocket stand. OctoPrint says my old printer managed to print it in 51 minutes. The Prusa took 68 minutes. Unfortunately, I can’t say for sure that the infill density and perimeter counts are directly comparable here, but I’m excited that I’m approaching my old speeds already.

I’ve pushed far enough that I’m getting slightly messy perimeters. I’m excited that I’m figuring out the limits, and I’m pleased that they won’t be all that much slower than my old machine. At this rate, I expect I’ll be settled in on some reasonable print settings in a few days. Once I get the TPU dialed in, I’ll post my profiles!

What do you think? Is the Prusa MK3 worth paying two or three times the price of an Ender 3? Do you have a Prusa MK3S, or something entirely different? Are you happy with it? Let me know in the comments, or stop by the Butter, What?! Discord server to chat with me about it!

Four-Inch Miniquads Might Be Awesome Now!

| Comments

Early last year, I attempted to build out one of my Kestrel frames with 4” arms, and I did my best to keep the build under 250 grams. Well, maybe not my best. I wanted a 4” freestyle quad that would be legal in most parts of the world, but the 250-gram limitation isn’t a problem where I live, so it was fine if I went over.

I used Emax 1606 3300 kv motors with a 4S 650 mAh battery and came in at about 275 grams. I’m confident that I could get that down to 250 grams. I could use a 550 mAh battery, swap in a micro TBS VTX, and use a lighter antenna. If that didn’t get me there, it would get me close.

I don’t own any of these new motors!

I’m having enough trouble finding the time to keep my two primary 5” freestyle quads repaired and flying. I don’t want to buy more motors, frames, electronics, and batteries. I don’t want to build more quads right now.

I’m going to let other people figure this out. I’m excited that they’re doing such a good job!

KababFPV is blazing a trail here

I’ve been a fan of Bob Roogi’s work for a long time. One of my early miniquads was built on his Floss frame. My first real freestyle quads were built on his Flowride frames. My friend Brian is flying a Toothpick 3 build, and it is an amazing little machine.

Bob’s company is having some really interesting 2203 motors manufactured. It seems the intention here is to have smoother cinewhoop footage. Motors with a 22 mm stator use much bigger bearings than motors with 14 mm or 15 mm stators can support. Bigger bearings tend to be smoother and more durable.

I’m excited because Bob hasn’t stopped there. He’s designed a more robust equivalent to his Toothpick 3 frame for 4” and 5” props, and he’s calling it the Powerpick. This should allow for some insane power-to-weight ratios while keeping the overall weight and cost down.

Bob has also designed a new 4” freestyle frame called the Fouride. This is a bit heavier than the Powerpick. It is designed to be compatible with the DJI digital FPV system.

Bob posted some test footage from a 5” Fouride with FPV Cycle 2203 motors and an 1,100 mAh 3S battery carrying a GoPro Session 5. The whole thing weighed in at 429 grams, and it sure looked like it was flying great. For comparison, my 5” freestyle quads weigh in at about 640 grams with a GoPro Session 5.

There are a lot of new motors available for 4” quads

My other friend Brian has been collecting data and posting pictures of the motors he’s trying in Discord. I asked if I could write a blog post using his data, and he said that would be fine. That’s the inspiration for what you are reading right now!

Young Brian has been comparing the StanFPV 2203 motors from FPV Cycle, BrotherHobby’s VT 2004 motors, and the Emax 1408 motors. He has a nice spreadsheet with weights, stator volumes, and bearing sizes. I added the Emax 1606 motors that I fly to the list.

Motor Volume Bearing Weight
Emax 1408 1231 mm2 2x5x2.5 mm 14.34g
Emax 1606 1206 mm2 3x6x2.5 mm 15.8g with full wire
StanFPV 2203 1140 mm2 3x8x4 16.64g
BrotherHobby 2004 1256 mm2 3x7x3 mm 14.33g

Young Brian weighed all these motors with the wires cut down quite short, because he is planning on soldering the motors to racewire. I don’t have a spare Emax 1606 handy, and even if I did, I wouldn’t want to cut the motor wires so short! I’m just listing the manufacturer’s weight for the 1606.

The three motors young Brian is working with are the lighter t-mount variants. My 1606 has a heavier M5 prop nut.

What have we learned about motors?

About a month ago, I was chatting with young Brian about motors. We figured out that 1408, 1507, and 1606 motors all have roughly the same stator volume. Tall motors and wide motors have different power bands, but we’re not going to worry about that today.

Young Brian's 4-Inch Motors

What we learned that day was that the Emax 1606 has a significantly bigger bearing than any 1408 or 1507 motor that we could find specs for. If I remember correctly, I didn’t find any 1408 or 1507 motor with a bearing larger than the Emax 1408 motor in the table above.

That means that the inexpensive $12.99 Emax 1606 had the biggest bearings in its class, and it isn’t just a little bigger. Its bearings have a slightly larger diameter, but they’re also 50% taller. That’s a huge difference, and there are two bearings in each motor.

Why do I want larger bearings?

You might not want larger bearings. Young Brian wants to build the lightest possible long-range machine that he can. Adding 9.2 grams of weight to his quad to use the StanFPV 2203 motors with their gigantic bearings might not be a good fit for his needs.

I’m betting young Brian will choose the BrotherHobby VY 2004 motors for his build. Those motors should be more powerful than my 1606 motors, they have larger bearings, and they weigh less. Sure, the bearings are smaller than the StanFPV 2203 motors, but they’re still quite large!

StandFPV 2203 bearing compared to a 2207

Larger bearings tend to be smoother, and they also tend to be sturdier. Young Brian won’t be smashing his long-range build into concrete three times a day, so he doesn’t have to worry about that. He’s also not carrying a GoPro, so he might not care about getting every extra bit of smoothness that he can muster.

If you’re going to be smashing into concrete, you’ll want the biggest bearings you can get. If you’re going to be carrying a GoPro, you want the smoothest bearings you can find.

I bet the StanFPV 2203 motors from FPV Cycle are indestructible

Completely indestructible? Of course not! On an appropriate build, though, I expect them to take an absolutely insane beating!

The FPV Cycle 2203 motors use the same Japanese bearings as the 2207 motors I’ve been flying on my 650-gram freestyle quad. Young Brian isn’t expecting to have trouble staying under 250 grams, and I wouldn’t be surprised if you could build an insane Powerpick with 2203 motors and keep it under 200 grams.

Weights of three of the motors

I smash my heavy freestyle rig into concrete all the time. It took me more than a year to wear out any of my bearings. The StanFPV motors have the same pair of bearings and the same style of titanium motor shaft as my Hyperlite 2207 motors. How will they hold up when you smash your 200-gram miniquad into the pavement?

They ought to hold up A LOT better than my motors.

I think a 200-gram machine with these 2203 motors will be nearly indestructible. What about Kabab’s 429-gram build with the GoPro? Will it be indestructible too?

Probably not, but I have a feeling that it will take an order of magnitude more crashes and punishment to break that little guy’s motors.

If shaving 200 to 250 grams off the weight of my freestyle rig means it breaks significantly less often, I would absolutely consider switching to smaller machines like this. As long as I can carry a GoPro, I should be relatively happy.

Conclusion

I’m excited about the future of 4” and light 5” builds. This new hardware is going to allow people like my friend young Brian to build long range miniquads that meet some countries’ 250-gram legal requirements. It might also allow people like me that don’t care about weight to hit an interesting new point on the durability spectrum. Light enough to not break motors and GoPros as easily, while still heavy enough for hucking your quad around for floaty freestyle.

What do you think? Are you flying one of these new motors on a four-inch miniquad? Are you enjoying it? Are you planning on building something like a Fouride or Powerpick? Tell me about it in the comments, or stop by the Butter, What?! Discord server to chat with me about it!

Thoughts On The Xiaomi Fimi Palm 3-Axis Gimbal

| Comments

I only learned about Xiamoi’s competitor to the Osmo Pocket a few days ago. It was announced quite a while back, and it seems it has been available for months. I feel like I’m living under a rock or something!

I was informed of the existence of the Fimi Palm in an email from Banggood telling me it was on sale for $155, but apparently not currently available to be shipped to the United States.

I saw that, and I thought, “Holy crap! That looks just like my Osmo Pocket at half the price!” That isn’t quite true. I can order [a Fimi Palm from Amazon][fpa] right now for $195. That’s $125 less than the Osmo Pocket.

I haven’t ordered a Fimi Palm, but I’m going to tell you why I gave it some serious consideration!

The Xiaomi Fimi Palm is amazing on paper

Xiaomi has attempted to address almost every single complaint I’ve had about the Osmo Pocket. The Pocket is $320. If you want WiFi and Bluetooth, you need a $54 add-on module. If you want physical controls for the gimbal, that’s another $53 add-on.

This makes the Fimi Palm even more attractive, right? If you’re using these accessories, the Fimi Palm really is less than half the price of an Osmo Pocket.

I’ve started experimenting with using the Osmo Pocket to record close-up soldering footage at my workbench. I had to buy a USB-C extension cable to connect the Osmo Pocket to my phone in order to get a preview and control the video. You can’t use the normal USB-C port on the bottom of the Osmo Pocket to interface with your phone, so I needed to buy a $15 cable to do this.

It would have been nice to have built-in WiFi support to accomplish this for free and to eliminate the cable!

The wide field of view of the Fimi Palm would be fantastic!

The Xaiomi says that the Fimi Palm has a 128-degree field of view. That’s huge compared to the Osmo Pocket’s 80 degrees.

When I use my Osmo Pocket for vlogging, I pop on my Freewell wide-angle lens. That’s another $35 upgrade, and it is an upgrade I might easily lose too! This puts my Osmo Pocket in the 120-degree range, and it means I don’t have to hold the camera as far from my face while riding my Gotway Tesla electric unicycle.

The bummer is that the Freewell wide-angle lens is the only wide-angle lens worth using. All the others I’ve seen are quite blurry around the edges. Not only that, but it is sometimes tough to find the Freewell lens in stock. It’d be nice to not have to worry about losing this little guy.

The wide-angle lens lets me hold the camera closer to my face. With the lens attached, I can bend my elbow and still frame the shot the same as the bare Osmo Pocket held as far away as I can extend my arm. Holding the camera closer is safer for my balance while riding my unicycle, less tiring for my arm, and it gets the mic closer to my noise hole.

I’ve watched a handful of review videos. For my use case, the field of view upgrade would be negated by the Xiaomi Fimi Palm’s disappointing face tracking.

The Osmo Pocket usually puts the top of my head near the top of the frame. The Fimi seems to put your face right in the center of the screen. That’s horrible! Sure, I could crop some of that down in post, but by the time I do, I would have an image with the same view as the Osmo Pocket.

This was a disappointment I had with my Zhiyun Smooth 4 gimbal too. Why on Earth would I want my face in the center of the frame?

This is something that could be fixed in a firmware update.

The external mic support would be nice, but the built-in mic is a downgrade

The spec sheet says you can plug a 3.5mm microphone into the Fimi Palm. This sounds great, because the microphone adapter for the Osmo Pocket is another $27 add-on. Unfortunately, it sounds like the Fimi Palm also needs an adapter, and it doesn’t look like generic USB-C adapters work.

I have been absolutely amazed at the quality of the internal microphone on the Osmo Pocket. When I record in my office, I tend to be happier with the audio from my Osmo Pocket than I am with the audio from my Zoom H1n. The acoustics in here aren’t great, and I have a lot of computer fans running. The Osmo Pocket filters a lot of that out for me!

Not only that, but the Osmo Pocket has done an amazing job filtering out wind noise when I ride my electric unicycle at 15 mph.

I do assist the Osmo Pocket, though. I stick the base of the camera into a generic foam microphone windscreen. For all I know, this would work well on the Fimi Palm too. I haven’t gotten to try it with the Fimi Palm, but I do know for sure it works well with the Osmo Pocket!

I listened to some mic sample comparisons. If I could stick the Fimi in my wind guard and not get wind noise at 15 mph on the EUC, I would be happy enough with the mic.

The resolution and frame rate doesn’t matter

They’ll both do 4K. I think the Pocket can do 60 Hz at 4K, while the Palm can only manage 30 Hz. At other resolutions, both cameras seem mostly comparable.

Resolution doesn’t matter to me all that much. I care about image quality. DJI most definitely has better color science than Xiaomi. When I watch reviews comparing both cameras, I can always pick out the Osmo Pocket immediately, and I know which one I prefer.

I almost always record with the D-Cinelike color profile on my Osmo Pocket. This gives me a bit more room to correct things in post. I don’t usually take advantage of this, though. Most of the time I just drop my D-Cinelike color-grading template onto the footage. I like knowing a bit of extra dynamic range is there if I need it.

The Fimi Palm has a similar setting.

You can control the ISO, frame rate, and exposure compensation on the Fimi Palm. You can’t control shutter speed. The Osmo Pocket had limitations like this when it was first released, and I wouldn’t be surprised if this situation is corrected in a Fimi firmware update.

How much better is the video from the Osmo Pocket?

That’s the question. Is it $125 better? Is it $225 better? That’s roughly the difference in price between the Fimi Palm, the base Osmo Pocket, and an Osmo Pocket with WiFi and a scroll wheel.

The fact is that if you’re using an Osmo Pocket, you’ve already made a huge compromise. I’d love to carry a Sony a6500 on a gimbal when I ride my electric unicycle. I’d hate having to carry it, and I’d never be able to store it.

I carry the Osmo Pocket because it literally fits in my pocket. I’m already compromising on audio and video quality. A better question to ask is how much more I’d be willing to compromise.

The Xiaomi Fimi Palm has a tripod mount!

This is awesome, even if it isn’t in an ideal spot. I’ve 3D-printed things to help attach my Osmo Pocket to a tripod, but I rarely feel completely confident that my Osmo Pocket isn’t going to slip out and tip over.

Having tripod threads built into the body of the Fimi Pocket would make me feel better.

If I dropped my Osmo Pocket in the river, I would immediately order a Fimi Palm!

This is what I’ve realized here. My Osmo Pocket is doing a fine job. I have no need to replace it with a similar camera. The Fimi Palm isn’t really an upgrade. It has some improvements over the Osmo Pocket, and it is lacking in other areas. Even if it were a straight-up upgrade, it would be a minor upgrade at best.

I’m going to keep chugging along with my Osmo Pocket. When I inevitably drop the poor thing, I will probably replace it with [a Xiaomi Fimi Palm][xpa].

Maybe Xiaomi will have addressed my face-tracking issue with a firmware update by then, right?!

Conclusion

For me, the [Xiaomi Fimi Palm][xpa] is 75% of an Osmo Pocket at 50% of the price. That’s based on the situations where I use my own Osmo Pocket. If you don’t need to ride a unicycle at 15 mph, and your face-tracking needs are different than mine, the Fimi Palm might be more than 100% of an Osmo Pocket for half the price!

What do you think? Do you own a Fimi Palm or an Osmo Pocket? Do you have the same concerns as I have? Did it take you months to learn of the existence of this Osmo Pocket competitor? Let me know in the comments, or stop by the Butter, What?! Discord server to chat with me about it!
Gotway Tesla V2 Range Test

| Comments

I remember taking my InMotion V5F on a 14.5-mile journey and getting home with 15% remaining in the battery. I should have this documented somewhere, but I can’t find it! You’d think I would have been excited enough about that to tweet a screenshot of WheelLog, right?!

At any rate, I’ve been meaning to drain the Tesla’s 1,020 watt-hour battery. I’ve been curious how its range will compare to my little V5F. I saw a range test of the new 1,480 watt-hour Tesla, and that got me even more curious. If he can make it 50 miles on the third-party battery upgrade, how far will my stock Tesla go?

My range test took three days

I had a full battery when I went out for a ride Monday evening. I didn’t have a lot of time before sunset, so I only got 5.25 miles in. I was smart enough to not put the Tesla on the charger so I could continue testing the next day.

I took two different rides on the second day. I rode 7.2 miles in the afternoon and 10.48 miles later that evening. This left me at 45% charge.

The third day of testing was the most interesting to me. I wanted to see how the Tesla would react when the battery got low. I’m under the impression that I’ll start hearing a warning beep if I push the motor beyond 80% of available power, and I know from flying FPV miniquads that a nearly dead battery can’t supply as much current as a freshly charged one!

When I pulled up to my house, I had put another 10.35 miles on my Tesla, and the battery was reading 15% charge. That’s a total of 33.28 miles, and I’m confident that there are at least another 3 or 4 miles left in the battery. That’s not quite as much range as my wife’s Pace Aventon 350 e-bike, but it is still farther than we’re ever likely to go in a single day!

I’m quite pleased with these results. That’s more than double the range I was seeing on my little InMotion V5F, and I’m riding the Tesla so much harder. My average speeds are 2 to 3 mph higher. The V5F tops out at 17 mph, and I’m often cruising around on the Tesla at around 20 mph.

How did the Tesla act with the battery low?

I am not a speed demon. They say my Gotway Tesla can reach 30 mph, but I don’t want to go that fast. I have the audible warning set at 20 mph. That’s about as fast as I’d really want to go with the gear I’m wearing. I have pushed it to nearly 24 mph, and it didn’t require any effort to get there.

If I hear the beeps at 20 mph, I tend to back off. This seems to have me programmed for cruising at around 17 or 18 mph.

During the last two or three miles of my range test, I was being cautious. At one point, I had my phone out, and it said I was going 15 mph with 16% remaining. I leaned in reasonably hard to push my speed past 20 mph, and there were no complaints, and the voltage didn’t drop.

There’s a long hill at the end of my ride. I made sure to push fairly hard up the hill, and I kept an eye on EUC World the whole time. I maintained 17 mph up the hill, battery percentage held at 14%, and I didn’t get any warnings.

My brand new Gotway Tesla has no trouble handling my riding style at 14% charge. This shouldn’t be surprising, because EUC World was reporting that I was at 71 volts at this point. That’s a little over 3.5 volts per cell. There’s still quite a bit of juice left in an 18650 at that voltage!

Will this always be the case?

No! I beat the heck out of my FPV miniquad LiPo batteries. When one cell starts to fail, that cell drains much more quickly than the rest. During a flight, I might have 5 cells at 3.8 volts while the dead cell is at effectively zero. That means I only have 19 volts available instead of 22.8. That’s a lot less power!

The trouble is, while my quad is just cruising, the battery will read 22.8 volts. The dead cell is happy enough to supply 10 amps. When I ask it to supply 100 amps, it can’t.

Our EUCs will act the same way when a cell is failing. The battery will happily charge to 84 volts. The wheel will balance fine. It will cruise around fine.

When you ask the wheel to deliver a lot of power, it may fail.

My drone uses a 6-cell battery. When one cell is gone, 20% of available power goes away with it. My Gotway Tesla uses a 20-cell battery pack. If one cell fails, only 5% of available power vanishes.

While the rest of the cells are at 50% charge, that 5% may never make a difference. When your wheel is nearly depleted, that 5% may be the difference between staying upright and falling flat on your face!

Odds are high that this is the way your EUC battery will fail. It is rare for 20 cells to all age equivalently. There’s almost always a weak link. Lithium-ion packs that die of old age usually have just one bad cell or bank of cells.

I don’t want you to worry about your batteries. I just want you to understand that just because your Tesla responds amazingly at 15% battery during your first 200 miles, that may not be the case at 2,000 miles or 10,000 miles!

I’d be willing to push my Tesla down to 5% to get home tomorrow. Would I trust it at 5% in another 5,000 miles?

Should I be jealous of the 1,480 watt-hour version of the Gotway Tesla?!

I have to say that when I saw the listings for the 1,480 watt-hour Tesla on AliExpress, it definitely piqued my interest. You’ll get 45% more range for less than $1,200, and it only weighs 5 pounds more than my Tesla? Seems like a steal, right?!

The list price for the 1,020 watt-hour Tesla at eWheels is $1,575. It is currently marked down to $1,450, and when I bought it, it was on sale for $1,350. Even though I bought at such a low price, I still paid nearly $200 more for a less capable version of the Tesla. Did I get ripped off?!

Of course not. The community trusts eWheels. They’ve been around a while. They back their sales with a 1-year warranty. What happens if I have a dead battery pack on the upgraded model from AliExpress?

The extra range and cost savings may be worth the risk, though. A wheel with 50 miles of range and a 30 mph top speed for less than $1,200 is an amazing value. I’m not sure anything else can compete!

How’s the Tesla treating you?

I’m still quite pleased with my purchase. I’m not putting as many miles on it as I’d like, though. We had a couple weeks of rainy weather shortly after the Tesla arrived at my door, and since then it has been quite hot here in Texas. I’m starting to rectify that situation, though! By the time you read this, I’ll finally be over 200 miles, and half those miles will have been accrued in the last two weeks.

I keep saying that the Tesla is like 80% of a Gotway MSX Pro for 60% of the price. I stand by that. I’ve put a couple of miles on my friend Tanner’s MSX Pro. If I could somehow manage to mount the wheel without looking at it, I might not easily be able to tell you which wheel I’m riding.

I ride almost exclusively on pavement: sidewalks, bike trails, roads, and parking lots. We often have segments of our journey where we have to sneak across grass or dirt, though, and the Tesla handles it just fine. If you want to go off-road, there are much better choices than the Tesla.

For the road, though, I’m extremely pleased with the Tesla. The price is good. It has more performance than I need. The InMotion V5F has me spoiled, though, so the Tesla feels pretty heavy, but it isn’t too bad throwing it up into the back of our miniature SUV.

I’m still not used to the extra weight and girth!

After 350 miles, I was getting quite comfortable on the InMotion V5F. My calves didn’t really touch the sides of the wheel most of the time. For whatever reason, my left leg would brush against the padding, but I wasn’t putting any pressure on it. I could also easily lift a foot if I needed to adjust my positioning.

On the Tesla, my calves are in constant contact with the padding, even while I’m just gently cruising along. I don’t think the heat is helping, either, because when I get sweaty, my legs stick to the pads. This makes it hard to adjust the position of my legs forward or backwards. I’m thinking about adding something like Kuji pads to my Tesla, but I want to wait to see what happens when I get better at adjusting my feet.

I still can’t lift one foot off a pedal while riding the Tesla. I just don’t understand the extra weight of the wheel and what to do with my body. The pedals have nearly twice as much surface area as the V5F, and the sandpaper has even more grip. It is nearly impossible to slide my foot into position after the fact.

Sometimes I mount the wheel, and I’m just unhappy with where my second foot lands on the pedal, and I’m not good at fixing it. This is a problem with me and not the Tesla. The bigger pedals are a huge upgrade. I just have to level up my riding!

What’s next?!

I need to practice riding with one foot. I don’t need or want to be fancy like the folks that pick one leg up and waggle it around. I just want to be able to pick a foot up an inch or two off the pedal, then put it back down where it needs to go. I promise I will put in some practice.

What do you think? Did I make the right choice with the 1,020 watt-hour Tesla? Am I going to be disappointed that I didn’t wait for the 1,480-watt hour version, or is 33 miles enough range? I’m more than a little envious of the suspension on the KingSong S18 and the InMotion V11. Should I have waited for one of those? Let me know in the comments, or stop by the Butter, What?! Discord server to chat with me about it!
Why am I Not Manufacturing and Selling Kestrel FPV Miniquad Frames

| Comments

I’ve been asked more than a few times on social media why my Kestrel FPV frame isn’t up for sale yet. The answer is complicated. I can’t properly answer in a few tweets or a reply on Instagram, so I figured it would be best to write a blog going into some of the details.

The Kestrel isn’t dead. The design is open-source, and everything you need to cut your own Kestrel frame is available on Gitlab. The source code that generates the arms for the 3” Kestrel frame is also used in my 5” Falcon frame, so there are still improvements flowing back and forth occasionally.

3-inch Kestrel

Not all of my reasoning is fresh in my mind, so some of what I write about here may be a bit inaccurate. I’m going to go through my reasoning in approximately the order in which I came to these various realizations.

The FPV drone industry is tiny

Not long after rebuilding one of my Kestrels with Diatone’s $38 Mamba Mini stacks, someone at one of the five biggest FPV retailers in the United States told me they just got a shipment of these stacks in. I don’t want to get anyone in trouble, and I don’t recall the specifics of what we said.

It was something along the lines of, “We just got X units in, and you better order fast, because they’ll probably be gone in Y time!”

3-inch Kestrel

I got a little worried, because X seemed rather small. Not only that, but for such a small number, Y seemed like a long time.

A while later, I saw a video recorded at the warehouse of one of the other top five FPV stores. Other than the high ceilings, this warehouse didn’t look all that much bigger than my own house, and they weren’t using tall shelving to take advantage of that vertical real estate.

On top of that, we get a lot of hints about the scale of the industry when RaceDayQuads bought a big stake in Rotor Riot. You’ve all seen Rotor Riot’s warehouse too.

I understand that size of the warehouse isn’t the best indicator of how much product flows in and out. For all I know, these places are all receiving huge shipments to refresh their inventory every single day.

These are just things that I noticed that made me less interested in bringing a product to this market.

I can’t safely sell at the prices I want

When I sat down to design my own HD freestyle frame, I said I wanted a lighter Ummagawd Acrobrat frame with replaceable arms. As far as I know, my Kestrel is the only other 3” frame that separates the camera and battery from the rest of the quad using rubber grommets. We’ll talk about that part soon enough.

The Acrobrat is priced at $45. I really wanted to be able to hit a price point of around $30, but I wouldn’t have been mad if I had to go all the way up to $45. I’m saving the details of the manufacturing pricing and options for the next section, but let’s just say it will cost me almost half of that $45 per frame just to get the carbon manufactured, cut, and shipped to me.

Standoffs, grommets, and M3 screws don’t add up to much. Super simple packaging won’t cost much.

Even if we ignore those extra costs, it feels risky selling Kestrel frames at $45. Sure, it sounds like doubling your investment is safe, but there’s more to it. If things get lost in the mail, I have to send a replacement. If I don’t notice a part was cut wrong or poorly, I have to send a replacement.

When I run out of inventory, and do the math, what would my hourly rate come out to? The most likely answer is that it wouldn’t be high enough to be worth the hassle and initial expense.

How much does it cost to cut a 3” Kestrel in Pat’s garage?

I remember doing the math. I don’t want to do the research to verify my old math, so we’re going to have to trust Pat from last year. I hope he was trustworthy!

My recollection is that it takes less than 13 dollar’s worth of Hobby King carbon fiber for a single Kestrel. You need two or three different thicknesses of carbon fiber plate, and you can’t buy them in exactly the right size sheets to cut precisely one quad. If memory serves, I had at least $120 in carbon sitting here before I started cutting.

Carbon is mean to endmills. I tend to use cheap endmills because I goof up and break them fairly often. After cutting two or three entire frames, it’ll be time to replace an endmill. The endmills I used at first cost about $12 each. I can get a ten-pack of the tools I use today for about the same price.

I’m always prototyping, so I tend to cut one entire frame at a time. Cut four arms and two side plates out of 3mm carbon, swap in a new sheet, then cut a bottom and top plate, and finally swap to the final sheet to cut the arm brace plate. This would be inefficient if I were manufacturing in significant quantities.

Let’s ignore my time and the time on the $2,000 Shapeoko CNC. If we add up the carbon, standoffs, screws, and worn-out endmills, that Kestrel frame costs me $15.

If you really want a Kestrel, CNC Madness can probably cut you one

When I asked around, everyone recommended CNC Madness in Canada. Their prices are actually quite good, and I hear nice things about the carbon fiber they use.

If my memory is reliable, CNC Madness quoted me $35 to cut a single Kestrel frame. I remember exchanging a few emails trying to figure out how low we could get the cost in quantity. They said I could get down to around $21 or $22 per frame as long as I consumed entire sheets of carbon.

That means I wouldn’t really be ordering 100 or 200 frames. There would be plenty of spare parts left over. We didn’t do any layout tests to figure out how this would truly work out.

Why did you say probably?

My Kestrel frame has only ever been cut on my Shapeoko in my garage using my cheap 2mm endmills. What happens when a professional shop like CNC Madness cuts a Kestrel?

The arms and dog bone on the Kestrel and Falcon all fit together perfectly for me when I cut them using my uncalibrated, untested, garage-grade CNC machine. I’m wouldn’t be surprised to learn that when CNC Madness cuts my frame with a much nicer machine, this wouldn’t be the case!

The arms might fit more loosely and flop around. Things might be too tight, and it will be impossible to fit the dog bone in place.

I’m saying that I can’t guarantee that the Kestrel will fit together perfectly when cut on someone else’s machine. Order at your own risk!

I wish I had a reasonable manufacturer in China

Competing with Acrobrat prices while manufacturing my frame in Canada isn’t a fair fight. Not that I want it to be a fight. The Acrobrat is a fantastic frame, and you can’t go wrong buying one.

I wouldn’t be the least bit surprised if a manufacturing company in China could manufacture and package a few hundred Kestrel frames and get them to my door for less than $15 each.

How do you find that manufacturer? How do you know they’re going to use quality carbon fiber? How do you know the carbon will be consistently good? I have no answers to these questions.

If the Hyperlite Flowride can be made from such high-quality carbon and retail for $45, surely there’s a way to sell a tiny Kestrel for $30, right?!

I don’t have the industry contacts to do this.

Is the rubbery suspension really necessary?

The smooth HD footage problem on micros that the soft suspension is trying to solve has been successfully attacked from at least two other directions.

Betaflight and blheli_s have improved dramatically. 48 Khz modulation in JazzMaverick and JESC firmware for our ESCs has given us longer flight times and smoother flights. The static and dynamic filters that we’ve had in Betaflight for a long time have been improving incrementally for a long time, and the RPM filter has just been amazing. All these add up to smoother flying micro quads.

Now people are taking apart their GoPro 6 cameras to ditch all the heavy pieces. These naked GoPros weigh less than 30 grams, and ReelSteady Go can make extremely herky-jerky flights look smooth and silky.

If taking apart a GoPro is too much for you, you can always try the 20-gram Insta360 Go. They recently unlocked an FPV mode that lets you record for 5 minutes.

Do you need a soft suspension for smooth footage out of a Caddx Turtle, Runcam Hybrid, or Caddx Tarsier? Probably not.

Does the suspension help? Maybe, but I’m not convinced! My hope would be that your footage might stay smooth even if your props get bent just enough that a frame with no suspension would have shaky footage. I have little confidence in this, and I have no science to back it up.

Split-style cameras are terrible

I’m interested in capturing nice freestyle FPV footage. I rarely record any footage with my Caddx Turtle that I feel is worth keeping. This is because of a combination of how my mirco quads fly and the narrow field of view in the Caddx Turtle HD footage.

All micro quads I’ve flown seem to have a bit of a robotic feel in the air. This isn’t surprising, because they don’t weigh much, so they respond to your inputs with quite a bit of authority. I’ve tried my best to tune this out of my 4” Kestrel, and I’m starting to be pleased with the results, but the Turtle still bums me out.

A Tarsier or Runcam Hybrid would be a huge upgrade, but I’m not excited about spending more money just to give myself the opportunity to spend time installing a new camera. I’d be super stoked about the upgrade on my FPV feed that either of these cameras would provide, but the HD footage won’t be upgraded much.

I need the wide field of view that the GoPro provides. Every time I’ve flown freestyle without SuperView, I’ve been disappointed.

I’ve broken two Turtles so far. They haven’t been subjected to nearly as many miles or the horrific impacts that my 5” quads and my old GoPro Session have, either. The Split-style cameras haven’t even reached video quality parity with the ancient GoPro Session 4.

I’m not some amazing pilot with a huge following!

I’m sure this part is obvious. If I had hundreds or thousands of people trying to emulate what I’m flying, I would probably already be selling Kestrel frames, right?

That’s assuming this hypothetical amazing and popular pilot we’re talking about was actually doing anything interesting with his Kestrel. Even if I were doing interesting and unique things with my quads, and 100,000 people were watching me on YouTube, we have no idea if I’d actually be doing any of that amazing stuff with my Kestrel.

My 4” Kestrel is a fantastic cinewhoop

I wish it had ducts! I just haven’t wished for this strongly enough to put in the effort to design and 3D-print some 4” ducts.

You can get nearly twice as much thrust out of 4” props as you can get out of 3” props, and my 4” Kestrel isn’t all that much bigger than a Diatone Taycan. My 4” Kestrel with 1606 motors flies great when loaded up with a big 4S battery and a GoPro 6.

NOTE: I recently found out that my Emax 1606 motors have much larger bearings than most or all 1408 and 1507 motors. All three motor sizes offer comparable power output, but larger bearings tend to provide more durability and smoother flight.

I found a couple of old 3S 2200 mAh batteries lying around, and they are my favorite batteries to fly when pretending my 4” Kestrel is a cinewhoop. They’re heavy batteries, so they make things a bit more stable. They’re lower voltage, so they make my throttle easier to control.

Yes, I could set up the throttle so that a 4S 1500 mAh pack feels the same, but I have these oddball batteries, so why not use them? With the 3S pack, I can chase a 15 mph electric skateboard for 8 to 10 minutes.

The lack of ducts is limiting, but I enjoy having a jack-of-all-trades quad.

The Kestrel is huge

There’s a 250-gram weight limit for unmanned aerial vehicles in many parts of the world, so I tried to keep that in mind when designing the Kestrel. My 5” freestyle quads are heavy. That means I can huck them hard through the air, flip upside down, and their momentum will carry them a long way before air resistance slows them too much. I wanted to get as close to that as I could with the Kestrel, which meant I needed a build right at the 250-gram limit.

This feels contradictory to my initial goal of designing a lighter frame than the Acrobrat. I’d always prefer to carry my weight in the battery. If saving 10 grams on carbon gets me an extra 100 mAh of battery capacity, that would be awesome!

I also wanted to keep the props out of view of the Caddx Turtle. I succeeded on the 3” frame, and I came close on the 4” frame.

My 4” build comes in at around 270 grams with a 4S 650 mAh battery, and it flies for about 4 minutes. I’m confident I could swap a few components and get down to 250 grams, but I’m not worried about that. My lighter 3” build comes in at 223 grams with the same battery.

NOTE: That’s not a Kestrel. That’s Brian’s 106-gram AUW Toothpick 3!

While the 4” build feels so much more like a 5” freestyle quad than any sub-250 gram machine I’ve ever flown, it still doesn’t have the inertia that I crave. If it is never going to be a proper freestyle build to me, then why am I aiming for 250 grams?

I flew Brian’s 106 gram Toothpick 3 build this week. It is fast, durable, and feels great. His TP3 lacks an HD camera, but I barely care at this point. I can count the times I was excited to share my micro quad’s HD footage on one hand. The Caddx Baby Turtle would fit in his build, and it wouldn’t add all that much weight. It would be a huge downgrade to his FPV feed, though.

Brian is experimenting with the Insta360 Go. His Toothpick 3 still flies quite nicely with the extra 20 grams of weight, though it looks like it could use a bit of tuning, but that barely matters. The Insta360 Go software is able to stabilize most of that out.

Kabab has me thinking, but he’ll probably beat me to it anyway!

Kabab recently showed off a 4” build carrying a DJI setup. He used a 4S whoop-style AIO board for the build, and he didn’t have any trouble running 4S with powerful motors. That really got me thinking.

If the FPV Cycle 1303 motors work so well on a 3” Toothpick, I bet the 1306 motors I have here would work quite well on a 4” toothpick-style build, since 4” props generate about twice as much thrust as 3” props. I would enjoy trying out a sub-150 gram toothpick with some gentle HQ 4x2.5x2 props.

Would I enjoy it enough to design and cut a new frame? I’d also have to order a whoop-style flight controller. Do I really want to do that?

I’m just not excited enough about flying micro quads

If we ignore my general disappointment in the Caddx Turtle, I’d say that I’ve enjoyed the idea that my Kestrel has turned into a sort of jack-of-all-trades quad for me.

I can fly freestyle. I can weigh the Kestrel down with a GoPro and run the footage through ReelSteady Go for some cinewhoop-style footage. I can even throw on the Outcast Droneworks 2S 3250 mAh battery if I need to go long range. That thing manages to fly for six miles or 19 minutes on my build, whichever comes first!

I enjoy the idea of carrying a hold-my-beer quad. My Kestrel didn’t cost much more than my GoPro HERO6 Black. Sure, it doesn’t record as well, but it is nice to be able to send $250 into a sketchy situation instead of a $500 drone carrying a $220 camera.

All this stuff sounds great on paper, but I just don’t enjoy flying it.

The Kestrel still exists!

The source code is up on GitLab. DXF and SVG files of parts I’ve actually cut, tested, and flown are on GitLab too.

You could cut your own Kestrel. You could have someone cut parts for you. You could even manufacture and sell Kestrel frames. I’m not sure if I’d be bummed out or excited if you had a ton of success selling my frame. Probably a little of both!

What’s next?

I’ve been in an FPV rut for a while. It probably started sometime last year, but then we met some new FPV friends, and that pulled me quite a ways out of the rut, but I’ve slipped back in again. I’m flying the same spots all the time. My 5” quads are getting broken down.

I usually still get good footage, but my motor bearings are feeling a bit crunchy, and I’ve had to turn my filtering up quite a few notches in Betaflight. I’m due for eight new motors, I need to replace a failing Runcam Micro Eagle, my VTXes seem like they’re getting wonky, and one of my Flowride frames is getting soft.

The First Falcon Prototype Build

I was really hoping there would be an exciting new motor for me to try on my 5” quads, but that’s not working out. I had high hopes for the large bearing motors Kabab has been testing, but it doesn’t look like that’ll be an option anytime soon.

The Hyperlite 2207.5 1922 kv motors I’m flying now have lasted me nearly 18 months. I think that’s impressive, and I’m happy with the performance. I’m most likely just going to get another two sets of these. Isn’t that boring?!

Wait a minute! None of that had anything to do with the Kestrel!

It sort of did. The 3” Kestrel and my 5” Falcon frame share much of the same source code, and my upcoming rebuilds are going to require some fresh Falcon frames.

The Falcon frame I fly today looks a lot like the Hyperlite Flowride. There’s a 20x20 stack in the front where the Flowride just has empty space, and the top plate is elongated just enough to fit a second battery strap up there.

I’m planning on switching to the giant TBS Unify Pro32 HV VTX module. I figure I’ll just cut top and bottom plates that have room for 20x20 stacks in both the front and rear. This is easy to do, because these options are already part of the Falcon design.

That should give me plenty of room for the VTX in the back. I can sneak the TBS Crossfire Nano up front.

I’ve been experimenting with the idea of only using one screw per arm on the Falcon, and it is working surprisingly well. I’ve modified that setup quite a bit, but I haven’t cut the new carbon yet. I’m excited to try it out.

I’ve also been thinking about adding a fifth screw right in the center of the bottom plate to hold the dog bone piece in place. I can test the same quad out with and without that screw in place.

I’m not sure if these arm tweaks will fit the Kestrel’s tighter layout.

I don’t currently want to sell a 5” frame

I’m excited about my 5” Falcon freestyle frame because it is going to be exactly the frame I want to fly. There isn’t anything novel or original in the design.

I’m using the awesome battery strap layout of the Kabab’s Glide frame. I’ve designed a three-stack school bus layout just like every modern freestyle frame. Nothing about it is the least bit innovative, aside from the way the arms attach, but that’s a stretch.

The Falcon frame is just my favorite features from some of my favorite frames. Why would I sell it when I could just point you to the awesome Glide frame? It is inexpensive, made from high-quality carbon, and it includes most of the same features.

I almost forgot to mention the FAA!

I actually did forget to mention the FAA. I’m so disappointed about this. Ugh!

I wouldn’t say the upcoming FAA rule changes are a major factor discouraging me from manufacturing and attempting to sell the Kestrel. When you pile on this potentially significant hindrance on top of all the other concerns, it really does help make my decision a much easier one.

The new FAA remote ID rules will effectively make FPV as we know it today illegal in the United States. Is the United States the only market for my frames? No. It is by far the easiest market for me to sell to, though!

Conclusion

I may not be selling FPV quad frames, but it would be a real bummer if I weren’t working towards having something manufactured. All the folks at Butter, What?! are working on a nifty open-source blinkenlights display for your server, desk, or shelf. The OoberLights may not be all that relevant to FPV, but I think the project is quite cool, and I hope you will think so too.

Maybe once that gets rolling I will turn my design efforts back towards FPV. We’ll have to wait and see how long the OoberLights take to come to fruition, and we’ll also have to hope the FAA doesn’t start shutting things down by then!

What do you think? Are you bummed out that I’m not selling the Kestrel frames? Are you glad I’m not diluting the micro FPV frame market? Let me know in the comments, or stop by the Butter, What?! Discord server to chat with me about it!
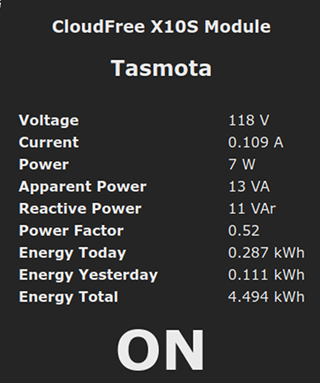
I’m Ordering a New Prusa 3D Printer!

| Comments

Today has been quite a roller coaster for me!

I was getting ready to 3D-print some stock for my Tindie store yesterday, when I noticed a slight aroma coming from my old MakerFarm Prusa i3 printer. It wasn’t a strong smell, but it seemed odd. I haven’t printed any ABS in almost a month, so I figured I just wasn’t quite remembering the odor of molten ABS.

About one-third of the way through my print, I noticed that the heated bed’s temperature was dropping. I realized that what I had been smelling was either the jacket on the heated bed’s wire or the screw terminal melting.

The print finished, and none of my ABS parts lifted from the bed, so I’m in good shape for a short while. I’ve been hankerin’ for a new 3D printer for a long time, and a hardware failure on my 6-year-old machine seems like a good excuse!

I quickly decided I wanted a Prusa MINI

I argued with my friend Brian about this. The Prusa MINI has a smaller build volume, and a much less robust layout than my old printer. Why on Earth would I downgrade in so many ways?

I only fire up the 3D printer once or twice a month these days. The Prusa MINI should handle my workload just fine, and the MINI has all the features that my ancient printer lacks: auto mesh bed leveling, a filament sensor, recovery from power losses, and ultra-quiet stepper motor drivers. That last part is what I’m most excited about.

I figure that the Prusa MINI ought to be enough 3D printer for 99% of people. Brian kindly pointed out that I might be part of the 1% here. That may have been true before I bought my Shapeoko CNC. Before that, I might have reached for nylon filament when I needed something really durable. Today, I would just cut something out of carbon fiber!

Nylon seems to be within spec for the MINI too. It isn’t in the list of officially supported materials, but the specs claim the extruder can handle 280 degrees Celsius. My prints with Taulman 910 were stronger printer at 285 degrees, but it prints just fine at 275 degrees!

The Prusa MINI ships with all the quality-of-life features I’ve been jealous of, but it doesn’t cost much more than popular budget printers like [the Ender 3][e3].

I was about to order a Prusa MINI. Then I saw that they aren’t going to be shipping new orders until September. That’s at least four months away!

Should I just repair my workhorse of a printer?

In some ways, my ancient MakerFarm printer is absolutely awesome. The stepper motors are oversized and powerful. The old Wade’s extruder with 3mm filament is almost impossible to jam, and I can print that thick TPU filament at 75mm/s! The TPU prints come out ugly with this drippy old Magma hot end, but they print fast and rarely fail!

You should have heard the noise my old printer made when a spool of 3mm ABS got tangled up. The powerful extruder kept pulling and pulling, and it was enough to flex the wooden frame quite a bit. Eventually, the 3mm ABS was pulled too hard, and it snapped! It is the loudest bang I have ever heard in my office. It was quite terrifying and unexpected. I don’t think a Prusa MK3S or MINI could do this.

The MakerFarm i3 was only sold as a kit. I bought this one already assembled from a guy 30 miles north of here. It was very poorly assembled. The Y-axis assembly fell apart on me in the first week, and the wiring is an absolute rat’s nest.

When I saw that I’d have to wait four months for a replacement, I did some troubleshooting. I unscrewed the bed’s wires from the screw terminals, and unbolted the bed from the Y axis. Everything tested fine with a multimeter, but the jacket on these cheap wires was getting brittle.

I soldered on some nice silicone-jacketed wire from my collection of miniquad gear, and I plugged the bed back in. I’m going to tell you that I tested the bed, and it heated right up, but it is unsafe.

One of the melted screw terminal’s threads felt like they gave way right as I got it tightened, and I can see some charring around it. This is a common enough failure on RAMPS boards.

The Infamous Rat's Nest!

Even with these issuess, I wanted to see if the bed was working. I do have a fire extinguisher here in my office, so I wasn’t afraid to give it a short test.

The quick fix to get me safely running until September would be to remove the screw terminal and solder directly to the RAMPS board. If you’ve seen the rat’s nest of cables I’d have to dismantle and reconnect to do this, you wouldn’t want to do it either.

I just realized we haven’t talked about price!

The Prusa MINI looks a bit flimsy, and the build area is a 7” cube. That’s 1” less in each dimension compared to my MakerFarm printer.

The Prusa MK3S’s build area is 9.84” x 8.3” x 8.3”, so it is a little bigger than my dying printer.

The Prusa MINI is $349. The Prusa MK3S DIY kit is $749, and the fully assembled MK3S is $999.

I’m ordering a Prusa MK3S

The lead time on the fully assembled Prusa MK3S is currently 5 to 6 weeks. I’m not happy about it, but I can see surviving 1.5 months without a 3D printer, but waiting 4 months or longer for a Prusa MINI sounds scary!

I enjoyed the idea that I could almost buy three MINIs for the price of a single MK3S. There’s a possibility we may need a small farm of printers for our OoberLights project. If that’s the case, I’d much rather have a trio of Prusa MINIs than a single MK3S, but you can’t always get what you want.

I’m having trouble getting Prusa’s website to let me enter my credit card information. Maybe I’ll have that sorted out before I publish this blog. Maybe I’ll give it a day or so. Maybe I’ll wind up just using Paypal. Who knows. The important thing is that I’ll have a Prusa MK3S at my house in less than two months!

The Prusa MK3S is definitely worth $1,107

That’s the total after shipping, and I’m certain it will be worth every penny.

The MK3S is a much more rigid design. The Prusa MINI has that arm supported on only one side, and that’s generally problematic. You aren’t going to push the MINI much harder than whatever the stock printing speeds are set to. I bet I can crank things up on the MK3S and reach speed and acceleration settings not too far behind my MakerFarm machine.

I wasn’t going to miss the build volume I would have lost by upgrading to the Prusa MINI—my breadboard vise would still fit! Even so, it doesn’t hurt to have some extra room on the MK3S.

Today, I have often had to cancel prints and start over, because my bed and nozzle expand as they warm up. Things seem alright when I check the height, but by the time I hit print, things are a little off. The Prusa’s automatic bed leveling will save me a bunch of time and frustration.

Conclusion

I’m excited, even though I was hoping to put off my upgrade until the next iteration of the Prusa printer, but it looks like that just isn’t in the cards. I’ve been assuming that the Prusa MK4 would include the 32-bit controller from the Prusa MINI, and probably a slew of other neat improvements. I guess I won’t be seeing those improvements improvements for quite a few years, but that’s fine.

What do you think? Should I have waited until September to try the Prusa MINI? Will I be happy that I spent three times as much on the bigger machine? Will I just not care? Let me know in the comments, or stop by the Butter, What?! Discord server to chat with me about it!
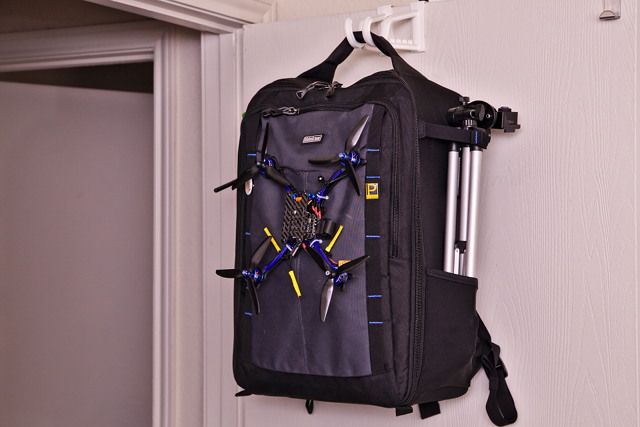
Should You Buy a OneWheel or an Electric Unicycle?

| Comments

This is a question I had to ask myself earlier this year. Two years ago, I bought a Hover-1 XLS folding scooter, and it has actually been an awesome device. I can throw on my backpack and ride to the park. Maybe I’m riding to the park to fly some FPV miniquads, or maybe I’m going to take my laptop. Either way, the Hover-1 never let me down here.

The problem with the scooter is portability. It weighs a little over 50 pounds, which doesn’t sound too bad, but when you fold it up, it is terribly awkward to lift, and quite tricky to get loaded into the car. That means I never take it with me.

I wanted something I could easily throw into the car. My friend Alex has a OneWheel, and Brian has an electric skateboard. Both of these are quite nifty, and each has advantages over the other.

Brian’s Exway X1 costs less than half as much as a OneWheel XR, weighs half as much, and has a higher top speed.

The OneWheel XR rides much smoother, and I was really excited about how well it rides on grass, but the $1,800 price didn’t seem like a good value to me.

This is just one guy’s opinion!

This post is sprinkled with facts, opinions, and things that seem to be true. I’m just one guy that has stood on a OneWheel once and been riding EUCs for about 500 miles.

I’m just one guy, and I’m learning. Even the most experienced EUC riders are still learning. This class of vehicle is still in its infancy. Even so, there are plenty of people with orders of magnitude more riding experience than me!

I think you should trust what I’m saying because I’ve been putting a lot of thought and research into this stuff over the past six months. I also think you should do more research!

What about electric unicycles? (EUC)

I didn’t have any friends with electric unicycles, but I did once meet two nice gentlemen at the park that were riding EUCs sometime last summer. I’m pretty sure they were riding InMotion V10 unicycles, but I can’t be sure.

When we were done chatting, I watched them take off at quite a fast pace. They showed me that their unicycles had absolutely no trouble riding fast through the grass too.

I looked up the InMotion V10. It has two or three times the range of a OneWheel XR, a higher top speed, a much more powerful motor, and it costs $500 less. I was having trouble understanding why anyone would buy a OneWheel at this point.

If you can ride a skateboard, you can ride a OneWheel!

Maybe. Probably. The skills are pretty similar.

I’ve never ridden a skateboard, and I was able to stand on a OneWheel without falling down. I didn’t get far, but I was confident that I could get the hang of it.

EUCs have a steep learning curve!

This is the biggest downside to electric unicycles. No one is going to climb on one and ride down the street on their first attempt.

It took me two or three days just to figure out how to get on the thing and ride in a straight line. Once things click in your mind, though, the rest comes easily.

I tried to teach my wife how to ride, but she hasn’t figured it out yet.

Which single-wheeled personal electric vehicle is safer?

I’ve been riding for just over 500 miles now, and I just had my first real fall. While learning, all I ever had to do was step off and jog away. One time, on slippery ground, my little InMotion V5F slid out from under me, and I was able to hop off and just take a few steps.

This time, though, I really fell. I wasn’t moving fast at the time, I just goofed up. I scuffed up my wrist guards, got some minor brush burns on my elbow and knee, and I somehow bruised my second toe on my right foot.

This is only based on my own thoughts and experiences, and I’m not at all experienced with the OneWheel, so take this for what it is worth. When your feet are side by side on an EUC, it is easy to step off and start jogging when something goes wrong. I can’t imagine how I’d straighten my body out to do the same on a OneWheel.

What about speed warnings?

I am told there are no audible alerts on the OneWheel. It does tilt back a bit when you near its top speed, but I keep reading that this is not an easy thing to feel due to your stance on the OneWheel. Unicycles also tilt back as their final warning. I’ve not gone fast enough to reach tiltback on my Tesla, but the tiltback sensation on my InMotion V5F is very obvious.

As far as I know, all EUCs have at least one audible warning that kicks in before tiltback occurs. My little InMotion V5F starts beeping at just over 15 mph, and tiltback occurs just before 17 mph. I keep reading that tiltback on an EUC generally happens 2 or 3 mph before the wheel won’t be able to keep up with you, and I believe this, because I have hit 19 mph on my V5F.

I’ve read that the margin between feeling tiltback and landing flat on your face is significantly wider on most EUCs than it is on the OneWheels.

Most EUCs have a built-in trolley handle, just like your luggage. If you stop at a convenient store or need to cross the street, you can just extend the handle and push your unicycle along. The motor does all the work, you just have to guide it.

OneWheels are pretty awkward to carry.

If you go too fast on either machine, you will fall forward!

On these single-wheeled machines, you are in constantly falling forward, and the wheel is trying to catch up to stay under your feet. If the wheel runs out of available power, and you’re still trying to lean forward even harder, you’re going to tip over!

NOTE: This was my first real fall in 500 miles of riding.

If you reach this speed on a OneWheel, you’re going to go into a nose dive, and the front pedal is going to scrape the ground. If that front pedal gets caught on something, the machine is going to attempt to catapult you off.

If you’re near the top speed of my little InMotion V5F when this happens, you might be able to jog to safety. If you’re all the way up at the potential 37 mph top speed of my Gotway Tesla, you’re probably going down, and you better be wearing lots of protective gear!

Advantages of the OneWheel

On paper, just about any EUC you can buy matches or beats the OneWheel XR, but I’ve noticed after riding with OneWheels that they do have some significant advantages over my EUCs!

The sideways stance makes it so much easier to look behind yourself. You can see if a bike or car is going to try to pass you, or easily see out onto the road if you want to transition from the sidewalk onto the road. It is also easier to have a conversation with a friend that is following you!

The extreme width of the OneWheel’s gokart tire gives it another big advantage. It is easy to balance on a OneWheel while at a complete stop. You aren’t going to be doing this on an EUC!

I already mentioned that learning to ride a OneWheel is much easier. The higher sticker price of the OneWheel XR might be worth that savings in time to you!

Advantages of an EUC

Bang for the buck is the most obvious advantage EUCs have over OneWheels. I’m certain my thinking is a bit biased here, because I managed to get a refurbished InMotion V5F for only $399. They’re not in InMotion’s store at that price very often, and that’s less than half the price of a OneWheel Pint.

NOTE: Refurbished V5F wheels are rarely in stock in InMotion’s store, and it seems that the price listed in the store has gone up to $499 since I bought mine!

Even at full price, though, the V5F still costs less than a OneWheel Pint, but its range and speed are more comparable to the $1,800 OneWheel XR. I should mention at this point that I don’t recommend the InMotion V5F at full price. There are better EUCs available at that price point, but it is an absolute steal if you can snag one for $399!

Once you’re around the price of the $950 OneWheel Pint, EUCs start to have significant advantages over even the OneWheel XR: more range, more powerful motors, higher cruising and top speeds, and even Bluetooth speakers.

  OneWheel XR InMotion V5F Gotway Tesla
Weight 27 lbs 25 lbs 42 lbs
Motor 750 watt 550 watt 1900 watt
Speed 19 mph (top) 15 mph 30 mph (cruising)
33+ mph (top, maybe)
Range 12-18 miles 14-15 miles 40-50 miles
Price $1,799 $399 refurb $1,450

NOTE: Range and top speed of the InMotion V5F are based on my own experiences. I’m well above the recommended rider weight at about 205 pounds.

Even if you’re not riding fast, having a more powerful motor and higher top speed give you a bigger safety margin. When you’re riding fast, and you hit a hard bump, your self-balancing machine will need to call upon extra power to keep you upright. Riding closer to the edge means you’re more likely to fall!

Disadantages of the OneWheel

You don’t get a lot of range or speed for the price. At $1,800, you’re getting close to the price of the Gotway MSX Pro. That’s a machine with up to 100 miles of range, a 2,500-watt motor with insane torque, and a top speed of 37 mph. The MSX Pro significantly outclasses the OneWheel XR!

The weak motor in the OneWheel concerns me. My friend Alex has “fangs” installed on his OneWheel XR. These are meant to help save you if you overtilt your OneWheel by letting the front pedal roll along the ground. Alex enjoys stomping hard on the OneWheel to get it going and forcing the front pedal and fangs down onto the ground so the front end scrapes as he rides.

This might be fun, and it might be cool, but the fact that you can overpower the OneWheel XR’s motor like this terrifies me! There’s no way I could stomp on my 1,900-watt Tesla hard enough to make the front end tilt down anywhere near that far. I know which machine I’m going to trust to keep me upright.

OneWheels also appear difficult to carry. My friend Alex has a homemade paracord handle on his OneWheel, while all my unicycles have carry handles built right in.

Disadvantages of an electric unicycle

For starters, EUCs are perceived as looking uncool. Standing sideways on a skateboard or snowboard is cool, while facing forward while skiing or riding a unicycle isn’t.

I have a blind spot directly behind my head. My friend Tanner is younger, skinnier, and more flexible than I am. He seems to have an easier time turning his head farther than I can without making significant changes to his direction of travel on his unicycle. OneWheel and skateboard riders have no trouble at all looking directly behind.

The EUCs that significantly beat the OneWheel XR on range and performance are quite a bit heavier than a OneWheel. Sure, my little $399 InMotion V5F weighs about as much as a OneWheel, but it does lag behind a bit on performance. My Tesla weighs 42 pounds, and I sure don’t want to carry it far at all!

My own experience

I’ve bought two unicycles so far. One is nearly comparable to the OneWheel XR by most measures, and the other outperforms the OneWheel quite handily. In total, I’ve still spent less on these two wheels than the cost of the OneWheel XR.

If I had to spend $1,800, I probably wouldn’t have gotten into any of these single-wheel machines. I have no idea how to ride a skateboard. What on Earth would make me think I’d be able to learn to ride a OneWheel? How disappointed would I be if I spent that much money and realized that I couldn’t ride it?

The lack of portability is what pushed me down this road, but portability is the only thing the OneWheel XR beats my old Hover-1 XLS on. That scooter has comparable range, is only 1 mph short of the OneWheel XR’s top speed, but the OneWheel costs over three times as much. $1,800 felt like a lot to pay for such a lateral move.

When I saw the refurbished InMotion V5F in InMotion’s store for $399 shipped, I just couldn’t pass it up. I’m on the heavy side for such an underpowered wheel, but at that price, it sure seemed like a great way to see if these unicycles were for me.

I beat the crap out of that V5F during the first few weeks. Aside from the scrapes, it is holding up quite well. I’ve ridden it more than 14 miles on a single charge with a reasonable amount of capacity left in the tank. I hit its 15 mph warning beeps all the time, and I’ve reached more than 18 mph. I managed to put 357 miles on the little guy before his replacement arrived.

If I were riding alone, I wouldn’t have upgraded. My wife upgraded to an Aventon Pace 350 e-bike, so she can ride dozens of miles before running out of battery. My friend Tanner rides with us on his Gotway MSX Pro, so he has 70 or 80 miles of range. My 14-to-15 mile range was starting to hold us back, and they both regularly hit 20 mph, so I was often in the back playing catch-up.

I upgraded to a Gotway Tesla, and I’ve put about 100 miles on it so far. I haven’t run its battery down anywhere near empty yet, but it is looking like I will be seeing somewhere around 40 miles to a charge. It is supposed to be capable of cruising at 30 mph, but I have yet to break 25 mph. I’m just not that brave! I do regularly ride at 20 mph, though.

The Tesla is normally priced at $1,575, but it was on sale when I bought it for $1,350. I’m not sure if the Tesla would have been my choice if it wasn’t on sale, but I’m extremely happy with it so far!

NOTE: It is unfortunate that refurbished InMotion V5F unicycles are rarely in stock!

I wouldn’t buy a OneWheel

In my opinion, the offerings from OneWheel are overpriced, too slow, and lack range.

As you approach $2,000, you start finding electric unicycles with 80 miles of range, 2,500 watt motors, 40 mph top speeds, and even some brand new models with a proper suspension. Any of the unicycles in this price range from Gotway or King Song outclass OneWheel’s best offerings by miles.

There are even awesome little unicycles like the 84-volt version of the Gotway MTen3 that meet or beat all the specs of the OneWheel XR, while somehow managing to only cost $50 more than the OneWheel Pint.

Choice in electric unicycles is a blessing and a curse

OneWheel gives you two choices. That’s it. The XR or the Pint. Not much to think about.

I’m just looking at eWheels, and they have nearly 20 unicycles from three different manufacturers with prices ranging from $400 to $2,850. Outside of eWheels, you’ll find a handful of offering from Segway and Ninebot as well.

I think it is awesome that there are so many choices. There’s almost certainly an option that perfectly meets your needs, but I can totally see lots of people suffering from analysis paralysis!

You have to trust the machine

When you’re hurtling down the road at 20 mph with a single wheel, you have to rely on the machine’s brain, electric motor, and batteries to keep you from falling flat on your face. You need to ride a machine you can trust.

Don’t just trust the machine I tell you to trust. Put some serious thought into it and question everything you are told!

I am quite confident that my Gotway Tesla’s 1,900-watt motor will always have enough power to keep me upright, especially since I don’t plan on cruising at speeds anywhere near its 30 mph limit.

My little InMotion V5F never failed to keep me upright even though it only has a little 550-watt motor. Is that always going to be the case? Will I ever hit a rough enough bump at 14 mph where 550 watts just isn’t enough to keep the machine under my feet?

Its top speed is only 15 mph. Would I trust the OneWheel XR’s 700-watt motor to always keep me upright at 19 or 20 mph? I’m not so sure.

For what it is worth, I would also trust a OneWheel

Sure, most EUCs have several layers of warnings before you get into the danger zone, and that danger zone will be harder to reach than on a OneWheel.

Even so, I wouldn’t be afraid to own and ride a OneWheel. I wouldn’t have as much faith in it at 20 mph as I have in my Tesla, but I would still ride the OneWheel!

Let’s face it. You’re already contemplating buying one sort of machine or another where the only things separating your face from the pavement are a helmet and a computer. Your risk-to-reward math is already tilted towards the riskier side!

If you buy an EUC, you better be ready to practice and have patience!

If you buy a OneWheel, I imagine you’ll be up and riding in minutes, and you’ll quickly be on your way to proficiency.

If you buy an EUC, you’re going to work hard just to figure out how to get on the thing, and you’re going to work even harder to successfully ride 15 feet. You’ll be jumping off a lot. You’ll be failing a lot.

Riding an EUC just isn’t intuitive. So much of what your reflexes do to keep you balanced will knock you off balance. Many of the adjustments you need to make on a unicycle are the opposite of your instincts. Just keep trying, and something will click.

Once things click, you won’t be able to explain what you’re doing differently. You’ll just be able to ride.

Don’t practice too much in a single session. If you’re not making any progress, sleep on it, and try the next day. It took me 3 or 4 days before things clicked, but I didn’t put in a whole lot of time on any of those days!

I am most definitely on Team EUC

I tend to be a very practical guy. I have trouble spending more to get less. From that point of view, there is no way I could have brought myself to purchase a OneWheel.

I may have questioned my sanity once or twice during those first few days when I was trying to ride my InMotion V5F, but once I got over the hump, there was no looking back.

I would trade my speed, power, or range just to look cooler riding a OneWheel!

To be fair, I wouldn’t look cool no matter what I am riding!

Conclusion

Keep in mind that I am just one guy with opinions. Yours are probably different, and we’d like to hear about them. If your goal is to have fun and look cool, there’s no way I’m going to talk you out of riding a OneWheel. In fact, I don’t want to talk you out of it! OneWheels are fine! They just aren’t for me.

What do you think? Are you on Team OneWheel? Do you prefer the extra power, range, and top speed of being on Team EUC? Do you think I’m silly for buying a Gotway Tesla in 2020? Are you riding an EUC or OneWheel, or are you looking to become a rider? Let me know in the comments, or stop by the Butter, What?! Discord server to chat with me about it!
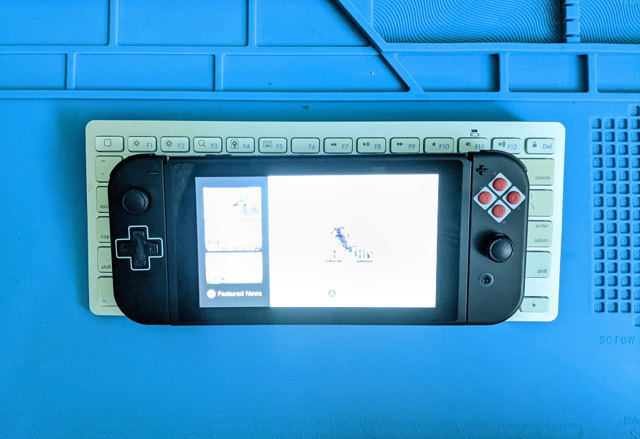
Our OoberLights Prototype Boards are Lighting Up!

| Comments

I’m super excited. Super duper excited! We’ve been working on the OoberLights project for quite some time. The first time I blogged about it was in May of last year, but I know we’d already spent several months hashing out the idea before then. The screenshots of the board that I used in that blog post were using the tiny WS2812 LEDs. They didn’t even exist when we started designing the board, so we were definitely already a good way into the project by May.

I don’t recall what was slowing us down. We had a few quiet months in there, but by the end of 2019, we were just about ready to pull the trigger and order the first batch of boards. Then Chinese New Year slowed us down, then COVID-19 hit. We started uploading files to PCBWay to get our quote on February 26. We went back and forth a few times answering their questions, and we finally got to pay for our order on March 5.

The boards arrived on Friday, April 23. On Sunday night, we got on a video call and started testing the first board.

What’s involved in testing the OoberLights boards

Our designer was worried that something would go wrong in his power supply circuits. Our board is designed to take a 5-volt input via USB, then it needs to supply 3.3 volts to the ESP8266 and 3.9 volts to the WS28212 LEDs. We’re also set up to take lithium-ion voltage input on an optional battery connector.

If his math was wrong, or he accidentally chose the wrong part, one of those voltages could have been out of spec, and it would be a HUGE bummer if we plugged in power and all the LEDs immediately burned out. Even if the power supplies were bad, it would be nice if we could just bypass them with external hardware. That way we could still test the ESP8266 and WS2812 LEDs and get some code written!

Our awesome hardware designer cut about a dozen of the power traces in the design and left solder pads for me to bridge, and the board is littered with test points for taking measurements. That way we could connect things up one section at a time.

He did a good job. All the power components were in spec, and nothing burned out!

This is where things got a little rocky

We were able to power the board via battery or USB, but the USB interface wasn’t working. Every time I plugged it into my computer, the Linux kernel was constantly attempting to reset the port and complaining about bad cables.

1
2
3
4
[6952390.844066] usb 3-2-port1: attempt power cycle
[6952392.091827] usb 3-2-port1: Cannot enable. Maybe the USB cable is bad?
[6952393.036179] usb 3-2-port1: Cannot enable. Maybe the USB cable is bad?
[6952393.036442] usb 3-2-port1: unable to enumerate USB device

The USB chip is small. The components that connect to it are tiny. We decided this was a good point to take a break. Our awesome designer was tasked with deliberating over the schematics, and I was tasked with digging out my FTDI board and manually flashing the ESP8266 using the programming pins we have exposed on the board.

It took a day or two before I could find where my FTDI board was hiding, find a spare mini USB cable, and get some code running on this thing. When I finally did, the news was good. Everything was working!

The truth is that I couldn’t have been more pleased with where we were at that point. The microcontroller worked. WiFi worked. The LEDs were way brighter than they need to be. The only thing that wasn’t working was the USB interface.

Even if I wound up being completely incapable of manually fixing the USB problem with my soldering iron, it wouldn’t be a big deal at all. I could have ordered up some FTDI boards, soldered them to our programming header, and happily sent any of these 10 boards to developers and testers.

We got the USB port working!

I’m glad I sat on this for a day or two. The initial suggestions involved hairy tasks. Things like disconnecting one leg on that tiny chip and connecting it directly to one of the other chips that happens to be the tiniest thing on the board, or adding minuscule capacitors in difficult places.

I’m not smart enough to understand how many new ideas actually came up, or which plans were just slight modifications of previous plans. At one point, though, our amazing designer said something I could understand. He told me to try bypassing the resistor labeled R9.

Connect a wire from one end of a tiny component to another! He was speaking my language! I can do this!

I plugged the test board into my computer and kept an eye on dmesg output. It was repeating the same error messages over and over again. Then I touched both sides of the resistor with the ends of a Dupont breadboard wire. Dupont connectors have rather thin but quite rigid conductors at the ends, so this was the best instrument I had on hand for the job.

1
2
3
4
5
6
[7100125.189710] usb 1-9: new full-speed USB device number 61 using xhci_hcd
[7100125.489721] usb 1-9: New USB device found, idVendor=1a86, idProduct=7523, bcdDevice= 2.63
[7100125.489723] usb 1-9: New USB device strings: Mfr=0, Product=2, SerialNumber=0
[7100125.489724] usb 1-9: Product: USB2.0-Serial
[7100125.497488] ch341 1-9:1.0: ch341-uart converter detected
[7100125.508561] usb 1-9: ch341-uart converter now attached to ttyUSB0

As soon as I looked up, I saw the message that a USB serial device was connected!

After three or four attempts, I even somehow managed to hold the Dupont cable in place while flashing the ESP8266. Everything was working!

Soldering a tiny bodge wire was fiddly, and it took me at least 4 different attempts. I would get the wire in place, it would look fine, but it wouldn’t work. I’d push down on the second solder point with my thumbnail, and it would immediately connect. Three or four more attempts, and I got it working.

One of the prototypes isn’t currently in the building, so I can’t bypass the resistor on that one. I have bypassed the resistor and flashed my test firmware on the remaining eight prototype units that I have on hand. I couldn’t get the USB serial interface to work on only one of those boards, but I was able to manually flash the firmware and see the blinkenlights, so the board isn’t a total loss.

I’ve done a bad job keeping track of things. I know for certain that on one of these boards, I accidentally touched a tiny component near the resistor with the soldering iron. Was that the board that isn’t working correctly? I have no idea!

What’s next for the OoberLights project?!

On the hardware side, we have a few fixes ready to go, and we’ve already come up with a handful of important upgrades. I don’t want to tell you too much about the upgrades. If they don’t work out, I would feel bad about crushing your dreams!

We’ve only just barely begun writing software. Everything we have running on there so far is just one sort of test pattern or another.

The OoberLights board is going to be Butter, What?!’s first product. What is it going to take to get this open-source product to market?

First of all, we need to be able to sell at least several hundred OoberLights boards. We need to have a reasonably large batch produced to get the per-unit pricing down to an acceptable level.

We have some pretty good estimates on what an order of 100, 200, or 300 boards will cost. We still have to design brackets and face plates for ATX case mounting. Designing is easy, and we can do the 3D printing and CNC work to fulfill early orders, but we will have to get quotes on having this stuff done in larger quantities.

This brings us to the software.

Minimum viable product?

I hate using these three words, but they keep knocking around in my head.

When the idea for the OoberLights board was much less uber than it is today, all it had was a single ring of LEDs. The LEDs weren’t even RGB! The software was going to be so simple. Progress bars, clock-like widgets, and maybe up to four LEDs spinning round and round at different speeds.

Writing the code to do that over a serial port would be a cakewalk. It would require almost zero planning and an evening or two at the keyboard.

Now we have WiFi, colors, brightness levels, and a whole lot more pixels. The more I think about it, the more complicated it gets. I want all of the potential complexity to be handled by the software on the OoberLights. Everything should be simple for the end user.

NOTE: This is where a video of the spinner and progress bars should go. I haven’t written any code for that yet!

I could write three long blog posts about the things I want the OoberLights to be able to do, and why those things are more complicated than they seem.

For now, I think we need to focus on building that minimum viable product. We need spinners, progress bars, and clocks. That’s it. If we have that, we have something cool for someone to put in their case or on their desk.

All the cooler stuff can be added over time.

The sooner I can put these up for sale, the sooner I can order a big batch of boards. When I order a big batch, I can get OoberLights boards into more developers’ hands. I don’t believe for a minute that if I build these, developers will come, but we are going to quickly run out of hardware with only 9 working prototypes!

Some test code is available on GitLab

The test code is rudimentary and slapdash. Once we got to the point where we were able to flash code to the ESP8266, I was in a rush to see if the LEDs would actually light up! I grabbed the Arduino IDE, loaded one of the Neopixel library’s test sketches, made some tweaks, and pushed it over to the OoberLights board.

That was a success, and I’ve been building on top of that ever since. Once I got three test patterns loaded, I was trying to test the power usage at various brightness levels. Needing to flash a new build just to change the test pattern or brightness was a pain, so I wound up borrowing my home automation’s very basic web server code.

The web server can be problematic. Some of our test patterns take several seconds before ever returning to the main loop, which tends to make web calls time out. It does the job for now, but it is annoying!

I’m hopeful that we can use the Arduino IDE for all our development. That makes the OoberLights easily hackable by the widest possible audience, and I’m excited about that. I’m certain we could squeeze more out of the hardware if we use the ESP8266 SDK instead, but the CPU on the ESP8266 is overkill for our needs, so I’m not worried about giving up some performance, storage, or memory if it makes development easier for the masses!

Conclusion

I’m going to say we have nine fully functional prototypes. We’ll be getting those into the hands of developers and testers soon. We have some ideas for upgrades on the second prototype. I’ve asked our designer to hold off on making those changes until after we hear back from our testers.

What do you think of the OoberLights? Are we making something cool? Are we on the right track? Do you need something like this in your FreeNAS server? Let us know in the comments, or stop by the Butter, What?! Discord server to chat with us about it!