Adding Another Disk to the RAID 10 on My KVM Server

| Comments

My NAS is a virtual machine hosted on my home KVM server. My KVM server has a RAID 10 array composed of two 4 TB drives. This gives me a measly 4 TB of usable disk space, and I can share that space with other computers in the house. Since it is a Linux MD RAID 10, it is super easy to add a third drive when I run out of space—at least, it should have been! I hit a roadblock in March, but we’ll talk about that later.

My NAS VM was spacious in 2015. I had more than 2 TB of free disk space available. The only thing that was steadily consuming more and more of my disk space was the constantly growing collection of RAW files from my Canon 6D DSLR. I was only taking about 120 GB worth of photos each year, so it seemed like I had quite a way to go.

In 2017, I started flying FPV quadcopters. It is a ton of fun, but I was saving a lot of video. My early quads weren’t powerful enough to comfortably carry a GoPro camera, so all my footage was standard definition video captured on my goggles. Even these small files were enough to really start eating into my free space.

This year, I started recording GoPro footage. A day of flying usually generates at least 15 GB of new video, and when the weather is nice, I fly three or four times a week.

In late February, I noticed that I was down to less than 400 GB of free space. It was time to add another disk. One more 4 TB drive would bring my RAID 10 from 4 TB to 6 TB of usable space. I figured an extra 2 TB would tide me over for nearly two years.

I hit a roadblock in March

I was excited when my third 4 TB disk arrived. I cracked the KVM box open, put the drive in, and got to work adding it to my RAID 10.

Except I couldn’t add it to my RAID 10. Why can’t I grow my RAID 10? I’ve done this countless times in the past! What’s going on here?

1
2
3
4
root@kvm:~# mdadm --add /dev/md1 /dev/sde1 
mdadm: added /dev/sde1
root@kvm:~# mdadm --grow /dev/md1 --raid-devices=3
mdadm: Cannot reshape RAID10 in far-mode

I created my original RAID 10 with far-copies. I chose far-copies, because the layout optimizes the disks for sequential reads. Writes are slower than the default near-copies, but read speeds are closer to the speed of RAID 0.

Unfortunately, you cannot reshape an array that is using far-copies. I had to convert to near-copies, but you can’t do that directly. I knew what I had to do, but it was going to be a pain in the butt—mostly because I had to open the server again!

I had to put another mirrored pair of disks into a fresh MD RAID device, add that new device to original Volume Group, and then use pvmove to migrate the data off of the original pair of disks.

Then I had to reverse the process. I tore down the original RAID 10 and recreated it with near-copies, added the new RAID to the Volume Group, and ran the pvmove in the opposite direction. Once that was done, I was able to remove the temporary disks from the Volume Group and tear down that array.

I have no good documentation of this part of the process. At this point, I am back to where I should have been when I started down this path in March—everything was super easy from this point on!

Adding a disk to a Linux RAID 10 array

The title of this section is a little misleading. There isn’t just a RAID 10 block device that needs resizing. There’s a Physical Volume (PV) that needs to grow, there’s a Logical Volume (LV) that also needs to grow, and there’s a file system on that LV that needs to grow.

Then I need to add more disk space to my NAS VM!

I’ll list the steps here, and then I’ll go into more detail.

  • Partition the new disk
  • Use mdadm to add the new partition to the RAID 10
  • Use mdadm to change the layout from 2 disks to 3 disks
  • Use pvresize to grow the PV
  • Use lvresize to grow the appropriate LV
  • Grow the EXT4 file system on that LV (lvresize will handle this)

At this point, the RAID 10 is roughly 50% larger, and the file system where my virtual disk images live has been appropriately expanded.

I had to go through a few more steps, because I needed to expand the storage of my NAS VM.

So what does this process look like?

I’ve done quite a poor job of saving my terminal output for this blog. I didn’t save the output of my work with fdisk, and I didn’t save the pvresize and lvextend output.

I can’t easily recreate accurate fdisk output, but I can at least show you the commands that I used. I’ll try to do better when I run out of storage next year!

1
2
3
4
5
6
7
8
9
10
11
12
root@kvm:~# mdadm --add /dev/md1 /dev/sde1 
mdadm: added /dev/sde1
root@kvm:~# cat /proc/mdstat 
Personalities : [raid1] [raid10] [linear] [multipath] [raid0] [raid6] [raid5] [raid4] 
md1 : active raid10 sde1[2](S) sdd1[1] sdc1[0]
      3906885632 blocks super 1.2 2 near-copies [2/2] [UU]
      bitmap: 5/30 pages [20KB], 65536KB chunk

md0 : active raid1 sda2[1] sdb2[0]
      243090240 blocks super 1.2 [2/2] [UU]
      
unused devices: <none>

At this point, I have added sde1 to my existing RAID 10 device. You can see that sde is followed by (S). That means that sde1 is currently configured as a hot spare. If sdc1 or sdd1 fail, the MD device will use sde1 in place of the problematic device.

This isn’t our intention. We want to store live data on sde1.

1
2
3
4
5
6
7
8
9
10
11
12
13
root@kvm:~# mdadm --grow /dev/md1 --raid-devices=3
root@kvm:~# cat /proc/mdstat 
Personalities : [raid1] [raid10] [linear] [multipath] [raid0] [raid6] [raid5] [raid4] 
md1 : active raid10 sde1[2] sdd1[1] sdc1[0]
      3906885632 blocks super 1.2 512K chunks 2 near-copies [3/3] [UUU]
      [>....................]  reshape =  0.0% (146816/3906885632) finish=443.4min speed=146816K/sec
      bitmap: 8/22 pages [32KB], 131072KB chunk

md0 : active raid1 sda2[1] sdb2[0]
      243090240 blocks super 1.2 [2/2] [UU]
      
unused devices: <none>
root@kvm:~# 

Now I have told mdadm that I want to grow /dev/md1, and I want to grow that array two three disks. The (S) is now gone from sde1, and the array immediately began reshaping.

You’ll notice that the number of blocks in the array is still 3906885632. When you create a fresh array, it is usable immediately. When will our RAID 10 grow?

I believe it happens as soon as every single block from the original devices has been moved to its new home. In the case of going from two disks to three disks, that should be shortly after the 66% mark.

I wasn’t present when the array officially grew, but I was here in the 90% range. By then, it had already grown to 5860328448 blocks.

We’re not done yet. The underlying block device has grown, but LVM and my EXT4 file system don’t know that yet.

1
root@kvm:~# pvresize /dev/mapper/raid10_crypt

I’m sorry I don’t have any output for this commant. raid10_crypt is a LUKS encrypted block device sitting on top of my /dev/md1. /dev/md1 is my RAID 10 array.

You don’t have to tell pvresize how much to resize the PV. It will detect the size of the underlying device, /dev/md1 in this case, and it will resize accordingly.

There are three layers to LVM. The Physical Devices sit on the bottom. Volume Groups are made up of one or more Physical Devices, and those Volume Groups can be sliced up into Logical Volumes. You can think of Logical Volumes as partitions.

You don’t have to resize Volume Groups. They know how big their Physical Volumes are. When you grow the PV, you will immediately see more free space in your VG.

I do have an LV that I need to extend, and it contains a file system that needs to grow as well.

1
root@kvm:~# lvextend /dev/raid10_crypt_vg/kvm -r -L +2000G

kvm is a Logical Volume in my raid10_crypt_vg Volume Group. The kvm LV contains an EXT4 file system. The -r flag tells lvextend to resize the file system. The -L +2000G flag tells lvextend to make the LV about 2 TB larger. That leaves me with 326 GB free in this Logical Volume.

At this point, all the hard work is done!

This looks like a lot of work. How long did this take?

Correcting my far-copies mistake felt like it took forever. It took months! I had to borrow a hard drive. Then I had to help my friend Brian move to a new house. Then I had to buy Brian’s old house. Then I had to move into Brian’s old house. Then I had to deal with four weeks with a useless Internet connection.

For the purposes of this blog post, I’d like to assume that I created this RAID 10 three years ago using the default of near-copies. If we make that assumption, the upgrade was a breeze.

The only bummer is waiting for the RAID 10 to reshape long enough for it to increase in size. If you ignore that, it took less time to run the various mdadm, pvresize, and lvextend commands than it took to install the new hard drive!

FreeNAS and ZFS do this for me! Why would I want to use LVM?

You can’t do this with ZFS. Once a zpool is created, you can’t add new drives to it. You can either replace all of your existing disks with larger drives, or you can create an additional zpool.

Let’s say you’re using RAID-Z2 with six 4 TB disks in your zpool. You will be dedicating two disks worth of data to parity. That’s 8 TB of parity and 16 TB of usable disk space.

If you create a second identical zpool, you’ll be dedicating an additional 8 TB to parity. This will bring you up to 16 TB of parity and 32 TB of usable disk space.

Now lets say I do the equivalent with MD and LVM. I create a RAID 6 array with six 4 TB drives. I’ll end up with 8 TB of parity and 16 TB of usable disk space. So far, this is just like RAID-Z2.

Now I want to upgrade. I can add additional drives to my RAID 6 device. I can add four more disks, and I’ll have 8 TB of parity and 32 TB of usable disk space. If I added the full six disks, I’d be at 8 TB of parity and 40 TB of usable space.

ZFS has no trouble growing upward, but ZFS’s inability to grow outward forces you into a particular upgrade path. Every time I run out of space, I can just add one more disk to my array. ZFS either forces you to plan ahead, or forces you into a bigger investment when you suddenly run out of disk space.

I’m ignoring many of ZFS’s cool features

ZFS is fantastic. It checksums every block on every disk. It is a copy-on-write file system, and that means you get lightweight snapshots. You don’t have to decide how much space to dedicate to a volume, either. That’s handy!

I understand why growing arrays isn’t a feature in ZFS. ZFS was meant to live on expensive servers in huge data centers. I’ve worked in big shops before. It was rare that we upgraded anything. We just spent lots of money to make sure each machine was equipped to function for two or three years, then we replaced the hardware.

I tend to be more frugal at home. I’d like to have ZFS’s checksums, but I also don’t want to guess at my data storage needs for the next three years. Things changed for me, and my calculations all went out the window anyway!

I’d prefer not to buy six disks when I only need two. Saving $600 or more up front is nice. Not having a bunch of unnecessary disks spinning away 24 hours a day in my server is even nicer.

Hard disks fail. The older they get, the more likely they are to fail. Why put all those miles on four extra disks when I can put fresh disks in as I run out of space?

Conclusion

I am getting off topic. I could fill a rather long blog post with ZFS vs. MD/LVM. I will have to put that on my to-do list. It would be a good topic!

I don’t like writing how-to posts, even more so on advanced topics. I also don’t enjoy using too much hand waving in the middle of a post, either. My hope is that I managed to strike a reasonable balance in this post—especially considering that I didn’t save quite enough terminal output for you to follow along on a perfect step-by-step journey!

Just remember. If you want to be able to grow your Linux MD RAID 10 arrays, you have to create them with near-copies. Thankfully, this is the default, so most of you should be fine!

Have you made my mistake before? Are you using LVM at home on your VM host or NAS? Do you think I’m out of my mind? Do you have any questions? Leave a comment, or stop by our Discord server and have a chat!

Six-Inch Hyperlite Flowride Quad

| Comments

Remember when I posted my FPV quad builds for 2018? I figured I wouldn’t be building another quad until the second half of the year, but I just couldn’t wait that long. The calendar barely rolled over to April, and I was already building another!

I should start by saying that my pair of OwlRC Dragon quads are still flying great! I did manage to damage one motor on each quad. I was able to keep them both flying fine for a while, but I kept having to enable more and more filtering. I finally gave in, found the bad motors, and replaced them. The notch filters are turned off again, and they’re both flying great!

The downtime was disconcerting, though. I pushed the F40 Pro V2 quad’s bad motor far enough that it started acting really wonky. By the time I was repairing that quad, the ZMX FinX30 quad wasn’t acting quite right, either. I felt like I didn’t have anything to fly for over a week. It was time to add a third 5S-capable quad to my bag.

If I built this quad in April, why am I writing about it in June?!

I had a pretty serious hiccup. The Kakute F4 that I used in this build was faulty. On one of my first batteries, I had an extremely gentle crash. I hit the grass, and the motors stopped spinning. The OSD stopped updating. I couldn’t arm or disarm. I unplugged the battery, and everything was fine.

I had other similar incidents, but those crashes were usually a bit harder—no harder than the punishment I’ve put my other Kakute F4 quads through. One day, I was flying under a picnic table, and my GoPro just barely touched the bottom of the seat. The quad fell 6 inches to the ground and had to be power cycled.

Then it started locking up when doing snap flips and rolls. Sporadically at first, but then on almost every flip. I eventually replaced the flight controller, and it is flying great again.

We were in the process of buying and moving into a new house at the end of April and into May. I didn’t have as much time as I’d like for flying. I really didn’t have enough time to repair a quad, especially when the other two were flying just fine.

At least this was a good excuse to try Butterflight on a Helio Spring flight controller!

The Hyperlite Flowride

Ever since I started flying with a GoPro HERO5 Session, I’ve been interested in trying a frame that allows for a top-mounted battery. All of my 5” miniquads have had bottom-mounted batteries. That felt fine to me, until I tried strapping a GoPro on top. Rolls and flips felt like spinning a dumbbell. The center of gravity is close to the center, but the bulk of the weight is on the outsides.

It felt terrible on my Shuriken X1. It felt even worse on the less powerful BFight 210. Fortunately for me, my heavy, angry 5S quads have no trouble using their sheer power to muscle themselves through flips and rolls. That’s not efficient, though!

Hyperlite Flowride

Putting both the battery and GoPro on top may move the center of gravity much closer to the top, but it moves all that weight closer to the center. Snappy flips and rolls are much easier that way.

I decided to order a Hyperlite Flowride. A few days later, the Hyperlite FlosStyle was announced. I’m glad I ordered the Flowride—I wouldn’t have had the patience to wait for a FlosStyle! You shouldn’t buy a Flowride. Everything I like about the Flowride is done better by the FlosStyle.

I don’t have a FlosStyle frame, so I’m going to tell you why I like the Flowride! There’s only one reason I can think of to buy a Flowride frame today. If you’re still running individual ESCs, the arms on the Flowride are wide enough to fit them.

I thought about this, because it seems like a quick and easy upgrade for my OwlRC Dragon quads!

Why do I like the Flowride?

The Flowride is very much an Alien-style frame. It has the big, bus-like fuselage. The FPV camera sits pretty far forward, so the props won’t obscure your view too much. The GoPro mounts directly above the FPV camera, and the 3D-printed Hyperlite GoPro mount is phenomenal.

I don’t believe the Flowride has room for a full-size FPV camera. That’s fine by me. I’ve been moving all my quads over to the amazing Runcam Eagle Micro. It is an improvement over the already awesome Eagle 2 and Eagle 2 Pro cameras, but it is about 10 grams lighter, and it takes up so little space!

Like all of Bob Roogi’s other frames, the Flowride is extremely well thought out. It is made from high-quality carbon fiber. The arms are quite a bit wider than the FLOSS frames, and that shows in the additional weight. I’m OK with that. My quads have more power than I know what to do with!

The Flowride has a perfect SMA antenna mounting hole on its bottom plate. There is just enough room below the hole to fit a 90-degree SMA elbow. I was thankful for this mounting point when my attempt at using an MMCX Pagoda antenna failed—more on that later!

The full parts list

Here’s the parts lists. The total cost for each quadcopter was somewhere around $350.

  Hyperlite Flowride
Frame Hyperlite Flowride 6”
Motors T-Motor F40 Pro V2
2306 2600 KV
Props DAL Cyclone T5544C
ESCs Holybro Tekko32 4-in-1
FC Helio Spring
VTX Holybro AtlAtl HV
Camera Runcam Eagle Micro
Antenna TBS Triumph
Receiver FrSky R-XSR

This is similar to the parts I used in my previous two builds. The only difference is the frame and ESCs. After swapping out the defective part, the flight controller is different, too.

I’m a big fan of the Holybro stack, but it is a little too tall for the Flowride. I wound up using 30 mm standoffs. That gives me enough room for the three boards in the stack.

I’m probably going to need to look for an alternative to the Holybro AtlAtl in the future. There’s plenty of room to mount a VTX outside the stack, and all the frames I like are using shorter standoffs. I’d like to bring my center of gravity down 5 mm, but this is working fine for now.

2600 kv motors? On 5S?!

When I built my last pair of quads, I was hedging my bets. I loved my Shuriken X1 with T-Motor F40ii 2600 kv motors. I wanted to improve on and repeat that success. I built those quads to be capable of running on 5S or 6S batteries, but I expected to continue to use 4S packs—2600 kv on 4S feels fantastic.

That’s not what happened, though. The benefits of 5S are just too great—they’re inexpensive, they don’t sag, and they pack even more punch!

I decided to go with T-Motor F40 Pro V2 motors for this new quad. Lower KV motors would be a better match for the batteries I’m running, but I’m trying to make my quads more homogeneous. I already have F40 Pro V2 2600 motors on one of my other quads. Using them again means I can stock fewer spare parts.

I had planned to use the ZMX FinX30 2207 motors on this build, but they’re more difficult to source.

2600 kv motors? With 6” props?!

I don’t plan on running 6” props on this build, but they do fit. I had some on hand, so I just had to test them!

I have a switch set up on my Taranis X9D+ to limit my maximum throttle. On my 5” quads, I run with an 80% throttle limit. That still packs more punch on 5S than 100% throttle on 4S, and it gives me more resolution on the throttle.

With the bigger props, 2600 KV motors, and a 5S battery, that throttle limit switch is essential. At maximum throttle, I believe the tips of my 5.5” and 6” props are reaching the speed of sound. The noise they make is absolutely terrifying!

Hyperlite Flowride with Kakute F4

Math tells me that 2600 KV on 5S could reach mach 1.2 at the tips of the props. I am certain that physics gets in the way long before then, but I have also read that propellers get extremely unstable at around mach 0.9.

I’m sure that folks with lower-KV builds have an efficiency advantage over my Flowride quad, but I’m extremely pleased with my flight times. I’ve managed to finesse a 9-minute flight out of a single 1,300 mAh 5S pack while running HQ 6x3x3 props. As I always do, I headed in for a landing when the battery was at about 3.65 volts per cell.

DAL Cyclone T5544C

I’ve been running Racekraft props for a long time. I used Racekraft 5046 props on my BFight 210 and Shuriken X1 last year, and I’ve been running Racekraft 5051 props on my more powerful builds this year. They’re great props. I get reasonable flight times, and they pack a punch! However, they aren’t all that smooth.

I had a few sets of HQ 5.5x4x3 props left over from a previous experiment, so I tried those first. The only equipment that I’ve used in testing these props is my butt dyno—I’m not sure that I want accurate scientific data!

The 5.5” props feel like they generate at least as much thrust as the Racekraft 5051, but they feel so much smoother. I don’t know if they have as much power on the top-end, but I’m definitely able to fly fast enough for freestyle.

The HQ props felt great, but they seem fragile. I broke three props on my first outing. All three had broken hubs. Two of those props went completely missing.

When I got home, I did some research and discovered the DAL Cyclone T5544C props. I ordered some immediately. Unfortunately, I was already out of 5.5” props before they arrived, so I flew the Flowride with Racekraft 5051 props for an entire day. I would have liked to fly both 5.5” props back to back.

As far as I can tell, the DAL and HQ 5.5” props both feel quite similar. I get similar flight times. They both hit the speed of sound at a similar throttle level. They both had a ton of grip and generate a lot of thrust.

I’m breaking fewer Cyclones. That’s a bonus. They seem more likely to bend, and it isn’t difficult to straighten them back out. When they do break, though, they are breaking spectacularly.

The Flowride is getting longer flight times

This is the part of my testing that needs more science, and that will take time. In a couple of weeks of flying the Flowride, this is what I’ve learned.

The Flowride is more efficient than either of my OwlRC Dragon quads. One of the OwlRC Dragon quads is using the same motors as the Flowride. The Flowride has different BLHeli_32 ESCs and a different frame. Everything else is nearly identical.

The first day, I assumed the Flowride was getting more air time due to the longer props. One day, I didn’t have enough 5.5” props in my bag, so I put Racekraft 5051 props on the Flowride, and it was staying in the air about 20% longer than my OwlRC Dragon quads.

Later, I discovered that 5.5” props just barely fit on the OwlRC Dragon frame. I couldn’t believe it! I’ve had 5.5” props in my drawer for months. I thought for sure that I tested this. How did I miss it?

On the OwlRC Dragon, the 5.5” props nearly touch in the front and back, but it flies like a dream. Similar punch compared to the Racekraft 5051, but much smoother and more efficient.

Still not as efficient as the Flowride!

With a similar flying style and the same props on each quad, my Flowride will always see about an extra minute of flight time. That’s usually around 20% or so.

Why is the Flowride more efficient? The weights on all these quads are pretty close. Am I getting cleaner air due to the much longer arms? Can the Tekko32 ESCs be more efficient than the Wraith32 ESCs? I’m suspecting that the longer arms are the advantage.

This quad is huge

This is the biggest quad I’ve ever owned or flown in FPV. I don’t really notice the extra size while I’m flying. The lower profile with the top-mounted battery seems to make it easier to fit under picnic tables, but I do seem to be bumping props off the sides of gaps more often now.

Every time I crash and do a test flight line of sight, I am amazed at the size. It looks huge compared to my OwlRC Dragon DSX-5 quads.

The larger size has several advantages. You want to fly a nine-minute, long-range mission? Put some 6” props on. Going for top speed? Maybe switch to some moderately aggressive 5” props. Need a good balance of both? Run 5.5” props.

The extra length also seems to provide smoother responses from the quad. Is it due to the extra leverage? Is the air cleaner when the props are spaced farther apart? I imagine it is a combination of both.

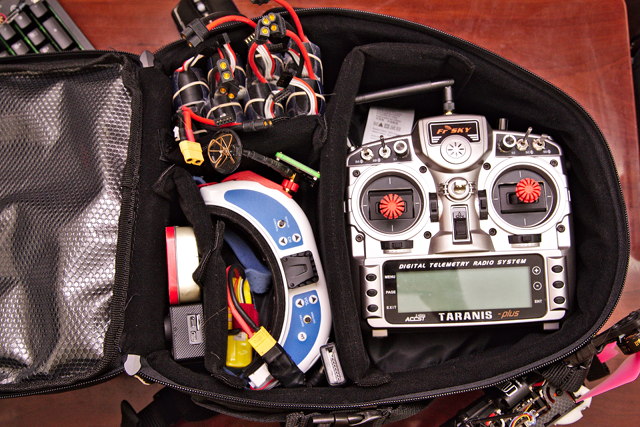
The size has a major downside for me. One of my favorite features of my giant Thinktank FPV Airport Helipak backpack is that I can easily fit three 5” quadcopters inside. I don’t have to to resort to hanging quads on the outside. I still have enough room for OwlRC Dragon frames with 5.5” props, but the long arms on the Flowride are problematic.

I could take a few dividers out of the bag, but then I won’t have space for my Leader 120 micro quad or Ryze Tello. It is a conundrum!

I’m waiting for a good MMCX antenna

I want to eliminate the MMCX to SMA cable on all my quads. Each connector impacts the quality of your signal, and the extra SMA connectors are adding unnecessary weight. Unfortunately, there isn’t a lot of variety in antennas that plug directly into MMCX ports.

Half of the options have a 90-degree MMCX connector. Those don’t fit my layout very well. There are a few that fit my needs, though, and I decided to try one for this build—a Foxeer Pagoda.

It fit nicely, and it saved me a few grams. Unfortunately, my video feed on my first flight was absolutely atrocious. In my rather gentle attempt to disconnect it from the VTX, the antenna came completely loose from the MMCX connector. It is the first time I’ve had that happen to an MMCX lead, and I didn’t even get a chance to pull very hard at all.

I assume the antenna was defective.

What’s next?

I was worried that I’d like the top-mount battery and Tekko32 4-in-1 so much that I’d have to upgrade the other two quads. I’d have to buy a pair of new ESCs, frames, and flight controllers. Sure, I could wire the Tekko32 into the existing AIO flight controllers, but it wouldn’t be as clean and simple!

It would cost me another $120 per quadcopter to make the switch. I am relieved that I don’t feel the need to spend the money or the time on those upgrades!

I like the top-mount battery, and I like the Flowride frame. It is significantly more rigid than the OwlRC Dragon frames. This surprised me a lot, because I remember thinking the Dragon frame was amazingly strong when I first handled it. Have my constant crashes been taking their toll?

Hyperlite Flowride

The first time I flew my Flowride build, I was amazed at how clean the video feed was—even at full throttle! I assumed this was entirely due to the upgrade to a Tekko32 ESC. Fortunately for me, that wasn’t the case. The Tekko32 definitely provides cleaner video than my Wraith32 ESCs, but part of my OwlRC Dragon’s problem has been my choice of props. The Racekraft 5051 props just aren’t smooth.

As soon as I discovered that I can fit 5.5” props on my other two quads, my thoughts about immediately upgrading mostly went away. The DAL Cyclone T5544C props are a good enough upgrade for my Dragon quads for now. They’re smoother and more powerful. Best of all, all my quads will be running the same props—that makes it easier to keep the drone bag stocked!

If I’m not upgrading frames, flight controllers, or ESCs, then what should I do next?

How’s Butterflight working out?

The first quad I installed Butterflight on was my Leader 120, and that went very well. With nearly stock settings, it flew better than my tuned Betaflight. With a bit of tuning, the Leader 120 is flying better than I ever imagined it would.

That was a good enough excuse to try Butterflight on my OwlRC Dragon DSX-5 quads. I overclocked their Kakute F4 flight controllers and ran a 32k/16k loop, and that seemed to work pretty well, at least on the OwlRC quad with QMX motors.

I had a lot more trouble with the F40 quad. That turned out to be a physical problem. The gyro chip on the F40 was touching the VTX. That must have been getting worse over time, and it explained a lot of issues I was having with that quad. I’m guessing the foam is expanding slowly or the adhesive is loosening.

After having my Kakute flight controller on the Flowride on two or three different versions of Betaflight, I figured it was time to give Butterflight a try. It didn’t correct my issue, so I upgraded to the Helio Spring.

How is the Helio Spring?

This section and the previous section probably deserve their own blog post, but I can summarize well enough here.

I like it a lot. The layout is quite nice. The VTX pins are near the back, the camera pins are near the front, and it plugged into my Holybro Tekko32 4-in-1 without any problems.

I’m running a 32k/32k PID loop on the Flowride. I left everything pretty close to stock. I added a bit of antigravity and TPA. I don’t think I’ve touched the PIDs. Just about the only tuning I’ve done is lowering the Q values in the IMU-F.

The Q values default to 3500 on pitch and roll. With those values, I believe I had jello in my GoPro footage. I lowered them to around 1500, and that cleared up the jelly, but the quad gets really unhappy with even the slightest bit of damage to the 5.5” props. It starts with jello, but a slight bend of a prop was making my motors get quite hot.

I believe I am currently around a Q value of 800 on pitch and roll, and a Q of 500 or so on yaw. This is lowering the trust in the gyro. I still get jello if my props aren’t perfect, but at least it isn’t trying to vibrate the motors to death!

TBS Crossfire

I’ve been talking about upgrading to TBS Crossfire for weeks. I wanted the Crossfire Micro TX for my Taranis X9D+, but they’ve been out of stock. I thought about spending more on the full-size module, but that thing is huge. I don’t need its additional features, and I don’t want my transmitter gaining so much extra bulk.

Crossfire Micro TX modules are finally in stock again. The Micro TX module and a trio of Nano RX modules were delivered just now. How am I managing to continue writing this blog post when I could be setting up Crossfire on all my quads? The answer is simple. I’m not home right now, and I won’t be for a couple of hours!

I’m starting to push myself far enough that failsafes are becoming an issue. I haven’t had many full failsafes lately, but I have lost connectivity for a fraction of a second on a number of scary occasions. Whenever that happens, my confidence level drops.

Should I try that power loop? Maybe not. I almost failsafed on my last battery. What if I failsafe at the top of the loop? What if I failsafe and fly into someone?

I’m not that interested in flying long range. I am very interested in keeping my confidence level up. It sounds like I’ll have a very hard time losing connectivity with Crossfire at the distances I currently fly. Having one less thing to worry about is easily worth the $250 I had to pay for a transmitter and receivers.

I will definitely have to try flying long range. If I have the equipment, why not make an attempt!

Conclusion

The Hyperlite Flowride is an excellent frame at an amazing price, but it has been superseded by the Hyperlite FlosStyle. I like the Flowride a lot, but I wouldn’t buy another. I’d go with the FlosStyle at this point.

Are you flying a Flowride, FLOSS, or FlosStyle quad? What do you think of it? Tell us about it in the comments, or stop by our Discord server and let us know what you think!

Eachine QX65 - Tons of Fun and a Great Value

| Comments

UPDATE: This post is already pretty outdated. Don’t buy the Eachine QX65. A whole mess of better, more durable brushless indoor quads are available now. I’ve upgraded to an EMAX Tinyhawk. I haven’t written about it yet, but I highly recommend it. It is a great way to get started in FPV, and it is an excellent indoor Whoop-like for experienced pilots. The bundle includes everything you need to get starts for $165—including goggles and a controller! Six additional batteries will set you back another $25. If you already have goggles and a Taranis, the Tinyhawk is only $99.

My friends and I have been talking about buying Tiny Whoops for ages. Not necessarily real Tiny Whoops, but one of the clones. None of our FPV quads are gentle enough to fly indoors, and we all want to have an option for flying on rainy days.

I’m not interested in the real Tiny Whoop. They use the original flight controller from the Inductrix. They say it flies better, but even if it does, I’m not excited about flying an unconfigurable black box.

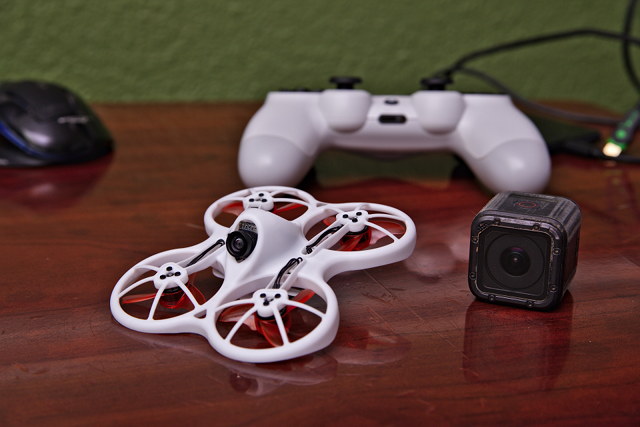
Eachine QX65 and a GoPro HERO5 Session

The next model I looked at was the NewBeeDrone AcroBee. Their full kit comes with the parts to build the brushed micro drone, four batteries, a charger, and three different sets of motors. You get all that and a case for about $136. That’s pretty reasonable.

Then I found the Eachine QX65 bundle. Eachine’s bundle isn’t directly comparable to the NewBeeDrone kit. The QX65 is assembled and ready to fly out of the box, but it doesn’t come with any spare motors.

With the QX65 advanced bundle, you get a drone with an F3 flight conroller, two spare frames, two spare sets of props, six 250 mAh HV LiPo batteries, a six-port charger, and a single-port USB charger. You don’t get a case, but you do get all of that stuff for about $90.

I’m not interested in becoming a professional Whoop racer. I just want to goof around in the house. More batteries, a parallel charge board, and the lower price convinced me to give the QX65 a try. I’m glad I did, too!

If you’re more serious than I am, the NewBeeDrone AcroBee might be a better choice

I’m certain that the AcroBee is a better quad, but probably not by a huge margin. The AcroBee uses the newer, larger battery connector. That bigger connector can push more power to the motors.

It would be easy to solder an upgraded connector onto the QX65, but you’re going to be stuck with half a dozen batteries with the puny connector. I don’t think this is a big deal—you can always have two connectors on your quad! It is just something to think about.

The AcroBee comes with better motors. It also comes with three different grades of motor, so you can try each one and see what you prefer.

I didn’t buy the AcroBee! I bought the QX65!

I’m pleased with the QX65. It was an amazing value. I was up, flying, and having fun in about five minutes. Since it runs Betaflight, I was able to quickly configure the rates and switches to match all my other quads, too!

I did some test flight at home, but a few days after I got my QX65, my friend Brian closed on a new house. His new house has a pretty good route where you can fly up the stairs to the second floor, through a room, and back down to the first floor.

Here’s some video of Brian flying his QX65 that day!

I noticed a problem at Brian’s house that I hadn’t experienced in my single-story home. When flying in angle mode, there’s a ton of prop wash when descending from the second story. So much prop wash that it is very difficult to not smack into the ground! For some reason, I didn’t experience this prop wash in air mode, but it is nearly impossible to fly well indoors with a Whoop in air mode.

The Project Mockingbird settings are fantastic

I had already heard about Project Mockingbird long before I even ordered my Eachine QX65. Even so, I wanted to try the stock settings before messing around too much with Betaflight. The stock settings work. Project Mockingbird is just so much better.

What is Project Mockingbird? Some folks are trying to come up with settings for Betaflight and your Taranis radio that will replicate the feel and responsiveness of a genuine Tiny Whoop.

I’m not sure how close they’ve gotten, but I can tell you that the Project Mockingbird settings are a huge improvement over the QX65’s stock settings.

The prop wash in angle mode is gone. It feels much better when banking or turning. You can definitely fly your QX65 with the stock settings, but I highly recommend trying out Project Mockingbird.

I didn’t follow all of their instructions. I thought their rates were much too high for me. My other quads all fly identical rates for roll, pitch, and yaw. I modified mine to match Project Mockingbird’s ratios. It seems to be working well!

Some minor issues

I’ve had trouble with the motors working their way loose from the frame. It was a minor annoyance on my first day of flying.

I had already decided that I was going to add a 3D-printed brace to the frame. When I installed that brace, I glued it in place with Welder glue. I’ve been using this stuff since I built my arcade cabinet, and I like it a lot. It is a bit like hot glue, but without the heat. It is a little stickier than hot glue, but not by a lot, and it doesn’t cure as fast, but it is more convenient.

While I was tacking my frame brace in place, I made sure to add a bit of glue to each motor. They’ll still be easy to remove when they fail, but they’re not getting knocked out of place anymore.

Four-blade props

I bought a whole mess of four-blade props. I’m not sure if they’re an upgrade. They don’t seem to have diminished my flight times, and they have made the QX65 a bit more twitchy on sharp stick inputs.

That leads me to believe that they’re providing more thrust. The quad is acting like it has just a little too much P-gain. I might try to tune that out.

The 6-way charger is awesome!

The 6-way battery charger that comes with the advanced QX65 is fantastic. You can set each battery to 4.2 or 4.35 volts. You can also set the charge rate to approximately 1c or 2c for each battery.

The input for the charger is an XT60 connector, so you can charge your batteries in the field using the LiPos you already have for your 5” quads!

I fried my charger. The label on the input claims it can handle 25 volts. I plugged it into the 23.8 volt power supply I use to power my ISDT Q6 Plus charger, and I let the magic smoke out.

The charger definitely handles 4S just fine. I want to tell you that I’ve used my 5S packs to charge my Whoop batteries, but I can’t say for certain. I’d suggest sticking to 4S packs!

Future upgrades

The heart of the QX65 is sound. The BeeCore V2 is an F3 flight controller with an integrated OSD. I have mine running with an 8k/8k PID loop, and the CPU utilization doesn’t even reach 40%. It should be a good, relevant flight controller for quite a long time!

I’m patiently waiting for my motors to wear out. A while back, Ready Made RC included a set of upgraded Whoop motors in one of my orders—they’re always throwing something extra in the box!

When those wear out, I’ll probably try one of the outrageous sets of motors from NewBeeDrone.

I tried really hard to convince myself that I should buy an AcroBee instead of the QX65. I love NewBeeDrone. Their battery straps are top notch. Their neat Fat Shark headset foam is amazing.

What sort of indoor quads are you flying? A brushless quad like the Tiny Whoop or QX65? Are you flying a 1S brushed micro? I’d love to hear about your experiences in the comments below, or you can come chat about it on our Discord server!

My FPV Quadcopter Field Charging Setup

| Comments

UPDATE: I’m designing an open-source 3” HD micro FPV quadcopter frame. I call it the Kestrel. You should check it out!

My friends and I avoided field charging for a long time. Why should we charge in the field? Wouldn’t it be easier to just carry more batteries for the quads? We did the math. That would cost a bit more, but it was still a good value for us.

Our flying lives were simpler back then. All our quads ran on 1300 mAh or 1500 mAh 4S packs, so that’s all any of us carried. Then we started adding micro quads to our bags. The micro burshless quads use tiny 2S or 3S packs, our Tiny Whoop clones use 1S LiPos.

Our inexpensive, prebuilt quads like the BFight 210 still use 4S packs, but all our new builds are using 5S or 6S packs.

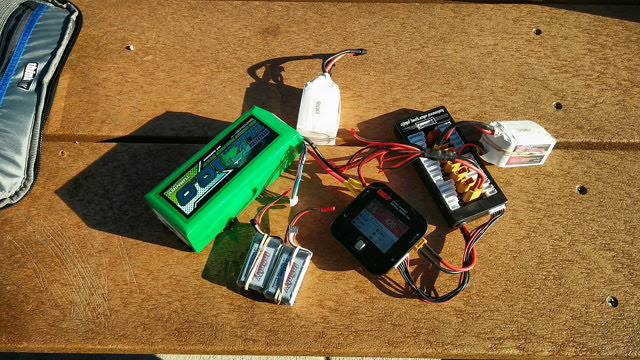
My 10,000 mAh 6S Field Charging LiPo Battery

It was easy to carry a dozen or more 4S packs. I’m not going to carry a dozen of each size pack. That’s expensive and heavy. Maybe it is time to carry one big, heavy battery that can charge all my other batteries!

Early experiments with field charging

I started experimenting as soon as I upgraded to an ISDT Q6 Plus charger. I picked up a cigarette lighter adapter, and I was able to easily charge from the tailgate of our miniature SUV.

This has its limitations. My ISDT Q6 maxes out at 14 amps. I do this all the time at home, and I am able to parallel charge six 5S batteries in less than 25 minutes. In the car, this wasn’t possible. When charging at around five amps, the input voltage would drop quite a bit. That was enough to parallel charge two 1500 mAh 4S packs in about 20 minutes.

That’s not fast enough to keep me in the air, but it was cheap, easy, and it would let me fly three or four extra packs on each outing. Also, our newer pilots don’t tend to have enough batteries to keep flying. If you lend out your own batteries, they’re likely to come back broken—it has happened to me twice so far! Charging someone else’s packs is a cheaper option!

Connecting the charger directly to the battery would allow me to push the ISDT charger to its limits, but that requires more effort. We only sit near the car at one park, too, so working on that option didn’t seem like it would provide enough value.

Replacing the car with a giant LiPo battery!

I’ve been on the hunt for a good power source for months. SLA batteries are cheap, but they’re way too heavy to carry around. There are all sorts of battery packs built out of 18650 cells. The most common of those are 42 volt packs for electric scooters. 42 volts puts those outside the input or output range of our ISDT Q6, so they wouldn’t be convenient.

I decided to use a big, heavy LiPo battery. Hobby King has a selection of large LiPos. They have 4S 8,000 mAh packs, 6S 20,000 mAh packs, and a dizzying assortment of sizes in between. As far as I can tell, one of those giant packs is always on sale. When that sale ends, a different size goes on sale.

The day before I decided to pull the trigger, I was looking at a 4S 16,000 mAh that was on sale. By the time I was ready to order, the price had doubled! I poked through their selection, and I found a 6S 10,000 mAh for about $70. That seemed about right, so I ordered one for myself and one for my friend Brian.

You should choose the battery that gets you the most watt-hours per dollar!

My giant LiPo was shipped with an XT90 connector. That is of no use to me, so I just soldered on an XT60 connector in its place.

What do I have to carry in my bag?

Including the battery, I have added nearly three pounds of hardware to my already gigantic ThinkTank backpack.

I had to snip the banana plugs off the JST parallel cable. I soldered on a Deans connector to fit into the extra port on the XT60 parallel board. I have a JST parallel charging cable at home that came with a Deans connector, but the one that came with banana plugs is higher quality. It uses thicker wire, and it just feels nicer. It was worth the extra five minutes of labor!

I haven’t bought a second ISDT charger, but I keep considering it. It is easy enough to pull my home charger off the Bat Safe and throw it in my bag, but I have forgotten to do that on at least one occasion!

How much can you charge in the field?

On each power up, the ISDT charger keeps track of how many watt-hours it has pumped into your batteries. There is some loss when transferring power from the source battery to the destination. When connected to a full 10,000 mAh 6S LiPo, the charger can output 220 watt-hours when discharged to 3.3 volts per cell. How many watt-hours does it take to charge one of my miniquad LiPos?

  • 3S 550 mAh – 5 watt-hours
  • 4S 1,500 mAh – 16 watt-hours
  • 5S 1,300 mAh – 23 watt-hours
  • 6S 1,000 mAh – 22 watt-hours
  • 6S 1,250 mAh – 27 watt-hours

My big LiPo can recharge 14 4S LiPos, 10 5S LiPos, or more than 40 of my tiny 3S LiPos. Any combination of those LiPos would weigh nearly twice as much as the charging battery!

Why is that? You lose quite a bit of power to heat when charging. Shouldn’t the charging LiPo end up being heavier?

I don’t fly my batteries all the way down to 3.3 volts per cell. If they get below 3.3 volts, they crash to 2.5 volts or twenty seconds and you’ll fall out of the sky.

Field Charging Some LiPo Batteries

That makes it difficult to fly home. I always stop flying when my goggles show a voltage near 3.6 volts per cell, and the batteries usually settle to around 3.75 volts while they’re waiting to be plugged into the charger. That means the batteries being charged aren’t completely dead—they probably still have 1/3 of their charge remaining.

I am discharging the 10,000 mAh LiPo all the way to 3.3 volts. It isn’t flying. I don’t have to worry about it falling out of the sky!

How many quad batteries would you need to carry?

This has been fun and interesting to think about. What is the minimum number of batteries you can carry and still fly nonstop?

It depends on how long your batteries last, how many amps you’re willing to pump into your LiPos, and your definition of nonstop.

I am comfortable parallel charging four of my 1,300 mAh 5S packs at 14 amps. That works out to a charge rate of about 2.7C and takes about 20 minutes.

When flying freestyle with my GoPro HERO5 Session, my 5S packs last a little over four minutes. If I hustle and use a pretty strict definition for nonstop, it might take me one minute to swap batteries and get back in the air. I never go that fast, though. There’s usually a minute of idle time at the beginning of all my GoPro footage, and the footage doesn’t start until my battery has already been swapped.

Let’s pretend I can go much faster than that.

I’d prefer to charge at 2C, so I’m already pushing things. That means I’ll need to carry at least eight batteries. I’d fly four batteries, then put them on the charger. By the time I fly the next four packs, the first four would be ready to fly. If I repeat that until the big LiPo is discharged, I would be able to fly a total of 18 packs. That’s 72 minutes of actual flight time.

To maintain that pace, I would need to hire a caddy to do my charging for me. Maybe they could swap batteries for me, too!

This isn’t how I spend my time flying, and seems like an unrealistic and extreme situation. I would never have the goggles on for 72 minutes straight. I take breaks. I watch my friends fly. I check Twitter. I go find my quad when it crashes—it crashes a lot! I help friends find their quads. I keep an eye out for pedestrians when my friends are flying.

This charging scenario might be realistic for somebody, but not anyone I know!

How many quad batteries do I actually carry?

I try to carry six batteries of each type. If I drop below six, I buy enough replacements to get up to seven or eight packs—I will certainly break more batteries!

I started field charging at the same time that I removed my final 4S quad from my bag—I really do miss my BFight 210, but I don’t miss the extra weight of those 4S packs! I was carrying more than six 4S packs. My 10,000 mAh field-charging pack weighs less than the 4S packs I removed from my bag, so I’m at a weigh savings overall.

I try to carry six of each size battery, because that’s how many ports my parallel charging boards have available. I have slots set up in my ThinkTank Helipak bag to fit two rows of three LiPos.

I’m currently carrying seven CNHL 1,300 mAh 5S packs and six 550 mAh 3S packs.

I don’t have a strict charging regimen. I’ll tell you about how things went yesterday at the park. I flew three 5S packs. I was mostly cruising around and talking to my friend Brian—I fly much slower when I’m talking. I was seeing flight times way up around six minutes.

I popped those on the charger at a little over 2C. The shade had moved, so we migrated our chairs back into the shade. I poured some water from my giant 2-liter Thermos, watched Brian fly, and I loaded a battery into my Leader 120 micro quad.

I’m nervous about flying freestyle around trees with the Leader 120. I don’t want to get stuck in a tree. I won’t be able to see it, and I don’t want to waste an hour trying to get it down. This fear usually leads to flight times of five or six minutes.

The three 5S packs were done charging before I finished two packs on the Leader 120.

What about sharing the charger?

If you and your friends are all flying similar batteries, this would be fantastic. My ISDT charger has no trouble topping off six batteries in less than 25 minutes.

Unfortunately, my friends and I are all running batteries with different voltages. I run 5S, my friend Brian runs mostly 6S, and our other friends all run 4S. We have to use separate chargers or take turns. Usually it ends up being a little of both!

The verdict

Field charging is legit. At the pace I tend to go through batteries, my field charging setup has no trouble keeping up with me. I carry enough 5S packs to keep me in the air for 20 to 25 minutes—even longer since I started flying with 5.5” props! If I need to fly longer, it is easy enough to throw some of those packs on the charger—the 10,000 mAh 6S has enough juice to give me another 35 to 40 minutes of flying time.

In terms of cash and weight, field charging is an excellent value. Ten more 5S packs would cost at least $250 and weigh roughly 4.5 pounds. The giant 10,000 mAh only cost me $75 and weighs about 2.5 pounds. The charger and balance board only weigh a few ounces, and I’m just unplugging my home charger and taking it with me.

Field Charging Battery Fits In My Bag

It doesn’t matter whether I carry 6 or 16 packs with me to the field. I have to charge every pack that I fly. Field charging moves the labor from home to the field. I find this to be a good trade-off, because I’m usually chatting with my friends in the field when I’m charging!

I’m still most excited by the versatility. Did it end up being a day for micro quads? No problem, I can charge those batteries all day long. No matter what type of battery you wind up depleting on a particular day, you can always top them back off and fly some more!

Are you field charging your LiPo packs? Are you using a big LiPo, or are you using something else to power your charger? Let us know what you think in the comments, or join us in the #drone channel on our Discord server!

I am Disappointed in Frontier Communications

| Comments

Is this title too strongly worded?

I’ve been a FiOS customer for more than six years. Our account was originally owned by Verizon. They sold their Dallas-Fort Worth FiOS lines to Frontier about three years ago.

We started with 35/35 symmetric FiOS Internet service. I believe it was during the second year of service that we bumped it up to 75/75. Speed and reliability were fantastic. I only recall one long outage during those six years, and my speed tests almost always came out at least 5 megabits per second faster than the advertised speeds. Moving large files back and forth from my own colocated server were just as fast.

Then we moved to a house not far away. Google Maps says it is a 2.1 mile drive. We’ve had amazing service from Verizon and Frontier for the past six years. We knew we had to order Frontier’s FiOS before we moved in.

This is where the problems started.

I don’t enjoy writing posts like this

If you can’t say something nice, don’t say anything at all. If something is terrible, I probably won’t tell you about it.

If I find a video editor that’s much better that what I’ve been using, I’ll tell you about it. If I find some great, new shell plugin or terminal-based program, I will tell you all about it. I’ll tell you what I like about it, and I’ll tell you if it has any problems.

If I order something from Amazon, and it is a piece of junk, I will just throw it away. You’ll never hear about it. It isn’t worth mentioning.

I have escalated my issue with Frontier as far as I can. I don’t know where else to go.

Apr 20: Frontier doesn’t service this address

My wife called Frontier to order FiOS service. I may have the precise facts a little off here, since I wasn’t directly involved. This should be pretty close.

The first person she talked to said our address doesn’t exist. This seemed interesting to me. We bought this house from my friend Brian. He’s had FiOS since he moved in, and he was living in this house long before my wife and I moved back to town. I’ve seen the FiOS gear. I’ve used the service. This seemed weird.

She tried again later, and the next representative explained that their system was down, and they couldn’t check whether FiOS was available or not.

The next day, Frontier was able to schedule a technician to come out and install FiOS on May 2. However, they said it would be a completely new install. Frontier claimed that FiOS never existed at this address.

My chat logs seem to indicate that she started this process on April 20. I can’t verify what day she finally managed to order our service, but I would expect it to be April 21. May 2 was about a week and a half away. That was a disappointment, but other things had conspired against us anyway, so we pushed the movers back a week.

Mobile data

The few days between our move and the installation of FiOS were pretty rough on my mobile data. I don’t have a large data plan. Unless I’m traveling, it is rare that I use more than 500 MB. Even when I’m traveling, I only wind up using 2 or 3 GB per month.

My Data Usage

I realize this screenshot is a bit off. I’ve done a bad job, and I’ve used two different phones this month due to some photography drone experimentation. The screenshot says I’ve used 34.6 GB of mobile data. I really got closer to 40 GB in that billing period. I am thankful for large, accumulating data stashes.

I thought wouldn’t have to tether after Frontier installed our FiOS service. That was almost three weeks ago.

May 2: FiOS is installed

The technician was very excited. It sounded like he thought this was going to be a brand new installation. All he had to do was upgrade us to a new ONT, because we were upgrading to 150/150 symmetric Internet service.

I told him that my wife tried to explain this to customer service when she was placing the order, but they just wouldn’t believe her.

It took him a little while to replace the ONT. Once he was done, I ran a speed test, and I registered something like 160/30. The 160 was right in line with the 80/80 I used to get on my 75/75. The 30 was disappointing.

This is where I’m my memory gets a little fuzzy. I can’t remember why I let the tech leave so quickly. When I talked to my wife later, she informed me that when she ordered the service she was told that it might take up to 12 hours for everything to be configured on their end.

I was dubious, but I was seeing better than 150/150 later that night, so I didn’t worry about it.

May 3: The link goes down

I wasn’t saving a seemingly constant collection of speed test screenshots at this point, but this is when my uplink dropped into the toilet. I was involved in two different text chats with tech support that day. For some reason, only the first of the two chat logs was emailed to us.

The first chat started at 2:53 PM and lasted for about 25 minutes. They asked me to use Frontier’s speed test site, and I explained that I was seeing 155 megabits on the download test, and the upload test was erroring out after a short while.

At some point during out chat, my upload speed returned to 150 megabits, and our chat session drew rapidly to a close.

I do not have a good record of when the second chat began. My laptop was tethered to my phone, and I was in a text chat with tech support on that laptop for more than two hours.

Towards the end of our troubleshooting, I was asked to plug the Ethernet coming out of the ONT into a laptop. I used my wife’s Windows 10 laptop.

As with just about every time we reset the ONT, my speeds were alright at first. The tech decided my router must be bad, so they put in an order for a replacement. Just minutes after that my upload started dropping. One speed test, it was in the 70 megabit range. Then the 30 megabits. Then less than one megabit. Then the Ethernet light on the laptop went dim.

This was the common occurrence of the day. The Ethernet link was dropping out.

They decided my router wasn’t bad, but they couldn’t cancel the replacement order. They needed to send a tech out to replace the ONT. He was scheduled to come out on Sunday, May 5.

May 5: Replacing the ONT

The first thing the new tech noticed was that the original tech didn’t replace the ONT’s battery backup. He said the new ONT units need the new power supply, so that was the first thing he replaced.

It didn’t help the situation. Then he replaced the ONT, and the Ethernet link came back up. Upload speeds were still abysmal.

First we tried through the router. Then we plugged my laptop, a Core i7-7700HQ laptop running Linux, into the ONT. I was getting terrible upload speeds. I am not sure exactly what those speeds were, but the tech agreed that it wasn’t good.

He suspected the problem would be a bad PON card out on the street somewhere. He needed to run a test with a “special laptop.” He was vague about that, but he said they’d be out tomorrow.

May 6: Nothing works except Frontier’s laptop

A third tech came out on Monday, and he brought the magic laptop. What’s the magic on this laptop? Absolutely nothing. He was just running speed tests from the same Frontier site as me.

We spent a lot of time testing things, but he explained that the only way we could get anyone to look at the PON card was to see a bad speed test on Frontier’s blessed laptop while plugged into the ONT.

I’m never going to recall the exact order in which he tested things, but we tried a lot of configurations.

My laptop plugged directly into the ONT couldn’t do better than 30 megabits per second on the upload test. His laptop plugged into the Frontier router had just about as much trouble as I did with my speed tests.

It felt like we were making progress. He plugged the blessed laptop directly into the ONT, and everything was fine. We couldn’t reproduce the problem. He figured I had a bad router, and suggested I buy my own. He claimed the Frontier supplied routers—that I didn’t know were rented for $10 per month—are horrible.

I asked if he had another one of these routers in his truck, and he did. So we hooked it up. Guess what? He couldn’t get a good speed test on his blessed laptop through the second router.

At this point, my wife’s laptop, my laptop, the first Frontier router, and the second Frontier router were having trouble with the uplink when plugged into the ONT. Frontier’s magic laptop is the only one that worked, and it worked every time.

We were at the end of his road. There’s nothing more he could do. I told him I was going to go grab a spare router that was still connected to my network at our old place, but when that doesn’t fix the problem, where do I go next?

I couldn’t get an answer useful answer.

So after he left, I took a short drive to pick up my old D-Link DIR-860L. I was using it as a Wi-Fi access point, and I chose that router, because it is well supported by OpenWRT. I never did put OpenWRT on it, though!

My old $30 router worked fine for a few hours. Aren’t intermittent problems fun? When my uplink speeds fell under 1 megabit again, I turned to Twitter.

May 8: Contacted by an Account Manager on Frontier’s Social Media Team

The account manager seems like a great guy. I would never mention anyone by name in this post, but I’d say the same thing about everyone else I’ve dealt with. They all seem like good people, and they all seem like they want to help.

I don’t believe this is the fault of any of the lovely individuals I have interacted with. They just don’t seem to have the power to get my problem resolved.

May 9: I did lots of local troubleshooting, and spoke to my Account Manager on the phone

If I’m remembering this correctly, I had a weird pair of speed test runs. This has become my habit—running speed tests. I ran a test, and my desktop’s upload speed was well under 1 megabit. I almost immediately ran another test on my laptop over 802.11ac, and it was reasonably fast. I repeated the test on the desktop, and it was bad again.

Uh oh. Did I screw something up? I purposely tested the wiring from my home office to the wiring cupboard over the weekend. Everything should be working!

There’s a 5-port Gigabit switch in my office. There are a pair of 5-port Gigabit switches in my wiring cupboard. The router in the wiring cupboard has 4 Gigabit switch ports.

Every room in the house is wired with Cat-5e. I helped run all this cable in 2011!

I’m a fan of iperf. It is a client-server program used to test the raw throughput of your network. Copying files around is a great test, but it can be limited by disk speed or your file sharing protocol.

I have an Infiniband network in my office. I can’t saturate the link unless I run at least three or four parallel transfers of very large files at the same time. Iperf has no problem maxing things out. I can’t hit the 20 gigabit maximum speeds of my Infiniband ports, but I am right near the theoretical limits of my 4x PCIe 1.0 Infiniband cards—7.6 gigabit out of a maximum of around 8 gigabits per second.

I ran around the entire house with my laptop. I ran iperf tests on ports in almost every room. Every test allowed me to push 950 megabits per second in either direction between my laptop and desktop.

iperf gigabit test

For the final test, I plugged [my laptop][lt] directly into my D-Link router. The traffic to or from my desktop has to traverse the switch on that router if I’m talking to the Internet. My laptop could run perfect 950 megabit per second iperf tests without any issue.

I sent an email to my account manager explaining all of this, and making sure I reiterated everything we’ve tested so far. Three routers and two laptops have never seen reliable upload speeds. Only one laptop has appeared to work correctly—Frontier’s own laptop.

He emailed me back later that day to tell me that my upcoming technician visit on Friday was canceled. They believe the issue is the PON card, and someone will be working on that.

May 10: A second replacement router arrives

I don’t know which day the first replacement router arrived. I just put it off to the side. I figured I’d worry about sending it back when my issue gets resolved.

This tweet isn’t relevant, but I enjoyed it immensely.

On May 10, an extra replacement router showed up at our door.

May 12: I start posting daily updates on Twitter

If I’ve been counting, this was my 11th day since the installation of FiOS without a reliable Internet connection. I wish I had intermittent outages. Instead, I have intermittent bursts when things work somewhat well.

This is when other people begin taunting me with their FiOS and Google Fiber speed tests. I don’t want their 500 and 1000 megabit speeds. I just want reliable upload. Is that too much to ask?

May 13: I had to request an update

My account manager told me there was no change, but this time he said they were going to “add a gigabit splitter at the distribution hub.”

My job title hasn’t been Network Engineer in almost 15 years, but this didn’t make sense to me. This is a change. It sounds like a completely different issue than I was diagnosed with early.

I’m only getting a peek into the inner workings of Frontier’s FiOS network. It is like a black box from where I’m sitting. I can only troubleshoot so deeply, and I have to take their word for things.

May 17: Maybe it will be fixed in another week?

I’ve been avoiding copying direct quotes into this post. It just doesn’t feel right. I just don’t think I can summarize this email from my account manager.

I’m sorry to hear that. I’m thinking they should have this resolved fairly soon. If you’re not getting better performance by next Tuesday evening/Wednesday morning, I’ll run another ticket in for a status.

Wednesday morning will be May 23. That will be three weeks without a functioning Internet connection. Three weeks. I feel like I need to say that one more time. Three weeks.

May 19: Packing up Frontier’s hardware

It is the weekend, and I have some free time, so I started opening boxes from Frontier. I needed to get the return labels out of the boxes just so I could stick them right back on.

I also had a return box for the original router.

Remember that extra replacement router that arrived on May 10? It wasn’t a router. It was a set top box of some sort. We don’t have TV service.

There were no instructions for scheduling a pickup from UPS, so I asked about that on Twitter. Apparently, that isn’t a service they provide.

Frontier is happy to charge $10 per month for hardware that their tech’s claim isn’t worth using. They’re happy to send a replacement that I didn’t even need. They’re happy to send me a set top box that I can’t even use.

However, they want me to pay for the pickup or spend 20 or more minutes of my time making a round trip to the nearest UPS store. This is after all the time I’ve put into trying my very best to get a working Internet connection.

They said they forwarded my shipping complaint to my account manager. I’ll be genuinely surprised if he doesn’t make it right, but that’s beside the point. This shouldn’t be happening at all.

May 20: I’m about to publish this blog

I decided to run Frontier’s speed test again. My upload speed was a miraculous looking 156 megabits per second. Fantastic!

I immediately ran it again. This time it was in the mid-70s. I ran it a third time and got 10.5 megabits per second. The fourth test finished at 1.9 megabits per second.

It is too bad that it is a rainy Sunday afternoon. I’d rather be flying racing quads than working on this blog post.

May 22: FiOS still isn’t working

I am going to have to tether to my phone today to upload a five-minute video to YouTube. Usually if I leave the upload window sit around for an hour, I’ll eventually hit a spurt of working upload. Not today. You’d think I’d be able to stop wasting my mobile data like this after three weeks.

My account manager is going to send someone out to pick up the two routers and the set top box.

May 24: Lowering my maximum speed

My account manager suggested that we try dropping me down to 75/75 instead of 150/150. My friend Brian had 35/35 or 75/75 in this house a month ago, and it was working fine every time I used it.

The hope was that if the some piece of hardware can’t handle 150, it may at least handle 75. At first, it wasn’t going well. I was seeing 90/1 or less. A few minutes later, and I was getting some 90/50 and 90/80 or so runs on the speed test.

Then I got 0.3 megabits upload on a speed test. I kept testing while I was talking to my account manager, and it started doing well again. He was about to be leaving for an extended weekend, and he was going to set me back to 150/150 if it wasn’t working. I asked him to leave it at 75/75. It couldn’t be worse, but maybe it would be slightly better. Who knows!

I imagine the problem is that Brian was plugged into 100 megabit hardware on Frontier’s end, and they moved the fiber to a gigabit port (GPON) when I started my 150/150 service. I figure I’m hosed unless they either fix the unhappy hardware or move me back to a 100 megabit port (BPON).

May 25: Maybe better. Maybe the same.

I’ve spent a lot of time away from my desk today. I’ve gotten in the habit of immediately running a speed test when I sit down and posting it to Twitter. I forgot to do that today!

When I went to check, things were going quite well. Lots of 93/89 speed test runs. The worst I had before that was 90/10. Is my connection finally starting to work?

Nope. I just had a 91.3/0.5 megabit speed test. The first time I tried to tweet a screenshot, it timed out.

May 29: A tech is scheduled for tomorrow

We’ve officially hit the four week mark. My account manager called today to inform me that a tech will be coming out to move me to a different “gigabit splitter.” I assume this is some sort of passive optical device, but I didn’t ask for clarification.

My account manager seems like a really nice guy, and I think he’s doing everything in his power to help me. I have no reason to doubt that.

This is why I was afraid to ask a few questions. Why didn’t we do this three weeks ago? Is this the new gigabit splitter that was mentioned a few weeks ago? Even if we couldn’t move me to a new gigabit port or device, why didn’t they move me back to an older, slower BPON port?

At any rate, I hope this is all resolved tomorrow.

May 30: I didn’t mention the EIGHT HOUR window

That’s right. My account manager said the tech was scheduled today between 9:00 AM and 5:00 PM. Eight hours. I asked if they’d call, and he told me they would.

I was woken up by an automated call to remind me that I had a tech scheduled today. It told me in English, and then again in Spanish, and started telling me which buttons to hit if I wanted to cancel the tech visit. I didn’t want to cancel the tech visit, but I had to stay on the line just to make sure I didn’t also have to confirm that I still wanted the visit.

There was just something about the robot lady’s tone that had me worried that I would have press a button to confirm that I did indeed still want a tech to come out. Having her repeat everything in a second language made the call take twice as long. I didn’t need this call at all. I was up late last night. I could have used more sleep.

I require functioning Internet access more than I require sleep.

The tech arrived around 12:30 PM or so. He messed around by the ONT, then asked me to unplug my router while he drove off to nearby remote CO—they don’t use the term remote central office for these boxes anymore, but I’m old, and I don’t know any better.

My FiOS connection is currently working great. He explained everything that he did, and I am going to do my best to repeat what he told me. My apologies if I’ve remembered any of this incorrectly!

He moved me from an older, congested Alcatel gigabit splitter to a newer Motorola splitter. He said I’m the second person on the Motorola splitter. I am assuming this is the gigabit splitter my account manager was talking about on May 13.

As I said, everything is working. I’ve been seeing better than 160/160 every time I run a speed test. Speedof.me even managed to reach 165/183!

I need to document this on my blog

Nobody reads my Twitter feed. I only have about 1,000 followers. Hardly anyone will see my daily FiOS connectivity updates, and in a few weeks, those tweets will be buried in the past.

People actually read my blog. Hundreds of people visit my blog every single day. Most of you arrive via search. I’m confident that when folks search for “Frontier Sucks” or similar phrases, they will see this page in their search results.

My struggle with Frontier will be here forever.

Time invested

Here’s a list of the time we’ve spent working with Frontier. It isn’t exhaustive, but it does have most of the major points.

  • Three phone calls just to get our installation scheduled (30 to 60 minutes?)
  • Showing the installer around so he could work (15 minutes)
  • Chatting with support and running around the house (2.5 hours)
  • Working with the second tech (at least 1 hour)
  • Working with the third tech (2 to 3 hours)

We have spent 6 to 8 hours of our time working with Frontier to get them to believe me that we have a problem, and getting them to actually work on that problem.

That’s an entire business day. Holy shit, right? I don’t even know what to say.

I don’t work a 9 to 5 job anymore. How many blog posts could I write in those six hours? How many times could I have taken my quads to the park for some flying? How many times could I have gone out to dinner or just hung out with friends?

I place a high value on free time, and I haven’t had as much as I’d like this month. We ordered new FiOS service, because we moved into a new house. You can imagine what that entails. Unpacking, setting up your utilities, unpacking, arranging furniture, unpacking, hooking up your washer and dryer, and unpacking. We’re still unpacking.

I’m not sure about everything I want to express in this section. I just thought it would be a good plan to tally up the big blocks of time my wife and I have wasted on this.

Why am I sticking with Frontier?

Frontier provides the best, most reliable Internet connection in my neighborhood. There is no worthwhile competition. In fact, my friends from out of town are always envious. They want symmetric service like I have. Google Fiber and other initiatives have made FiOS a bit less impressive, but it is still light years ahead of most of the United States.

My only other real option is a cable modem from Spectrum. We’ve been using Spectrum for years at my local makerspace. They have business class service, and it is is stupidly expensive—at least it was for the first two years. I believe they’re paying 200/20.

Spectrum has a 940 megabit plan for a very reasonable price, but I couldn’t find their advertised upload speed anywhere on their site. Some other Google search results suggested that it might be as low as 45 megabits per second. I need more upload speed.

If you’re at TheLab.ms’s weekly Video Game Night, and you join in for some online Rocket League, you’ll know just how bad Spectrum’s service is. The game will constantly drop connections. Your opponents on the Internet will be warping all over the place half the time.

When I take my laptop to TheLab.ms, I just tether to my phone. It is so much more reliable.

When FiOS works, it works great. Unfortunately for me, it has been like pulling teeth trying to get a working connection at my new home. It is frustrating and disappointing.

Conclusion

Everything is working now, and I am hopeful this trend will continue. It took 29 days to resolve my problem. That’s way too long. Ridiculously long.

My wife had to make three separate phone calls before she could convince Frontier that our address existed and that we were in their service area.

I had to work so hard just to get a working Ethernet connection from Frontier. There have to be errors or dropped frames showing up on an interface somewhere. I’m amazed that this isn’t something Frontier can immediately diagnose.

The technician that replaced our ONT spent at least two hours at my house. I had to spend that time just helping him convince his next level of support that I had a problem somewhere outside of my home.

From there, it only took three days for my account manager at Frontier and I to convince the right people that there was indeed something wrong.

To get from knowing definitively that there was a problem on Frontier’s end to getting the problem resolved took 20 days. Yes, 20 days.

As I said in the opening paragraphs of this blog post, I have been a happy FiOS costumer for at least six years. We’ve lived through a month of terrible customer service. It is inexcusable, but now that everything is working, I don’t expect to have any serious issues for at least another six years.

Was it worth the wait? I’m not sure. In hindsight, if I’d known this was going to take 29 days to install FiOS in my new home, I would have ordered Spectrum’s 940 megabit service. In the long run, I’ll be happier with symmetric FiOS service, but it has been an infuriating four weeks!

Have you experience similar problem with Frontier’s support? I’d enjoy hearing your stories in the comments below!

My Leader 120 Micro FPV Quad - Four Months Later

| Comments

I feels like I’ve been flying the Leader 120 for a long, long time. I checked the date on the first blog post I wrote about the Leader, and it was dated February 22. That didn’t seem right, so I checked my order history. I ordered my Leader 120 on December 20. I ordered one for my nephew on January 5—about the same day mine arrived.

I have two reasons for writing a follow-up post today.

My Leader 120 Micro FPV Quad

It looks like I’m about to reach my four month anniversary with this little guy. That’s a reasonable amount of time to let you know how durable the Leader 120 has been.

And last week, I thought I flew my last battery through my Leader 120. It wasn’t irreparably damaged, but it was showing enough minor problems that I thought it would be time to replace and upgrade some key components. Upgrade to a Tooth Fairy frame that could fit a Runcam Micro Eagle. Upgrade to a Runcam Micro Eagle. Upgrade to a 200 mw VTX.

What was wrong with my Leader 120?

The battery that I thought was my final battery was epic. It was the best flight I’ve ever had on my Leader 120. I was power looping multiple trees at the same time, then immediately lining up a few gaps, and then lining up passes through The Lady Tree. It was awesome! I usually have to cut out the boring parts of these videos, but this was three continuous, interesting minutes of flight!

This is the smoothest I’ve ever gotten the Leader 120. I upgraded from the generic 2.8” props to Gemfan 2540 props. That alone made the Leader smoother and more responsive. I also upgraded to Butterflight, and I messed around with filters until I could disable as many filters as possible. I’ll go over those details later.

What have I broken? The 3D printed camera mount cracked on one side, the VTX often cuts out at full throttle when the battery is full, and I found three nylon screws with their heads popped off.

Be sure to keep an eye on your nylon screws. With these screws broken, the only thing holding my carbon side plates in place was the camera mount. That’s why my camera mount broke!

I should also mention that I bent one of the Leader 120’s arms back in February. Something went wrong at the top of a power loop, and I fell from the sky and landed on a sidewalk. I bent the arm back into place, and it has been flying just fine ever since!

What went wrong at the top of the power loop? I had my minimum motor speed set too low. It shipped with an 8% minimum, and that feels extremely high. If you fly inverted, it seems like the Leader 120 is accelerating towards the ground.

If the minimum throttle is too low, the motors won’t always spin back up in time. I thought I had a good minimum set, but it was too low. That’s why I fell out of the power loop. I currently have my minimum throttle set to 6.5%. It is a lot easier to do inverted moves with this setting, and I haven’t had any flips of death.

How did the repairs go?

I replaced the broken screws and glued the camera mount back together. That’s it. It was easy. It is holding together well, and I expect to get another four months out of the repairs!

The VTX is still acting up. You can see it in the first power loop in the video above. It seems like the VTX is rebooting when I go full throttle. It only happens when the battery is fresh. I don’t have an explanation for that, but I’m going to live with it for now.

What’s this talk about Butterflight?

I’ve been itching to try Butterflight, so I decided to try it on my Leader 120. That went well enough that I installed it on one of my 5” quads, and that went so well that I installed it on all my quads. My first day with Butterflight wasn’t fantastic, though.

I started my journey by bumping the PID loop up to 8k/8k. I was impressed that the F3 flight controller in the Leader 120 could manage that. I had to turn off the dynamic filter to free up enough CPU to do that. I thought this would be a good choice, but it wasn’t.

I tried tweaking all sorts of things from the Butterflight Lua script on my Taranis that first day, but I just couldn’t get rid of the oscillations. I tried more filtering. I tried less filtering. I tried all sorts of Q and R values. I just couldn’t make it fly as nice as my Betaflight 3.2.5 tune.

How can I run 8k/8k and the dynamic filter?

This was problematic on this tiny F3 flight controller. I turned on the dynamic filter, and my CPU utilization was through the roof. What could I disable to bring my CPU utilization down from the stratosphere?

The most obvious thing to disable was the accelerometer. That wasn’t enough. Then I thought about dropping from Dshot600 to Dshot300, but I didn’t like the idea of adding to my quad’s latency.

What about Multishot? It is faster than Dshot600, but should require less CPU. In fact, it requires a minuscule amount CPU power. Multishot is so friendly to the CPU that I could probably turn the accelerometer back on. I didn’t, but I could.

The only thing I’m giving up is turtle mode, but I have never successfully turtled the Leader 120. It is always embedded in the grass, and it just can’t get up.

If you switch from Dshot to Multishot, don’t forget to calibrate your ESCs!

Would you still buy the Leader 120?

Absolutely. It is a tremendous value. It is about $90 from Gearbest or $120 from Banggood. It is a great deal at either price.

I spend most of my time flying 5” or 5.5” miniquads, but I bet I fly the Leader 120 at least once a week. Sometimes I’ll just fly one battery. Other times I’ll burn through all six. It depends on my mood and it depends on what’s going on at the location.

If there are lots of random people around, I’m more likely to fly the micro quad. It is less noisy. It won’t scare anyone. It won’t do any serious damage to anyone.

I’d be surprised if I have run fewer than 100 batteries through my Leader 120.

2S or 3S?

I started flying my Leader 120 with 550 mAh Infinity 2S LiPos. I already had six of them for my KingKong 90GT. The Leader was fun to fly on 2S. It was pretty quick and nimble, but it didn’t really have enough thrust to pull off anything too acrobatic. It was very difficult to manage to pull up at the very last moment. I hit the ground a lot!

I ordered 550 mAh 3S Infinity LiPos, and you should, too. It is so much more fun on 3S. So far, we’ve clocked the Leader 120 at 67 miles per hour with the radar gun. I’m confident that I can break 70 with the Gemfan 2540 props.

I run my batteries down to 3.5 volts per cell, and I usually get five minutes out of a 3S pack. It has tons of power, and it is tons of fun.

My Butterflight settings

I have no idea if I’m doing this correctly. I most definitely have absolutely no idea how to correctly tune the Q and R values—I can say with absolute certainty that plenty of people could tune this better than I can! I just went out to the field, and I tweaked the Q and R values using the Butterflight Lua script until I liked the way my Leader 120 felt.

If my understanding is correct, my Q and R values make no sense with an 8k/8k PID loop, but I have trouble arguing with the results. Here are the relevant parts of my configuration.

1
2
3
4
5
6
7
8
9
10
11
12
13
14
15
16
17
18
19
20
21
22
23
feature ANTI_GRAVITY
feature DYNAMIC_FILTER
set gyro_filter_r = 200
set acc_hardware = NONE
set baro_hardware = NONE
set pid_process_denom = 1
profile 0
set dterm_notch_hz = 0
set dterm_notch_cutoff = 0
set vbat_pid_gain = ON
set anti_gravity_threshold = 300
set anti_gravity_gain = 3500
set setpoint_relax_ratio = 50
set dterm_setpoint_weight = 75
set p_pitch = 33
set i_pitch = 36
set d_pitch = 34
set p_roll = 31
set i_roll = 36
set d_roll = 31
set p_yaw = 110
set tpa_rate = 35
set tpa_breakpoint = 1280

As I said, I am running Gemfan 2540 props. My Leader has always been a fun quad, but it has never been this smooth and responsive before!

Conclusion

The price of the Leader 120 seems to be increasing. Four months ago, paying $85 for a Leader 120 seemed like a good risk on an unknown micro quad. I don’t know that I would have bought one for $120 at the time.

Knowing what I know today, though, I believe the Leader 120 is still a good value at $120. It is quick, but not scary. It is reliable. It is a ton of fun to fly.

My Leader 120 FPV Micro Quad

The Leader 120 easily meets all of my minimum requirements for an FPV quad. The flight controller is fast enough for an 8k/8k PID loop, it has the Betaflight OSD, it supports telemetry and the Betaflight/Butterflight Lua script, and it can run Dshot600 or Multishot.

Do you have a Leader 120 or one of its competitors? What do you think of yours? Have you tried Butterflight? Let us know in the comments, or join us on our Discord server!

Eachine Q90C Flyingfrog - Your Gateway to FPV

| Comments

I ordered the Eachine Flyingfrog three months ago. It looked like an interesting package. For about $90, you get everything you need to get a taste of flying an FPV quadcopter. There’s a brushed-motor quad, a remote control, and a set of FPV goggles. You even get a battery and a simple USB charger.

I’ve been carrying this box around in my car for weeks, but I keep forgetting to give it a try. I recently added a Ryze Tello photography drone to my oversized backpack. These two drones are trying to meet different needs, but there will be some overlap for some people. Even though they are meant to serve different purposes, there are two obvious similarities. They both use 8520 brushed motors, and they are both priced at around $100.

You won’t be doing any photography with the Flyingfrog. A lot of people seem to think they’ll have fun flying their Tello in FPV using their phone. If you’re more interested in flying FPV than taking pictures, you’ll have a lot more fun with the Flyingfrog.

It will be a while before I collect enough photos and video to decide if the Tello is worth the price, so I figured I should write about the Q90C Flyingfrog first!

You get what you pay for

I’m going to get this part out of the way. The experience isn’t great. The goggles work, but the screen is tiny and difficult for me to focus on. The remote control works, but they have a huge dead zone near the center of the sticks.

It isn’t like flying a proper FPV racing or freestyle quad. I’ve flown several micro quads with brushed motors just like the Q90C Flyingfrog, but I flew all of those other brushed quads with a $200 radio. There are no dead zones on Taranis or Spektrum radios. As an experienced FPV pilot, the dead zones on the Flyingfrog’s remote control are infuriating.

You still get a lot for your money

I started flying FPV quadcopters more than a year ago. At the time, all the veterans told me how good I had it. I only had to pay $200 for a radio, $100 for a set of entry-level goggles, $250 for an overpowered bind-n-fly racing quad, $50 for a charger, and $25 per battery. It was so much cheaper than when they got into the hobby two years earlier.

That was still over $600 just to get in the air. Things have improved since last year. You can probably get in the air today with a BFight 210, a Taranis Q X7, and a $50 set of box goggles for well under $400. The BFight 210 is an excellent quad at an amazing price.

That’s still three or four times more money than the Eachine Flyingfrog, and that $400 only gets you entry-level gear. Do you want to spend $400 just to learn whether you’re interested in the hobby?

Even with its faults, I think the Flyingfrog is an excellent way to try FPV. Let’s talk about what’s in the box.

The goggles

Why am I talking about the goggles first? If you decide that flying FPV quadcopters is a fun hobby, the goggles are the only thing in the box that you will be able to use with your future quadcopters.

The goggles work surprisingly well. They’re the smallest set of box goggles I have ever used, but they also have the smallest screen. They have an internal battery that charges over USB. They are standard 5.8 Ghz analog FPV goggles.

I can definitely fly with these goggles. The reception is surprisingly good, and I have even flown one of my most expensive FPV quads with them. They work fine, but I switched back to my Fat Shark goggles as soon as I verified that the Eachine goggles work!

If you do get into the hobby, you’ll definitely want to upgrade the goggles. That said, though, you could most certainly limp along with these goggles for your first few months. You’ll also be glad you have a spare set. They will make an excellent set of spectator goggles.

The Q90C Flyingfrog quadcopter

The Flyingfrog is an overgrown Tiny Whoop. It is a bit large for flying indoors, but that didn’t stop me from trying. It has enough power to fly outdoors on a breezy day, and it can manage to do some simple acrobatics.

The Q90C has props guards, and I would highly recommend using them indoors. The trouble is, the prop guards are way too fragile for a quadcopter this heavy. I don’t even think mine has been in the air for 30 minutes yet, and I’ve already broken two.

It works a lot like our full-size miniquads. It can fly in angle, horizon, or manual modes. In angle mode, the quadcopter will level itself, and it will only tilt to a limited angle. Beginners usually prefer this mode—if you get in trouble, just let go of the left stick and the quad will flatten itself out.

If you want to do acrobatics, you’ll want to fly in the Flyingfrog’s manual mode. Manual mode is equivalent to Betaflight’s rate mode. That means you have to keep the throttle above zero during acrobatic moves—even when you’re upside down! Most pilots use Betaflight’s air mode so we can drop our throttle all the way and still have a responsive quadcopter.

This is difficult for me to get used to, and this is why I fell out of the sky in my video when trying to do a power loop!

The radio

We refer to it as a “radio” or “transmitter”. You might call it a remote control. It is the thing with the sticks that allows you to control your quadcopter.

The Q90C radio feels terrible. For the price, though, I find it difficult to complain. It has huge dead zones at the center position of each stick. When you’re trying to perform delicate maneuvers, you’ll push the stick slowly, then all of a sudden the quad will respond to your input more rapidly than you intend.

This makes it difficult to fly with precision, but the Flyingfrog isn’t exactly a precision machine. It is a toy meant to give you a taste of what it feels like to fly a real FPV racing quad. It does that job well enough. If you’ve never flown before, you’ll probably get used to it quickly.

Flying in the simulator

This is probably the best part about the Flyingfrog. You can use the included hardware to fly in most FPV simulators!

Setting it up is a bit convoluted. You have to plug the Flyingfrog quadcopter into your computer. Then you hit the CH/GAME button on the remote control. It should be detected as a USB joystick.

I tested it in the Liftoff simulator running on Linux. Everything worked just fine.

The simulators are awesome. For Christmas, we got my 13-year-old nephew a 5” BFight 210, a Taranis X9D+, and everything else he would need to fly FPV. We put him in the simulator for an hour or so two days in a row. We took him out to the park, and he flew around the big, open field.

That night, we let him practice flying through race gates in Liftoff. The next day, he was flying through our race gates with his real quad. It took me a month of real-world practice to do that without having a simulator.

If you can fly well in the simulator, you are probably ready to fly a real racing quad!

What is the upgrade path?

I firmly believe practicing in the simulator is the fastest and cheapest way to learn to fly. Being able to use the Eachine Flyingfrog’s controller in the simulator is a good first step, but you will quickly hit a wall. Even if you could manage to get used to the dead zones, the stick gimbals are quite awful anyway.

The first thing you should do is upgrade your radio. You’ll want to upgrade to something you can use with all your future quadcopters. You should definitely get a FrSky radio. I am a fan of the $190 Taranis X9D+, but the $110 Taranis Q X7 is also a fine radio. You can plug either of these radios into your USB port to use with the simulators. They are the radios of choice for most FPV racing and freestyle pilots.

Once you’re ready for a full-size miniquad, there are a lot of options. I’ve already written about two of them. You can build your own, or you can buy something that has already been assembled. The parts are comparable. It is a lot like the difference between buying a computer or building your own.

My friends and I are all fans of the BFight 210. I’ve written about it several times. At around $140, it is quite inexpensive, but you get a lot for your money. It flies great out of the box, and it is light for a 5” miniquad. My friends regularly get 9-minute flights out of theirs. Even if you are heavy on the throttle, it is tough to get less than 5 minutes out of a single battery.

Most experienced pilots build their own quads. You’re going to be spending time repairing them, so you may as well build exactly what you want. I wrote about my 5S quadcopter builds for 2018. Those two quads are fairly high-end, and extremely durable. You can build something like that for around $350. You can spend more. You can spend less. It just depends on what your goals are!

You could also stick with micro quads. Brushless micro quads are finally starting to feel and fly very much like a full-size miniquad. I carry a Leader 120 in my backpack. It is priced at about $90—same as the Flyingfrog kit, but it doesn’t come with goggles, transmitter, or receiver. It is a fantastic little quad. I’d pay quite a bit more than $90 for it, but it is awesome that I didn’t have to!

Other alternatives

I was talking to my friend Mike. He borrowed my Flyingfrog and Ryze Tello for a Boy Scout event. When he stopped by to pick up the gear, we chatted about other alternatives.

Maybe you don’t want to get straight into FPV. Most of us started our journey flying toy drones line of sight. Mike recommends the SYMA X5C-1 from Amazon. For less than $60, you get a relatively large quadcopter, a couple of batteries, a controller, and some spare props. That’s everything you need to get started and keep flying for a while!

The SYMA drone is too big to fly indoors. If you want a cheap, indoor toy, you should be looking at the Eachine E010. For around $13 shipped, you’ll have everything you need to get flying. The Eachine E010 is a clone of the Blade Inductrix. It doesn’t have enough power to fly outside unless it is a completely wind-free day, but it is fantastic for flying around in the house!

I’ve not flown the Eachine branded model, but I have flown toy drones that look identical. I imagine they come out of the same factory. They fly just fine, but you get what you pay for. That said, they’re cheap enough that you can buy one for everyone in the family!

If you don’t want to wait for the $13 quadcopter to arrive from China, the JJRC H36 Mini Drone at Amazon looks identical to the Eachine. It is currently $20 with Prime shipping.

Eachine also has a Flyingfrog-style combo package—the Eachine E013, but it includes a Tiny Whoop clone instead of a Flyingfrog. I haven’t tried it, but Stew at UAVFutures says it is pretty good. I assume it is comparable to my Flyingfrog. It is also $30 cheaper than the Flyingfrog!

I like the lower price, and if you want to fly indoors, the Eachine E013 is probably a better fit than the Flyingfrog. Unfortunately, it doesn’t look like the E013 can be used to control a simulator.

Conclusion

If you haven’t flown an FPV quadcopter, the Eachine Q90C Flyingfrog is an inexpensive way to test the waters. Before I got into FPV, I had a $230 Spektrum DX6 radio and a $60 Blade Nano QX. I had no camera and no goggles. The only advantage I had with that setup over the Flyingfrog was the high-quality radio.

The Spektrum radio was a huge advantage, but I would have happily given that up at the time for FPV—especially if I got to keep the other $200 in my pocket!

If you want to try FPV, it is hard to beat the Eachine Q90C. You can spend $90, and be flying around your back yard or a park in no time.

How did you get started in FPV? Do you agree that the Eachine Flyingfrog would be a good way for a newbie to test the waters? Do you have a better idea? Let us know what you think in the comments, or join us on our Discord server!

My Favorite Lens - The Tamron F/2.8 28-75mm

| Comments

It has been almost two years since I bought my first DSLR—a used Canon XSi. The first upgrade I bought was a Canon 50mm f/1.8 prime lens. Being able to use such a huge aperture on that ancient camera was a fantastic upgrade. It wasn’t much later that I discovered the Yongnuo 35mm f/2 lens. It was just as good as the Canon 50mm, but it was a much more appropriate lens for me to carry with me.

It was the correct lens more often, but there were still plenty of situations where I needed a longer lens. I did some research, and I found the Tamron F/2.8 28-75mm. It covers more than the range of my prime lenses in both directions, the aperture opens nearly as wide, and a used Tamron 28-75mm doesn’t cost much more than my two prime lenses. Were the prime lenses a mistake?

NOTE: I haven’t searched through thousands of photos to find the very best in my collection. These are just photos that I like, and that I enjoy. Most of them were used in other blog posts!

Yes, the prime lenses were a mistake. Sort of.

I like having the prime lenses in my bag, but I rarely use them now. I can’t even tell you when I last had one on my camera. I do sometimes miss the size and the weight savings, but the Tamron 28-75mm is much more versatile, and F/2.8 is close enough to F/1.8 most of the time. In fact, F/2.8 is often way too wide open on my current camera—a full-frame Canon 6D.

I learned a lot shooting with the primes, but I’d recommend that you skip the prime lenses and jump straight into the Tamron F/2.8 zoom lens.

Brian Moses at Beer Brewing Night

I already wrote quite a bit about my two primes. If you still want a prime, here’s the short version of my advice. Buy the Yongnuo 35mm f/2.0 for a crop-frame camera or the Yongnuo 50mm f/1.8 for a full-frame camera—in those conditions, they have roughly the same effective zoom.

But this Tamron lens doesn’t have image stabilization!

I know. There are comparable lenses that have stabilization, but they cost quite a bit more. The rule of thumb is that you can take a stable shot if your shutter speed is the inverse of your focal length. That means you should be capable of taking a steady shot at 75mm with a shutter speed of 1/75.

This only starts to get problematic in dim lighting. It was rare that I longed for image stabilization with this lens on my old Canon Rebel XSi, and the lighting would need to be extremely dim to prevent me from getting a shot with my Canon 6D.

BFight 210 Racing Quad

I took this into consideration when I was buying this lens. I knew image stabilization would buy my two or three stops. I also knew that a camera upgrade would get me at least two or three stops worth of usable ISO. I figured the extra $500 would be more valuable to me on my next body.

This worked very well for me. Your situation my be different, so your mileage may vary!

The Tamron F/2.8 28-75mm on a crop-sensor camera

The Tamron F/2.8 is a full-frame lens. You can use full-frame glass on a crop-sensor camera, but that doesn’t always work in the other direction. I tried to future proof as much as I could, so I was only shopping for lenses I could use on my eventual full-frame camera.

When I was shooting with my crop-sensor Canon Rebel XSi, I felt like the Tamron zoom lens was all I’d ever need. Crop-frame cameras enlarge your photos by about 60%. Their smaller sensor can’t see all the light coming in—they effectively ignore some of the light that would hit a 35mm sensor.

That extra zoom makes 75mm feel like 120mm. That’s not exactly telephoto territory, but it sure brings things in much closer than the naked eye. You can easily shoot on the other side of the street.

The Tamron F/2.8 28-75mm on a full-frame camera

The Tamron 28-7mm zoom is still my favorite lens. In fact, it spends most of its time mounted on my Canon 6D. It is a fantastic lens for shooting indoors. I can use it for taking close-up shots of small, inanimate objects, and it is a reasonable portrait lens when zoomed to 75mm.

My only complaint since upgrading to a full-frame camera is that I had to buy a lens to supplement my Tamron zoom lens. Full zoom on the 28-75mm with the Canon 6D is an awful lot like shooting with a nifty-fifty on a crop sensor. That’s about as far as I need to zoom when I’m indoors, but I surely can’t get a good shot of something on the other side of the street!

Long Exposure Bus

It is actually quite rare that I shoot outside, but I decided to add a telephoto lens to my bag. I ended up buying an ancient, used Tamron f/4.0-5.6 70-300mm lens. I wasn’t careful, and I believe I ended up with a pre-DSLR lens for film cameras! It does a fine job on a sunny day, but it works best if you keep the aperture wider than f/8.

Would you still buy the Tamron f/2.8 28-75mm for a full-frame camera?

Yes. I believe I still would. The Canon f/4 24-105mm would be a great upgrade, but it also costs a lot more than the $250 I paid for my used Tamron. I could buy a lot of interesting toys with the money I saved.

Canon 6D vs. Sony a7s

That said, you may shoot differently than I do. If I spent most of my time shooting on the streets, I would find the extra 30mm to be invaluable. For my uses, 75mm is more than enough to shoot people that are less than 20 feet away, and I’d hate to give up the f/2.8 of my Tamron zoom lens!

Conclusion

I have been shooting with my Tamron f/2.8 28-75mm lens since May 2016, and I’ve been using it on my Canon 6D since September 2016. In that time, it has rarely been removed from my camera. My wife took her Canon 60D on a week long trip once, and I let her take the Tamron with her. I felt lost several times that week. I was probably only shooting here at my desk for the blog, and I was using my Yongnuo 35mm prime. It is a fantastic lens, but it felt weird having to use it!

If I lost this lens, I would buy another in a heartbeat. I would go straight to Amazon and order one with zero hesitation. It is versatile, sharp, and the price is unbelievable.

Do you own a Tamron f/2.8 28-75mm lens? Do you own one its competitors? Let us know what you think of it in the comments!

Failing to Extend the RAID 10 on My KVM Server

| Comments

When I built my homelab server in 2015, I built it with future upgrades in mind. Since it was acting as my home NAS, room for more hard drives was important, and I chose a case with plenty of 3.5” hard drive bays.

Netflix, Hulu, and other streaming services have greatly reduced my storage needs. Last year, I had nearly a terabyte of free space on my NAS. The fastest-growing part of my collection of important data was the raw photos from my Canon 6D. I seem to take about 80 GB each year, so I assumed my first hard drive upgrade would be at least three or four years away.

Then I started flying FPV quadcopters. Last year, I recorded 209 GB of FPV quadcopter video. Most of that was low-bitrate, standard-definition DVR video recorded on my goggles. Last month, I started capturing FPV footage with a GoPro HERO5 Session. Those video files are much bigger, and I’ve already collected 151 GB of video this year. I won’t be surprised if I end up with 100 GB of video each month!

I bought another 4 TB 7200 RPM disk for my KVM server. That will give me an additional 2 TB of storage.

How many disks are currently in your RAID 10?

There are two disks in my RAID 10. Linux’s software RAID allows RAID 10 arrays to have just two disks or even odd numbers of disks.

I could have created a RAID 1 with those two disks, but that complicates adding additional disks. You can add a third disk to a RAID 1, but it won’t increase your available space—it will increase your redundancy with a third copy of your data.

If you have a RAID 1, and you want to increase your available storage space, you will have to use another pair of disks to create a mirror. I didn’t want to have to buy my disks in pairs.

With my two-disk RAID 10, I can install a third disk and extend my array. Linux’s software RAID 10 implementation will make sure there are two copies of every block spread across all three disks—two copies of each block spread across as many disks as you have in the array!

What’s involved in adding another disk to a RAID 10?

It is pretty simple, but there are quite a few layers involved.

  • Partition the new disk
  • Add the new partition to the RAID 10
  • Extend the LVM Physical Volume (PV)
  • Extend the LVM Logical Volume (LV) where my qcow images reside
  • Grow the file system that resides on this LV

That will take care of the KVM host, but it won’t do anything to directly address my lack of storage in my NAS virtual machine. I will also need to grow the NAS virtual machines’s qcow image.

  • Resize the NAS qcow image
  • Grow the NAS’s EXT4 file system to match the larger qcow image

I hit a road-block

This was supposed to be a straightforward blog post. Adding a disk to a RAID 10 is simple. I’ve done it before. No problems. This time, though, I seem to have outsmarted myself. I managed to get to the “Add the new partition to the RAID 10” step when I encountered a problem.

1
2
3
4
5
6
root@kvm:~# mdadm --add /dev/md1 /dev/sde1 
mdadm: added /dev/sde1
root@kvm:~# mdadm --grow /dev/md1 --raid-devices=3
mdadm: Cannot reshape RAID10 in far-mode
root@kvm:~# mdadm --grow /dev/md1 --layout=n
mdadm: Cannot reshape RAID10 in far-mode

I intentionally created this array using far-copies for the increased read performance. I didn’t know that it would take away my ability to reshape the array!

What to do next?

This should be easy to remedy, because I am running LVM on top of my RAID 10. I just need to migrate the data off the existing array, recreate the array using near-copies, then migrate the data back. LVM will do all the heavy lifting for me without any downtime outside of the hardware swap.

I have enough free disk space to make that happen right now. My two-disk RAID 10 is the same size as my new, single 4-TB drive. I could add that 4-TB drive to the Volume Group (VG), remove the RAID 10 from the VG, and then recreate the RAID 10.

I’m not brave enough to do that. I don’t have a lot of trust in a single, brand-new hard disk. I’d feel much more confident using a mirrored pair of disks as my temporary storage.

I asked my friend Brian if he had any spare 4-TB drives around. He is the NAS guy, so he usually has spare parts sitting around. I figured it’d be easier to borrow a drive from Brian than order another disk. It won’t actually be easier, but it’ll save me a few bucks, and it’ll be an excuse to write another blog post. That’ll have to do.

RAID is not a backup!

I try to say this as often as I can. RAID helps you prevent downtime. RAID may increase your disk throughput. RAID is not a replacement for backups.

Your RAID will probably protect you from a disk failure. It may or may not protect you when two or more disks fail. In fact, you may very well lose another disk when the array is rebuilding.

Your RAID won’t protect you from ransomware. It won’t protect you from accidental file deletions. It won’t protect you if you save corrupt data over an important file.

I have good backups, so why am I worried about using a mirror as temporary storage for this data migration?

Pretty much everything in my home directory is synchronized almost instantly to the cloud. My blog posts, my shell scripts, and even my save games are synchronized to my Seafile server.

Until recently, the largest files I had to regularly back up were the raw photographs from my Canon 6D. That adds up to less than 100 GB every year. All those raw files are stored in the cloud, on my laptop, and on my NAS.

Now I fly FPV quadcopters a couple of times a week. Every time I go out now, I come home with around 20 GB of GoPro footage.

Is this footage worth backing up? Almost definitely not. Just browsing through yesterday’s video is a time-consuming process. The older these videos get, the less likely I am to use them. Once I’ve compiled a video and uploaded it to YouTube, I don’t think I’ll ever touch the original video files again.

I’m not syncing these videos to the cloud, but I’d prefer not to put them in jeopardy on purpose.

I’d also be bummed out if I had to restore all these virtual machines. A little extra work up-front may prevent a whole bunch of problems later on!

Conclusion

I’ll get back to this in a few days. Brian used this as an excuse to upgrade his personal NAS to 8-TB disks. His 8-TB drives will be here soon, and I’m sure he’ll start the process of upgrading shortly after they arrive.

In the mean-time, I’m going to zero out the new drive and see if it gives me any problems! Once the drive arrives, I’ll document the process of juggling Physical Volumes (PVs). Once that is done, I should be able to document the process I was hoping to run through in this blog post!

1
2
root@kvm:~# dd if=/dev/zero of=/dev/sde1 bs=1M status=progress
1333833760768 bytes (1.3 TB, 1.2 TiB) copied, 7171.01 s, 186 MB/s 

This is the part where I usually ask my audience a question, but I don’t have a good question this time. If you have questions about any of this, please leave a comment below or join our Discord server!

IP Over InfiniBand and KVM Virtual Machines

| Comments

Two years ago, I added InfiniBand cards to two machines on my home network, and it was a very inexpensive upgrade. My raw network throughput between these two machines has increased from 1 gigabit per second to around 6.5 gigabits per second, and the two cards and one cable cost less than $60.

I’m not seeing the full 20-gigabit speeds that these cards should be capable of maintaining, because I only have 4x PCIe slots available in these two computers, and the older, more inexpensive cards operate at PCIe 1.0 speeds. If I had 8x PCIe slots, the speeds of these cards should double, and more expensive InfiniBand cards support PCIe 2.0.

IPoIB InfiniBand iperf Bandwidth Test

I’m quite pleased with my results, though. My Samba sequential throughput tops out at around 320 megabytes per second. This is a limitation of my low-power server and Samba’s single-thread-per-client limitation—faster InfiniBand cards wouldn’t change that. I can usually double that throughput when running three or more file transfers at the same time.

Why am I writing this two years later?

I’m not. Most of this blog post has been sitting in a draft for two years. I’m just fact-checking and adding a few closing paragraphs today. I’ve done a bad job here.

I don’t just write these blogs for you. They’re also documentation for my future self. If my KVM machine with InfiniBand burns down in a fire, I know I could get a new machine up and running. I ran into minor issues when I got this all set up the first time, and if I don’t document this, I’ll most likely run into the same problems again!

Limitations of IP over InfiniBand

You can run IP over InfiniBand, but that isn’t what it was designed for. It works great, but it operates at layer 2—that means you can’t bridge over the InfiniBand interfaces. This isn’t a huge problem, but it does require more effort than when you’re using something like 10 Gigabit Ethernet.

I ended up creating two new private subnets for my InfiniBand network—one subnet for the physical hosts to use, and another subnet on a virtual bridge for the KVM virtual machines. The routing between those subnets should have been easy, but I had trouble getting good speeds.

To get great speeds out of IP over InfiniBand, you need to set the MTU of each interface to 65520, and you can’t miss any interfaces. I had trouble setting the MTU of the bridge device. You can’t set the bridge’s MTU when there are no interfaces connected to it, and I couldn’t set the MTU of the bridge to 65520 until I connected a virtual machine and set the virtual machine’s MTU to 65520. This is fun, right?

What about Ethernet over InfiniBand? (EoIB)

Ethernet over InfiniBand would solve all my problems, but it would create new difficulties.

When I set this up two years ago, all of the EoIB implementation was maintained outside. This wouldn’t have been convenient for my setup. There are only two InfiniBand devices on my network, and one of those is my desktop computer. I often run bleeding edge kernels with scheduler patches on my desktop. Would they be compatible with the current versions of the EoIB modules? Probably not.

Some quick searches on Google lead me to believe that this may no longer be the case, at least if you’re running RHEL or Centos.

Why not skip this nonsense and use 10gbe?

I convinced my friend Brian to go the 10-Gigabit Ethernet route. His pricing says he can do two cards and a cable for less than my InfiniBand setup, and he’s getting a solid 9.8 gigabits per second and Samba speeds just like mine. So if you’re only connecting two machines, 10gbe is probably a wise decision.

InfiniBand starts to become a much better value as you connect more machines. There are 8-port InfiniBand switches on eBay as low as $50. The options for 10gbe switches start at more than ten times that price!

Brian is doing well with three machines, but adding a fourth 10gbe device will be problematic for him. I’m still in search of a good excuse to add a third InfiniBand device to my network!

IPoIB between physical hosts

IP over InfiniBand was extremely easy to set up. You just have to make sure your InfiniBand network adapters are in “connected” mode—they default to the much slower “datagram” mode.

1
2
3
4
5
6
7
8
auto ib1
iface ib1 inet static
        address 10.42.253.2
        netmask 255.255.255.0
        pre-up modprobe ib_ipoib
        pre-up echo connected > /sys/class/net/ib1/mode
        mtu 65520 
        post-up route add -net 10.42.252.0 netmask 255.255.255.0 gw 10.42.253.1

Once I got into connected mode, my iperf test numbers went up to over 6 gigabits per second. That’s well short of InfiniBand’s 16-gigabit-per-second limit—InfiniBand encodes data using 10 bits per byte. This is just about as fast as I can go with my combination of a PCIe 1.0 InfiniBand card in my available 4x PCIe slot.

I guess I’m going to have to route!

It should be easy to set up a handful of IP subnets and route from my desktop to the KVM server, then from the KVM server to a virtual machine, right? It turned out to be much more difficult than I had anticipated. It took me an embarrassingly long time to pinpoint my problem, too. You’ll get to benefit from all the time I spent investigating this conundrum.

My Ethernet subnet is 10.42.254.0/24. My two InfiniBand ports are on the 10.42.253.0/24 subnet—10.42.253.1 is the KVM server and 10.42.253.2 is my desktop computer. I created a lonely bridge device on the KVM server named ibbr0—InfiniBand Bridge Zero. This bridge isn’t connected to any physical Ethernet devices, and its subnet is 10.42.252.0/24.

1
2
3
4
5
wonko@kvm:~$ ip route
default via 10.42.254.1 dev eth0 
10.42.252.0/24 dev ibbr0  proto kernel  scope link  src 10.42.252.1 
10.42.253.0/24 dev ib1  proto kernel  scope link  src 10.42.253.1 
10.42.254.0/24 dev eth0  proto kernel  scope link  src 10.42.254.200 

I added a second virtio network interface to my NAS virtual machine and connected it to ibbr0. At first, this seemed to work quite well, since I was able to ssh from my desktop to the NAS virtual machine via this route.

As soon as I ran iperf, though, I knew something was wrong. To say the speeds were slow would be an understatement. I was seeing speeds less than one megabit per second!

Don’t forget to enable packet forwarding!

I didn’t forget to enable packet forwarding on my KVM host, but I did forget to write about it here! If you don’t have ip_forward enabled, your host won’t bother to route packets for you.

To manually enable forwarding, you can run this command:

sysctl -w net.ipv4.ip_forward=1

To permanently enable IP packet forwarding, you can add this line to your /etc/sysctl.conf file:

net.ipv4.ip_forward=1

There are similar sysctl options to enable forwarding of IPv6 packets.

Don’t miss any MTU settings

I set the MTU of my new network device on the NAS virtual machine to 65520. This partially solved my problem. I was seeing 5 or 6 gigabits per second from the virtual machine to my desktop, but I still couldn’t even reach T1 speeds in the opposite direction.

To be honest, I was starting to pull my hair out at this point. Why was it slow in one direction? Every network interface I could think of had its MTU set to 65520. I even tried running socat on the KVM server to bypass the additional route, and that got me up to 1.5 gigabits per second. Why couldn’t I hit that when routing?

As it happens, I missed setting the MTU on an important interface. No matter how hard I tried, I just couldn’t set the MTU on ibbr0. You do need to set the MTU on the bridge device, but you can’t set the MTU on the empty bridge.

When my NAS virtual machine starts up, it creates a virtual Ethernet device named vnet0 and attaches it to ibbr0. Once I set the MTU on vnet0, it lets me set the MTU on ibbr0. From that point on, I can get InfiniBand speed traffic through to my NAS virtual machine!

I do lose some speed when talking to the virtual server—roughly one gigabit in each direction. This is over five times faster than my Gigabit Ethernet connection, so I’m still quite pleased with the results!

Configuring the network interfaces

Setting up the IP-Over-InfiniBand configuration is easy enough.

/etc/network/interfaces on the KVM host
1
2
3
4
5
6
7
8
9
10
11
12
13
14
auto ib1
iface ib1 inet static
        address 10.42.253.1
        netmask  255.255.255.0
        pre-up modprobe ib_ipoib
        pre-up echo connected > /sys/class/net/ib0/mode
        pre-up echo connected > /sys/class/net/ib1/mode
        mtu 65520

auto ibbr0
iface ibbr0 inet static
        bridge_ports none
        address 10.42.252.1
        netmask 255.255.255.0

Setting the MTU on the bridge device took a little more effort. I only have one virtual machine that benefits from InfiniBand speeds—my Network Attached Storage server. I need to set the MTU after my NAS virtual machine is booted. Thank goodness QEMU offers hooks for this sort of thing!

/etc/libvirt/hooks/qemu
1
2
3
4
5
6
7
8
9
10
11
12
13
14
#! /bin/bash

## If KVM machine named 'nas' is started

if [[ "$1" = "nas" ]]; then
  case "$2" in
    started|restore)
      for x in $(brctl show ibbr0 | grep vnet | awk -e '{ print $4 }');do 
        ip link set "$x" mtu 65520
      done
      ip link set ibbr0 mtu 65520
    ;;
  esac
fi

The configuration inside the NAS virtual machine is much more straight-forward. Just bring up the interface, and add the route to the InfiniBand subnet.

/etc/network/interfaces on the NAS virtual machine
1
2
3
4
5
6
auto eth1
iface eth1 inet static
        address 10.42.252.2
        netmask  255.255.255.0
        mtu 65520
        post-up route add -net 10.42.253.0 netmask 255.255.255.0 gw 10.42.252.1

And finally, here’s the InfiniBand configuration on my desktop.

/etc/network/interfaces on my desktop
1
2
3
4
5
6
7
8
9
auto ib1
iface ib1 inet static
        address 10.42.253.2
        netmask  255.255.255.0
        pre-up modprobe ib_ipoib
        pre-up echo connected > /sys/class/net/ib0/mode
        pre-up echo connected > /sys/class/net/ib1/mode
        mtu 65520
        post-up route add -net 10.42.252.0 netmask 255.255.255.0 gw 10.42.253.1

Conclusion

Setting this up wasn’t difficult. The MTU issue wasn’t easy to spot. Now that I’m aware of it, though, it is simple enough to circumvent.

My InfiniBand setup has been running for more than two years now without any issues. At first, it was running on my power-sipping AMD 5350 KVM host. I’ve since transplanted the hardware to my new Ryzen 1600 KVM box. I didn’t have to reconfigure anything. I just moved the hard drives and InfiniBand card to the new machine, booted it up, and everything just worked.

InfiniBand CX4 Cable

I store the raw files from my Canon 6D and the quadcopter videos from my GoPro Session on my NAS virtual machine, and I interact with all those files over InfiniBand. For the most part, it is comparable to working with the files on the local machine. If I had to start from scratch, I would still choose InfiniBand.

Are you using InfiniBand or 10-Gigabit Ethernet at home? I’d enjoy hearing about your experiences! Feel free to leave a comment or join us on our Discord server!