Caddx Turtle or Runcam Split vs a GoPro on FPV Freestyle Quads

| Comments

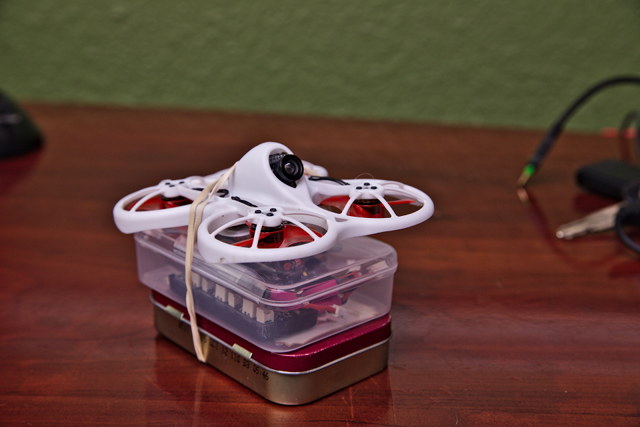
I’ve been carrying a micro FPV quadcopter in my bag for quite a while. I started with a KingKong 90GT, then made a huge upgrade to a Full Speed Leader 120, until finally making the minor upgrade to a Leader 3. These micros were always an afterthought for me.

Micros don’t fly as well as a 5” miniquad. They’ve been getting better quickly, though! The hardware has been improving, and so has the software. The gap between 3” and 5” FPV quads hasn’t completely closed, but it isn’t the chasm it was just a couple of years ago!

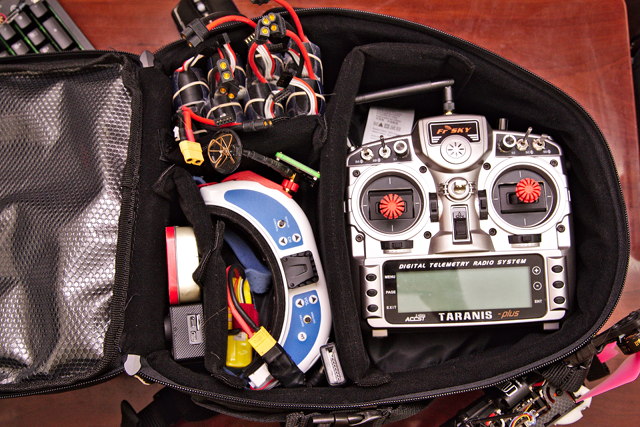
I still like having one in my backpack, even if they don’t fly as well. They don’t weigh much, and they don’t take up much space.

That performance gap is closing, and I bought a CNC router this year. Designing a spacious 3” micro quad with vibration damping seemed like it would be fun! That means it was time to try out one of these FPV cameras with a built-in HD recorder.

This blog post isn’t going to tell you how to get the best footage out of your Runcam Split—I haven’t been flying long enough to figure that out yet! I am going to tell you why I think there are times when you might want to settle for the footage from a Split or Turtle.

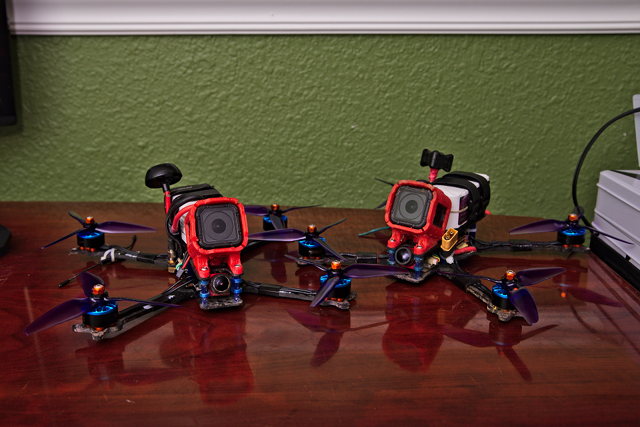
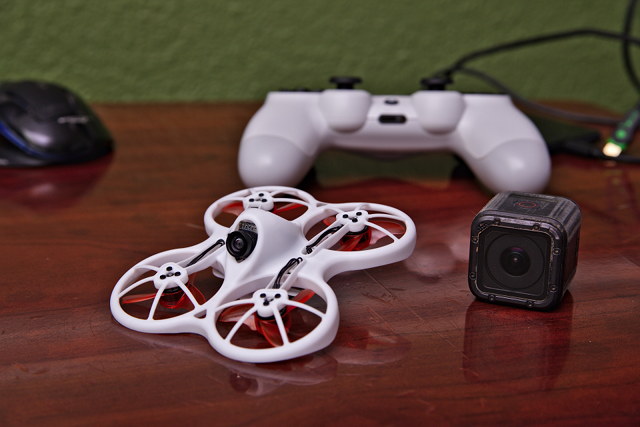
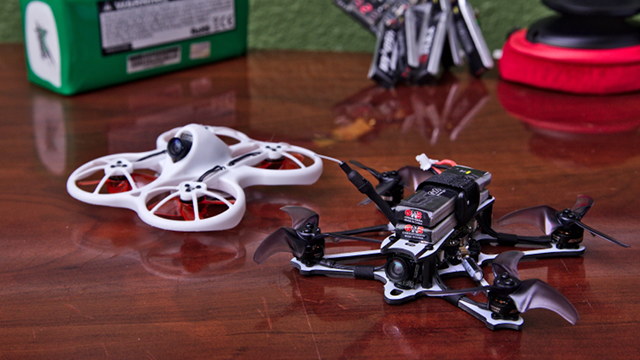
The Caddx Turtle V2 always makes me miss my GoPro HERO5 Session!

I didn’t have a terribly compelling reason for choosing the Caddx Turtle over the Runcam Split Mini 2. The footage straight off the Turtle seemed marginally more tasteful to me, and I remembered not having a good time getting the original Runcam Split Mini into Brian’s 3” micro last year.

As far as I can tell, there’s little difference in the video output of these cameras.

Every time I get home and look at my footage, I wish the Caddx Turtle had GoPro’s Superview. Everything looks so goofy and fish-eyed through the lens of the Turtle. This looks worse the farther the horizon gets from level. Near the top of a power loop, the horizon will be curved to a ridiculous degree.

The overall quality of the video isn’t the best, either. You can tell that the Turtle’s video files aren’t matching the bitrate of the GoPro, especially when you’re flying fast!

I believe using an ND filter on the Turtle would address some of my complaints. I’m planning on trying this out sometime!

Why the heck would I fly with a Caddx Turtle or Runcam Split if the GoPro is so much better?

If I weren’t in the process of designing a 3” HD micro frame, I might have already given up on the Turtle. Getting smooth video out of the Turtle is a challenge, especially on a 3” quad. My 680-gram 5” freestyle quad is almost always smooth, and 15 MPH winds don’t push it around all that much.

I feel there are at least two extremely compelling reasons to use a Caddx Turtle on a 3” micro quad: cost and safety.

The components I used to build my 5” freestyle quad cost about $550. They don’t make my GoPro HERO5 Session anymore, but mine cost about $200. The full-size GoPro HERO6 Black costs $279. A battery costs about $25. That means I have $750 to $830 in the air every time I fly; even more with a GoPro HERO7 Black!

My Leader 3 cost me about $120. The Caddx Turtle costs $65. It is tough to put a price on the Kestrel frame I cut for myself, but let’s just call it $35—that’s $10 less than an Acrobrat. Batteries for the little guy cost about $12. When I fly the Kestrel, I have less than $250 in the air.

That’s $250 for everything in the air: the quadcopter, the battery, and the HD camera. That’s less than the cost of a GoPro HERO6 Black. The only way I know of to make that GoPro fly for free is by throwing it!

If I want to capture some FPV footage in a spot where I might lose my quad, I know exactly which one I’m going to be flying!

Are these really the only two options?

Of course not! You can definitely build a capable freestyle miniquad for less than $550, and there are less expensive camera options. Foxeer and Runcam have made some reasonably priced action cameras.

You can still get refurbished GoPro HERO4 Session cameras at Amazon for less than $100. I have one in my bag as a backup. It fits my existing GoPro mounts, and it has Superview, but I’m always disappointed in the footage I bring home when I have to use it. I’m sure I’ll be saying the same thing about my HERO5 Session when I finally have to upgrade!

I could stick that $100 HERO4 Session and a $15 TPU mount on top of my $130 BFight 210 5” quad. I’m certain that that combination will fly smoother and record better freestyle video than the Caddx Turtle on a 3” micro, and the cost is about the same!

Cost isn’t the only difference

My own 5” miniquad with a GoPro Session weighs 680 grams, and it is capable of traveling at speeds of more than 100 MPH. This has a tremendous impact on safety, and the extra weight means things are more likely to break in a crash.

It is easy to destroy a $300 GoPro in a crash. I broke my first GoPro Session when I crashed into a tree. Trees are solid, but they’re not as solid as concrete! Just like everyone else, I have insurance on my GoPro cameras, so I had that one replaced. That takes time and effort, though.

I don’t just break GoPros, though. I break arms, motors, FPV cameras, and batteries. The heavier your quad, the more likely you are to break something. You might break something on the quad, but you may even break something else.

My 5” miniquad is going to do some serious damage if I hit a window, a car, or a person. A 680-gram object is going to do a lot more damage than a 250-gram object.

This is where we drift back into talking about cost. The motors and batteries on my 5” quad cost about twice as much as the motors and batteries on my 3” Kestrel. This is partly my own choice. My 5” quad uses premium components, while my own Kestrel build is meant to be an inexpensive HD freestyle build!

Risk affects your confidence

I’m usually nervous the first time I try something new or different. I remember the first time I flew over trees instead of in an open field, the first time I flew under trees, and the first time I flew over concrete or water. I was definitely a little shaky!

Over the summer, I was riding my bike past a creek at the park. It is rather narrow, and the water is ten feet below the spot where I could stand. I decided I wanted to fly down there, so I loaded up my cheaper GoPro HERO4 Session, strapped my goggles on, and got into the air.

It was tight down there, and I had to fly slowly. There was quite a bit of scraggle, and I did nearly clip a ghost branch on my way back. I was shaky and nervous the entire time! I was only saving $100 by swapping GoPros. If I wound up in the drink, I could have been out over $600.

I wish I had my Kestrel that day. Risking a total of $230 would have improved my confidence tremendously!

Losing $230 into a river would bum me out very much, but I can do that three times, and it would still be cheaper than losing a single 5” miniquad!

This makes my 3” Kestrel my “hold my beer” quad. Is there a good chance the quad is going to get wet? Am I likely to lose my quad in the woods? Is it going to get stuck on top of a building? Hold my beer, and I’ll use my Kestrel!

Light weight has other advantages!

My usual backpack is a huge ThinkTank FPV Airport Helipak. Loaded up with all my gear and batteries, it is well over 25 pounds. It isn’t bad when I’m driving, but it is quite a bit to carry when I ride my e-bike to the park.

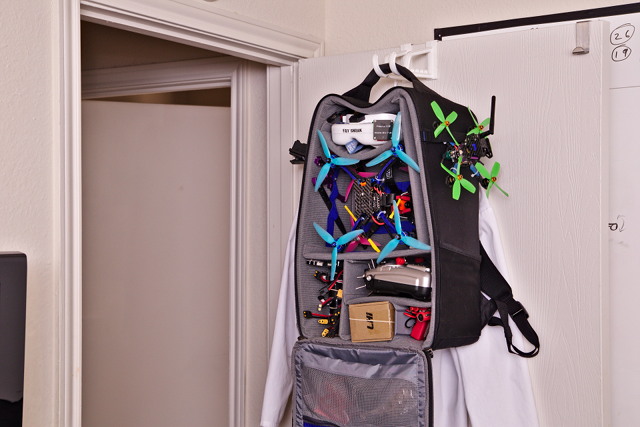
I have an AmazonBasics camera bag that I sometimes use to carry my gear, but I have to pare down quite a bit. I only bring my transmitter, goggles, one quad, and as many batteries as I can squeeze in. Sometimes I strap my 2-pound Moon Lence chair on there as well.

My AmazonBasics DSLR Bag as a Quad Bag

If I take my 5” quad, that means I’ll bring six batteries. With the chair, this weighs just over 12 pounds, and that’s enough batteries to keep me in the air for 18 to 24 minutes.

If I take my 3” Kestrel, I carry six 650 mAh 4S and six 450 mAh 4S packs, and I have plenty of room for more. With the chair, this comes in at around 9 pounds. That’s not a huge difference, but now I’m carrying enough battery for 45 minutes of aggressive freestyle flying, and everything weighs in at about 1/3 as much as my big ThinkTank setup!

I could easily fit more batteries and a spare Kestrel, and it still wouldn’t reach ten pounds. Fitting a second 5” quad would be cumbersome.

It isn’t just the HD video that’s worse than a GoPro

If you run a Turtle or Split, you may also be degrading the quality of your FPV video feed. I use Runcam Micro Eagle cameras on all my 5” miniquads, and the Turtle is a huge downgrade.

The Eagle has a wider field of view, transitions between lighting changes more quickly, and has much better dynamic range. The Runcam Micro Eagle costs $45. That’s 70% of the cost of a Caddx Turtle, but the Turtle also doubles as your HD camera.

I was flying on a cloudy day with the Turtle, and it was nearly impossible to even see the trees without leaves. It is difficult to spot the branches with a Runcam Eagle, but with the Turtle, small trees manage to completely sneak up on me!

FPV is full of trade-offs. This is just another one of those trade offs that you need to be aware of.

I hope the Turtle and Split continue to improve!

I doubt this is the end of the road for the Turtle and Split. They’re outclassed by a $100 GoPro Session from 2014, and that GoPro Session is already quite far behind the current $380 GoPro HERO7 Black. I am confident that Runcam and Caddx will continue to improve these cameras.

I’ll be surprised if a Turtle or Split doesn’t manage to surpass the performance of the old GoPro Session in a couple years. I’m sure GoPro will continue to improve their cameras, so I would be very surprised if Caddx or Runcam could ever manage to actually catch up.

They don’t need to catch up, though. They each have a camera that is a reasonable compromise. Their cameras are a fraction of the price, weigh next to nothing, and do the jobs of both your HD and FPV cameras.

These cameras don’t need to perform as well as a GoPro. They just need to perform well enough, and they almost do that today.

Was the Caddx Turtle the right choice?

I have a short list of reasons for both why I’m pleased and disappointed with the Caddx Turtle. I expect there’s a good chance that I’ll change my mind about some of my complaints, so I’m going to hold off on talking about the pros and cons of the Turtle for now.

It is absolutely fine for what it is: a $65 camera that manages to handle the responsibilities of my $45 Runcam Eagle and my $200 GoPro. It does neither job as well, but it is a great value and compromise at this price point.

Conclusion

Just a year ago, I couldn’t have been more displeased with Splits or Turtles on micro quads. The footage was usually shaky, the quads didn’t fly all that well, and fitting all that gear into a single 20x20 stack was just too much work!

These cameras have made some incremental improvements in their recording capabilities, the 20x20 hardware has improved enough that it almost matches our 30x30 hardware, and Betaflight has micro quads flying better than ever. There’s also no shortage from frames with room for two or three 20x20 stacks—including my own 3” Kestrel frame!

There’s not much excuse left for not carrying a 3” HD micro quad in your FPV backpack. Are you flying with a Turtle or Split? Is it on a micro or a miniquad? What do you think of it? Let me know in the comments below, or stop by our Discord server to chat about it!

Attempting to Make a Calcium-Free Latte

| Comments

Over the summer, I was diagnosed with Chronic Kidney Disease (CKD). I could dedicate a series of long blog posts to this topic, but only a small part of my troubles are relevant to this particular blog post. At the time, I may have been just a few weeks or months away from needing dialysis. One of the oddities in my blood tests was a high calcium reading.

I don’t want you to worry. I’ve made changes to my diet, I spent a lot of time sleeping, and my kidneys have adequately resumed their duties, but the high calcium level is still there—though it isn’t all that far outside the normal range now!

My Calcium Free Latte

When my kidney specialist told me to avoid calcium, I didn’t think that would be a problem. I was surprised how difficult it was! At that time, I was sleeping sixteen hours each day, and when I was awake, I was always tired. I’d find myself wandering around the house while my wife was asleep or at work, and I’d be wondering what I should eat.

I didn’t have much of an appetite, but I was often foraging through the cabinets looking for something small and easy to prepare. My choices were limited. When my doctor confirmed that I was diabetic, the diet was quite simple; avoid carbs and eat protein!

He called me the next morning, because the results of my blood test were in, and my kidneys were barely functioning. The kidney specialist threw a wrench into the works. Since my kidneys were failing, I also needed to avoid protein. Avoid carbs. Avoid protein. Avoid calcium.

I was excited one day when I found a can of corn in the cupboard. Butter doesn’t have much calcium, and the carbs aren’t too terrible, and I can microwave corn!

Then I read the nutrition information. That little can of corn had more calcium than a glass of milk or a slice of pizza! I had to give up pizza, and I had to give up my daily lattes. That stupid can of corn wasn’t going to be on my list of high-calcium foods to cheat with!

Giving up lattes

I still remember the day I put the moth balls in my Rancilio Silvia. I was too tired to put the espresso machine away on the day we got home from the news that I can’t have any calcium. A few days later, though, I emptied the reservoir and drained as much water as I could out of the boiler.

It was just another thing I couldn’t have or do anymore. I’d been using that machine every day for nearly four years. Draining Miss Silvia and putting my Craft Coffee subscription on hold was a bummer of epic proportions!

When I started feeling better, I wanted coffee!

When I was asleep more than I was awake, I didn’t really miss drinking lattes. As my condition started to improve, I really wanted to add coffee back to my diet. I’ve been keeping my calorie intake low, and I’ve been avoiding as much sugar and calcium as I can.

I started doing some research. How can I make a latte with no calcium? Avoiding fat and sugar is easy—skim milk and Stevia will do that trick there! How do you avoid calcium?

The Internet gave me all sorts of ideas. Several non-dairy milks are low in calcium. The options available at the grocery store were a different story. I checked the labels on cocounut, almond, and soy milk—any milk-like substance I could get my hands on. They all had as much or more calcium than real milk! I assume they’re fortified in some way.

Non-dairy creamer

I didn’t even look at the non-dairy creamers at first. It seemed blasphemous to use some sort of weird mixture of chemicals and vegetable oil in a latte. I don’t know why I thought this, because I would have considered using soy or almond milk just as blasphemous a year ago!

Non-dairy creamer is calcium free, and it is available with or without sugar. I’m talking about the liquid stuff in the dairy refrigeration, and not that weird powdered stuff. I’m using Nestle Coffee Mate. It is available is all sorts of flavors, but I’m using the original unflavored kind.

Can you make an awesome latte with non-dairy creamer?!

Absolutely not. I experimented a lot, and I still haven’t made anything as good as a latte with 100% whole milk. I’ve made things that aren’t entirely unlike a latte, though, and they taste alright. Not as good as the real thing, but they’re enjoyable.

Coffee Mate creamer lattes taste alright, but the texture is all wrong. They aren’t unpleasant, but the foam isn’t right, and the foam disappears long before you finish sipping your latte.

Heavy cream is low in calcium!

Heavy cream was my first mistake. I don’t know why, but I assumed the fats from the milk were what my latte was missing in regards to both flavor and the problems with the foam.

I was wrong. The heavy cream available at the supermarket is ultra-pasteurized. That means they take it up to a higher temperature than regular milk during the pasteurization process, and this changes the sugars. That changes the flavor a lot. Ultra-pasteurized lattes taste funny.

And the heavy cream didn’t help my foam. It isn’t the fats in the milk that make up the structure of the foam. You need the proteins. You would think I would have figured this out on my own. I’ve steamed skim milk before. The texture isn’t as nice as whole milk, but the foam is plenty stable.

I tried various ratios of non-dairy creamer, heavy cream, and water. The water was to bulk up the contents of the steaming pitcher a bit. It also helped dilute the latte without adding additional fat or calories. I don’t add water to my pitcher anymore, but it did work well enough.

The important lesson that I learned here is that milk is quite different than watered-down heavy cream!

If you want proper foam, you need to add some milk!

I’ve given up on making completely calcium-free lattes. My levels are down quite a bit, and they may even be in the normal range next time I get checked. I’ve been adding some milk to my steaming pitcher.

It doesn’t take a lot of milk to improve the foam by a huge margin. I’ve tried ratios of around 20% milk and 80% heavy cream, and even that comes out looking and feeling so much more like a proper latte than a 100% Coffee Mate latte.

The more milk you use, the better it tastes. I’ve settled in on using about 1/3 2% milk with 2/3 Coffee Mate non-dairy creamer. It isn’t perfect, but it is definitely satisfying my craving.

I’m not certain how much of each ingredient I’m actually ingesting. There’s always a lot of extra liquid left in the pitcher. I imagine that most of the foam winds up coming from the milk, while the remainder of the steamed liquid is close to the expected ratio of milk and creamer.

I’ve switched from my old triple-shot basket to a double-shot, so I’ve reduced the size of my overall latte by 1/3. One 8-ounce serving of milk has roughly 300 mg of calcium.

I’m probably putting about 3 ounces of milk into my steaming pitcher, so that’s a total of 100 mg of calcium. I’m using about half of the volume of fluid from the pitcher in my double-shot latte. I imagine I’m getting somewhere around 50 mg of calcium per latte—certainly less than 100 mg!

Stevia instead of sugar?!

I am definitely leaning towards the diabetic side. It is at the very least a major contributing factor in my kidneys shutting down. I’ve been doing a good job managing my carbohydrates, and my glucose numbers are still a little above normal, so I’m avoiding using sugar in my lattes.

I’ve tried Stevia and Splenda. Neither tastes right, but I’ve learned that if I use both Stevia and sugar, I barely notice the odd taste of the Stevia.

Sugar in a latte?! That’s crazy talk!

Quite a few years ago, I learned that I am a supertaster. I guess most supertasters learn to tolerate the strong flavors that they don’t enjoy, and it seems to be common for those supertasters to find their calling as chefs.

I never learned this skill. I’ve tried tasting regular coffee and espresso right out of the machine. My photography and limited audio-editing expertise would describe the sensation as being a lot like clipping. No matter the coffee, my bitter taste buds feel like they’re maxed out.

Add some milk and sugar, and I can usually pick out many of the things that Craft Coffee lists on their tasting notes on each bag of beans.

I will be sticking with sweet lattes.

Whole milk is so much better

I do cheat every once in a while. After taking such a long vacation from the Rancilio Silvia, my success ratio with pulling shots has plummeted. I’m doing better, but I’m still much more likely to get a fast pull than I used to be.

When I see what seems to be a perfectly timed pull, I think about dumping out my concoction of Coffee Mate creamer, milk, and heavy cream. Will one whole-milk latte kill me? I’d say I’ve cheated roughly once a month, and I try to use 100% whole milk and all sugar at least once with each bag of coffee beans.

The foam is better. The texture of the milk is better. Milk tastes better. Drinking a 100% whole-milk latte is an amazing treat for me!

Conclusion

I was hoping that last month’s blood test would tell me that my calcium levels were fine. I already knew my kidneys were doing a fantastic job again, and there was a good chance my worries about high calcium levels were over. I wasn’t quite that lucky, but that’s OK!

I’m functioning well enough that I can get away with eating a couple slices of pizza and drinking one whole-milk latte every month, but I think I’m going to be drinking these downgraded lattes for a long time. I better get used to them!

I don’t think this post will have a wide audience. My Google searches for a calcium-free latte came up completely empty. I imagine there aren’t a lot of folks making lattes at home every day, and a low-calcium diet seems extremely uncommon. I doubt there’s much overlap between those two groups!

I bet there are at least two of us, though! I’ve already done the research and experimentation. Now you don’t have to!

Cutting Carbon Fiber Sheets on My Shapeoko CNC

| Comments

The list of materials you can cut with a CNC router seems endless. Wood is very common, and it looks like my Shapeoko XXL can even manage to handle aluminum. I didn’t buy a CNC machine to cut either of those materials. I’m sure I’ll find some excused to do some woodworking projects in the future, but I bought my machine to cut carbon fiber quadcopter frames!

Shapeoko XXL Cutting Carbon Fiber

If your CNC machine can handle hardwood or aluminum, you shouldn’t have any trouble cutting carbon fiber sheets. You certainly don’t need a machine as big or as powerful as the Shapeoko or an X-Carve. You could definitely replicate my success with a small machine like my friend Alex’s SainSmart 3018 Prover CNC.

Safety first!

Carbon fiber dust is hazardous. It is conductive, and it gets all over everything. The dust might manage to short circuit something in your laptop. It will get into your router. It will get in your lungs.

That last part is the scary part. Take lots of precautions. Wear a mask. Keep the garage door open, and point a big fan over your machine and out the door. Better yet, pick up the machine and take it out into the driveway!

Me and My Dust Mask

I wear a mask, and I’m constantly running my little Shopvac knockoff. I would give you a link to the mask I’m using, but I doubt it is really up to snuff. It has a filter, and it doesn’t leave any gaps around my nose. To be properly safe, I should probably look like Barbeque from G.I. Joe.

If I end up doing this often enough, I plan to build an enclosure for my Shapeoko. I’ll put a blower on that enclosure, and I’ll plumb it up to a dryer vent. I haven’t gotten that far along, though.

Be safe. Do your best. Do a better job than I am!

Tell me about these carbon fiber sheets!

I’m not an expert, but as far as I know, there are two common ways to work with carbon fiber. You can shape the woven fabric, then coat it with epoxy. This is a lot like repairing a fiberglass hot tub.

Quadcopter frames are cut from premade sheets of carbon fiber. The factory stacks layers of carbon fiber, and they impregnate it with epoxy resin. The process generates flat sheets. The sheets I’m using have alternating layers with the carbon fibers rotated 90 degrees. The top and bottom layers have the woven pattern.

The sheets I’m using today are 1 mm, 2 mm, or 3 mm thick.

This stuff is really sturdy! Is it hard to cut?

Carbon fiber is actually quite easy to cut. Your router doesn’t need a ton of torque or speed—my router’s minimum speed is actually too fast!

My feeds and speeds

This is probably the tl;dr section of this post. How do I cut carbon fiber sheets?

I’m using 1/16” fishtail endmills that I bought on eBay. They’re about $20 for a pack of 10. I haven’t broken one yet, but I will be sure to keep pushing my feeds higher until I do!

1/16-inch Endmills from eBay

These are my current settings:

  • Depth per pass: 0.8 mm
  • Feed rate: 320 mm/minute
  • Plunge rate: 100 mm/minute
  • Router speed: 1 on the Dewalt DWP611

I’ve tested all sorts of settings. I’ve gone as high as 800 mm/minute with a cut depth of 0.5 mm. I broke a $20 bit from Carbide 3D on that cut. I’m not sure the speed was the problem, though. My 3 mm carbon fiber sheet came loose during that cut, and I assume that put a lot of stress on the bit.

The math says I should be running my router at 5,000 to 6,000 RPM. My Dewalt router can’t run that slowly. I believe the lowest setting works out to around 20,000 RPM. Too much speed generates heat, and it cuts out dust instead of chips. The heat could be bad for the epoxy, but it hasn’t been problematic yet!

I chose a depth per pass of 0.8 mm, because I’m cutting 3.2 mm deep on my 3 mm sheets of carbon. That means I can cut all the way through a single sheet of carbon in four passes. Choosing your depth per pass based on the thickness of your material seems smart!

My parts are coming out clean and smooth, and I don’t need to do any cleanup afterwards.

I can reduce my number of passes to three if I increase the depth per pass to 1.1 mm. I plan to test this, and I will also be increasing my feed rate.

How much cutting have you done so far?

I am not an expert. I have cut about three quadcopter frames’ worth of parts. Not three complete frames, though. My design process is iterative, so I’ve been replacing parts as I make improvements.

I’ve used up almost half of my first 400x500x3 mm sheet of carbon fiber, and I’ve ordered a less-expensive second sheet from another vendor!

3-inch Kestrel HD Micro Quad

The 400x500 mm 3K carbon fiber sheets are definitely high quality. I ordered those from GetFPV.com. I ordered another sheet of 3 mm 3K carbon fiber from Hobby King. That sheet hasn’t arrived yet, and they don’t stock 400x500 mm sheets. Their prices are quite a bit better, though. You get about 40% more material for your dollar at Hobby King.

I’ll have to crash the new, cheaper sheet to see how sturdy it is!

Conclusion

I don’t know why, but I thought this would be a longer blog! I guess there’s not much to say. These are my feed rates. These are the bits I’m using. This is the carbon fiber I’m cutting. The cuts are clean. Done. Right?

I plan to push my feed rates and depths as high as I can. That’s just what I do. I pushed my 3D printer as fast as it could go. I push my quadcopters as fast as they can go. So why not push my Shapeoko as fast as it can go, too?!

Are you cutting carbon fiber on your CNC router? Are you having as much success as I am? I’d love to hear about your machine and your process! Leave a comment a below, or stop by [our Discord server][bw] and chat with me about it!

The Kestrel FPV HD Micro Drone: The Road to the Second Prototype

| Comments

Almost everything regarding my new frame design has been working out better than I expected. Using the Shapeoko XXL is easy. Cutting carbon fiber was even easier than I expected. The first prototype fit together quite well, and it flew almost perfectly. I mostly just needed to tune the PIDs on the pitch axis, because of that long fuselage on the Kestrel.

I’m slightly exaggerating. The first test cuts of the earliest prototype didn’t go perfectly. The bottom and side plates came out great, but the arms broke free of the carbon fiber before the motor holes were drilled. It wasn’t a big deal, and I learned from my mistakes. It also gave me a chance to test fit all the parts of the fuselage before cutting again.

The Kestrel FPV Micro HD Frame

That first fuselage was beefy. Much too beefy. The side plates are cut out of 3 mm carbon fiber sheets, and I believe I made the length of the side plates 6 or 7 mm thick. It didn’t need to be that sturdy. I’ve dialed that back quite a bit.

All my holes for M2 and M3 screws were too tight, and the slots in the side plates for mounting the top plate were too snug. I managed to get that first fuselage assembled, but I had to widen all the M3 holes, and I had to tap the top plate into place with a hammer!

I was excited to see that my design was coming together, though. All I had to do was tweak three or four variables, run the SVG files through my CAM software, and cut the real prototype!

The prototype flies great, but…

One of my major goals for this project is to build a lighter Acrobrat. Using those beefy 7 mm rails and having a beefy camera pod on the side plates may look nice and sturdy, but it adds quite a few grams.

I only know one way to figure out just how light, thin, and spindly you can make your quadcopter frame. That’s to make it thinner than you think you can get away with, then crash the heck out of it! Wherever it breaks is too thin, so that’s where it needs to be reinforced!

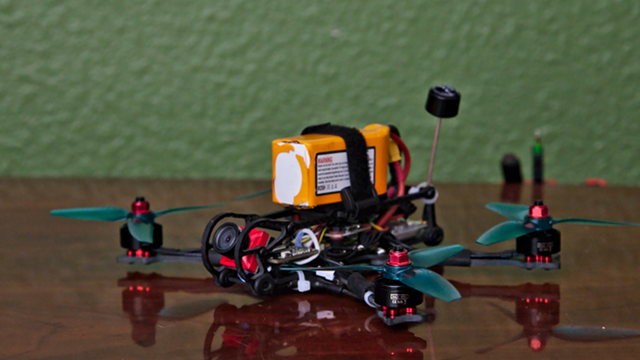
NOTE: Test flight before the Caddx Turtle V2 arrived. I wasn’t smart enough to update the name in the OSD!

There are a few spots I’m still worried about. The tabs that slot into the vibration-dampening bushings of the side plates can only be so wide, and the bottom plate is only 2 mm thick. I’m expecting that to be the weak point in a crash, but I’m also worried that I’ll need to make those tabs even narrower to allow the bushings to float a little more freely. We’ll see how that goes.

If it is a freestyle frame, how light can it get?

I’m concerned about this. The Acrobrat is designed to use 1407 or 1408 motors, and everything that goes along with that can easily push your weight over 250 grams. I’m not personally worried about the 250-gram limit, but doesn’t it seem like an interesting target to design against?

Heavier quads are better for freestyle. My prototype Kestrel frame is using all the hardware from my Leader 3, including the tiny 1106 motors. A whole set of those 1106 motors weighs less than a pair of 1408 motors, by the way.

I’ve flown my Leader 3 quite a bit, and upgrading to the Kestrel frame and a Caddx Turtle hasn’t increased the weight all that much. Even with the new camera and heavier frame, I believe I’m still lighter than my friend Brian’s Diatone GT-M3!

Flying freestyle with a quad that weighs 160 grams with a battery is challenging. My 680 gram 5” quad is an entirely different beast. I can huck him over a tree, roll upside down before I even reach the tree, and then finish off the S-turn when I get past.

The Kestrel FPV Micro HD Frame

With the 160-gram Leader 3, I can’t do that. If I invert before I clear the tree, my quad will likely end up in the tree. I have to wait until I’m almost past the tree before inverting with the Leader 3 or my 1106 Kestrel.

My Kestrel build weighs in at about 185 grams with a 4S 450 mAh battery. It flies for 2.5 to 4 minutes on a charge, but most of the time I land at just barely over 3 minutes. I tend to get pretty close to 3.3 volts per cell, but they usually recover to 3.7 volts shortly after the flight.

I ordered a bunch of 4S 650 mAh packs, too. They should put my Kestrel at just over 200 grams. I think it will be interesting to see if the extra weight makes the quad a little more huckable, and I’d like to see how that influences my flight times.

UPDATE: On my current prototype frame, my 1106 Kestrel weighs 128 grams dry, 189 grams with a 450 mAh 4S, and 217 grams with a 650 mAh 4S.

My friend Brian transplanted his Diatone GT-M3 with HGLRC 1407 motors over to a Kestrel frame, and he added a Caddx Turtle. The Diatone frame must be heavy, because the weight is one gram lighter after the upgrade! His Kestrel with 1407 motors weighs 168 grams dry, and 253 grams with a 650 mAh 4S battery.

If weight helps with freestyle, why keep the weight down?

In the end, it all comes down to cost. If I want to upgrade from 1106 to 1408 motors, I’m going to be carrying quite a bit more weight. That means my arms need to be sturdier, and that adds more weight. This extra weight starts to add up, and now I might need to upgrade to a bigger battery.

At this point, maybe the camera protection needs to get beefier, too. The bigger motors on the heavier quad will also be rougher on your batteries, and you’ll be more like to damage someone’s property when you crash.

Heavier quads are more likely to break, and they’re more likely to damage property. I can always make the frame tougher. That just adds more weight, and it doesn’t keep the other exposed components safe. A 180-gram quad is less likely to break a camera or battery than a 250-gram quad!

My perspective might also be a little different. In some parts of the world, that 250-gram weight limit is a real limitation. In those places, your only choice for freestyle might be a 250 gram drone!

The Kestrel FPV Micro HD Frame

For me, my HD micro drone is more of a backup; almost an afterthought. It is an extra piece of gear to keep in my bag alongside my 5” and 6” quads for those times when a bigger quad isn’t appropriate.

As I’m writing this, I realize that this sounds like a strange perspective for someone to have when they’re putting all this time and effort into designing a 3” HD micro quadcopter frame!

I know I’m not the only person interested in this sort of frame. I want something light, inexpensive, and relatively safe to keep in my bag. Adding an HD camera is a huge bonus for me. I’m sure I’ll miss my GoPro and superview when I fly my Kestrel, but I absolutely expect to fly my Kestrel in situations where I wouldn’t dare fly my 5” quad!

Of course, the Kestrel won’t just be for 1106 quads. I’m going to be making wider arms for 1408 motors, and I’m also going to try longer arms for 1806 or even 2204 motors with 4” props. My prototype will be for my specific use case.

Rubber bushings don’t solve all problems!

My first day out flying with an HD camera on the prototype Kestrel was a disappointment. I had a flutter at full throttle, and my cruising footage wasn’t smooth at all—even with a fresh set of props!

When I got home, I noticed that my flight stack wasn’t secure. I was surprised, because I wiggled it around to make sure it was solid while I was installing the Caddx Turtle. Two standoffs between the flight controller and ESC were busted, and two standoffs between the frame and ESC were broken as well!

I took out all the old nylon standoffs and soft-mount standoffs, and I replaced them with fresh M2 nylon standoffs. It is too bad I couldn’t reuse the soft standoffs. A piece of a nylon standoff broke off inside, so I just replaced them all with regular standoffs.

NOTE: Sorry about the vibrating footage!

It was almost dark when I finished buttoning the Kestrel back up, so I just took it outside the house to give it a few punches. My full-throttle oscillation seems to be gone. I didn’t get to do much slow cruising, but I’m hopeful that the shakiness is gone there, too.

You also need clean props. I tried to make a pass under my car, and I forgot to flip the switch from air mode to rate mode, and I chewed up the tips of two props on the pavement. They didn’t look terrible, but that definitely added more vibration.

I’m hopeful that the rubber bushings will help silence some vibrations, but I know for sure that it will only reduce vibrations with low amplitudes. I think I’ll be changing props a lot more often with an HD camera!

You sure do talk a lot, Pat. You haven’t even told us what’s next!

Yeah. I’m doing a bad job of getting to the point of this blog post!

I’m quite pleased with the first prototype of the Kestrel. I will probably be flying my copy as it is for quite a while, but I plan to cut frames for some friends soon. The prototype isn’t without flaws, but I am thankful that they’re not show-stoppers!

The Kestrel FPV Micro HD Frame

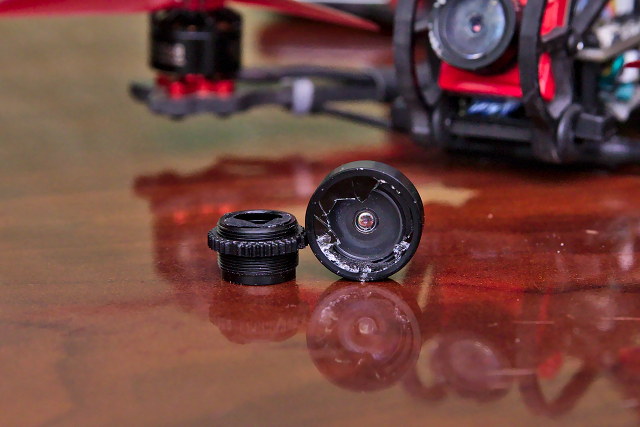
The most obvious problem is the camera protection. I based the radius of the curve on Caddx’s measurements for the Turtle. I’m guessing that those measurements don’t apply to the bigger lens on the newer Turtle cameras, because the lens sticks out nearly 2 mm past the front end of my quad!

That was easy enough to fix. I just had to adjust a variable. That’s why I love OpenSCAD.

I left the bottom standoff out of the build, but the holes are still there in the prototype. It turns out that I don’t need it for rigidity, and leaving it out saved more than 2 grams. I don’t know that I could put it back in place, either, because it would be awfully close to the camera.

It will just barely fit, and I’ll probably put it back in place before my test flights. The wiring harness for the Caddx Turtle is at the bottom, and on my current build, those wires will be exposed in a crash, and they are fragile wires.

I’ve already adjusted the model in an attempt to alleviate this issue. There’s plenty of room to bring the camera backwards. I moved the camera upwards by a few mm, and back far enough that the camera’s mounting screw is behind the center of the front bushing.

That should be back far enough that the frame’s bottom plate will protect the camera. In the worst case, I can extend the bottom plate forward far enough to keep those wires safe.

I also rearranged the various support pieces near the camera. I eliminated the vertical post connecting the front bushing to the front standoff. The camera is close enough, so I’m hopeful that the camera pod will be structurally sound enough to support the entirety of the front end. I also adjusted one of the camera’s braces so that it follows the direction of the carbon for strength.

The Kestrel FPV Micro HD Frame

Moving the camera back left the standoff a little too close to the camera. I’ve pushed that standoff back, so it shouldn’t interfere with uptilt.

While I was working with the side plate, I also decided to drop the deck by 3 mm. It should still be quite roomy. My stack is still using a set of tall standoffs to cap off the top, and those are a bit tall. I’ll probably still have just enough room even with those giant standoffs being used as screws, but I’ll just swap them out for proper M2 nylon nuts.

I’ve moved the camera back quite far. I think I’ll be OK, but there is a possibility that the props will be in view with the new design. If they are, I will adjust the angle of the arms to compensate!

The Foxeer Mix camera

I was waiting for my Caddx Turtle to arrive before I started messing with the shape and location of the camera pod. I wanted to move the camera inward, but not so far that I might interfere with the Turtle’s circuit board. I wanted to see it in the real world. I didn’t quite trust my measurements!

It turns out I have plenty of room for the Turtle, so I moved the camera way back. I looked up the Foxeer Mix HD camera, and I couldn’t believe how big its circuit board is! It is 37 mm long and wide!

I’m not even going to attempt to accommodate it in my frame. At 37 mm, it will stick quite far out each side of my frame. Not only that, but I wouldn’t be able to push the camera back very far at all.

It is a good thing the Foxeer Mix didn’t wind up being the most amazing HD FPV camera, or I might be disappointed!

I’m going to need testers!

Designing the Kestrel has been a lot of fun. Almost as much fun as flying it! Weather, camera problems, and my own mistakes have greatly impacted my flight time, and I’m realizing that I don’t need to be doing all the test flying on my own!

I’m looking for help. I don’t have enough time, parts, or funding to test every configuration that I’d like to support with the Kestrel. I’m most interested in the 1106-scale version of the frame, so that is where I’m focusing my time.

I’m about to cut a frame for my friend Brian. He’s going to be transplanting his upgraded Diatone GT-M3, so I’ll be cutting him beefier arms with wider holes to support both 9 mm or 12 mm motor hole spacing. I expect he’ll be right at or just over the 250 gram limit. I’m excited about taking his heavier Kestrel for a spin!

I’m also extremely interested in seeing a Kestrel with 4” arms, especially if it squeezes in under 250 grams! I don’t expect to be building one of these any time soon. I think it’d be a very interesting build, but at this point, it’d be too much like my 5” quads for me to include it in my fleet.

So what do you want to build?

I want to hear about what you want to build. If you’re an experienced freestyle pilot, and you want a Kestrel frame customized for an interesting configuration, please contact me! Leave a comment, send me an email, or stop by our Discord server. I have no idea what kind of a response I’m going to get from my request for help, so I have no idea how this is going to go.

I expect I’ll be sending a freebie prototype to a few select pilots, but I’d like to get as many of these out into the world as I can manage. Even so, I’m limited by my production capacity.

I’m going to have to figure out a reasonable way to charge for my time and materials if enough people are actually interested in trying out my frame.

How much will a prototype frame cost?

I tend to be overly honest and forthcoming about my costs and processes. This is probably why I’m a terrible business-person.

I did some very naive math after my first successful cut of a frame. I measured about how much space I used on each sheet of carbon, then figured out approximately how many frames I could fit on each sheet. I’m using relatively expensive carbon fiber sheets from GetFPV.

My math says each frame consumes just shy of $14 worth of carbon fiber. I can probably cut that in half if I use cheaper carbon, but I’m quite pleased with how sturdy it is. The cheap 3mm carbon from the Leader 3 is much easier to flex!

Lazy 3-day shipping withing the United States is around $7. Lets just say it costs me $20 of actual cash out of my pocket to get a frame out the door.

I haven’t taken labor into account. Sure, the CNC machine does most of the work, but at this point, I have to babysit for an hour or more for each frame. So far, I’ve broken a $20 endmill while cutting frames. I don’t know how often I’ll be breaking stuff, but I’ll need to account for that.

Things will slowly get more efficient on my end. If I ever get to the point where I can mass-produce these, I’m certain my costs will go down, too!

But this is where we’re at today. I have to make them myself. If you have interesting plans for my frame, please let me know!

How can I help support Pat?

I’ve set up an account on Patreon. I haven’t thought this through as well as I’d like, but here’s what I’m imagining so far. If you like what I’m doing, and you’d like to make sure I have access to the supplies and tools I need to keep doing these things, you can support me at Patreon.

I would prefer to provide a product or a more tangible service. Buying my frame would be a great way to support my future development, but I’m really not there yet. I’m going to be a huge production bottleneck for the time being.

There are Amazon affiliate links all over the place on my blog. You don’t have to buy what I’m linking to. Any purchase made shortly after clicking one of my links will earn me a small percentage, and every little bit helps!

This section could use a blog post or Patreon post of its own—maybe both! I need to put more thought into this.

The current specs of Pat’s personal Kestrel prototype

My Kestrel is built using the guts of a Full Speed Leader 3 and a Caddx Turtle. It is currently weighing in at 123 grams dry, and 183 grams with a 4S 450 mAh CNHL battery. I’m getting flight times ranging from 2.5 minutes to 4.5 minutes, but most of my somewhat aggressive freestyle flights come in at right around 3 minutes.

Here’s the laundry list:

  • F4 Flight Controller
  • 28 amp blheli_s 4-in-1 ESC
  • 25-600 mw VTX (my smartaudio is busted!)
  • 1106 4500 kv motors
  • Caddx Turtle V2
  • HQ 3x3x3 3-hole props
  • Crappy dipole antenna
  • 186 grams with CNHL 4S 450 mAh
  • GPL licensed design
  • Currently hosted on Thingiverse

Conclusion

I’ve already started cutting updated carbon. We’ll probably be transplanting Brian’s Diatone GT-M3 this weekend or early next week. I can’t wait to see how that flies.

I’m excited. I’m tweaking designs, cutting frames, and slowly collecting some HD footage. I’m sure it won’t be long before the next update, especially if it stops being rainy and cloudy!

Are you looking for a lighter 3” freestyle frame with removable arms? Do you think I’m on the right track here? Are you interested in helping me test my design? Leave a comment, or stop by our Discord server and talk to me!

My First Shapeoko CNC Adventure: Cutting Carbon Fiber

| Comments

I bought a Shapeoko XXL CNC router, and I have almost no idea what I’m doing. What’s the first project someone should attempt on their new, freshly assembled, and untested CNC machine? Carving or cutting something with a cheap piece of scrap pine is probably a smart place to start. I may not be that smart.

My first CNC project was cutting an FPV quadcopter frame out of carbon fiber!

Mind the cancerous dust!

Carbon fiber dust is dangerous. It is extremely fine and quite conductive. It can short-circuit electronics, and it can probably cause lung cancer.

There are several interesting possible ways to reduce these risks. I’m impatient, and I have yet to test any of those possibilities. I have a filtered mask, a shopvac knockoff from Harbor Freight, and I try to cut with the garage door open.

Don’t do this at home. Don’t do this at work. Don’t do this anywhere. I’m working on a better solution. I was impatient, and wanted to get my prototype cut. Hopefully, I’ll be better prepared for the next iteration!

Carbon fiber isn’t cheap

My quadcopter frames required me to buy carbon fiber sheets in three different thicknesses: 1 mm, 2mm, and 3mm. Each is more expensive than the last. The three sheets of high-quality 3K carbon cost me about $200.

I’ve had to file and saw carbon fiber before, and it isn’t all that difficult to cut. It isn’t all that demanding on your machine. It is infinitely easier on your machine that cutting aluminum, though I hear it is quite rough on your bits.

I didn’t take notes as I was working

I’ve done a bad job at documenting my experimentation. At first, my CAM software was set to inches. This seemed easier for me, because my endmills are measured in inches. Unfortunately, I kept goofing up my cutting depth when converting from metric.

So at some point, I switched everything over to metric. That’s when I got mixed up on my cutting speeds.

I did do one test cut into a scrap of particle board

My first test cut with Carbide 3D’s 0.0625” endmill was into a scrap of particle board. I considered my attempt to be quite a success, even though I had to cancel the job long before it was over.

Kestrel Prototype After its Maiden Flight

I accidentally set my cutting depth to about 0.4” instead of 3 mm. Did I set it to 0.4” manually? Did I accidentally leave something at the default? I have no idea. I just know my cut was approaching the depth limit of my endmill, so I had to cut it short!

Goofing up the cutting depth has been my most common mistake so far.

The first cuts into carbon fiber

The first thing I attempted to cut was the arm-bracing plate of my quadcopter frame. It is the only 1 mm part, and that’s the cheapest sheet of carbon fiber in my collection. It seemed like the safest place to start!

Arms and Sideplates Cut on the Shapeoko XXL

I’m sure you can guess what I did. I goofed up the depth again, and I had to stop the job early. It only got as far as cutting the perimeter. The job was set up to cut the entire perimeter first, then drill out all the holes.

I was still excited. The machine had no trouble cutting the carbon fiber. The only problem so far had been human error!

Making more mistakes

The bulk of my quadcopter’s frame is 3 mm thick. I laid out the side plates and four arms in OpenSCAD, loaded them into Carbide Create, and had a go at cutting them!

I believe they were running at a feed rate of 16 inches per minute with a glacially slow plunge rate. Watching the machine retract 10 mm above the carbon fiber at that plunge speed for every move wasn’t fun. I’ve bumped up the plunge rate without trouble, but I don’t think I’ve found the place to limit the retract height in Carbide Create yet.

This cut went reasonably well. I added tabs to the parts to keep them in place during the cutting process, but my guesses at tab widths and heights were terrible. The ends of the side plates came loose while drilling out the grommet holes, and the arms came completely loose before the holes were drilled.

I got enough parts out to test fit my side plates to the bottom plate, but the arms were completely unusable.

Learning from my mistakes

For the next attempt, I broke each job up into two different tool paths. The first path drilled all the holes and cut out any internal voids in the parts. The second tool path carved the arms and side plates out of the sheet of carbon fiber.

This went much better, but I had new problems to deal with!

What were the new problems?

I imagine my problems were exacerbated by my increase to a cutting rate of 800 mm per minute. That’s approximately double my initial cutting rate! Two bad things happened, but I’m not sure which happened first.

On my very first cut, I used some Nitto double-side tape to hold the 1 mm sheet of carbon fiber to the wasteboard. All my carbon fiber sheets have the same length and width, so I used three screws and washers to hold the corners down. This worked well on the cuts into 1 mm and 2 mm carbon fiber.

At the higher speeds, the 3 mm carbon fiber sheet managed to work its way loose, and it was moving back and forth on the Z-axis!

Not only that, but my router was wobbling around!

I thought I was imagining it, but it sure was moving around. One of the pulleys holding the router to the X-axis had worked its way loose!

Recovering from the setback

I canceled the job, and I jogged the router upward by a few inches. I tightened the pulley, and I secured my carbon fiber sheet with a fourth screw and washer.

If I had been using my 3D printer, I would have scrapped the parts and started over. This isn’t a 3D printer, though!

Camera Pod is a bit messed up on the second prototype

I simply restarted the job. The machine wasted some time cutting into areas it had already visited on the first attempt, but that was OK. I didn’t have to waste $10 worth of carbon fiber on a failure.

The cuts weren’t perfect. The struts around my quadcopter’s camera mount are a little messed up, but they’re perfectly usable!

Then I broke a $20 endmill

It is a good thing I ordered two 0.0625” endmills when I bought my Shapeoko! While cutting the perimeter of one of my quadcopter’s arms, my endmill broke!

I’m pretty sure that at any reasonable cutting speed, my Dewalt router spins at a higher RPM than necessary, so I don’t think that was the problem.

I already know how to recover from a failure. I canceled the job, and I jogged the router up about two inches above my work surface. Thank goodness I had one more bit to use!

I broke an endmill in carbon fiber!

But that’s all I had. I’d have been set back quite a few days if I broke this one.

The holes were all drilled, so I disabled that part of the job. I lowered the cutting speed to 500 mm per minute, decreased my cutting depth from 0.4 mm to 0.3 mm, and I exported the gcode again. I also turned up the speed of the router a couple of notches. As I said before, I doubt the router was spinning too slowly. If anything, it is always spinning too fast for carbon fiber. At that point, I’d prefer to melt some epoxy and have rougher edges than have to wait a few days for a new endmill!

Success!

Less than an hour later, I had all the parts I needed to assemble my prototype quadcopter!

Amazingly, the quadcopter flies great. I’ve made quite a few tweaks to the design. They’ll make the frame quite a bit better, but they’re not required for me to begin testing. I think I’ve had a tremendous success!

Upcoming improvements to my process

The Internet tells me that I should be using fishtail endmills when cutting carbon fiber. Carbide 3D’s wiki pointed me towards a set of 0.0625” fishtail endmills on eBay. I was able to buy a pack of 10 for about $23. That’s what I paid for a single bit from Carbide 3D.

1/16th Inch Fishtail Endmills

I’ve installed one on my router, but I haven’t had a chance to test it yet. As long as it works about as well as the Carbide 3D bit, I will be pleased. I have a feeling it will be at least a small upgrade when cutting carbon fiber, though.

I need to work on dust collection, and I really should build some sort of enclosure if I’m going to be cutting carbon fiber often.

Conclusion

My Shapeoko has been a lot of fun so far, and a lot less intimidating than I expected! Cutting carbon fiber was less of a challenge than I expected, and I’m looking forward to cutting the next revision of my prototype quadcopter frame!

I’m not sure what my next project is going to be, but I have a few ideas lined up. My friends and I are talking about designing a bartop arcade cabinet, and I need to design some sort of SWAG for Patreon. The latter should be a quick and easy project, so that will probably be up next.

Do you have a hobby-grade CNC router? Are you cutting quadcopter frames out of carbon fiber? Have I done a good job at my first attempt? Do you have any questions? Leave a comment below, or stop by [our Discord server][bw] to chat with me about it!

My Shapeoko CNC Journey vs. 3D-Printing: CNC Software is Awful!

| Comments

My Shapeoko XXL arrived about a week ago. It took me a day or two to assemble it. I didn’t think it was going to be a difficult build, and it wasn’t. In fact, it was even easier than I expected!

I only had two complaints during the build, and one complaint afterwards. I don’t want to go into too much detail here, but I feel that it would be rude to mention my complaints without summarizing them.

Both complaints are in regard to the drag chains. There isn’t enough clearance between the X-axis limit switch and the drag chain. You need to shim and bend the drag chain bracket, or else the drag chain catches on the limit switch. The drag chains are attached to the rails with VHB tape. One of them already came loose. I’m going to need to drill holes and screw those drag chains down.

Also, I was under the impression that the Shapeoko’s GRBL firmware is correctly configured from the factory. My first few attempts at running the machine involved the router slamming into the bed. I tried using three different pieces of software to generate the gcode, and they all did the same thing as Carbide 3D’s “Hello, World,” file.

They were all going in the wrong direction when retracting the tool. I reversed the Z-axis in GRBL, and immediately had a successful cut. I’m not sure whether I’ve done the right thing yet. I’ll write about how the cutting workflow goes after I have some proper successes under my belt!

CNC software is awful

I’m not helped by the fact that I run Linux on all my machines, but even if I weren’t, the 3D-printing software ecosystem is leaps and bounds ahead of CAM software for CNC routers!

Open-source slicers for 3D printers are abundant and extremely capable. Slic3r, specifically the Prusa Edition, has been improving tremendously ever since the Prusa Mk2 started shipping. It seems to have mostly caught up with everyone’s favorite commercial slicer: Simplify 3D.

Technically speaking, slicers are CAM software—Computer Aided Manufacturing. CAM software converts your 2D or 3D model into gcode that runs on your CNC router. Just like a slicer.

Open-source CAM software is archaic compared to slicers. I haven’t dug deep into any of the open source packages yet, so I fully expect my opinions to change in a few months. That isn’t going to stop me from writing about what I have learned so far!

The commercial packages with reasonable price tags for a hobbyist are better, but still not great. They’re definitely a step up, but not nearly as big a step as I would have hoped!

2.5D vs. 3D CAM vs. V-Carving

2.5D CAM software works a lot like a slicer for your 3D printer. It carves one layer, lowers the tool, and then carves the next layer. If you are cutting a 3D shape, you will see stair stepping in your object.

On your 3D printer, those steps are 0.1mm high, so you can get rather smooth curves out of it. On a CNC router, those steps might be 10 or 20 mm tall. This doesn’t matter for the rather two-dimensional parts I’m cutting for my carbon fiber quadcopter frame, but it will matter a great deal if you’re cutting something with curves on the Z-axis!

3D CAM software mills smooth lines on the Z-axis by slowly raising and lowering the cutting tool as it is moving. This will result in a smoother finish than you can get with an FDM 3D printer.

My understanding is that 2.5D CAM software tends to create more efficient toolpaths for simple parts than most 3D CAM software.

Finally, there’s v-carving. This is what you use when you want to engrave text or other fine detail. With normal milling, the smallest detail you can create is the width of your mill. If you use a V-shaped bit, it is possible for the machine to carve a tiny point, but how does it do this?

By varying the depth of cut, the machine can control how narrow a line can be. The deeper you go, the wider it gets!

I don’t have any V-bits yet, so I haven’t done much research here.

3D CAM

PyCAM seems to be the top-tier open-source 3D CAM package, so it is the first thing I played around with. The interface seems clunky, and you really need to know what you’re doing to use it properly. It seems to do a reasonable job generating proper 3D toolpaths, but as far as I can tell, it doesn’t give you the option of leaving support structures behind.

Supports are different than what we use in the 3D-printing world. They’re much simpler here. CAM software lets you define areas of material to be left behind. These are referred to as tabs.

When I am cutting carbon fiber quadcopter arms, I will leave about a 1 mm square of material behind on each side of the arm. That will keep it in place, so it doesn’t pop out of place and get destroyed by the router when the next arm is being cut. Just like with 3D-printed supports, I will have to cut those out manually at the end.

The commercial, hobby-grade 3D CAM of choice seems to be MeshCAM. I run Linux on all my machines at home, and, like most CAM software, MeshCAM is only available for Windows and Mac. However, version 6 seems to work mostly fine under Wine. I had trouble with the Beta for Version 7. That trouble isn’t making me want to invest $250 in this product!

MeshCAM is much easier for me to understand than PyCAM. I’m sure MeshCAM is miles ahead of PyCAM, but my simple brain makes them look mostly comparable. MeshCAM has a simple interface for adding supports, and that alone might justify the $250 price tag for me!

I’m not in a rush here. My first projects don’t require 3D CAM software.

2.5D CAM

My first successful cut on my machine was done using JSCut. JSCut is open source, and it runs in your web browser. Like all the 2.5D software I’ve tried so far, JSCut is pretty clunky.

It will let you insert tabs, but you have to add them to your SVG file before importing your model into JSCut. The toolpaths generated by JSCut are very simple and not terribly configurable. When I import my quadcopter arm, it wants to just carve the outline before drilling the holes for the motor mounts.

I guess this won’t be a big deal if I add the appropriate tabs, but it would make more sense to me to mill out all the holes while the arm is at its most rigid. I can make this happen, but only if I import the holes and the arm as two separate SVG files. I hope!

For now, I’m probably going to be using Carbide Create—the no-cost software package for Carbide 3D’s line of CNC routers. As far as I can tell, adding tabs and choosing the order of my cuts should be relatively straightforward in Carbide Create.

However, selecting multiple nodes in Carbide Create is dumb. The only way to do it is by drawing a box around the items you want to select. There is no control-click option. I want to select the five holes on one end of my object along with the two holes on the other. It is impossible to select all seven holes without also selecting the outline of the arm!

V-Carving

I’ve barely looked at V-Carving. The top-tier hobby-grade V-Carving product seems to be V-Carve Desktop or V-Carve Pro from Vectric. I haven’t done enough research to know what differences there are between the two other than price. Desktop is $350 and Pro is $750.

I have absolutely no idea if V-Carve Desktop or V-Carve Pro function under Wine. For what it is worth, it looks like V-Carve Pro or Desktop can also handle 3D works.

It seems you can do reasonable V-carving with Carbide Create, and Carbide Create runs just fine under Wine. When I pick up my first V-bit, this is where I will start!

What about Fusion 360?

Autodesk Fusion 360 looks like a fantastic CAM tool. Like most CAM tools, I haven’t actually used it. Yet.

But I have done some research. It sounds like Fusion 360 is fantastic at CAM as long as you created your object using Fusion 360. If you’re importing an STL, things are less awesome.

Fusion 360 doesn’t run on Linux, and it sounds like a pain to get it working. I do most of my modeling using OpenSCAD, so I’m not too excited about the idea of getting Fusion 360 running just for its CAM functionality!

I always tell people that 3D-printing is very different than using their inkjet printer

On your laser or inkjet printer, you hit the print button, and a perfect copy comes out. I always tell people how much more complicated 3D printing is. You can’t just hit the button.

Check your printer. Make sure the bed is clear. Make sure your filament is loaded. Keep an eye on your print just in case it fails.

Compared to a CNC router, a 3D printer may as well be an inkjet printer! With a CNC router, you will often run multiple gcode files to produce a single object.

You’ll zero out your CNC, and cut the first file using a big endmill to strip away huge pieces of material. Then you might change to a much smaller ball-shaped bit and run your next file to carve out your smooth 3D contours. After that, maybe you’ll switch to a V-shaped bit to engrave writing and detailed designs. After all that, you’ll switch back to a beefy endmill to cut your piece the rest of the way out of the material.

I complain if I have to change filament in the middle of a print. Now I’m going to have to do the equivalent at least once on most CNC router jobs?! I might even have to do it three or four times!

CNC routers are faster than 3D printers

My old 3D-printed nylon quadcopter frame required two print jobs to build, and each job took nearly three hours.

Making my new carbon fiber frame will require me to cut three different thicknesses of carbon fiber, and cutting the parts will take less than ten minutes per sheet. This is only a rough estimate based on the time it took to run a test cut of one arm on a piece of particle board.

It may not be a perfectly direct comparison, because the two frames aren’t exactly identical, but I fully expect this to be at least an order of magnitude faster than 3D-printing.

One of the biggest differences here is trading some of my time for an increase in manufacturing speed. 3D-printing requires me to interact with the printer for a few minutes when the three-hour job starts and ends, and my interaction is quite minimal.

The CNC requires a little more effort on my part. I have to clamp down the carbon fiber. I have to make sure it is nice and squared up, because the quadcopter is strongest when the carbon runs parallel to the arms. I also have to zero out my tool in an unused and spacious enough section of the carbon fiber sheet.

Doubling or tripling the effort on my part means I can have sturdier parts ready in a fraction of the time. Is it a good trade-off? In this case, it certainly is!

Why is open source 3D-printing software so far ahead of CNC CAM software?

It has to be the accessibility of the technology. You can buy a reasonable 3D printer from Monoprice for $200 to $300. You can upgrade to one of the most advanced consumer printers available, the Prusa Mk3, for less than $1,000. These machines are small, and they’re quiet enough that they can sit next to your desk in an apartment.

My Shapeoko XXL cost me a little over $2,000. At this size, a belt-driven machine like this is about as low end as you can get. My machine’s little brother, the Shapeoko 3, is around $1,200. I would say the Shapeoko 3 is roughly equivalent to that $200 3D printer from Monoprice. I would say that the CNC router equivalent of the Prusa Mk3 probably would be driven by lead screws, and it would cost somewhere in the neighborhood of $6,000 to $10,000.

That big difference in price isn’t the only thing keeping CNC routers out of the majority of hobbyist’s hands. Spinning up a router to carve wood is loud and extremely messy. You’re not going to run the little 18” x 18” Shapeoko 3’s Dewalt router in the living room of your apartment. It is going to make a mess, and the neighbors are going to complain about the noise.

These barriers to entry make CNC routers at least an order of magnitude more rare than 3D printers. I can easily name five local friends who own 3D printers. I’m the only person I know with a CNC router.

What’s next?

I can see that the next few weeks are going to be fun and exciting. I’ve made my first test cut, and it went better than I expected. My design for a quadcopter frame is about 75% of the way to the first prototype. I imagine I’ll be cutting that sooner than I expected.

I keep adding more projects to my list. I just tweeted about my interest in cutting a Coleco Pac-Man-inspired bartop arcade cabinet, and two of my friends are interested in helping out and building their own. I won’t be surprised if a few more friends join in on that fun!

My friend Brian wants to mill a small wooden clock with his face on it. He wants to put it behind his Prusa Mk3 to show off just how quickly things are moving in his timelapse videos.

Have you bought a CNC router already, or are you thinking about pulling the trigger? What CNC machine did you choose? Is it better than mine?! Do you have a question? Tell me about it in the comments, or stop by our Discord server to chat about it!

Moon Lence Ultralight Folding Chair

| Comments

I don’t enjoy writing reviews. I’ve tried reviewing products on more than one occasion. Every now and then, a company will send me something to review. Usually those products are just fine, and every now and then they are also a good value. Sometimes those free products are terrible. I once received a 3D scanner from Gearbest, and it was total garbage and a complete waste of my time.

I was told that if you can’t say something nice, don’t say anything at all. I didn’t have a single nice thing to say about that scanner, so I didn’t write a single word.

I’m getting a little off track here, because Moon Lence did not send me a free chair. I bought one of their chairs almost a year ago. I was looking for a compact, light-weight chair to strap to my quadcopter backpack.

There are a lot of chairs like this on Amazon. In fact, most of them look almost identical to the chair from Moon Lence. I’m pretty sure I chose this particular chair due to the price. It was probably a few dollars cheaper than any of the other similar chairs available with Prime shipping!

Why are you writing about this chair a year later?

My chair broke. A tear showed up in the fabric near one of the corners, and I noticed my butt was starting to touch the frame sometimes. It was still usable, but I figured it was time to order a replacement.

Moon Lence improved the chair quite a bit since I bought mine. They’re added larger feet. This is a huge upgrade, because the narrow feet on my original chair tend to sink into the ground. Especially if it rained recently.

My Portable Chair from Moon Lence

The shape is a little different, too. I feel like I’m sitting up a little straighter. They’ve also added a small pocket to the chair, and it is a pretty good spot to stow my phone while I’m flying.

I ordered a two-pack of new Moon Lence chairs. When they arrived, I noticed that the box claimed that these chairs have a lifetime warranty. Have they always had this warranty? Will my old chair be covered?

The warranty warranted the blog post!

My old chair did have the lifetime warranty, and it was covered. I exchanged a couple of emails with Moon Lence, and a complete replacement chair arrived in three or four days! The replacement was the older model with the smaller feet.

As far as I was concerned, this was just a cheap, two-pound chair. It was disposable. If it was terrible, who cares? Nobody will care about my opinion. I believe it became a more interesting product now that I know about the warranty.

A great chair for FPV quad pilots

The Moon Lence portable chair weighs about two pounds, and it collapses down to be rather compact for transport. When I go flying, I almost always bring my giant ThinkTank FPV Airport Helipak backpack. With all my gear, the bag already weighs more than 20 pounds. Adding a two pound chair doesn’t weigh me down much, and the chair fits well in the tripod storage area—ThinkTank bags are usually for photography!

It only takes a minute or so to set the chair up or pack it away. I don’t use the carrying case. I just strap the folded frame and the seat to the side of my backpack.

I think it is quite comfortable. I’m about 6’ tall. When I started using the chair, I should have been up at around 250 pounds. These days, I’m at about 190 pounds.

When we go out flying our drones, we’re often out at the park for three hours or more. I don’t sit for three hours straight, but I usually sit while I’m flying or spectating. I would guess that I’m sitting the majority of the time, though, and I’m never uncomfortable.

I used to carry a larger chair. When I rode my Hover-1 electric bike, or we flew at a spot with picnic tables, I would usually leave that big chair at home. Picnic tables are uncomfortable, and I’m getting old. If I’m out there sitting for an hour, I want support for my back. The Moon Lence chair has never failed me here.

I have no idea what the history of this chair is. I assume anyone can buy from a manufacturer in huge bulk with a custom logo, but for all I know, every chair on Amazon is a clone of a clone of a clone.

In any case, there are similar chairs available from other vendors with high backs. They weigh an extra pound, but I figured there was a good chance I would upgrade for the extra back support. In my opinion, the extra support is unnecessary. It might be useful if you wanted to rest your head and take a nap, but that’s of no use to me!

The Go Chair

My friend Brian and I are waiting for some folding chairs from Indiegogo to arrive—the Go Chair. They weigh a bit more than the Moon Lence chair, and the sitting experience looks like it will be comparable. The Go Chair costs three times as much, but it also folds up like an umbrella.

Will the Go Chair be worth paying three times the price? I’m excited about saving a minute or two each time I go out flying. That’s enough time to fly about half a battery, and it could be three hours each year.

When we ordered the Go Chairs, I wasn’t just excited about the way the Go Chair folds and unfolds. I was also excited about the larger footprint of its feet. My Moon Lence chair used to sink into the ground all the time. The new model with the huge feet from Moon Lence has completely solved that problem.

When the Go Chairs arrive, I’ll be sure to post an update!

Conclusion

You probably won’t need Moon Lence’s lifetime warranty. I use my chair several times each week. I imagine most people that own folding chairs only use them occasionally. Even so, why not buy the chair with the warranty? The price is comparable to other similar chairs on Amazon, and I think the price is quite low.

Now that I have spares, I keep one in the car. It is compact and hardly weighs anything, so it doesn’t take up much room, and I’m prepared in the event that I forget to strap my chair to my backpack—I just made this mistake a few days ago!

Do you have one of these ultralight portable hiking chairs? Is it like the Moon Lence chair, or is it something a little different? Is there a better option? Let me know about it in the comments, or stop by our Discord server to chat about it!

I am Designing a Freestyle HD Micro Quad Frame!

| Comments

I enjoy flying 3” micros. In fact, the first quadcopter frame I designed was a 3D-printed nylon frame sized for 3” props. I would have enjoyed trying 4” props, but my 3D printer isn’t big enough to print that style frame in a large enough size to accommodate bigger props.

I’ve been avoiding HD cameras on micro quads. I helped my friend Brian build a 3” quad with the original Runcam Split Mini—the first model with two boards. It was a fiddly build. If I remember correctly, his 20x20 stack was five boards high: 4-in-1 ESC, flight controller, the pair of Runcam Split boards, and a VTX. It was a lot of little wires to manage in a microscopic amount of space. Finding quality 20x20 components was very difficult at the time, too.

My Freestyle Micro Frame

After all that work, the footage from the Runcam Split wasn’t all that exciting. Micros just don’t fly as smooth as their 5” cousins, and everything just looks weird to me without GoPro’s Superview. It also doesn’t help that the bitrate on the Split seemed like it could use a boost.

A lot has happened since the Runcam Split’s debut. There are quite a few roomier 3” freestyle frames now, but the only one that truly piqued my interest is Ummagawd’s Acrobrat frame. The Split has competition these days with the Caddx Turtle and the Foxeer Legend.

There have been a lot of advancements in the electronics, too. 20x20 ESCs work better and are more reliable. It is easy to find good 20x20 flight controllers with fast F4 chips, and Betaflight has improved dramatically in the last year or so. My little Leader 3 flies quite a bit better than any micros we were building when the Split Mini was first released. The Leader 3 arrived fully assembled and only cost around $120. The parts for Brian’s old HD micro build cost $262.57.

Micro components are getting more reliable, and the selection of reasonably priced parts has improved tremendously since then. I think it is time to revisit the idea of a 3” HD micro quad.

Ummagawd’s Acrobrat

I am excited about the Acrobrat, but it doesn’t quite fit in with my needs. The Acrobrat is heavy and quite large. In fact, I used to have a smaller 4” quad at one point. My 4” quad isn’t a good comparison, because it was a tiny racing frame, but that quad was already so much bigger than any of my current 2.5” or 3” micros!

The extra weight is understandable, even if I’m not exactly thrilled about it. It is much easier to fly freestyle with a heavy quad. I can’t properly huck my Leader 3 over a tree. It only weighs about 150 grams, so it has a lot of trouble maintaining momentum under the drag of the air.

With my 680 gram 5” quad and a sharp blast of the throttle, I can go inverted before I even reach the tree. With the Leader 3, I had better be mostly past the tree before I stop accelerating forward.

I believe Tommy is doing a fantastic job. His idea to use rubber bushings to separate the clean and dirty sides of the quad is amazing. He has designed a great frame for an amazing 3” freestyle quad.

With the large footprint of the Acrobrat, I’d be tempted to run a 4” setup. I’d like to try going in both directions. I want a smaller, lighter Acrobrat for 1106 motors, and I’d like to test out a 4” Acrobrat with larger motors. I am more than a little curious about what sort of 4” quad I could squeeze in under 250 grams!

Albert Kim’s Crossbow frame

I like the way Albert Kim thinks. He also wants a light, 3” HD quad with camera isolation and 1106 motors. I was excited when I saw the prototype of his Crossbow frame from Tomoquads.

His 3D-printed TPU camera mount is smart. It is simpler than Tommy’s bushings, but I’m a little worried that it will be too stiff. All the TPU filament I have on hand is flexible, but it isn’t very soft. Tomoquads might be using softer TPU, but the stiffness of TPU isn’t my only problem with the concept.

Tommy’s Acrobrat design puts the mass of the battery, camera, and side plates on the same side of the suspension. It is difficult for vibrating motors to transmit Jello to the 80 or 90 gram combined mass of the camera, side plates, and battery.

The Runcam Split Mini’s camera weighs less than 10 grams. The TPU would need to be extremely soft to allow a 10 gram camera to keep itself steady in the middle of vibrations.

When I started designing my frame, there was probably an 80% chance that I was going to emulate the Crossbow’s TPU camera mount. It is simple, clever, and 3D printing is right in my wheelhouse. I’d rather print something here than have to track down and order rubber bushings!

What are my goals?

I am designing my HD micro frame using OpenSCAD. It is a parametric design, and the design will be open source.

What does parametric mean in this context? It means the design of the components is built up from measurements. If you want to use 1106 motors, you can punch in 9 mm for the motor hole spacing. If you want to go up to 2207 motors, you can punch in 16 mm, and the motor mount will scale up. The base will grow, and the tips of the motor guards will extend.

My Freestyle Micro Frame

So far, I’ve planned ahead well enough to make the following elements configurable:

  • Motor hole spacing
  • Arm length
  • Arm angle
  • Arm width
  • Prop diameter (for the mock prop ring)

I’m thinking about adding parameters for fuselage length, but I believe it would be best to keep the configuration to the arms. Most people can’t cut their own carbon, so I think it would be better to keep the center of the quad standardized. All of the necessary customization to accommodate different size propellers or various X, H, and stretch-X geometries can be realized with changes to only the arms.

What happened? I didn’t even talk about the goals yet!

I’m planning to emulate Tommy’s bushing idea from the Acrobrat. I ordered a big bag of reasonable bushings from McMaster-Carr. They should arrive in a few days. I won’t tell you about the bag of giant bushings that I accidentally ordered. They’re wider than a 1407 motor!

I have a complaint about both the Acrobrat and the Crossbow. It probably isn’t a big deal, but it still irks me. The carbon doesn’t run parallel to the arms. It is close on the Acrobrat, but it is nearly 45 degrees out of alignment on the Crossbow. The extra bracing in the front of both frames probably helps, but when the strands of carbon don’t run the entire length of the arm, you end up relying on the epoxy for rigidity and durability.

My Freestyle Frame

This is part of the reason I’m attempting to use individual, replaceable arms. That makes it easy to cut the carbon with the strands running parallel to the arm. Individual arms will also save me a lot of wasted carbon material, and it will make it easy to change the configuration of the quad.

Here’s a list of my design goals:

  • Individual, replaceable, configurable arms
  • Standard fuselage for all configurations
  • Scalable from 2.5” to 4”
  • Scalable from 1106 to 1806 motor mounts
  • Three 20x20 mm stacks
  • Props completely out of view of the HD FPM camera
  • Top-mount battery
  • Acrobrat-style bushings
  • 3” Freestyle micro HD with sub-200 gram all-up weight
  • 4” Freestyle micro HD with sub-250 gram all-up weight

My new Shapeoko XXL CNC router is in the hands of UPS, and as I write this, it is out for delivery! I’ve already ordered three 400x500 mm carbon fiber sheets from GetFPV: 1 mm, 2 mm, and 3mm.

I plan for the arms to be 3 mm, the bottom and side plates to be 2 mm, and the small brace plate under the arms will be 1 mm.

This is too long! I didn’t read it! What’s the elevator pitch?

I’m designing a smaller Acrobrat-like freestyle frame for HD FPV cameras with easily configurable arm geometry. It should allow 3” builds under 200 grams, and 4” builds under 250 grams. I hope! The design will be open source.

I want this frame to be a good upgrade path from your existing 2.5” or 3” bind-n-fly micro. Pick up a Runcam Split Mini or Caddx Turtle, transplant the guts of your Leader 3, and start recording awesome HD freestyle footage!

Does that seem like a reasonably accurate summary?

When will it be ready?

I have trouble even guessing at this. I’ve never operated a CNC router, and I’m still waiting for UPS to drop it off—I bet it will be here before I finish writing this, though!

My Shapeoko XXL Waiting To Be Unboxed

The Shapeoko is a kit, so I’m going to have to assemble it. Then I’m going to have to test it. Carbon fiber is relatively expensive and messy, so cutting frames won’t be my first project. It might not even be my second! But who knows. I’ll probably get impatient!

I don’t have the time or funds to test every configuration

Designing a frame is fun. If I can transplant my Leader 3 hardware into this frame and stick an HD camera on it, I’ll be happy. I don’t need to go past that, but I’d sure like to!

I’ve noticed that the quads in my bag tend to fall into three different buckets: I have my Tinyhawk for indoor flying, my 5” and 6” quads for capturing proper HD freestyle footage, and I have my 3” micro quad for more considerate outdoor flying.

I think building this frame out to fit 4” props would be fantastic. Power and efficiency go up dramatically compared to 3”, and it wouldn’t need to be all that much heavier. Conservative motor sizing and a reasonable 4S LiPo should put a sub-250 gram 4” build easily in reach.

I’m not so sure I want to buy the parts to build that quad. In my mind, it would just fall into the same bucket as my 5” quads. I would very much be interested in finding someone that wants to build that quad. There are parts of the world where the 250 gram weight limit is a real problem.

NOTE: That isn’t a micro. That’s my 5” freestyle rig.

If you’d like to be the guinea pig for a 4” version of my frame, please get in touch with me. Tell me about your plans, and I’ll work on getting you a frame. You can stop by and chat with me on our Discord server. Keeping it under 250 grams isn’t required, but it would be a much more interesting build!

I need to get my own 3” designed, cut, and flying first. I don’t think it would be right to send a crummy design that doesn’t work right out to someone without at least a little testing first!

How is the design going?

I’m much farther along than I expected! The arms seem reasonable, and they look correct at every length and angle I’ve tested. The mounting holes are there, and they line up with the mounting holes in the frame. I’m a little impressed by that, because it is easy to leave an important number out of your math somewhere in OpenSCAD and have things not quite line up!

The bottom plate is about half finished. It needs tabs to fit into the side plates’ grommets. I’m waiting for the grommets to arrive. The grommets are round, but I’ll be fitting them into oval holes. I’ll 3D-print some test parts with a variety of dimensions to see what shape works best.

My Freestyle Micro Frame

A wider oval will accommodate a wider tab on the bottom plate. The wider the tab, the less likely it will be to break in a crash. If it goes too wide, the bushing will lose a lot of its springiness. Testing will be required!

The bottom plate also needs some cutouts to save weight. That will be quick and easy.

I imagine there will be several iterations of the side plates. I’ve decided to separate the side plates with 20mm standoffs—that’s 5mm narrower than the Acrobrat. This is 1 mm wider than the FPV camera, and the narrower bottom plate should help shave a few grams off the frame.

Once I get the side plates ready, I plan to 3D print the components for a test fitting.

How can I keep up to date on the progress?

Of course, you can check back on my blog for updates. I’ve spent nearly ten years writing about my various projects as I’m working on them, and I don’t intend to stop now!

There will be videos on my YouTube channel, and I regularly post photos and random thoughts on Twitter. I would greatly appreciate it if you subscribe to my YouTube channel or follow me on Twitter. Interactions are even better!

I am set up on Patreon, but I’m doing a bad job of advertising it and making use of it. Maybe I should get better at that!

If you have questions, comments, or critiques, you can leave a comment or stop by our Discord server. I’d love to know what you think, and I would enjoy your input!

NOTE: I finished the final draft of this blog post before UPS arrived with the Shapeoko, but it will be a few hours before the photos and screenshots are ready. The CNC router was delivered before I managed to publish this!

I Bought a CNC Machine: I Have No Idea What I’m Doing

| Comments

I’ve been interested in owning a CNC machine for a long, long time. When I was building my arcade cabinet, I thought it would be awesome to have a machine that could quickly carve new cabinets out of 4x8’ sheets of plywood or MDF.

When I bought my 3D printer in 2014, I began thinking about CNC routers again. At the time, I didn’t have room for a large machine, and I didn’t have many interesting uses for a small machine.

That’s all changed. I have plenty of room in the garage for a large machine, and my newest hobby has me interested in being able to machine parts out of carbon fiber.

What is CNC?

Computer numerical control. Doesn’t the term sound antiquated? CNC machines move tools under the control of a computer.

3D printers are CNC machines. They use stepper motors to guide a tool along three axes. In the case of a 3D printer, that tool is an extruder. It melts plastic and deposits it in precise locations in order to build up a part from the ground up.

A CNC router is in the same family. Just like a 3D printer, CNC routers move a tool around on three axes; the biggest difference is the tool. A 3D printer moves the print head around to deposit material, while a CNC router moves a spindle around to remove material from a solid piece.

In either case, you model something in your CAD software, process that model, and send it the machine.

Which CNC routers should I have in my garage?

When I started shopping, I had two goals in mind. I want a CNC router to be able to cut quadcopter frames out of carbon fiber, and I’d also like a machine that can work with 4x8’ sheets of material from the lumber yard. Thankfully, these don’t need to be the same machine.

CNC routers that can operate on a full sheet of plywood are expensive and take up a lot of floor space. That’s why I’m excited about the Maslow CNC machine. I doubt that it has the precision to machine interlocking carbon fiber parts for my quadcopter frames, but it would most definitely meet my needs for furniture-scale projects—like arcade cabinets!

NOTE: Jeremy and I recently interviewed Winston Moy on The Create/Invent Podcast. You should check it out if you’re interested in owning your own CNC!

The Maslow is about ten feet long, but unlike a traditional CNC router, the Maslow cuts with the material standing up on its side. This means that you can put the Maslow up against a wall, and it will only take up about 10’ by 2’ of floor space.

My favorite feature of the Maslow is the price. The full kit is only $479! You have to supply some of your own lumber and a couple of bricks, but that doesn’t add much to the price. You’ll also have to supply your own router.

If you’re just getting started, you may want to check out the SainSmart 3018 Prover. My friend Alex recently bought one, and he’s enjoying the little machine quite a lot!

Which machine did I choose for cutting carbon fiber sheets?

Carbon fiber is rough on cutting bits, but it isn’t all that difficult to cut. If your machine can handle harder woods, then carbon fiber ought not to be a challenge. Carbon fiber sheets are available in a variety of sizes, so you could get away with a minuscule machine that would fit on a desk in your office.

I don’t want to cut the small sheets. I want a machine that can handle the larger 400x500 mm sheets with a thickness of up to 5 mm.

I quickly zeroed in on the Shapeoko CNC routers from Carbide 3D. Their base model, the Shapeoko 3 kit, is available for around $1,200 with a Dewalt router. Its cutting area is 16x16”. That’s just over 400mm, so it isn’t quite large enough to handle the 400x500mm sheets I want to cut.

This is where I got into trouble. The Shapeoko XL kit with a router is around $1,600. The extra $400 doubles the size of the cutting area to 16x33”. That’s plenty of room for the large carbon fiber sheets, so I can stop here, right? Can’t I?

Nope. I couldn’t. While I was weighing my options, I thought to measure the dated cabinets in my kitchen. This is where things get fuzzy.

I have a vivid memory of measuring the cabinet doors and deciding that I would need to go all the way up to the 33x33” Shapeoko XXL to fit the widest of my cabinet doors.

I just went to measure them, because I wanted to tell you the correct dimensions. My tallest doors are about 29”, and the widest doors are about 15”. These absolutely would fit in the Shapeoko XL! I wonder what made me think I needed to upgrade all the way to the biggest model?

This is almost definitely a happy accident. It might have been nice to save $400 and some floor space, but I’m not going to complain. The bigger machine will be more fun!

All that being said, if all you want to do is make quadcopter frames out of carbon fiber, there are small machines available for as little as $250. You’d just be limited to small sheets of carbon!

The Shapeoko XXL with a Dewalt router

I don’t need to rattle off all the specs—they’re listed clearly on Carbide 3D’s site. The Shapeoko XXL has a 33x33” cutting area with a 3” of Z-axis travel.

The Shapeoko routers don’t look particularly difficult to assemble. I’ll be reporting back once I get this thing up and running. The order page said there was a ten day lead time, so I am at least two weeks three or four days away from cutting anything with my Shapeoko XXL.

When I had my mind mostly made up about buying a Shapeoko, I asked my friend Jeremy S. Cook what he thought of it. Jeremy often uses his CNC router in projects that he posts to YouTube. He has a much nicer and more expensive machine than the Shapeoko, and he’s been using it for a while, so I was excited about getting some input from him.

I know enough from my 3D-printing experience that lead screws are a much better drive mechanism than belts. Belts are stretchy, so they have some slack. They can overshoot on fast travel, and they can stretch and miss their intended position if you’re trying to cut tougher materials. Lead screws are a huge upgrade.

However, machines that use lead screws are a lot more expensive. I don’t have any plans to cut aluminum, but if I did, the belts might make that problematic. I’m sure I’ll put that to the test at some point, but it isn’t a problem I’m particularly worried about!

What’s this about kitchen cabinet doors?

Our kitchen is more than adequate for our needs, but the cabinets are old. Some of the wood is rough around the edges. One of the doors has a hinge that doesn’t hold the door closed anymore.

In general, though, the kitchen in our new house is dark. The cabinets are stained fairly dark, and most of the walls are cabinets. As much as I hate the idea of covering up stain-grade wood, I figured that the easiest way to brighten up the kitchen would be filling any chips or dings in the wood and painting the cabinets.

Then I started shopping for a CNC router. A Google image search for ‘CNC cabinet doors’ turns up all sorts of interesting ideas. Some have elaborate and intricate designs. Others have simple patterns that look like they could be done by cutting rounded trim with a jigsaw and hitting that trim with a fancy router bit.

I tend to lean towards clean and simple, but I want to design cabinet doors that are interesting. A design that would be difficult to do well by hand.

I am not artistic, but I’m still hoping I can come up with a reasonable design. I’d like to design a pattern of some sort that progresses across the kitchen from one cabinet door to the next. My simple mind is seeing some sort of curved line carved into each door. That line should run from one end of the kitchen to the other.

My first CNC router project: a parametric 3” quadcopter frame

If you asked me what I’d do with a CNC machine a year ago, I know exactly what I would have said. I’d be cutting quadcopter frames. That’s still true, but at the time, I would have assumed I’d be cutting all my own frames for quadcopters with 5” or 6” propellers.

I’m not as enthusiastic about that idea today. The frame I fly, the Hyperlite Flowride, is a well thought-out design, and it is made from high quality carbon fiber. Best of all, it is only $45, and replacement arms are about $5 each. At this price point, I don’t see any need to cut my own.

3” micro quadcopters are way more interesting right now. FPV cameras that can record HD footage have been improving a lot. Rotor Riot’s Acrobrat frame]ab has really piqued my interest. It uses soft rubber bushings to separate the camera and battery from the motors. This helps keep the vibrations of the motors from shaking up your HD footage. I like the design of the Acrobrat, but it is rather heavy and quite large for a 3” frame.

Albert Kim has been talking about his frame for a 3” HD micro—the Tomoquads Crossbow. It is smaller than the Acrobrat, and it should be significantly lighter. Albert Kim designed an interesting TPU mount for the camera in the hopes of limiting vibrations. His frame looks like it was inspired by the Acrobrat, but uses a different method of vibration damping for the HD camera.

I was excited about the Crossbow until I saw the directionality of the carbon. Instead of having the carbon fibers run parallel to the arms, it has the fibers running parallel to the fuselage. The arms would be much stronger if the fibers spanned the entire length of the arm. In the Crossbow’s chosen orientation, it relies more on the resin for rigidity. The Acrobrat doesn’t appear to suffer from this shortcoming.

I’ve designed a quadcopter frame before, but it was a 3D-printed nylon frame. Designing for carbon fiber is totally different, and I don’t expect my first attempt at a carbon fiber frame to be better in any way than the Acrobrat or Crossbow.

I see details in both frames that I want to implement in my own, and I see problems in both frames that I want to avoid. I imagine I’ll create my own problems. We’ll have to wait and see how it goes!

Tell us about your quadcopter frame!

I’m working on a parametric design using OpenSCAD. I plan to Open Source the design, and it will be available as a Customizer on Thingiverse. That means you’ll be able to punch in numbers to customize the layout of your copy of my frame.

Do you want to use 1106 motors and 3” props? You’ll be able to punch in the diameter of the motor bolt pattern, and also the length and angle of the arms. Do you want to upgrade to 1806 or 2204 motors with 4” props? Just reconfigure the motor hole spacing, lengthen the arms, and you’ll be good to go.

Parametric Quadcopter Frame Arms

I started with the arms, because they’re the most complicated shape on the quadcopter. I’m emulating Bob Roogi’s guitar-style arm ends from the Floss, Flowride, and FlosStyle frames. It was an interesting challenge creating a shape like that using OpenSCAD’s shape primitives!

Arms are all I’ve designed so far. The rest of the frame should come pretty easily. I’m trying to decide between trying to emulate Albert Kim’s TPU camera mount or the Acrobrat’s bushings. I have another idea for separating the noisy side of the quad from the camera and battery, but I’m not sure how well it will work.

I’m not sure what else will be parametric. The arms are the part that will need the most tweaking. They’ll need the configurable motor hole spacing, especially if you want to go up to 4” props.

I also want to get the camera forward far enough to get the props out of view. That will involve tweaking the angles and lengths of the front arms. Once they’re in place, I’ll need to reposition the rear arms in an attempt to keep the center of gravity close to the middle of the aircraft.

This is going to be fun!

What else can I do with my new CNC machine?

I’m pleased. I have several good uses for the CNC router, and I’ll be able to start working on those projects almost immediately. It wouldn’t be disappointing if those were the only uses I found for the machine, but it would be way more fun if I could do more stuff!

I will be able to mill printed circuit boards. There’s an ESP8266 and an RF433 transmitter module wired up through a breadboard in one of my breadboard vises sitting in an old plastic toolbox in my closet. It runs an Arduino sketch that allows my OpenHAB server to control some cheap radio-controlled power outlets. Wouldn’t it be nice to tie that all together on a PCB?

Speaking of breadboards, I’m very interested in converting my 3D-printed breadboard spring vise design to a CNC friendly format. I sell them on Tindie, but I encourage everyone to print their own instead. I have to charge too much for them. They use about $1.50 worth of plastic, but it takes way too long to print a complete vise—four or five hours, if I’m remembering correctly!

Carving a vise out of wood could take minutes instead of hours. It would require a little more assembly, and I’d have to buy some dowels at Lowes, but they’d be way less difficult to manufacture.

Brian and I talked about machining some sort of coins out of aluminum. I’ve always wanted patshead.com arcade tokens. Brian wants coins with his face on them. I have no idea how practical this is, but it is on our list of fun projects.

I have some other half-baked ideas, but they’ll have to wait until I get a feel for what the machine can do. I imagine it will be a lot like owning a 3D printer. At first, I’ll be replicating things other people are already doing. Then I’ll be designing more and more of my own models. Eventually, I should start seeing every problem around the house as a problem that can be solved with a CNC router!

Conclusion

This is going to be fun. The title might be an exaggeration. I have at least a small idea of what I’m doing. A lot of what I’ve learned about 3D printing and laser cutting will apply to my new CNC router, and I’ve already spent years modeling things with OpenSCAD. It is nice to have a head start, even if it is only a small one!

Waiting to unbox my Shapeoko XXL

The Shapeoko XXL kit is due to be delivered in about two days. Carbide 3D did a good job at beating their advertised 10-day lead time! I ordered a temporary 48” square folding table from Amazon, and it is already in place. The table was quite cheap, and it shows. It is quite sturdy, but it is severely lacking in craftsmanship. If you’re looking for a quick table for your Shapeoko XXL, you could do worse than spend $115 on this heavy-duty folding table.

Do you own a hobby-grade CNC router, or are you shopping for one? What do you think of the Shapeoko? I’d enjoy hearing about it in the comments, or if you’d like to come chat with me, please feel free to stop by our Discord server!

Why I fly FPV Quadcopters, and You Should, Too!

| Comments

In December of 2016, I helped folks out at a quadcopter build event at TheLab.ms makerspace. They were building 450mm quads to fly by line of sight. My friends tried to talk me into building one, too, but it didn’t look all that appealing. Everyone talked about putting cameras and gimbals on these quads, much like a DJI Phantom, and that didn’t interest me. I enjoy photography, but videography is hard work, and I rarely see compelling footage from a DJI drone.

My friend Brian really wanted me to participate in the hobby, so he bought me the most expensive piece of required equipment for Christmas—a Spektrum DX6 radio. Don’t repeat our mistake. Don’t buy a Spektrum radio. Save money, get better range, and get more features with a Taranis QX 7 or X9D+.

Hyperlite Flowride

I ordered a toy quadcopter—a Blade Nano QX, and a mess of batteries, and I started playing. I started designing a 3D-printed FPV quadcopter frame almost immediately. In fact, I had it built, tested, and uploaded to Thingiverse by February 17. I had taken one of my first FPV flights a week later, and I haven’t stopped since!

Why FPV Quadcopters?

When I was in my early twenties, my friends and I enjoyed fast cars. We enjoyed driving them, and we enjoyed modifying them in an attempt to make them go faster. Most of my friends ended up zeroing in on the DSM family of cars—the Eagle Talon, Mitsubishi Eclipse, and Chrysler Laser. These were little all-wheel-drive monsters with solid, turbocharged engines that could handle a lot more boost pressure than was available from the factory.

This was at a time when V8 pony cars were running 14.5 second quarter miles from the factory. The Eagle Talon would only manage a little over 15 seconds from the factory, but it was possible to get that down into the high 12-second range with just bolt-on parts: a 2.5” or 3” turbo-back exhaust, a boost controller, and some modifications to the intake. This was a fantastic value at the time, and the car was a ton of fun to drive.

Racing quads scratch a lot of the same itches. They’re stupid quick, and easily pull 9 g or more when you punch the throttle. A fast sports car can only pull a little over 1 g. Flying an FPV quad is like playing a video game, except the quad isn’t virtual. You’re also infinitely less likely to kill someone when pushing your quadcopter to its limits, and that means you can push it to its limits all the time—no more waiting for traffic to clear up!

I suppose we don’t tend to modify quads, though, since we build them from scratch. We do often upgrade parts as things wear down or break, though, so that’s a little like modifying a car. I’ve spent more money on bigger turbochargers than I’ve ever spent on a single quadcopter.

And speaking of video games, building quadcopters is a lot like building a computer. There’s a wide array of components available at various price points, and you get to pick and choose what will meet your needs and fit into your budget. Unlike building a gaming rig, our quads need to be sturdy enough to survive crashes at over 80 MPH, and the build process involves quite a bit of soldering.

Racing quads? Are you racing these things?

Sometime early last year, I ran into some drone-racing guys at my favorite park. They were packing up their race gates as I was arriving, but we chatted for a few minutes. They wanted to know if I raced, and I told them that I didn’t. So they said that I must be flying freestyle, and I didn’t really think that was true, either. I was still learning.

I was every bit as much of a freestyle pilot as I was a racing pilot at that point. I was just trying not to hit trees, trying to fly a little faster each day, and trying to get a little closer to hitting things without actually making contact.

Racing sure didn’t sound like my cup of tea. I’ve participated in racing events before, but that was with cars. We used to go to the drag strip a lot—all-wheel drive is fantastic off the line! I didn’t race often, though. Running at the drag strip meant 10 to 20 seconds of driving followed by a whole bunch of waiting.

Drone racing is similar. You fly for two minutes, give it everything you’ve got, and then wait for another turn to go. This isn’t for me.

When I go out flying with my friends, it is normal for me to fly enough batteries to stay in the air for 60 to 90 minutes.

What is freestyle?

I often meet passersby while flying, and they usual inquire about the drone in my hands. I always tell them the same thing. These are FPV racing quads, but I don’t race. I fly freestyle. It is all about having fun and doing various tricks. It is a lot like skateboarding, but also a little like barnstorming!

When flying freestyle, I’m trying to have fun. I’m trying to pull off interesting maneuvers, and those maneuvers get more difficult and technical as my skills progress. I’m also capturing this with a GoPro in the hopes that I collect enough interesting footage on a single outing to string together a fun two- to three-minute video that I can set to music.

I spend most of my time flying in parks, though, so the video has been getting repetitive. Office buildings make for some awesome video, but they’re busy at least five days a week, so I don’t get much practice at locations like that.

We build and repair just as much as we fly!

This is definitely an exaggeration, but for a while it was surprisingly close to the truth. My friends and I used to buy cheaper gear, and quadcopter components weren’t nearly as bulletproof two years ago as they are today.

In those days, something was always breaking. Some days we’d smash a camera, other days we’d burn out an ESC. Sometimes you bend a motor or break an arm. Every now and then, the problem is less obvious.

Flowride Being Built

A combination of things have happened to help alleviate this problem for me. I don’t crash as often now. When I do, it is often much more spectacular, though. I’m buying higher-quality parts. The quads I fly today cost about $550 each, and I have to invest several hours building each one myself. Two years ago, I was flying a preassembled quad that cost less than $250.

It also helps that I’m spending most of my time flying at parks. I’m slowly finding new spots to fly, and those spots are full of concrete and steel. I imagine that pendulum is going to swing back the other way for me soon!

If you enjoy tinkering, soldering, repairing, and upgrading, then this hobby might be a good fit for you. I know some folks that enjoy building even more than they enjoy flying!

You don’t need to be a pro to enjoy flying FPV!

I always have a good time when I can get better at something. Especially when I can see that progress. I had fun when I was golfing. I got to watch my drives go farther and straighter. I also enjoyed practicing pitching the ball onto the green from 50 yards out. I always hated putting. I still hate putting.

I play quite a few video games with high skill ceilings, and I’m always excited when I start regularly pulling off difficult moves.

The same is true when flying FPV. I had fun when I was lucky to take off, fly a few laps around a big open field, figure out where I was standing, and disarm the quad six feet above the ground—sometimes referred to as landing. I had fun when I was learning to fly under trees. I was ecstatic the first time I pulled off an S-turn and a power loop!

I’m still learning, and I’m still experiencing that feeling. I have more free time to fly, so I’m progressing faster than most of my friends. No matter how quickly they’re progressing, though, they’re still having fun. They’re enjoying every step of their journeys.

I get out to fly four or five times a week, even if I’m only out long enough to fly one or two batteries. My friend Brian usually only gets out on weekends—winter daylight hours aren’t helping him! We have other friends that get out to a park once or twice a month.

These 5” racing quads look mean and scary!

They are. At least, they can be. Safety first!

These propellers spin at over 20,000 RPM. The tip of the props can be moving at up to 300 miles per hour! If you’re negligent, they can cut you open right to the bone. Most of our quadcopters weigh more than a pound. My setup weighs 1.6 pounds when in the air, and I’ve clocked it at over 120 miles per hour using GPS.

You can’t just fly these things around a crowd of people. Getting started in the hobby can be intimidating.

We don’t just fly big, heavy quads!

We fly smaller quads, too. Some of them are small enough to safely fly indoors.

I have a 3” micro quad—a Leader 3 from Full Speed RC. When we refer to the size of our quadcopters, we are measuring the propellers. My Leader 3 weighs less than six ounces, but it can still reach speeds of in excess of 80 miles per hour. Both [my 5” quads][phq] and my Leader 3 can reach their top speeds in less than three seconds.

The Leader 3 may be too fast and powerful to fly indoors, but it is an order of magnitude safer than my big freestyle quads. It is a great way to build confidence flying outside before moving up to a 5” quad, and it is fun for me to fly when the 5” would be too loud or dangerous.

There are all sorts of options for indoor fliers. The venerable Tiny Whoop has been a popular indoor FPV drone for years. In fact, I used to fly a cheap Tiny Whoop clone myself—the Eachine QX65. There’s been a lot of progress recently in this category, though, and I think there are a lot of better options now.

I recently picked up an EMAX Tinyhawk. It weighs more than a Tiny Whoop, but it’s still less than two ounces. The extra weight comes from the much sturdier frame, better motors, and bigger battery. I’ve been having a great time flying my Tinyhawk. It is a big upgrade over my Eachine QX65, though I hear the official Tiny Whoop and Newbeedrone Acrobee both fly better than the Tinyhawk.

I’m excited about the Tinyhawk bundle Emax is offering. It includes everything you need to get flying for $165: a Tinyhawk, box goggles, a controller, a battery, and a 6-port charger. Throw in some extra batteries—you always need more batteries, and you’ll have everything you need to get started for less than $200.

How do you get started flying FPV quadcopters?

I could write an entire post about how to get started in the hobby. I’ll do my best to keep it brief here. There are three or four common paths to get into FPV quadcopters, but you can definitely land anywhere in between. There’s no right or wrong way to do it. Each path has advantages and disadvantages.

Jump into the deep end

Buy a $200 Taranis X9D+ and $500 Fat Shark HDO goggles with a $170 RapidFire module. Then spend $600 on parts to build an awesome 5” freestyle quad, and stick a $400 GoPro HERO7 Black on top. Then you can throw all that stuff into a $200 backpack. You’ll realize that you’ve spent over $2,000, and you haven’t bought a charger or batteries yet!

My ThinkTank Backpack full of stuff

Each battery will fly 3 to 6 minutes, and they cost about $25. A charging setup will run you between $60 and $150.

Not many people begin their journey this way.

5” on a budget

You can start with 5” without spending nearly that much money. Skip the GoPro and use a backpack that you already have lying around. Buy a $120 Taranis Q X7, a $70 set of Eachine EV800D box goggles, and a $180 bind-n-fly freestyle quad like the Eachine Wizard 220HV. You’ll still need batteries and a charger.

My BFight 210

That’s less than $400. You’ll eventually want to upgrade the goggles, and the Eachine Wizard will probably need repairs quite often, but this is a much more reasonable way to get a feel for the hobby.

Each battery will fly 3 to 6 minutes, and they cost about $25. A charging setup will run you between $60 and $150.

For a long time, my friends and I were recommending the BFight 210. Even when it was new, you could get it for around $130, and some of my friends are still flying theirs over a year later. Unfortunately, the BFight 210 is getting outdated and is harder to find, so I’m recommending the Eachine Wizard X220HV—the HV model is a huge improvement over their older models.

I don’t feel great about recommending something I haven’t used myself, but that’s the best I can do right now!

2.5” or 3” is a better way to start

Buy all the same gear I mentioned in the previous section, but skip the Eachine Wizard. Buy a Full Speed Leader 3 instead. You’ll save $60, and your batteries will be even cheaper!

A little over a year ago, I might not have made this recommendation. These days, though, 2.5” and 3” quads fly an awful lot like a 5”. They’re also a fantastic way to learn to fly.

You won’t need as much space as you do with a 5” quad. They aren’t nearly as heavy, so you won’t be paying to repair someone’s windshield!

Batteries are a little cheaper. Each battery will fly for 3 to 5 minutes, and they cost about $12. You’ll use the same charging setup, and that will set you back somewhere between $60 and $150.

Forget about the real world

You don’t have to buy goggles. You don’t have to buy a quadcopter. The only piece of hardware you need to get started is the controller, also known as the radio. You can plug the $120 Taranis Q X7 or $200 Taranis X9D+ into a USB port on your computer, and use it with several popular FPV quadcopter simulators.

My Old Spektrum DX6 and My Taranis X9D+

This is the direction I point everyone in. Forget about the real world. Get a radio and hop in the simulator. The monetary investment is small. You won’t break anything when you crash. Simulator or not, you will crash a lot. You won’t have to waste time searching for your quadcopter when you crash. Did I mention that you’ll crash a lot? You won’t have to charge batteries, either.

NOTE: Yell at me about this old video. It is well over a year old, but it is the only Liftoff video on my YouTube channel. I need to record something better!

Every time you crash, you just hit the reset button and start over.

The simulators won’t turn you into a pro. I always tell people that I fly seven times better in the simulator than I do in the real world, and it isn’t as much of an exaggeration as you might think. The flight controllers and software on our quads have been improving at a tremendous pace, so the gap between the simulator and real life is closing, but you still won’t be able to pull off everything you manage in the simulator in real life. You eventually need to practice on the real thing!

There are free simulators, like FPV Freerider, but I always recommend Liftoff. It is available on Steam for $20 and supports Linux, Mac, and Windows. Liftoff is more capable than FPV Freerider, has more interesting maps, and you can directly transfer your rate settings between Liftoff and a real racing quad running Betaflight.

But the simulator just isn’t enough for me!

This brings us back to where we started. There are plenty of indoor-friendly drones to choose from. The don’t fly much like a 3” or 5” quad, but they’re a ton of fun, and they’ll get you used to the controls. They’ll also help safely scratch the FPV itch if you’re not patient enough for the simulator.

As I said earlier, Emax has a fantastic bundle with everything you need to get flying for $165. Throw in another five batteries for $25 more, and you’ll be having a blast.

If you buy a Taranis radio to learn with the simulator, the Emax Tinyhawk would be a good second step on your journey. The base Tinyhawk is $99 without the radio and goggles. It will bind right up to your Taranis, and it comes with a battery and charger. You’ve been flying in Liftoff already, so I don’t have to tell you that you’ll want more than one battery.

The Tinyhawk will fly outside, as long as it isn’t too windy. Around the house, I get nearly four minutes of flight out of each battery. There’s more room to maintain speed outside, so it is easy to drain a battery in two minutes!

Conclusion

It doesn’t matter if you’re flying around open fields doing flips and rolls, or you’re pulling off a sweet dive down the Empire State Building. It doesn’t matter if you have inexpensive gear, or you’re carrying thousands of dollars’ worth of hardware around in your backpack.

Flying FPV is fun. It is fun when you’re just starting out. Learning new tricks can be challenging but rewarding. Everyone I fly with is having a good time regardless of their skill level.

For some of us, it is a lot like driving fast sports cars, but with a lot of advantages. Flying FPV quads is so much cheaper, our quads accelerate faster than a Top Fuel drag car, and they corner harder than a Formula One race car. It is like playing a video game in real life.

Do you fly FPV quads? Are you racing or doing freestyle? Did I miss anything important here? Tell me about it in the comments or stop by to chat on our Discord server!