Adding Hooks or Straps to Your Backpack Just Got a Whole Lot Easier!

| Comments

Last year, I had two problems to solve. I needed to carry one more thing in my smallest laptop bag. I also wind up having two long and narrow strips of carbon fiber plate left over after cutting batches of a product I sell on Tindie, and I am always trying to come up with a good use for that extra material.

I feel like I found a good solution for both problems. I cut two small pieces out of carbon fiber, poked some tiny holes in my laptop bag with a razor, and bolted those pieces of carbon fiber to the laptop bag. Now I can use a Velcro strap to tie my PlayStation 4 controller and a water bottle to my laptop bag!

No-Sew Carabine Hook

I think this is a cool little product, but I have two serious problems with it. I have no idea how to market it. What would you type into Google if you needed to attach something to your bookbag? Even more importantly, how would you even know that this is an option?

The other major problem is that poking the holes in the bag was a fiddly process. People won’t have the right tools, and the tools I was using myself weren’t even the right tools. This is the problem I solved this week!

Before I forget!

This will all be open-source. The STL files no-sew doodads are on Printables. The OpenSCAD source will be on GitLab and Printables. I will also stock the non-printable pieces separately in my Tindie store just in case you want to print your own, but you don’t want to source bits and pieces of hardware from all over Amazon or Aliexpress.

The OpenSCAD source has gotten ugly. My intention is always to make a clean, parametric design. Then I start using magic numbers. Then I copy and paste modules so I can work on two different ideas at the same time. Then stuff gets left over, and stuff gets ugly.

The source will get out there, but cleaning it up is pretty low on my list. I need to get this listed on Tindie. I need to get the STL files exported and uploaded to Printables. I really, really need a video to embed in this blog to show you exactly how well this all works.

All of these things should be happening at the same time, but I can’t do everything at once. I will get there soon.

I designed an alignment tool for a leather punch!

I figured there must be some sort of punch tool that would work on thick fabric. Where I wound up here is definitely not quite where I expected to be.

I was betting there would be a tiny punch that I could embed in a 3D-printed part. I hoped I could embed two of them at the correct spacing. I was picturing a tool that you could insert the fabric into and squeeze like a red Swingline stapler.

No-Sew Punch Tool

What I found were three-inch leather punches. I couldn’t put those inside a small tool. They are also rather dull. I don’t think you can punch through fabric unless you tap the punch pretty solidly with a hammer. Even if you could, my original idea was terrible, because you might want to poke your holes miles away from the edge of the bag.

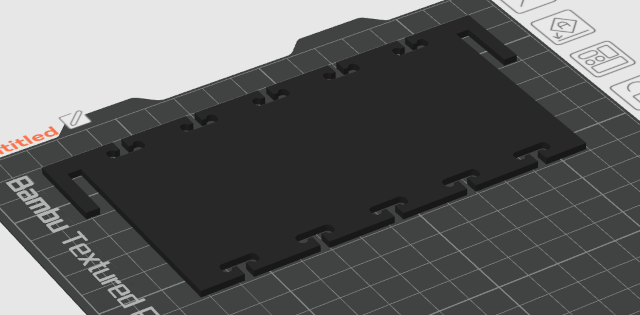
What I settled on is a two-piece alignment tool with two holes spaced to match all the accessories. You put one half of the tool inside your bookbag, then connect the other half of the tool outside the bag. They stick together, because they have a pair of strong magnets!

Then you just put the leather punch in each hole and give it a little tap with a hammer. You have to use a bit of authority when hammering, but not nearly as hard as you would when driving in a nail. It only takes a few seconds to punch two holes in exactly the right spots to bolt on one of my hooks or straps.

NOTE: I had one bag that really didn’t want to punch! I had to give it quite a hit with the hammer! My testing sample size is still pretty small here.

No more carbon-fiber parts

At least for now. I did some testing with a chain of various 3D-printed parts. I tied my 42-pound electric unicycle to a 3D-printed camera plate, and that camera plate was bolted to an old backpack using a 3D-printed piece with heat-set inserts. I was able to lift the 42 pounds without anything showing any signs of wear, though I was really worried that my terrifying set of zip ties and carabiners would slip off the tripod screw!

No-Sew Camera Mount

I am not saying that you should hang 42 pounds off your backpack, but I do feel very confident in the strength of the 3D-printed parts.

More importantly, the 3D-printed parts do a good job keeping any steel screws from scratching anything inside your bookbag. The old carbon-fiber pieces left exposed nuts and bolts, while the 3D prints cover those up for you.

I used to joke and say that the carbon fiber could probably hold my weight, and that the bookbag fabric would break first. I suspect I was more correct than I thought. It might be fun to rig up a real test someday!

3D-printing opens up so many possibilities

The carbon-fiber parts could only take advantage of two dimensions. I couldn’t do much besides letting you strap a water bottle, a game controller, or a baseball bat to your bag. That’s pretty handy, and it is cool having it made out of such a sturdy and exotic material, but that was nearly as far as the idea would ever go.

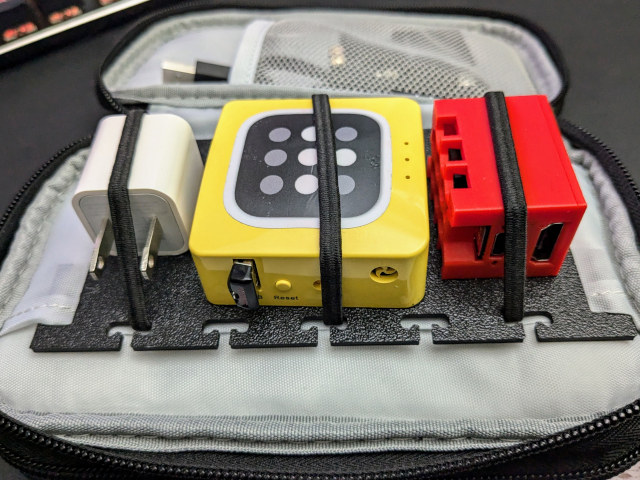
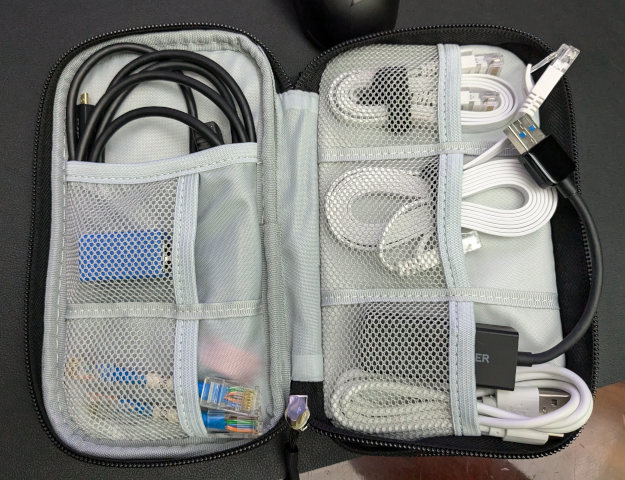
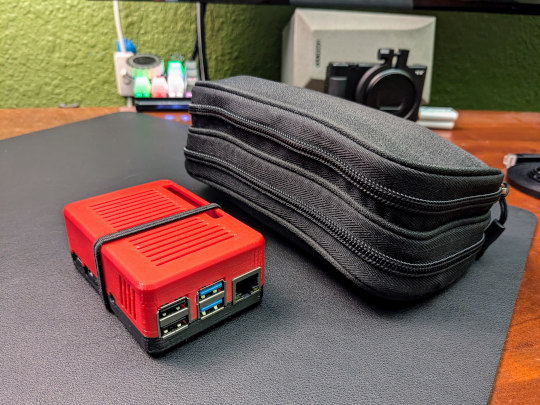
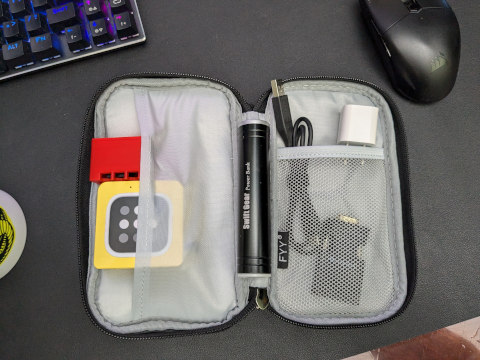
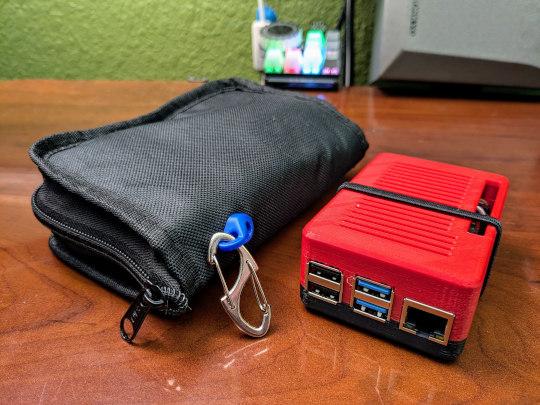
I almost immediately printed some hooks to match the carbon-fiber plates. I use an old headphone case to hold all the parts of my Raspberry Pi KVM kit. Adding the hook to that case meant that I could clip the kit to my small laptop bag with a carabiner. I don’t need to take it with me often, but it is nice to know that I don’t need to pack a bigger bag when I do need it.

No-Sew Carabiner Hook

This week, I have been contemplating ways to quickly stow a DJI Pocket 3 while riding my electric unicycle. I am not allowed to buy a Pocket 3 unless I can find some good uses for my Osmo Pocket 1, so I figured I better put some thought into this.

My favorite solution so far involves printing a PGYTECH-compatible quick-release plate for my Osmo Pocket 1. I have 3D-printed receivers that are compatible with these plates, but they don’t lock nearly well enough for me to trust them in motion, so I designed a no-sew camera adapter.

I can bolt the no-sew adapter to my backpack strap. Then I can attach a real PGYTECH quick-release doodad to my backpack, and I can quickly and easily clip my Osmo Pocket to my backpack. How cool is that?

I figure that if the no-sew camera adapter can lift my 42-pound unicycle, then it should be safe to attach any of my cameras to it.

There are so many possibilities

I am doing my best not to go too bananas. I just want to get some simple parts into the collection that work well together. I accidentally went down the wrong, more complicated path when first attempting to design the camera bracket.

I knew that having the tripod screw between the bracket and your bookbag would be problematic because you would never be able to tighten the camera in place without removing the bracket from your bag. I wound up designing and abandoning a fairly convoluted dovetail system to get around this problem before realizing that fabric is flexible, so I just had to make sure the camera bracket was wide enough to allow you to fold it out of the way to get to the screw. This simple solution is so much better.

No-Sew Carabiner Strap on my Electric Unicycle Bag

The dovetail that I designed was convoluted because it needed extra screw holes to make sure it never accidentally let go of your $2,000 camera. It was thick, and the need for the extra screw made it cumbersome to install or remove.

I think I could simplify things for situations where you aren’t carrying something expensive. Maybe we can design some sort of quick-release mechanism using magnets for quickly stowing an inexpensive water bottle or something as light as a PlayStation controller.

What exactly is in the Tindie store?

I have been running off most of the test parts in PLA on my Bambu A1 Mini because I am lazy, and I always have PLA loaded up and ready to go. The parts on Tindie are all ABS plastic printed on [my Sovol SV06][sv06is2].

Why ABS? PLA is definitely strong enough, and if you print your own, I wouldn’t be afraid to use it. The trouble is that PLA can get soft if you leave it in direct sunlight in your car here in Texas. I don’t want parts breaking on anyone just because they left their bookbag in the car, and ABS doesn’t have this problem.

If you want to 3D-print your own, I have a bundle with the punch tool, magnets, and rubber bumpers. If you can’t or don’t wish to print your own, that is fine. I am stocking all the various parts.

I don’t want to give you my money, Pat! It is MY money! I want to print my own doohickeys!

This is fine! It is better than fine! I don’t want to take your money. I will be just as excited if you print your own no-sew accessories. I think I have made a neat thing. I find it useful. I think a lot of people could get some use out of them. I will be excited to see other people using them!

You can even source your own magnets and punch tools. You don’t have to buy them from me. In fact, you can even skip these things. They aren’t necessary to make the system work, but they do make things much easier and cleaner!

What’s next?

I have some other ideas since installing the first no-sew carbon-fiber doodad last summer. I haven’t fleshed those ideas out, and I haven’t put any design work into them. I felt like this idea was pretty much dead because cutting the holes was a pain in the butt. The template and punch tool have corrected that problem! I wouldn’t be surprised if I could install a hook on a backpack in the same amount of time it takes you to thread a needle.

I have some half-baked parts that attach to the bag using dovetails. I almost used them for the camera mount, but I realized that it wasn’t necessary. Even so, I think the dovetails are a neat idea, and I have some other uses where they might work well. I hope!

What do you think? Do you need to add a heavy-duty attachment to your backpack, but you don’t know how to sew? Maybe you just don’t know how to sew well enough to hold 42 pounds securely. Do you just need to hang one more water bottle on your bag? Is this a good idea? Let me know in the comments, or stop by the Butter, What?! Discord server to chat with me about it!

My Bambu A1 Mini - My First Six Hours of 3D Printing

| Comments

Earlier this month, I wrote about ordering myself a Bambu A1 Mini 3D Printer. I could rehash all the reasons why I chose to add an A1 Mini to my collections instead of a Bambu P1S, or why I think the A1 Mini is a good size, but I feel like we will indirectly cover that sort of stuff while we talk about how fantastic the printer has been so far. Let’s summarize some of what I have already learned.

My Bambu A1 Mini with Little Trudy Judy

The Bambu A1 Mini is a little slower than my souped-up Sovol SV06; sometimes by a big margin, but usually only by a little. The Bambu dials in a perfect first layer and flow rate every time, so the prints all come out cleaner than my Sovol.

I can’t decide whether I am disappointed or relieved that the A1 Mini didn’t immediately make my Sovol SV06 obsolete. Maybe we will figure that out together!

The A1 Mini is tiny. I wasn’t sure if the A1 Mini sitting next to the AMS Lite seemed to take up more space or less space than I expected, so I got out the tape measure. The combo is about 23” wide and 17” deep. I think that is interesting, because that is precisely the footprint my Sovol SV06 requires, except the Sovol is 17” wide and 23” deep!

My first Benchy

The A1 Mini ships with a sliced SpeedBoatRace Benchy already on the printer. I didn’t print that. That file is specially tweaked to print super fast. I wanted a realistic test, so I sliced my own Benchy with the 0.16-mm profile. It took a little over 40 minutes to print, so my Sovol SV06’s 21-minute Benchy printed in half the time. I even used the same filament just to be fair.

My first Benchy on the Bambu A1 Mini

These Benchy’s are apples and oranges. My Sovol SV06’s Benchy breaks the SpeedBoatRace rules by using 0.24-mm layers, and those thick layers are noticeable in the final product. Bambu definitely dials in the first layer better than I ever did on the Sovol, and almost every fine detail of the Benchy came out better on the A1 Mini.

The hull came out cleaner on the Sovol, but to be completely fair here, the clean Benchy on my Sovol had a huge external fan blowing across the printer.

Testing PETG support interface with the AMS Lite

I expect having the option to print in four colors will be fun, but that isn’t the reason why I was excited about buying the A1 Mini Combo. I keep hearing and seeing that PETG supports don’t stick well to PLA, so you can pop the supports right off! And you only have to print the interface layers in PETG, so the printer doesn’t have to change filament for every single layer of the support structure. Isn’t that neat?!

I didn’t have a handy part to test. I wound up printing one of the camera adapter plates for my no-sew backpack hooks. The part is designed to print without supports, so I just flipped it so the wrong side was up, and I made some tweaks to the slicer settings to use PETG for the supports.

Testing PETG supports on a PLA print with the Bambu A1 Mini

NOTE: Believe it or not, that is the smoothest surface of the print as far as my finger can tell! If I used black PLA with black PETG, I don’t think we’d ever know there was support material in that hole!

I was surprised how many clicks it took to set this up well in OrcaSlicer. I had to pick the material, change the number of interface layers, change the interface layer distance to zero, and increase the density of the interface layer. I kind of expected there to be a single button to hit to make all this happen!

I wanted to make sure it would be easy to see what was going on, so I used white PLA for the part and black PETG for the supports. This was probably the worse possible combination, because you can see lots of leftover bits of black PETG on my PLA part.

The supports didn’t completely pull away quite as cleanly as I was led to believe, but most of it did pop out easily and cleanly. I just had to clean up one extra layer of PETG.

Even though the layer looks behind rough due to the black bits, the bottom of the supported part of the print feels smoother than the top of the print. It is quite impressive!

I suspect that I could have gotten an easier separation here if I changed the pattern of the interface layer. I am sure I will be experimenting with this more in the future.

I had to try printing ABS

And it worked really well! OrcaSlicer was being a pain about letting me add an ABS filament profile, so I just copied a PETG profile and adjusted the temperature a bit.

I don’t print large parts using ABS. I print small structural parts, and they are usually parts that I need to survive in the sun here in Texas. Small parts print perfectly well on my Prusa MK3S and my Sovol SV06, but I was worried that the Bambu A1 Mini’s bed-temperature limit of 80C would be too low.

ABS test on the Bambu A1 Mini

Left to right: ABS on my A1 Mini, ABS on my Sovol SV06, PETG on my A1 Mini.

I printed a set of my no-sew backpack pieces. I kept an eye on things just in case something came loose from the bed during the print, but I learned afterwards that if anything, the ABS adhered too well to the textured PEI sheet.

I don’t expect to have any problems printing batches of these parts on the A1 Mini.

UPDATE: My test prints with ABS were with three or four small parts. My next print had about twice as may parts, and one of them had about three times the footprint of the others. The big part came loose on me during the print. Your mileage may vary if you try to print ABS, because so far, my own mileage is definitely varying!

Is that 180x180 bed too small?!

I had a slightly worrisome moment while unboxing the new printer. The textured PEI sheet is right on top of everything along with the quick-start guide. I was out in our cavernous living room when I was unpacking everything, and I have to say that the print surface looked absolutely minuscule out there!

Once I got it into my office, though, it looked like a much more reasonable size. Yes. It is much smaller than the Prusa MK3 or the Sovol SV06, but the Bambu A1 Mini has quite a reasonable print volume.

Bambu A1 Mini bed vs Prusa MK3S

If you want to be able to print a Scout Trooper helmet, then the A1 Mini isn’t the right printer for you. For that matter, neither are the Prusa MK3S, Prusa MK4, or the Sovol SV06. You need something at least as big as the Bambu P1S or the Sovol SV06 Plus!

This tiny printer will be fine for nearly everything I print. You can tell by the wear on the grid printed on my Sovol SV06 that I mostly only use a 2” square in the center of the bed.

I mostly send one or two small parts to the printer for testing, and they rarely take more than 20 minutes to print. Then I check that the parts will fit, make any necessary tweaks, and send another small 20-minute job to the printer. Then I repeat that until I get it right.

If you work like I do, you will be fine.

Should you buy a Sovol SV06 or Bambu A1 Mini?!

An answer to this question will need to be a whole blog post on its own, but I had some good thoughts long before the printer arrived, and most of them have already been confirmed in the first day of ownership. It seems worth writing a few paragraphs here.

These printers are not directly comparable. The small, fast, much more user-friendly machine costs $100 more, and Bambu has much better quality control than Sovol. The bigger, still capable machine costs $100 less, but Sovol has pretty poor customer service.

The Sovol SV06 is $195 now. The design and technology is very comparable to the Prusa MK3S, and that design is a proven workhorse. If you get a good machine from Sovol, it ought to be a tank, and you’ll have no trouble finding parts to repair it. The bummer is that this is outdated tech that was extremely exciting in 2016.

The Bambu A1 Mini is modern and friendly, but it costs $299. You don’t have to learn how to calibrate your own z-offset. You don’t have to learn to dial in your flow rate for your filament. These are the two most common problems over on /r/FixMyPrint, and Bambu does it for you. You also get a camera, WiFi printing, and remote print monitoring.

You are paying an extra $104 to save yourself hours of potential aggravation, to receive a more modern and higher quality product, and for a much faster printer that you can send prints to from your phone or computer. The Bambu may be smaller, but you get a lot for the extra money.

If you want to try 3D printing for the first time, I feel like the Bambu A1 Mini is one of the best options.

But you said your Sovol SV06 is faster than your Bambu A1 Mini!

So far, this does seem to be true. The trouble is that I put in a lot of work to get it to that point.

If I paid myself minimum wage, I don’t believe it would have cost me the entire $104 to get the Sovol to where it is today, but I’ve been upgrading and configuring Marlin on 3D printers for eight years. I suspect it will take you longer, and I hope both of us value our time more than that.

Benchy on my Bambu A1 Mini

If you think it will be fun, then by all means, grab a Sovol SV06 or SV06 Plus and have fun! Just remember, the performance isn’t the only difference.

What’s next?

I need to do a legit and ridiculous multicolor print. I poked through my filament collection, and I decided to paint agepbiz’s awesome print-in-place F14 to look like Skywarp from The Transformers. I have black for the body, purple silk for some highlights, gray for the scoops, and coextrusion gold and silver to use for the canopy. I think it’ll be fun, but it will be a 12-hour print and take 20 times more filament than just printing a single-color jet, so I am going to put that off for at least a few days!

Articulated F-14 painted like Skywarp from The Transformers

I want to see how well the A1 Mini switches to the next spool when a spool runs dry. I have quite a few nearly depleted spools. I figure I can drop a whole mess of Gridfinity bins on the plate to eat through those leftovers to see how well it does!

Other than that, it will mostly just be printing as usual. Except on a different printer!

What do you think? Is the Bambu A1 Mini at $299 cheap enough to be an impulse purchase? Is it worth paying the extra $100 and compromising on size for the modern conveniences and high speeds out of the box? Do you think I am correct when I say that everyone should have Bambu’s first-layer compensation and flow rate tuning on their first printer, or do you think new people should struggle to figure out how to set a z-offset? Let me know what you think in the comments, or stop by the Butter, What?! Discord server to chat with me about it!

I Bought a Bambu A1 Mini Even Though I Know What I Am Doing

| Comments

Writing these sorts of blogs is starting to feel like a tradition, and it would feel weird not to do it. I buy a thing. I don’t know what I am getting myself into. I write about what I am expecting and hoping for. I did this when I bought my first wooden 3D printer. I did it again when I bought a Shapeoko CNC router. I did it when I bought an electric unicycle. I did it again when I bought a LumenPNP pick and place machine.

Stable Diffusion 3D printing guy

The Bambu A1 Mini is different. It isn’t my first, second, or third 3D printer. I also can’t decide if I chose the A1 Mini because I know what I am doing, or in spite of the fact that I know what I am doing. That is assuming I really do know what I am doing!

At this point, I have only placed my order for a Bambu A1 Mini. It says my printer is supposed to ship before December 8. That is just over a month from now.

The Bambu A1 Mini should be an amazing printer for beginners!

It wasn’t that many months ago where a beginner had to either pick a good printer than would do most of the calibration work for them, like a Bambu X1C for $1,200, or a decent but inexpensive printer with a bit of a learning curve, like the Sovol SV06 for $250.

It is true that Bambu won’t yet sell you the A1 Mini without the AMS filament changer unit, but Bambu says that when they do, the A1 Mini will be priced at $299. That gets you all of the awesome hand-holding of the Bambu X1C for only a little more cash out of your pocket compared to the Sovol SV06.

NOTE: I am aware that this is a Sovol SV06 Benchy video and not a Bambu A1 Mini. I don’t yet have an A1 Mini to record a video.

It may not be obvious to you if you have never owned a 3D printer, but r/fixmyprint and r/Sovol over on Reddit are both overflowing with new users who don’t know how to correctly dial in their first layer. A significant portion of those posts explain how frustrated they have been spending hours trying to figure things out without success.

In my opinion, almost the entire price of the Bambu A1 Mini is worth it for a new user not having to spend the time learning how to calibrate your z-offset.

I stand behind everything I have ever written about the printers from Sovol. They were an amazing deal, and if you need a larger printer, they are still a good value. Bambu has really shaken things up six months after I picked up my refurbished Sovol SV06 for $159.

Let’s move on to talking about me. I know how to calibrate my z-offset. I had my Sovol SV06 printing a nice first layer in less than 15 minutes. I have done this hundreds of times. Once you get that first layer dialed in, you may not have to touch it again for months.

Every now and then, though, my first layer on the Sovol SV06 or Prusa MK3S will be a little extra squished if I run two prints back-to-back. Things expand and contract as the temperatures change, and the longer the bed is heated, the more parts in the bed take on that additional temperature. The Bambu A1 Mini’s perfect first-layer calibration will mean this won’t happen to me ever again. Any small improvement in the reliability of print jobs will encourage me to waste less time keeping an eye on the printer, and I consider my time to be valuable. You should value your time as well!

Bender MINI 13 on the Sovol SV06

I bought the Sovol SV06 because friends were asking me which 3D printer to buy, and the Sovol SV06 seemed like the printer to recommend. I didn’t feel great having to explain that it looks like an amazing printer, but I haven’t used it myself, so I have to make the recommendation based on what I have heard from others.

The same is true of the Bambu A1 Mini. It is so obviously the 3D printer for people new to the hobby, but I haven’t used one, and I don’t own one. I feel like I need to correct that problem.

Why did I buy such a small printer?!

Some people buy a Bambu X1C, open the box, and immediately print a Mandalorian helmet to stick on their own head. If that is you, then maybe the A1 Mini is the wrong printer for you.

The vast majority of the parts I print are much smaller than my hand. I could count on one hand the number of things I couldn’t print because they wouldn’t fit on my Prusa MK3S. I am sure that number would be even larger with the 180-mm bed of the A1 Mini, but it still wouldn’t be all that large!

I am much more excited about iterating on my own designs quickly. So many things that I print on my Sovol SV06 are finished 10 to 20 minutes after hitting the upload and print button in PrusaSlicer. It helps that I have set up Marlin’s input shaper on the Sovol and upgraded to a 0.6-mm nozzle.

Bambu A1 Mini build plate with a Gridfinity Pliers holder bin

The Bambu A1 Mini is large enough to print the biggest Gridfinity bin I have ever printed. There is enough room for a 4x4 bin or grid.

My SV06 is about three times faster than my Prusa MK3S. That means I can print three or four iterations on my hot-rodded Sovol SV06 in an hour to test fit a part, whereas it would take all afternoon to do the same on the Prusa MK3S.

The Bambu A1 Mini may be up to twice as fast right out of the box as my Sovol SV06, and I have put a lot of hours and work into dialing up the speed on the Sovol. Being able to iterate on a part five or six times in a single hour is going to be fantastic!

NOTE: I imported my Sovol SV06 input-shaping profile into Orcaslicer. I figured it would be easier in the long run to use one slicer for both printers, and Orcaslicer supports the Bambu A1 Mini. My aggressively tuned SV06 with its 0.6-mm nozzle printed my Orcaslicer test part in 8:46. The fastest profile for the A1 Mini with its 0.4-mm nozzle estimated just over 13 minutes for the same part.

I am also excited about the multicolor AMS unit

The AMS module for the A1 Mini is interesting. It looks fairly small. I have been guessing that it looks to be about three spools of filament wide, and maybe about two spools deep. That’s pretty compact, especially compared to the huge AMS for the Bambu P1S and X1C.

The trouble is that the new AMS won’t just stack on top of your brick of a printer. My setup with the A1 Mini won’t be as tall as a Bambu X1C combo, and it will probably take up less depth on the shelf, but I expect my setup will be wider than a Bambu X1C. I will understand this better when I see it in person.

Printing multiple colors will be a neat trick. I am sure I will print some fun toys and trinkets in four colors, but that isn’t what I am excited about.

I am excited about printing support material interface layers for PLA prints using PETG. You can dial down the separation between supports and the print so that they are touching, and the PETG won’t stick well to the PLA, so you can just pop it right off. From what I have seen, the supported underside of those PLA prints is almost as clean as if they were printed right on the bed. How awesome is that?!

I am excited about trying ABS prints on the Bambu A1 Mini!

I don’t print all that much using ABS filament. ABS is one of the more durable filaments, doesn’t require extreme temperatures to print, and it doesn’t wreck brass nozzles. It is also one of the few filaments that will survive when sitting on the sunny dashboard of my car here in Texas.

Bookbag hooks on the Sovol SV06 in PETG

NOTE: I usually print these in ABS, but I bought my first spool of PETG, and I figured they would be a good test print. I just picked a PETG filament profile, made sure the flow rate limit was up around 20 cubic mm/s, and hit the yolo button at 28-minute Benchy speeds on the Sovol SV06. I thought they came out all right for zero tuning for PETG!

ABS filament isn’t supported on the A1 Mini, but I want to try it anyway. The A1 Mini’s bed can reach 80C, and I used to print ABS on my original printer at 90C, so maybe I can get away with that. Most of the parts that I print in ABS are rather small, so I am expecting it will work out all right.

The A1 Mini’s hot end can reach 300C. That is way more than you need for ABS. That is hot enough to print nylon.

Why not the Bambu P1S with an AMS?

The short answer is some combination of timing, cost, print volume, and the fact that I just can’t buy every 3D printer I would like to own. The P1S combo for $940 was released several months after I bought the Sovol SV06. I also have friends running Bambu P1P and Bambu X1C printers. I have watched them print. I have no worries about recommending these printers to people.

Stable Diffusion 3D Printer Guy

I can’t find any actual timing numbers, but everyone seems to be saying that the new AMS Lite can change filament significantly faster than the original Bambu AMS. If you are printing with all four colors, this can be a HUGE deal. It takes the original AMS more than 30 seconds to swap filament.

If you run a print job that has to change colors four times for every layer, and that print is 200 layers tall, then the original AMS would spend more than 6 hours on just filament changes. Trimming just ten seconds off each filament change would shave two hours off the print time.

I like the idea of spending half as much for faster multicolor prints.

Conclusion

I could write so much more. I am way too excited about my Bambu A1 Mini order, and I can hardly wait for it to ship. I figure I should probably stop speculating on my future here, because I don’t have any data or photos to back myself up, right?!

This isn’t really a conclusion. I haven’t even started yet. My Bambu A1 Mini won’t even ship for another four weeks. This isn’t the blog about how awesome the A1 Mini 3D printer is or isn’t. This is the blog about why I made this choice, and what I expect to come of it.

What do you think? Will I keep using my Sovol SV06, since it might be 10% faster than the Bambu A1 Mini? Or will I only fire it up to print things that don’t fit on the A1 Mini, since the first layer of the Bambu ought to be more reliable? Are you upgrading from a Sovol SV06 or Prusa MK3 to a smaller Bambu A1 Mini like me, or have you already done so? Are you happy with your A1 Mini? Or should I have paid more for a P1S? Let me know in the comments, or stop by the Butter, What?! Discord server to chat with me about it!

Marlin Input Shaping on the Sovol SV06: Three Months Later

| Comments

NOTE: In my attempt to call attention to the problems, all photographs are lit and angled in a way that most highlight any printing imperfections. Just about everything pictured here looks better in person than zoomed in and lit so directly across the layer lines!

I have some complaints. I have run into some disappointments. Even so, I have gotten way more than my money’s worth of an upgrade out of this free firmware upgrade for my Sovol SV06. Let’s start with the good stuff.

If you already have practice flashing Marlin on a 3D printer, then setting up input shaping on your Sovol SV06 will be a piece of cake. The benefits of enabling input shaping are absolutely worth the effort. You can just turn on input shaping, skip the step where you tune the input shaping, dial up your speed and acceleration settings in PrusaSlicer, and you will have no trouble printing a Benchy in under 30 minutes.

Cable clips

NOTE: These parts were printed with no slowdowns for overhangs and no minimum layer time. The only difference is whether or not that 45-degree overhang was facing the coolest side of the part-cooling duct or the warmest. The part’s default orientation faces it in the worst direction.

At least, it was easy for me to print a Benchy that with a 0.6 mm nozzle. We will touch on that more later.

I can’t upgrade my Prusa MK3S, so I have almost completely stopped using it. My Prusa has printed exactly two parts for me since cranking up the speeds on my Sovol. One time it happened to have the correct color already loaded. The other time I had forgotten to load one part of a project onto the Sovol’s build plate, and it was already printing, so I ran off the missing part in parallel on the Prusa.

I want to stop tinkering, but I can’t!

I keep thinking that I have dialed in my speeds pretty well, but I am constantly finding edge cases where I run into my machine’s limits.

I can print a nice 21-minute Benchy from the SD card, but Octoprint can’t keep up with the curved hull at that speed, so I dial that back to around 24 minutes. This week I noticed that my cooling is significantly worse on the front, but especially to the left of the front, and I can’t print a clean 20-mm cube. I set the minimum layer time to 3 seconds, and I now have a nearly perfect cube, and that also cleaned up a lot of other small problems with other prints.

I don’t really want to have to think about this stuff. I am excited that I was able to hit a reasonably fast speed with my Sovol SV06, but I would like to be able to just hit print and not worry about it. Bambu has already run into the problem I had, and they have tuned their printer hardware and slicer profiles to avoid these sorts of issues. My free upgrade has cost me a lot of time.

It has mostly been fun, though, and being able to say that my $169 printer can crank out a Benchy in 21 minutes is neat!

Balancing cooling, the 0.6 mm nozzle, and Octoprint

I have been on the right track this entire time, but I didn’t quite make it to the destination I was expecting.

The faster you lay down plastic, the more cooling you need. To put down more plastic, you have to send more g-code to Marlin in a shorter amount of time. Octoprint can only send g-code to Marlin at 115,200 baud. I could try rebuilding the firmware to allow for 250,000 or 500,000 baud, but that is more effort than I want to invest. Especially knowing that it might not work well at all!

Moving up to a 0.6-mm CHT-style nozzle means you can extrude roughly twice as much plastic for every line of g-code. That helps avoid the communication speed issue with Marlin, and that is awesome.

Stable Diffusion 3D printer guy

What I didn’t realize is just how much more difficult it is to cool that thick line of filament. PrusaSlicer’s default 0.15-mm profile for a 0.4-mm nozzle has an extrusion width of about 0.45 mm, while my own 0.24-mm profile has an extrusion width of 0.7 mm.

I am extruding nearly three times more plastic. This is like spaghetti compared to linguine. How much harder is it to cool the center of that 220-degree linguine? It is a lot harder!

I was correct up to a point. I don’t have to push the speeds an acceleration nearly as high with a 0.6-mm nozzle to print as fast as the hot end can melt the plastic, and sending half as much g-code does indeed help Octoprint keep up. What I didn’t anticipate was just how much more difficult it is to cool the parts!

I paid $4 for a better part-cooling duct

I think it was a good deal! At first, I was on a mission to quiet some of the ridiculously loud fans on my Sovol SV06. Bigger fans are quieter, so I upgraded the part-cooling fan from a 4010 to a 5015, and I printed one of the popular ducts from Printables.

Minimum Layer Time

NOTE: The $4 fan duct doesn’t cool nearly as well towards the front left for me, but it definitely feels like it moves a lot more air than the free ducts on Printables. I had to add a 2-second minimum layer time to clean up that corner on my test cubes.

That was fine. I was able to run the part-cooling fan at about 30% instead of 100%, and it was a lot quieter. Then I started printing fast, and running the 5015 fan at 100% wasn’t cutting it. I almost printed one of the dual-5015 fan ducts, but Reddit suggested that the $4 from Cults3D was much better, since it was designed using air flow analysis software.

I assume they are correct, because this sucker feels like it moves a lot of air.

I stopped optimizing for the Benchy, and so should you!

Printing a single small object is challenging. You need quite a bit of cooling to quickly print that narrow little smoke stack on top of the Benchy. Most prints aren’t as demanding.

In the olden times when most of us were still using wood-framed 3D printers, we had a pretty standard piece of advice that we would give out when a small part was printing poorly; print two of them instead! If you smoke stack doesn’t have enough time to solidify between layers, giving it more time to cool by printing a neighboring smoke stack will probably help a lot.

We aren’t always speed-boat racing. We are trying to print the parts that we need to print. You don’t literally need to print two identical parts, either. You can always add another thing that you need to the build plate. My go-to objects are Gridfinity bins.

What have I done to balance these forces? Should I clean up my PrusaSlicer config so I can share it?

While breaking the rules of the speed-boat race, I think I have managed to dial in a reasonably clean Benchy in around 28 minutes. I don’t need an external part-cooling fan for this like I would to get under 20 minutes. Most of the overhangs print well. This Benchy is definitely not pristine, but I feel that the quality is better than just acceptable.

There is one part of the Benchy that prints poorly because Octoprint can’t feed gcode fast enough at 115,200 baud. Everywhere that the hull extends high in the front of the boat has weird artifacts. These artifacts vanish when printing from the SD card.

Benchy with Marlin Input Shaping on the Sovol SV06

NOTE: You can see the difference in the hull between my 24-minute and 28-minute Benchy via Octoprint. The rough back corner is facing the problematic corner of my cooling setup!

The lower parts of the hull print well, because those long straight lines that wrap the hull around the back of the ship only take a few lines of gcode to print several inches of filament. That leaves room in the serial port’s buffer for the more complicated shape up front.

I improved this issue by lowering the G-code resolution from 0.0125 mm to 0.05 mm. That decreased the size of my gcode file for the Benchy from 3.2 megabytes to 2.3 megabytes. This didn’t completely eliminate the problem, but it helped tremendously!

What about speed, acceleration, and flow rate limits?

I should start by saying that I kept the first layer speed extremely conservative. I don’t need high speeds keeping a part from sticking to the textured PEI sheet. I did widen the extrusion width for the first layer from the default of 0.65 mm to 0.9 mm. That speeds things up by nearly 50%, and the wider extrusion helps with adhesion if the z-offset is a hair to high.

I am currently running 5,000 mm/s2 acceleration for pretty much everything. I have infill set to 190 mm/s, perimeters set to 170 mm/s, and external perimeters set to 140 mm/s. Nothing seems to go past 160 mm/s with my usual 0.24 mm layer height, because I have flow rate restricted to 21 cubic mm/s.

How did I settle on 21 cubic mm/s? Thin walls had crummy layer adhesion with a 0.48 mm layer height at anything over 22 cubic mm/2 with my knock-off 0.6 mm CHT nozzle, so I scaled it back by one extra just to be safe.

Larger parts spend most of the time printing up at 160 mm/s. Parts like a Benchy vary from 15 mm/s to keep the smoke stack cool, 60 to 90 mm/s around the overhangs of the hull, to 140 mm/s or so just above the hull.

Who cares about Marlin’s input shaper now that we can buy a Bambu A1 Mini for $299?!

Bambu is really smacking us over the head with the amazing specs and price on that Bambu A1 Mini. It can crank out a nicer Benchy than mine using a 0.4 mm nozzle in 14 minutes right out of the box. The new printer from Bambu is a fast, advanced, and priced super competitively.

I think that makes Marlin’s input shaper more important than ever before. I already know what happens when you own a slow printer and buy a fast printer. I can’t easily add input shaping to my Prusa MK3S, so I stopped using it.

I know there are cheaper ways to add Klipper to a printer, but most people are buying $120 Klipper screens. Is it worth spending $120 to upgrade a printer to make it about half as fast as a Bambu A1 Mini? Dialing in Klipper for fast speeds is definitely time consuming. I would feel better putting that $120 towards the faster printer.

Marlin’s input shaper doesn’t cost any money, but is it worth the time and effort getting those speeds dialed in? I don’t know, but spending a couple of hours speeding up an old printer might keep it out of a landfill, and that seems like a win to me!

Why aren’t you sharing your PrusaSlicer settings and printer settings?

First of all, I am extremely uncertain that I have tuned my input shaping correctly. That said, it does seem to be working pretty well! I left the damping alone on both axes, and I am only right now wondering if that is something I should be tuning. I set the frequency on the X-axis to 45.8, and the Y-axis is at 36.7. That may very well be the most useful piece of information I have.

Marlin Input Shaping Settings for the Sovol SV06

What about the slicer profiles? My profiles are a mess. Copies of copies of profiles with awful names. If I am going to export this for public consumption, I would need to clean it up. If I am going to clean it up, it really had better be of use to someone!

I am using a 0.6-mm nozzles with a 0.24-mm layer height. My suspicion is that none of you lovely people interested in Marlin’s input shaper on a Sovol SV06 are interested in using a bigger nozzle. Maybe I am wrong. If I am wrong, let me know in the comments. That would encourage me to get to work clicking on things in PrusaSlicer.

Bambu sure does give you a lot for your money

I am reorganizing my office. To tidy up my workbench, I printed a large Gridfinity organizer for my pliers. It took up most of the length and more than half the width of my Sovol SV06, and it is the biggest simple part that I have printed using my input-shaping PrusaSlicer profile.

Not enough heat input shaping

Why does that matter? Long, straight lines let your printer really get up to speed, and they keep your extruder pumping out filament the entire time. I had one side come out quite clean, two sides come out a little icky, and one side of the box had so much underextrusion and poor layer adhesion. Printing 24 inch lines without a retraction, z-hop, or non-printing move just wasn’t giving the heater any breathing room to catch up!

Most of this part printed at the 22 cubic mm/s that I specified for my max flow rate in PrusaSlicer. I backed that off by one cubic mm/s, I bumped my print temperature up from 200 degrees to 210 degrees, and I bumped my retraction from 0.2 mm to 0.4 mm to compensate for the extra temperature.

Bambu has already done tests like this. They ship you an extremely fast slicer profile that doesn’t push beyond the limits. I didn’t find my Sovol’s limits with smaller prints, but my first big print like this found some flaws.

It would be nice to buy a Bambu A1 Mini or Bambu P1S and not have to think about this at all, but I am not grumpy about it. My large Gridfinity bin is most definitely a usable part. I won’t be wasting 200 grams of filament in an attempt to print a perfect bin. I just made some mental notes, some minor slicer tweaks, and I will see how it goes when I print something similar in a month.

That is another reason why I am not maintaining a slicer profile for the public. I am not excited about immediately printing a test part to see if I found a solution. Maybe I fixed it, maybe I didn’t. I will find out eventually!

Conclusion

This is getting longer than I anticipated. Maybe we should wrap things up!

It is a weird and exciting time to be shopping for a 3D printer. Bambu is really shaking up the market. I got an email yesterday saying that the Sovol SV06 is on sale for $199, and the Sovol SV06 Plus is on sale for $289. The latter seems to be strategically priced $10 less than the Bambu A1 Mini. Is that a low enough price for this particular set of compromises?

Has Bambu’s latest release managed to make them your first choice for your new 3D printer? And do you want to print with four colors? Or do you need a big, honkin’ printer like the Sovol SV06 Plus? If you are moving up to a Bambu A1 Mini or Bambu P1S, will you be trying out Marlin’s input shaper on your old printer to extend its useful lifespan? Let me know in the comments, or stop by the Butter, What?! Discord server to chat with me about it!

The Bambu A1 Mini is So Good I Had to Delete an Entire Blog Post!

| Comments

I am not even sure about the direction this post is going to take. I had a pretty reasonable blog nearly completed over the weekend, which discussed how Sovol seems to be trying to squeeze as much speed and quality into printers without costing so much that everyone would just spend $150 or $200 more on a Bambu P1P instead.

I knew Bambu was going to be releasing something a few days ago. I had no idea it would pack so many features and so much performance into $300. Bambu has very nearly made almost every single budget 3D printer obsolete.

Stable Diffusion 3D Printer Guy

It is a bit early to be shouting about how amazing the Bambu A1 Mini might be, because so far it is only in the hands of reviewers. How the unboxing experience goes for normal people will be much more important, and how they hold up in the long run isn’t a foregone conclusion.

Bambu has a commendable track record thus far. If I were Sovol, Creality, or Prusa Research, I would most definitely be planning for the A1 Mini to be a huge success.

The Bambu A1 Mini has set a new standard for budget 3D printers

The Bambu A1 Mini is an astonishingly well-equipped 3D printer for $299, and the A1 Mini with the optional AMS unit that lets you print objects in four colors is an amazing value at only $469. Bambu has managed to include every important next-generation feature that makes the Bambu X1C and the Prusa MK4 such amazing machines.

The Bambu A1 Mini can print a Benchy in 14 minutes. It has strain sensor bed leveling for a perfect first layer just like the Prusa MK4 and Bambu X1C. Unlike the Prusa MK4, the Bambu A1 Mini has fast enough WiFi to upload your gcode in a reasonable amount of time. The Bambu also has automatic flow rate compensation.

If you poke around r/FixMyPrint, you will notice that there are two common problems that make up the vast majority of posts. So many people don’t know how to calibrate their z-offset. The Bambu A1 Mini’s load sensor does this for you. Almost as many people don’t know how to tell if they are over extruding, and the Bambu’s flow rate compensation ought to solve that problem, too.

Should your first printer be a Sovol SV06 for $259? Or is it worth spending $40 more to let the printer solve these two common problems for you? There is absolutely no question in my mind that these two features alone are worth way more than $40, and the 14-minute Benchy is just icing on the cake. Extremely delicious icing.

Budget printers are bigger than the Bambu A1 Mini. Does it matter?

When you are shopping for a 3D printer, you likely have particular objects in mind that you want to be able to print. Some subset of you that are reading this want to print large things: a NAS computer case, a cosplay helmet, or huge Gridfinity bins. Size might be the single most important specification of your 3D printer.

I bet you can fit 99% of the objects hosted on Printables on a Bambu A1 Mini. I can count on one hand the number of times in the last three or four years that I wanted to print something that wouldn’t fit on my Prusa MK3S. I could definitely get by with a smaller printer.

Stable Diffusion 3D Printer

I will always be looking to print the biggest Gridfinity base plates that I can fit on my printer no matter how big my printer is. Whether I am limited to the Bambu A1 Mini’s 180 mms, or I am limited to a Sovol SV06 Plus’s 300 mms, I will still be gluing base plates together.

The advanced features that Bambu has managed to cram into $299 are fantastic. I would think long and hard before choosing a bigger printer over a Bambu A1 Mini.

Bambu has quality control and customer service departments

I love my refurbished Sovol SV06. I paid $169 for it. I set up Marlin’s input shaping to make it able to crank out a clean Benchy in 21 minutes. It is a well engineered, sturdy machine. It is unfortunate that Sovol uses cheap electronics and loud fans, but it was an amazing printer for the price.

If you follow r/Sovol you will see that quite a few people receive broken printers. My suspicion is that the percentage of people unboxing duds is quite minimal, but we have no way to know the actual numbers. What is more important to note is how many of those people complain about Sovol’s customer service.

Robot on the Prusa MK3S

If you are one of the lucky ones who got a good Sovol SV06, then you ought to be in good shape. You might be one of the unlucky few with a bad stepper motor or a control board that fries itself almost immediately. It seems like it may take you several weeks or even a couple of months to get a replacement. Once you get things squared away, though, you should be good for a long time.

This was a reasonable risk and trade off when your options might be a Sovol SV06 for $259, a Bambu P1P for $599, or a fully assembled Prusa MK4 for $1,150. Why bother taking this risk when you can get a better printer from a company that has a well-staffed customer service department?

Is speed really all that important?!

It depends. Since tuning the input shaper on my Sovol SV06, I have rarely used my Prusa MK3S. The Sovol is at least three times faster. Why wait when you don’t have to? This is a bit disingenuous to say, because if I didn’t have a faster printer, I would definitely be using the MK3S!

When you are printing small parts once every few days, the speed really doesn’t matter. When you are iterating on a design, the speed is a game changer! A handful of design and printing iterations that may have taken all afternoon before can be done in not much more than an hour now.

Speed is awesome when you need to run long print jobs. A 24-hour print is awful. You’d prefer not to have any power blips. It is better to be nearby to keep an eye on the print, because you certainly don’t want a catastrophe to happen while you are asleep. Cutting that down to less than 8 hours is much more reasonable.

Perfect first layers and flow rate compensation

I already talked about this, but I feel like it is worth repeating. Not having to calibrate my z-offset would save me dozens of minutes every time I set up a new printer, swap a nozzle, or change my build plate. If you have never done this before, Bambu’s bed leveling system will save you hours.

Stable Diffusion 3D printer guy

The active flow rate compensation will save you from having problems that you might not even know how to diagnose, and it will save you before you even encounter the problem.

Neither of these features are the game changers that the original automatic bed leveling was, but they are nonetheless huge. I have been printing for nearly a decade, and these features would save me a lot of time and effort. If you are buying your first printer, these features will save you so much headache!

What now for Sovol?

When the Sovol SV06 was released, it was almost too good to believe. The printer cost $259. The printer was nine screws away from being assembled when you open the box. The SV06 is mechanically and electronically comparable to the $750 Prusa MK3S+ kit while being nearly as ready to go as the $1,150 fully assembled Prusa MK3S+.

I was recommending it to friends almost immediately, but I didn’t like that I was recommending something I hadn’t used myself. I ordered a refurbished unit for $169, and I have been using it every few days ever since.

Bender MINI13 Scaled Up

The Sovol SV06, the Prusa MK3S+, and even the Prusa MK4 only have three major items on their spec sheets that the Bambu A1 Mini can’t meet. The SV06, MK3S+, and MK4 are all open source, they all have bigger print surfaces, and they can print more exotic filaments.

The Bambu A1 Mini meets pretty much every other specification, except the A1 Mini is faster and ships with a webcam.

It is easy to recommend rolling the dice on Sovol’s customer service and quality control when the roughly equivalent Prusa MK3S+ costs three or four times as much. It is much harder to make that same recommendation against the $299 Bambu A1 Mini.

It sure looked like Sovol was attempting to make the best set of compromises possible to put a fast, reliable 3D printed in your hands for less than the price of a Bambu P1P. You can nearly buy a pair of Sovol SV07 printers that can crank out a 24-minute Benchy for the price of a Bambu P1P or Bambu P1S. The Sovol SV07 made pretty reasonable compromises to save you $300 here.

It is impossible for me to suggest that you buy a Sovol SV07 for $40 more than a Bambu A1 Mini.

I think it is possible for Sovol to engineer something to compete with the Bambu A1 Mini on price. Prusa has shown that you can print a 17-minute Benchy using linear rods on the Prusa Mini+. If Prusa can sell the Prusa Mini+ for $459, then I bet Sovol can sell something comparable for under $200.

I will be surprised if they can fit a Klipper screen into the budget. If they do, I would expect the price will get too close to that of the Bambu A1 Mini. Why buy a $270 printer from Sovol when you can pay $20 more for a Bambu? I think they would do well if they shipped a Prusa Mini+ shaped printer running Marlin’s input shaper.

The AMS Lite is the killer feature

Multi-color printing is going to make it even harder for Sovol to compete. You only have to pay $170 extra to print in four colors on the Bambu A1 Mini.

If there is even a possibility that I will want to print with multiple colors, why would I ever spend more than $200 on a Sovol printer that will likely never have a multicolor add-on? Wouldn’t it be better to hedge my bets, buy a Bambu A1 Mini, and assume they will sell me the AMS Lite separately at a later date?

A functioning filament changer on a $469 printer than can also crank out a Benchy in 14 minutes is an amazing value.

Conclusion

The last two years have been exciting for 3D printing. There’s new competition. New features are showing up pretty regularly. Prices have been dropping so fast! I felt like my Prusa MK3S was a fantastic deal three years ago at $1,111.31. Six months ago, I felt like my refurbished Sovol SV06 for $169 was nearly equivalent to my Prusa MK3S. I know that the refurbished price feels a bit like cheating.

This week, Bambu has managed to pack a heck of a lot of value into both the $299 and the $469 Bambu A1 Mini packages, and they haven’t left much room to for the competition. I am excited to see who Sovol, Creality, and Elegoo respond with in the coming months. I hope they manage to stay competitive!

What do you think? Is Prusa Research in trouble? What about Sovol and Elegoo? Are you happy with your Sovol or Prusa printer? Do you wish you waited a couple of months for a Bambu A1 Mini? Let me know in the comments, or stop by the *Butter, What?! Discord server to chat with me about it!

Harnessing the Potential of Machine Learning for Writing Words for My Blog

| Comments

It is probably obvious that I asked ChatGPT to assist me in writing the title for this blog. I am not terribly pleased with it. This title is about half way in between what I originally wanted and what ChatGPT suggested. Since I am writing about using artificial intelligence to assist me with my work here, it seems like I should let it help out from the very beginning of the task!

Stable Diffusion Coffee Guy

If you are looking for an article to tell you exactly how to leverage things like large language models to make your work easier, then this probably won’t be the blog post for you. I am only starting down this road. It has been bumpy, and I don’t know if I am doing a good job.

I have already had some success, so I figure this is a good time to talk about what I have done so far, and to tell you where I hope this journey takes me!

You need to be using Stable Diffusion

I have been using Stable Diffusion to generate images akin to stock photos for my blog for most of 2023. I don’t know that I can say that it has been a game changer, but it has been a huge help!

Blog posts look better when there are images to break up the wall of words, and nice photos make things feel more inviting. The images help to anchor your eyes. When you decided to scroll back to reread something important, you are more likely to find the words quickly if you remember them being near a particular photo.

Stable Diffusion NVMe Guy

On occasion, I find that I just haven’t taken enough photos. There are also a lot of times when I am writing about a topic that doesn’t actually exist in the real world, so there is no tangible subject matter available to take a photo of. It is amazing to be able to give Stable Diffusion a prompt like nefarious hacker stealing a laptop. I can ask for 400 images, and they’ll be ready by the time I finish making my latte. I can flip through A.I. images for five minutes to find one to spruce up a blog about [running Octoprint through a networked serial port]nsp].

Initially, I was using Stable Diffusion on other people’s computers via the Stable Horde open-source project to generate images. Images took quite a while to generate, and I could only ask for a few at a time. I have since followed Automatic1111’s guide to get Stable Diffusion running locally, so now I can use my Radeon 6700 XT to easily generate 400 images in less than ten minutes.

I also got some tips from watching our friend Novaspirit Tech’s videos. I have downloaded other models besides just Stable Diffusion 1.5, and I am able to generate cartoon images now. Those are a lot of fun!

I am not trying to fool anyone. I don’t work hard to generate images that look real or correct. I embrace the absurdity. Does the guy have three thumbs? Is there a misspelled approximation of a company logo on the NVMe the cartoon character is holding up? Then it is a fantastic image!

There are Stable Diffusion images sprinkled all over this post. I didn’t generate them to go along with the words. I am just picking some of my favorites that I didn’t wind up using in other blogs.

Dipping my toe in the ChatGPT waters

I wrote a new blog last week and I pasted every single paragraph into the free ChatGPT web interface. I tried telling it to rephrase this to make it more interesting, but that made for some extremely pretentious writing. I know I tried a few other adjectives besides interesting, but I wound up settling on just prefacing every paragraph with rephrase this.

I purposely overdid things. I did my best to replace at least one sentence in every paragraph with something straight out of ChatGPT. This was tough, because ChatGPT’s output doesn’t usually feel like my style.

Manually copying and pasting every paragraph into the ChatGPT web interface was tedious. I don’t time myself, but that definitely felt like the slowest blog I have ever written, and I was hoping that using ChatGPT might speed things up a bit!

What do you get if ChatGPT rephrases an entire paragraph?!

I should give you an example. This paragraph has been rephrased by ChatGPT 3.5 Turbo. There we be a copy of the original paragraph quoted below this one. Does this sound more pretentious than the rest of the blog? Would anyone actually want to read 2,000 words written in this style?

May I provide an example? Below is the rephrased version of this paragraph, generated by ChatGPT 3.5 Turbo. Do you think this excerpt sounds more pretentious compared to the rest of the blog? Would anyone have any interest in reading such a lengthy piece written in this manner?

When I write, I try to imagine that I am speaking to you. We might not be having a conversation, but maybe I am up in front of a classroom. I don’t want to sound like a textbook, and I definitely don’t want to sound like a fancy novel.

What if we ask ChatGPT to rephrase that paragraph in the style of Douglas Adams?

Allow me to present an illustration. See, this very passage has been tweaked by ChatGPT 3.5 Turbo. Right after it, you’ll find a replica of the original paragraph. Now, does this sound excessively pompous in contrast to the rest of the blog? Dare I say, would anyone possess the inclination to peruse a hefty 2,000-word composition crafted in this fashion?

That would never fit well on my blog, but it is awesome, isn’t it?!

Optimizing my use of ChatGPT a bit

I signed up for an OpenAI account, and I installed the chatgpt-arcana modules for Emacs. Then I wired up a key binding that would send any selected text to ChatGPT while automatically adding rephrase this to the prompt.

The chatgpt-arcana plugin isn’t quite what I want, and it is a little buggy for me. I can usually hit my key bind over and over with the results showing up in the same window. Every once in a while something changes, and it wants to split windows again, and I wind up having two ChatGPT windows side-by-side. When it works, it is way nicer than the context switch of manually pasting things into a web browser!

Isn’t ChatGPT is supposed to make me work faster?!

So far, it does the opposite. I am spending so much more time shipping paragraphs over to ChatGPT, reading through the results, and cherry picking phrases or sentences to swap out.

Asking ChatGPT to take a blog title and give me back ten related titles might be saving me some time. Instead of massaging the words myself, ChatGPT will reorder the words, pick out some synonyms, and definitely give me options I wouldn’t have considered on my own. This is definitely faster than the usually stewing I do over a title.

I am confident that there are ways one can use ChatGPT to save time while writing, but I have yet to discover them.

I feel that ChatGPT is improving the quality of my writing

While writing that first blog with the aid of ChatGPT, I really wanted to see what it would suggest for each and every paragraph that I wrote. That proved to be quite time-consuming. Now, I only send paragraphs over when something just doesn’t feel right.

Stable Diffusion Podcast Hosts

Sometimes I am repetitive on purpose. Sometimes I write short sentences with the same simple structure. Sometimes it fits well. That felt really forced, but I imagine you get the picture.

Other times repetition is accidental. I might overuse a particular adjective or verb. I usually look for that on my own, but now I can just send the paragraph to ChatGPT just to see what she does with it.

Is the ChatGPT API expensive? Should I be running a local LLM?!

I was curious about how much this would all cost. It turns out that chatgpt-3.5-turbo may as well be free. I went through a blog that was nearly complete, and I sent every paragraph through ChatGPT at least one. Between that 2,000 word post and all my various testing to tune in my Emacs plugin, I have accrued $0.03 in charges, and I can tell by the graph that they had to round up to get me to that third penny.

They have yet to let me try GPT-4. I am excited about trying it out. It only costs about four times as much as GPT-3.5 Turbo. Four times very nearly free is still nearly free! I hear it is a good bit slower, and that might be a big disappointment. I am getting decent responses back today in just a couple of seconds. Would I be willing to wait longer? Would I use ChatGPT less often if it took two or three times as long to get a response?

Stable Diffusion 3D Printer Guy

I did some very basic research into running a large language model locally. The consensus seems to be that Llama 2 70b is more or less comparable to chatgpt-3.5-turbo. My understanding is that 70b is too big for a single 24 GB GPU.

That isn’t the end of the world; you can easily find a pair of older server-grade Nvidia GPUs for just over $400. That’s not too bad, right?!

Later, I found out that Llama 2 70B might only run at around 30 or 40 tokens per second on a pair of Nvidia 4090 cards. It isn’t going to run anywhere near that fast on a couple of $200 Tesla P40 cards from eBay, and 40 tokens per second is already molasses compared to using OpenAI’s API.

Llama 2 and ChatGPT are moving targets. The stack for running Llama 2 locally keeps getting faster, but ChatGPT is also being optimized.

There are definitely privacy concerns when sending all your words up to a cloud service, but they aren’t relevant for my use case. Everything I send up to ChatGPT is going to be published on my blog a couple weeks later anyway.

ChatGPT vs. a human copy editor

For the last ten years, Brian Moses and I have been paying an actual human being to proofread everything that we write. Our fantastic editor has been worth every penny, and she will continue to be an important part of our writing processes for as long as she allows us to keep paying for her services!

Our editor has definitely improved my writing. I made a lot of the same exact grammar mistakes for years. Every time I read her corrections, I wind up thinking about them, and I am ever so slightly less likely to make the same mistakes next time. Once enough time goes by, I almost stop making those mistakes altogether. I know for certain that there are a lot fewer red marks on my posts today than there were five or ten years ago.

I can already see that ChatGPT is going to have a similar impact on my writing. ChatGPT will replace words and phrases with alternatives. Sometimes I hate the replacements, but every so often I like them quite a lot. When I like what ChatGPT tells me, it is going to make an impression on me, and I expect that I will start making small changes to my writing without even thinking about it.

A decade of experience tells me that everyone should have a human editor. I suspect having a robot assisting me for the next decade will be nice, but I definitely don’t want to live without the human editor. She is worth every penny, even though she costs more than ChatGPT!

What’s next?

I think this will be a fascinating question to learn the answer to! I am content, at least for the moment, to just do what I have been doing, but hopefully do it more efficiently. Asking ChatGPT to rephrase every paragraph I write is time consuming. Learned when to ask will streamline things quite a lot.

I am aware that ChatGPT could do a better job if I gave it more context. Even gpt-3.5-turbo can hold 4,000 tokens. That is enough space to feed it an entire blog post when asking it to rephrase just one paragraph. If I have blogs that don’t fit, I could pay a bit more for a model with a higher token limit. This seems like an interesting next step, but I am not in a hurry to figure out how to get chatgpt-arcana to do that automatically for me. Sending an entire post for context will probably slow down by queries, but maybe I can set things up so I only take that hit on the first query of each session.

What do you think? Am I only just barely scratching the surface, or have I already dived deeper into Stable Diffusion and ChatGPT waters than I realize? Are you using machine learning to generate stock photos for your articles or using a large language model to help you with your writing? Should I be doing something completely different? Let me know in the comments, or stop by the Butter, What?! Discord server to chat with me about it!

chatgpt-arcana.el on GitHub”

The Sovol SV07 and Rethinking My Dislike of V-Wheel 3D Printers

| Comments

The inspiration for this blog post comes from someone in the Butter, What?! Discord community. They were asking what we thought of the Elegoo Neptune 3 Pro 3D printer. I looked at it and said, “Yuck! That printer uses V-wheels! I would never buy a 3D printer with V-wheels!”

I thought about that some more, and I decided that never is too strong a word. It got me thinking about 3D printers, CNC routers, network gear, and home server stuff. These are all topics we get deep into on the *Butter, What?! Discord server. When we buy stuff for our hobbies, we are always making compromises.

Bender MINI 13 on the Sovol

If an Elegoo printer got me thinking about this, then why does the title mention the Sovol SV07? It is because I think the Sovol SV07 is an interesting printer at an interesting price point, and Sovol has made interesting compromises to get it there. Interesting.

Why is the Sovol SV06 better than the Sovol SV07 and Ender 3?

The V-wheels are rubbery, imprecise things that sometimes need to be readjusted as they slowly wear down. I don’t have either of these printers on hand to measure, but it looks like the V-wheels for both the x- and y-axis are riding on 20-mm extrusions.

The steel rods of the Sovol SV06’s x-axis are two inches apart, and the steel rods on the y-axis are six inches apart. That is significantly more stable than the cheaper configuration on the Sovol SV07 or the Ender 3.

Sovol SV06 Y-axis

NOTE: Look at that wide stance! Like a Sumo wrestler!

I have put more than a dozen spools of filament through my Prusa MK3S over the years, and its linear bearings are as smooth as the day I bought the printer. They say that V-wheels wear down, and they say they will run down much faster at 24-minute Benchy speeds, but I have no idea how true this is.

Here’s the important question: Does any of this matter?!

Thinking about my Shapeoko 3 compared to the latest CNC routers from Carbide 3D

My Shapeoko 3 XXL is over four years old now. It was one of the best values in CNC routers at its size when I bought it. It is sort of like the Ender 3 of CNC routers. All three axes ride on V-wheels, though they aren’t the rubber V-wheels found on 3D printers. Each axis is driven by belts, too, though they are wider than the belts on our printers.

The CNC community can be rather snobby. A lot of folks would tell you that my Shapeoko isn’t a proper CNC router because it doesn’t use linear rails and ball screws.

The current iteration of the Shapeoko replaced the V-wheels with linear rails, upgraded to wider belts, and ships with a few other minor upgrades that my machine lacked. This made much of the CNC community happy, but the current Shapeoko costs 50% more than what I paid.

The new machine doesn’t cut wood or carbon fiber any better than my ancient machine. The new Shapeoko will do a better job at cutting aluminum, but that isn’t something I am interested in. Why should I pay 50% more? My V-wheels work fine!

How much more could the Sovol SV07 cost and still be a good value?

I suspect that shipping an Ender 3 clone with Klipper instead of a Prusa MK3 clone with Klipper was an extremely deliberate decision.

The Sovol SV06 costs you or me about $260. Buying our own Klipper screen for our Sovol SV06 would cost another $120 or so. That would be $380, yet the Sovol SV07 manages to be priced at $360, while also coming with a higher quality power supply, the beefier hot end from the SV06 Plus, that huge extra blower fan for fast printing, and a filament runout sensor.

Stable Diffusion AI 3D Printing Guy

I am guessing that if Sovol added all those upgrades to the SV06 along with Klipper, that they would have priced it somewhere around $450.

That isn’t bad, but Bambu just dropped the price of the Bambu P1P to $600. That gets you an even faster printer, a much nicer motion system, a larger print volume, and better quality control.

I definitely see the value in a $340 machine that can print a 24-minute Benchy, but if you get too close to the price of a Bambu P1P, it just tempts me to pay a little extra to not buy more advanced than an overclocked bed slinger.

Why am I writing about any of this?!

I don’t know if I should be calling anyone out by name, but someone on our Discord server asked how we thought the Elegoo Neptune 3 Pro compared to the Sovol SV06. I took one look at the Elegoo, saw the V-wheels, and left the product page.

The prices of the Neptune and the SV06 are pretty close, especially at their sale prices. The Elegoo has a color touch screen and a filament runout sensor. The Sovol SV06 has the superior motion system. I am still on Sovol’s team here.

Especially if you can snag a refurbished Sovol SV06 for $169 shipped!

Your bed slinger better have two z-axis motors

I may be willing to say that printers with V-wheels are just fine, especially if they are priced right, but you shouldn’t buy an i3-style printer with a single z-axis motor. That is just a Prusa MINI-style printer trying to disguise itself as a Prusa i3.

It would only cost the manufacturer $10 or $15 to add a second stepper motor and lead screw. It is common for the unpowered side of a single-motor z-axis to get stuck. Paying a bit extra for that second motor is a good value. It eliminates so much potential frustration, especially if you have no idea how to identify this as a problem.

What does any of this even mean?!

Old-school bed-slinging 3D printers just don’t make sense if they cost $500 or more in a world where the Bambu P1P is priced at $600, unless you absolutely need a build plate bigger than 256 mm. A Sovol SV06 with all the Sovol SV07 performance and quality upgrades would just cost too much to be worth buying.

You don’t need Klipper or a Klipper screen to go fast. I am getting 24-minute Benchy prints out of my $169 refurbished Sovol SV06, and all I had to do was upgrade the firmware so I could enable Marlin’s input shaping. I’m not even at the limits of Marlin. I am at the limits of my cooling and of Octoprint.

If the Sovol SV07 is such a good value, why don’t I buy one?!

I am quite pleased with my $169 refurbished Sovol SV06. I rarely even use my Prusa MK3S anymore. My Sovol SV06 with Marlin input shaping is three or four times faster. Why would I wait for the Prusa? The only time I send a job to the Prusa is when it happens to have the correct color already loaded!

If I were to add another Sovol printer to my tiny farm, it would almost definitely be the larger Sovol SV06 Plus. I have already put work in getting Marlin’s input shaper going, and I can print a Benchy on my SV06 in 24 minutes. It should be trivial at this point to get a 24-minute Benchy out of an SV06 Plus, and it would be nice to have the larger print surface available if I ever need it.

If I hadn’t already done all that work, the Sovol SV07 would be a terrific deal. I put way more than $100 of my time into getting fast prints out of the Sovol SV06. There is a lot of value in being able to open the box, power up the printer, and immediately see a 24-minute Benchy start printing.

Conclusion

I was worried about the 3D-printing ecosystem at the end of last year. I almost wrote a blog saying that it seemed like a terrible time to buy a printer, because so much cool stuff seemed to be just around the corner. We are most of the way around that corner today, and the selection of printers available are amazing!

You can have the Prusa MK3 experience with the Sovol SV06 at $259. You can have a cheap, fast printer running Klipper with the Sovol SV07 at $339. You can go twice as fast with the Bambu P1P at $599 or the Bambu P1S at $699, and Bambu even seems to have a QA department, which is definitely worth a few dollars.

This is the part that blows my mind. You can load four different colors into a Bambu P1S equipped with a filament changer for $949. That is a fully assembled printer with a working filament changer for less than the cost of a fully assembled Prusa MK4. Brian has been having good luck with the filament changer on his Bambu X1C. We are living in exciting times!

What do you think? Are 3D printers with V-wheels OK to buy? Have I been too hard on them all these years? Are you running a 3D printer with Klipper, or have you tried Marlin’s input shaper? Do you own a Sovol SV07 or SV07, or are you thinking about buying one? Tell me about it in the comments, or stop by the Butter, What?! Discord server to chat with me about it!

Marlin Input Shaping, My Sovol SV06, and My Twenty-Minute Benchy

| Comments

I am not even close to the end of this journey. I haven’t even decided where this journey is going to end. I installed Michael Hill’s Marlin build with input shaping on my Sovol SV06 last night. I farted around with settings. I ran some test prints. I had a reasonably clean Benchy print today in less than 22 minutes.

Sovol SV06 21-minute Benchy

NOTE: Cooling was my biggest issue with the other ugly Benchy that I am leaving in for the rest of the photos. I ran the exact same gcode again with 2-year old blue Hatchbox filament, but this time I pointed a huge fan at the printer. The curling in the rear corner went away, and the overhangs on the hull printed really nicely this time!

I have done so many things wrong, and I am ignoring the SpeedBoatRace rules. My Sovol SV06 is running a 0.6 mm CHT-style nozzle. I am printing with a layer height of 0.24 mm with infill combined every second layer.

I am just absolutely amazed that I can ALMOST print a Benchy in 20 minutes on a nearly unmodified $169 3D printer. All it took was flashing some firmware, installing a $2 0.6 mm nozzle, and pointing a huge fan at the printer. The firmware and the fan are quite necessary, but I am not pushing the 0.6 mm nozzle very hard here. I bet the Benchy would print nearly as fast with the stock 0.4 mm and the same speed settings.

I would like to be able to tell you how to successfully get input shaping going, but I am not there yet. I don’t think I am doing a good job yet, but I do feel like I have to write down what I have done so far.

I made certain to set up the lights for the Benchy photos to be as harsh as possible to show off every layer line, every imperfection, and every problem. I don’t want to make you think these look better than they actually do, though I will say that they look much more acceptable in person when you are holding them!

What am I doing wrong?!

I am not just ignoring the rules of the race. I am not participating in the race, and I don’t care about printing with 0.2 mm layers.

I did my best to print the input-shaping test part. You have to carefully adjust all sorts of slicer settings, and some custom layer-change gcode SHOULD slightly tweak the input shaping settings from layer to layer. I am quite certain that I did something wrong. My test print came out looking pretty much the same from top to bottom.

Sovol SV06 Twenty Minute Benchy

So I did what anyone who has no idea what they are doing might have done. I picked the height that kind of, sort of, maybe, possibly looked cleaner than the rest. I did the math, and I punched those numbers in for the input shaping frequency. Then I went on to run test prints.

My suspicion is that just enabling input shaping and setting the frequency to something that isn’t ridiculously incorrect makes a huge difference on its own. I know what a resonating printer sounds like. My old Makerfarm printer used to rock the table around when printing infill fast. I don’t hear anything from the Sovol SV06 that sounds remotely like I did on that old printer. It just sounds fast.

What am I doing right?!

I cranked up acceleration and speed settings. I started at around 120 mm/s with 3,000 mm/s2 acceleration, but I wound up going as far as 160 mm/s with 5,000 mm/ss acceleration.

After some successful but ugly Benchy prints, I cranked out a few small Gridfinity bins with a 0.48 mm layer height. These don’t even come close to pushing the printer to its limits. I had 273 mm/s set as the maximum volumetric speed in PrusaSlicer, and that kept the print head moving quite slowly.

Sovol SV06 21-minute Benchy

I also learned that my extruder can’t manage 273 mm/s. I backed that off to 213 mm/s, and I got much cleaner layers on the bin. I will probably try pushing that up a little higher, but 16-minute 1x1x3 Gridfinity bins seem pretty good to me.

Am I doing anything else wrong?!

I am not doing a good job keeping track of print times. When I printed a 24-minute Benchy last night, I noted that it took about 2 minutes for the printer to heat up and check the tramming of the bed, so I just subtracted 2 minutes from Octoprint’s numbers.

I sliced up a simple 18650 battery sleeve today. PrusaSlicer said the whole thing would be cooking at 140 mm/s, but I noticed that the print was really jittery. Sort of like it was pausing and restarting quite a few times on every curve.

Sovol SV06 Twenty Minute Benchy

I stopped the print to click the arc welder button in Octoprint. This converts dozens of small line segments into arc commands. This means fewer lines of gcode have to be pushed over the serial port to print the same part. This improved the print quite noticeably!

That is when it hit me. Were my problems with last night’s Benchy prints caused by the slow USB serial connection? I copied last night’s gcode to an SD card, and I printed it locally.

That brought my 24-minute Benchy down to 21:38 by the stopwatch. Not only that, but this is the cleanest Benchy I have printed in the last 24 hours.

My 21:38 Benchy is far from perfect!

There are definitely cooling issues. I am running the popular 5015 part-cooling fan upgrade. I only have the single fan, but I am running it at 100% speed.

The front corner of the hull comes out quite lumpy, even though PrusaSlicer is likely slowing that part down to 20 or 25 mm/s. Is my cooling inadequate? Are the wide layers from the 0.6 mm nozzle making this overhang a challenge? It is probably a little bit of both.

The rear of the Benchy facing the front of the printer was curling during the print. It is quite obvious in the photo. The opposite corner printed quite well.

Why Marlin input shaping instead of Klipper?

Klipper is expensive. Maybe. You can add one of those Klipper screens that you can get for around $120 from Creality, but why would I want to add $120 in hardware to a printer that I bought for $169? Klipper would for sure let me squeeze every last drop of performance out of the Sovol SV06, but I don’t want to work hard. I want to grab an easy win.

Marlin’s input shaping was just a firmware upgrade away. I don’t have to squeeze all the toothpaste out of this tube. Doubling my print speed would be fine, and for the most part, it sure seems that I am going to run out of heat in the extruder before I get to the end of the road with Marlin’s input shaping.

Ghosting on the Sovol SV06 with Input Shaping

NOTE: I print the agepbiz cube to check for ghosting. The print seems free of ghosting, but it has a defect on the layers where there are solid layers for the floor and ceiling of the articulated cube’s interior.

I was already pushing my Prusa MK3S and Sovol SV06 to 2,500 mm/s2 acceleration and speeds of 140 mm/s, but I only reach those numbers on infill. I have perimeters set slower, and I have external perimeters down at 70 mm/s with 1,500 mm/ss acceleration.

Here’s what I figured. If Marlin’s input shaping was capable of just letting me keep the faster speeds I was already running while improving the print quality to be more in line with Prusa’s stock profiles, then I would be quite happy. If I could get external perimeter speeds matching my infill speeds, that would be a huge win!

I am already doubling the acceleration, and doubling my old external perimeter speeds. I am running out of capacity to melt plastic, and I am already at the limits of my cooling. I don’t need to go faster, so I don’t need Klipper.

Maybe I do need Klipper?!

Having to print from the SD card is goofing up my plans, and it might really gum up my workflow. I rarely open Octoprint. I just hit the upload-and-print button in PrusaSlicer, and more often than not, everything just goes smoothly.

The SD card functionality in Octoprint was being stubborn. I enabled it, it didn’t want o see the SD card. I pulled the SD card out of the Sovol SV06 to sneakernet the Benchy gcode over to the printer, and then the next time I looked, the SD was available in Octoprint. Go figure.

It is almost not an exaggeration to say that it takes longer to upload gcode to the SD card than it takes to print the same object. The serial port can’t keep up during a print, but there are also two minutes of waiting around for the printer to heat up and run a bed probe before each print.

My Octoprint server has more than enough horsepower to run Klipper for a small fleet of 3D printers. Maybe Klipper would solve all my problems. Maybe. I feel like it will also create all sorts of fresh problems!

My Prusa MK3S just became obsolete

I was thinking about setting up input shaping on the Sovol SV06 from the minute I placed my order, but I have been putting it off.

I have been running the same PrusaSlicer settings for my Prusa MK3S and my Sovol SV06. I send most jobs to the Prusa, because it is so much quieter, but I sometimes choose the printer that happens to have the correct color filament loaded. I didn’t have to think about which printer needed which settings. They were the same.

Now they are not. I have to choose a profile with 5,000 mm/ss acceleration for the Sovol, and I have to choose a slower profile for the Prusa.

The gap between the printers is only going to get wider. I am sure I will figure out how to correctly print the input shaping tuner next week. It is only a matter of time before I don’t want to use the Prusa ever again.

You can run Marlin on the Prusa’s Einsy board, but it seems like a bit of a hack, and it throws away some of the things that make the Prusa MK3S a Prusa printer. I am considering the idea of selling the Prusa MK3S and maybe putting a Sovol SV06 Plus in its place.

Conclusion

I am absolutely amazed that Marlin’s input shaping works so well even though I more than likely just completely made up the frequencies to use for the X-axis and Y-axis. I am sure it isn’t living up to its full potential, but I haven’t heard any significant resonance out of the printer. Does input shaping make this big of a difference just being enabled, or did I luck out and choose an appropriate value?

I am not exactly sure what I will be doing next. Probably just using my Sovol SV06 to print things for now. I hate printing calibration objects over and over again. I would much rather print things I may actually use! I am tempted to just dial everything back by about 20% and roll with it.

What do you think? Have I made good progress in my dozen hours with Marlin’s input shaping, even though I slept through eight of them? Am I a fool for skipping Klipper? Is it OK that I haven’t caught up to Brian’s Bambu X1C? Are you using input shaping on your Sovol SV06? Why aren’t low-end printer manufacturers shipping with Marlin input shaping preconfigured? Let me know in the comments, or stop by the Butter, What?! Discord server to chat with me about it!
Pay For Your Sovol SV06 With Just One Print?!

| Comments

One of our friends on our Discord server showed us this amazing espresso distribution tool on Printables. It ticks all the boxes for an amazing 3D printed object. I am a sucker for anything with interlocking print-in-place gears. Two of the pieces are assembled with giant 3D-printed threads. It even uses magnets.

The best part is that it is by far the very best espresso distribution tool I have ever used. It seems to be a 3D-printed implementation of the $475 Moonraker espresso distribution tool!

Is the title of this blog clickbait?

I can’t decide if it is or not! I think it depends on how you look at it.

The 3D-printed Umikot tool is certainly not worth $475. There are other tools that may not do as good of a job, but they definitely attempt to do the same job. The fixed-needle DUOMO distribution tool is a little over $200.

You can also spend $2 on acupuncture needles in my Tindie store and print jkim_makes fantastic WDT tool. That is what I have been using for the last year, and it does a bang-up job.

Both the Moonraker and DUOMO are premium products with some real heft. The Umikot tool is an inexpensive piece of 3D-printed plastic, and it feels like an inexpensive 3D-printed piece of plastic. The Umikot tool gives me a cleaner bed of grounds in three or four seconds than I would get from twenty or thirty seconds with my old WDT tool, and the fancy tool is way more fun to use.

My print of the Umikot espresso tool may not be worth as much as the Moonraker, but is it worth as much as the $169 that I paid for my refurbished Sovol SV06?

I feel like it is.

I cheated a bit!

I printed the grey parts on my Prusa MK3S while at the same time printing all the black parts on my Sovol SV06. Both printers are using knockoffs of the CHT 0.6 mm nozzle. Using two printers is faster than using just one. I chose to print the mechanical part on the Prusa, because it was going to take 2 hours longer than the rest of the parts combined, and my Prusa is much quieter than my Sovol.

Sovol build plate with all the Umikot pieces

I printed the Umikot tool with 0.22 mm layer height using PLA. The whole things takes about $5 or $6 in plastic. I already had a ton of acupuncture needles on hand, and I had plenty of the correct screws in one of my assortments from Amazon.

Is this really better than a basic WDT tool?!

I used to do a good job with the WDT tool, but I recently upgraded to a Turin DF64P grinder. My old dosing funnel is too big for the new grinder, so I am using the narrow aluminum ring that came with the DF64P.

The Turin dosing ring is too narrow. I can’t see how good of a job I am doing with the manual WDT tool. There was a tendency for me to have a low side quite often, and almost every time that happens, even after attempting to correct the distribution, those shots wound up having at least some minor channeling.

I haven’t had a bad pull yet with the Umikot tool. It seems to give me a nice looking bed after only three or four turns, but it takes less time to just do ten turns than it did to make one trip around the basket with the WDT tool.
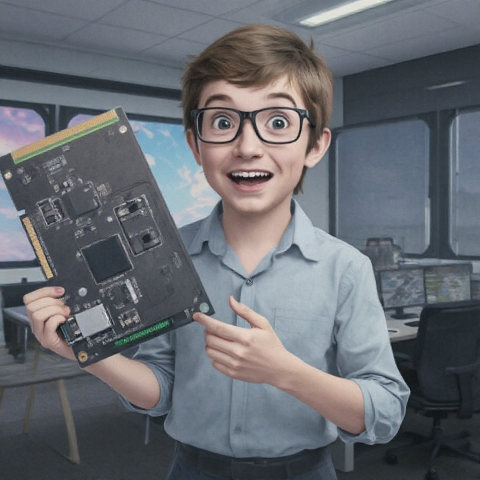
I could live without the Umikot tool, but I would rather not!

Conclusion

We are always on the hunt for those killer prints. The sort of prints that make owning a 3D printer worthwhile. This is easily one of those prints! The Umikot tool is such a delightful upgrade to my daily espresso routine, and it isn’t something I could easily acquire without a 3D printer.

You don’t have to find a killer print to justify the cost of your 3D printer. Printing is a fun hobby, but I am always excited when I find something this useful to print. What about you? Do you have a killer print that can justify the entire cost of your 3D printer in a single print job? Or are you just 3D printing for fun? Let me know in the comments, or stop by the Butter, What?! Discord server to chat with me about it!

My New Radeon 6700 XT – Two Months Later

| Comments

I put off a GPU upgrade for as long as I could. I had been running an Nvidia GTX 970 since 2014. It served me well for quite a long time, but by the time I needed an upgrade, crypto mining pushed GPU prices to super-inflated levels. Prices were so high that I paid less for my GTX 970 than a roughly comparable GPU would have cost only a little over a year ago.
Stable Diffusion Radeon Guy

I just couldn’t stomach paying so much for an upgrade, so I limped along for a few years longer than I should have. I decided prices have come down enough for an upgrade, so I wound up upgrading my monitor, GPU, and eventually my CPU. Why didn’t I spend more on a GPU? Did I really need the CPU upgrade? Let’s find out!

Stability!

This seems important for me to touch on. I had to install OpenCL drivers from AMD’s Ubuntu repository, and it didn’t take much time after that before I decided I wanted to try bleeding-edge Mesa libraries to see how much ray tracing performance was improved.

I am running the latest Ubuntu LTS, and I installed Mesa libraries from the Oibaf PPA. My machine was locking up randomly at least every other day. Usually I would just find it dead when I woke up, but occasionally my Xserver would just crash and reload.

I have since switched to Ernst Sjostrand’s PPA. I haven’t had any weird crashes or freezes since.

Was the 6700 XT enough of an upgrade? Why not a 7900 XT or an Nvidia GPU?

Until this week, RDNA3 cards like the Radeon 7900 XT didn’t have support for ROCm or OpenCL on Linux. That took those cards right off the table. I need DaVinci Resolve to edit podcasts, and it won’t run at all without OpenCL or CUDA.

Everyone has been talking about how amazing AMD cards are on Linux now. AMD GPUs also offer significantly more performance and VRAM for your dollar compared to Nvidia GPUs. Both seemed like excellent reasons to try out an AMD GPU.

If I couldn’t buy one of the latest RDNA3 GPUs, then I also figured I shouldn’t buy the most outrageous RDNA2 GPU. I thought it would be best to only buy as much GPU as I need today, and we can see how far that carries me.

Control RTX

I am going to say that the 6700 XT has been enough of an upgrade. I can run a lot of nearly recent games, like Prey and Severed Steel, at 3440x1440 with settings cranked up to high or ultra and still manage to keep the frame rates up near 100 FPS. There are some newer games, like DEATHLOOP and Tiny Tina’s Wonderlands, where I have to drop the resolution to something around 2700x1160 and let FidelityFX SuperResolution (FSR) scale that up to native resolution to maintain 100 FPS.

The only game making me wish I splurged on a 6800 XT is Control. I can max out the settings with ray tracing enabled at 1080p, and the game can nearly run at 60 FPS. I would enjoy playing through Control with RTX, and spending an extra $120 would have put me in a good position to do that.

I did get to play through Severed Steel at native resolution with RTX enabled, and that looked quite cool!

Is 12 GB of VRAM enough?!

We have been talking about this a lot on our Discord server lately. Let’s start by talking about how things are going today.

Most of the games I am running never manage to use more than 8 GB of VRAM, and I have the texture settings dialed up to the limit. Control seems to sit at about 6 GB, Red Dead Redemption 2 also needs around 6 GB, and Borderlands 3 seems to top out at around 8 GB.

DEATHLOOP is a weird exception. No matter where I set the texture slider, it winds up using all available VRAM. I suspect it just never unloads unused textures or something. I wouldn’t be surprised to find that DEATHLOOP would run just fine with less total VRAM.

Claptrap Stairs

There are games that exist today that use more than 8 GB of VRAM, and it sure sounds like we will be seeing games fairly soon that won’t fit in my 12 GB of VRAM.

I don’t have solid advice, but I have some feelings. I don’t have a lot of faith that Intel will remain in the GPU market, and their drivers lack polish, but the Intel ARC A750 8GB was on sale today for $200. Who cares if it is future proof? It can play most current games at 1440p at 60 FPS with a bit of FSR. That is a fantastic value. I have similar feelings about the Radeon 7600 with 8 GB at $270.

I do not like the Nvidia 4060 Ti 8 GB at $400. This card is for sure going to be fast enough to play games that require 12 GB of VRAM, but it won’t have enough VRAM to load them. I think this is a terrible deal.

My 6700 XT has gone on sale for even lower prices since I bought mine two months ago, but I feel pretty good about it. I paid $380. My card has better raster performance than the $400 4060 Ti, and I have an extra 4 GB of VRAM. I think you can sometimes find my GPU for under $350 now.

I also upgraded from a Ryzen 1600 to a Ryzen 5700X

This was definitely a worthwhile upgrade, but if you are following my lead, you should skip the Ryzen 5700X and just put a Ryzen 5600 in your old B350 motherboard. The 5700X is only 8% faster in extremely multithreaded workloads, and that isn’t something that will help with any games.

Most of the games I tested didn’t perform significantly better after the CPU upgrade. Borderlands 3 gained a few frames per second. Control didn’t perform any better with RTX enabled. Some games improved significantly.

DEATHLOOP was limited quite a lot by the slower CPU. There were parts of the game where it would drop down under 70 FPS, and when it did, the game just felt jittery. The CPU upgrade moved those low points up by about 20 FPS, and it smoothed out those jittery spots quite a lot.

I am sure there are other games that will benefit from the extra single-core performance of the Ryzen 5700X as much as DEATHLOOP.

You should enable the new AMD P-State EPP driver!

You can ignore this if you have an Intel CPU or an older Ryzen CPU.

I am not a CPU and GPU benchmarking site. I don’t have lots of data. I don’t have tools to collect interesting information. I mostly only have the seat of my pants and Mangohud.

I had trouble on a lot of maps in Tiny Tina’s Wonderlands. The frame rates stayed quite high, and the frame-time graphs looked smooth enough, but the game felt really jittery when I moved my mouse. This was really in Brighthoof, and it still feels ever so slightly unsmooth there, but it was a problem on other maps as well. Usually in places where your sight line wasn’t blocked by much of anything, and you could potentially see most of the map.

Stable Diffusion Radeon Guy

Even turning the settings down to the minimum and dropping the render resolution didn’t solve the problem.

Booting a version 6.3 Linux kernel with the new P-State EPP driver enabled almost completely fixed this problem.

I am pretty sure that it also fixed the times in DEATHLOOP where things were still slightly crunchy after the CPU upgrade.

What about machine learning?

I got Stable Diffusion up and running pretty quickly. There’s some really good documentation to get you going.

That was just about the only machine learning tool that was easy to get up and running with ROCm and OpenCL. Machine learning is dominated by Nvidia’s CUDA.

Stable Diffusion

NOTE: What do you get when you use stable diffusion as your Stable Diffusion prompt? Mostly horses.

Things seem to be getting better. It looks like OpenCL support is coming to LLaMa, and there’s some documentation on the Fauxpilot forums for getting Fauxpilot running on ROCm in a Docker container.

I haven’t tried either of these. I am interesting in messing around with Fauxpilot, but their models that fit in 12 GB of VRAM seem quite limited.

DaVinci Resolve is working quite well

I almost wish I knew how well Resolve is running. My video-editing needs are usually quite simplistic. My old GPU wasn’t exactly slowing me down all that often before the upgrade.

My suspicion is that slow tasks like running a magic mask would be much faster with a similarly priced Nvidia GPU, but I have no way to test this. Running tools like magic mask took significant time on the old GPU, and they still take time on the new GPU.

I guess the important thing for me is that things are working, and I am pretty sure the slow jobs are less slow now.

It is a bummer that I have lost the ability to export h.264 video. It isn’t the end of the world, but it is disappointing.

Conclusion

Even though I couldn’t go bananas on a 7900 XT, for both the sake of my wallet and needing to run DaVinci Resolve, I have to say that I am quite pleased with where I landed with the Radeon 6700 XT. It is quite solidly a 2560x1440 60 FPS card, and I mostly only have to apply a little bit of FSR to stretch that up to 3440x1440 100 FPS.

That is quite reasonable for the $380 I paid two months ago. I keep seeing similar cards on sale for $350 now, and that is even more reasonable!

The Radeon 6700 XT has been a solid upgrade. It runs DaVinci Resolve more than adequately for my needs. It cranks out images from Stable Diffusion at a decent rate. I expect it to be enough GPU for my gaming needs for at least two or three years, and by then, I might be able to get something comparable to the 7900 XT for the same price!