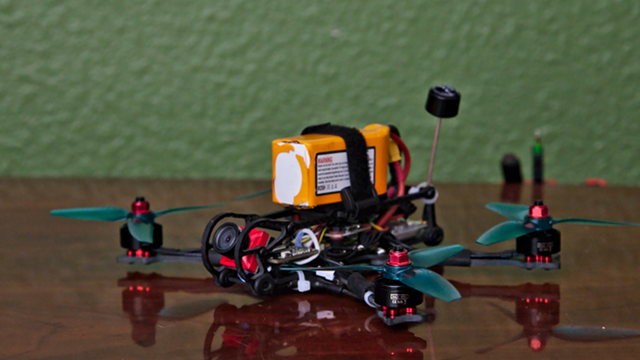
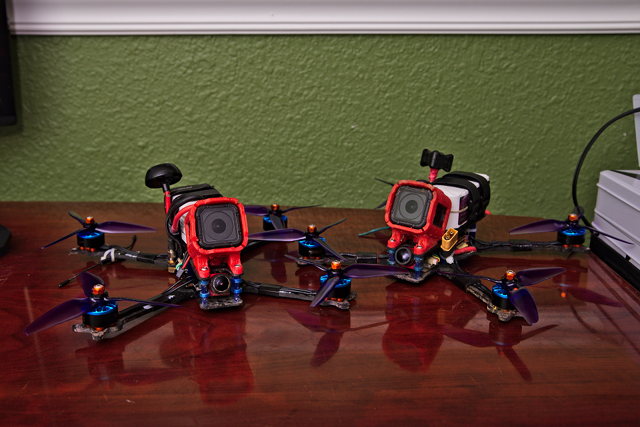
I’ve been replacing the Helio Spring flight controllers in my 5” freestyle quads, and I’ve been building and repairing a couple of HD micros over the last few months. I had to configure Betaflight on all these quadcopters when I set up the new hardware, then I had to configure them all again after Betaflight 4.0 was released.
I don’t manually reconfigure each quad by hand. I always save a diff before upgrading a quad. If I’m upgrading from Betaflight 3.5.1 to 3.5.3, or from one nightly build to another, I’ll just paste that entire diff in after flashing. It’ll be back up and running in seconds.

You can’t just paste you diff back in when upgrading from 3.5.3 to 4.0. The new version just doesn’t fly the same. Settings that may have flown well before may fly poorly in 4.0, or they may even smoke your motors!
What about setting up a fresh quad? Can you just paste a diff of one of your other quads in and call it a day? Sometimes you can, but I have a special diff file set aside. I’ve pruned out all the PID, filtering, and serial settings. All that’s left are the settings that should work on all my quads: rates, switches, Crossfire settings, and OSD settings.
I’m going to walk through which settings I keep, why they’re important, and why they work well on every quad in my bag, from my TinyHawk to my 5” Flowrides!
- So Long Helio Spring, Hello iFlight SucceX F7 TwinG! at patshead.com
- The EMAX TinyHawk is Fun, Inexpensive, and Awesome! at patshead.com
- The Kestrel HD Micro Quad Frame Version 1.0 at patshead.com
Features
I used to paste in settings related to PID loop timing, ESC protocol, and minimum throttle. Those settings vary too much between my various builds. My blheli_s builds may use DSHOT600 or Multishot, while my blheli32 builds always use DSHOT1200. I usually have to fix it anyway, so why bother pasting it in?
1 2 | |
I disable air mode because I have air mode on a switch. It is nice to be able to drop back to rate mode when I want to skid under a car!
The only quad I own that doesn’t support telemetry is my TinyHawk, so I enable it here as well.
1
| |
I don’t use buzzers on any of my builds, so I enable the DSHOT beacon.
1
| |
Before Betaflight 4.0, I usually left the accelerometer disabled, but I do enable it on some quads, like my TinyHawk. In the event that I do enable it, I want to make sure my quad allows me to arm while it is upside down.
Betaflight 4.0 can show G-force on the OSD, and it can show you maximum G-force reading on the summary screen. This has encouraged me to enable the accelerometer, so I’m glad I’ve been pasting the small_angle into all my builds!
Radio settings
Most of my builds use TBS Crossfire, so I don’t mind pasting that in.
1
| |
My TinyHawk is my only quad using SBUS.
1 2 3 4 | |
The goal is to have the ends of your stick travel reading 1000 and 2000 in Betaflight. I tweaked the settings in my Taranis, but it was impossible to get them spot-on. They would either read a bit high, or a little low. For a long time, I flew with them overshooting the 1000 and 2000 marks by 11 or 12 nanoseconds.
The rxrange command lets you set those limits correctly. My receiver tab now reads exactly 1000 to 2000 nanoseconds for my sticks.
1
| |
I fly with my RSSI or Link Quality on channel 5. This lets me display my control link’s quality on my OSD. When you failsafe, your RSSI or Link Quality will just get stuck, so it might not be obvious to you that your signal is gone.
This command sets channel 5 to the minimum value. That way, when you do failsafe, your OSD will start blinking at you!
1 2 3 4 5 | |
I fly with the same people most of the time, and we each have a designated channel. These settings put me on Raceband 1 with power level 3.
The vtx_low_power_disarm settings puts my VTX at 25 mW when I’m not armed. This helps keep me from knocking my friends out of the air when I plug in or land near us.
OSD settings
OSD settings and positions are safe to paste from one version of Betaflight to another. Sometimes the names change, but that won’t hurt anything. You’ll just end up with something missing from your HUD!
1 2 3 4 5 6 7 8 9 10 11 12 13 14 15 16 17 18 19 20 21 22 23 24 25 26 27 28 29 30 31 32 33 34 35 36 37 38 39 40 41 42 43 44 45 46 47 | |
I’ve always tried to keep my OSD somewhat minimal. I feel that cell voltage, RSSI, and flight time are quite necessary.
I like to have my quad’s name listed. That makes reviewing DVR footage easier, and it helps my friends know who they’re tuned in to. At this point, fitting all my data on one line would be a tight fit.
The Emax Tinyhawk seems like it will be plenty fast enough for indoor flying. It doesn't have GPS on it, so I can't tell how fast it is going. And GPS doesn't work in the house. I only know it can go 0 to Wall in about a second and a half! pic.twitter.com/0V8lsbBqh7
— Pat Regan (@patsheadcom) January 3, 2019
Most of the time, I don’t need to see my VTX channel and power info, but sometimes it comes in handy. If I’m getting poor signal, it is nice to see if I’m running at 200 mW or 800 mW. On the rare occasions when I change channel, it is nice to have something to refer to when a friend asks what channel I’m on, too.
There’s still room left on the second line, so I squeezed in amp draw and mAh consumed.
Then I added GPS to all my 5” quads, and I had to expand to a third line! I’m disappointed that my OSD is getting so crowded, but I tried to keep that new line spread out towards the edges!
OSD settings for Betaflight 4.0
Betaflight 4.0 now has support for up to three OSD profiles. You can have different elements active in each profile.
I haven’t decided how I’m going to make use of this. Currently, I paste in OSD settings to enable the GPS data that I like to see. My micro quads don’t have GPS, so I wind up manually disabling those options during setup.
I might move the GPS data to a separate profile. That way, I can just change profiles on my quads without GPS!
Rates
In my opinion, rates are the most important thing to customize on your miniquad. Everyone prefers a different feel, and you need to find yours.
1 2 3 4 5 6 7 8 9 10 | |
These are my rates. I keep my yaw linear and quite a bit more gentle than the other axes.
These rates feel right to me on my 5” miniquads, but they’re a little aggressive on my micros. In any case, it is a good starting point for any quad I might fly!
- So Long Helio Spring, Hello iFlight SucceX F7 TwinG! at patshead.com
- The EMAX TinyHawk is Fun, Inexpensive, and Awesome! at patshead.com
- The Kestrel HD Micro Quad Frame Version 1.0 at patshead.com
Modes
These are my modes. Don’t use my modes. In fact, you should probably be getting all these settings from your a diff from one of your own quads!
1 2 3 4 5 6 7 | |
I use a single three-position switch, switch SG, on my Taranis X9D+ for arming and choosing rate or air mode. The first position is disarm. The middle position is rate mode. The final position is air mode. Most of the time, I just flip the switch all the way to one end or the other.
Switch SD activates either my beeper in the center position and turtle mode in the final position.
Switch SA enabled blackbox logging in the center position and GPS return to home in the final position.
That’s it!
I’m surprised there’s not more. This looks like everything I paste into a brand-new build.
I don’t paste out of this file all that often. Only when I build a completely new quad or a new major release of Betaflight shows up.

I have three identical 5” Hyperlite Flowride quads. I don’t paste this file into each of those. I set one up, and get it flying the way I like. Then I paste that good config into the other two!
Conclusion
When you have a bunch of quadcopters to configure, don’t rely on your memory. Get in the habit of saving diffs before making major changes to your quads. It is easier to paste in your old config than it is to make sure you don’t miss an important checkbox in the Betaflight configurator.
Even just cherry-picking lines from your Betaflight 3.5 diff when upgrading to 4.0 is easier than hunting around the configurator trying to make sure you didn’t miss an important setting!
Did I miss anything? Do you have a similar diff that you paste into all your new quadcopters? Do you have any questions? Let me know in the comments, or stop by our Discord server to chat about it!
- So Long Helio Spring, Hello iFlight SucceX F7 TwinG! at patshead.com
- The EMAX TinyHawk is Fun, Inexpensive, and Awesome! at patshead.com
- The Kestrel HD Micro Quad Frame Version 1.0 at patshead.com